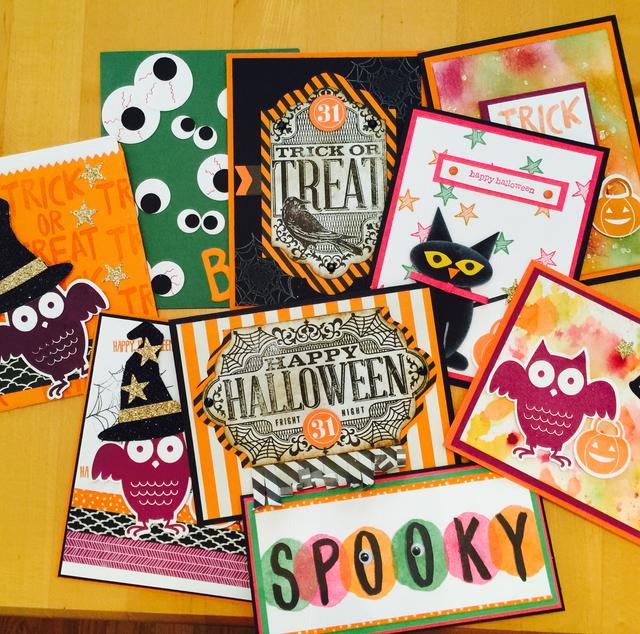
I can’t believe Halloween is finally here! I still have Halloween projects I would like to make! As I was beginning to mail out some cards the other day, I just grabbed a bunch and took a photo. You will probably find most of these on other blog posts. And now that Halloween is here, it is on to the other holidays! Have fun tonight! Watch out for the ghosts and goblins!
Monthly Archives: October 2015
Halloween Mini Treat Bag
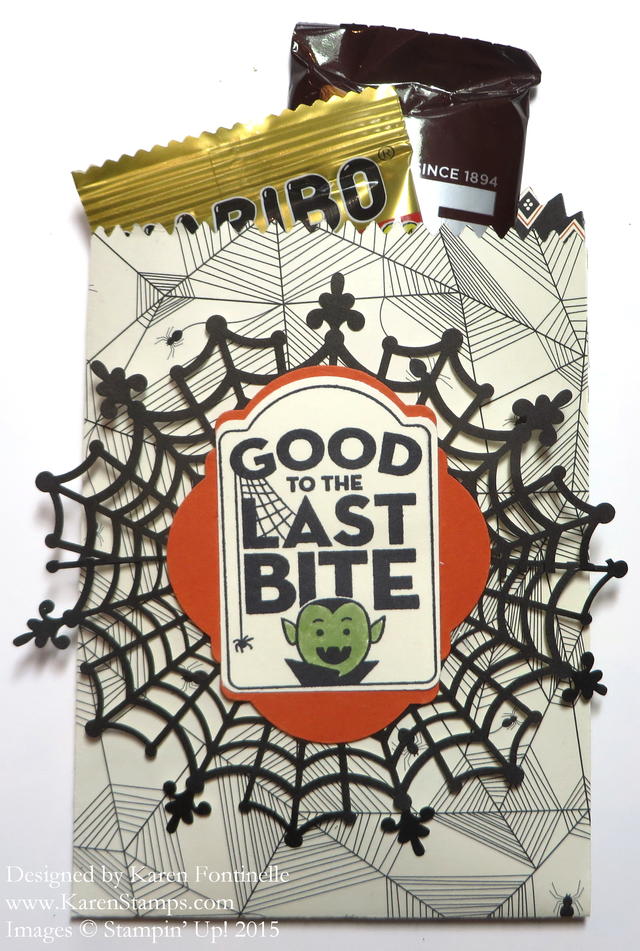
One more day until Halloween so here is a Halloween Mini Treat Bag for holding some treats! If you have the Mini Treat Bag Thinlits Die, you can make your own treat bag. If you don’t, maybe this will give you an idea for decorating whatever little bags you have or can buy at the craft store if you are needing some last minute treat bag ideas! I couldn’t even find my Spider Web Doilies but I did have two halves laying on my table so I used those! The tag is from the Merry Everything Stamp Set. I colored in the little vampire with a Pear Pizzazz marker.
For a layer behind the tag I just punched 4 pieces from the Note Tag Punch, cut off the bottom portions, and adhered them behind the tag, just for a different look! The spider web paper from Happy Haunting was perfect for this.
I hope you are ready for a fun Halloween! And I hope the weather cooperates for all the little trick-or-treaters, wherever you live!
Punch Art Black Cat Halloween Card
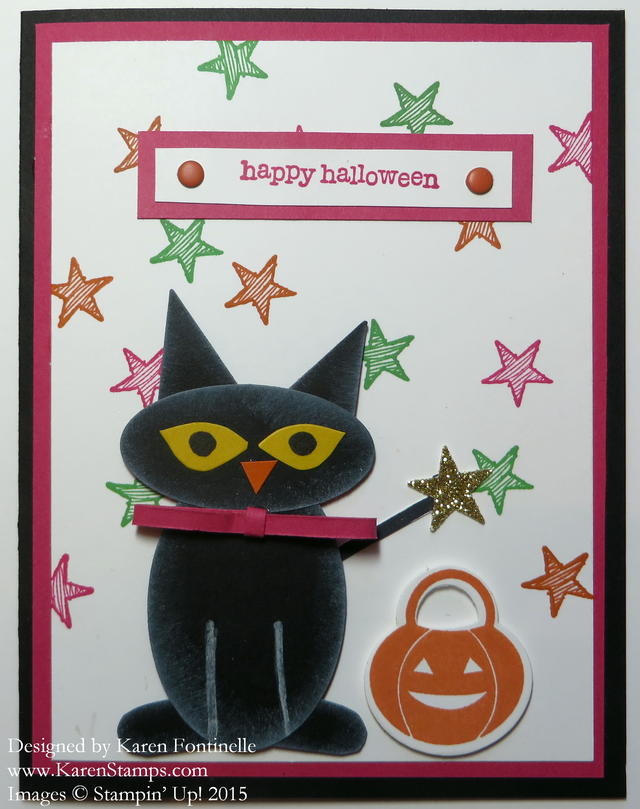
I would say this punch art black cat Halloween card has two levels of inspiration on it. One day I saw pink being used in Halloween decorations and I thought that would be a fun thing to do. I added some bits of Melon Mambo to this card, in the layers, the stamped greeting and in the paper bow on the punch art cat. (Sometimes just seeing a scrap of paper on your work table will provide inspiration!) The cat came from a picture of a cat decoration of some kind in a magazine article I recently read on the plane (the only time I seem to get to catch up on my magazines!) that made me think of the shapes of our Stampin’ Up! punches.
I used the Extra-Large Oval Punch for the cat’s body and the Large Oval Punch for the head. The ears are the top tip of the Tree Punch. The feet are the Word Window Punch, cut in half. The legs are drawn in with the White Stampin’ Chalk Marker. I don’t remember how I did the eyes! Maybe I just cut the shapes by hand. Possibly I used the leaf on the Bird Builder Punch and trimmed it. Punches just make things easier but there is no reason why you can’t cut things out by hand if you don’t have the appropriate punch – or use something else and then modify the shape.
The greeting is stamped with a stamp from Teeny Tiny Wishes. Have I ever mentioned how I think this is one of the best stamp sets to own?? It has so many greetings to use, both for holidays and generic. Very useful. You can never have too many sentiments and greetings to use. For a little pizzazz, I added two Brights Candy Dots. I love those cute Candy Dots! The little stamped stars are from the Something to Say Stamp Set. The star on the wand is punched from Gold Glimmer Paper with the star punch in the Itty Bitty Accents Punch Pack. The jack-o-lantern is stamped with the Howl-o-Ween Treat Stamp Set and punched out with the Boo To You Framelits Dies.
If you are looking for some last minute Halloween card ideas, maybe this punch art black cat Halloween card idea will help you.
Howl-O-Ween Treat Halloween Trick or Treat Card
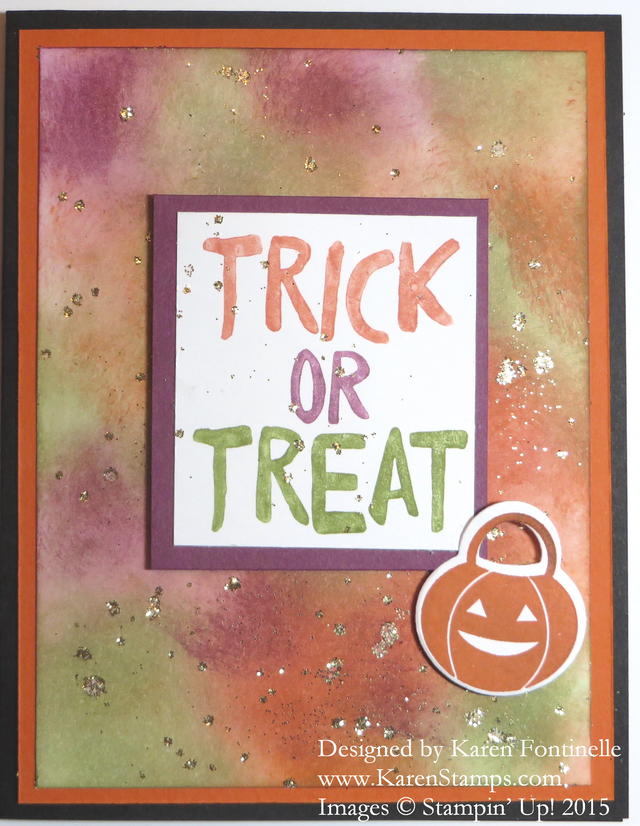 If you are looking for a colorful Halloween card, look no farther than this Howl-O-Ween Treat Halloween Trick or Treat Card. The stamps are both from the Howl-o-Ween Treat Stamp Set. The greeting is colored with three different markers and layered on the front of the card. The pumpkin is stamped and then die cut with the Boo To You Framelits Dies.
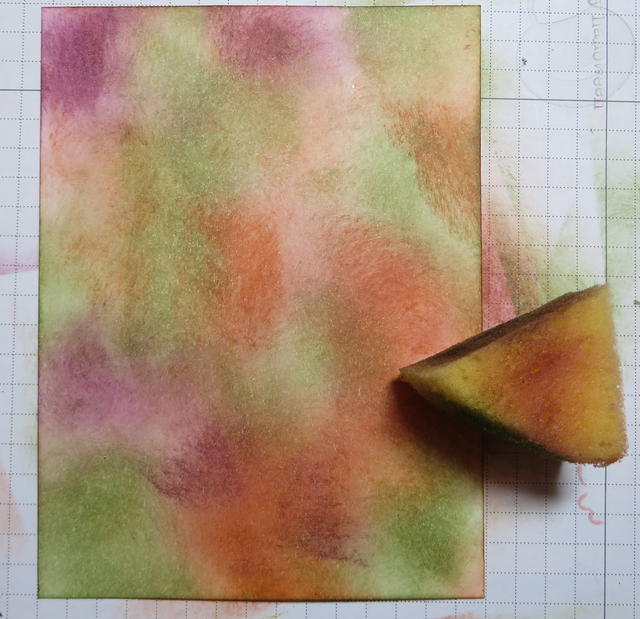
The background is simply a piece of Whisper White cardstock, with different colors just sponged on. I have always cut the Stamping Sponges into pieces and used them that size.
After the sponging, I could see the card was going to need “something”, so I splattered the watered down Multipurpose Liquid Glue (the “green” glue, as we often say) over the card front and the greeting piece with my Aqua Painter, just like you would with a paintbrush. After applying the glue this way, sprinkle the card with Gold Stampin’ Glitter and then of course shake off. You will have splattered sparkly glitter! Really fun!
You have to hurry if you want to mail any Halloween cards to friends! Halloween is Saturday, Oct. 31!
Did you know that Oct. 31st will be the last day of daylight savings time for this year?! Time to “Fall Back” and get that extra hour of sleep!
*************
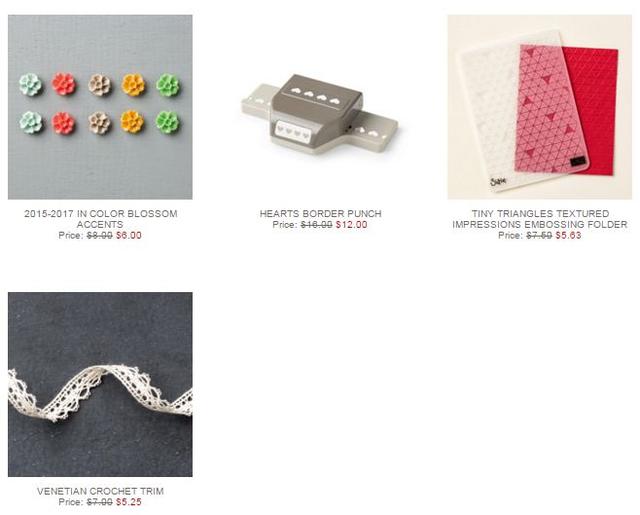
Here are the new Stampin’ Up! Weekly Deals! Some fun things for jazzing up your cards and projects!
Shop for any supplies you need, whether for my Howl-O-Ween Treat Halloween Trick or Treat Card, or any of your other papercrafting projects at my Stampin’ Up! Online Store HERE.
Witch’s Hat Triangle Treat Box for Halloween
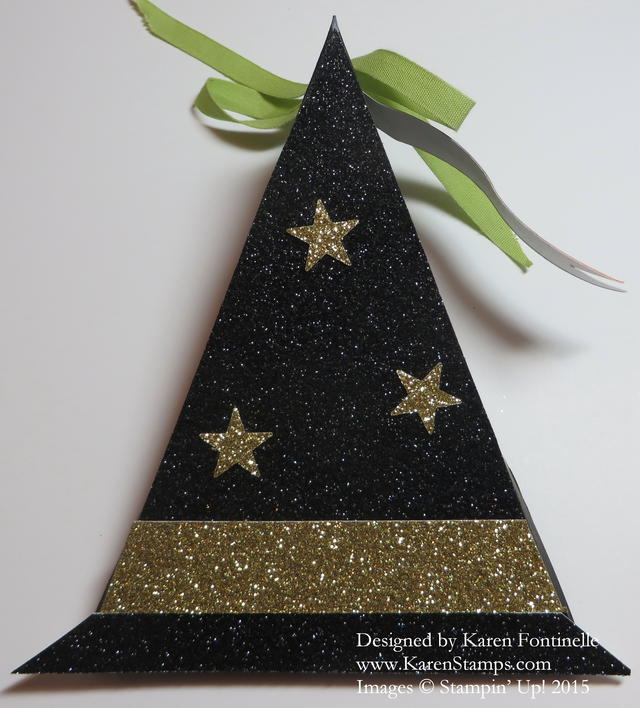
This Witch’s Hat Triangle Treat Box for Halloween is one I learned to make a long time ago and think it is SO easy to make! You can vary the size and certainly make it for any occasion! And all it takes is half a sheet of card stock!
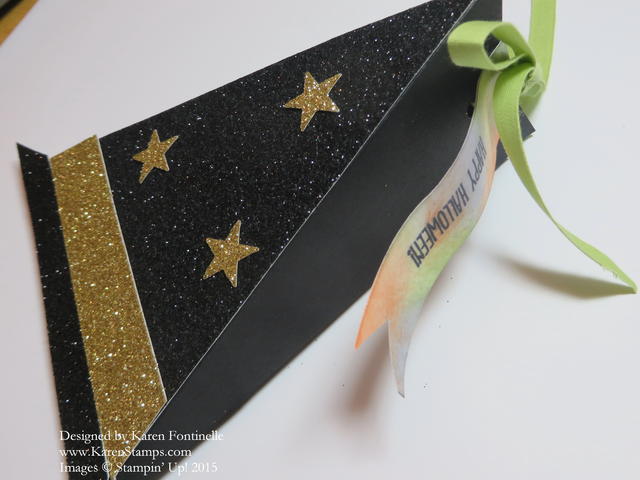
This is a difficult project to photograph, but here you can see it from the side to see the dimension. Holes are punched in the top and I threaded the Pear Pizzazz Cotton Ribbon through them after putting some candy treats inside. I also made a Halloween tag tied on with the cotton ribbon by just sponging on some colors of ink on to the tag and stamping “Happy Halloween” with Basic Black Archival Ink. The stamp is from the And Many More Stamp Set. This is a great stamp set, you can never have too many greetings because we always want just the perfect wording for our cards and projects. I suggest buying the wood-mount in stamp sets like this one with smaller stamps and one that you will use a lot because being mounted .already on the wood, they are quicker and easier to use.
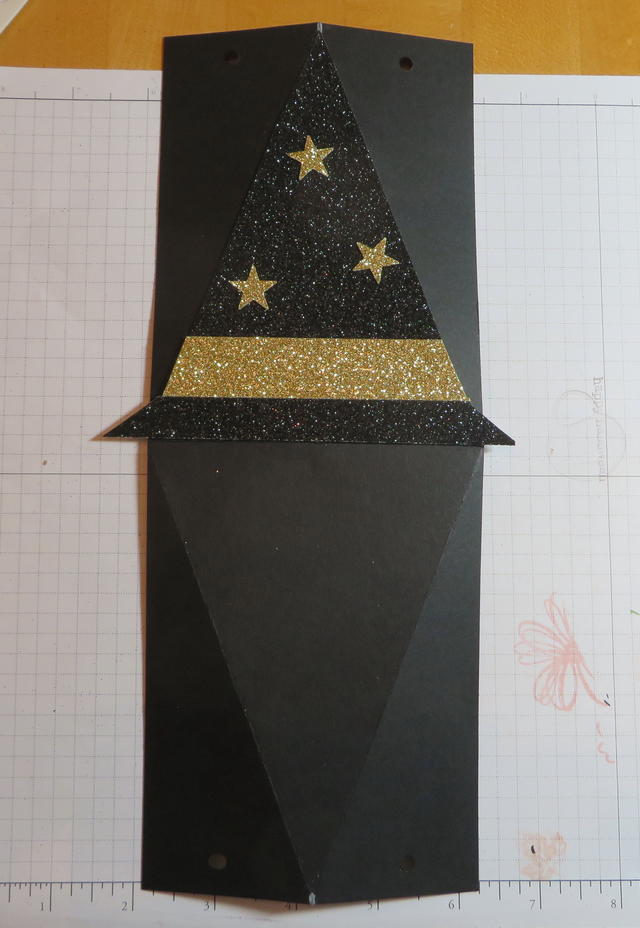
I made the basic triangle box out of Basic Black Card Stock and then traced the top shape onto the back of a piece of Black Glimmer Paper. I glued this on to the top of the box and added a band of Gold Glimmer Paper. Underneath the gold band, I cut another piece of Black Glimmer Paper to fit into the bottom space except I made it longer by about half an inch or so than the bottom of the hat. Then I trimmed it to make it look like the brim of the witch’s hat. I also punched out some Gold Glimmer stars with the Itty Bitty Accents Punch Pack star punch.
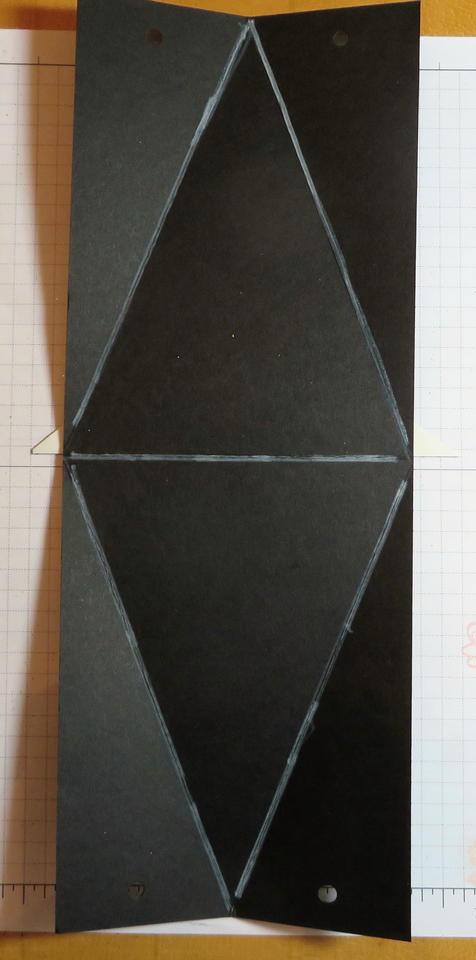
To make the triangle box, cut a piece of card stock in half longways, 4 1/4″ x 11. Score in the middle at 5 1/2″. Then put a small mark at the center of each end, which for this size would be 2 1/8″. Use the Stampin’ Trimmer to score from this center mark to the center score line at an angle. Do this on both ends on both sides. Fold everything on the score lines, and you will see how it all fits together. Then punch holes in the top edges for the ribbon. Be sure to add your treat before tying up the box!
Try this project! These are really fun to make! And I love projects and ideas that can be used for not just one occasion or theme. This Witch’s Hat Triangle Treat Box for Halloween is just one way to use this triangle box idea!
Halloween Picture Frame
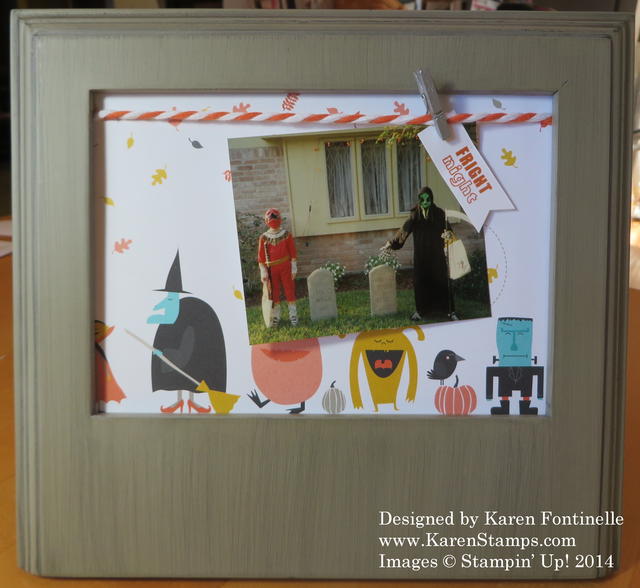
This Halloween Picture Frame is from last year, but I thought I would post it as a reminder of something fun you could make. This is a piece of Halloween paper from last year (Motley Monsters) placed inside a picture frame. Then I took a piece of Tangerine Tango Two-Toned Trim (which you can still buy on the Clearance Rack and also in Old Olive) and strung it across the top of the frame opening (I took out the glass). Just clip on a photo or two or three with a Mini Metallic Clothespin and maybe a little greeting or Halloween decoration. You can use any designer paper, Halloween pattern or something similar (you could use a print or polka dots or stripes in Halloween colors, too).
This is a really fun way to display some current or past Halloween photos or make as a hostess gift if you are going to a Halloween party! You can also stick on some Halloween images on to the frame itself to further decorate it.
As you can see, you make things other than cards with papercrafting supplies! Make your own home decor with a picture frame and paper! Just think of how you can change out the paper to make a frame for birthday photos, anniversary, or a holiday celebration! Sometimes it helps to think of making a card, but then put if in a picture frame! Or think of how you would make a scrapbook page but put it in a picture frame! Lots of ideas that you can make!
Shop Stampin’ Up! Online for anything to make your Halloween picture frame or display for any occasion!
Last Day! Stamp Sale! 15% Off Stampin’ Up! Stamps!
Today is the last day for this unusual sale from Stampin’ Up! – Save 15% on stamps from Stampin’ Up! Just go through the Annual Catalog and the Holiday Catalog and pick out the stamps that you have on your Wish List! It’s pretty hard to decide which are the best ones! Here are a few you might get some use out of!
Order your stamps before midnight tonight (11:55 pm MT) to take advantage of the 15% off Sale!!
Shop Stampin’ Up! Online HERE!
Trick or Treat Watercolor Wash Halloween Card
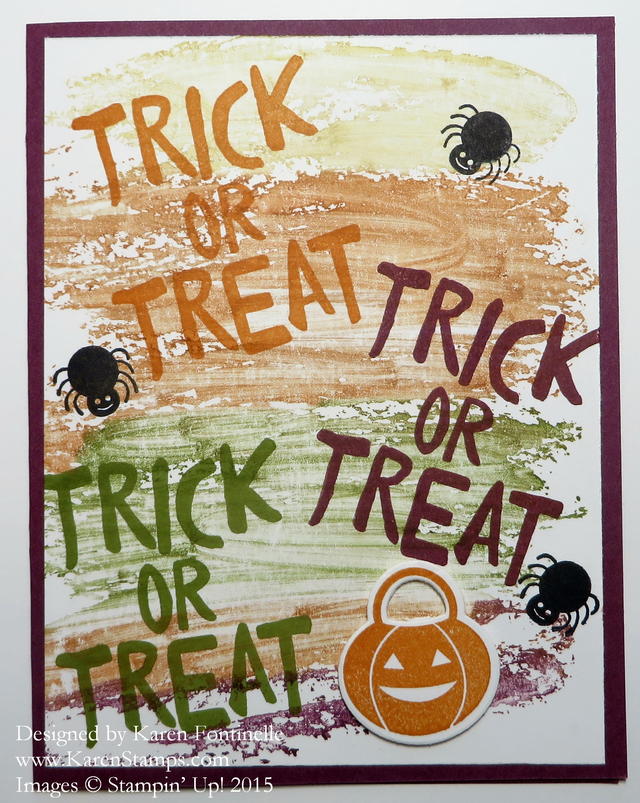
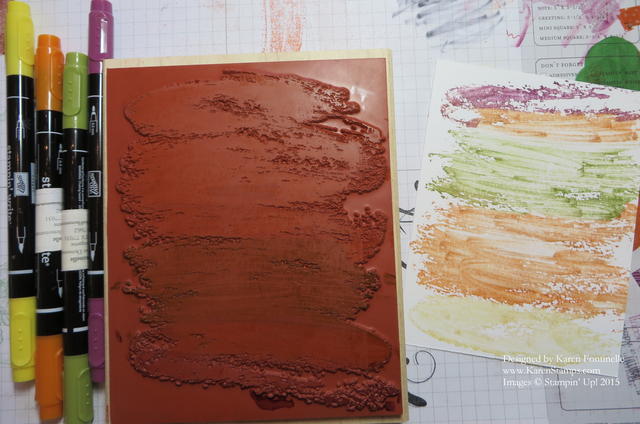
The other day I got this idea to use this background stamp to make this Trick or Treat Watercolor Wash Halloween Card. The Watercolor Wash is a large background stamp, and I colored it with several markers to make a multi-colored background. After coloring with markers, be sure to “huff” (or breathe) on the inked stamp to remoisten the ink before stamping. I thought using Halloween colors with the Watercolor Wash stamp would be fun and interesting!
I recommend getting these background stamps in the wood-mount version. I just think it’s easier to use them on the wood block. I think the really big stamps and the really little stamps are better wood-mounted, and you don’t have to do any mounting as they are all ready to stamp!
After stamping the background, I used the Howl-o-Ween Treat Stamp set for the “Trick or Treat” words, the pumpkin die-cut and the stamped spiders! It’s a fun Halloween stamp set plus comes with matching Boo To You framelits dies. You can also purchase the Bundle and save 15%.
Don’t forget about the very short Stampin’ Up! Stamp Sale, which ends on Friday, October 23!! That is tomorrow! All stamps are 15% off! Don’t miss out!
Shop Online at Stampin’ Up! to get your great stamps on sale, but do it by Friday!
Lovely As a Tree Christmas Card
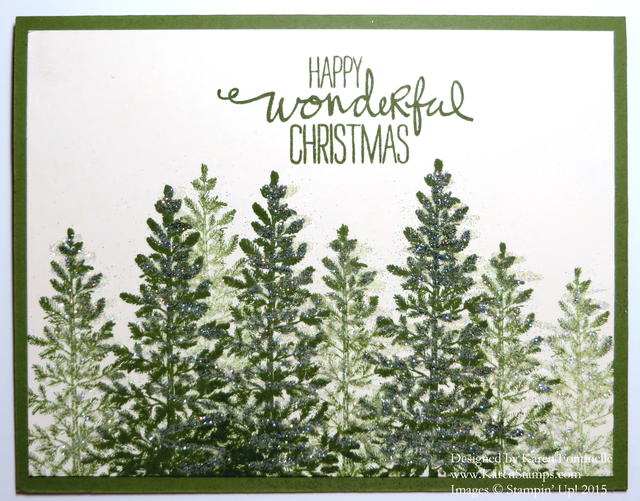
This Lovely As a Tree Christmas Card is one of the easiest and most beautiful Christmas cards you could ever make! With Stampin’ Up! having the 15% Off Stamp Sale this week,
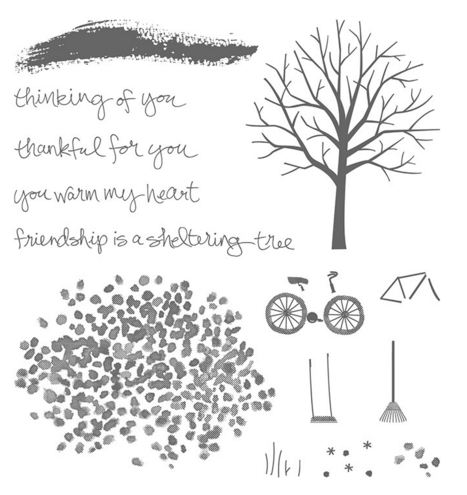
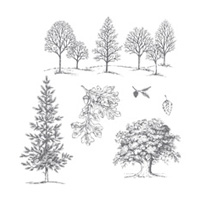
October 19 – 23, I would like to encourage you to make sure you have this stamp set, Lovely As a Tree, in your collection. If you have been with Stampin’ Up! for many years, you probably DO own it. But if you are newer, you should know Lovely As a Tree is one of the most classic stamp sets Stampin’ Up! has ever sold! It has been around since 2001, I believe, which is around the time I started stamping. The fact that it is still in the catalog means that it is still very popular and still getting sales. This is a stamp set every stamper should own!
I saw the design of this card way back when I was first a demonstrator. The stamping is so easy on this card. Simply ink up the single evergreen tree and stamp. Then immediately stamp again right next to that tree. Since there is less ink on the stamp, that tree will stamp lighter. Then ink up the stamp again and stamp – and then stamp again without inking up. Continue stamping this way over the Very Vanilla card front until it is filled with trees. Stamp a greeting at the top. I used the greeting from the Wondrous Wreath Photopolymer Stamp Set.
One of everyone’s favorite embellishments back then, and probably still, was Dazzling Diamonds Stampin’ Glitter. This doesn’t require any thought or expertise! Simply take the 2-Way Glue Pen and scribble on each tree from top to bottom. Shake Dazzling Diamonds Glitter all over the trees on the card front and dump off the excess. You will be amazed at how beautiful your Lovely as a Tree Christmas Card is now!
Shop at my Stampin’ Up! Online Store for any supplies you need for this card!
Layered Letters Alphabet Spooky Halloween Card
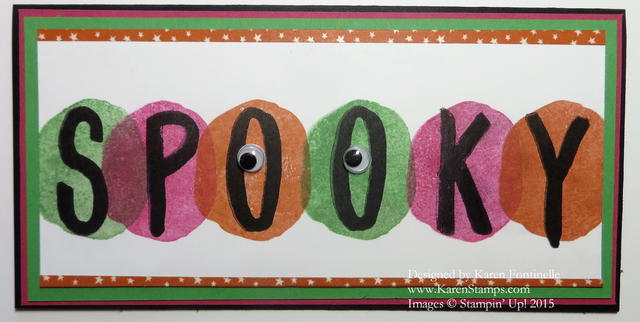
With the Stampin’ Up! Stamp Sale this week, you might be looking through all the stamp sets wondering which ones to buy, so I thought I might suggest the Layered Letters Alphabet Photopolymer Stamp Set so you can make fun cards like this Layered Letters Alphabet Spooky Halloween Card! I liked this alphabet stamp set when I first saw it, back when the new annual catalog was introduced.
This card starts with a 6″ x 6″ piece of Basic Black card stock, folded in half to make a 3″ x 6″ card. Sometimes this size is fun to make! I was in to adding a pop of pink (Melon Mambo) to my Halloween card, so I have a layer of Melon Mambo and then Cucumber Crush. I used the same ink colors plus Tangelo Twist. The black is the new Basic Black Archival Ink. For a little extra pizzazz I added some Happy Haunting Washi Tape just on the very edges of the Whisper White, top and bottom. Then I happened to think of adding some Googly Eyes to the O’s in Spooky! Every crafter has googly eyes in our stash, don’t we??!
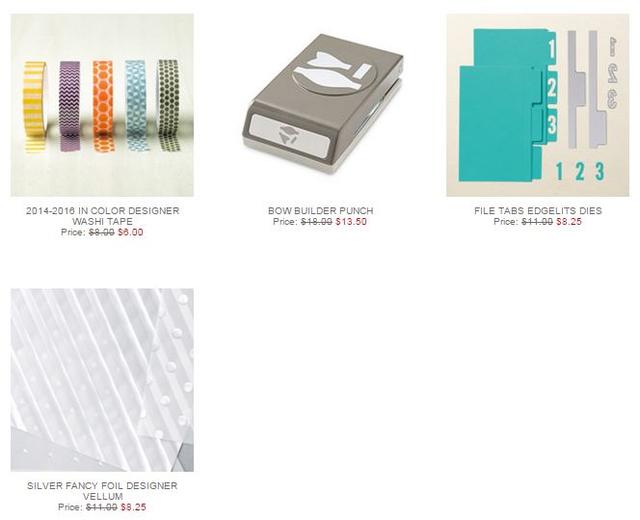
Here are the new Stampin” Up! Weekly Deals! Only four items again this week.
Get the Bow Builder Punch just in time for Christmas packaging (it’s small) or cards and projects. Use the Silver Fancy Foil Designer Vellum for making Christmas cards or packaging. Washi tape is always fun for a multitude of uses (there are whole pages on Pinterest for washi tape ideas!), and if you need to do some filing for the new year when we all try to get organized again, you will be ready with the File Tabs Edgelits Dies! But you can also use them for making cards and projects!
Shop Online for any and all of these Stampin’ Up! Deals and offers at my Online Store!
Save 15% on Stampin’ Up! Stamps This Week!
Yes, you read that right!! Stampin’ Up! is having a sale on stamps!
This week only, Monday – Friday, October 19-23! Save 15% off stamps!
Shop Online for all the stamps you have been wanting!
(Or contact me and I can put your order in for you!)
Here are the details:
Hostess stamp sets and rotary stamps are not eligible for the 15 percent promotional discount on stamps.
Bundles are not eligible for this promotional discount, but they will retain their current 15 percent Bundle & Save discount. The stamp set from the bundle may still be purchased ala carte with the 15 percent promotional discount.
Stamps purchased using a 50 percent Stampin’ Rewards discount will not be available for this 15 percent promotional discount. Stamps purchased using Stampin’ Rewards discounts will still be 50 percent off retail value of the stamp set.
There is no limit to how many discounted stamp sets can be placed on an order.
There is no minimum purchase required for this promotion.
Don’t forget to check the Stampin’ Up! Weekly Deals to add to your stamp order – and the Clearance Rack!
IF you want to go big, or go in with some friends to order stamp sets and anything else, put together a $300 order and get an extra 3% in Stampin’ Rewards! You can also add a Prepaid Paper Pumpkin Subscription to your order (even if you are already a monthly subscriber) if you want to build up your order. Bonus Stampin’ Rewards good now through November 9th. Just a little extra in hostess benefits!
Shop the Stampin’ Up! Annual Catalog for stamps!
Shop the Stampin’ Up! Holiday Catalog for stamps!
Shop Stampin’ Up! Online to place your order!
Take advantage of the Stampin’ Up! 15% Sale on stamps this week! Have fun!
Halloween Tower of Paper Mache Boxes Home Decor
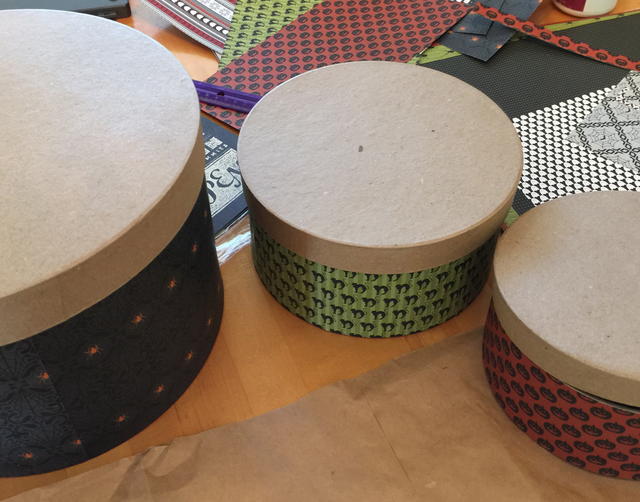
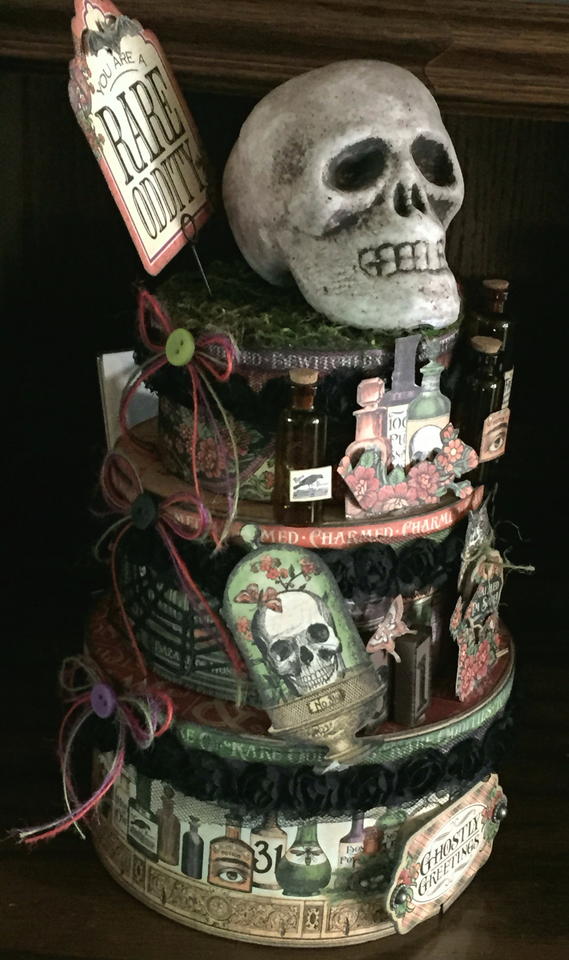
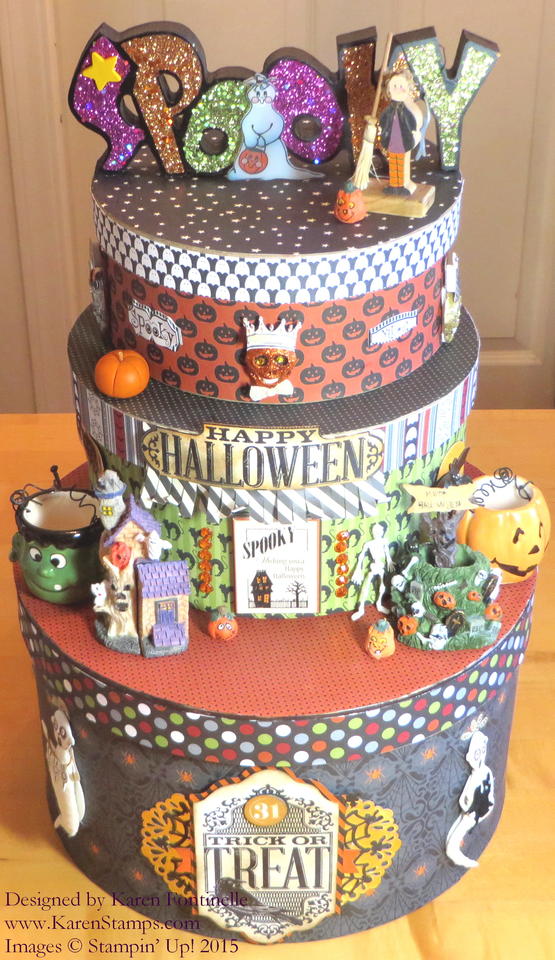 When my friend Nona sent me a photo of a similar Halloween project she had made with the round paper mache boxes, I absolutely loved it and had to make a Halloween Tower of Paper Mache Boxes myself! Since I didn’t have nor could find exactly the same decorations she had on hers, mine turned out a little differently, and yours will too if you make one also! I purchased some things at the craft store, I stamped the two greetings on the box, and some of the little trinkets I already had in my stash of Halloween decorations! The only problem was knowing when to stop, and that probably happened only because it was late at night! I might have added some ribbon or bows around the edges of the lids and maybe added a few more Halloween trinkets or stamped images, but, for now, I think it is finished!
I started with three round paper mache boxes and covered them with Stampin’ Up! designer series paper. As it turned out, I only used a small piece of the current Happy Haunting paper and used retired DSP for the boxes. It just depends on the patterns you are looking for and the quantity of paper you have. I needed a lot to go around the largest box on the bottom. I would advise you to think about your seams, which I forgot, but since “shabby” is okay on Halloween boxes, it didn’t really matter on this project! For me it was easier to use up some of my retired paper rather than the current, but for other paper hoarders out there, they would die to use up the retired paper that they might not be able to get more of if they used what they had! So whatever works for you!
I used good old Mod Podge for the adhesive for the paper on the boxes and applied the Mod Podge to both the box and the backside of the paper with a foam brush. It seems like there is some advantage in doing both the box and the paper, but I don’t remember that tip exactly. I knew I did need something that would provide some “movement” as the likelihood of getting the paper on perfectly straight on the first try was slim to none! I didn’t cover the outside of the paper with Mod Podge although I suppose you could.
After I had the boxes and lids all covered with paper, the fun began of decorating my Halloween home decor piece! I stamped the two Halloween greetings from the Witches’ Night Photopolymer Stamp Set and fancied them up with other Stampin’ Up! products and sponging. Other embellishments I bought at the craft store (you might find them on sale right now!) and some items I already had in my overly abundant Halloween decoration stash! Just play with what you have or what you buy and you will eventually come upon some placements and design that you really like. I used Fast Fuse Adhesive on most everything on the box, mostly out of laziness in not wanting to deal with my hot glue gun. Fast Fuse is REALLY sticky and I hope it will hold long term. I adhered the bottom of each box to the lid underneath it and all the trinkets to the lid. I suppose if you didn’t think it would get picked up or moved, you could get away without glueing things and therefore would make storage easier if you could store each box inside another, but I didn’t see any way around glueing the boxes together. The lids are not glued so I might be able to consolidate a little bit for storage.
Here is the project my friend made so you can see where I got the idea and perhaps provide even more inspiration for you to make your own!
If you are already a crafter, you might have some paper mache boxes in your closet or you can certainly buy them at the craft store. Then just gather some supplies and start playing and see what you come up with! You could also make a home decor project like this one for any other occasion, such as a birthday, a baby shower, Christmas, Easter, etc. My husband asked me if I made a Halloween cake!
You don’t always need to spend a lot of money at the store for fancy home decor. Often you can make something yourself for a lot less money, probably with things you already have on hand. And once you make it, it often becomes a very special decor piece to you and your family. Create your own memories for your household! I really like my Halloween Tower of Paper Mache Boxes Home Decor project and it looks great on my coffee table with my other Halloween decor!
If you need any papercrafting supplies, please visit my Stampin’ Up! Online Store HERE.
Tomorrow!!!! On Monday, Oct. 19 – Friday, October 23, Stampin’ Up! will have a 15% off sale on stamps! Details coming tomorrow so stay tuned! Check back tomorrow morning to find out!
Coming Monday, Oct. 19th! Stampin’ Up! Stamps 15% Off
Hot off the press from Stampin’ Up!:
Starting October 19, stamps will be discounted 15 percent off retail. This sale will only be around for a few days before it ends on October 23, so don’t miss out! It’s a great time to purchase stamp sets on your wish list.
***Details coming on Monday, October 19th. ***
Tip: Don’t start entering an order before Monday or the sale prices might not show up when you go back to it on Monday. Just make out your list and then you’ll be ready to enter in to an order.
Check out all the stamp sets HERE in my Stampin’ Up! Online Store!
Work of Art Howl-o-Ween Treat Halloween Card
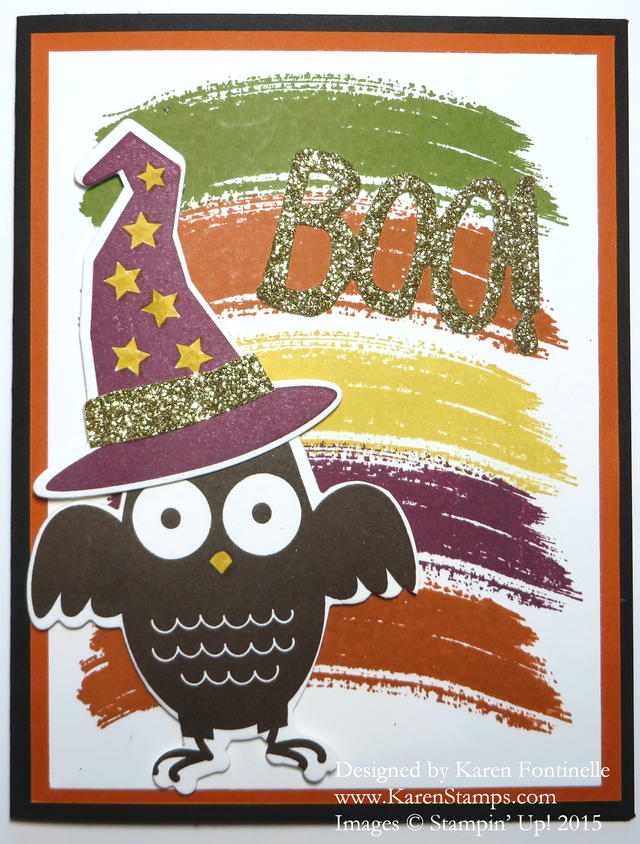 I got the idea the other day to make a Halloween card with two different stamp sets, Work of Art and Howl-o-Ween Treat, so here we have the Work of Art Howl-o-Ween Treat Halloween card! The Work of Art Stamp Set has been very popular since it was first introduced, and you can see how versatile it can be. Just change the colors and it can be used for almost any occasion. To make it work for Halloween, just ink the stamp with Halloween colors and add some Halloween images, such as the owl and hat from Howl-o-Ween Treat.
If you don’t like cutting out things, get the Howl-o-Ween Treat Bundle that includes the Boo To You Framelits Dies along with the stamps for a 15% discount! The framelits also cut the “Boo!” which I think is super cute to put on cards.
Even if you do not have “official” Halloween stamps, look through your stamp sets and see what you do have that you can use! You might find a “Happy Halloween” in a large stamp set of words and greetings. You might find a background you can use in Halloween colors. You might find a cat stamp that you make look “Halloweeny”. Just try it and see what you can find! If you aren’t into Halloween, make a fall call in a similar fashion.
HOT OFF THE PRESS: If you are in the market for some Stampin’ Up! stamps, wait until Monday and next week! Check back on Monday for all the details (because I don’t have details yet!)! Start making your wish list over the weekend.
Halloween Happy Haunting Sour Cream Containers
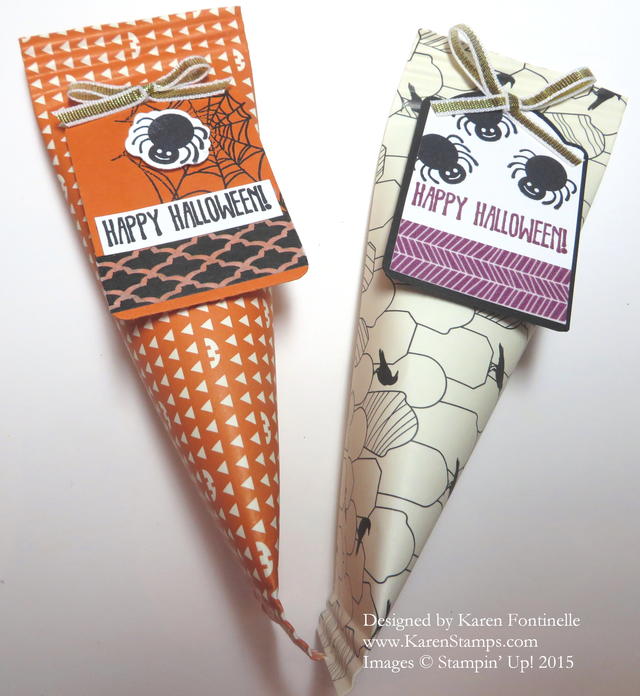
It’s time to start thinking about Halloween treats so here is an idea with these Halloween Happy Haunting Sour Cream Containers! Sour cream containers have been around at least since I began stamping, but they are so popular and useful and easy that they are still around!
So easy to make! You can make the sour cream containers small or large. I’ve seen various sizes such as 4 1/2″ x 6 1/2″, 4″ x 4″. 5″ x 5″, etc. On my samples, I used Happy Haunting Designer Series Paper cut to 4 1/4″ x 5 1/2″, so the same size as a card front. If you use a rectangular size, you will put adhesive on one long size and at both ends. Use a strong adhesive, such as Fast Fuse or the new Tear & Tape Adhesive. No matter what size, you will put adhesive on three sides of the paper. You can use designer paper or card stock.
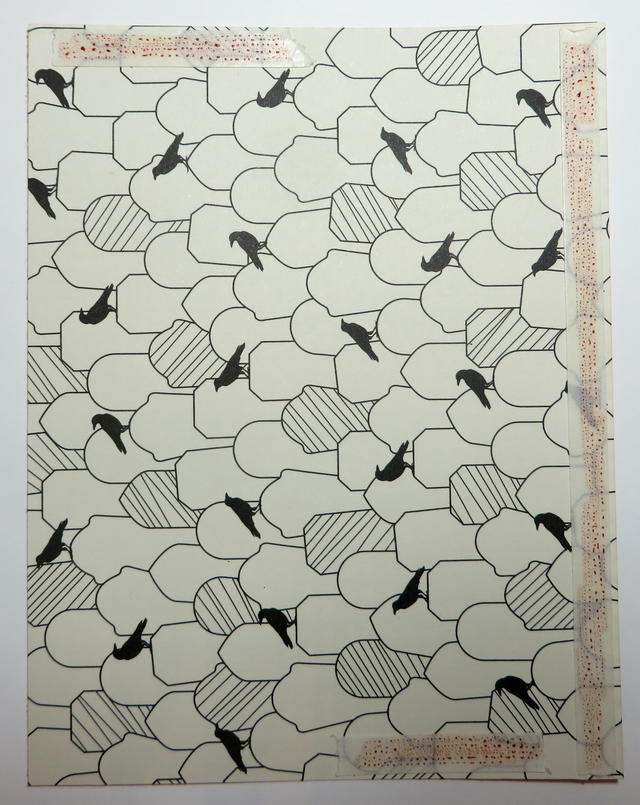 I used Tear & Tape Adhesive and since the backing on the tape is white, it wasn’t showing up well in the photo so I colored with some marker ton top of the tape strip so it could be seen in the photo. I would also put a full length of tape on each end rather than the pieces, but the pieces worked.
After applying the tape and removing any liners, fold the paper lengthwise into a roll, like a toilet paper roll. Then squeeze one end of the roll together. As cute as this project is, don’t forget to add your candy or gift inside before closing the other end!! After you have the contents inside, you want the other end of the container to NOT close in the same direction as the first end. Squeeze the opposite end of the sour cream container together so it will be going at a 90 degree angle to the bottom.
If you happen to have a Paper Crimper, you can crimp the ends of the container as I did, but this is not necessary. Another option would be to punch holes in one end instead of adding adhesive and tying some ribbon through so that the sour cream container can be opened neatly instead of ripped or cut open.
Next, decorate the sour cream container according to the occasion! I used the Note Tag Punch to make a small tag. I embellished the tag with some Happy Haunting Designer Washi Tape and stamping with the Howl-O-Ween Treat Stamp Set and the little spider web in the Witches’ Night Photopolymer Stamp Set. And for a finishing touch, I tied a little Gold 1/8″ Ribbon into a bow and stuck it on with a Glue Dot.
There are an infinite number of ways to decorate these Sour Cream Containers for any occasion! Use them for candy or small gifts. You can use plain card stock or stamp card stock, but for a quick and easy way to make sour cream containers, use designer paper which is already decorative. I hope my Halloween Happy Haunting Sour Cream Containers inspire you to try your hand at making these treat holders.
Shop Stampin’ Up! Online HERE or
contact me to put in your order for you!

