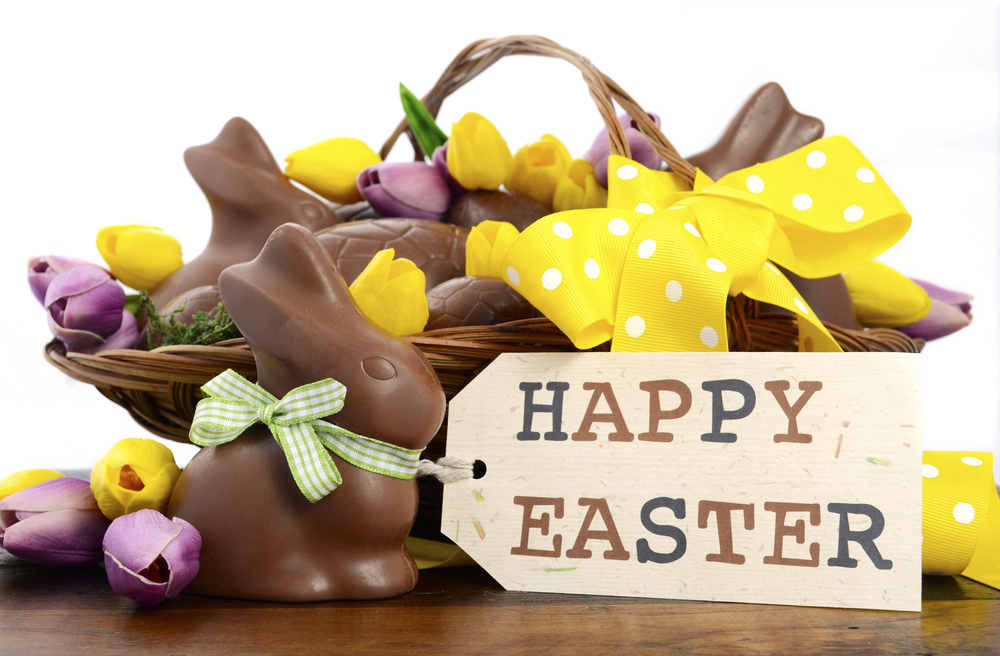
Happy Easter Everyone!
Enjoy this special day (and I hope the Easter Rabbit brought you some chocolate bunnies and eggs in your basket!)!

Happy Easter Everyone!
Enjoy this special day (and I hope the Easter Rabbit brought you some chocolate bunnies and eggs in your basket!)!

If you are looking for some easy and fun Easter baskets to make, here are Three Fun Little Easter Baskets To Make to help you get started! You can copy these exactly or make the basic basket and then choose how you are going to decorate it. These baskets are from five years ago apparently but they have been very popular through the years! I have made newer ones in recent years, including this year, but these just seem classic. Use whatever colors you like, use cardstock or designer series paper, decorate with stamping or punch art, whatever your creative mind comes up with!

This is some Gingham Gala 6″ x 6″ Designer Series Paper (retired) that I used back then. Since it was already 6″ x 6″ in size, it was perfect. Score at 2″ and 4″ on one side, then turn the paper and score at 2″ and 4″ so you have that tic-tac-toe pattern as I like to call it. All three baskets are made this way. Cut up on the two vertical score lines up to the horizontal score line. Do the same on the opposite side. If you like, you can round off the corners as I did on this basket if you have a punch that can do that. But it is fine if you don’t. Cut a matching handle of about 8 1/2″ x 1/2″.
Fold the paper into a basket and use brads or glue to hold the sides and handle together. The handle goes in between the two side flaps and the center flap. That hides it a little bit on the inside.
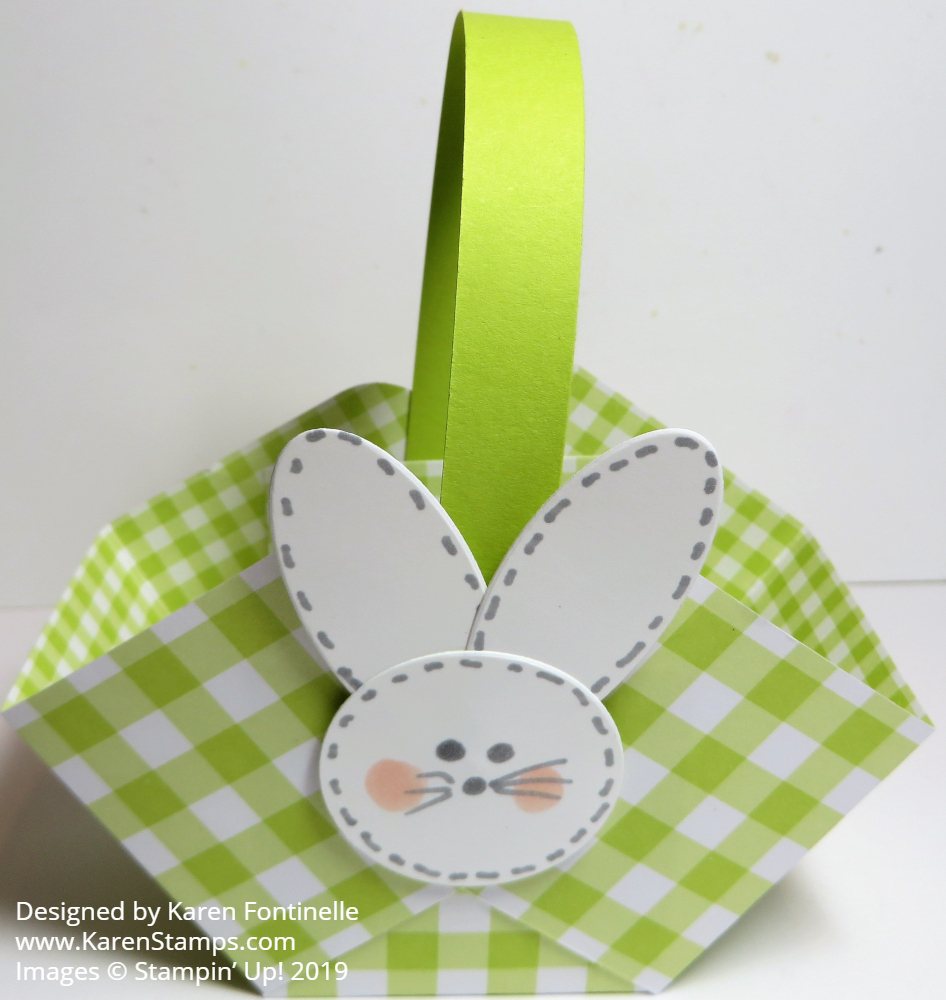
This gingham basket is decorated with a little punch art bunny face! So cute! I made the bunny face with a circle die and two oval dies. You could use punches. If you don’t have any ovals, you might have a leaf die or punch that would work or just cut something out by hand. I used the tip end of Stampin’ Blends markers to draw on the parts of his face and the little “stitching” around the sides of the face and ears. Adhere to the side of the basket with Stampin’ Dimensionals.
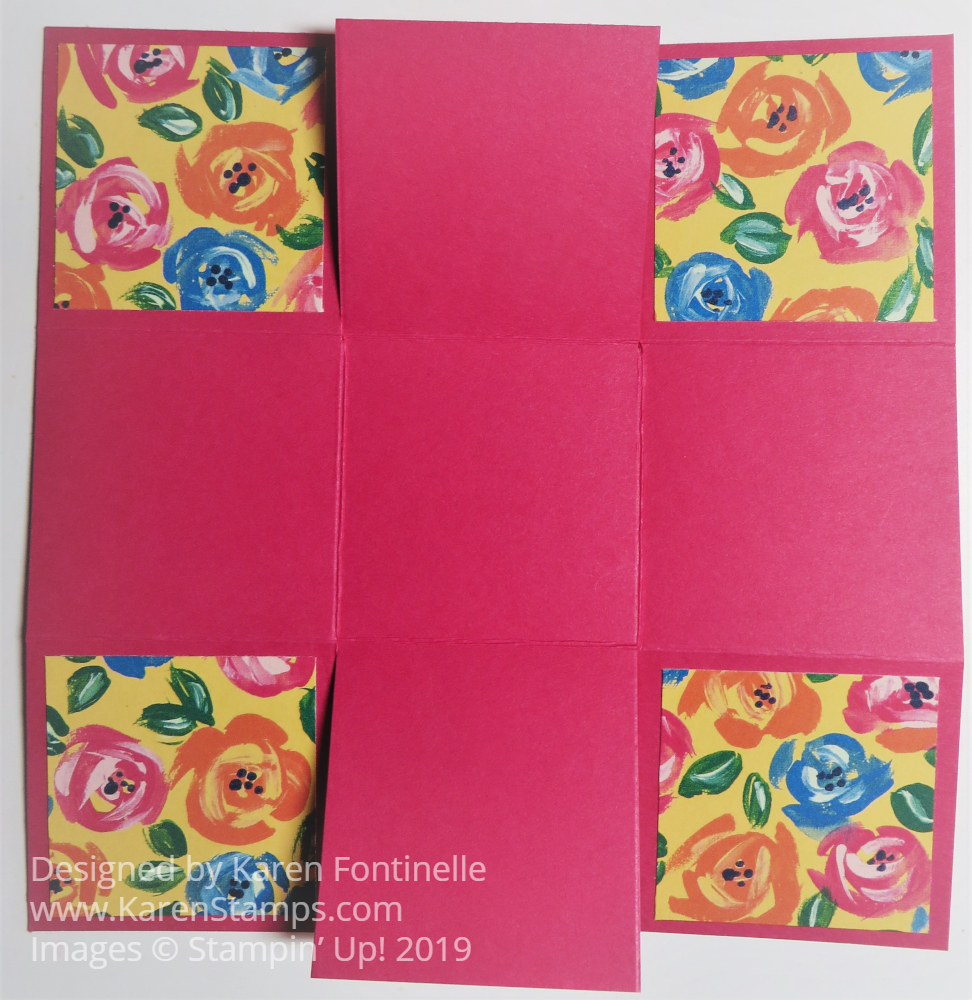
This basket is made with Melon Mambo cardstock, scored and cut the same way as the basket above. The paper is the retired Garden Impressions 6″ x 6″ Designer Series Paper (retired). Each section of the Melon Mambo basket is 2″ x 2″ so you can cut the designer paper just a “smidge” less than 2″ on each side or 1 3/4″ x 1 3/4″ if you want a little bit of margin showing.

Just fold the sides of the basket together, adhere with brads or glue, adding in the handle as well. Then decorate with a flower such as with the Daisy Punch or whatever you have and add a gem to the center.

This last basket is pretty enough with some floral stamping on the cardstock! It is Pool Party cardstock stamped with flowers in the Painted Glass Stamp Set (retired) with Pool Party ink. Just add a pretty ribbon like this Variegated Petal Pink and White ribbon.
Fill the baskets with Easter grass or paper shred and some Easter candy treats! These would be cute as a little favor at each place setting at your Easter table. Or make one for yourself for a decoration in your home! Complete with chocolate candy, of course!

Here is an Easy Chocolate Easter Bunny Treat that you can easily make for a little favor or treat for Easter. All you have to do is buy some chocolate bunnies! They are required for Easter, aren’t they? I’ve made these little treats through the years and you can vary the size according to the size of your chocolate bunny or whatever you are putting inside.
If you have a bigger treat, just make the treat holder taller or wider and possibly increase the size of the base if you need to to make the treat fit inside. You don’t even have to cut a window in the front if you want to decorate the front and hide the treat a bit. But my preference is making a cute opening so you can see the treat inside as if it is in its little home!
For this particular one, since I had just a small chocolate bunny, I cut a strip of Pool Party cardstock at 2″ x 8 1/2″. I could have made it a little bit shorter or probably wider would have been better for wider sides to be a little sturdier. After cutting the 2″ wide strip, score at 3 3/4″ from each end. That gives you the middle section which will become the flat base of the treat holder and you will put the treat on that center base. You should be careful with adhesive and candy, but I did put a little Stampin’ Seal on the bottom of the treat holder to hold the bunny in place.
For the opening, I used one of the rectangle dies in the Nested Essentials Dies. Position it on what will be the front side of the treat holder and exactly where you want it to be. If you are decorating your treat holder with designer paper, then adhere that to the front first before you diecut. After you have the front opening cut out, fold and crease the two score lines and punch two holes for ribbon at the top, unless you are going to use some other closure. Decide if you want another color or stamping on the inside background behind the candy and adhere that to the inside before adding the candy.
Decorate the front however you like, with stamping, DSP, embellishments, a greeting, whatever you like. I used a few diecuts in the Celebrate Love Ephemera Pack. See! It wasn’t just for Valentine’s Day! I even glued a stem of flowers to the inside. Oh, and I put some Lemon Lime Twist grass at the bottom. When I used to make these I used the Scalloped Tag Topper Punch I think it was named to make the top edges fancy. But rather than look for a punch, I just clipped the two corners off to give it a little something. Then I tied it together with some silver trim I had handy.
As you can see, you can make one of these little Easter decorations pretty quickly and easily and they will give your guests a smile on their face to receive one! Plus one by each dinner plate at your table for a little favor and to decorate the table! Or put one in an Easter basket!
Here is a side view of the treat holder.

Just play with this idea and see what cute things you come up with!
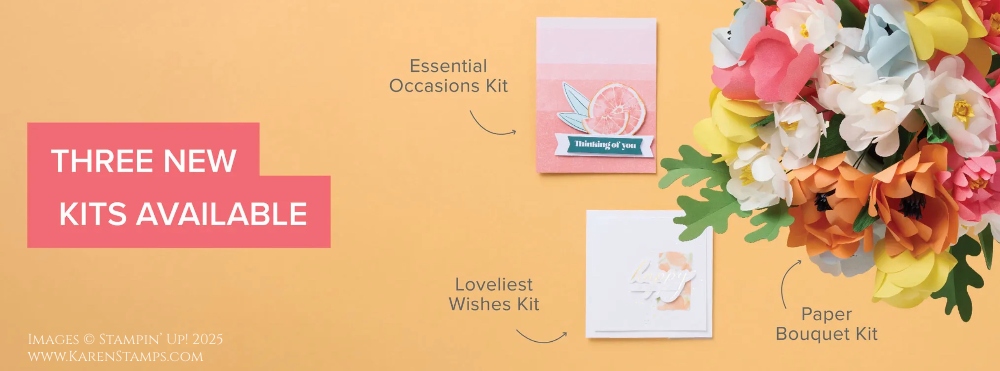
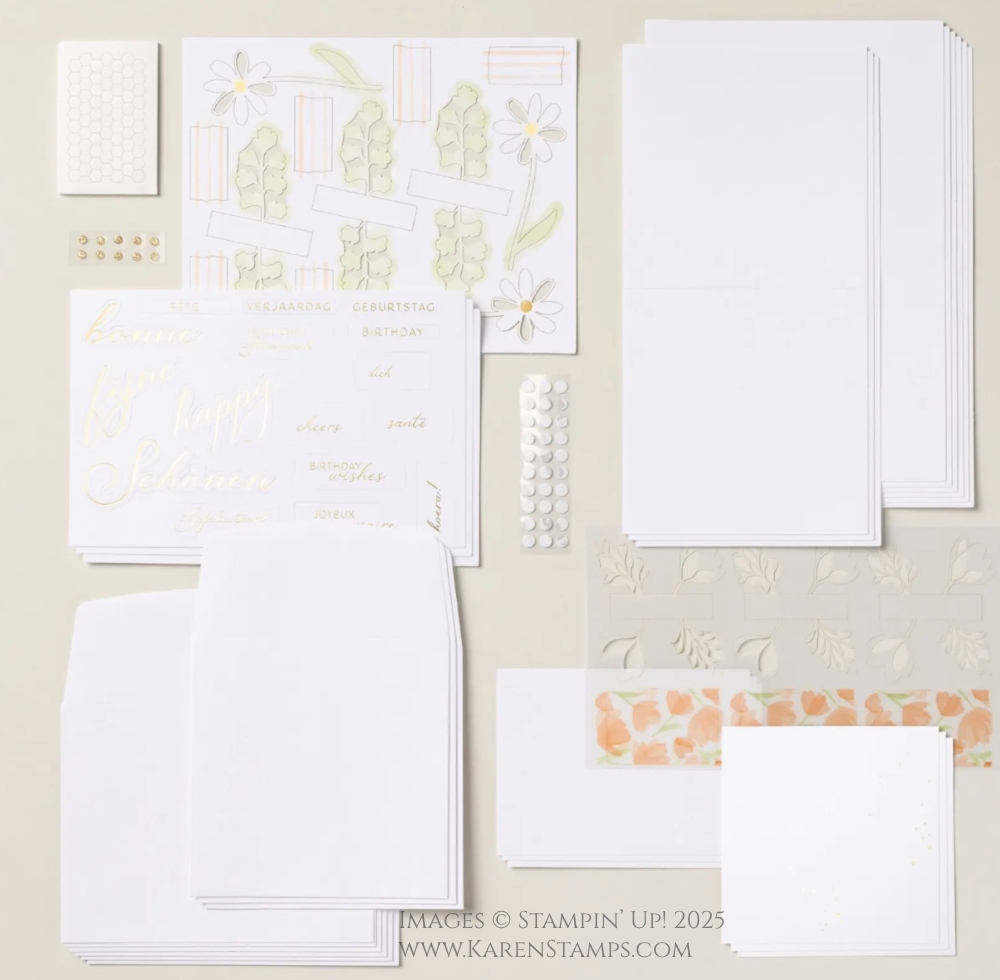
Last week Stampin’ Up! released THREE new Kits in the Kits Collection! In my opinion, one Kit is especially noteworthy for Spring! It’s the Paper Bouquet Kit that will take your breath away just to see the photo! The other two kits are for cards and are very pretty also, as always! These kits in the Kits Collection are available in the Online Store. They are not subscriptions and not to be confused with the Paper Pumpkin monthly subscription. You can buy these kits whenever they are available, putting them on your order as usual. Kits are perfect for anyone – new crafters, crafters who don’t have a stash of supplies, and avid crafters who are experienced but who like to just open a box and make a project! Everything you need for the project is included in the box except for maybe scissors! Try one and enjoy!
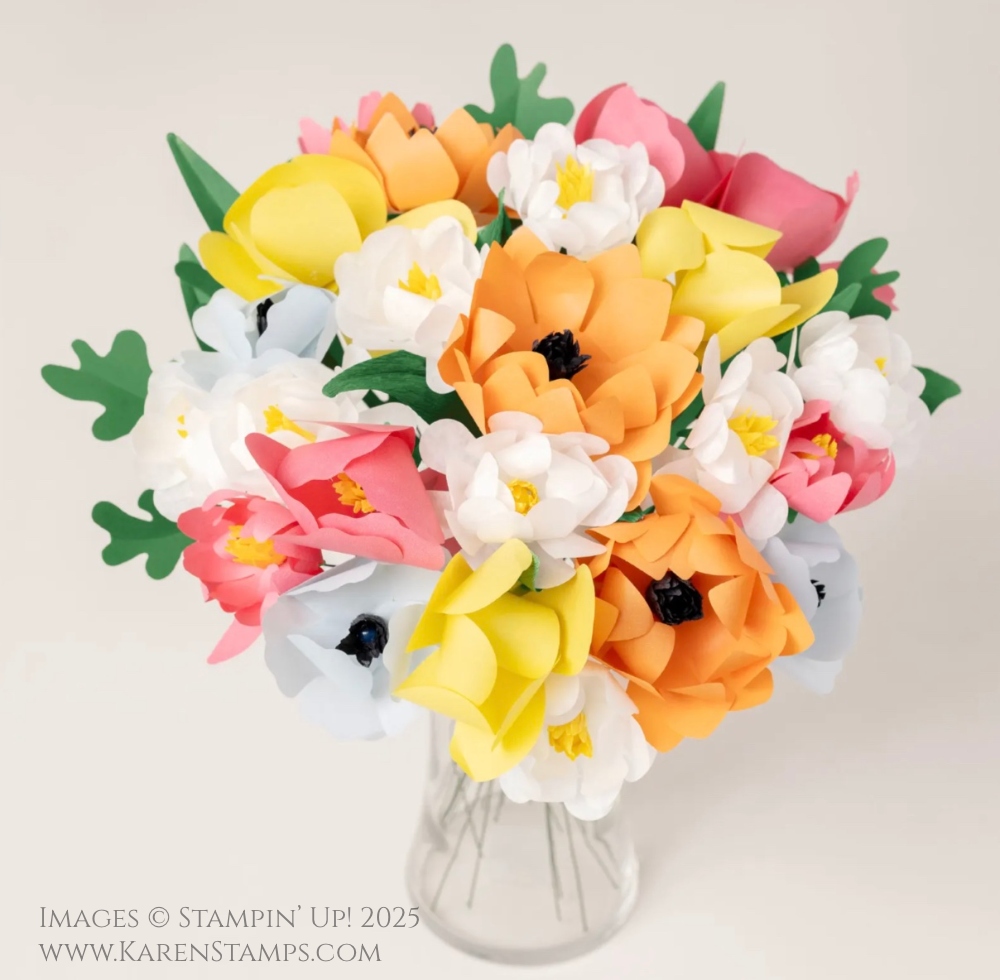
This is the Paper Bouquet Kit. Wouldn’t you just love to have those flowers in a vase sitting on your table without having to water them or watch them wilt and die? The Kit will make 23 flowers and 11 leaves in all of the new In Colors! You get the precut pieces, floral wire, and pony beads. Hot glue gun required for assembly but not included. Vase not included.

_________________________
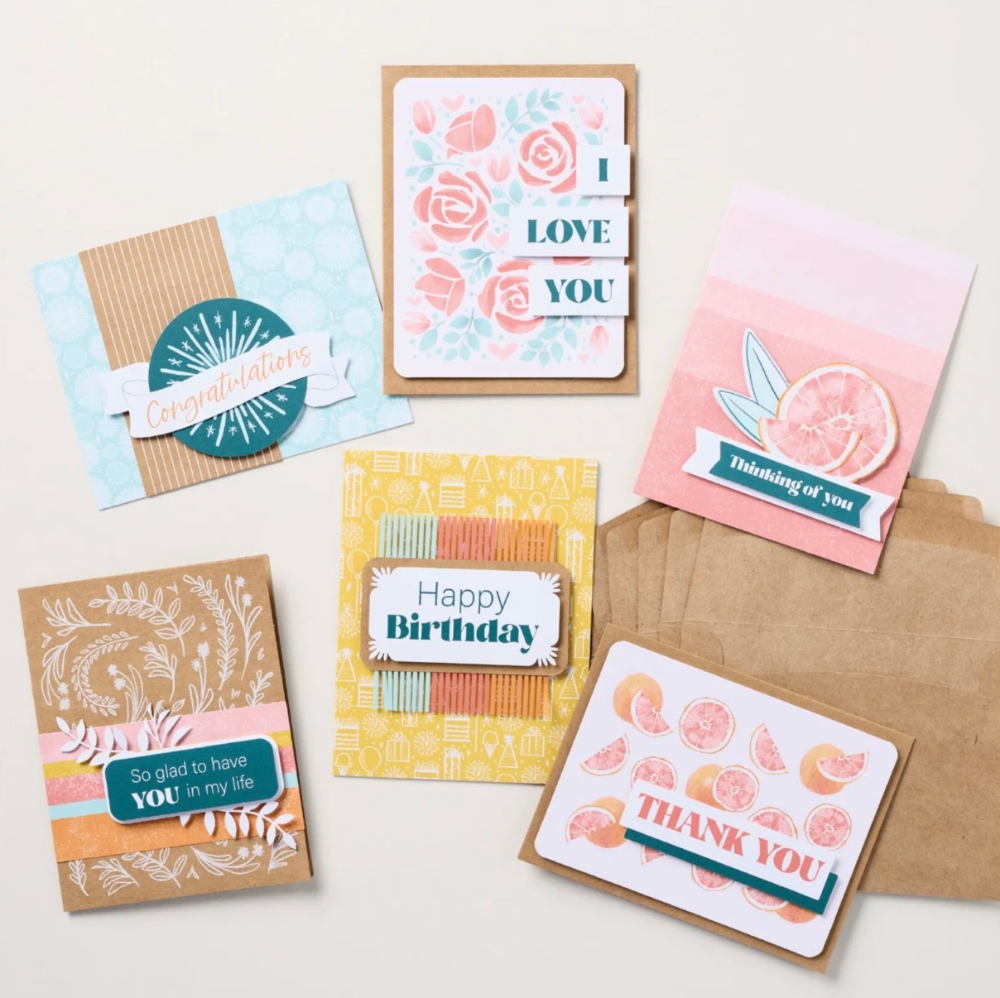
The Essential Occasions Kit is a card kit. It makes 6 cards, one of each design. The sentiments cover many different occasions you might need a card for, like birthday, well-wishes, or thank you. In the kit you get precut pieces to make the cards, envelopes, and adhesive.

____________________________________________
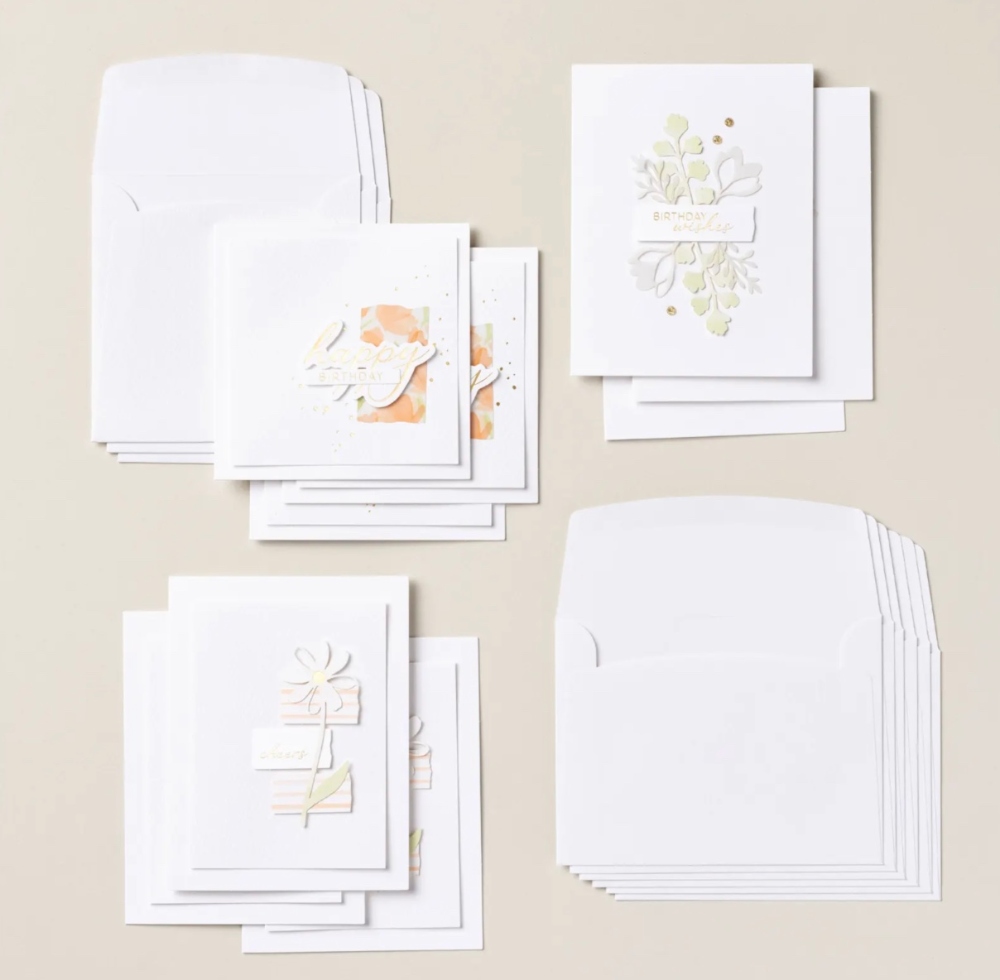
This is the Loveliest Wishes Kit! The light colors make it a little difficult to see in the photos but I think you can tell how pretty the cards will be. This kit makes 9 cards, 3 each of 3 designs with precut images and gold foil sentiments for birthdays! The kit colors are Petal Pink, Soft Sea Foam, and white. The envelopes are printed and you also get embellishments with the other supplies.
I can’t tell you yet about assembling the Paper Bouquet Kit, but I would say these two card kits look very easy, great for beginners. Relaxing for experienced stampers and crafters! Order a couple of kits and make them with friends or family for an extra dose of fun! Just follow the directions adhering the pieces to the cards and you’ll have a new, beautiful collection of cards at the ready for many occasions!

It’s time to make some cute things for Easter and here are two quick and easy Easter Baskets! All you need is a 6″ x 6″ piece of paper to make the basket. You can make the baskets with either cardstock or designer paper or both. After that, just decorate the basket a little bit and add some “grass” and treats!
Start with a 6″ x 6″ square piece of paper and score like a tic tac toe. Score at 2″ and 4″, then turn and score at 2″ and 4″. Cut on the two vertical score lines up to the horizontal score line. Do the same on the opposite side. See the photo of the basket with designer paper below to see how the basket paper is scored and cut. Cut a handle of about 8 1/2″ x 3/4″ or whatever size you like.
Crease and fold all score lines. Round all four corners if you like or leave them as is. Form the paper into a basket and use brads, staples, or glue to hold the sides and handle together. Make sure you are putting adhesive so that it doesn’t show from the front. If you think of it ahead of time the handle goes in between the two side flaps and the center flap. That hides it a little bit on the inside. ! Or it can just be glued to the inside of the basket.
If you use cardstock for the basket, you can decorate with squares of designer paper as you see on this layout. Since each square is 2″ x 2″, I cut the Storybook Moments Designer Paper at 1 7/8″ x 1 7/8″.

If you want to decorate the basket handle you can add a narrow strip of designer paper to the cardstock. You can even tie a ribbon on to the handle if you like.
Here is what the front and back of the basket looks like with the flaps folded in and adhered together.

The basket with the Storybook Moments DSP has a base of Old Olive cardstock. I love the strawberry design on this paper. The other basket (the one show above) is made with the Timeless Plaid Designer Series Paper. Each basket has a diecut character from the Storybook Moments Paper. The little mouse is layered on a diecut out of Old Olive. I just found it in my package of cardstock, it probably is a retired die but I liked it. You can use anything that fits the size of whatever decoration you are putting on the front and goes with the size of the basket. The plaid basket has a Calypso Coral die cut circle for a layer made from the Stylish Shapes Dies.
Just do whatever you like to make your basket and decorate it. These baskets only take about five minutes to make! So cute and so fun! Especially with chocolate candy inside!


What did I do on a beautiful second day of spring yesterday?! Of course, I worked on a Christmas Paper Pumpkin Kit from 2024! It’s the Filled With Joy November 2024 Paper Pumpkin Kit that I did not get around to making before the holidays! I just had some free time and I thought of two kits that I had wanted to work on and they were just taking up space in my head. I simply said I’m stopping the world and doing these kits! So now instead of being behind for Christmas 2024, I’m AHEAD for Christmas 2025!
This Filled With Joy Kit was pretty quick and easy to make. I just had to stamp the tags, turn down the collar of the stocking, and pin on the tag! The kit came with the cute little pins! A stamp set is included with every Paper Pumpkin Kit so I used that to stamp the tags and the ornaments. Then I just had to adhere the gold ornament top on the ornament and add Stampin’ Dimensionals to the back to adhere to the tags. I’ll save them for next year and either use them for little gifts or make them decorations for a Christmas meal.

I also had this Christmas Ornament wreath kit from the Kits Collection sitting on my desk since Christmas! I DID make these cute little wreaths on the gold rings and even put some as tags on gift bags. But then I saw another Demonstrator, Linda Heller, jazz them up a bit with some gold paint on the leaves and white paint for snow on the pinecones. I wanted to do that on the rest of them so I finally got that done yesterday and put the box in the closet with the Christmas gift wrap and things.
I had to do a little digging to see if I had some acrylic gold paint and I did in all my craft stuff. At least my paints are somewhat organized by color. I just put some gold paint on a brush and lightly streaked it on the leaves on the wreath. It really did add a little to the leaves to make them look a little less like paper. Then I switched to white paint and just dabbed on some “snow” on the little plastic pinecones. I found some glitter in my craft stuff and shook a little bit of that over the white paint. These were just little, easy embellishments I did to these wreaths and I thought they added a lot! I also added some of the Drusy Embellishments for a little sparkle on all of the wreaths. It was something relaxing to do on a spring afternoon! (Although my rockhounding family members would tell you it should be spelled Druzy!) I added those after I took the photo though!
Whenever you get around to making your Paper Pumpkin Kits or the kits you purchased in the Stampin’ Up! Kits Collection, it doesn’t matter! No matter when you make them it will be a relaxing, enjoyable experience! I think they are especially good to make on a weekend or on a rainy day!

In this post I’ll show you how to make Sour Cream Container Easter Treats very easily. I loved the treats shown in the Stampin’ Up! Spring Mini on page 26 so I just used those for my examples. Mine turned out slightly different because of choice of paper and ribbon. We have all been making these sour cream containers for years and years for treats for every occasion so they are very versatile! You can make them larger too if you want. I don’t even know why they are called “sour cream containers” but I think maybe sour cream used to be packaged in small portions like these, maybe in restaurants? I don’t know!
Mine are slightly different sizes but you can barely tell. You really can vary the sizes. One starts with a piece of designer paper 4 1/4″ x 5 1/2″ and one is 4″ x 5 1/4″. You can make them with 6″ x 6″. It just depends on how big you want them and what they will hold. Mine hold 4 little chocolate eggs. You could also use cardstock but designer paper is more flexible to roll up into this odd shape.
I used the Storybook Moments Specialty Designer Series Paper which has cute diecuts included along with the adorable designer paper. On both I used the generic side of the paper so that the little tag and ribbon would stand out. Be sure to use a strong adhesive such as Tear & Tape Adhesive to hold them shut and kind of loosen up the paper fibers before you put them together but gently rolling into a tube shape or run the paper over some curved object, like the edge of the table if it is rounded.
Lay the paper out, long sides top and bottom. Put the adhesive along the edges of the long sides, top & bottom, and on one short end. There is no adhesive on the other short end.

To make it easier to not have adhesive all over the place while you are trying to assemble the container, pull down a short section of the tape cover and press to crease so you can grab that later. Take off the paper on the short section and adhere it to the opposite side forming a tube. Then reach inside and peel off one of the papers and adhere one end together. Use a bone folder to something to press on these seams to make sure the adhesive is holding firmly. Be sure to add the treat inside the container at this point before you adhere the final side! Remove the third adhesive paper from inside and adhere the other end making sure it is perpendicular to the top. It’s surprising how easily it goes together this way even though it’s a little odd.

For the little tags on each container, I just cut a piece of Basic White at 2″ x 1 1/2″ and added diecuts that are in the Storybook Moments DSP. Use whatever ribbon you have to adhere a loop on the back of that tag and pop it up with Stampin’ Dimensionals. Sometimes I put Stampin’ Seal Adhesive on the back first to hold the ribbon and then put Dimensionals to help hold the ribbon in place and to pop up on the card or project. One ribbon is a retired Pool Party ribbon and the other is a retired Bubble Bath ribbon that came in a Combo Pack.
Once you try these sour cream containers you will find they are easy to make. Be sure to loosen up the paper a little as I said to make it easier to roll up. Click here to see some that I made for Halloween. This post also has photos that might help you see how to fold them together. These would be so cute to make with any of the sides of the Storybook Moments paper to put in Easter baskets or make for little favors for Easter gatherings! This paper is in stock now so be sure to grab some quickly if you want it!
If you are looking for some last minute Valentine ideas, here are some from past years that you can make with stamps and paper in your older “stash” or update them with newer craft supplies.
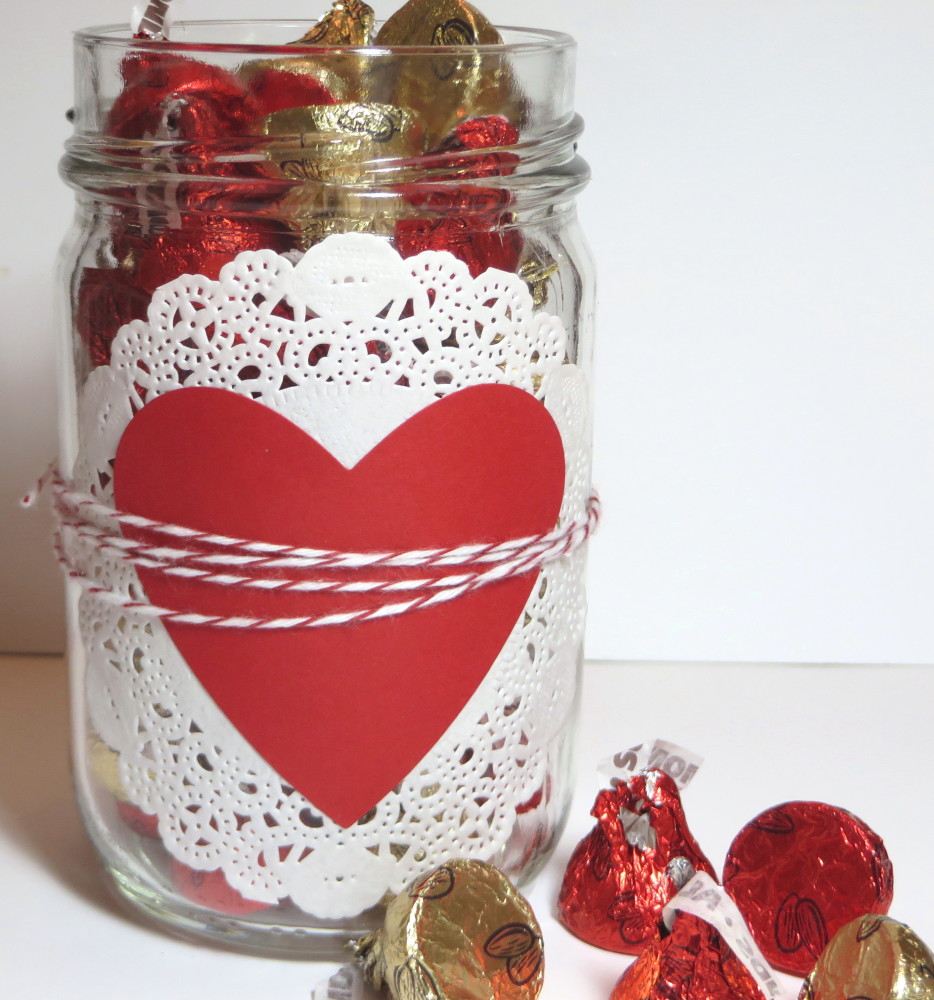
The first one you see above is super easy if you want to make a treat for someone….or put a candle inside! Just grab a jar, a doily, and a heart! Tie some ribbon or twine around, even add a greeting if you like and you have a very cute holder for some candy, a small gift, cookies, whatever you have that will fit in your jar. You don’t even have to have a lid, but if you do, you can decorate the top of the lid.
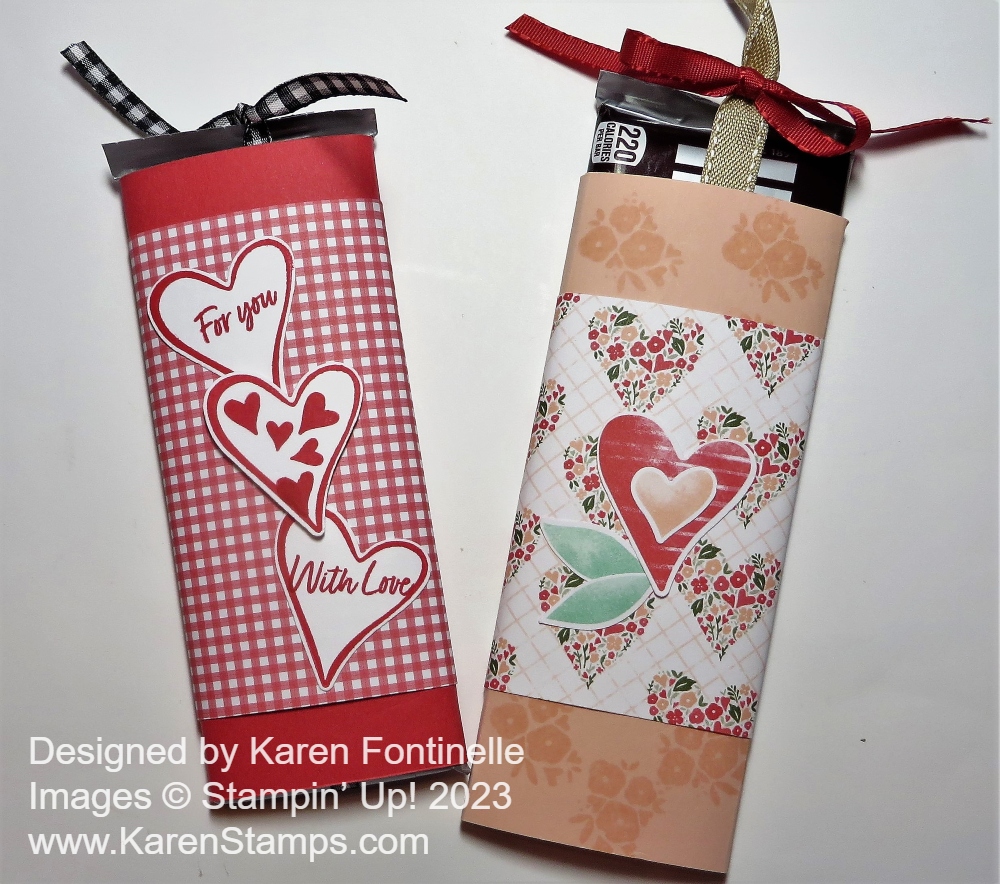
Get a regular-size chocolate candy bar (or even the gigantic ones!) and wrap it with cardstock or designer series paper and decorate. Even if you almost have no supplies, you can cut out or draw hearts for sure! If you want, tie a ribbon around the candy bar lengthwise you they can pull it out of your decorative wrapping without tearing it open!
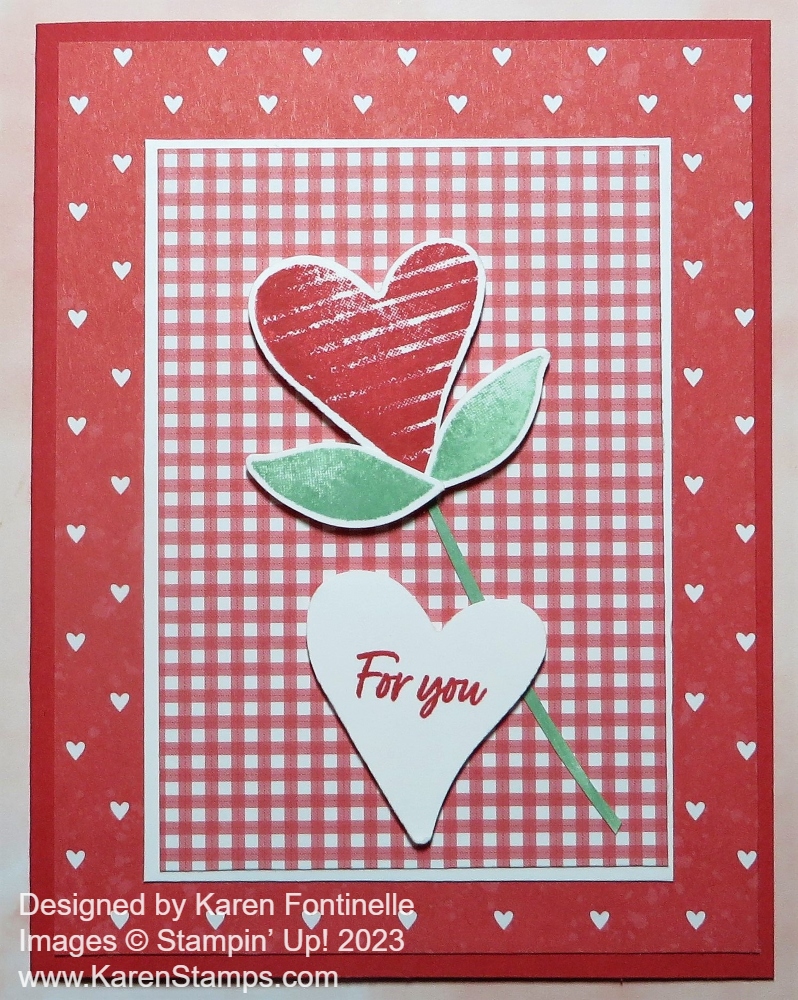
Use this card as an idea to make a flower out of a heart, a couple leaves, and a stem! While you’re at it, make two or three heart flowers! You can make a card similar to this one or decorate your Valentine jar with one.
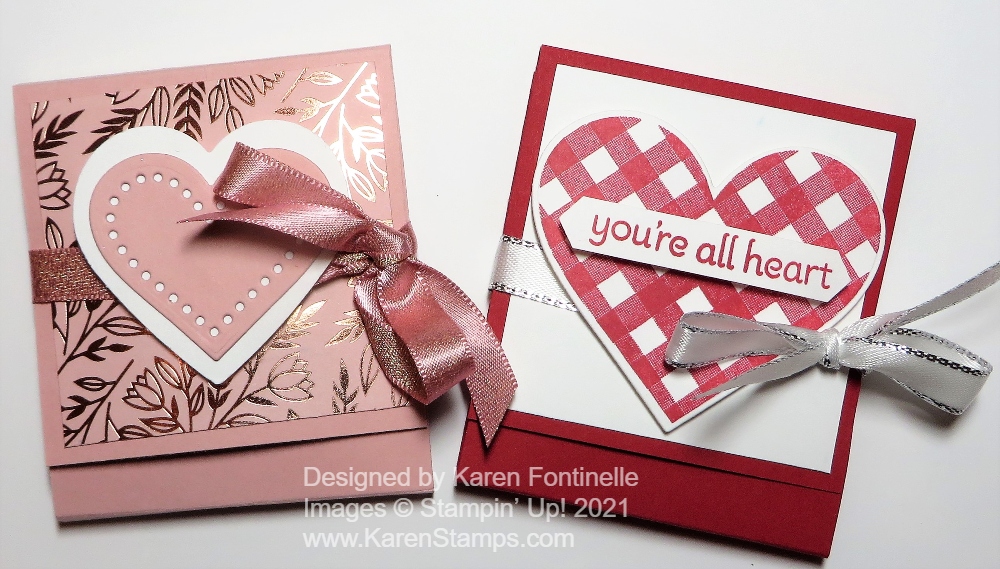
Valentine’s Day Chocolate Candy Holders
This idea is an oldie but goodie paper craft….candy holders in a matchbook design! Just fold a strip of cardstock, cut or punch a slit in the bottom section that folds up and slide a chocolate square into it. Decorate the cover and you’ve got it. Click on the title to go to the blog post for all the directions.
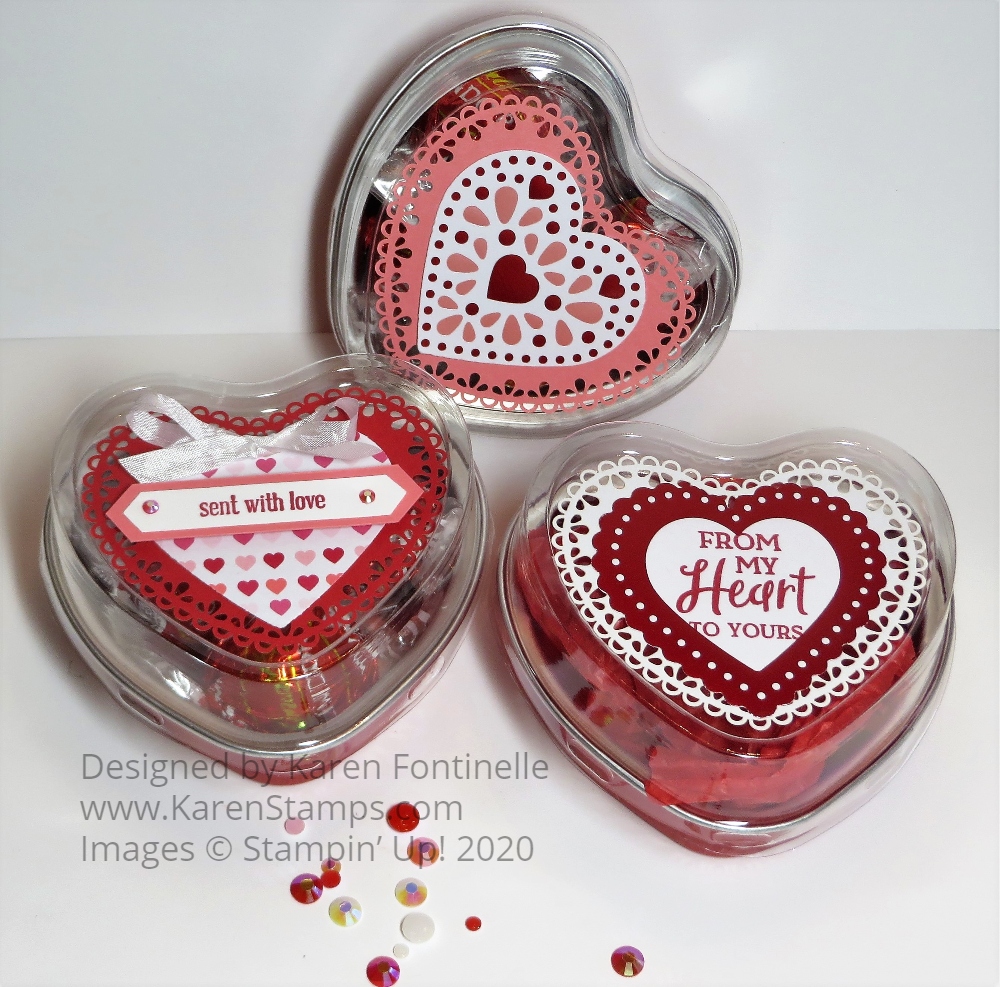
Maybe you still have a few of these Heart Foil Tins in your stash somewhere, but if not, just decorate a small box or whatever you have. Just use hearts or doilies, stamps, whatever you have to decorate your container.
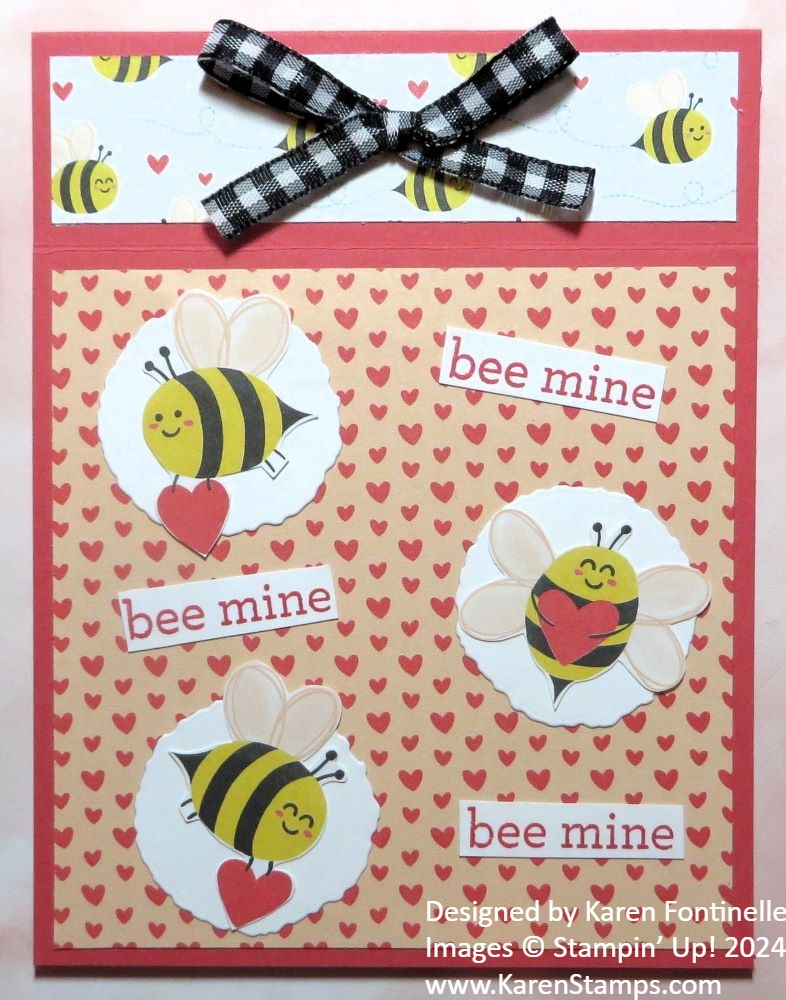
Whether you have the old Bee Mine Designer Series Paper or the newest Cute As Can Bee Designer Series Paper (which I think is almost the same designs, just different colors) you can make plenty of Valentines with any of the sheets. This card is the fun Book Fold design, with the fold at the top, which is very easy to make. Click on the title under this card for all the directions.
Hopefully these samples give you some ideas if you need to make a Valentine card or treat right away!

The other day I was looking in the closet wondering if I had more Valentine decorations than I had found so far. I’m used to SO many decorations for Halloween and Christmas that one red and white plastic bag just didn’t seem like that could possibly be all I had for Valentine’s Day! It actually was pretty much true, but I did come across just a couple more things and one was this old Valentine Collage that I made some years ago! I don’t recall how many years ago! All I can say is that the famous Owl Punch was a thing as you can see in the last square and also that Pretty In Pink was a regular Stampin’ Up! color at the time!
I wondered if I had a frame the Valentine Collage would fit in because obviously it had been in a frame at one time. The backing was still underneath the collage in the closet. I probably swapped it out for a Christmas collage at some point. As luck would have it, I did find a nice white frame for it. I just had to trim down the outside edges a little bit. I think it had to be fate that I found this collage in the closet AND a frame to put it in for my Valentine decorating!

Even though this Valentine Collage is way past its time, it can still provide inspiration for you to make something similar yourself for your home decor or even a gift for someone. You can make twelve squares or you can double-up two squares and make a rectangle in some of the spaces. Or put four squares into one big square! Whatever you like!
You might want to choose a frame first so you know what size to make your collage. You wouldn’t want to have to cut into or too close to your design. Maybe you would prefer a square shape. Lots of possibilities!
Think about making a fun, quick collage, maybe even a smaller one, for Valentine’s Day! You have time! Here’s an example of a smaller collage from twelve years ago!!
Or jump ahead To Easter if you like to plan ahead! Just have fun with it!

Remember the Book Treat Boxes that were in the Holiday Mini Catalog last fall? I decided to make one into a Valentine Book Treat Box! You can still find these boxes in the Stampin’ Up! Online Store and they are handy to have on hand any time for a small gift or treat. Then just decorate for whatever occasion!
First step is to assemble the box. These Book Treat Boxes come ten in the package and are easy to assemble. They look like books! There are two pieces to each box. One is the box itself that fits inside the cover. They are all scored and even have adhesive strips to adhere everything together. You will easily see how to do it. The boxes are 3″ x 4″ with a 1″ side spine. You can decorate as little or as much of all the sides as you like. On this box, I decorated the front, the back, the spine, inside the front cover and inside the box. All you would have to do is decorate the front.
I used the Marbled Elegance Specialty Designer Series Paper, cutting the paper at 3″ x 4″ for the front and back of the cover, also inside the cover. The spine measures 1″ x 4″. The measurement for inside the box is just a tad smaller that 3″ x 4″. You can measure yours with a ruler after you assemble it to see the exact size.
For the hearts on the front, I used the Hearts of Elegance Dies to cut out a large Gold Foil heart and the same size heart in Melon Mambo. Then I layered on a Petal Pink pierced heart on top of the Melon Mambo and a small Gold Foil heart on top. The background gold heart is adhered flat on the box, while the other three hearts are first glued together then popped up on Stampin’ Dimensionals. The side tab that could be adhered to the top of the box is 1″ wide and I covered it with designer paper, then trimmed around the curved end. Since I wanted to be able to slip it underneath the hearts rather than adhere it, I popped up the hearts but didn’t put Dimensionals where I wanted that tab to go underneath.
The greeting is in the Hearts of Elegance Stamp Set. I stamped it in Melon Mambo ink on Basic White cardstock. To make it fit better on the box without taking away from the hearts, I decided to cut out around the word “Love”. I completely left off the “You” but it probably would have fit okay. This is a great way to save space with a greeting or you can cut the words apart and do your own spacing according to your project. You can decorate or not decorate the inside of the box before you add your treat! I did a little bit.

I think these boxes are great to have on hand so be sure to add them to your next order for a little different gift wrap or treat box idea. Or create a little scene inside as I did at Christmas on a project for my 12 Weeks of Christmas email.

There are lots of fun things you can make with these Book Treat Boxes! Try one!


It’s that time of year, that time of the holiday season, where we need some gift card holders for gifts. This Easy Gift Card Holder will fit the bill for you! There’s almost no time left for shopping before Christmas and gift cards are a great solution for those you don’t have any gift ideas for. You could fold up some cash and put in this pocket as well!
Start with a 4″ x 12″ strip of cardstock. You could make it taller if you wanted to. Score this strip of paper at 4″ and 8″, basically in thirds, since the paper is 12″ long. Then on the end section, cut from the score line down to the corner on a diagonal. This can be on either end of the card.

Put a strip of Tear & Tape Adhesive or other strong adhesive on the bottom of that section with the diagonal cut. Then fold that diagonal piece over to the inside panel next to it.
My sample is a base of Real Red, and I used the Reindeer Days Designer Series Paper and Sticker Sheet to decorate the holder. On the front I cut a piece of designer paper with the packages at 3 3/4″ x 3 3/4″. The tree and strip of holly leaves behind it are stickers from the Reindeer Days Sticker Sheet.
You can decorate the inside however you like or leave it plain. I put another paper behind the diagonal piece and a diagonally cut piece of designer paper on that diagonal corner. Just cut a square of 3 3/4″ x 3 3/4″ and cut diagonally from one corner to the other. Just make sure you have the pattern going the right way and that you cut to and from the correct corners. You can write a message on the inside left of the holder or add a piece of Basic White on which to write or stamp something.

Put your gift card or cash in the pocket. Decorate the front a little more with some bling, like these Iridescent Faceted Gems on the tree. If you prefer, make a belly band to go around the gift card holder to keep it closed. These are so quick and easy I bet you can’t make just one!

The other day while searching for some tins I ordered many years ago for candy, I found these Stampin’ Up! White Gift Boxes (142000) in my retired stash. I had to change my design idea from candy in a tin to candy in a box for a few gifts. Whether or not you have these official White Gift Boxes in your stash, you can use this idea of any plain box. It would even cover up company printing on the box and the size of the box doesn’t matter. You can use this same principle.
Each side of this box is 3″ x 3″. I cut out five pieces of cardstock at 2 3/4″ x 2 3/4″, then five pieces of designer series paper at 2 5/8″ x 2 5/8″ (or you could do 2 1/2″ x 2 1/2″). Just adhere the designer paper to the cardstock and then on to the box. I like to use Multipurpose Liquid Glue because it gives you “wiggle room” to get the paper on straight on the box. On this box, I used the A Little Bit Festive Specialty Designer Series Paper and Misty Moonlight Cardstock.
The snowman on the top of the box is punched out of the Snowy Scenes Designer Series Paper with a Circle Punch and then layered on a punched circle of Daffodil Delight to match his scarf. You could use whatever you like.
For a final touch (before adding candy inside!), I wrapped around some ribbon that I had handy, which happened to be some retired Pretty Peacock ribbon, but I thought it matched okay. Use Mini Glue Dots to hold the ribbon in place at least in the back and maybe the sides, then tie a bow on the front.
Even if you had a small Amazon or other shipping box, you could use this same idea to cut out pieces of cardstock and/or designer paper to cover the sides of the box and personalize it! Just have fun with it! Time to wrap those gifts!!

Finally, I got my Christmas Ornaments Kit in the Stampin’ Up! Kits Collection made! I’ve kept the box out ever since it arrived weeks and weeks ago, and yet it didn’t get made until the pressure was on here at the last Christmas minute! The kit makes nine ornaments, three each of three designs, which I posted in the photo above. Unfortunately, the kit is “currently not available” in the Online Store, but maybe you already have the kit and haven’t made it. This is your reminder to get out that kit and sit down and enjoy making the ornaments! Or if you are too busy, get it out right after Christmas when you have more free time and make the kit. Then you’ll have them ready for next year!
The kit is called Christmas Ornaments, but you could use these for fancy gift tags on packages! If you were hand-delivering a card or mailing a card inside a package, maybe you could use this ornament as a card front! Then the recipient can take it off the card and use it themselves as an ornament or decoration.
Someone suggested jazzing up these ornaments a little bit! I plan to do that this afternoon in my “spare time”! Just as with the Paper Pumpkin Kits, people always think of other creative ways to use the kit and make “alternate” projects with the contents. So even though you are given directions and a video, you can still make your project differently, however you want to make it! Some of the suggestions I saw were adding a bit of gold or maybe some Wink of Stella glimmer. Paint on a bit of white for a snowy look on the pinecones. Add a greeting or another Christmas image on the ornaments. Six red bows are included in the kit but you can add your own bows to the other three ornaments if you wish. Just play around with the kit and do what pops into your head to make it your own!
The only difficult part of this kit is tying on the gold thread onto the gold hoop. The hoops are very nice, by the way. Strong and good quality. Use the included glue dots to put glue dots where the gold thread is going to go. You will see a little bump on each hoop, some barely noticeable, so you might want to wrap the thread around those areas if you can. Be sure to watch Sara’s video assembling the kit to see how she does it. You can watch it again and again or pause it to follow along with each step. Or just go wild and crazy and do it however you like, as I’ve said!
Watch the video below about the kit. As I said, if you have the kit but haven’t made it yet, now is the time!
Here is the kit in the Online Store that you can check out and keep an eye on in case they get more in stock.
While you are there, check out the other Kits in the Kits Collection! You can purchase a kit for yourself or get an extra one to make with a friend or loved one (I hear lots of grandmas do this for their grandchildren!). Maybe you just want to purchase a kit as a gift for a friend! Lots of variety to choose from! Enjoy!!
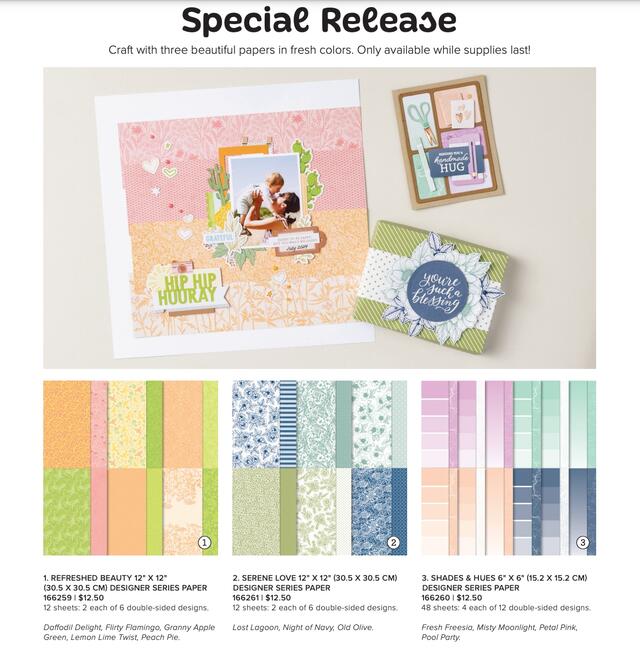
Stampin’ Up! has taken these designer series papers we have had previously and changed the colors to fresher, updated ones! You will find these papers in the Online Exclusives category and are available while supplies last!
Refreshed Beauty (#166259) is the previous Blackberry Beauty DSP. This paper is 12″ x 12″.
Serene Love (#166261) is the previous True Love DSP. This paper is 12″ x 12″.
Shades & Hues (#166260) is the previous Color Theory DSP. This paper is 6″ x 6″.
Watch this video to see the papers a little closer:
This is a new way to present the retiring products from catalogs, which beginning today are products in the September – December 2024 Mini Catalog (or Holiday Mini Catalog as we know it!). But from now on, this list will contain any retiring products from any catalogs and from Online Exclusives and Kits in the Kits Collection. (This does not include Paper Pumpkin kits.). Some products will be discounted and product discounts may change over time. This will take the place of the Clearance Rack.
The good thing is that everything is in one place and instead of, for example, a stamp set retiring from the Holiday Mini Catalog, will not go away at the end of the catalog, but instead will be in the Last Chance list for however long, until it sells out and is then discontinued. So you will have access to all those products “while supplies last” once they are on the Last Chance list. You can sort for “Discount Applied” in the Online Store for the Last Chance List if you want to see the sale items without scrolling through everything.
What this means is that the “retirement list” for the Holiday Mini is out today but it is in the Last Chance category and those products will remain there until they sell out, whether one day or whether two months. Go check it out!
NEW KITS IN THE KITS COLLECTION!
There are new Kits in the Kits Collection today!
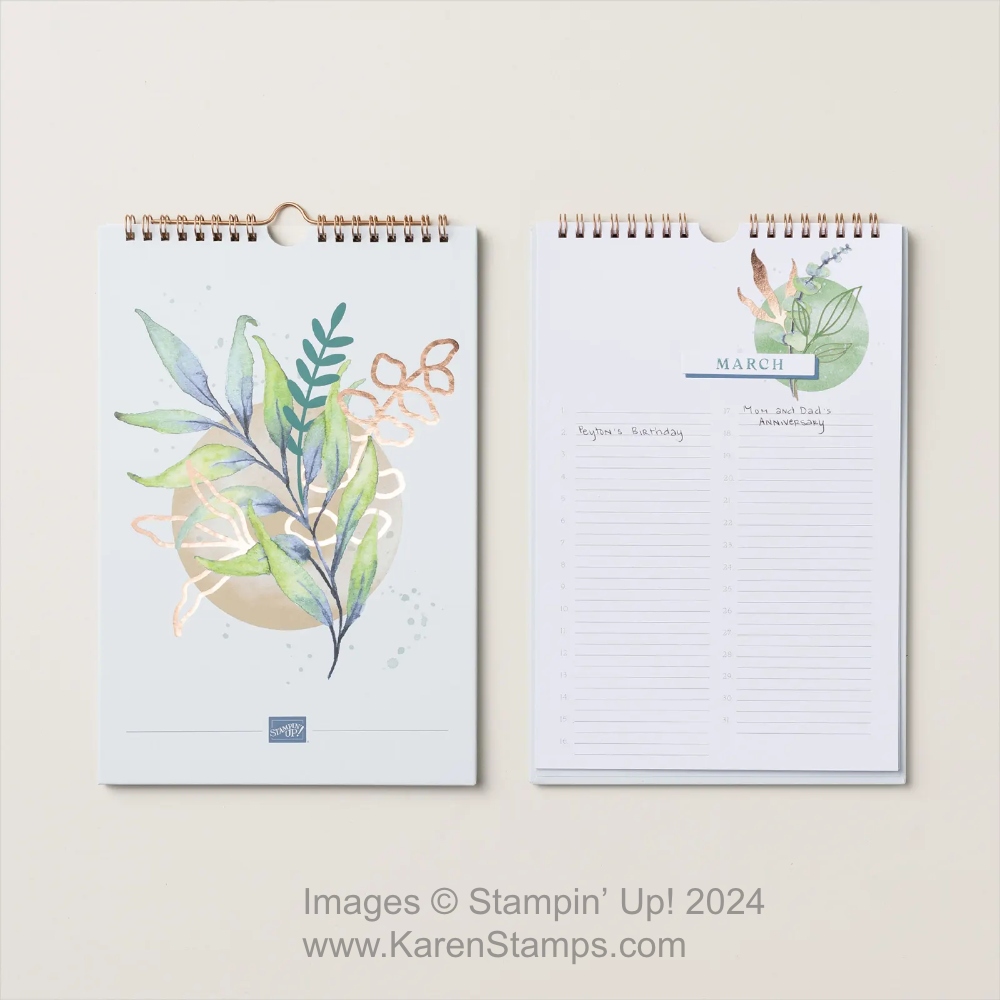
You will want the Perpetual Beauty Calendar Kit here at the beginning of the New Year to have your list of birthdays and anniversaries and other occasions all in one list for each month!
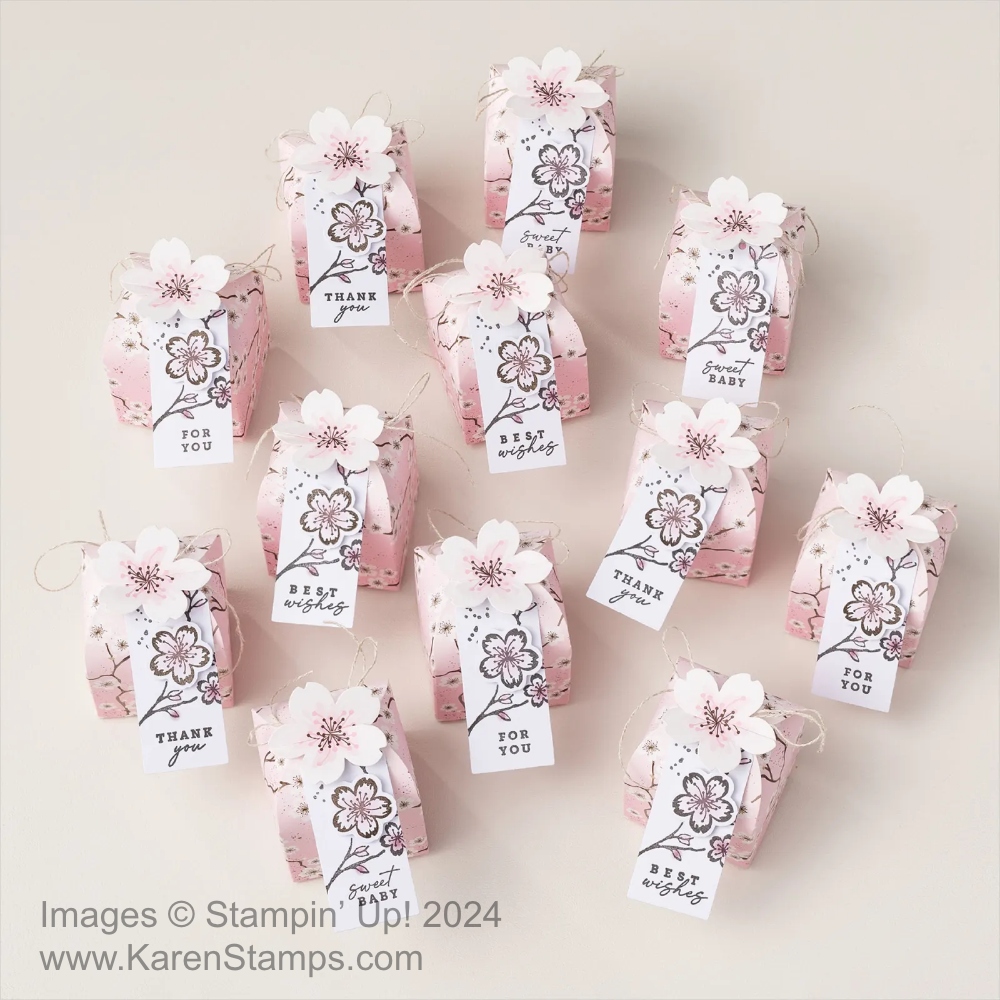
The Cherry Blossom Treat Boxes Kit will make beautiful favors for parties, showers, weddings, or birthdays, even just small gift boxes. The boxes are already printed, you just need to assemble and stamp the greeting on the tag.
That’s a lot for one day! There might even be more that I missed but it’s time to get this post out!

If you are serving Thanksgiving dinner at your house, you might want to make place cards so people know where to sit or just for a table decoration. When I was a little girl, I always liked to make place cards! Sometimes I made them at my grandma’s house when it was just my family and grandparents. I just folded some paper in half and stuck on a sticker or drew a little picture. Little did I know that years later I would have all kinds of paper, ink, and stamps and a multitude of tools and accessories to make place cards!
Here are three ideas for making place cards.

This little pumpkin is made with punched hearts. I used the heart in the retired Heart Punch Pack that had this regular heart punch and one with a scalloped heart punch. You may have other heart punches or heart dies you can use. If you have the retired Apple Builder Punch that would work also. Just cut or punch out several hearts and score them down the middle to make folding them in half easier. You can cut out a little stem by hand if you like.

Fold and crease each heart in half. Apply glue to the top of the first folded heart and adhere another folded heart to it, making sure it lines up pretty well on all sides until you have all the hearts stacked up and glued together. Use as many or few hearts as you like. Before making it into a pumpkin, use a sturdy scissors and cut off the bottom point of the stack of heart to make a straight line for the base of the pumpkin. You only need to take off a little bit. Die cut or cut out by hand a leaf and write a name of a guest for the place card. Then open up the stacked hearts. before you glue them together, adhere the stem if you cut one and the leaf to hold them. Glue the hearts together so you have a standing pumpkin! If you want to get fancy, maybe you have a stamp set with a pumpkin and can stamp that first and fussy cut or diecut, whatever you have, or shade the edges of the hearts.

Here’s the standard kind of place card, the kind I used to make for our family dinners. You can make it any size you want. Mine is a 4 1/2″ x 4″ piece of Basic White cardstock, scored in half at 2 1/4″. I stamped the small pumpkins from the Playful Ghosts Stamp Set, colored them with Stampin’ Blends markers, then cut out by hand. I also diecut some foliage from the Textured Floral Dies in both Lemon Lime Twist and Garden Green cardstock. If you have the Bough Punch you can use that. I cut the diecut foliage apart because I only needed little pieces to glue to the place card behind the pumpkin. I put just a tiny bit of glue behind the pumpkin to hold it in place while I glued down the foliage where I wanted it and then added a bit more glue under the sides of the pumpkins. An easier way, if you have the stamps that fit, would be to stamp a pumpkin, hold a mask over it, then stamp foliage on each side. Remove the mask that protected the pumpkin and yours should look like mine except stamped! Or simply stamp and color a pumpkin in the corner of the card.

This kind of place card is actually a little party favor, too! I simply covered a small chocolate bar with a piece of designer paper and added a name on top. I used a piece of the green plaid paper in the Season of Green & Gold Specialty Designer Series Paper. You could just use cardstock as well. I used a piece that was about 2 1/2″ x 3 1/2″. It all depends on your candy bar, of course. For this card, I diecut a piece from the Everyday Details Dies on which to glue on the pumpkins and write the name. On the other candy bar in the top photo, I used a diecut from the Unbounded Love Dies in Very Vanilla and used a Pumpkin Pie Stampin’ Blend just to outline the edges of the diecut, plus added two Gold Textured Dots. There are no bounds to what you can do with these!
These are just some ideas to get you started! Once you begin, you will likely come up with more and better ideas! Just have fun!