It’s time to be a part of the Stamping With Karen Mailing List since it is the new Stampin’ Up! Catalog time, with new products, things to learn about, and not to mention the Holiday Mini Catalog will be coming out sooner than we can imagine! Keep up with news about the new Paper Pumpkin Kit every month and what is new with Stampin’ Up! each week!
If you are on my blog, you will see a red sign-up box in the top right corner where you can simply put your name (or first name) and best email. If you are on your phone, you probably need to scroll way down to get to the sidebar things. OR you can go to my sign up page HERE.
You will receive an email with a link to your free gift from me.
I send out a weekly email every Tuesday afternoon with the latest Stampin’ Up! news and offers plus stamping ideas with a supply list and directions. Even if you never make the project, maybe just seeing ideas will do your crafty heart good! I know it does mine! I’m all about the ideas!!
While we are still somewhat quarantined during this virus and just trying to be careful in our daily lives, relieve the stress and worry with stamping, cardmaking, and papercrafting! Let’s stay connected and in touch with each other over our favorite thing to talk about…..stamping with Stampin’ Up!
Sit down with Shelli Gardner and Sara Douglass (mother and daughter, if you are new!) and go through the new Stampin’ Up! Annual Catalog with them!
Watch these videos about a few of the new products you will find in the catalog!
Most of these are very short but give you an idea of the new product and a close-up view!
So many great new products to absorb as you look through the new Stampin’ Up! Catalog!
If you want to be a Stampin’ Up! customer but do not have a Demonstrator to get a catalog to you, please send me your contact information at Karen@Karenstamps.com and I can send you a complimentary catalog if you are interested.
It’s time to give yourself a present, like the paper and ribbon to make this Ornate Garden Handmade Gift Box!
Order new products from the brand new Stampin’ Up! Catalog!
That’s right! The new Stampin’ Up! 2020-21 Catalog went live yesterday and there was certainly a flurry of orders, judging from a few glitches on the website, which usually happens on such an exciting day! Customers and Demonstrators were trying to get their orders in as quickly as possible so they could get their hands on the new products as quickly as possible!
If you have a large order, keep in mind these amounts:
A $150 or higher order of merchandise earns 10% or more in Hostess Rewards (see page 187).
June 3-30 a $250 order earns an EXTRA $25 in Hostess Rewards!!
Remember, there are Bundles in the new catalog that will save you 10% if you buy the two items together. Make sure you are putting in the correct number for the Bundle, not just the stamp set. I think it is a little trickier to spot the Bundle on the catalog pages but just look!
There are now a few Collections, such as the Ornate Garden Suite Collection on page 64 or the World of Good Suite Collection on page 24. If you want EVERYTHING that goes together….the stamp set, the dies, the paper, the ribbon, the embellishments…you can just put in that one number for the Collection. You will still get the 10% discount if there is a Bundle involved, but if you don’t like the ribbon or don’t want the embellishments, then just order the individual items you want.
As you look through the back of the catalog, with the tools and accessories, you may notice that the listings are a little confusing. There are numbers on the product photo that you then need to match up with the number of the listing and description of the product. I found that particularly confusing on the page with rhinestones, sequins, dots, etc. You can’t just look across and see what is what, you have to match the numbers.
Watch for the tiny little red “N” symbol on the New products.
Read the “fine print” in the product descriptions to see if there are dies that coordinate and on what page to find them. There are a couple pages of Bundles in the back of the catalog with stamp sets and dies and then there are other pages with just dies, but they aren’t duplicated so you have to look in both places to see all the dies available.
Check out the new adhesives! Snail Adhesive is gone and replaced with the new Stampin’ Seal. Be sure to buy some refills when you order. The other new adhesive is the Stampin’ Seal+ (plus) which is stronger and replaces the old Fast Fuse we had once upon a time ago. And then we still have our other adhesives like the Multipurpose Liquid Glue.
The new Stampin’ Cut & Emboss Machines on pages 170-1 and the Tools that go with them on page 172 are not available YET and we have no date when they will be available. They sure look cute and I hope they hurry up!
So back to my Ornate Garden Handmade Gift Box! After you treat yourself to some “gifts” from the new catalog, maybe you can make a box like this to store some adhesives in or ribbons or whatever.
I made this gift box just like I made THIS ONE recently on my blog.
To begin making the bottom of the box, you will cut the tiniest sliver off the side of two sides that share a common corner. To determine a “sliver” you can just slide your paper the teeny tiniest bit past the cutting track. It might not be even 1 1/16″ wide but you could use that measurement if you want. This makes the bottom just the tiniest bit smaller so that the box lid will fit easily over it.
Next, score at 2 1/2″ on all four sides of the box. Crease well with a Bone Folder to make the folds crisp, like a box should be. Then cut the flaps on opposite sides of the paper on the score lines. If you want, cut a small wedge off all four corners just to make the box bottom a little neater when the sides all come together.
After creasing all the folds really well, assemble the box and use a strong glue to assemble. You could use Tear & Tape but I like to use Multipurpose Liquid Glue to give me that extra few seconds to make sure everything is lined up perfectly.
For the top of the box, I used a sheet of the Ornate Garden Designer Series Paper but you could use cardstock too. The top piece is 10 1/2″ square. Make the top in the same way (except don’t cut off a sliver!). Score 1 3/4″ all around and cut the flaps in the same way. Assemble with glue and put the lid on the box! This allows part of the bottom of the box to show, if that’s what you want. The inside of the lid will also have a lovely paper pattern from the other side of the paper! Usually it is difficult to decide which side of the paper to use! This way both sides are seen!
You can watch a video by Donna Griffith from a few years ago about how to make these boxes and how to resize them to what you want!
I hope you are enjoying the new Stampin’ Up! Catalog! I always say to treat yourself once in awhile and I think this catalog has come out at the perfect time when we need to relax and use our stamping as therapy at times! Just paging through the catalog and getting ideas from the samples is relaxing and fun!
If you plan to be a Stampin’ Up! customer but don’t have a Demonstrator to assist you, I would be happy to be yours and send you a complimentary catalog if you would like one. Just send me your contact information.
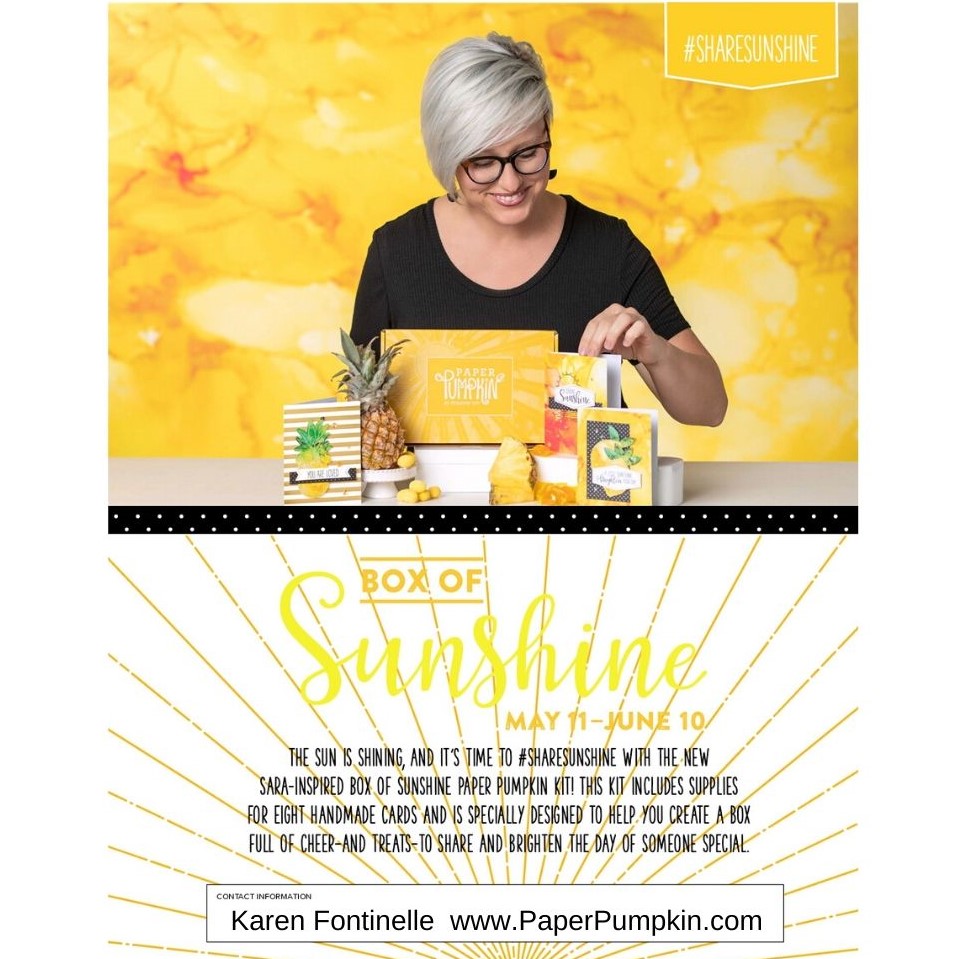
You may think it is early to subscribe or reactivate your account in order to receive the June 2020 Paper Pumpkin Kit, the Box of Sunshine, but be forewarned this kit is likely to be popular and could sell out! Get yourself signed up TODAY!
What is so special about this Paper Pumpkin Kit?
This exclusive Sara-inspired Paper Pumpkin kit is here to help you #sharesunshine. It includes supplies for eight handmade cards and is specially designed to help you create a box full of cheer. Once you’ve made all the cards, use any leftover pieces to decorate the box. Fill it with yellow goodies, add the included adhesive label, address it to someone special, and brighten their life with a little sunshine!
ABOUT THE JUNE KIT
The Box of Sunshine Kit contains supplies for 8 cards and envelopes (2 cards of 4 designs): Card size: 4-1/4″ x 5-1/2″ Envelope size: 4-1/2″ x 5-3/4″ Coordinating Colors: Basic Black, Bumblebee, Crushed Curry, Poppy Parade, Shaded Spruce, White, and Gold
Box of Sunshine Information
This kit includes extra pieces and stickers (including a sticker label) to help you create cards AND a Box of Sunshine filled with treats and goodies to send to a friend. (Treats not included.)
The May 2020 Paper Pumpkin Kit with the new In Colors inside sold out in a flash, before May 1st! Don’t delay if you want this June Paper Pumpkin Kit because I think people will order multiple kits to give with treats inside and will be popular, especially because anything Sara Douglass helps design will be something special!
The deadline for signing up or reactivating your account is June 10 but I wouldn’t wait that long! You can also add a Prepaid Subscription to your Stampin’ Up! order of one month or several months or even give this as a gift. You will receive an email with directions for setting up your account and how to input the code showing you have a Prepaid Subscription. Be sure to set this all up right away so you don’t forget or you may miss the June Kit.
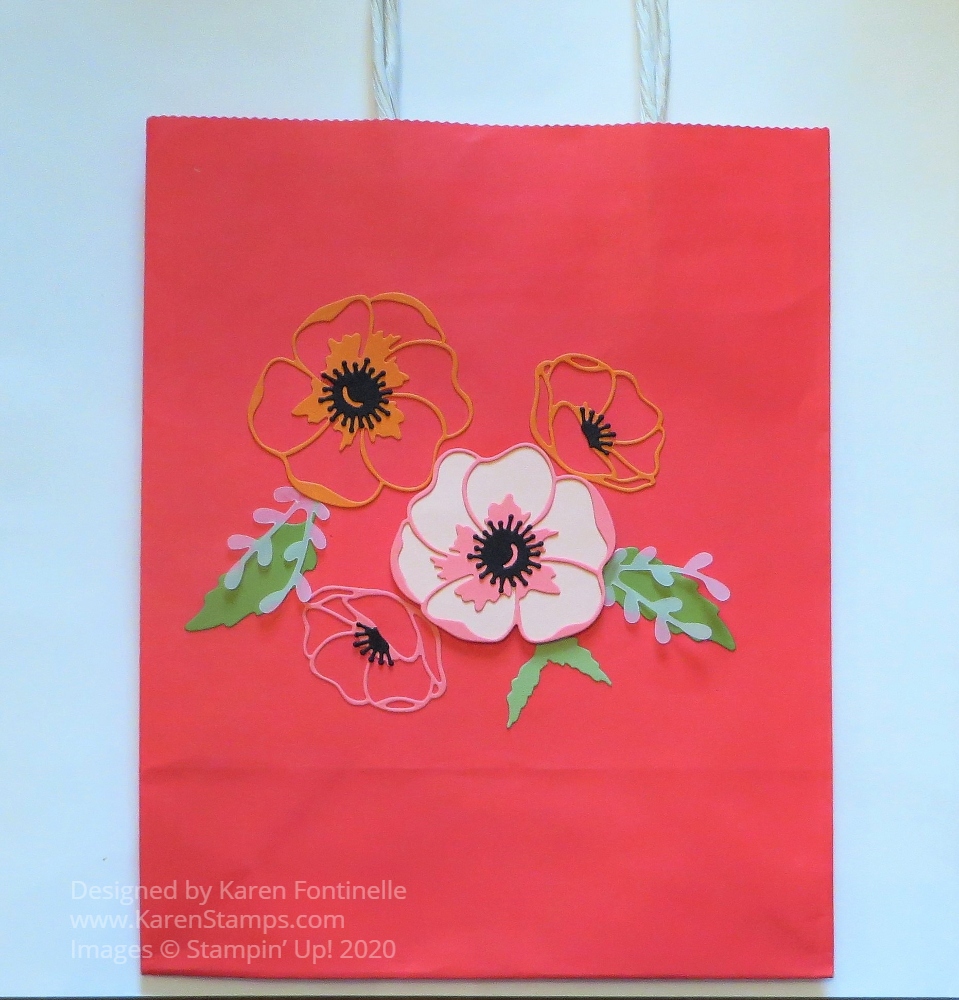
One of my favorite projects to make is to decorate a gift bag like this Poppy Moments Altered Birthday Gift Bag that I made for a friend’s birthday. Sometimes I use a bag I got out shopping and even if it has the store name on the side, I can cover the name with paper and decorate. It’s almost like making a card on the side of a bag! And if you don’t already have a cute shopping bag, you can buy a bunch at the craft store.
To decorate this shopping bag, I used thePoppy Moments Dies and just cut out a few flowers and leaves! I also used the Sprig Punch to punch a few leafy sprigs out of Vellum Cardstock. I made this bag pretty simple because there was no store printing that I had to cover up. After putting a gift inside the bag with tissue paper, you could also tie a ribbon around the bag handles. You could also attach a gift tag that you made. So many possibilities!
Here’s a birthday gift bag I decorated several years ago. The bag itself is pretty with a swirly leaf print on it, but I did need to cover the store name but that’s usually easy to do, sometimes on the front and back of the bag.
This gift bagturned out really pretty I think! I don’t remember if the bag was plain on the front or if it had printing on it, but it was easy to cover almost the whole front of the bag almost like if I had been making a card! You can see how you could make the same design for a card just by making it smaller!
If you are cleaning up closets and cabinets during the pandemic, save those small shopping bags and do something creative with them! Decorate for birthdays or Christmas or something generic and then you will have some personalized gift bags ready to go! Or maybe you can make a bag that matches your gift.
Altering or decorating bags you have around the house is something fun you can easily do and a great way to recycle! And it just might save you a trip to the store for a gift bag!
You may think it is early to subscribe or reactivate your account in order to receive the June 2020 Paper Pumpkin Kit, the Box of Sunshine, but be forewarned this kit is likely to be popular and could sell out! Get yourself signed up TODAY!
What is so special about this Paper Pumpkin Kit?
This exclusive Sara-inspired Paper Pumpkin kit is here to help you #sharesunshine. It includes supplies for eight handmade cards and is specially designed to help you create a box full of cheer. Once you’ve made all the cards, use any leftover pieces to decorate the box. Fill it with yellow goodies, add the included adhesive label, address it to someone special, and brighten their life with a little sunshine!
ABOUT THE JUNE KIT
The Box of Sunshine Kit contains supplies for 8 cards and envelopes (2 cards of 4 designs): Card size: 4-1/4″ x 5-1/2″ Envelope size: 4-1/2″ x 5-3/4″ Coordinating Colors: Basic Black, Bumblebee, Crushed Curry, Poppy Parade, Shaded Spruce, White, and Gold
Box of Sunshine Information
This kit includes extra pieces and stickers (including a sticker label) to help you create cards AND a Box of Sunshine filled with treats and goodies to send to a friend. (Treats not included.)
The May 2020 Paper Pumpkin Kit with the new In Colors inside sold out in a flash, before May 1st! Don’t delay if you want this June Paper Pumpkin Kit because I think people will order multiple kits to give with treats inside and will be popular, especially because anything Sara Douglass helps design will be something special!
The deadline for signing up or reactivating your account is June 10 but I wouldn’t wait that long!
You can also add a Prepaid Subscription to your Stampin’ Up! order of one month or several months or even give this as a gift. If you want to do this, you can combine it with your order from the new Stampin’ Up! catalog and perhaps boost your Stampin’ Rewards if you have a large enough order! You will receive an email with directions for setting up your account and how to input the code showing you have a Prepaid Subscription.
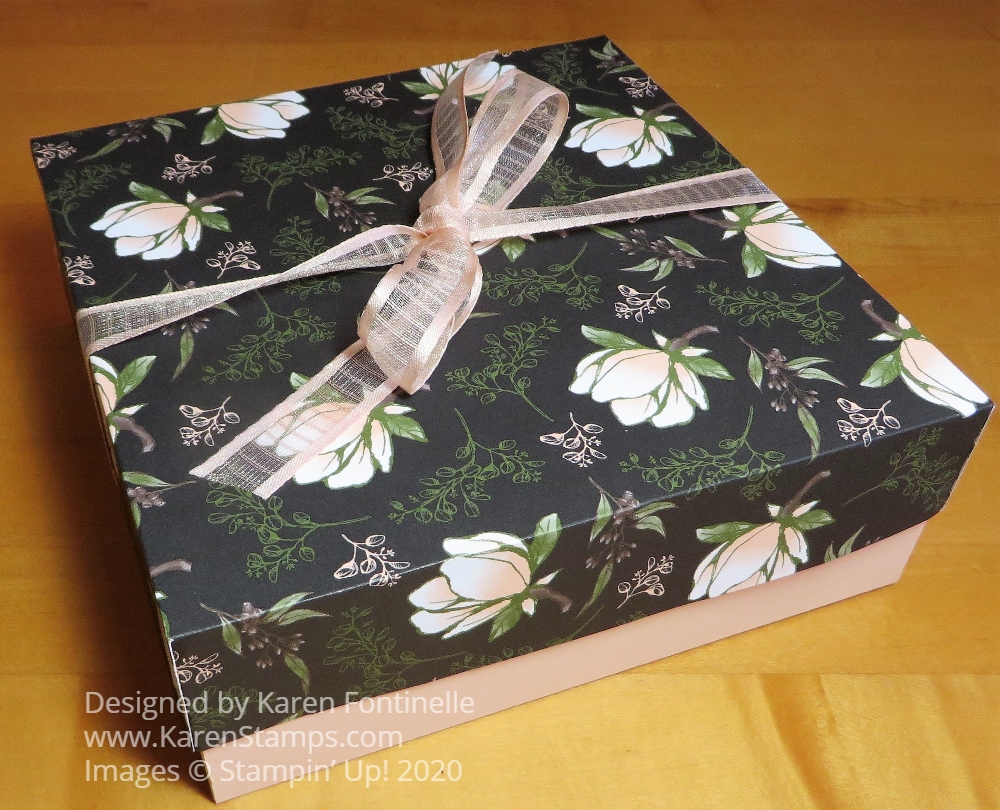
With Mother’s Day coming up on Sunday, birthdays, and maybe graduations, even if virtual these days, you need to learn How to Make a Magnolia Lane Gift Box. It is so simple, as you will see and will make your gift extra-special, not to mention saving you a trip to the store to find a gift bag or box at the last minute!
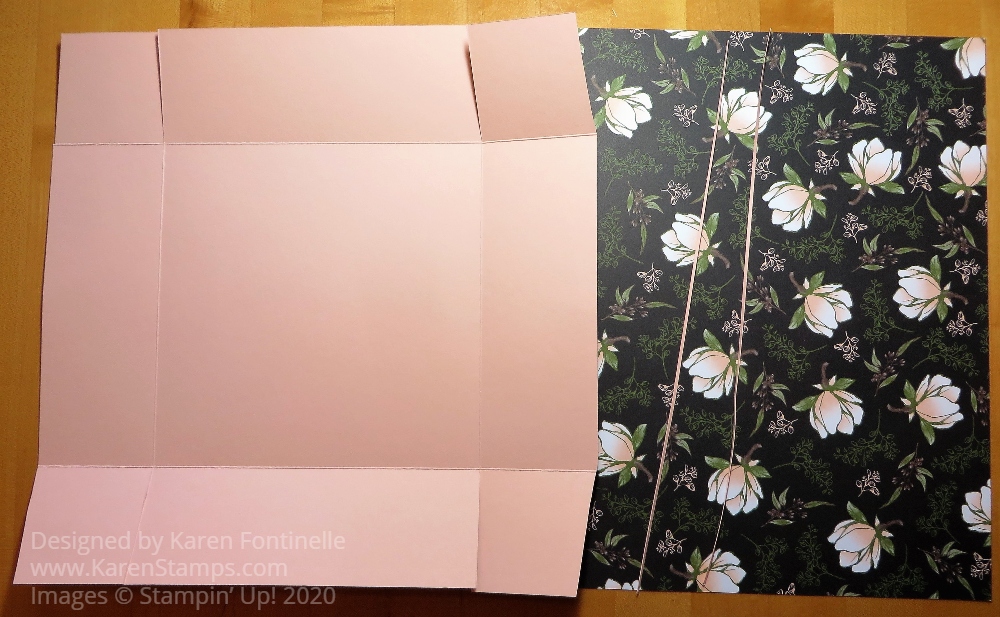
This particular box is 7″ square and you do need two 12″ x 12″ pieces of paper. The bottom of the box is made with Petal Pink Cardstock and the top with a piece of Magnolia Lane Designer Series Paper.
To begin making the bottom of the box, you will cut the tiniest sliver off the side of two sides that share a common corner. To determine a “sliver” you can just slide your paper the teeny tiniest bit past the cutting track. It might not be even 1 1/16″ wide but you could use that measurement if you want. This makes the bottom just the tiniest bit smaller so that the box lid will fit easily over it.
Next, score at 2 1/2″ on all four sides of the box. Crease well with a Bone Folder to make the folds crisp, like a box should be. Then cut the flaps on opposite sides of the paper on the score lines. If you want, cut a small wedge off all four corners just to make the box bottom a little neater when the sides all come together. In the photo below, you can see the slivers I cut off from the two sides of the paper, so you can see how narrow they are.
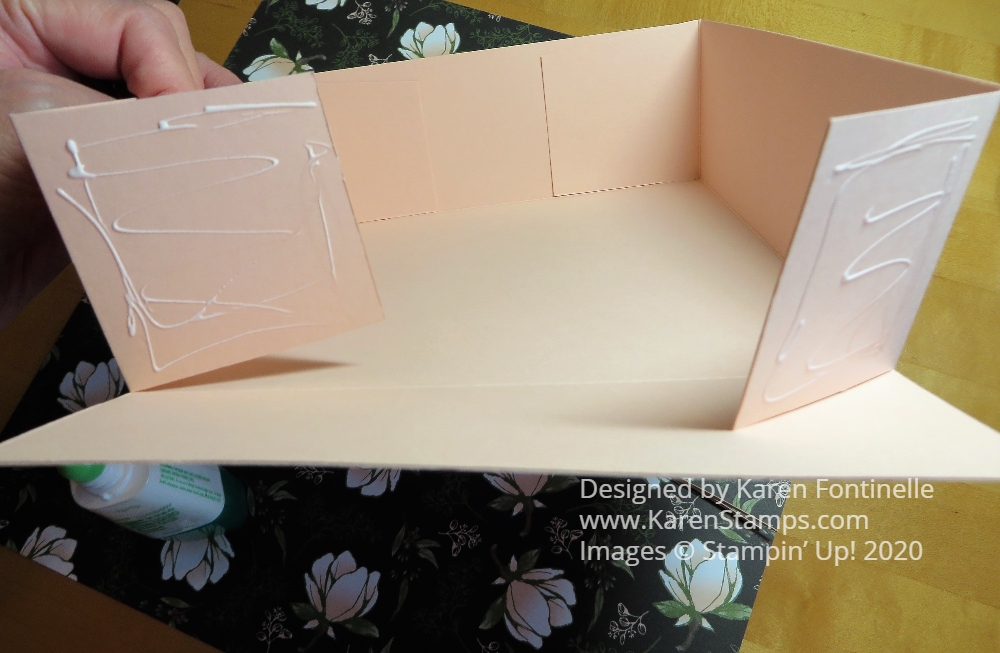
After creasing all the folds really well, assemble the box and use a strong glue to assemble. You could use Tear & Tape but I like to use Multipurpose Liquid Glue to give me that extra few seconds to make sure everything is lined up perfectly.
For the top of the box, I used designer paper but you could use cardstock too. The top piece is 10 1/2″ square. Make the top in the same way (except don’t cut off a sliver!). Score 1 3/4″ all around and cut the flaps in the same way. Assemble with glue and put the lid on the box!
Tie a pretty ribbon around the gift box like this Petal Pink 5/8″ Organdy Ribbon. Add a nice card or pretty gift tag and you’ve got something special!
Here is another gift box I made a few years ago after following a video by Donna Griffith at the Stampin’ Up! Home Office. It’s what I followed to make this gift box and she also explains how to make different sizes.
Now might be a good time to use up some designer paper that will be retiring that you have left and turn it into something useful by making boxes so you will be ready for all the new products coming out in the next Stampin’ Up! Catalog on June 3rd! And your gift wrap stash will be ready for any gifts with a few boxes on hand!
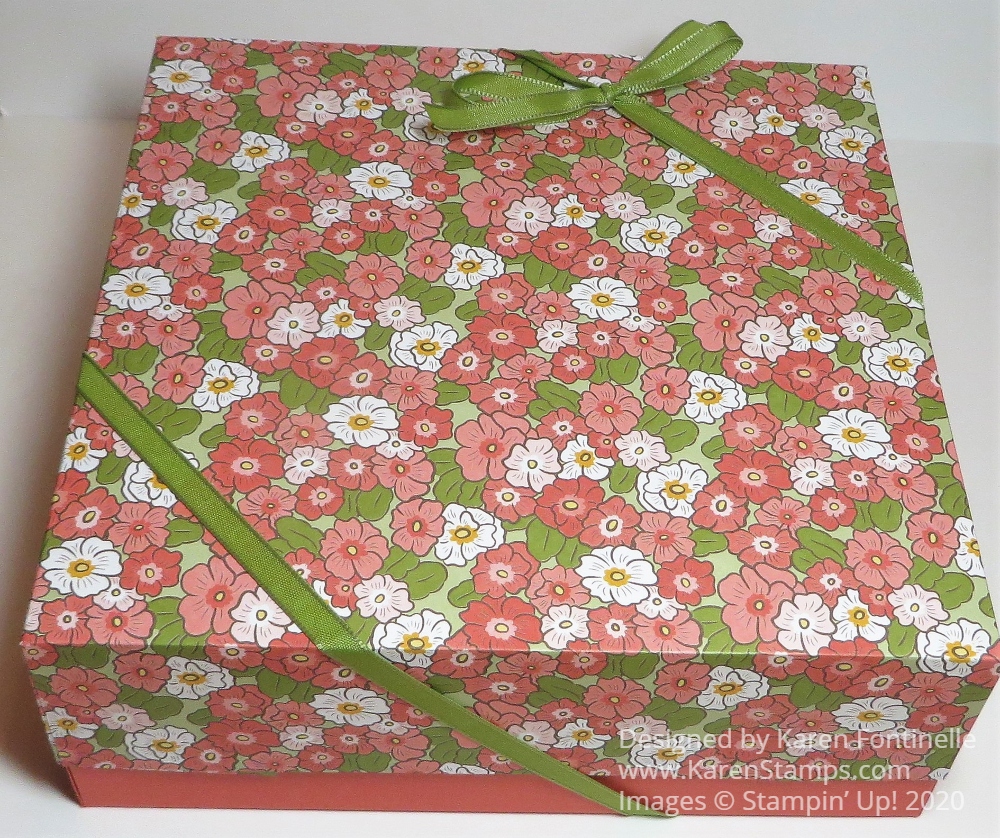
As I was looking through what is left of my Peaceful Poppies Designer Series Paper, I had a full sheet of this poppy floral pattern and thought it looked so pretty and that it would make a lovely Peaceful Poppies Gift Bag With Poppies. You could use this gift bag for a small gift for Mother’s Day or a birthday or any special occasion. There will be graduations coming up even, perhaps, without graduation ceremonies this year. Making your own gift bag out of pretty Stampin’ Up! designer paper would make a very special gift presentation!
You can make this gift bag with just half a sheet of designer paper, whichever one you choose to use. I used the Peaceful Poppies Designer Series Paper to make the bag. Start with the paper cut to 6″ x 11 3/4″. Using the Paper Trimmer or the Simply Scored scoring tool, score along the long side at 1 1/4″, 5 1/4″ 6 1/2″ and 10 1/2″. Turn the paper so the short end is at the top of the board and score at 1/4″ on one side, then at 1 1/4″ on the other side. Pay attention to the pattern on the designer paper so the bag will have the design going the correct way. The narrow 1/4″ scored area will be the part you will fold over to make a smooth top edge. The other long scored 1 1/4″ area will be the flaps at the bottom of the bag.
Crease all the score lines and fold over the narrow 1/4″ piece at the top of the bag. If you prefer you could fold it to the outside if you’d like that side to show as a contrast. OR don’t score that 1/4″ line and have your bag be 1/4″ taller. Use some adhesive of choice to adhere that to the inside of the bag.
Use the Classic Label Punch to punch a handle at the top of the bag. You can squish the front and back sides together and try to center the punch to make the handle opening or you can do one side at a time.
Assemble the bag folding on all the scored lines and flaps. Then decorate for the occasion.
To decorate my gift bag, I die cut two large poppies using Poppy Parade for the body of the flower and Flirty Flamingo for the outline, plus Basic Black for the center. The leaves are Old Olive and Pear Pizzazz. I tied a bow of Poppy Parade 1/2″ Textured Weave Ribbon separately (after trying to tie it onto the handle unsuccessfully!) and adhered it to the handle with Mini Glue Dots.
In this photo you can see the actual designer paper better from the back of the bag and how pretty it is:
Add some tissue paper and a gift inside, maybe make a matching gift card and you’ll have a charming gift to give someone special! Here’s a matching card idea you could even use to go with the bag! Just cut half a sheet of designer paper and make a gift bag with the basics of this Peaceful Poppies Gift Bag With Poppies.
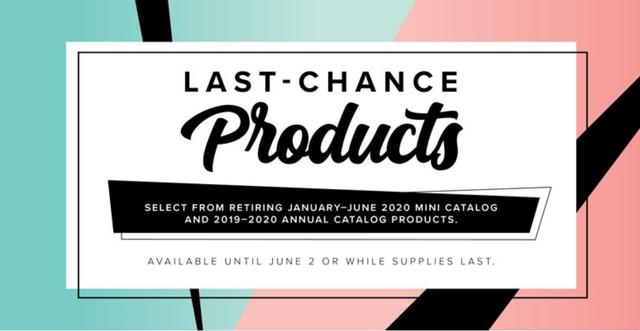
The Stampin’ Up! Last Chance Products Are In the Online Store!!
Stampin’ Up! has posted the retiring product lists for the January–June 2020 Mini Catalog and 2019–2020 Annual Catalog. These last-chance products will be available until June 2 or while supplies last only!
And remember—retiring items sell fast. Get your favorites before they’re gone!
The quickest way to find out what products will be retiring is to check my Stampin’ Up! Online Store! There is a banner near the top and Last Chance Products category on the left sidebar of the store.***
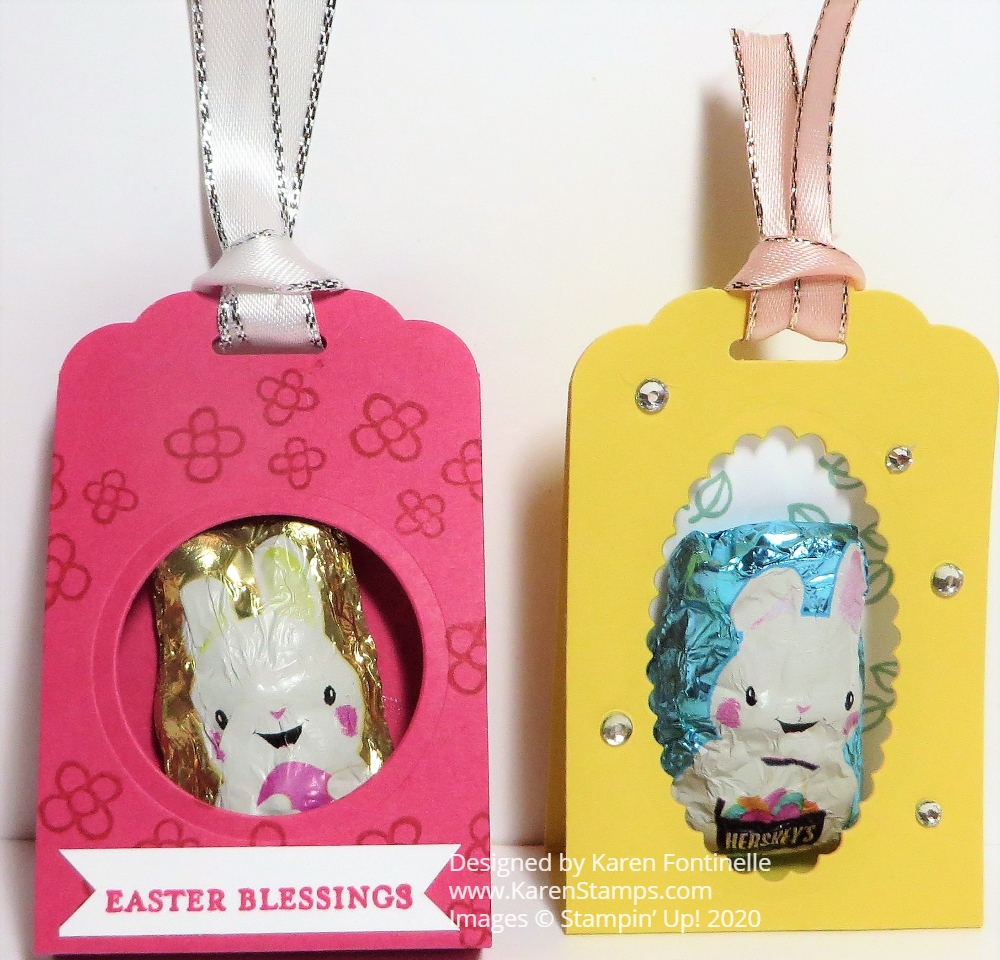
If you want to make some last-minute Easy Easter Candy Treats, these will work! These are quick and simple and you can vary the size according to the candy treat you have to put inside. You could even not cut an opening in the front and just decorate the front for the occasion and tuck your candy treat inside. You can make these taller or wider.
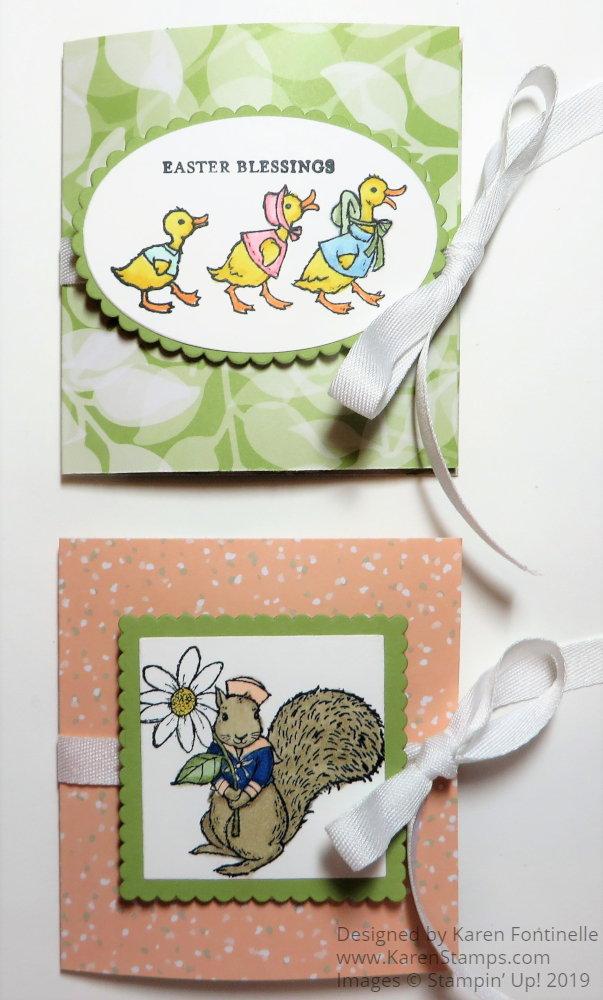
These candy treat holders are 2″ x 8 1/2″ to start with but depending on your candy, you can cut them down a little shorter. The 2″ width is so the piece of cardstock will fit into the Scalloped Tag Topper Punch. Cut the 2″ x 8 1/2″ strip of cardstock and punch each end in the Scalloped Tag Topper Punch. Then place one end at the 3 3/4″ inch mark on the Paper Trimmer and score, then turn and place the other end at the 3 3/4″ mark and score. That gives you the little space in which to place your candy treat.
Before you put the candy inside, decide if you want a different color background inside. The Daffodil Yellow treat holder has a Whisper White piece stamped with the little green leaves in Welcome Easter, although you really can’t see them! The Melon Mambo treat holder doesn’t have an inside layer. However, on that one, I stamped the little flowers in the Welcome Easter Stamp Set on the front. The greeting is stamped from the Itty Bitty Greetings Stamp Set and punched out with the handy dandy Classic Label Punch. To decorate the Daffodil Delight holder, I just added some small Rhinestone Jewels.
I didn’t have any exciting Easter candy but these little chocolate bunnies which are pretty flat fit in just fine. So if you had a larger chocolate bunny, for example, you probably would need to make the base wider and therefore the strip longer in the beginning. Then you can die-cut or punch some kind of opening in the front. Just add a ribbon to tie the top together and you’re done!
Sometimes you need to give credit where credit is due so I must give credit to myself! I made a similar Easter treat last year but I had a cuter piece of candy to put inside! You can see that post HERE.
None of us will be having big family Easter dinners this year, so it would be easy to make one of these Easter candy treats to put at each place at the table for you and your spouse, or children, or whoever you are living with during this quarantine time.
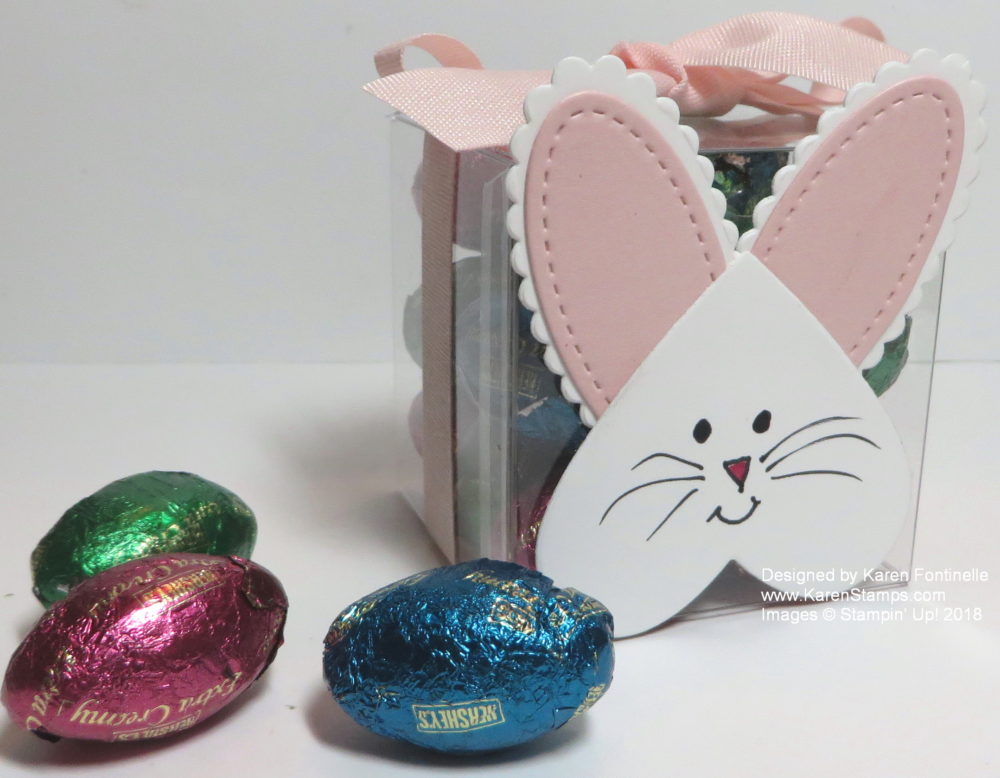
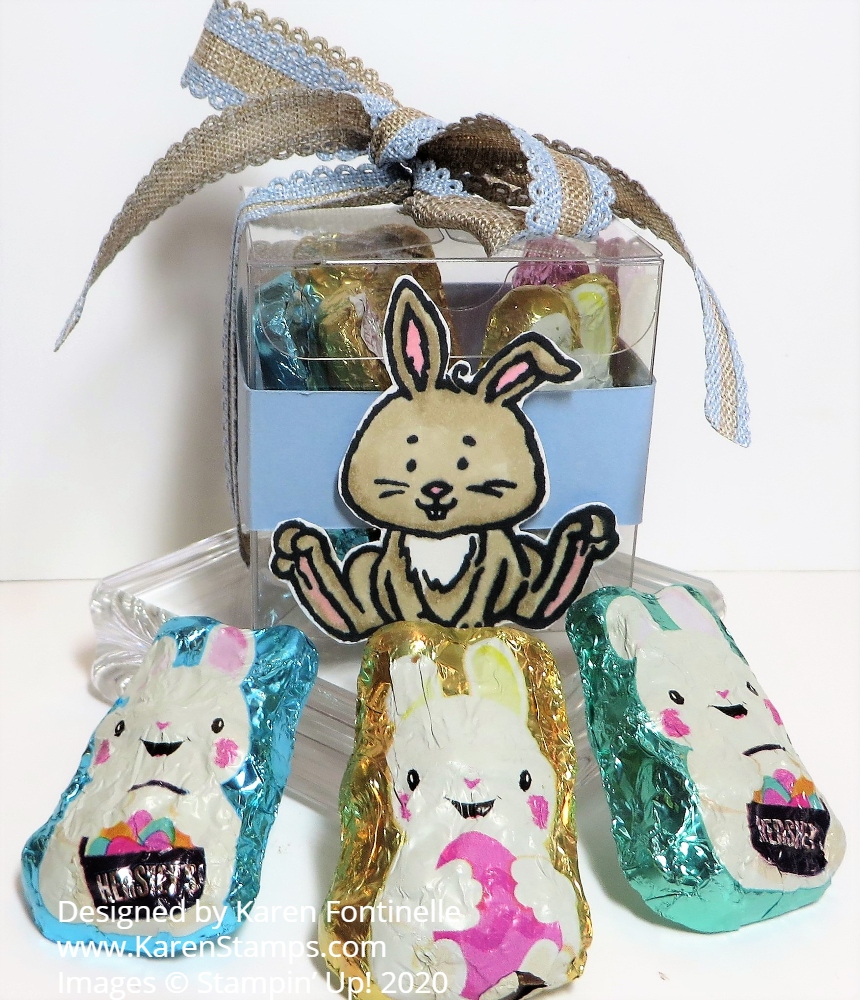
Which do you like better, the Easter Bunny Clear Tiny Treat Box or the chocolate bunnies?! Luckily, they go together so you can like both and not choose! Any time you need a quick and easy treat box, you can turn to the Clear Tiny Treat Boxes in the Stampin’ Up! Annual Catalog!
I intentionally made this Easter treat super simple. You can decorate these Clear Tiny Treat Boxes in many ways, of course. I started with the bunny in the Welcome Easter Stamp Set. It is stamped in Memento Ink and colored in with a Light Crumb Cake Stampin’ Blend marker and a bit of the Dark for shading. For the little bit of pink in his ears and bottom of his feet, I used a Light Flirty Flamingo Stampin’ Blend Marker.
Since the area on the front of the Tiny Treat Box is fairly small, I just cut out the bunny by hand. I wrapped around a 3/4″ strip of Seaside Spray Cardstock, one of the current In Colors, around the box. If you put the ends of the strip on the front of the box, the junction of those paper ends will be covered up by the image you put on the front of the box. You could also use ribbon, but since I was going to tie ribbon around the top of the box, I just used cardstock. You could also use some pretty border dies to die cut a strip going around the box. You can apply a little bit of Snail Adhesive to hold the strip in place. Then the bunny is popped up on Stampin’ Dimensionals on the center of the box front.
Be sure to fill the box first with candy treats or a small gift and then tie with a ribbon. This is decorative plus holds the lid of the box closed for sure. The ribbon I used is the Seaside Spray 1/2″ Scalloped Linen Ribbon. It is very pretty with the linen and the light blue! I just tied it around in a bow. You could also adhere just the ribbon and then tie a bow separately to adhere to the top of the box if you wanted the bow closer to perfect.
Here is a very similar design with a Clear Tiny Treat Box that I made for Halloween using a strip of designer paper around the box and a Halloween image cut out from designer paper with a ribbon tied around the box.
That’s all there is to it! You could also stamp a “Happy Easter” greeting or a “Happy Spring” greeting. Maybe it would be a party favor at a baby shower and that would be cute with the bunny! Keep a stash of these Clear Tiny Treat Boxes on hand to use for quick treats or gifts or order a quantity for a party or event. For a treat or even a little home decoration, try this Easter Bunny Clear Tiny Treat Box for this spring or Easter!
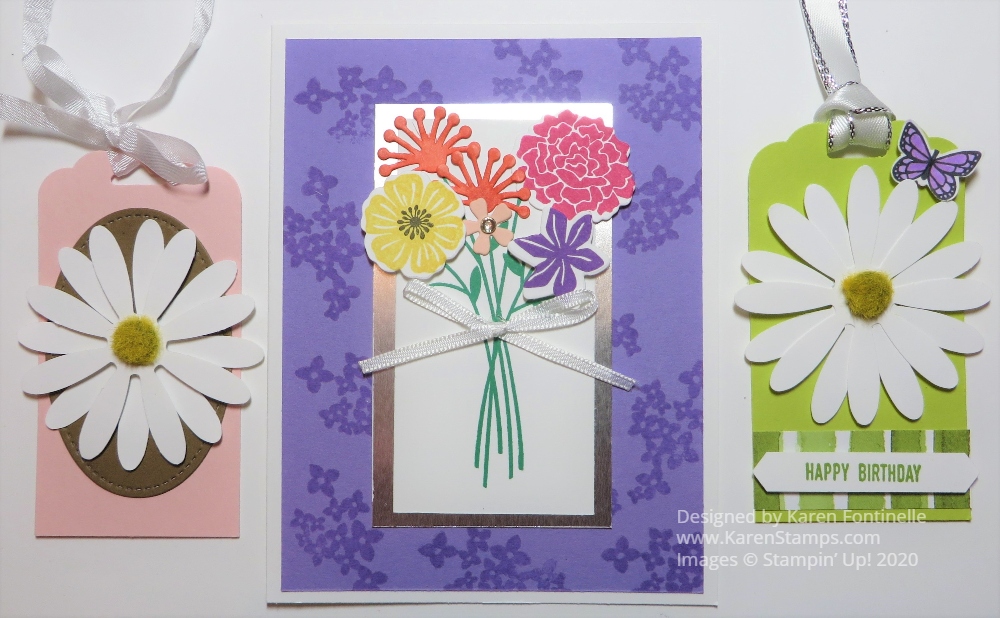
The other day I said I had cleaned off my kitchen table to “sanitize” it and decided to use my little pile of scraps of cardstock, designer paper, die cuts, punched pieces, etc. to make cards and here are some Floral Cards and Tags From Scraps that I made.
Saturday afternoon, Sara Douglass, CEO of Stampin’ Up! did a Facebook Live at her home showing her family having a craft party! I happened to catch it at the beginning so I moved my laptop over to the table and got out my scraps that were on my table plus another baggie full! I sat there and did my own stamping and cardmaking while watching and listening to the Douglass family in the background. It was the most relaxing afternoon for me!
If you are on Facebook, just search for Sara Douglass, Stampin’ Up! CEO. You will find her craft party video plus a new Facebook Live she did yesterday just checking in with everyone. More important than just telling you about her family Facebook Live, is telling you to check out the projects her girls were doing! Such cute things! Sara later posted more details about the projects that you will see in her posts. Near the end, Sara makes her own cards with the Magnolia Memories & More Large Specialty Cards & Envelopes. Even her husband makes a card he saw on the internet! Even if you missed it Saturday, you can still stamp along with the Douglass family!
I found several punched daisies in my scraps so I put two together on each card and added the Perennial Essence Floral Centers. The daisies are punched with the Daisy Punch. These tags were already in my scraps! I can keep them as tags or I can add them to the front of a card.
The center card is made with stamped flowers from the Beautiful Bouquet Stamp Set and die cut with the Bouquet Bunch Dies. I don’t remember what dies the orange flowers came from but they were in my scrap stash. In fact, they were white but I wanted color, so I just colored them with Stampin’ Blends. The little panel with stems was already stamped. I just cut down the length and layered it on a piece of Silver Foil. The background on the card is stamped with Versamark Ink although it still came out darker than I expected.
You can check out some other cards I made with my scraps the other day HERE. It’s fun to sit down with whatever scraps you have, it’s almost like a treasure hunt! You don’t know for sure what you will find if it has been a long time since you looked! Then just let your imagination run and see what cards you can come up with! You can still add other stamping or embellishments and greetings, but try to use as many scraps as you can as I did with this Floral Cards & Tags!