Category Archives: 3-D, Gifts & Things

St. Patrick’s Day Card and Leprechaun Treat Tubes

St. Patrick's Day Card and Leprechaun Treat Tubes

If you need some last minute St. Patrick’s Day things for today or tomorrow, I hope you will get some inspiration from this St. Patrick’s Day Card and Leprechaun Treat Tubes.  I told you hearts weren’t just for Valentine’s Day!  Just make a little treat or card for a loved one, a friend, or a neighbor for a St. Patrick’s Day wish!

The card is made with Emerald Envy, one of the retiring In Colors. I am not fond of this color at all!  I guess I’m not a “green” person unless it’s a really pretty green!  I used the Heart Happiness Stamp Set to stamp the hearts randomly around the card front. In order to make sure I got each stamp stamped the way I wanted it, I used my new Stamparatus!  The St. Patrick’s Day greeting is from the Teeny Tiny Wishes Stamp Set, which has a greeting for almost anything, and it is punched out with the Classic Label Punch.  I wanted to add some gold to the card so I just tied a little bow with the Gold 1/8″ Ribbon and attached it to the big heart with Mini Glue Dots.

For the candy treats, I used some Treat Tubes I had leftover from the ones in the Holiday Catalog.  I don’t believe you can get those any more, but if you are a Paper Pumpkin subscriber, you can order the Something Good to Eat Kit or Refill under Past Kits.  They are filled with green candies, and then the cork top is wrapped with Pick a Pattern Washi Tape to keep it from coming off and spilling the candy!  Wouldn’t want that to happen!

Thanks to some other creative stampers, someone discovered that you could color the Santa in the Cookie Cutter Christmas Photopolymer Stamp Set to look like a leprechaun for St. Patrick’s Day!  I cut off the curved part of the hat and added a separate square piece of paper, colored green, to make the top of his hat.  The leprechaun is colored with Stampin’ Blends Markers.  I love coloring with these markers!  Then he is punched out with the Cookie Cutter Builder Punch.

I layered the leprechaun on a piece of Gold Foil die cut with the Lots of Labels Framelits Dies. The leprechaun is adhered with Stampin’ Dimensionals to pop him up a bit and then the whole piece is adhered to the tube with Mini Glue Dots.  If you don’t own the Treat Tubes, just use a little cello bag or make a little box and then adhere the leprechaun to the front of that,  There are lots of ways to make little candy treats to give someone!

If you are celebrating St. Patrick’s Day on Saturday, March 17th, or if you just want to have a little fun with your family, make something like this St. Patrick’s Day Card and Leprechaun Treat Tube.

Shop Stampin’ Up! Online!

Sale-A-Bration Ends March 31!


Easter Bunny Tiny Treat Box For Candy

Easter Bunny Tiny Treat Box For Candy

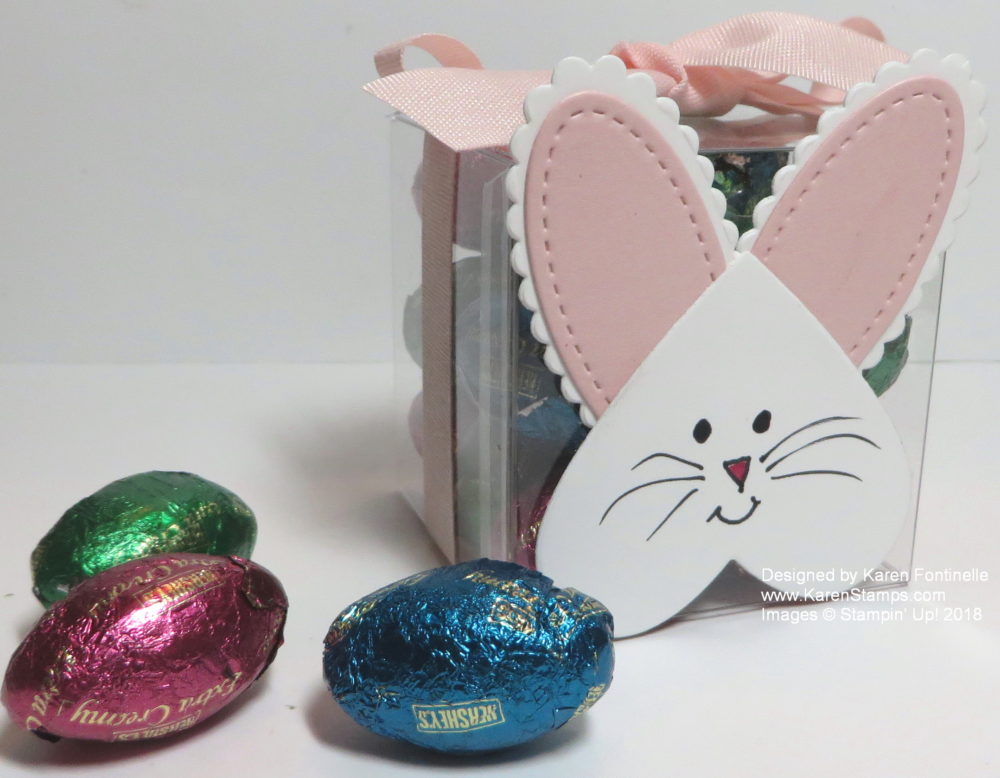
Here’s a fun Easter Bunny Tiny Treat Box for candy or even a small Easter gift! It’s so handy to keep some of the Clear Tiny Treat Boxes on hand for making cute little treat boxes or party favors like this one for any occasion.

The Clear Tiny Treat Boxes come flat so storage is not a problem.  They are small, just 2″ x 2″ x 2″ and even food safe.  But that size is big enough to make a cute project out of them.  Just assemble when you are ready and fill with your special treat or gift!

For Easter, I made this cute punch art bunny!  Just use one of the heart die cuts in the Sweet & Sassy Framelits Dies for the bunny face, or you can use a heart punch if you have one the right size.  For the ears, I used a small oval from the Stitched Shapes Framelits Dies and then layered on a scalloped oval die cut from the Layering Ovals Framelits Dies.  I just drew on the face myself.  Use oval punches for the ears if you prefer.

After you put the treat in the box, just tie with a ribbon! I used the Powder Pink 1/2″ Finely Woven Ribbon, which is a beautiful light pink color and has such a nice feel to it. In fact, I think I have used up my roll so it’s time to order more!

Speaking of ribbon, if you need or want any of the 2016-2018 In Colors that will be retiring in May (at least if Stampin’ Up! follows their usual routine!), whether you need ink refills, cardstock, any ribbon with those colors or designer paper (well, usually most designer papers retire!), I would suggest ordering what you need in those In Colors right now before everyone else is thinking about it.  As soon as that retirement list comes out, people rush to order, especially the ink refills, and later on you will end up paying a higher price on an auction site! I know it is early to think about retiring products and the list won’t come out until May, but that’s only a month and a half away!  Beat the rush so you won’t be disappointed.

But right now, we have Easter coming up, so if you want some easy cute treats for your family, your guests, teachers, co-workers, try this Easter Bunny Tiny Treat Box and impress everyone!

Easy Elegant Mini Treat Bag with Springtime Foils Paper

Elegant Mini Treat Bag with Springtime Foils Paper

I’ve said many times before how much I love the Mini Treat Bag Thinlits Dies, so today I made this easy elegant Mini Treat Bag with the beautiful Springtime Foils Paper. You can earn this gorgeous paper FREE with a Sale-A-Bration order of $50 or more. Now’s the time to get it before Sale-A-Bration ends March 31.

The Mini Treat Bag Thinlits Dies have always been one of my favorites! I think the bags turn out so cute and are easy to make, plus you can vary the look of the bag by folding the top over or cutting it down, adding a belly band or tying with a ribbon…..so many options! They are perfect for just a greeting on a card inside or inserting a gift card, candy treat or small gift! Very easy and simple.  All you need is a Big Shot and these dies which come with lots of pieces to use for many different projects!

When you use the Springtime Foils Designer Series Paper, you will automatically have an elegant project, no matter what you do with it!  And the best part…..it’s FREE!  Just spend $50 on Stampin’ Up! products and choose a free Sale-A-Bration product! This paper should be one of your top choices (although they are all wonderful choices this year!).

Here is another Mini Treat Bag I made with the Birthday Memories Designer Series Paper and put some punched balloons at the top of the card inside. So many occasions you can use these dies for!

To accent the bag, I colored a flower from another pattern of the Springtime Foils Paper with my Stampin’ Blends markers and cut it out with my Paper Snips.  To color the flower I used the Pink PIrouette Blends plus the Light Rich Razzleberry marker.  Honestly the Light Pink Pirouette colors so lightly on this glossy paper that you can barely see it.  I just thought it would be fun to add some other color, the Rich Razzleberry, so see what the blended flower would look like.  The leaves are colored with the Old Olive markers.

This flower is then layered on a piece of Blushing Bride Cardstock, die cut with the Stitched Shapes Framelits oval die and then layered on a piece of Silver Foil die cut with one of the scalloped Layering Ovals Framelits Dies. For a tiny bit more bling, I added a piece of the Silver Mini Sequin Trim.

Shop Stampin’ Up! Online HERE and earn your Sale-A-Bration rewards with every qualifying order!  No limits! Choose a free Sale-A-Bration product with every $50 increment on your order, and if you reach $100 or more, you can either choose two $50 rewards or one $100 higher-value reward!

Browse the Sale-A-Bration Brochure HERE!

Browse the 2nd Release of Sale-A-Bration products HERE!

You can use any kind of cardstock or designer series paper to make a mini treat bag such as this one, of course. But if you can earn this Springtime Foils Designer Series Paper during Sale-A-Bration, I think you will find it to be beautiful paper and worth your choice! Then go ahead and make some elegant cards and projects like this Easy Elegant Mini Treat Bag with Springtime Foils Paper.


How to Make an Easy Paper Easter Basket With Punch Art Bunny

Sweet Soiree Easter Basket With Punch Art Bunny

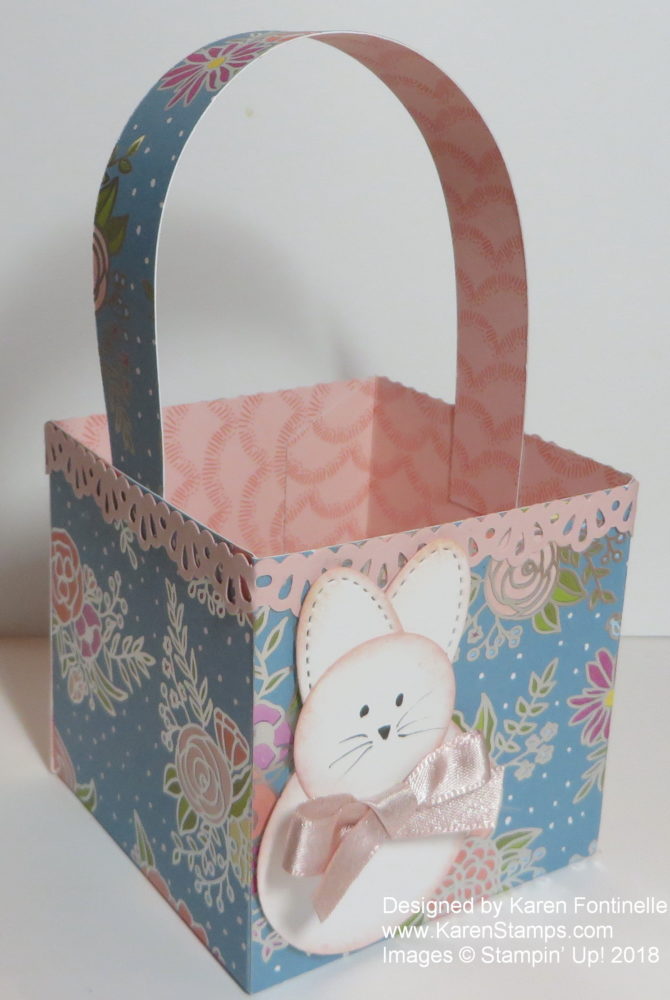
Easter is on its way, so let’s learn how to make an easy paper Easter basket with a punch art bunny using the Sweet Soiree Designer Paper.  When I saw this paper, I knew it would make a beautiful gift box, but somewhere along the way it turned into an Easter basket!  And what better decoration for an Easter basket than a cute punch art bunny!

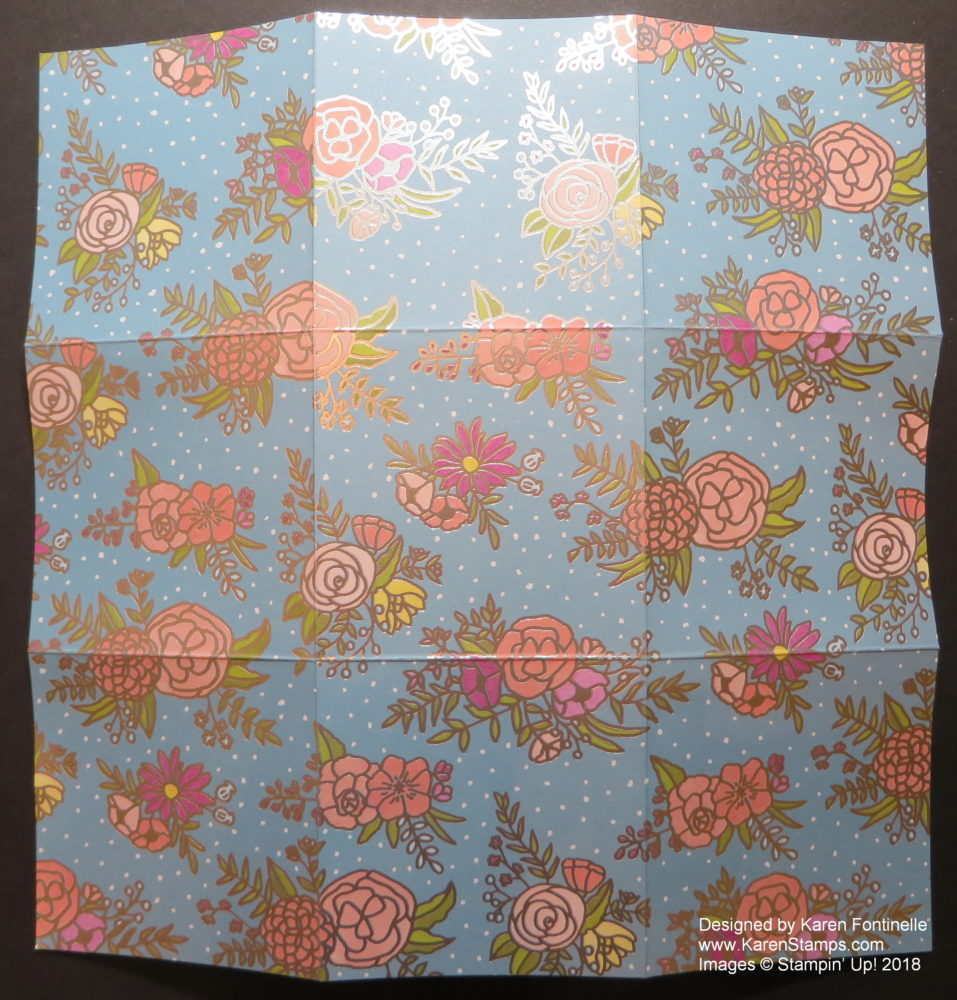
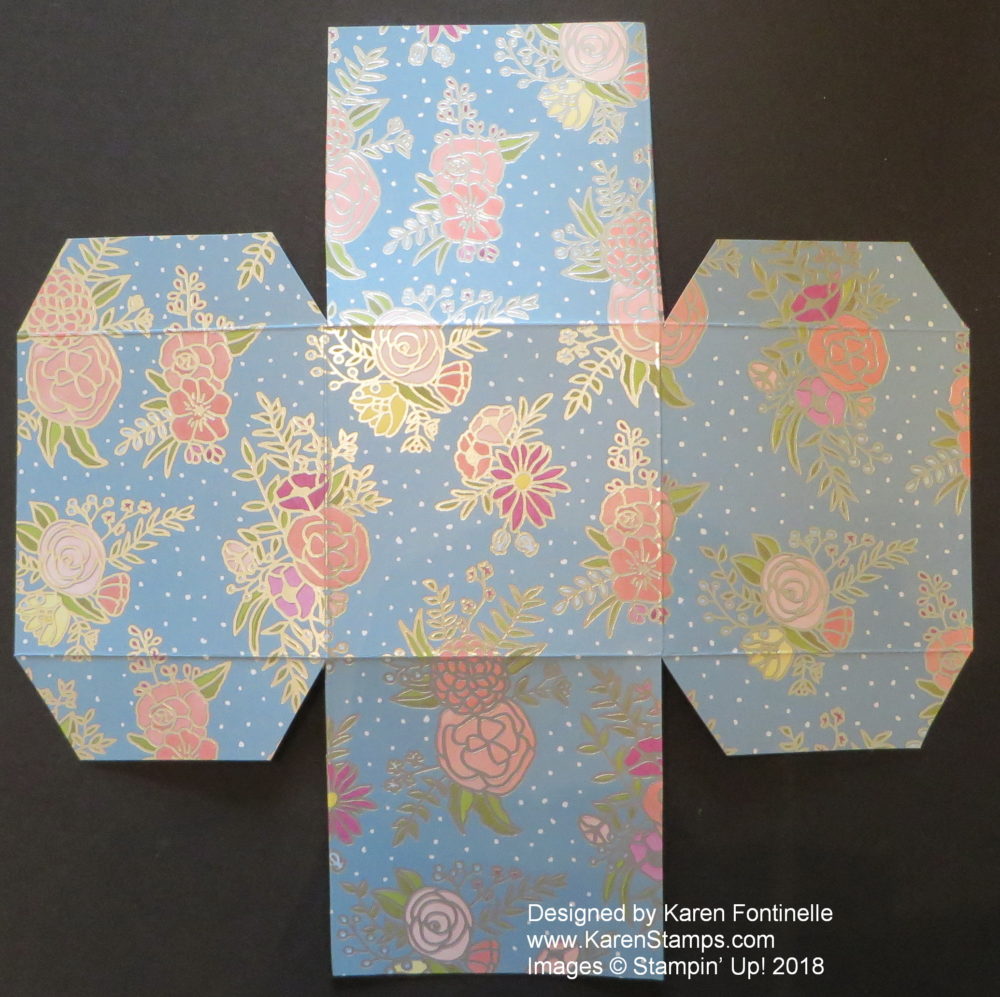
You can decide what size you want your basket to be, but I chose 3″ wide on each side, which meant I needed to start with a 9″ x 9″ piece of the Sweet Soiree Specialty Designer Series Paper.  I just scored it at 3″ and 6″ on each of the two sides so that it looks like a tic-tac-toe board.

Sweet Soiree Designer Paper Scored For Basket

At this point, you can cut on the vertical score lines from the bottom up to the horizontal score line and down the same way from the top.  Then you can crease all the score lines, fold in all the tabs, and make your basket.

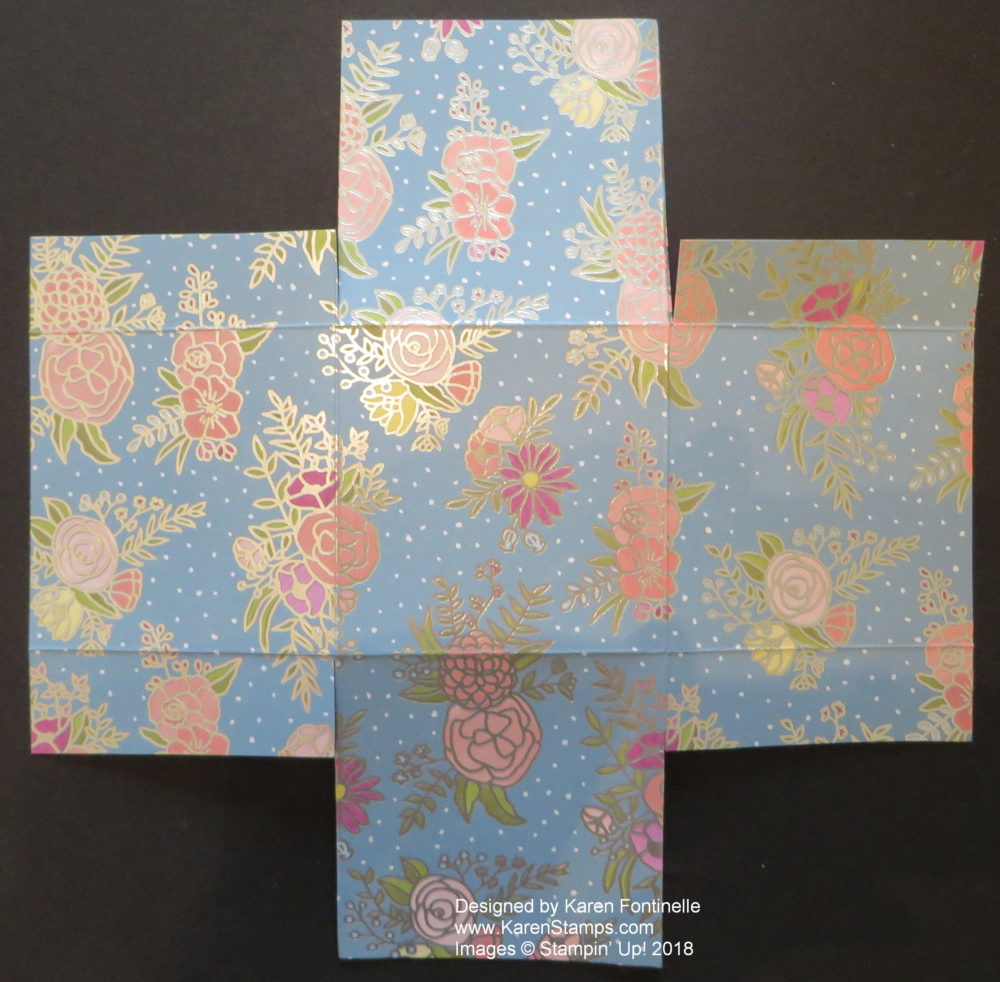
To eliminate the bulk of all that paper, after I cut up to the score lines as above,  I cut in from the sides as you see below in the photo.  This makes “tabs” to adhere to the sides.  The tabs do not have to be cut exactly straight. I just eyeballed that part. Then you can use Fast Fuse, or I used Tear & Tape Adhesive on the tabs.

Sweet Soiree Designer Paper Scoring and Cutting For Basket

Just for an extra tip, I cut the little angles on the tabs, just to keep them out of the way on the edges. Nothing special, just eyeballed it.

Sweet Soiree Designer Paper Cut For Basket

The handle for the basket is just a 3/4″ strip of paper, adhered inside the basket again with Tear & Tape. You could use brads or staples if you wanted to, or ribbon. For a little embellishment, I punched strips of Powder Pink Cardstock with the Decorative Ribbon Border Punch to decorate the top edge of the basket.  I also made this 3/4″ wide but if I did it over I probably would make it wider.

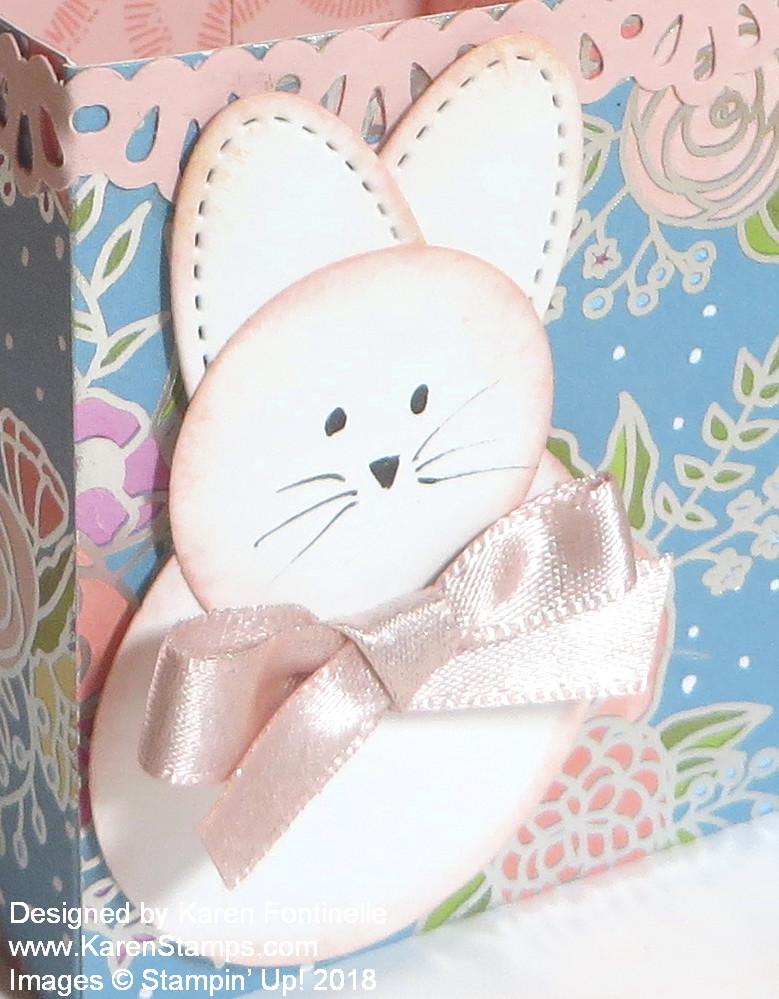
Punch Art Easter Bunny For Paper Basket

The punch art Easter Bunny is fun to make!  You can experiment with whatever punches you have.  For this bunny I used the 1 3/4″ Circle Punch for the body, the 1 1/4″ Circle Punch for his head, and a small oval from the Stitched Shapes Framelit Dies for his ears.  If you have a retired Oval Punch you can use that. I only needed one die cut because I just cut it in half for the ears. For the face, I just drew it in.  Before adhering the bunny, I sponged the edges of the pieces lightly with Powder Pink Ink. I meant to color the inside of the ears with Stampin’ Blends in pink but I forgot!  The bunny is popped up on Stampin’ Dimensionals on the front of the Easter basket.  He/She still needed a bit of something so I tied a bow with Powder Pink 3/8″ Shimmer Ribbon.

The Sweet Soiree Specialty Designer Series Paper is so pretty by itself you can make bags, baskets, or boxes easily without having to do much else!  The silver foil and colorful handpainted design of the flowers don’t require much embellishment.  If you learn how to make an easy paper Easter basket with a punch art bunny with the Sweet Soiree paper, you will have a beautiful little gift or treat for someone special.

Chinese Red Money Envelopes for Lunar New Year, Year of the Dog 2018

Chinese Red Money Envelopes1

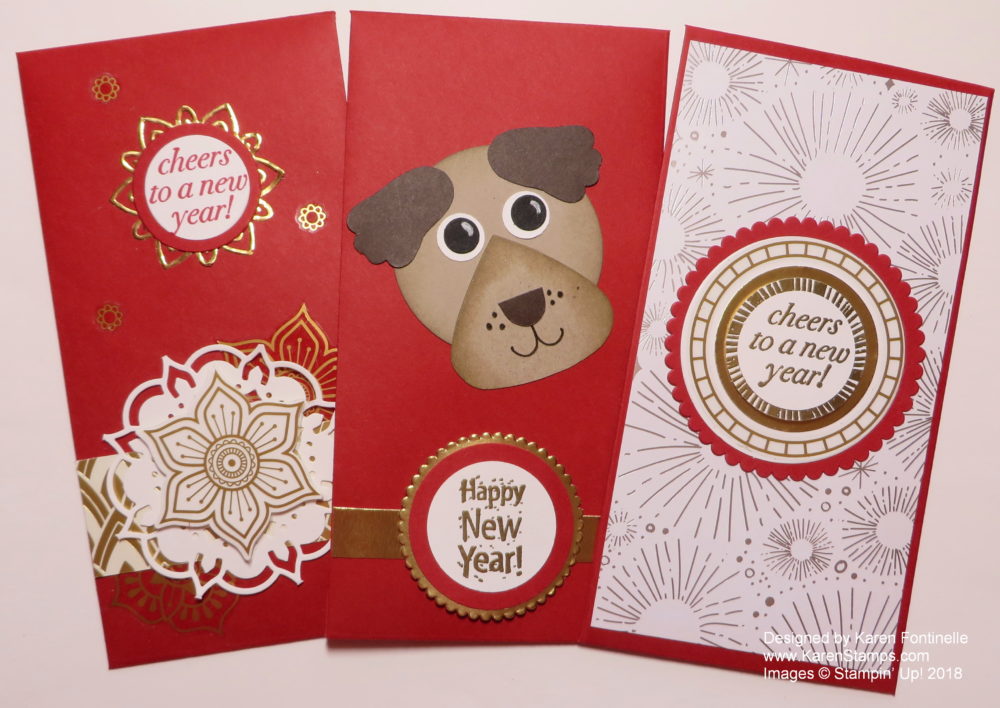
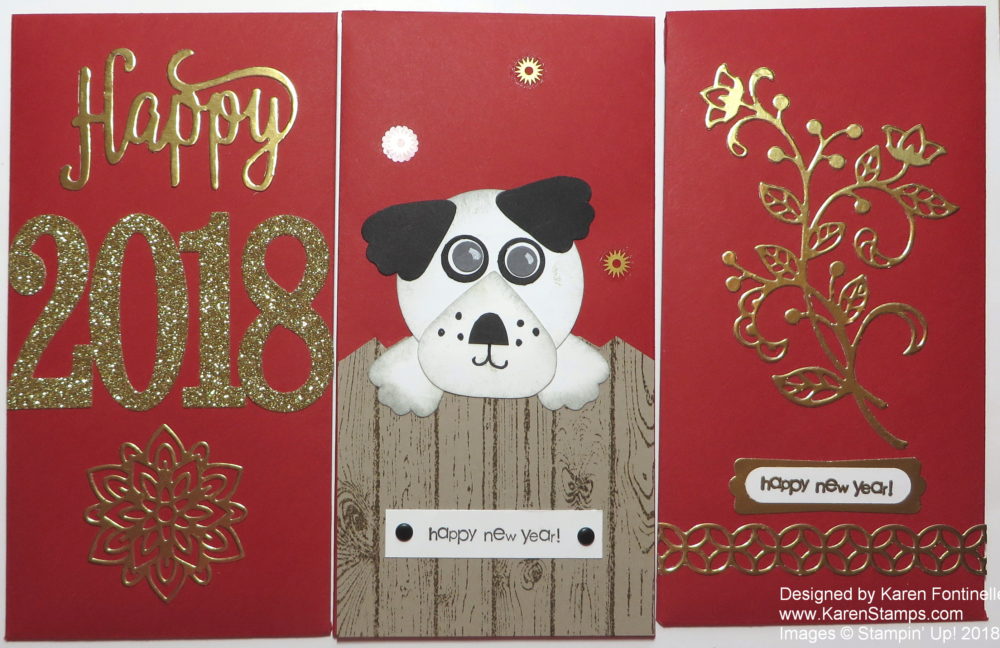
Today is the first day of the Chinese New Year or Spring Festival.  This year is the Year of the Dog in the Chinese Zodiac. Chinese people gift family and close friends with cash money in these “lucky envelopes”. A Chinese acupuncture doctor asked me to make some red money envelopes for her so here they are!

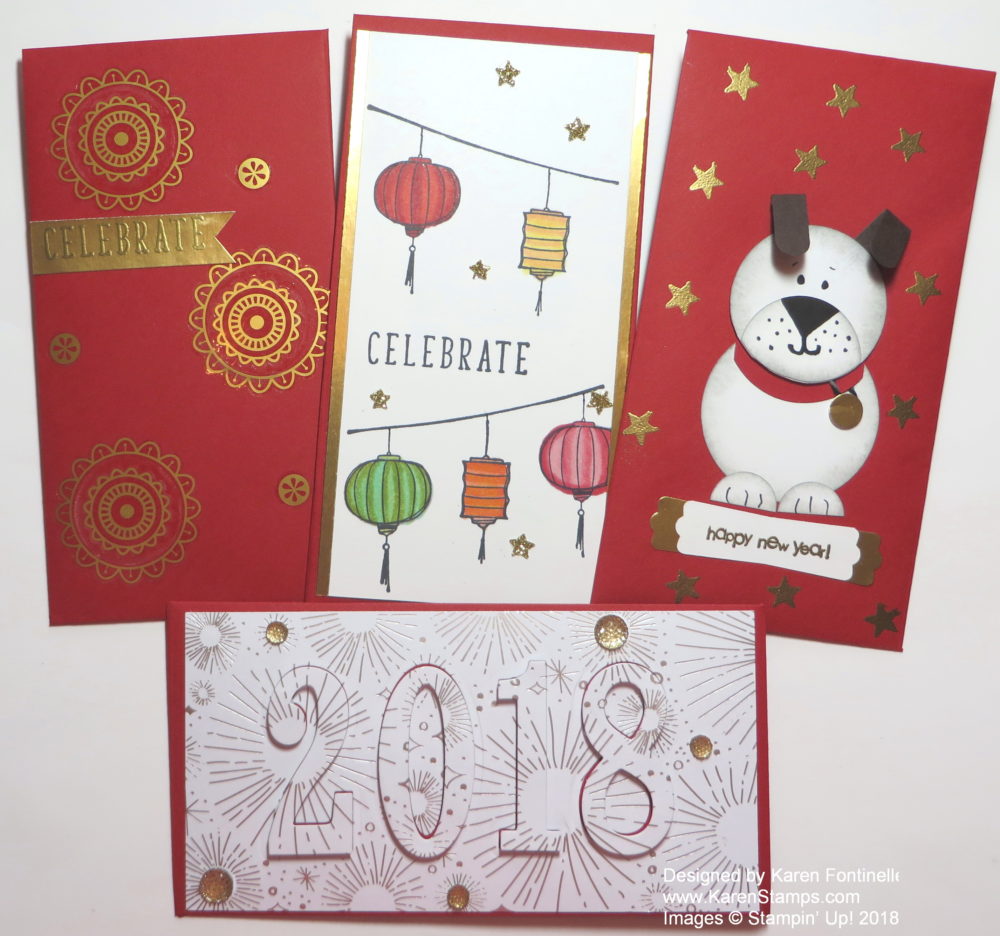
Since it is the Year of the Dog I made some of the envelopes with “punch art” dogs. Of course I found ideas on Pinterest and other online places and used what punches I had to make what I could. But for other envelopes, I thought of other ideas, pulling out retired stamps and accessories or whatever I had! I figured lots of gold was good to use on the red envelopes either with Gold Foil paper or gold embossing or maybe some of the Eastern Gold Vinyl Stickers.

Chinese Red Money Envelopes

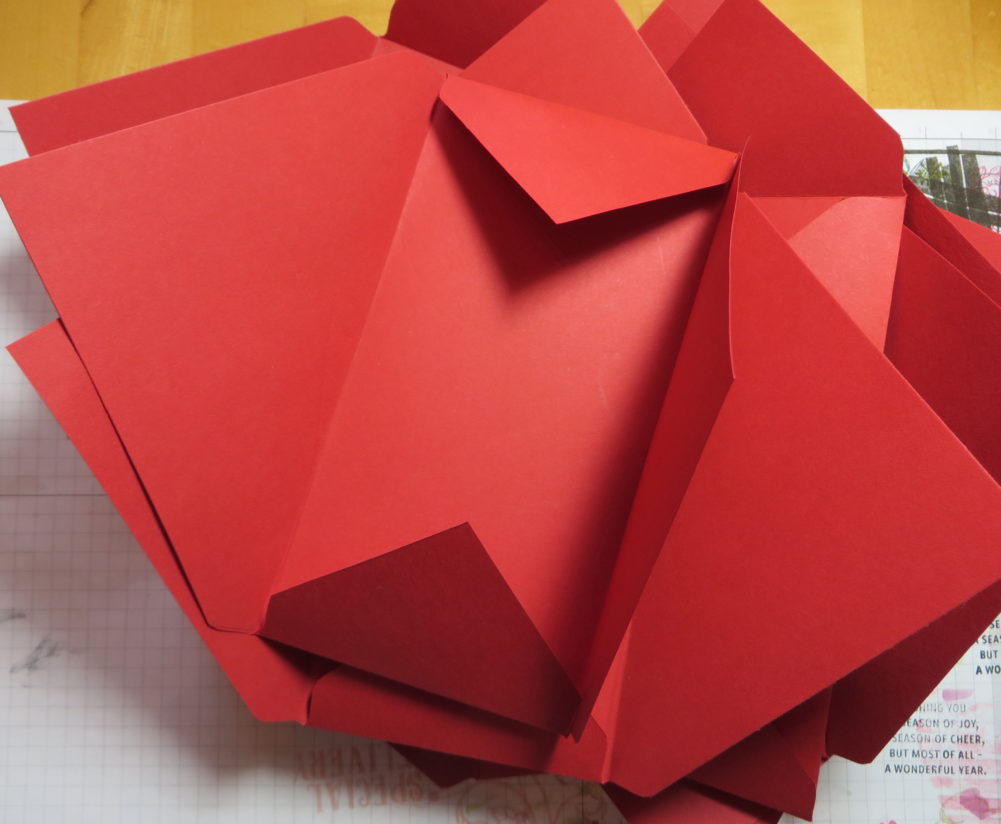
This is how I began, making the envelopes out of Real Red Envelope Paper (retired). If I wouldn’t have this paper, I would use Real Red Cardstock. Too bad Stampin’ Up! retired this envelope paper because it is a little lighter to use than the cardstock.  The Envelope Board was great for punching and scoring to form these envelopes, and then they just needed a little creasing with the Bone Folder and a bit of adhesive.

Chinese Red Money Envelopes2

The Big Shot came in handy as well, for die-cutting some images to embellish the Chinese red money envelopes.  On these I used the Large Numbers Framelits Dies, the Flourish Thinlits Dies, and the “Happy” from the Happy Birthday Thinlits Dies.

Chinese Red Money Envelopes

Finally I remembered I had the stamp set Color Me Happy, a special set brought out when we got the new alcohol markers, Stampin’ Blends.  You can order it even though it is not in any catalog.  Just search for it in the Online Store. This stamp set had the Chinese lanterns which were perfect for one of the envelopes! Finally I tried the “Eclipse Technique” with the Large Number Dies for the year 2018!

If you want to see envelopes I made last year, you can click HERE. It was the Year of the Rooster in 2017!

The more I worked on these Chinese money envelopes, the more ideas I got! If you want to celebrate the Chinese New Year, make some Chinese red money envelopes for the Lunar New Year, the Year of the Dog! Surprise someone with a Chinese gift!

Last Minute Card and Treat Ideas For Valentine’s Day

Easy Valentines to Make with Sending Love Paper Stack

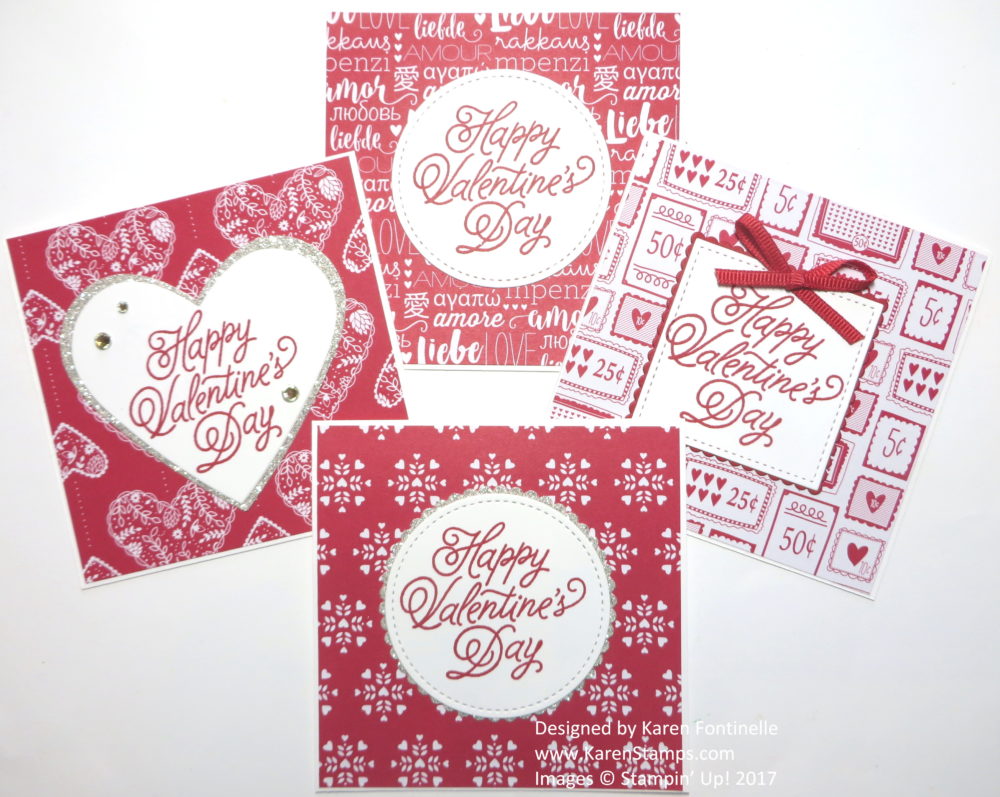
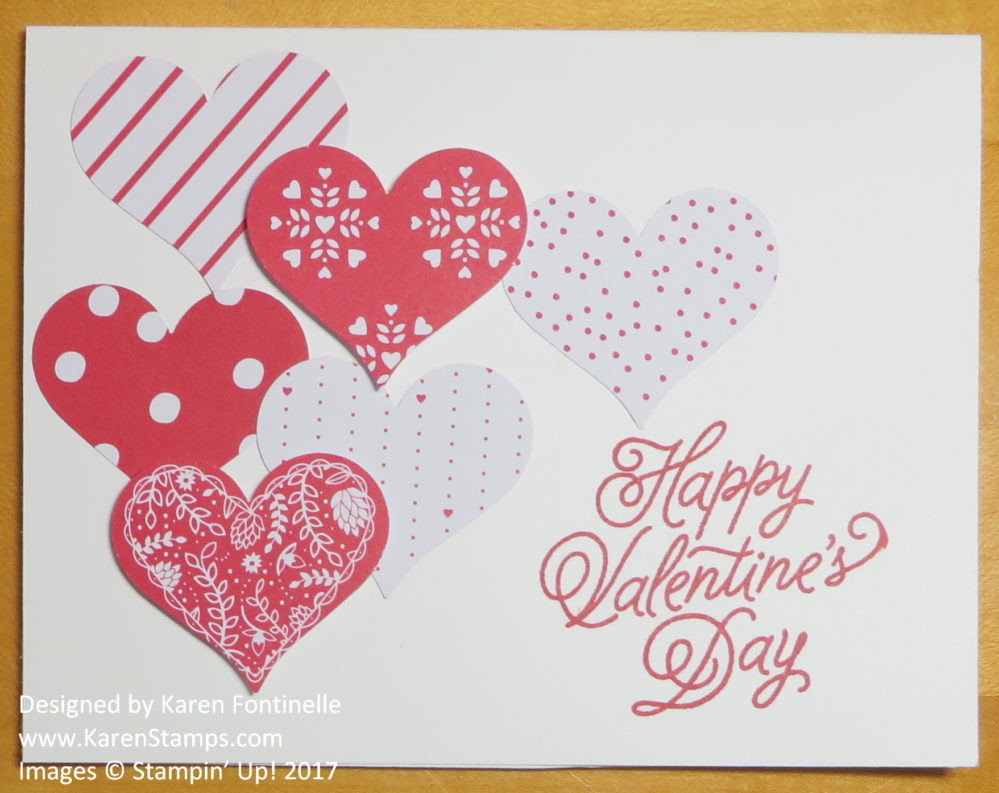
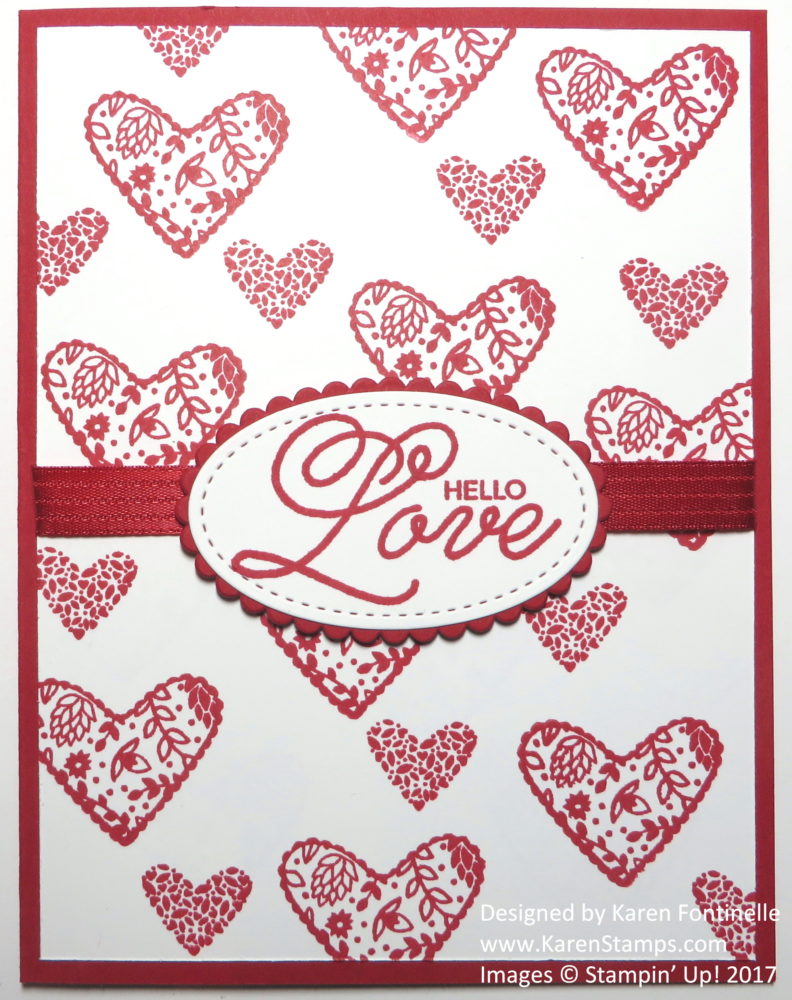
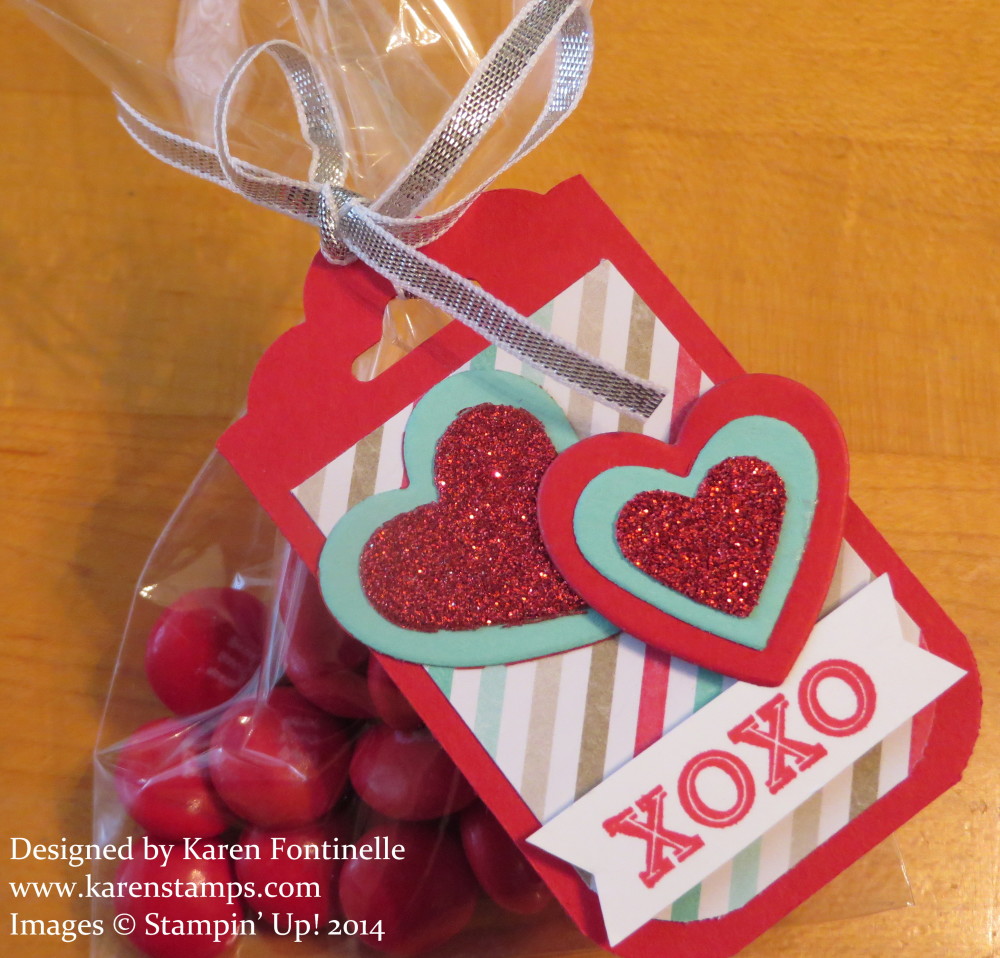
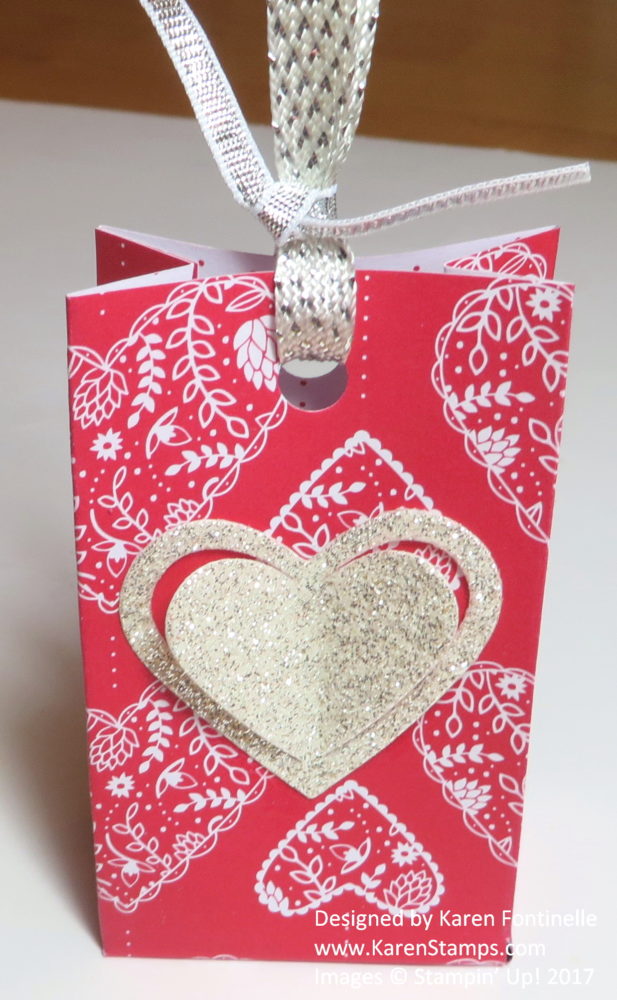
Since we are just one day away from Valentine’s Day and we all probably procrastinate, I thought I would post some of my past projects that you can use for last minute Valentine ideas for cards and treats for inspiration if you need another card or two or a little treat for someone!

Click here for the above cards:  Easy Valentines to Make With Sending Love Paper Stack

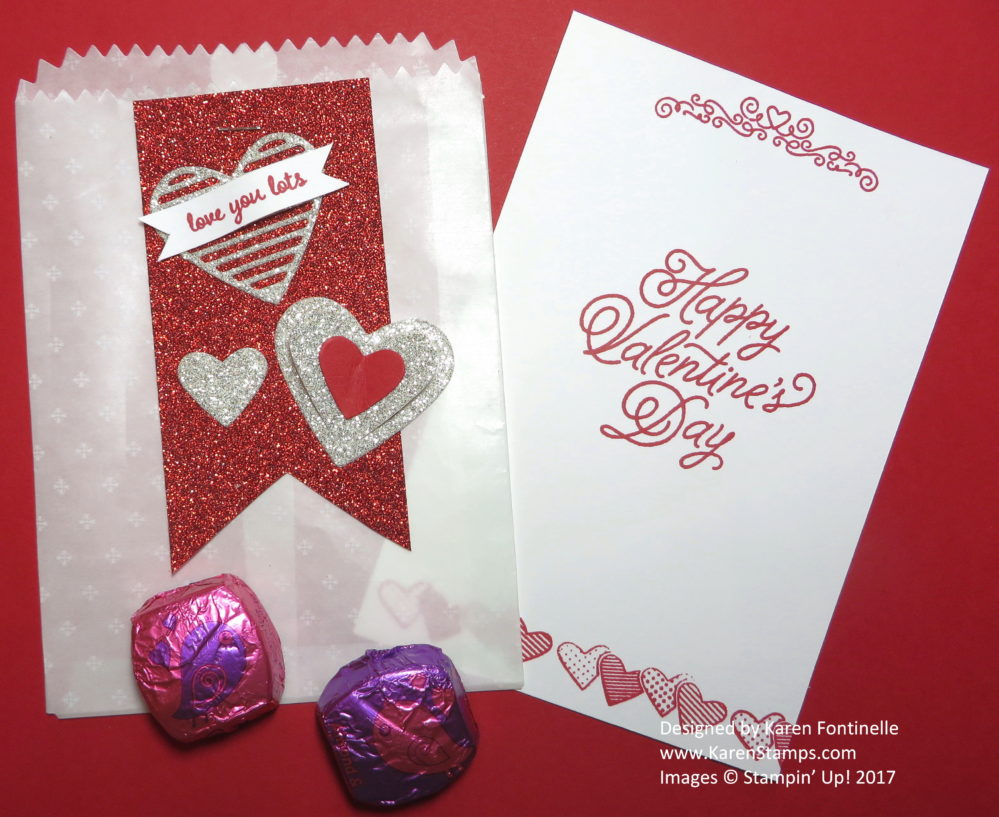
A Valentine Mini Treat Bag For a Valentine Treat

A Valentine Mini Treat Bag With Glassine Sheet

Quick and Easy Last Minute Punched Hearts Valentine Card

Quick and Easy Last Minute Punched Hearts Valentine Card

Easy Stamped Valentine Card

Stamp An Easy Valentine Card with Sealed With Love

Valentine Treat Bag with Hearts Tag

Make a Valentine Treat Bag with Scraps

Valentine Sending Love Small Treat Bag

Valentine Sending Love Small Treat Bag

These are just a FEW of my past Valentine ideas!  You can put “Valentine” in the Search Box on the right sidebar and find even more, some very old ones! Or you can look through the Archives drop down menu and choose a very old year and see what we used to make! So if you need last minute Valentine ideas for cards and treats, just check these out!  Have fun!


Mini Mailbox For Valentine’s Day Candy

Mini Mailbox For Valentine's Day Candy

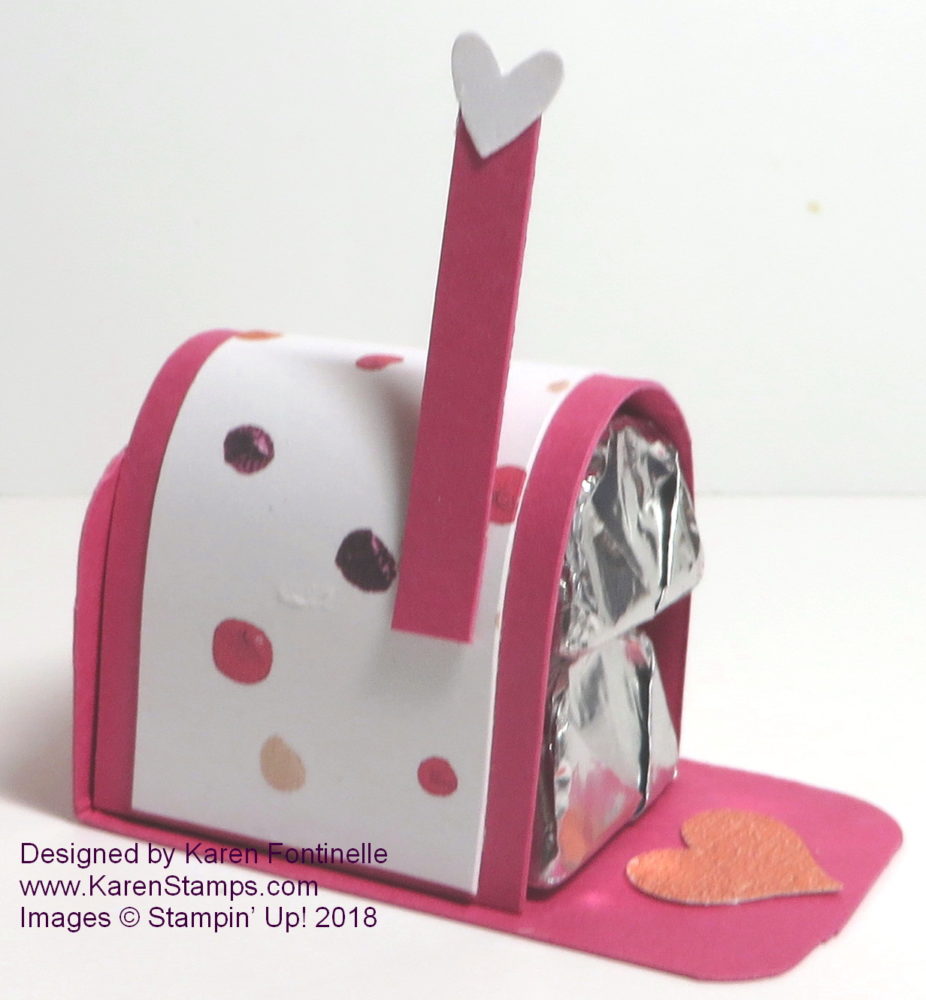
I’ve seen these Mini Mailboxes For Valentine’s Day Candy around on the internet and they are so quick and easy to make! I’m sure you could also make them for other occasions, like a birthday or Christmas.  Just change the paper and colors to suit the occasion!

This mailbox has two chocolate nuggets inside. You could use a low-temp glue gun so as not to melt the chocolate of course, but I just used Mini Glue Dots. They won’t interfere with the candy.

For the mailbox base, you need a strip of cardstock that is 3″ x 1″ with the corners rounded at both ends.  I used a Project Life Corner Rounder Punch (retired) but you could also just round the corners by hand with your scissors. This is just a little candy treat, it doesn’t need to be absolutely perfect! Mine isn’t! I think I used the wrong piece of paper for the base!

Score this base piece at 1″ to form the flap that makes the back of the mailbox.  You don’t need to score the other end unless you want to be able to fold it up like a mailbox door.

Next cut a piece of cardstock 1 1/4″ x 3″ and a piece of designer paper 1″ x 3″ and glue together. This will fold over the stacked chocolate candies. Again, you can use the low-temp glue gun or I used the Mini Glue Dots.  You might want to loosen the paper fibers a bit by kind of curling the paper just a bit with a Bone Folder.  Then just cut a very narrow strip of paper for the mailbox flag, topped with a tiny heart!  I used the Owl Punch (retired)for the small heart and another small heart punch for the lid of the mailbox.  You can also just cut these hearts by hand, too. We’ve all been cutting hearts since we were kids, right?!

Here are some other fun and easy Valentine candy treats to make! Click HERE.

Try this mailbox project!  It really only takes minutes and you can use up your scraps! Make a Mini Mailbox to hold a couple chocolate candies and give to someone on Valentine’s Day!

Quick and Easy Tiny Treat Box For Valentine’s Day

Quick and Easy Tiny Treat Box For Valentine's Day

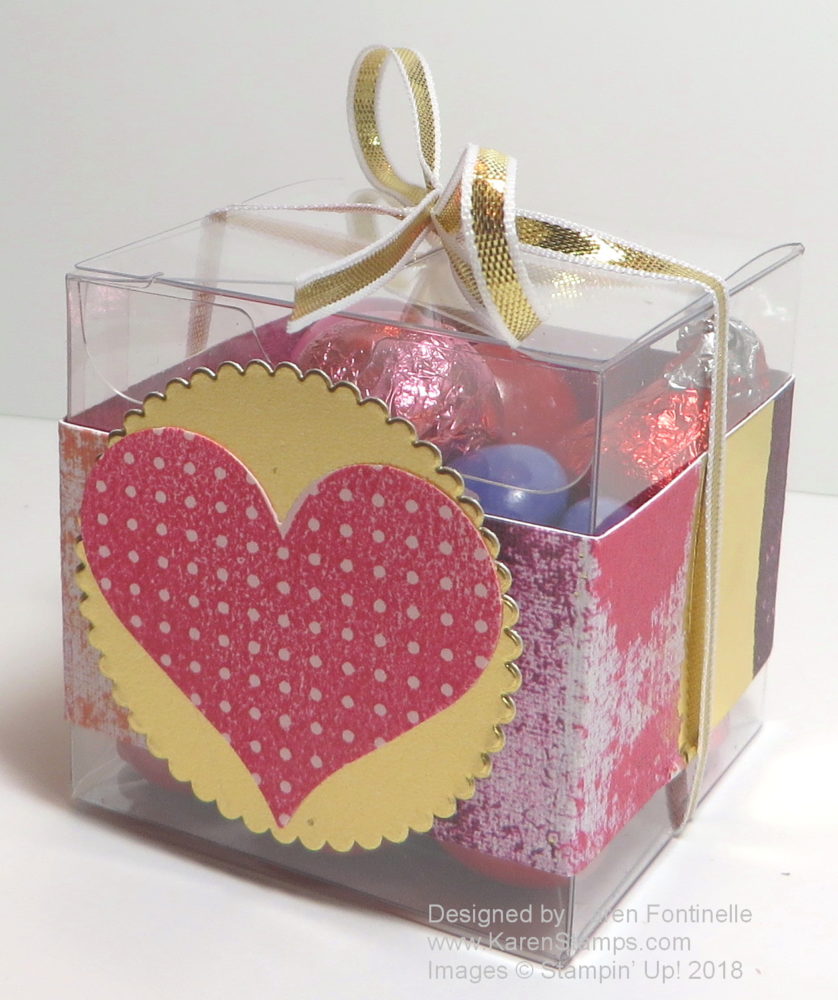
If you keep a package of these Clear Tiny Treat Boxes on hand, you will be able to make things like this Quick and Easy Tiny Treat Box For Valentine’s Day in nothing flat! If you need a little gift box or treat box for an occasion or party favors, these Clear Tiny Treat Boxes are the answer!  Just wrap a little piece of paper or ribbon around the box and embellish for the occasion and you’ve got it!

These Clear Tiny Treat Boxes store flat and have a little plastic wrapping on them. Just crease the score lines when you are ready to use them and assemble the box. Fill with some deli cious candy or place a small gift inside. These would be great as party favors as well.  You can decorate them in any way you like!

For this Valentine treat box, I simply wrapped a narrow scrap of the Painted With Love Specialty Designer Series Paper (This paper has gold foil accents! So pretty!) around the box and adhered the two ends in the back. It’s best, I think, if you hold the strip of paper at the back of the box, then fold the paper around the first corner.  Take the paper off and give it a good crease, then hold it back on the box and fold around the next corner.  Again, remove it, give it a good straight crease, and continue folding around the box.  This way you don’t have to bother measuring. Sometimes when you measure a strip because of the folding, the measurements don’t quite work.

To decorate the box, I simply stamped a heart from Heart Happiness in Melon Mambo Ink on Powder Pink Cardstock and cut out. I adhered the heart on a piece of Gold Foil punched with the Starburst Punch. Just for a little extra I tied a piece of the Gold 1/8″ Ribbon around the box to match the gold in the paper and the Starburst Punch. You could add even more if you wanted to, like a banner greeting across the front of the heart or another smaller heart in the center. Lots of ideas!

As Valentine’s Day is fast approaching, think of how you can make a quick little gift for your family or a neighbor or friend like this Quick and Easy Tiny Treat Box For Valentine’s Day with any little box that you have in your home, and later you can order a supply of the Tiny Treat Boxes to keep on hand!


A Cupcake Box Made With Designer Paper and a Mini Pizza Box For Valentine’s Day

Cupcake Boxes

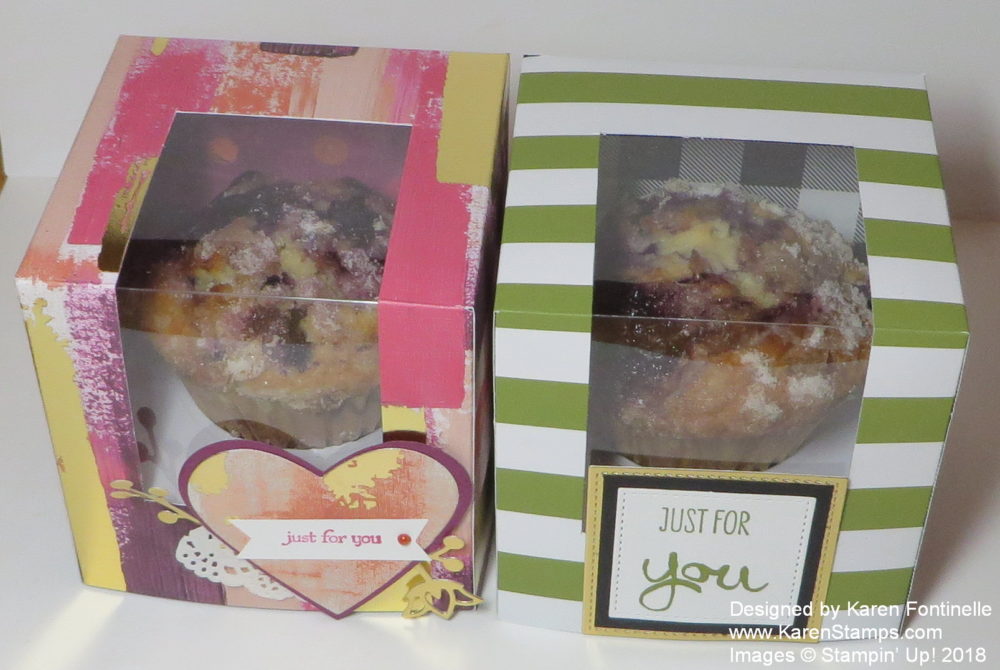
The other day, Sara Douglass, CEO of Stampin’ Up!, did a quick Facebook Live video about how to make a cupcake box like these.  The fact that she did it first thing in the office in just a few minutes before she had to dash off to a meeting, tells you that these are not real complicated!

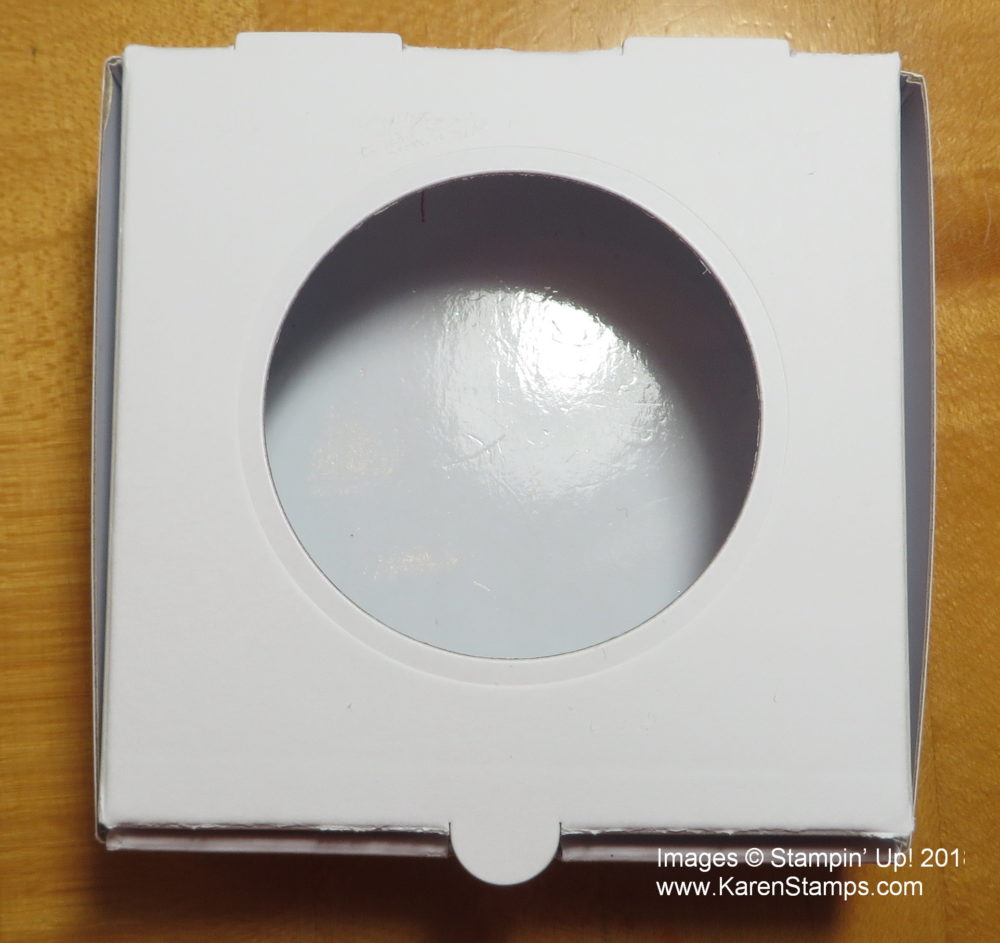
This cupcake box is really one of the Mini Pizza Boxes for the base to hold the cupcake and then the paper “lid” with a cutout for a window sheet or piece of plastic for the window to see the cupcake inside…..or in my case, a homemade blueberry muffin! The lid of the Pizza Box has a hole cut in the center using one of the Layering Circle Framelit Dies which holds the cupcake in place.  You can make that hole as small or as large as you need it to be according to the size of the cupcake or treat. Just make sure you are clear on which area of the box gets the hole!Pizza Box Lid Hole

Like Sara, I chose one of the papers in the Painted With Love Specialty Designer Series Paper package. Each sheet has gold foil accents on it, so it is really a beautiful paper! No matter which design you choose! Your Stampin’ Trimmer really gets a workout cutting and scoring this paper that will become the box, but it is really handy for cutting out that window in the middle of the paper.  The second box is made with a paper in the Merry Little Christmas package (Retired). This one was going to a man so I didn’t want it to be Valentiney!

Unfortunately, the Fast Fuse Special sold out early this morning! I have edited this post but you can still enjoy the Cupcake Box! So sorry if you missed it….and I know you did miss it!  So did I!

Watch Sara’s Facebook video about making the Cupcake Box!

Cupcake Box Diagram Sara DouglassHere is the diagram Sara made with measurements.  If you need more info just go to her Facebook page HERE.

Try making a Cupcake Box for a cupcake, muffin, or small treat for any occasion, not just Valentine’s Day!

Valentine’s Day Party Pandas Mini Treat Bag

Valentine's Day Party Pandas Mini Treat Bag

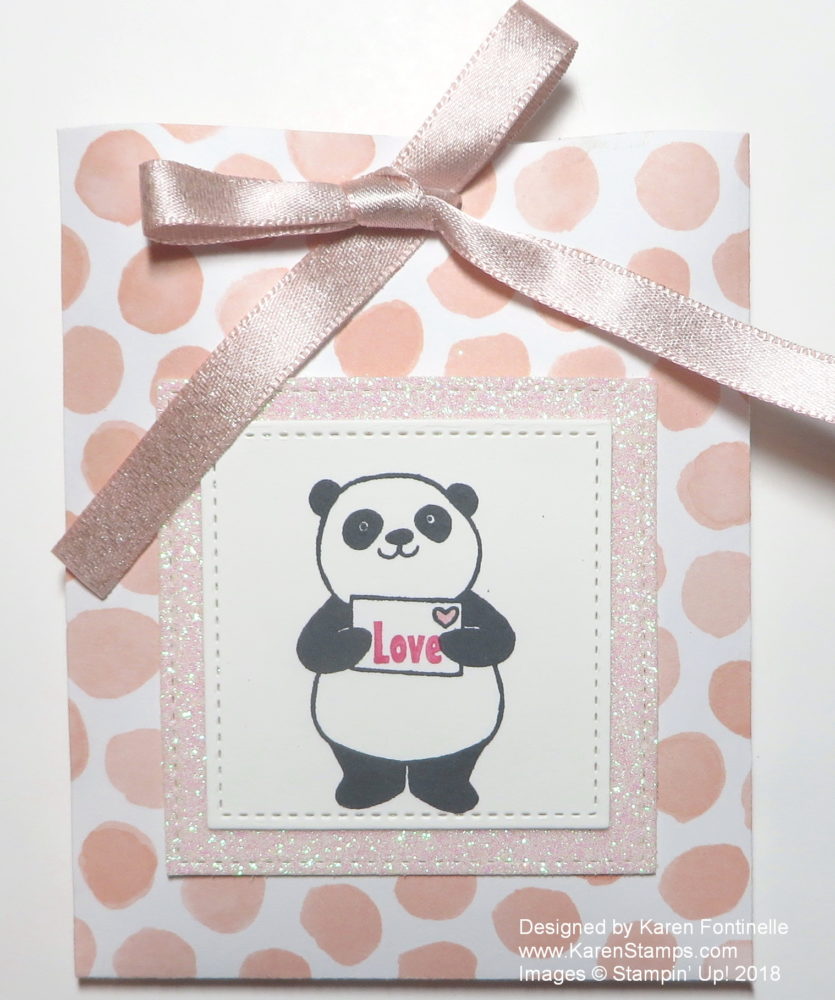
How about a cute Valentine’s Day Mini Treat Bag stamped with one of the Party Pandas? This mini treat bag is big enough to hold a few pieces of candy inside, a gift card, a small gift or just a note! You can make it for Valentine’s Day, but really it could be used for lots of occasions!  And one of the best parts is that you can get the Party Pandas Stamp Set FREE during Sale-A-Bration with a $50 purchase of Stampin’ Up! products!

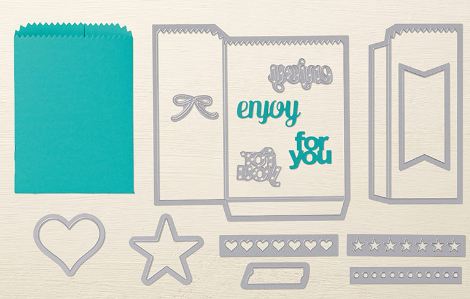
It’s so easy to make a treat bag with the Mini Treat Bag Thinlits Dies.  These dies have always been one of my favorites!  I also like the other pieces that come in the collection besides the two pieces that make up the treat bag.

Mini Treat Bag Thinlits Dies

For the Party Pandas treat bag, I made the treat bag with a paper in the Whole Lot of Lovely Designer Series Paper.  I figured the pink dots could be used for Valentine’s Day but also for other occasions.  I did trim off the top edge of the bag since I was going to tie the bag shut with the Powder Pink 3/8″ Shimmer Ribbon.

The Panda is stamped with the Party Pandas Stamp Set available during Stampin’ Up! Sale-A-Bration!  You can’t buy this stamp set, you have to earn it! You earn it with a $50 purchase, which is easy to do, and then you choose a special Sale-A-Bration product for your FREE product!  I think the pandas are probably one of the most popular Sale-A-Bration sets this year! The panda is just stamped in black ink.  (I used Memento Black.)  Just color in the little heart on the envelope with a pink marker.  I stamped just the word “Love” from the stamp in the set and inked it up with the Melon Mambo Marker.  I got lucky and stamped it in just the right place!

Next I die cut the panda with the Stitched Shapes Framelits Dies and layered on a piece of the Iridescent Myths & Magic Glimmer Paper in the Occasions Catalog. This glimmer paper was also die cut with the larger square in the Stitched Shapes Dies.  The paper almost seemed to take on a little bit of the pink from the paper and the ribbon!

Here is another Mini Treat Bag I made last summer with the Birthday Memories Designer Series Paper.  I put a card inside the bag for the birthday card.  There are so many ways you can use these treat bags!

If you need a little Valentine Treat Bag, you can make one yourself with the Mini Treat Bag Thinlits Dies out of any paper you choose. Best of all, with a $50 purchase, you can choose the Party Pandas Stamp Set for your free Sale-A-Bration item and make all kinds of cute cards and projects with the pandas.

If you like this project and want to share it with your friends, you can click one of the social media buttons right below this post! Or leave me a comment!

Shop Stampin’ Up! Online During Sale-A-Bration!

Make a Valentine Treat Box With a Mini Pizza Box

Valentine Treat Box with a Mini Pizza Box Embellished

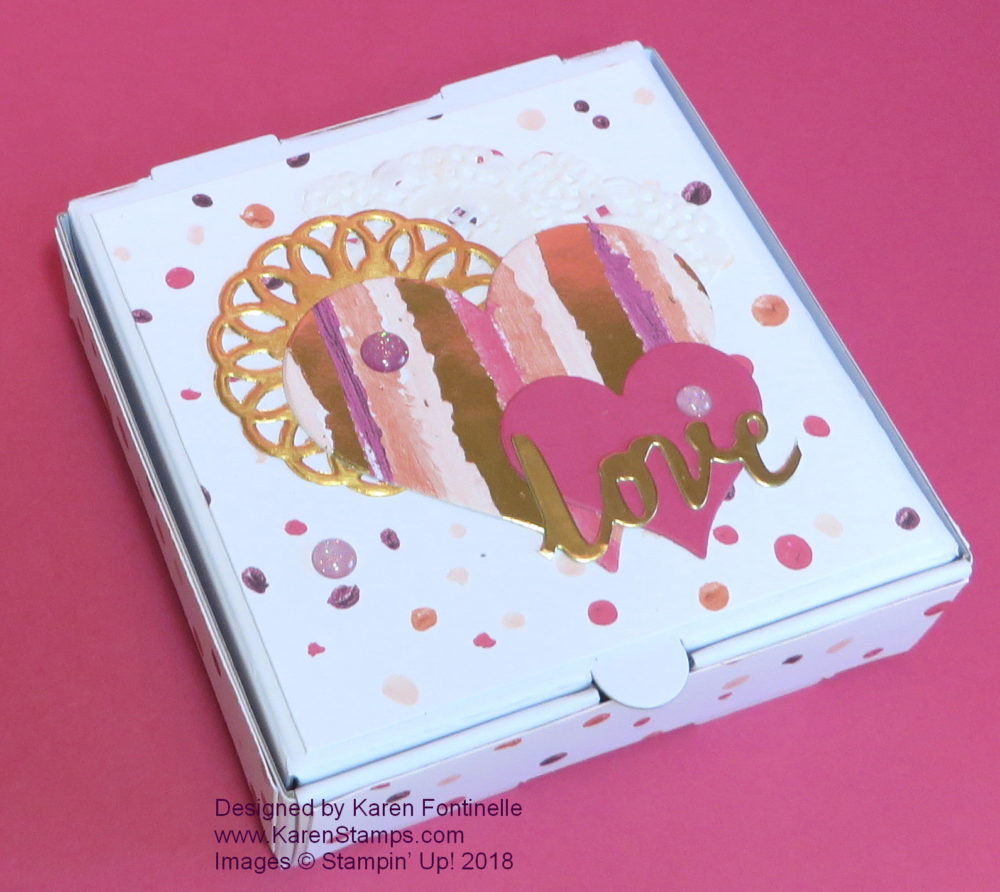
Here’s an easy project for Valentine’s Day or any occasion –  Make a Valentine treat box with a Mini Pizza Box from Stampin’ Up!  Use a small box to decorate with paper and embellish to put a special treat inside!

Did you know you can still purchase the Mini Pizza Boxes that were in the Stampin’ Up! Holiday Catalog?  They are on the Carryover List of products that are still available at least until the next Annual Catalog comes out.  Then we will see which products continue on in the new catalog or if they are retired. Anyway, you will still find the Mini Pizza Boxes in my Online Store! You will find all the Carryover Products listed in the Online Store under Holiday Favorites.

The Mini Pizza Boxes come flat in the package so storage is not a problem.  Then just fold on all the scored lines and assemble the pizza box. Decorate however you like for whatever occasion! For this box, I chose to use the Painted With Love Specialty Designer Series Paper.  Even though one side of each sheet has gold foil accents, today I chose to use the side without the gold foil. Just cut a square slightly smaller than the top of the lid and individual strips to adhere on the sides of the pizza box.  You can make them the same or contrasting.

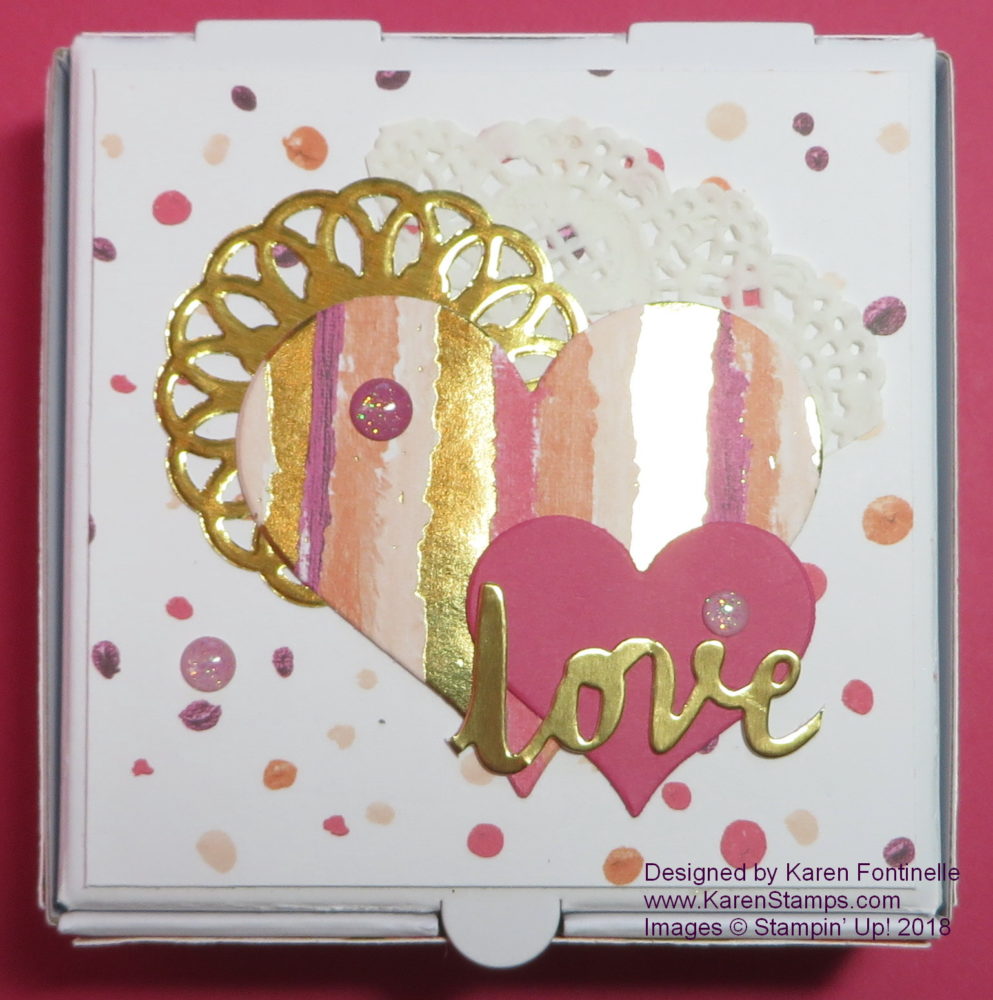
For the top of the box, I chose some hearts since we are close to Valentine’s Day, but hearts can be for anything! I used the Sweet & Sassy Framelits Dies to cut out the two hearts. If you look closely at these dies, you will see there are two styles of hearts – one sweet, and one sassy, I suppose! One shapes curves inward near the bottom and the other shape just has a straight edge to the bottom point. I don’t know which shape is sweet and which shape is sassy, but you can choose! Sometimes I don’t notice these subleties so in case you are like me, I thought I would point it out. Of course you can mix and match the shapes of the hearts however you like!

I also added two kinds of doilies. One is a small gold doily in the Metallic Foil Doilies package.  The other is part of a white doily in the Delicate White Doilies package.  Always good to have embellishments like these on hand for when your project needs a little something And for some extra little embellishments, I stuck on a few of the Glitter Enamel Dots.

At the last minute I added the word “Love” in Gold Foil because I thought the top of the box still needed “something”.  How did I get the word “Love”?  From the Lovely Words Thinlit Dies!  The die cuts out a heart and the word “Lovely”, so I just trimmed off all but the “love” part!  Very easy!  I think it adds just the right thing on this box. The other two words are “hugs” and “friend”.

Do you have some Mini Pizza Boxes that you can make into a Valentine Treat Box with embellishments and designer paper or cardstock?  If not, put them on your Stampin’ Up! order!Valentine Treat Box with a Mini Pizza Box Top Closeup


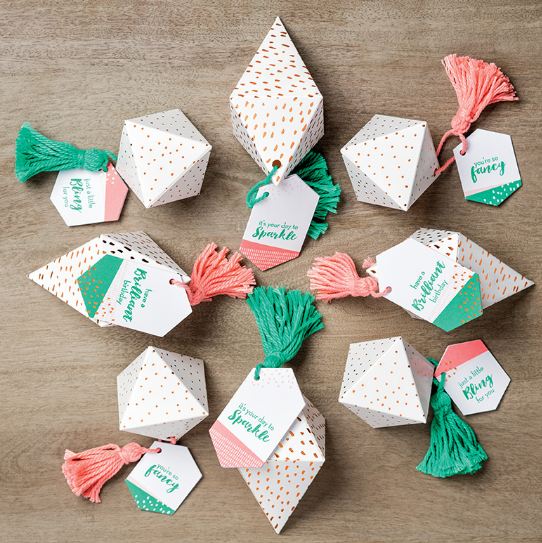
Get a Stampin’ Up! Card Kit: Past Paper Pumpkin What a Gem Kit 50% off!

Past Paper Pumpkin Kit What a Gem 50% Off

You can get a Stampin’ Up! Card Kit, the Past Paper Pumpkin “What a Gem Kit” 50% off through Valentine’s Day!  This is a Paper Pumpkin Kit that was offered a year ago July, and Stampin’ Up! is now offering it at half price! If you are looking for a little kit to have on hand for unique little gifts, this might be it!  Think about Valentine’s Day coming up and how you could use these little gem boxes for a small gift (or cash!) or candy inside. Time to order!

Normally this kit sells for $17.00 in my Stampin’ Up! Online Store under “Paper Pumpkin/Past Kits”, but right now it is selling for $8.50. You must be a Paper Pumpkin subscriber to even see the Past Kits available, I believe, so here is the information about the What a Gem Kit and Refill.

The Kit contains supplies for 8 treat boxes and 12 mini cards.

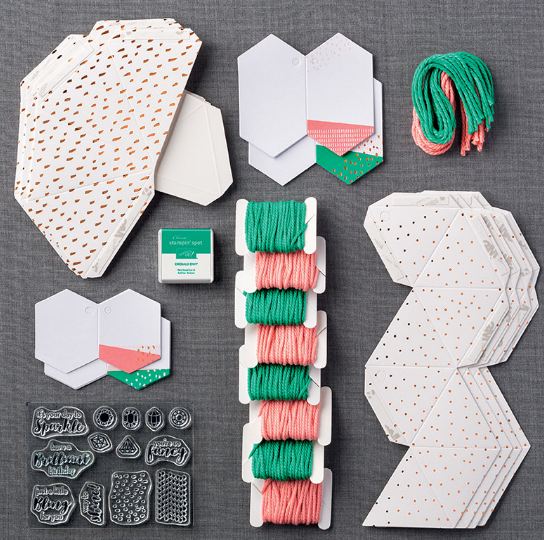
Your kit includes:

• What a Gem Photopolymer Stamp Set

• Emerald Envy Classic Stampin’ Spot® ink

• 4 small gem boxes• 4 large gem boxes

• 12 mini cards (6 ea. in 2 sizes)

• 8 pieces of pink baker’s twine (8″ ea.)

• 8 pieces of green baker’s twine (8″ ea.)

• 4 spools of pink baker’s twine (96″ ea.)

• 4 spools of green baker’s twine (96″ ea.)

Past Paper Pumpkin Kit What a Gem 50% Off

This is an exclusive stamp set for Paper Pumpkin that you can use forever. And of course you can use any of the materials in the kit however you like! If you don’t care for the original project, there are many alternative ideas online that other stampers have come up with!

Now if you need more than 8 treat boxes, also order the What A Gem Kit Refill which has all the supplies from the kit but not the stamp set or ink spot.

Contains supplies for 8 treat boxes and 12 mini cards

Your kit includes:

• 4 small gem boxes
• 4 large gem boxes
• 12 mini cards (6 ea. in 2 sizes)
• 8 pieces of pink baker’s twine (8″ ea.)
• 8 pieces of green baker’s twine (8″ ea.)
• 4 spools of pink baker’s twine (96″ ea.)
• 4 spools of green baker’s twine (96″ ea.)

Now you do have to be a Paper Pumpkin subscriber in order to purchase Past Kits. But if you haven’t joined Paper Pumpkin yet, now is the time!  In my opinion, the kits just keep getting better and better!  And it is so much fun to look forward to that red Paper Pumpkin Box showing up in your mail once a month! Paper Pumpkin is a monthly subscription to an exclusive papercrafting kit from Stampin’ Up!  Each month is a surprise! Some people, I know, do not like surprises, but I think that is part of the fun! I think the majority of the kits are for making cards, but some are for other projects – could be treat holders, a home decor piece, a small album, a holiday item, etc.

You can subscribe on a monthly basis by signing up on my Paper Pumpkin website HERE! But another choice is to order a 3-month Prepaid Subscription in the normal Stampin’ Up! ordering process in my Online Store.  This is a great deal during Sale-A-Bration, going on now, because a 3-month Prepaid Subscription will earn you a FREE Sale-A-Bration product! (Just so you know, if you ONLY order a prepaid subscription, your FREE Sale-A-Bration product will be shipped to you separately like a regular Stampin’ Up! order so you will pay $6.95 minimum shipping on that item. Therefore, I would recommend ordering some extra Stampin’ Up! supplies that you can use along with the Prepaid Subscription so you get your money’s worth out of the shipping charge!)  There are also longer Prepaid Subscriptions available to earn even more Sale-A-Bration items!

Even if you are already a monthly subscriber, you can take advantage of the Sale-A-Bration offer, by just purchasing the prepaid subscription you would like.  Your subscription will automatically send out the prepaid kits monthly and then your normal monthly subscription will resume, you don’t have to do anything.

Everyone will receive an email from Stampin’ Up! to activate the prepaid subscription so watch for that and follow the instructions.  If you have any questions, let me know!

So get a Stampin’ Up! Card Kit, the Past Paper Pumpkin What a Gem Kit at 50% off, until Valentine’s Day, February 14th and/or the What a Gem Kit Refill.

Shop Paper Pumpkin HERE at Stampin’ Up! Online!


Join My Stamping With Karen Mailing List Today

Red Mailbox for Mailing List Sign Up

DON’T MISS OUT!  JOIN MY STAMPIN’ UP! MAILING LIST

Why would you want more email?? Because this is FUN email about STAMPING! And who doesn’t want more ideas for stamping projects?  I know I always like to see new ideas for things to stamp…..even when I’ve seen hundreds of them! There always might be one more that will really inspire me!

Every Tuesday I send out an email.  The first Tuesday of the month is my longer email newsletter with several stamping and papercrafting ideas and complete directions, plus the latest Stampin’ Up! news. This gets you started for the new month!

The other three weeks I send out a shorter email with any updates or recent news or specials, but always another project or two! I even include my favorite or most popular projects on my blog in one of the emails called “The Best of the Blog”. They’re all there in one place for you!

When you sign up for my Mailing List, you will receive an email with a link to a FREE GIFT just for signing up with gift wrap ideas. These are easy things to do with whatever materials you have on hand.  Just change the paper or the stamp and you have an idea for perhaps a last minute gift wrap instead of racing to the store for a gift bag or wrapping paper! Much quicker to make your own!

Just put your name and email in the red box on the right of my blog or click HERE. Then watch for your Welcome Email in your Inbox and free gift!  We’d love to have you!

JOIN MY MAILING LIST FOR STAMPING IDEAS AND STAMPIN’ UP! NEWS!

Frame a Wedding Invitation For a Gift!

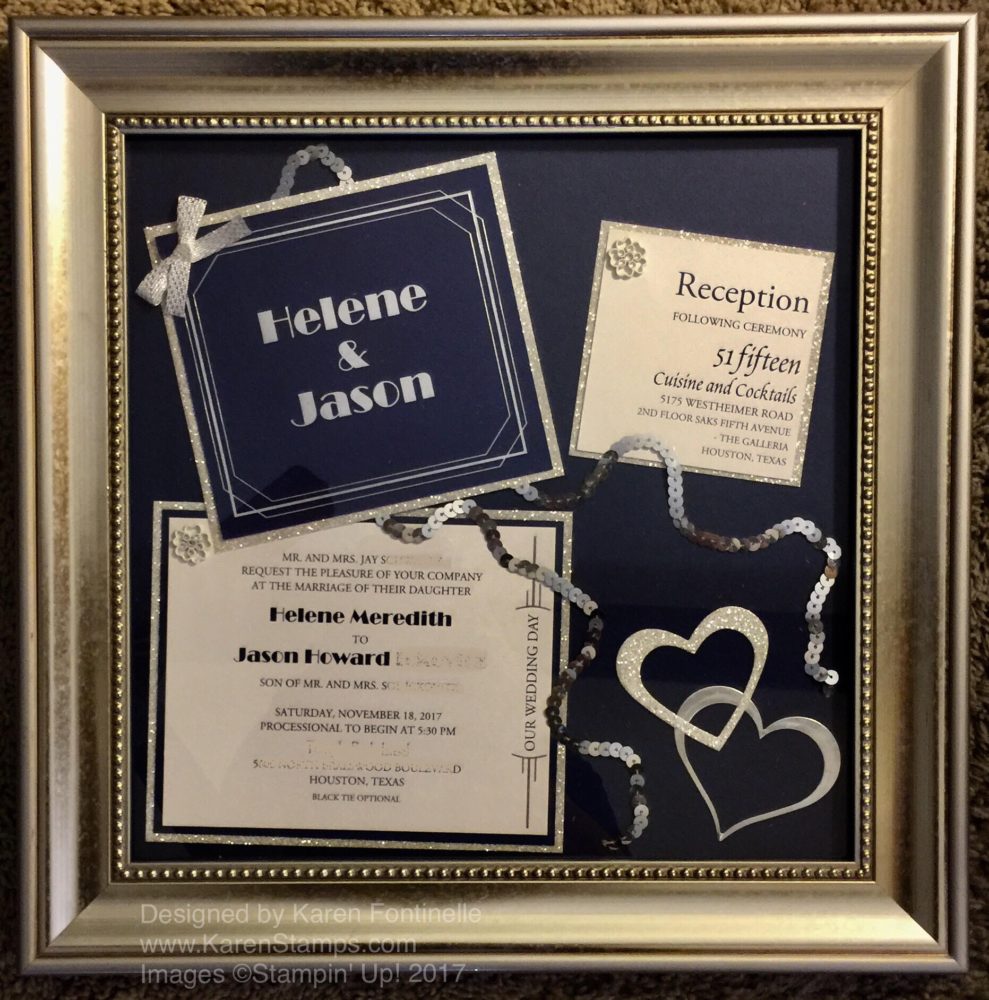
Framed Wedding Invitation

When you are invited to a wedding, you might be able to frame the wedding invitation for a gift to the bride and groom to make a beautiful keepsake! My daughter’s childhood friend got married in November, and the bride’s mother had asked if I could do something “artistic” with her wedding invitation since she likes my cards.

The invitation was three pages with a rivet in the top corner holding all of them together.  At first I was a little stumped with how to decoratively fit these three pages into a frame. Finally I started placing them “catty-wampus” on a 12″ x 12″ page. I started off thinking of a silver background, but once I tried the Night of Navy paper, I really liked that. It was just by accident that I used the Silver Glimmer Paper as kind of a placeholder for my Silver Foil Paper on order!  Once I saw that glimmer paper with the invitation, I loved it and had to use it.

Next I started pulling out any embellishments, ribbons, whatever that I thought I might use on the framed invitation.  You just have to play around with these things and see what you think looks best. It isn’t always in your mind to begin with, at least it’s not in mine! For example, I thought the Sequin Trim would look good somewhere, somehow but I wasn’t getting it quite right until my daughter got home and suggested the layout of the trim that you see. I used some retired silver ribbon to cover up the hole from the rivet and also some retired embellishments to cover the holes on the other pages.  At the very end, some die cut hearts in Silver Glimmer Paper and Silver Foil seemed to fill up that corner just perfectly.

The last step, perhaps it should have been the first, was to find a frame!  Since the embellishments were actually pretty flat, I didn’t need a real shadowbox. The man in the store found this frame for me,  12″ x 12″ and it turned out to be perfect!

I got lovely notes from the bride’s mother and the bride, saying she had opened my present last and that she loved it and said it was the best present to open last! So I think it as a success!

Sometimes your ideas don’t come right away. I began by looking for framed wedding invitation ideas, but I did better when I looked for wedding scrapbook pages! Then you have to play and play with the elements – sometimes it all comes together right away and sometimes you have to give it time to develop! Especially using someone’s wedding invitation, I wanted it to be extra perfect and something she would like really like. This framed wedding invitation really was fun to make and I was pleased with how it turned out! But I could have easily given up and said I had no ideas on something that would look good. Just keep playing, maybe walk away for awhile and come back to it. Give yourself time to come up with what works. Then finally you will see that you have a design you are satisfied with!

You can use your stamping and papercrafting skills in so many different ways, like this framed wedding invitation. And a handmade gift is often one of the best kinds!

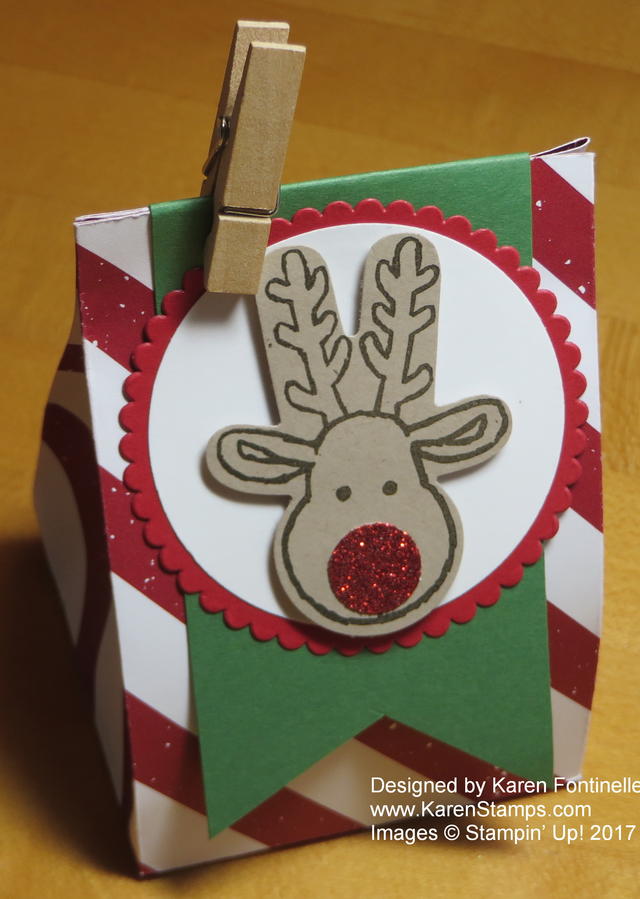
Quick and Easy Reindeer Small Treat Bag

Reindeer Small Treat Bag

If you need a quick and easy little treat, this Reindeer Small Treat Bag is easy to make!    Honestly, it only took me a few minutes before I went out the door!  Nothing like planning ahead!  I got the basic idea from another demonstrator, Angie Juda.

The paper I used for the bag is from the Be Merry Designer Series Paper package. Of course you can use any pattern, any paper, and make one for any occasion.  Keep in mind if there is a pattern going in one direction, think about which way you are cutting the paper!  I had to use the reverse side of the designer paper on another treat bag I was making because I didn’t pay attention to the pattern on the side I intended to use!

Start with a 6″ x 12″ piece of paper.  Score the length of the paper at 2″.  This will become the bottom flaps of the bag. Now turn the paper so you have the 12″ width going horizontal. Score at:  1″,  3 3/4″, 6 1/2″ and 9 1/4″. Crease the score lines. Cut off that tiniest portion under the 1″ section (it’s 2″ x 1″). On all those score lines you just made, cut up from the bottom to the 2″ score line to make the bottom flaps. Apply a strong adhesive to that 1″ flap and adhere the other side of the bag.  If you just fold the paper over in half you will see that it matches up with that 1″ section with the adhesive. Fold in the bottom flaps and use adhesive.  Reach inside the bag with a bone folder or something to press down to make the adhesive stick.

Now you have the basic bag made.  You could leave it open at the top, punch holes and run ribbon through to tie it, fold it over, staple it shut, or use a small clothespin (retired) like I did. Actually I cut a strip of paper to fold over the top and made the flag ends. I did put a little bit of Multipurpose Liquid Glue on the back of the front banner and let it dry, just a small circle of glue, in hopes it would be “reuseable”.

To decorate the bag, I stamped the reindeer from the Cookie Cutter Christmas Stamp Set, gave him a Red Glimmer Paper nose, and punched him out with the Cookie Cutter Builder Punch.  Just turn it upside down for the reindeer!  Then I die cut a circle and a larger scallop circle to mount the reindeer on. Very cute and easy! Quick and easy, I should say, because I was really doing it before leaving the house for an appointment!

Check my blog for other past treat or gift bag ideas if you need some last minute ones! Here’s one with the Mini Treat Bag Thinlit Dies.  Just click on the category you want or write something in the Search box!

I need more time to stamp more holiday projects I wanted to make! But if you want something simple to make, try this Reindeer Small Treat Bag for some candy treats, small gift, or maybe a gift card!