Category Archives: 3-D, Gifts & Things

Enjoy Some Stampin’ Up! Holiday Videos!

The new Stampin’ Up! Holiday Catalog is LIVE!  You can view it online and order from it! Start enjoying all its gorgeousness!  It really is time to begin thinking of the holidays and all the cards and projects we want to make.

Click HERE to View the Stampin’ Up! Holiday Catalog!

Click HERE to See the Holiday Catalog Products Online in the Store!

Summer has ended and now it is almost fall, at least that’s what Labor Day weekend tells us! Here in Houston we still have plenty of hot weather to go, although after the wrath of Hurricane Harvey last weekend, I think we are going to be treated to a little bit cooler weather for a few days. It’s hard to believe a week ago we’d had 3″ of rain with another 32″ to go by Sunday morning. And even as I write this post, people are still being evacuated from places that are still flooding and from places east of Houston where Harvey’s path took it after it hit here. By some grace of God, we are still fine in our home.

That’s why it is so good to have something to help us relax and take our minds off the troubles of the world for a little while. That’s why we say “Stamping is cheaper than therapy!” Of course a lot of stampers and other Demonstrators are still trying to save their stamps and papercrafting supplies from the flood or will have none left when this is all over with.  Stampin’ Up! has already stepped up to help some of those people.

Here are some Stampin’ Up! videos for you to enjoy and to get a better feel for some of the products in the Holiday Catalog!

When you look through the catalog, when you see that little “play” arrow near a product description, that means there is a video for that product or suite of products.

If you do not have a Demonstrator and would like a Holiday Catalog, it seems that our mail service is back up so I can send you a complimentary copy.  Email me at Karen@KarenStamps.com with your contact information and let me know if you would also like a copy of the Stampin’ Up! Annual Catalog.

Be sure to order your favorite products as soon as you can as some could go on backorder temporarily as we have seen in the past!  If something is backordered when you want to order it, I always think it is best to go ahead and add it to your order anyway rather than wait until the stock is resupplied because Stampin’ Up! will send it out to you as soon as they have it.

To check out some other Stampin’ Up! product videos, look at THIS POST.

Enjoy your Holiday Catalog and enjoy your Labor Day weekend!

SHOP STAMPIN’ UP! ONLINE HERE!

The Stampin’ Up! Holiday Catalog is Live Today! Sept. 1st!

The new Stampin’ Up! Holiday 2017 Catalog is LIVE today! Finally the day is here!  Can you believe it? Time for stampers and papercrafters to get going to get ready for the holidays!

Click on Photo to View Catalog!

Click HERE to View the Stampin’ Up! Holiday Catalog!

Click HERE to See the Holiday Catalog Products Online in the Store!

If you are interested in Stampin’ Up! products and want a Holiday Catalog, email me your contact information at Karen@KarenStamps.com.  As of this moment, I don’t know when our regular mail service will be restored after Hurricane Harvey so it might take me until next week to find an open post office and know that it will get out of Houston! The airports opened yesterday so maybe mail will start coming in and out as far as planes are concerned, and by truck as more and more roads completely open up!

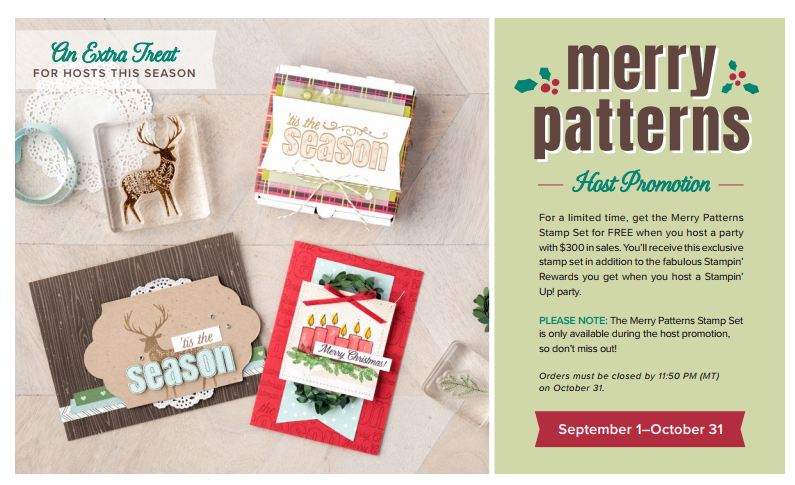
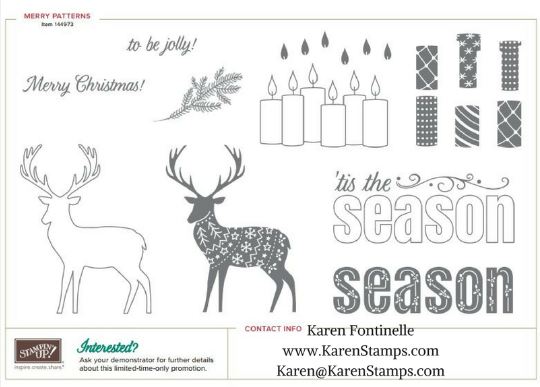
And during September and October, Stampin’ Up! has this special Host Promotion! If  you have your own large order or gather some orders from friends, if your workshop or order total reaches $300 or more, you will receive this FREE exclusive stamp set, Merry Patterns!  This is in addition to your normal Hostess Rewards benefits!

SU Merry Patterns Host and SampleMore information on my blog post yesterday HERE.

SU Merry Patterns Stamp SetGo ahead!  Start enjoying the new Stampin’ Up! Holiday Catalog!  Ordering begins today, September 1st. Get your favorites right away before they are backordered!
Shop Stampin’ Up! HERE!

Handmade Gift Box and Card For a Birthday–For Me!

Handmade Gift Box For a Birthday

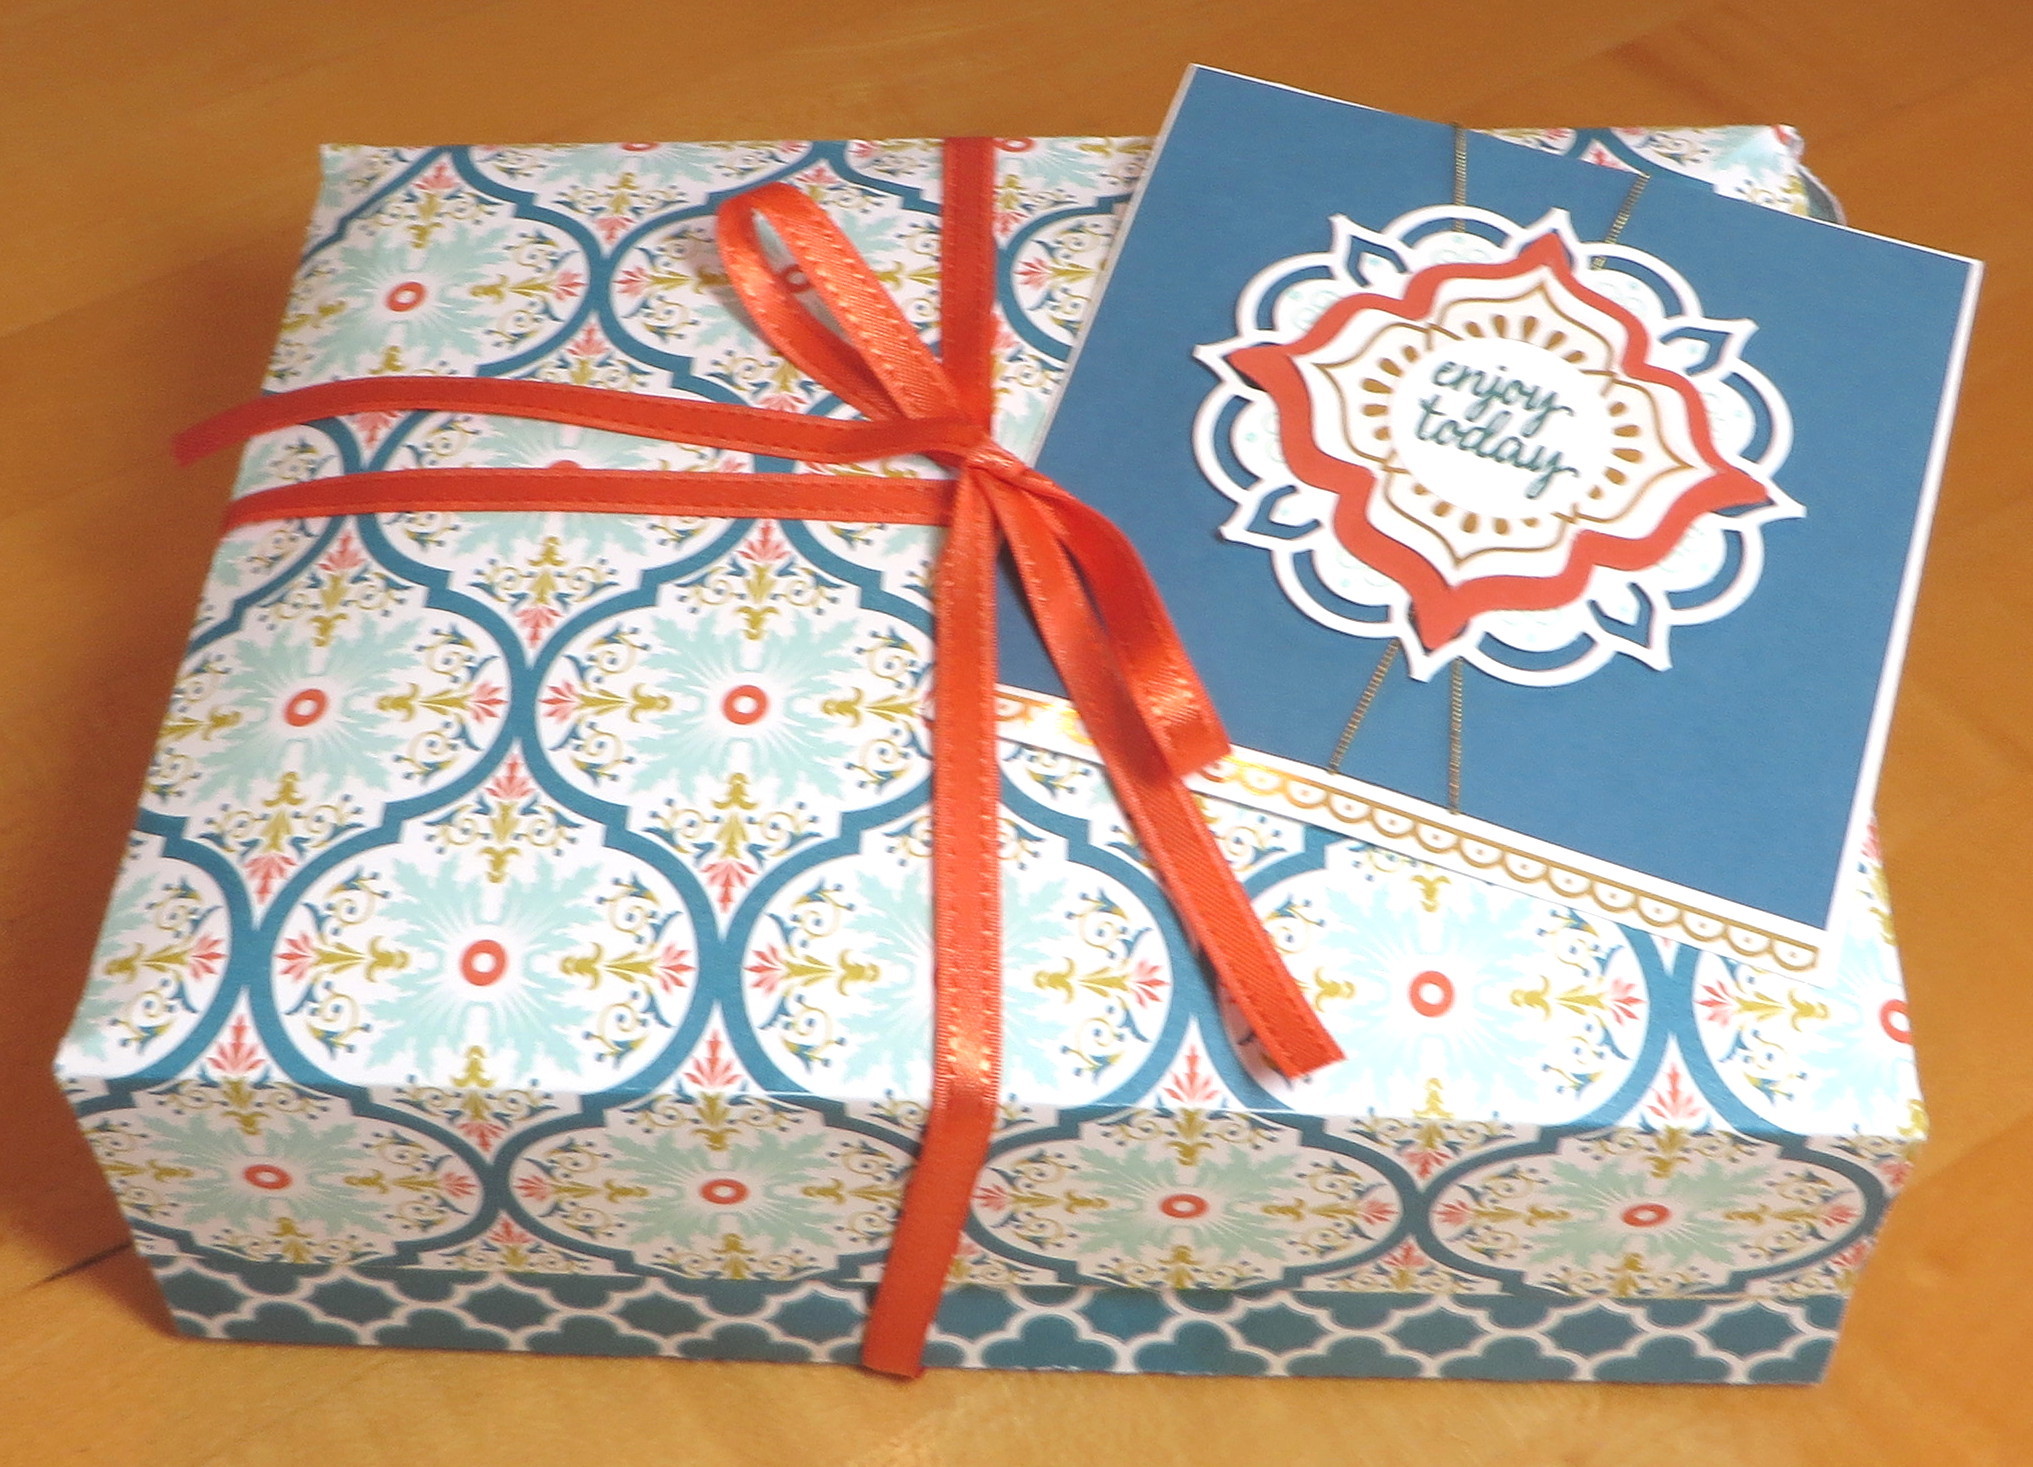
I was so lucky to receive this handmade birthday gift box and card from my friend Jan recently! Such a happy thing to see after opening the mailing box! So many gifts now are given in gift bags, which are fine, so it was an extra treat to see a package to “open”! And of course my friend made it herself plus the card!  So pretty! She makes such beautiful cards and things!

The box is made with the pretty Sycamore Street Designer Series Paper from Sale-A-Bration several years ago. There are lots of instructions online of how to make a box out of paper, very simple. You can find directions to a box I made recently in THIS POST.

The birthday card she made me is made with the stamps, dies, and stickers in the Eastern Palace Suite.  This suite was released the month before the new Stampin’ Up! Catalog came out, but of course it is still available now. You can make very pretty cards and projects with this group of products, and the stickers are such high quality and fun to use.

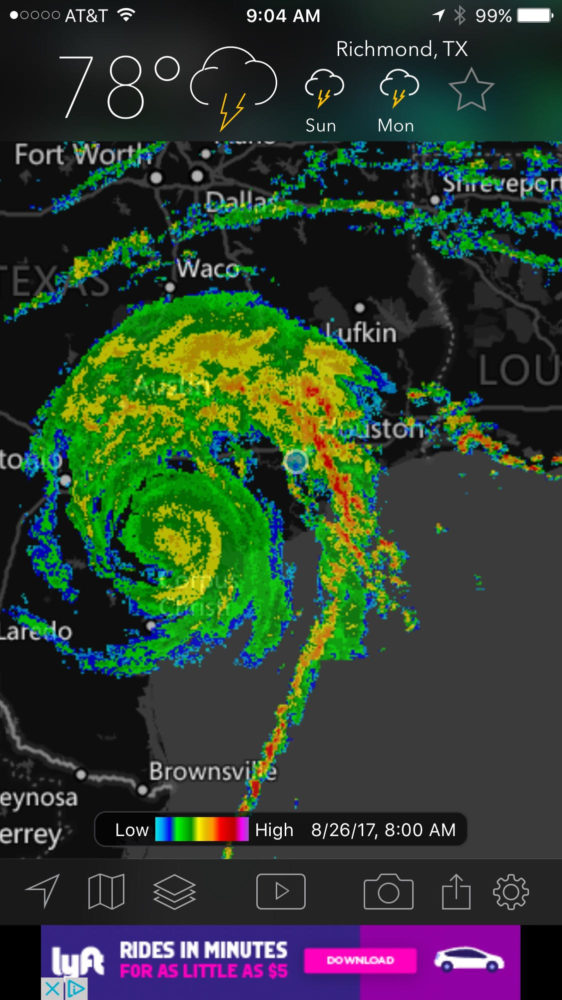
We made it through Hurricane Harvey just fine last evening and overnight. We’ve gotten almost 5″ of rain at our house in our rain gauge. It’s just the outer bands of rain from the hurricane, not anything like the people close to the eye had.  So it might rain lightly or more heavily for a few minutes and then let up. No heavy wind, maybe some light wind gusts, like we had last night when we tried to go for a walk after dinner and misjudged the radar! There was a tornado that struck at 1:00 am several miles from here in a very nice neighborhood with lots of young families, about fifty homes damaged. The pictures on TV look pretty horrible but I’ve heard only one minor injury. They say these tornadoes drop down quickly and go back up quickly, but this one looks like it was pretty strong.  As long as these bands of rain keep moving through and don’t stop over one location they think things will be much better.  Every break in the rainfall gives the water time to drain.  Still a mess and the storm can do whatever it wants, no matter the weather predictions, so who knows!  Our power just blipped off for a second last night but we are very lucky at this moment to still have power, internet and air-conditioning!

Here is a screenshot of the radar on my phone at 9:00 am today, Saturday Aug. 26. I’m the blue dot!

Hurricane Harvey Aug 26 9 am

That’s the hurricane update for now!  Keep your fingers crossed for us!  The worst is yet to come I think for our location and the city of Houston.

Wouldn’t you love to receive a beautiful handmade gift box and card like my friend sent me? Make one for your friend and send it!  It really only takes a little bit of time to make something like this and you know it will be very much appreciated! Love it, Jan!  And the gifts inside! Guess I should say……if you are curious….she sent me a cute candle in a little bottle with a birthday cake scent and a cute boxes of matches – which we may have to put to use this week!! – and a cute little Halloween decoration because she knows I love Halloween!

Don’t forget to use your Bonus Coupons before August ends!!

Enjoy your weekend if you’re not in Hurricane Harvey’s path!

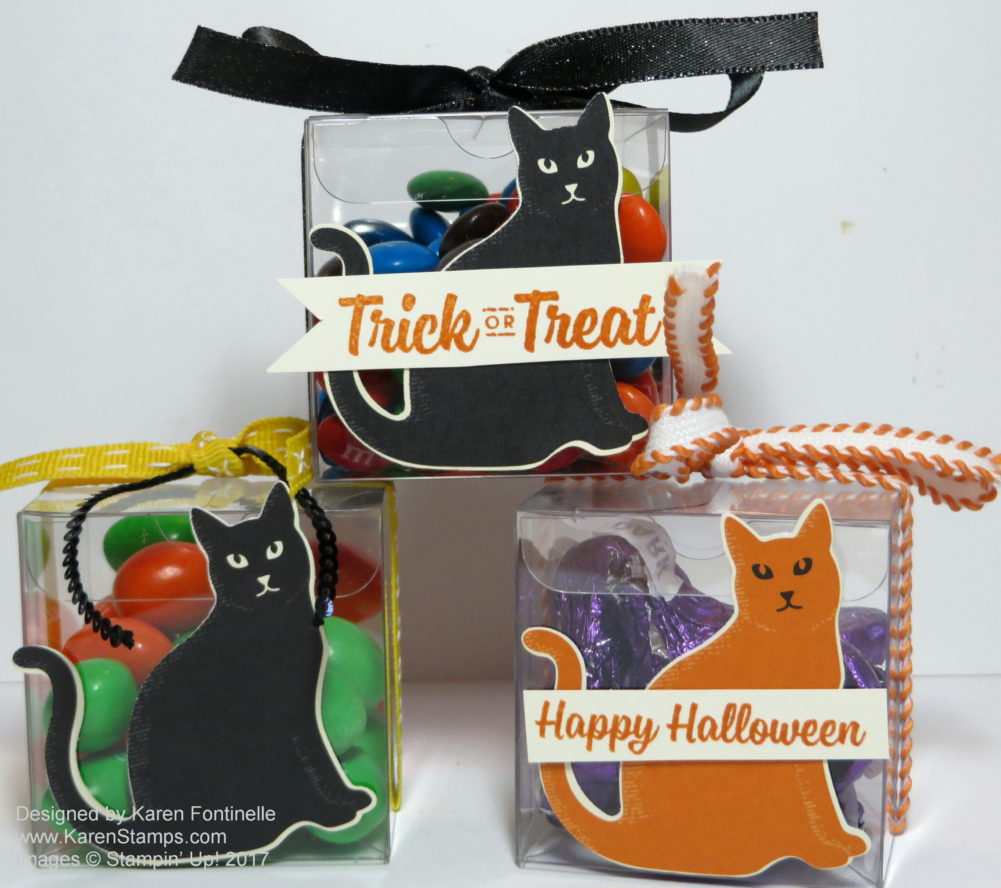
Halloween Tiny Treat Boxes with Spooky Cat

Halloween Tiny Treat Boxes with Spooky Cat

How do you like these Halloween Tiny Treat Boxes with Spooky Cats?  I bet that one of the most popular items in the upcoming Holiday Catalog will be this Cat Punch! If you are interested, I would order it right away when the catalog comes out. What is really great, is that you can punch the cat right out of the Spooky Night Designer Series Paper!  You can also stamp and punch with the Spooky Cat Stamp Set!

If you are ordering in August, I would go ahead and order the Clear Tiny Treat Boxes from the Annual Catalog.  They are currently backordered, but yours will come as soon as they are resupplied, which will be faster than if you wait until they are back in stock and then order.  You get 16 boxes that are 2″ x 2″ x 2″ and are food safe!  And the cost is only $7.50. These are great for having on hand any time you need a little treat for someone or to hold a small gift.  You can decorate them however you like.  You will see this Halloween idea in the Holiday Catalog. I chose to just punch out some cats from the Spooky Night Paper and tie with some ribbon, plus I added a stamped greeting from the Spooky Cat Stamp Set.  So fun!  So many creative possibilities!

This is such a quick and easy Halloween treat to make and will be so fun with the new Cat Punch!!

Remember to use your Bonus Coupons that you earned in July by August 31.

I can’t believe how fast August is flying by!

Bonus Redeem

SHOP STAMPIN’ UP! ONLINE HERE!

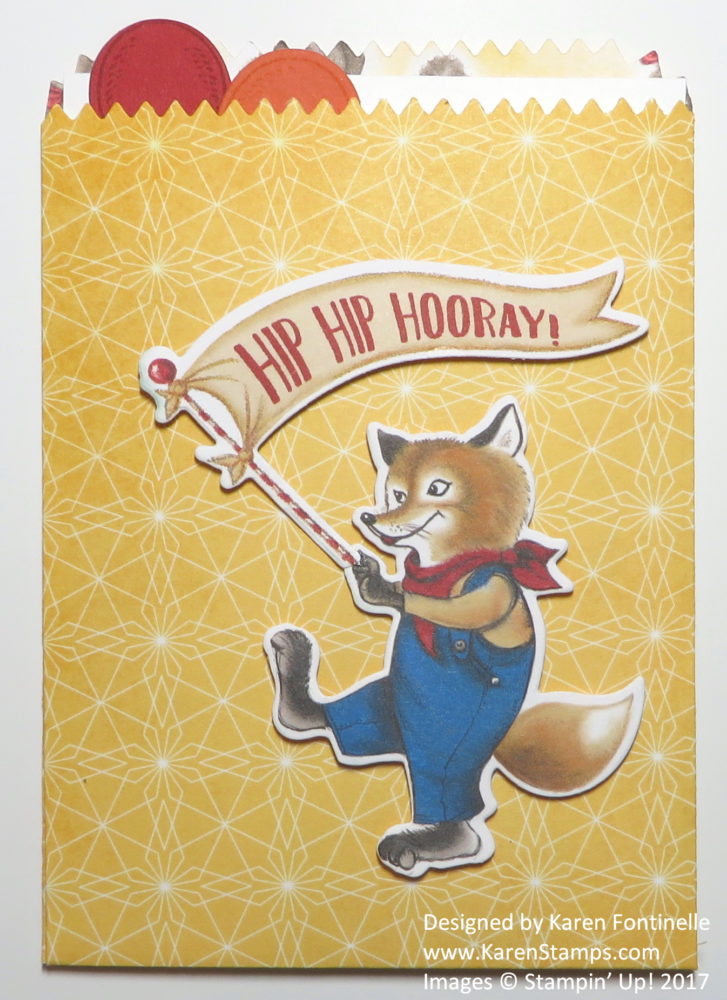
Birthday Mini Treat Bag With Birthday Memories Die Cuts

Birthday Mini Treat Bag

Isn’t this Birthday Mini Treat Bag With  the Birthday Memories Die Cuts such a cute way to send your Happy Birthday wishes to someone?  I have always loved making these mini treat bags and putting a card inside. But now that we have the new designer paper and stamp set in the catalog that I used here, we can do many more fun things with the treat bag!

Did you see the Birthday Memories Designer Series Paper in the new Stampin’ Up! Annual Catalog?  It is so fun and cute and almost a little vintage looking!  Perfect for young children but really for anyone!  I don’t know who wouldn’t smile upon receiving a card made with pieces of this paper.  The only problem with the paper is that you will hate to cut into and use it!

What’s even better is that there are die cuts that match the designer paper! The Birthday Friends Framelits Dies  will cut out several of the images in the paper, like this foxy guy and his banner!  I also stamped on the banner with the coordinating stamp set, Birthday Delivery Photopolymer Stamp Set.  Lots of cute images in the stamp set as well.  If you want to save 10%, get the Birthday Delivery Photopolymer Bundle that has the stamp set and framelit dies together.  You WILL want both!

You’ll be able to use this Birthday Memories Designer Paper and Birthday Delivery Stamp Set for more occasions that just birthdays.  It will be cute for party favors, invitations, and many other projects!

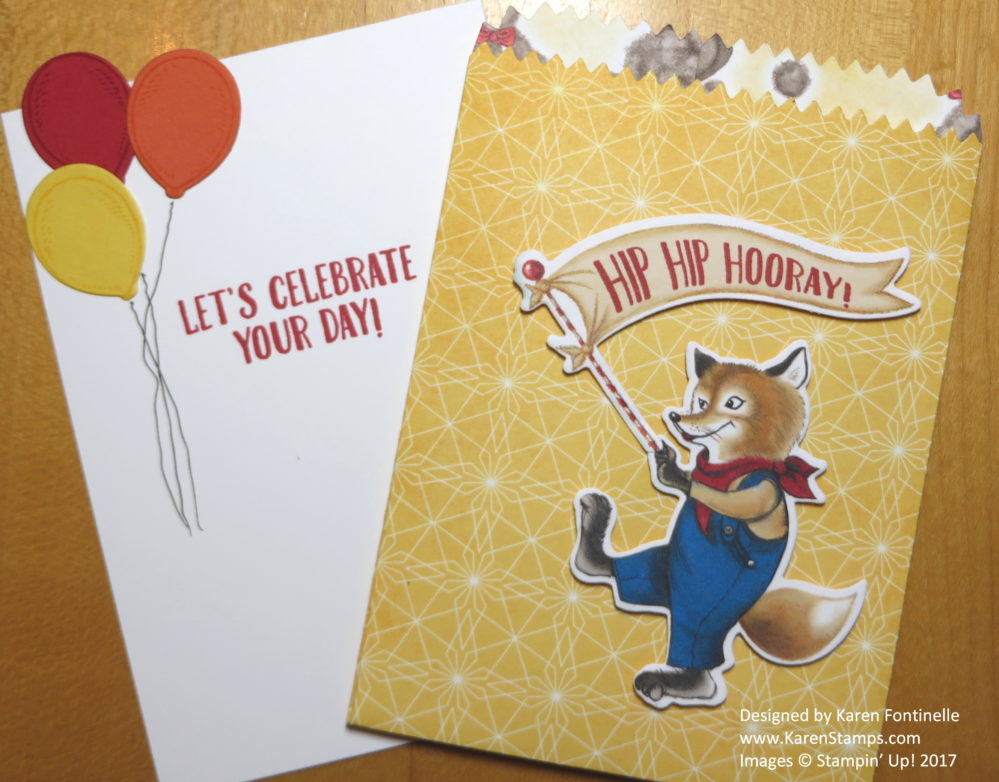
Birthday Mini Treat Bag Inside Card

This is what the inserted card looks like.  I stamped the balloons and die cut with one of the framelit dies in the set.  I purposely made them stick up at the top off the card a little bit so when it is inside the card, you will see the edge of the balloons and know to pull out the card. You can see how you could easily make this into a birthday party invitation or some other congratulatory occasion.

And let’s not forget to mention the Mini Treat Bag Thinlits Dies!  These have been in the catalog before and I have so much fun with them!  To make the bag, there are two dies, one cuts the front of the bag and part of the back.  The other die cuts the other half of the back portion plus the fold that adheres to the front of the bag. It’s so simple, plus the die set comes with so many other fun pieces. I chose to make this mini treat bag simple by just adhering the die cuts from the Birthday Memories Paper on the front.  I could have done lots more embellishing, but I thought this was cute enough as is!  There are even other options to make besides a basic gift bag, such as I made in THIS POST.

Be sure to check out the Birthday Memories Suite in the catalog.  You can order the Bundle and Designer Paper plus any other embellishments that you want so that you can make some fun cards and projects like this Birthday Mini Treat Bag With Birthday Memories Die Cuts.

Shop Stampin’ Up! Online HERE!

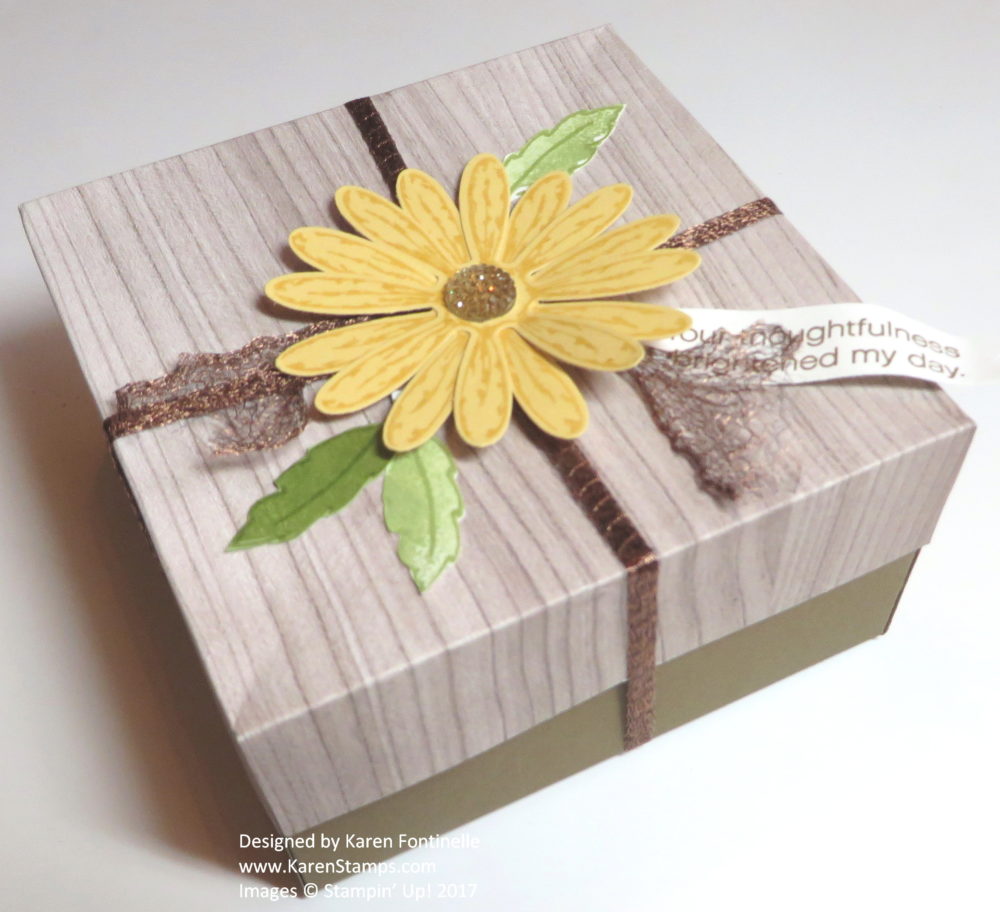
Handmade Daisy Gift Box

Handmade Daisy Gift Box

Make a Handmade Daisy Gift Box  like this one or similar when you need a small gift box quite easily!  Sometimes we need a gift box or gift bag in a hurry and it’s really quite easy to make one yourself rather than take all the time to run out to the store.

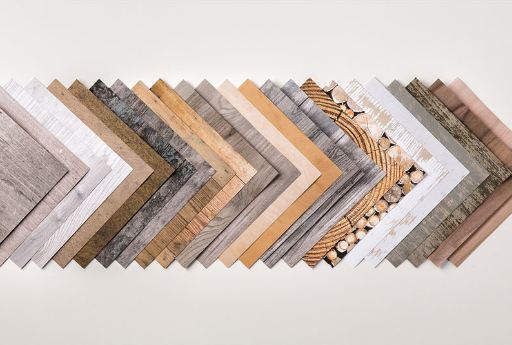
This gift box was made with a paper from the Wood Textures Designer Series Paper Stack. This paper has natural, rustic patterns in so many designs on 6″ x 6″ sheets.  You will want to have this in your “stash” because woodgrain works very well as a background or backdrop for your projects. The woodgrain, whether dark or light, works as a neutral when you are creating something.

Wood Textures

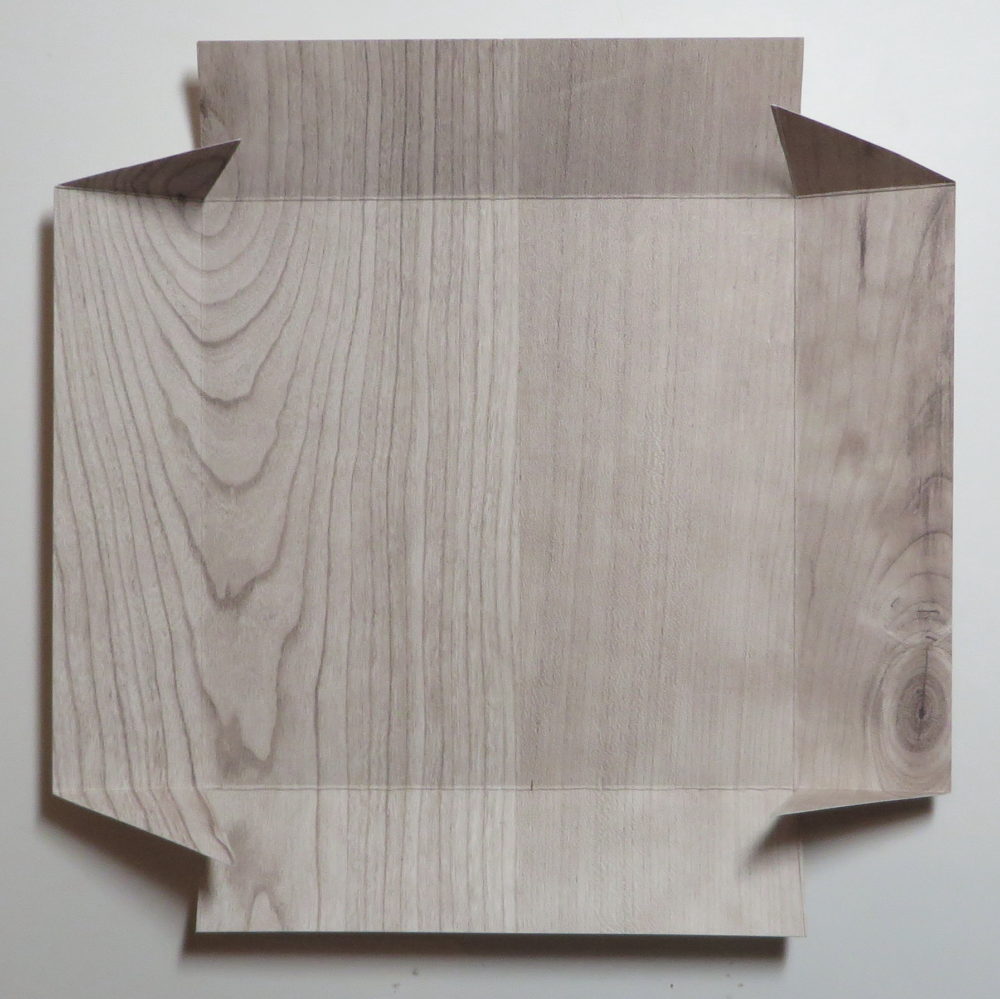
To make the box lid, I used the full 6″ x 6″ paper because I wanted the box to be 4″ x 4″ with a 1″ border to fold down for the lid. So 4″ across for the box plus 1″ on each side equals 6″. Then I scored on all 4 sides at 1″ to make the lid. I trimmed off the corners at an angle just to make it easier for fold in. It’s not absolutely necessary to do, but I like to.  Then cut up on the little score lines up to the score line above on two opposite ends.  That makes the tabs to fold to form the lid.

Box Lid

To make the box bottom, I did the same thing but with a piece of Soft Suede Cardstock. Now you can make it the exact same size, but I made the bottom just a “smidge” smaller, which means I cut the paper just 1/16″ inch shorter on each side.  This makes the lid fit better without having to squeeze the two pieces to fit.

Now you can have fun decorating your gift box!  I tied mine with the interesting and fun 1/4″ Copper Trim. The fun thing about this ribbon is that you can pull the sides apart to make it wider and with a different look, as I did to the ends of the ribbon.  If you don’t like it, you can just yank on the end of the ribbon and it will go back to the original shape.

The daisies are stamped with the Daisy Delight Stamp Set with So Saffron Ink on So Saffron Cardstock and then punched with the now-back-in-stock Daisy Punch.  I also stamped a few leaves and cut them out, plus the greeting that was in the stamp set.  And for a finishing touch, why not a Gold Faceted Gem?

Here is another post where I made a Christmas gift box, a larger one, out of 12″ x 12″ paper. Click HERE!

This Handmade Daisy Gift Box can be for most any occasion and is easy enough to make! Your recipient will appreciate that you made the box yourself and just for the occasion!

SHOP STAMPIN’ UP! ONLINE (and remember to use your Bonus Coupons from July!)!


4th of July Stampin’ Up! Card Ideas

4th of July Flag Card with Swirly Scribbles Thinlits

HAPPY 4th of JULY!!

If you are still looking for some last minute 4th of July card ideas, here are some from past years, plus you can check the last two days on my blog!

4th of July Fireworks with Swirly Scribbles Thinlits

Flower Patch 4th of July Fireworks Card

4th of July Fireworks Card

4th of July Uncle Sam Scalloped Tag Topper Treat Holder

Paper Pumpkin Patriotic Pinwheel Wreath

I hope you and your family are having a wonderful holiday!  If you need a last minute 4th of July card or project idea, I hope you found some inspiration right here!

HAPPY INDEPENDENCE DAY!

4th of July Patriotic Crate With Daisies

4th of July Patriotic Crate With Daisies

I saw a cute little white wood crate stamped with stars that inspired me to make this 4th of July Patriotic Crate With Daisies. I used Real Red Cardstock and aged it a little bit with some Soft Suede sponging on the edges and even the front and back. I loved how just the red crate turned out by itself!!  The Wood Crate Framelits Dies really make it easy to make this box for treats, gifts or little notecards. So cute!!  Check out the video below on how to use these dies!

To make my crate look patriotic for the 4th of July, I die cut some stars from the same framelits package out of the Gold Foil Sheets, Whisper White and Night of Navy paper. You want to be careful glueing something to the crate because of the slits in it, in between the “boards”, so something doesn’t stick from the inside!

Next I stamped daisies in red, white and blue to go in the crate.  I used the Daisy Delight Photopolymer Bundle to stamp and punch. The Daisy Punch is back in stock now after being SO popular that it was backordered for awhile! You will want to get one on your next order!

When you stamp the daisy, stamp it with one petal straight down, close to the edge of the paper, so that the punch will be in the correct position. Otherwise you will have to cut around your stamped image to get the punch to fit in right.  A lot of times the punch looks like it is never going to fit around that daisy exactly right, but if you are patient and just keep working with it, you will get it in the perfect position to punch the daisy.

To make stems, I covered a piece of scrap cardboard with some Emerald Envy green cardstock and then cut that into thin strips. I glued one end to the back of the flower and folded the other end back so there would be something to glue to the bottom of the crate. To make the filler stuff for the crate, I cut very thin strips of the green cardstock and then crumpled up the whole pile of it with my hands to get it “smooshed”.  You could also use a Paper Crimper.

Fun project!  Certainly the Wood Crate Framelits Dies can be used for lots of different occasions and purposes!  Here is another project I made in the beginning when I received the dies:  Click Here!

Watch this Stampin’ Up! video for more ideas!

It’s not too late to make a 4th of July Patriotic Crate With Daisies for your home 4th of July decorations, but if you don’t have the framelits yet, save this idea for when you do order them and then make this crate before you forget!

Shop Stampin’ Up! in July and Earn a $5 Bonus Coupon with Every $50 in Merchandise!

Uncle Sam 4th of July Patriotic Favor

Uncle Sam 4th of July Patriotic Favor

If you are going to a 4th of July party or picnic and want to take a little something, or if you just want an easy decoration for your house for the 4th, try making this Uncle Sam 4th of July Patriotic Favor.

This favor/home decoration came about when my husband asked me if I could use this tin for anything. I think he got it for Christmas with some kind of treats inside. At first I said no because my daughter would make me throw it away on her next visit after helping me organize most of my craft stuff back in February. But in the next second I thought, maybe I can make something out of that for the 4th of July!  Yes, a crafter’s mind always at work when there is something ready to go in the trash!

I simply took a piece of Real Red cardstock and wrapped it around the tin after adhering some white strips of Whisper White cardstock cut about 1/2″ wide. Then I wrapped around about a 3″ wide strip of Night of Navy blue cardstock around the bottom.

For the Uncle Sam, I die cut a scalloped circle and a smaller regular circle with the Layering Circle Framelits Dies for his face and his beard.  You can choose whichever sizes you like for your project. To make his face, I also punched a 1/2″ Circle for his nose, and then sponged some Blushing Bride ink on his face and nose and added a bit of Crumb Cake ink as well. Just use a marker to make the eyes and mouth.

Uncle Sam’s hat is just a scrap piece of Whisper White and a few strips of Real Red with a brim punched from the Classic Label Punch out of Night of Navy cardstock.

And then I found several different stars already punched in my box of scraps so I used those around the tin.  Just use what you have to decorate your creation!

Put some cookies or treats inside a cello bag and drop inside the decorated tin along with some red shredded paper or just use as a piece of 4th of July home decor!   I have a few 4th of July decorations!  You knew I would, right?!

Patriotic Uncle Sam 4th of July

It’s fun to have a few decorations around even for holidays like the 4th of July or to take as a little gift to the hostess of the pool party, picnic, or family gathering.  See if you can make an Uncle Sam 4th of July Patriotic Favor out of something you already have….a paper towel roll, a tin, a Pringles can, some other kind of can, whatever you have!  It’s fun!

Making a 2-4-6-8 Box With Foil Frenzy Paper

2 4 6 8 Box With Foil Frenzy Paper

One of the beautiful new papers in the new Stampin’ Up! Catalog is the Foil Frenzy Specialty Designer Series Paper and is perfect for making boxes and bags for gifts such as this 2-4-6-8 Box.  This 12 x 12 kraft paper has foil designs printed on it, twelve sheets with 1 each of 3 single-sided designs in 4 colors. It is beautiful and you will want it in your stash for making that special gift bag or box or card.  The dots on this box I made are all gold (In case they look green in the photo with the glare!).

I punched two holes in the top, after pinching the top together and the sides in a bit. The ribbon I chose is the gorgeous Gold 3/8″ Metallic-Edge Ribbon.  You will want to add this ribbon to your order for those really special projects…..well, if you can hold off on not using on every project because it is so elegant!

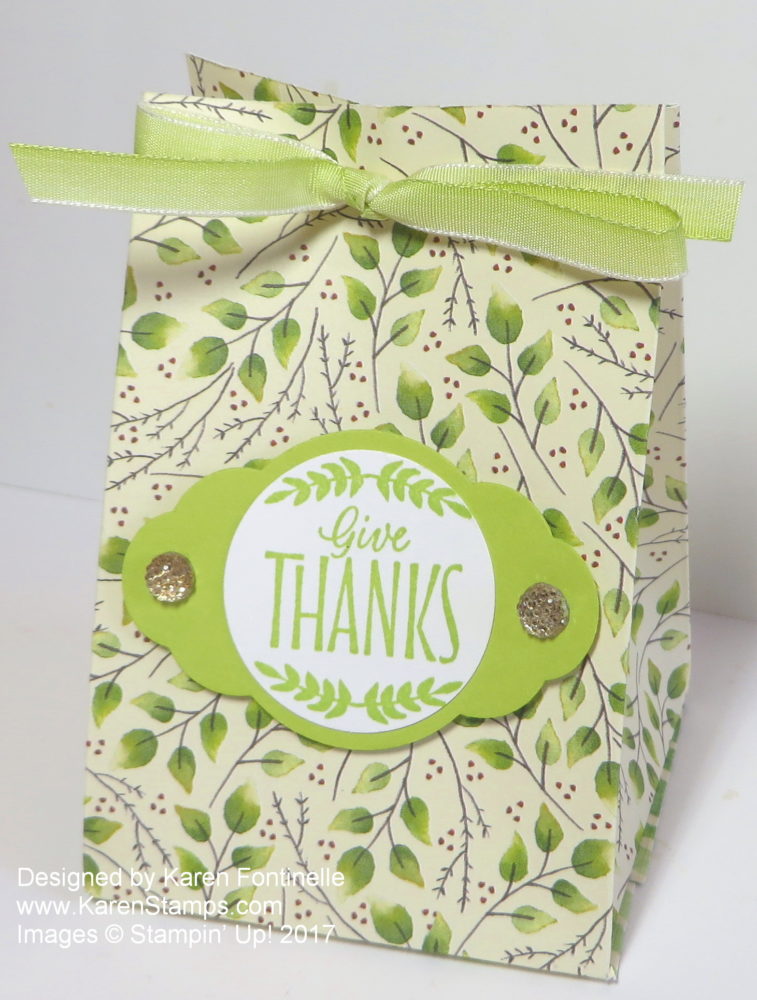
The greeting on the front is stamped from the Label Me Pretty Stamp Set and punched out with the 1 3/8″ Circle Punch. I adhered it to a piece of Gold Foil punched with the Pretty Label Punch. (This punch is presently backordered until July 10th but you can still order it.) Actually you will want to get the “Bundle”, the punch and stamp set, so you can save 10%! And you’ll just want both of them even if you weren’t saving 10%! For another embellishment, I adhered two Gold Faceted Gems on each side of the label.

Here’s how to make the 2-4-6-8 box:  It’s very easy and has been around a long time. No pattern required!

  • My box is made with an 8 1/2″ x 8 1/2″ piece of paper.  You can vary the measurements depending on the size you want your box. If your paper has a pattern, decide where the bottom of the bag is. Score at 2″ on one side which will become the bottom tabs.
  • Then turn the paper the other way and score at 2″, 4″, 6″ and 8″……hence, the 2-4-6-8 box! That will leave a 1/2″ edge on one side of the paper. This is where you will put a strong adhesive later on.
  •  Now that the box is scored, hold the paper with the bottom portion at the bottom and cut up to the horizontal score line on each score line to make the bottom tabs. That little 1/2″ piece on the bottom should just be cut off.
  • Crease all the score lines and see how the box will go together.
  • Apply a strong adhesive along that 1/2″ edge, preferably Tear & Tape or Multipurpose Liquid Glue. If you lay the box flat on the table, you can just fold the other side over to adhere.
  • Figure out where the backside of the box will be so the seam doesn’t show from the front. Fold the back tab at the bottom in and fold the other tabs in as well. If they don’t line up perfectly, just trim with a scissors. Use a little bit of glue to hold the tabs in place for the bottom of the box.
  • Put your gift inside, punch holes in the top for ribbon to tie shut or leave open, add a handle, whatever you like. Embellish the box if you like.
  • You can vary the measurements, making the box shorter or taller.  The bottom tabs need to be the same width as the side panels of the box. Then you need that little 1/2″ strip at the edge of the paper so you have to consider that math as you figure out the sizes.

2-4-6-8 Box Inside Scoring

In the photo below you can see that 1/2″ strip where I applied the Tear & Tape Adhesive.

2 4 6 8 Box Tape on Side

Now that you know how to make a 2-4-6-8 box, go try one yourself!  You might like to use computer paper on your first one to see how it works.  Use the Stampin’ Trimmer or the Simply Scored scoring board to to do the scoring.

If you make your 2-4-6-8 Gift Box or Gift Bag with the Foil Frenzy Specialty Designer Series Paper, you will have a special box indeed!

Shop Stampin’ Up! Online 24/7!

For Summer Notecards and Gift Bags From Paper Pumpkin by Stampin’ Up!


What says summer more than a cute melon theme for some gift bags and notecards?! This is the June 2017 Paper Pumpkin Kit from Stampin’ Up!, all designed for you and ready to create in a cute box with everything you need for the project!  Going to a friend’s house for a swim party or barbecue?  Just stick a little treat in one of these gift bags or wrap up some of the notecards for a little hostess gift.

Paper Pumpkin is by subscription only, so get signed up now so you will be on the list for the July Kit to be shipped to you mid-July.  Once you are a subscriber, you can also look at any past kits or refills that Stampin’ Up! is offering if you want to pick up something you missed.

You can subscribe by the month or if you are ordering regular products from Stampin’ Up!, choose a prepaid option in the Online Store and perhaps boost your order total to earn Stampin’ Rewards! You will receive an email detailing how to set up your Paper Pumpkin account and a code to put in the Promo Code box so it will identify you as a prepaid customer.

JOIN PAPER PUMPKIN HERE TODAY!

or

BUY A PREPAID PAPER PUMPKIN SUBSCRIPTION HERE!

Either way, the fun will arrive in your mailbox around mid-month. No risk, no obligation. Skip a month now and then if you need to. Get an extra kit for a friend or loved one. The Paper Pumpkin fun never ends!


View the Whole Lot of Lovely Designer Series Paper

Whole Lot of Lovely Designer Series Paper

One of my favorite new designer papers from Stampin’ Up! in the new catalog is called Whole Lot of Lovely. Now I say one of my favorites but, so far, I think every pack of paper I have ordered is my favorite!  I think Stampin’ Up! did a bang up job this year on the designer paper. And you know that in person, every paper looks even a million times better than just the picture in the catalog.

Here is the rest of the paper.  I guess I didn’t count evenly!  There are 12 sheets of paper in the package, double-sided.

Whole Lot of Lovely Designer Series Paper

There’s no way any photo can really show how pretty this paper is.  I see lots of potential projects with each different pattern.

If you look in the catalog or on the back of every package, you will see the colors listed that coordinate with these designer paper.  I find it most handy to look on the back of the package for the coordinating colors, but since they are written in pretty small print, I usually just take a Sharpie marker and write out the colors, larger, on that white chipboard that backs the package.  That way I can see at a glance what colors I might us rather than having to grab my reading glasses!

These are the coordinating colors:  Basic Black, Crushed Curry, Pear Pizzazz, Pool Party, Powder Pink, Soft Suede, Tangerine Tango, Tranquil Tide, Whisper White.

If you missed the easy little gift bag I made yesterday using the Whole Lot of Lovely Designer Series Paper and the Gift Bag Punch Boardclick HERE to see my post or click on the photo below.

Make Your Own Gift Bag With the Gift Bag Punch Board

Check out all the beautiful designer series papers in the new Stampin’ Up! Catalog!


Make Your Own Gift Bag With the Gift Bag Punch Board

Make Your Own Gift Bag With the Gift Bag Punch Board

When I received my new catalog order the other day, as I quickly skimmed through the papers in the Whole Lot of Lovely Designer Series Paper, this pattern with the black background and little flowers just struck me that it would make a pretty gift bag! Of course the inside with the white polka dots is also really cute….which side to use??!

Instead of looking up directions online for how to measure, score, and fold  the paper to make a gift bag, I pulled out my Gift Bag Punch Board. The instructions are printed right on the punch board so I didn’t have to go looking for them. A scoring tool is tucked right into the board in a storage slot.  You can make the bag so that the sides are just straight, or you can score it as you make it so that the sides are gusseted and fold in a bit on the sides. This bag is basically a 3 3/4″ square size, but you can make various sizes with the punch board.

To finish off the bag, I just punched two holes in the top and threaded some new Pool Party Shimmery Ribbon through.  Very pretty ribbon! I also made a little tag using a stamp in the Label Me Pretty Stamp Set. I die cut that with the Stitched Shapes Framelit Die and layered the tag on a die cut scalloped circle made with the Layering Circle Framelit Dies. I used some Linen Thread to tie the tag onto the bag.  Linen Thread is a valuable product to have in your collection to use in many ways, sometimes as a visible accent and sometimes are something that doesn’t detract from the rest of the design.

Here’s the Stampin’ Up! video you can watch about the Gift Bag Punch Board and see how to use it.

I urge you to take a good look at the new designer papers in this new Stampin’ Up! Catalog because I think they are especially beautiful this year! I would say this Whole Lot of Love Designer Paper is my favorite, but then I’d say the Delightful Daisy paper is my favorite, but then I’d love the Foil Frenzy Paper, too!  So look them over and let me know which ones are your favorites!  Then try making your own gift bag with one of your favorite papers and the Gift Bag Punch Board!

SHOP ALL THE NEW PRODUCTS AT STAMPIN’ UP! ONLINE!

Watch Some New Stampin’ Up! Product Videos!

I’m sure with all the excitement over the new Stampin’ Up! Catalog, you would enjoy watching some new Stampin’ Up! product videos to find out more about the great things you are seeing in the catalog!


For yourself or someone who doesn’t have a lot of craft supplies and would enjoy making all these cards from one kit! You can even get a refill! The Soft Sayings Card Kit is on pages 10-11 of the new catalog.


You might recognize this Oh So Eclectic Bundle and Suite from the samples on the front of the catalog.  You will find the beautiful papers and everything in this suite on pages 132-33. One of my favorites!  It’s on my order!


While I don’t have THIS Embossing Paste, I have used a similar product as few years ago on picture frames in THIS POST and THIS POST. At that time, it didn’t occur to me to use it on cards! You can color the paste with ink refills if you want, and use the Decorative Masks (stencils) and Palette Knives to apply the paste.


Isn’t this Love Today Planner Kit the cutest thing?!!  I just love the designs on the pages and the colors! I’m just wondering, for myself, would I use a planner? If I’m not sure I would use it as a planner, though, I could use it as sort of a daily or weekly scrapbook or journal. Sara Douglass at her OnStage demonstration, used it more as a scrapbook/journal writing in what she or her family did that day or week, added a few small photos, embellishments, etc. Let me know what you think about the Planner! Planners are certainly a hot, trendy item out there in the world! The dates are not preprinted in this planner so you can start it now, not wait until January, and you can buy the Refill for another year.

If you are relaxing on the weekend or if your Saturday is a rainy day like ours might be here in Houston, enjoy watching these Stampin’ Up! videos showcasing the new products just like you are at the movies!

Everything is ready for you to order now from the new Stampin’ Up! Catalog!

Just SHOP HERE!

Make a Cute Paper Crate With the Wood Textures Suite

Make a Cute Paper Crate With the Wood Textures SuiteSoon you will be able to make this very cute little paper crate with the Wood Textures Suite, coming in the new Stampin’ Up! Catalog! This was my first try and to put something inside, I grabbed two of my Mother’s Day chocolate covered strawberries and put them in a little bag and stuck them in the crate! The crate is small but large enough to cram two gigantic strawberries inside!

The Wood Textures Suite contains a stamp set, Wood Words, and the Wood Crate Framelits Dies plus two ribbons, cello bags and the Wood Textures Designer Series Paper Stack. The patterns in the paper stack are all wood grain looks of various kinds on both sides of the paper, so when you have the wood grain on the outside of the crate, it will also have a similar wood grain look on the inside. The stamp set is very cute and useful with a very pretty flowery stamp for perhaps making note cards to go in the crate or even to decorate the crate.  There are quite a few words in the set to go with the crate or notecards. Lots of creative possibilities with this whole suite. The ribbon I used to tie my cello bag closed is the 1/4″ Copper Trim.  This is a real interesting ribbon because you can leave it as is, like you see at the top of my bag, or you can pull it apart to make it wider and give it a different look.  If you don’t like it, you can pull it and it will go back to its normal shape.

For some decoration on my crate, I just cut a Delicate White Doily in half and put it draped over the front and the back. If you want stamping on the crate, be sure to stamp the paper before you assemble (note to self!)!

If you are interested in Stampin’ Up! products and need a new Stampin’ Up! Catalog which will go live on June 1st, please send me your contact information and I will mail you a complimentary catalog. If you already have a Demonstrator you want to continue working with, she will have a catalog for you.

In the meantime, be sure to check out the Retiring Products and the Clearance Rack. There are some great bargains on the Clearance Rack, things you can use for upcoming holidays and other stamping projects.  But hurry, because I see there are not as many items left any more!

SHOP STAMPIN’ UP! ONLINE TODAY!