Category Archives: 3-D, Gifts & Things

Valentine Sending Love Small Treat Bag

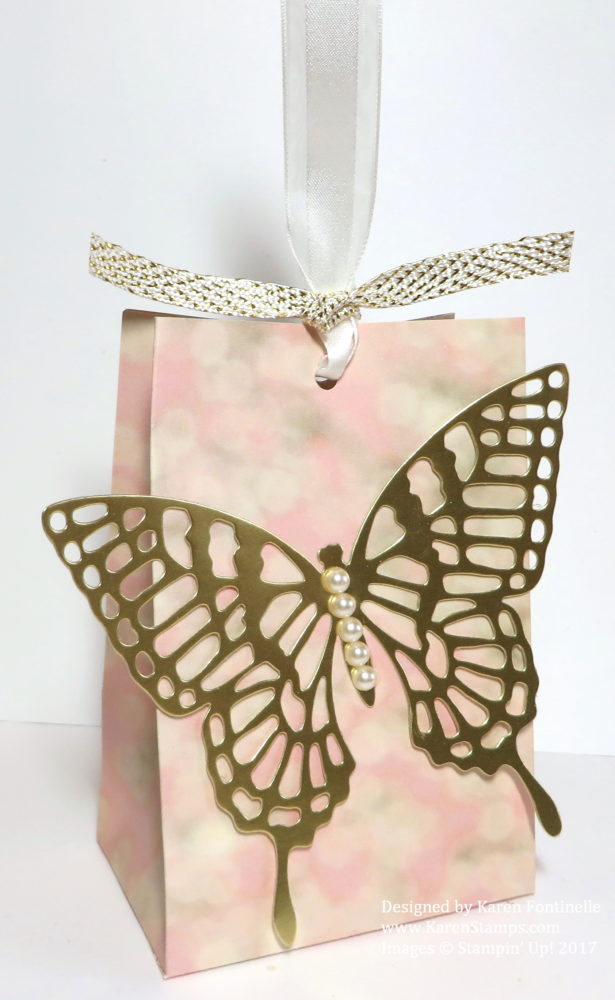
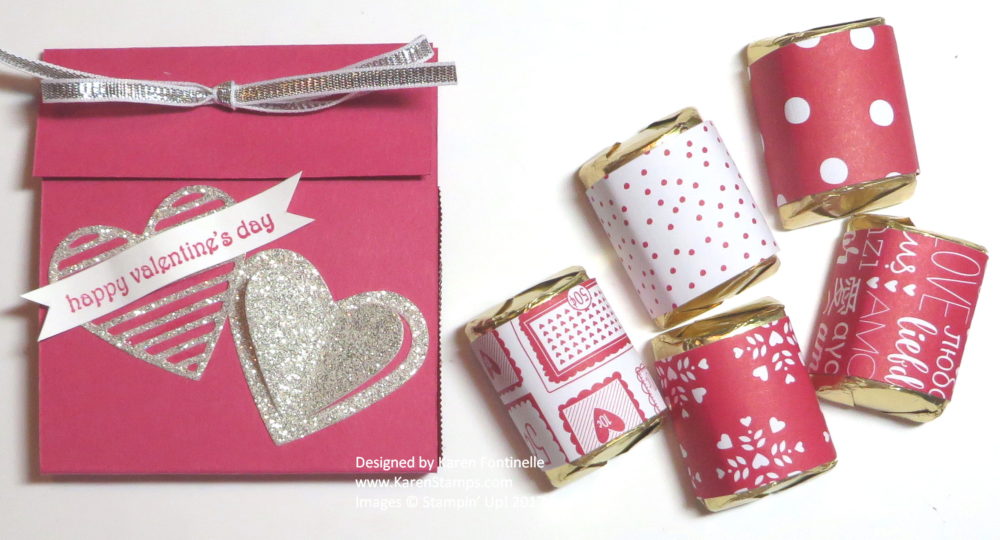
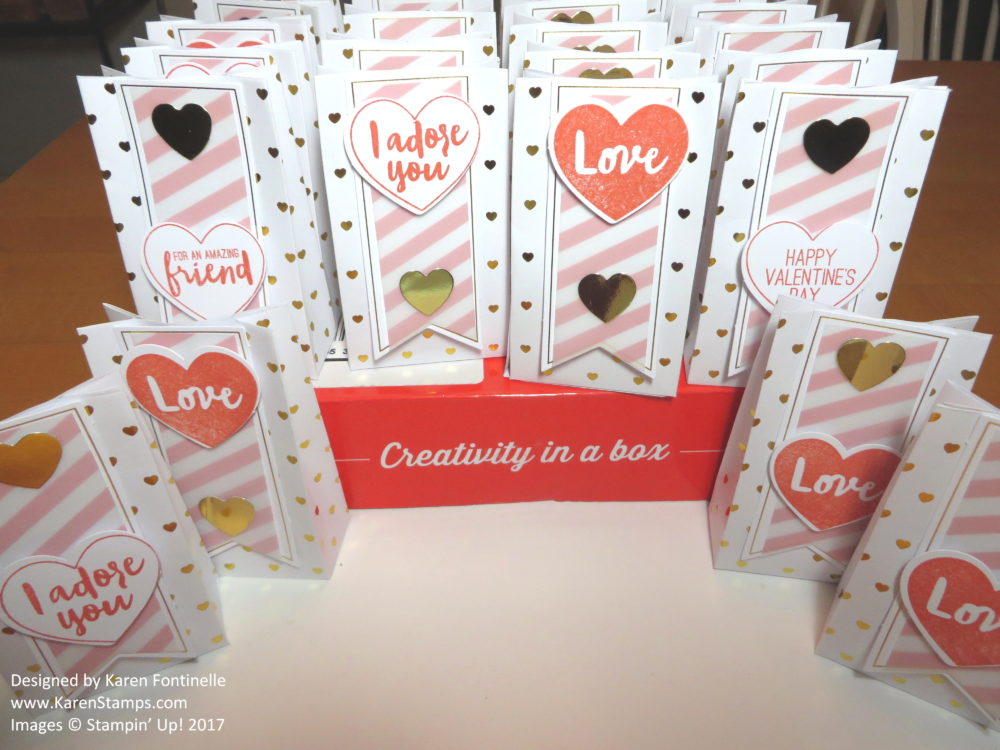
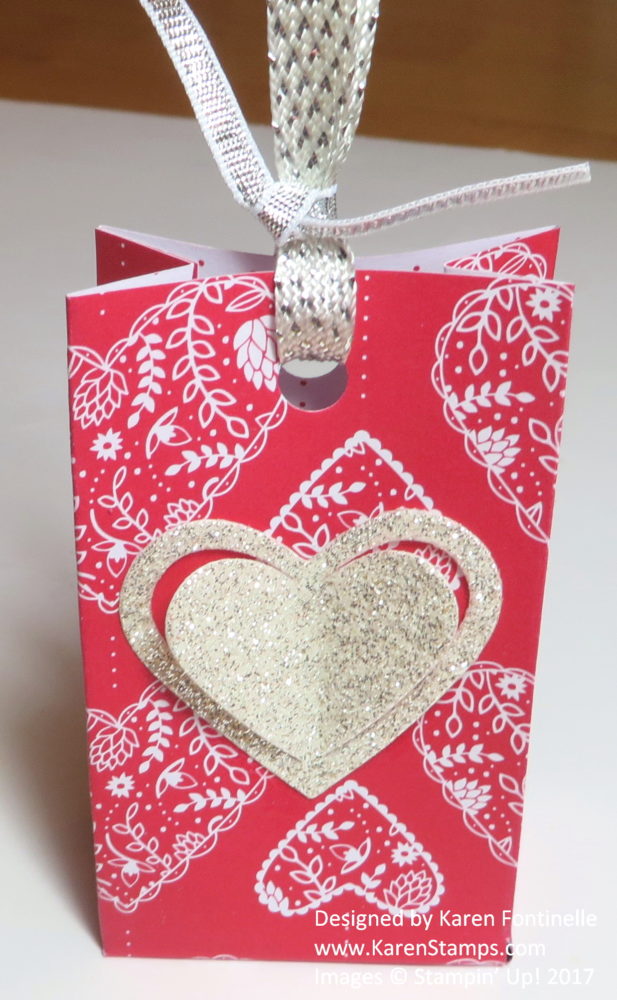
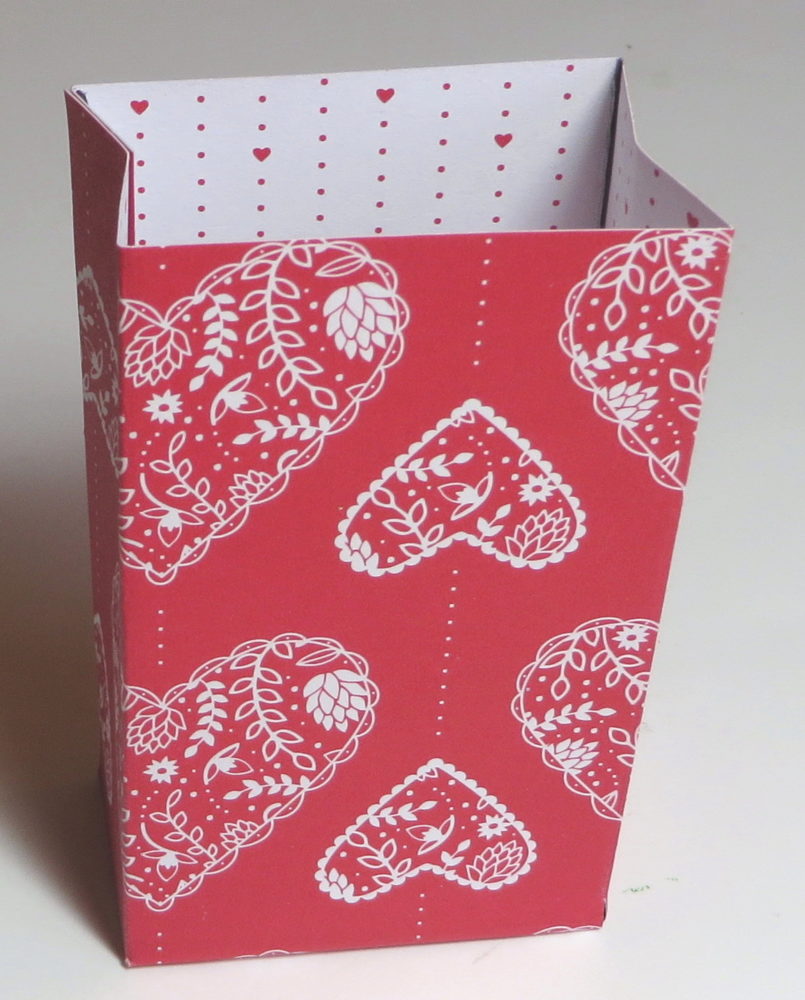
Valentine Sending Love Small Treat BagIf you are looking for ideas for Valentine treats, this Valentine Sending Love Small Treat Bag might be the perfect idea for you! It is the perfect size for just a few treats and easy to make! You can use cardstock or designer paper and make this treat bag for any occasion.  Decorate it however you like with die cuts or greetings or just leave plain if you use cute paper.

Start with a piece of paper 4″ x 6″. The Sending Love Designer Series Paper Stack is 6″ x 6″ so it is perfect to just cut off 2″ and you are ready to go! It’s easiest if the paper doesn’t have a pattern that must go a certain way, but if it does, just be careful to have the pattern running the correct way.

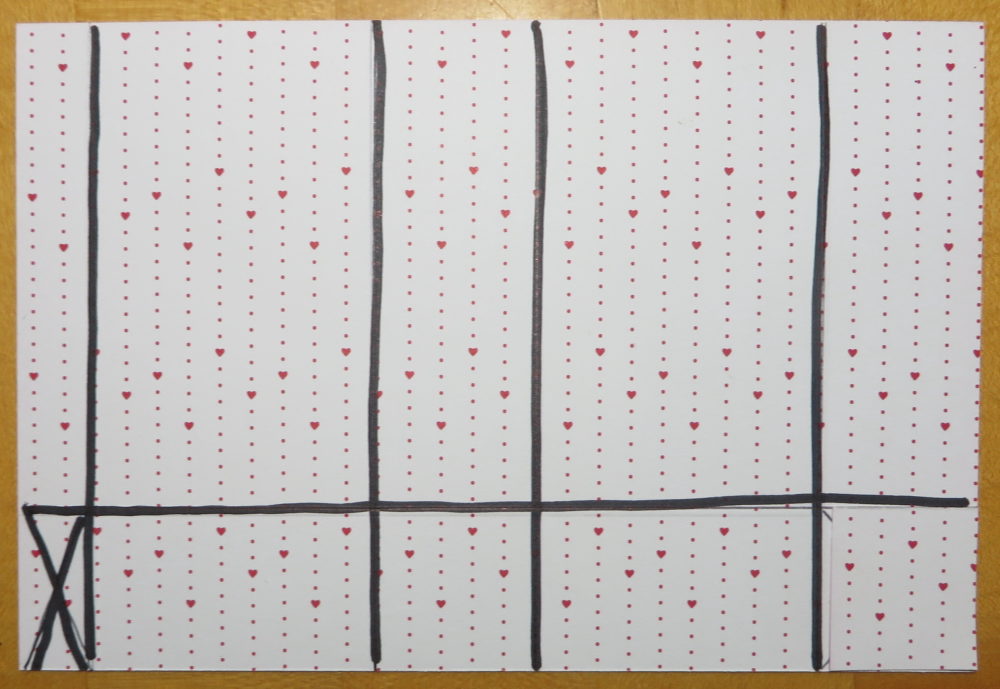
Treat Box diagram

This is the inside of what will be my treat bag but I drew on the score lines so you could see.  The “x” marks the area that you will cut off entirely.  You can see how the score line going across lengthwise indicates where the bottom of the bag will be, so watch your pattern.

Place the paper lengthwise on the Simply Scored board and score at 1″ (portrait). The bottom of the bag should be along the left side of the board.  Then turn the paper and score at 1″, 2 3/4″, 3 3/4″ and 5 1/2″. (Obviously if you have the paper turned the wrong way you wouldn’t be able to score at 5 1/2″ if the paper is only 4″ wide.) After scoring, cut up on all those bottom score lines up to that 1″ score line. Then cut off the little area marked with an X on my diagram. Fold and crease all the score lines.  I like to use a Bone Folder to get a good crease!

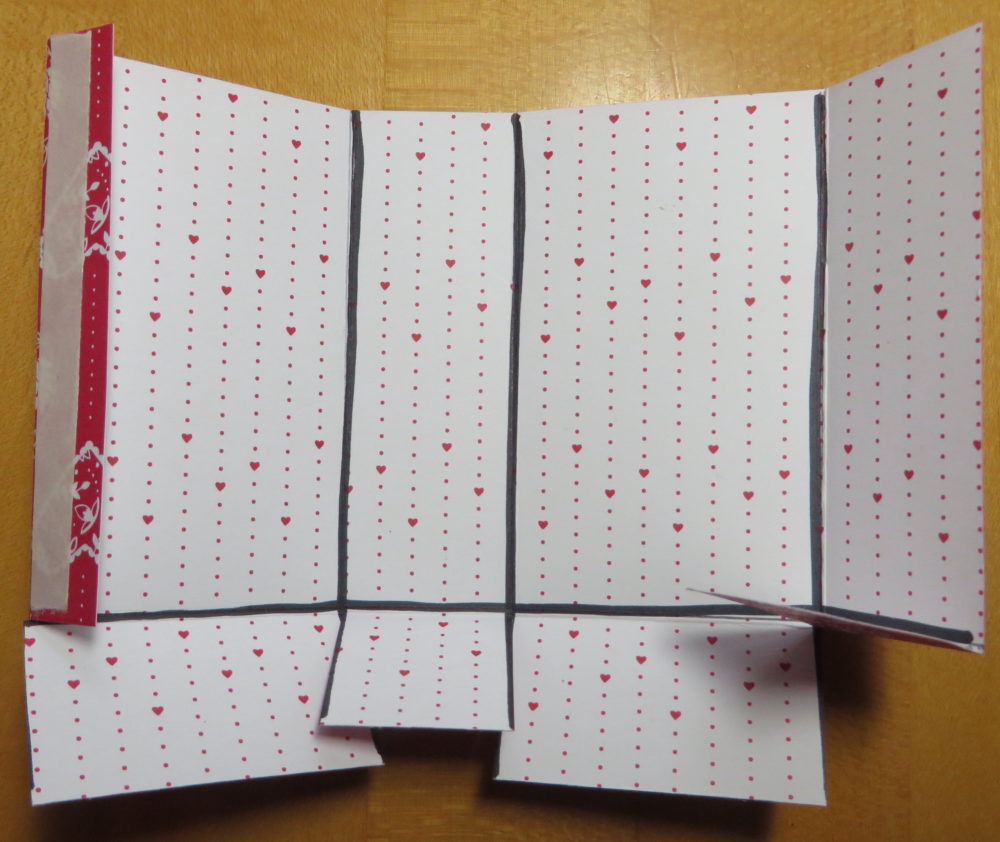
Treat Bag Folded

After the bag is creased, add some adhesive to the narrow flap on one side.  I like to use Tear & Tape because I’m sure it will hold the bag closed. You can see it in the photo above. If you just fold the other side of the box over it is easier to adhere flat than to have the box 3D. Just match up the top of the bag so the edges are even.Treat Bag open box

When the box is all assembled, this is what it looks like.  You could leave it like this! But if you want the top closed, be sure to put your treat inside and then punch a hole or two holes in the top and add a ribbon or bow. Just push in on the sides in order to pull the top edges together. When you have the treat bag assembled, add on whatever you like to decorate.

Just think, if you use birthday paper or the colors of your themed party, then you have something for another occasion!  Once you make some of these, you would probably be able to design your own treat bag according to whatever size you want.  Just draw a little sketch showing how wide and how tall you want the front and back and then how wide you want the sides. You could use this same idea and make a smaller or larger bag or box.

No matter what, this little Valentine Sending Love Small Treat Bag is easy to make and fun to give!

Shop Stampin’ Up! Online for all the best in stamping in papercrafting supplies!


It’s Chinese New Year! The Year of the Rooster!

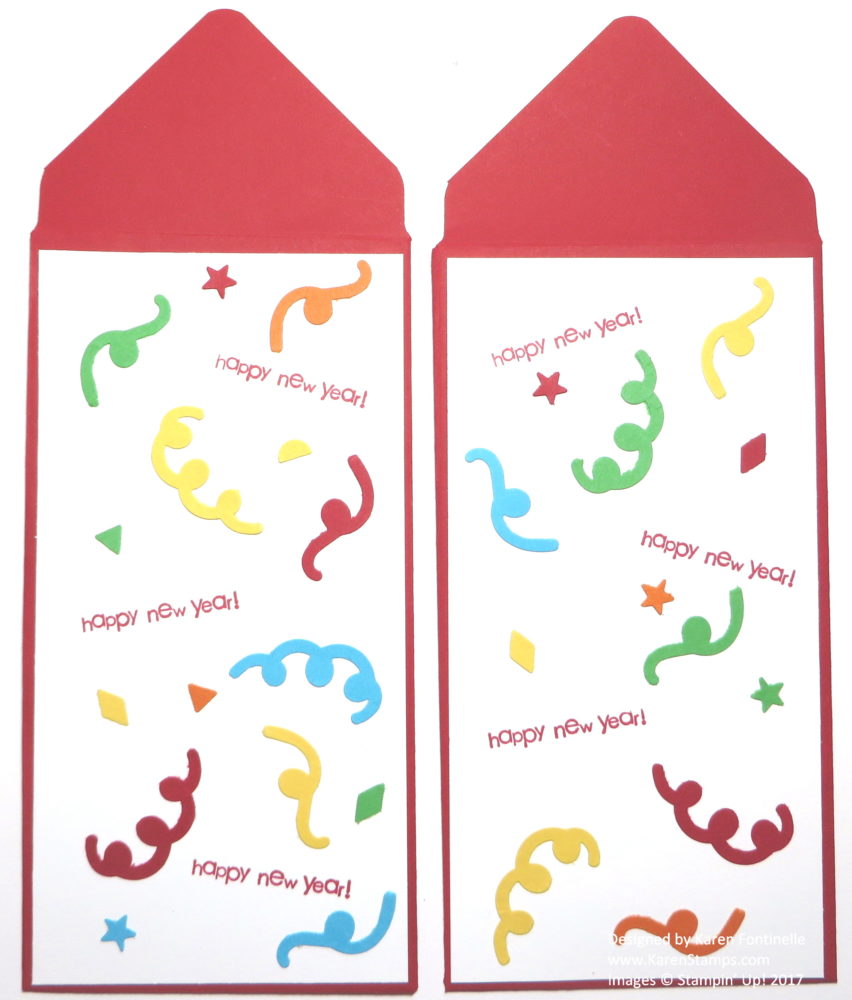
Chinese New Year Red Money Envelopes Confetti

It’s the Chinese New Year, the Year of the Rooster! Depending on where you live, you might be able to catch a Lion Dance somewhere in celebration or maybe someone will give you a red money envelope, such as the ones I made above, for luck and prosperity. It’s customary to put crisp, new bills in the envelopes (no coins!) so people have to make a trip to the bank to trade in their old wrinkled bills. And it’s not good to give an amount of money with a “four” in it because the number four in Chinese sounds like the word for “death”.  Eight, however, is a lucky number.

These red money envelopes in the photo above I made with retired Real Red Envelope Paper and decorated with cardstock from the Sprinkles Punch.

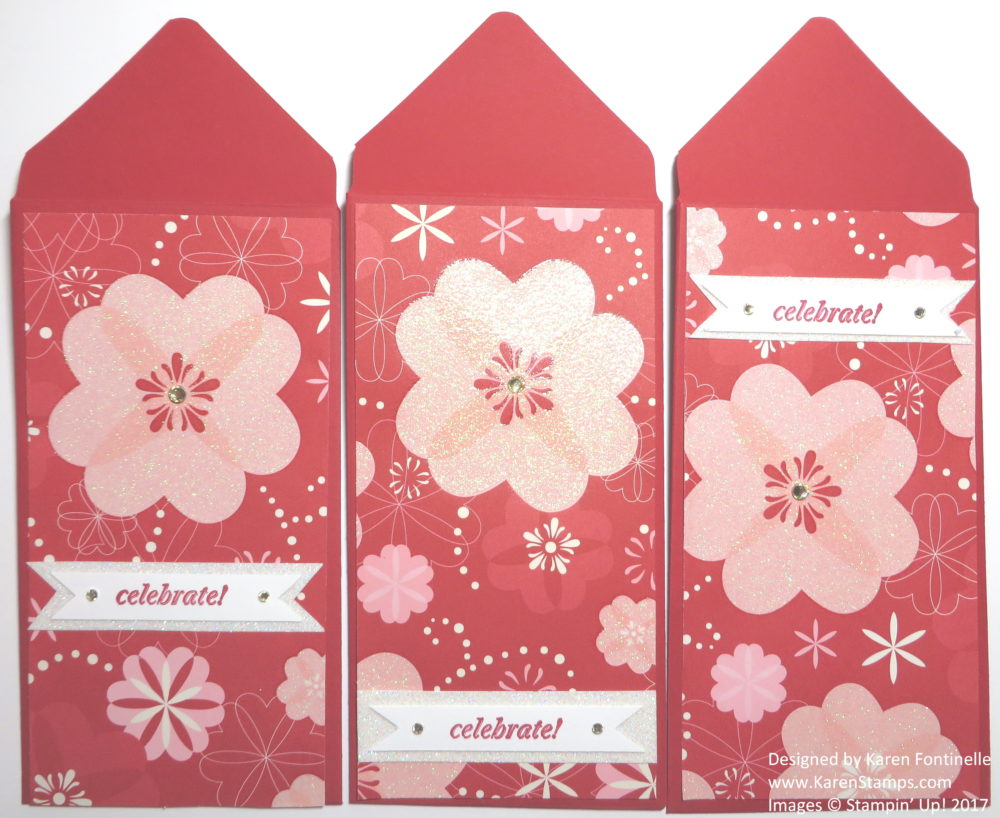
These envelopes I made with some old retired Stampin’ Up! designer paper that already had glimmer on the flowers!

Chinese New Year Red Money Envelopes Glitter Flowers

You can see some of the other red money envelopes I made for someone in my post HERE the other day.

Check out the blog post on the Stampin’ Up! website about Chinese New Year and see some projects made by one of the Artisan designers!

Chinese New Year

Image Stampin’ Up! 2017

Happy Chinese New Year!


Make Red Money Envelopes for Chinese New Year

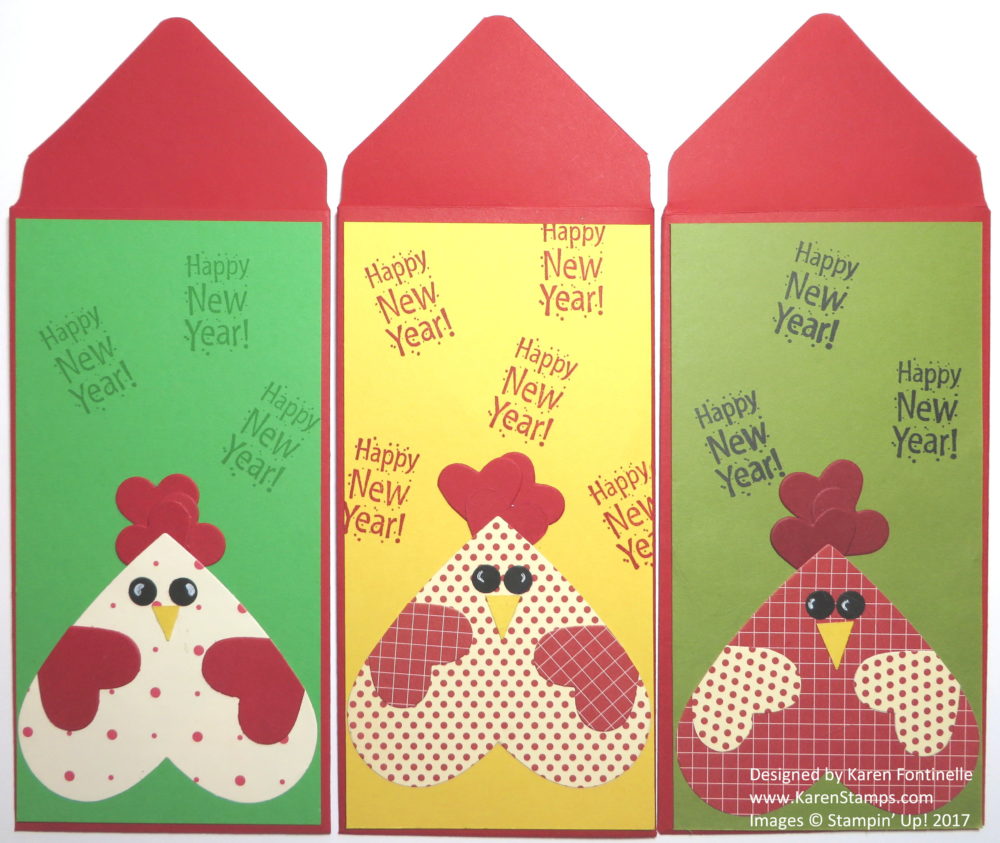
Chinese New Year Red Money Envelopes Year of the Rooster

This weekend is Chinese New Year on January 28th, and it is tradition for Chinese people to give out these red envelopes with money inside! Here are some red money envelopes for the Chinese New Year that I made for someone. I made an assortment of different designs. This New Year is the Year of the Rooster, so I tried to make some roosters with heart shapes! These were really fun to make!

I couldn’t have made these envelopes very easily without the Stampin’ Up! Envelope Punch Board. I found the size listed on the board, cut my paper the correct size and followed the directions found on the board.  I used some retired Real Red Envelope Paper that was perfect for this project. Luckily I ordered some extra packages before it was all gone! That is the envelope flap that you see at the top.

I made different designs since I was making a lot of them, some more whimsical like these heart roosters and some with gold embossing that to me look more like red envelopes I’ve seen online.

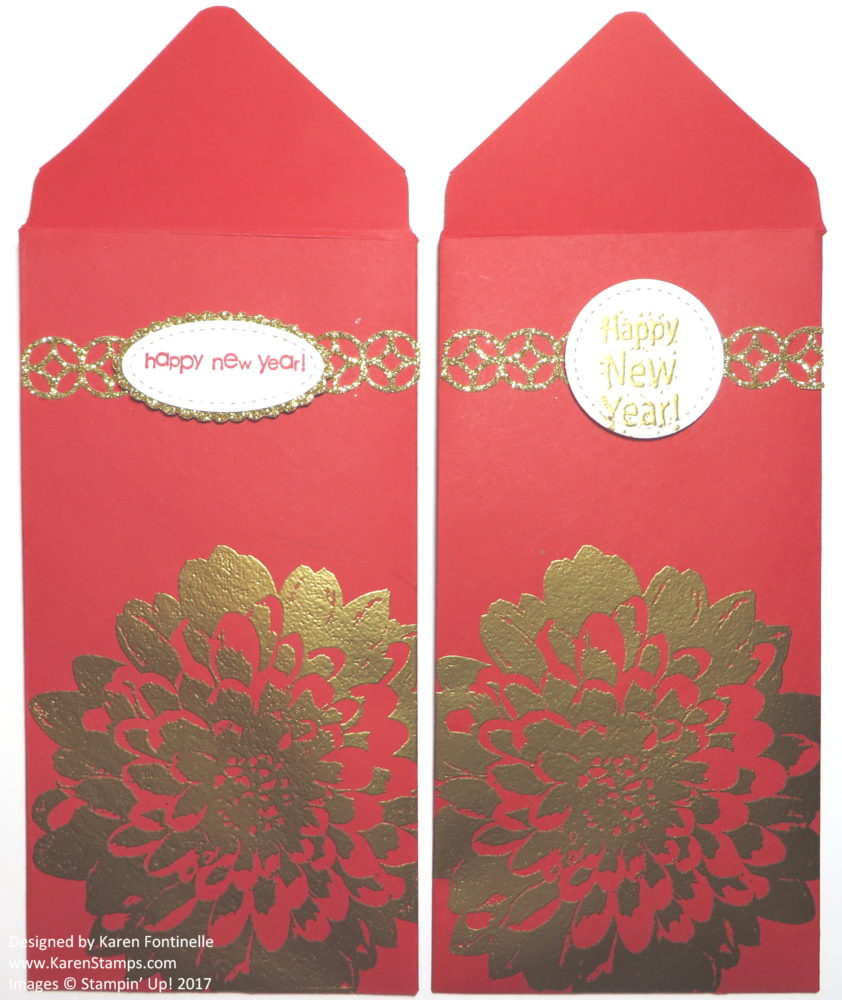
Chinese New Year Red Money Envelopes Gold Embossed Dahlia

This doesn’t photograph as well, but I loved this gold embossed Definitely Dahlia stamp! I also pulled out any retired Happy New Year stamps I could find in my stash!

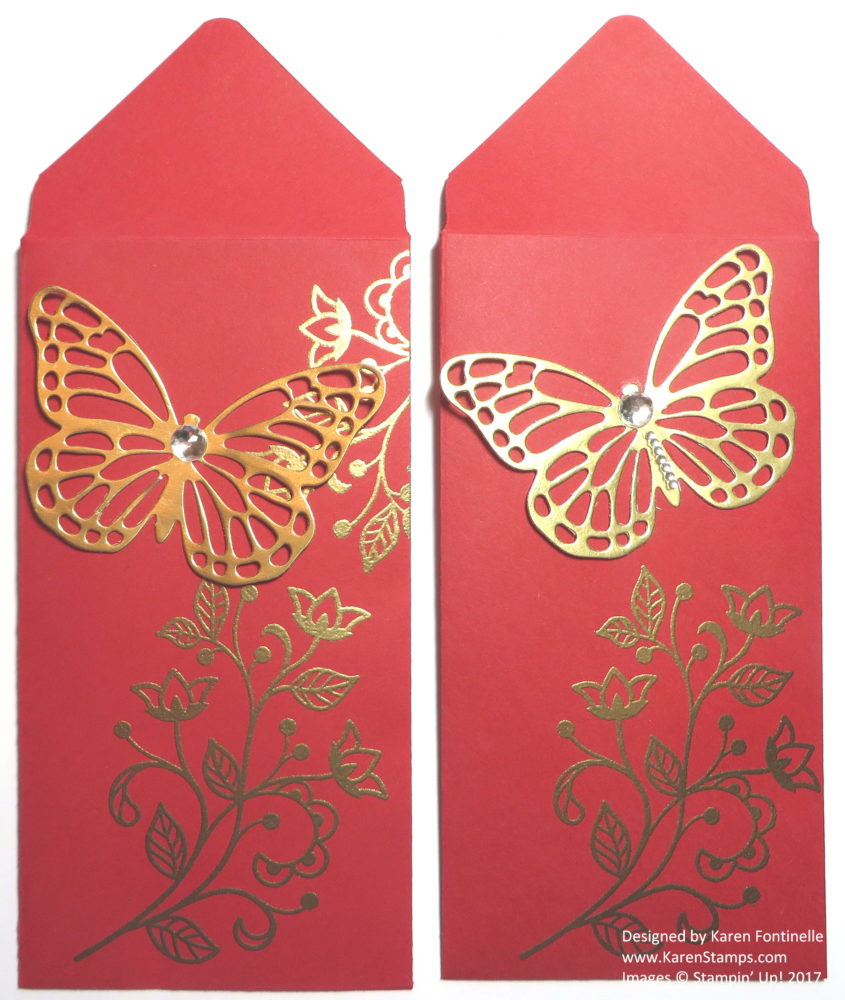
Chinese New Year Red Money Envelopes Gold Butterfly

This envelope is stamped and embossed with the Flourishing Phrases Stamp Set and embellished with a butterfly die cut with the Butterflies Thinlits Dies.  This envelope is one of my favorites…..after the roosters!

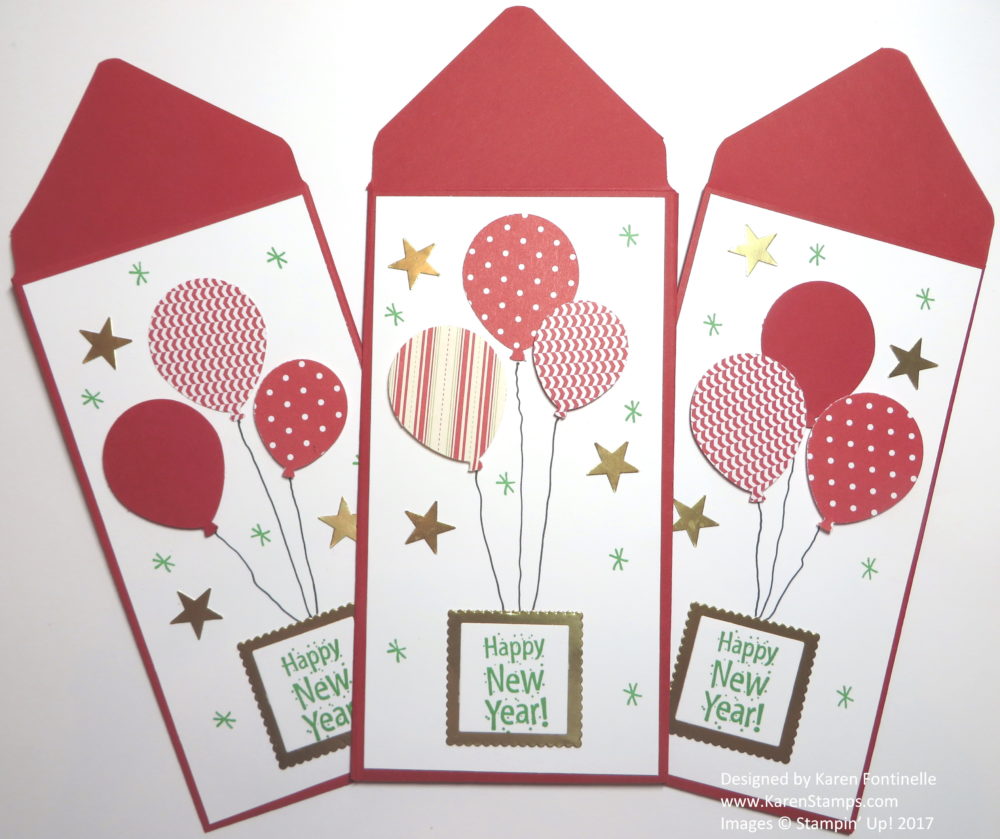
Chinese New Year Red Money Envelopes BalloonsHere is another more whimsical one made with the Balloon Bouquet Punch.

I also made a few more designs as well as the ones I made last year in this post.

On January 28 celebrate the Chinese New Year 2017, year of the Rooster! Maybe make some lucky red money envelopes to give someone a cash gift!

Big Shot Die Cut Window Box

Big Shot Die Cut Window Box

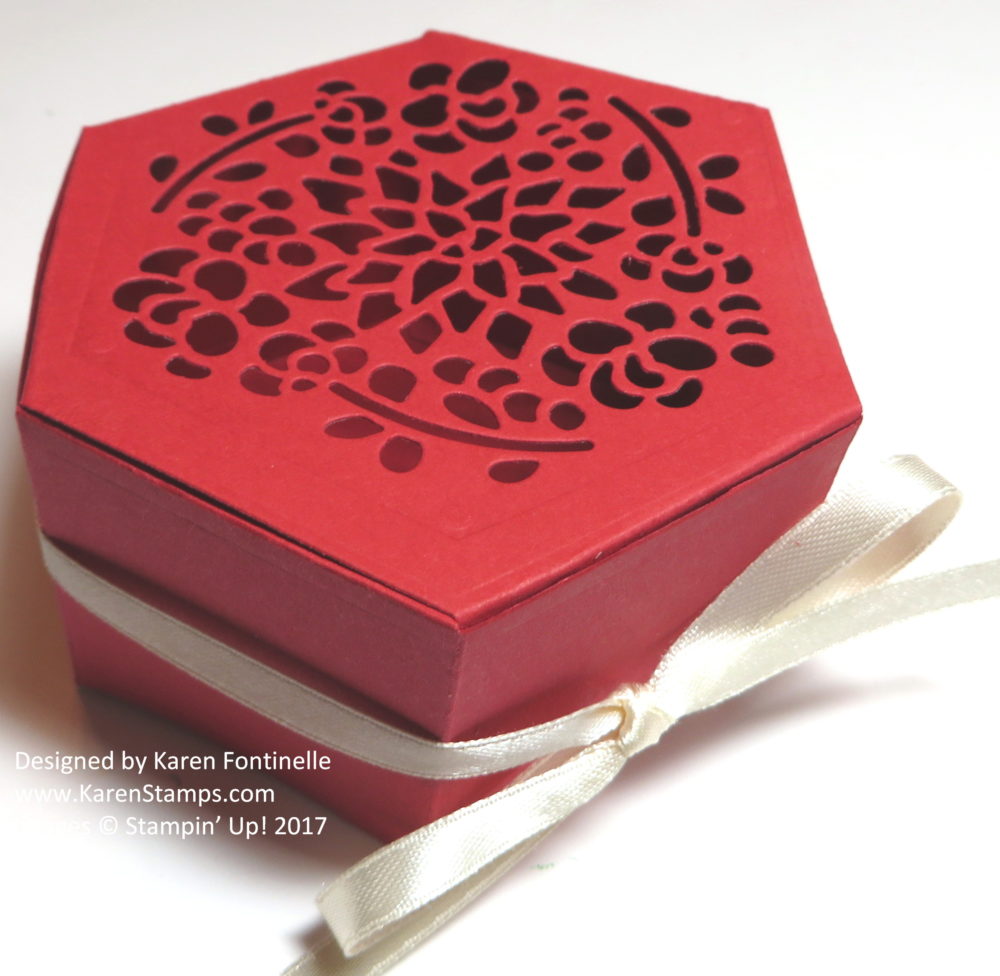
Here is my first try making this Big Shot Die Cut Window Box with the dies from the Occasions Catalog. This was one of the products I was excited to purchase because I think it makes a beautiful little gift box and lots of other projects. To make this box I used the Window Box Thinlits Dies.  For my first time, I would say the process is a little bit tedious and I don’t think this first box is the best I can do……but on the other hand, how else would you make a cute box like this in just a few minutes without Stampin’ Up! products?!

You can just use the box die to make a plain box or you can die cut the top design with any of several different dies and or the sides of the box.  Lots of possibilities to explore! You can line the die cuts underneath with another color paper or Window Sheet or Vellum or whatever you like,

You can also use the dies to just make intricate designs on cards! There is also a coordinating stamp set, the Window Shopping Stamp Set that you can use for greetings with the box.  Save 10% when you buy the Window Shopping Bundle  to get the stamp set and thinlits dies together.  The clear-mount Bundle costs $50.25 which then earns you a FREE Sale-A-Bration item!

Watch the Stampin’ Up! video below to see how Donna Griffith at the Home Office uses these dies. You need to cut two of the box pieces in order to make the full box and she shows you how to cut off the side tabs on one of the pieces.  You will see when you assemble the box that you don’t need those side tabs on the one piece because the other piece has them!

With a little practice and patience I think we will all be able to make beautiful boxes of many designs!  I can’t wait to play some more!

Shop Stampin’ Up! Online and earn a Free Sale-A-Bration product with every $50 purchase!

January 10th! It’s Paper Pumpkin Sign Up Day!

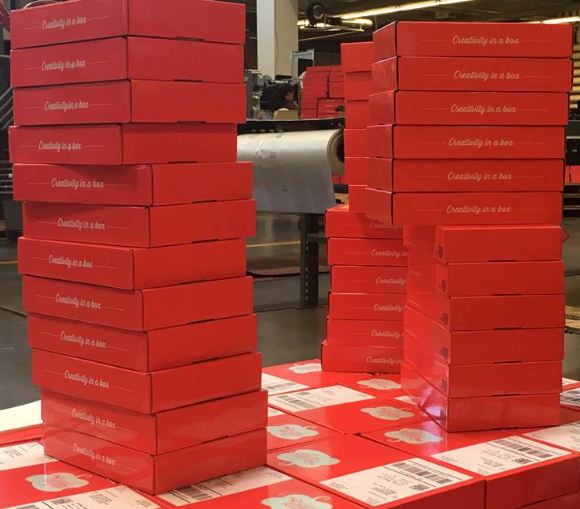
Paper Pumpkin Boxes Shipping

Today, January 10th, is the day to sign up for Paper Pumpkin so that you will receive a red box like one of these in your mailbox around the middle of this month! You’ve had a busy holiday season, I daresay even a busy clean-up season after the holidays, and it’s time to sit down and do something for yourself when your Paper Pumpkin Kit comes in the mail with an exclusive surprise project inside! With your very first kit you will receive a clear block on which to mount the stamps that come in the kit. In each kit is an exclusive stamp set as well as an ink spot plus all the other materials you need for the project. Almost always the project is a surprise. Sometimes we get a hint or a peek, but not usually.  Have some fun, relax, and be surprised!

Each project comes with directions and a Stampin’ Up! video to watch. If you don’t care for the project, make something else with the materials! For example, the December project in the kit was to make an album, but people who didn’t feel that was for them, took the pages of the album and turned them into cards!

This was the December kit:

And for another example, here is the November 2016 Paper Pumpkin Kit, which, from what I could tell, was very popular and really made some lovely Christmas cards! Not to mention all the alternate ideas people made with the kit! I know I thought it was beautiful!

Paper Pumpkin November 2016 Kit Wonderful Winterland

Sign up by the 10th of  any month to get that month’s kit. If life gets busy, pause your subscription by the 10th of any month to skip that month or to cancel. Once you are a subscriber, you can purchase any past Paper Pumpkin Kits or refills that are available. Refills come with the materials but not the stamp set or ink spot.

Sign up by the month or prepay for kits on your regular Stampin’ Up! order. For example, during Sale-A-Bration you can put the 3-month Prepaid Paper Pumpkin Kit on your Stampin’ Up! order and save $5, perhaps helping you earn hostess rewards at $150 or more, not to mention earning you one free Sale-A-Bration item!

JOIN PAPER PUMPKIN BY THE MONTH HERE!

BUY A PREPAID PAPER PUMPKIN KIT HERE!

Please choose me as your Demonstrator in the appropriate spot or go directly to my Paper Pumpkin website HERE if you are doing the monthly version.

I feel sure if you try at least a few months of Paper Pumpkin, in order to get a variety of kits, you will enjoy receiving that red box in your mailbox every month!  If you have any questions, just let me know!

Today is January 10th, so sign up TODAY to get the January Paper Pumpkin Kit.  If you sign up tomorrow or after, that is fine, too, you will receive the February Kit in mid-February.

Go ahead.  Do it right now!

JOIN PAPER PUMPKIN!

Handmade Paper Lace Gift Bag

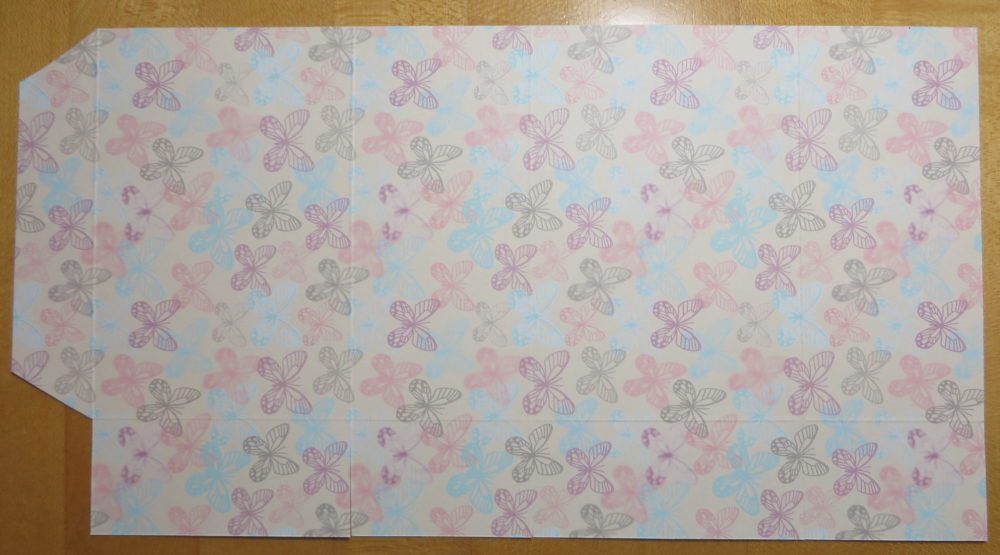
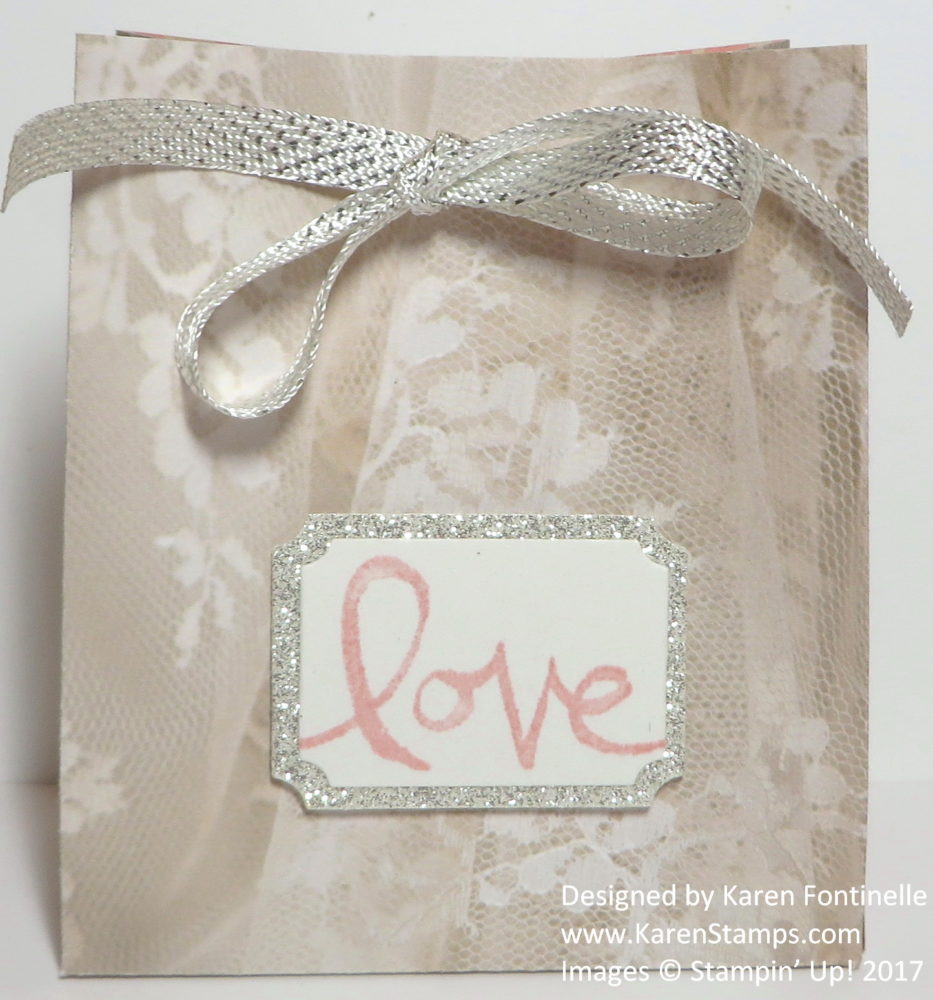
handmade paper lace gift bagAfter having fun yesterday making a gift bag (in THIS post)  with the Falling in Love Designer Series Paper (and using the hearts pattern to make  it look a little like Valentine’s Day), I decided to make another one with the OTHER side of the paper, this realistic-looking, beautiful lace pattern!

Once I made the bag, I just punched two holes in the top and threaded the new Sale-A-Bration ribbon that you can get FREE with a $50 purchase, the 3/8″ Metallic Ribbon Combo Pack (143601).  You might overlook this ribbon in the brochure, but I can give a high recommendation for it!  It’s very soft and easy to tie and beautiful, way prettier than you can tell in the photo.  You get both the gold and silver rolls in the pack!

To embellish the bag, I didn’t want too much to take away from seeing the lace pattern on the paper so I just made a simple label with the Tags & Labels Framelits Dies Since I had a scrap of Shimmery White Cardstock laying on the table, I just used that since it is just the slightest bit off-white and stamped “Love” from the  Watercolor Words Photopolymer Stamp Set. I love that stamp set’s greetings – almost something for everything! For some pizzazz, I added a layer behind the greeting of Silver Glimmer Paper Easy to do that layering with the graduated sizes of the Tags & Labels Framelits Dies!

You can get all the measurements on my post from yesterday! This would be a good time to get out your retired paper stash and make a few gift bags of several sizes and keep them on hand for gifts throughout the year like this Handmade Paper Lace Gift Bag.

The new Occasions Catalog is live as is the Sale-A-Bration promotion, so go ahead, order your heart out!

Shop Stampin’ Up! Online!


Make a Falling in Love Handmade Gift Bag

Falling in Love Handmade Gift Bag

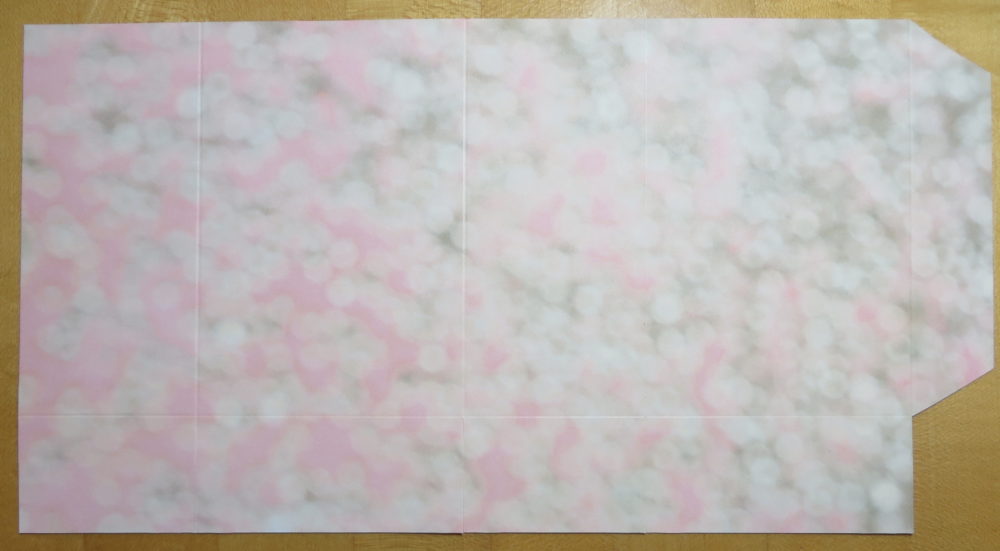
Here’s how to make a Falling in Love Handmade Gift Bag very easily! The Falling in Love Designer Series Paper will make any number of beautiful gift bags and other projects with the lovely patterns and bokeh look on many of the sheets. This bokeh look is actually a little difficult to photograph because by definition it has some blurriness in it, which also photographs as being blurry! But you will love the paper when you see it in person!

I started off making this gift bag to be for Valentine’s Day with the heart patterned paper and of course it could be.  But it could also be for a wedding or shower or baby gift or birthday or any occasion! And if I used the pattern on the opposite side, that would also be beautiful!

To make this gift bag, I just cut a 12″ x 12″ piece of designer paper in half.  Think about your pattern as you make something like this so the pattern doesn’t end up upside down (as I almost did!) or sideways. Your scoring and cutting will determine which way the pattern goes.

You could easily use the Gift Bag Punch Board, but today I chose to use my Simply Scored board. Score at 1 3/4″, 5 1/2″, 7 1/4″ and 11″.

Gift Bag scoring

Then turn and score lengthwise at 1 3/4″ and 5 1/2″.  This is where you need to think about which way the pattern of the paper is going because the 1 3/4″ area will be the bottom flaps.

Gift Bag Scoring2

Then crease all the score lines and see how your bag will go together.  Cut out the small piece on the bottom edge and cut up on the score lines that will make the bottom flaps of the bag.Gift Bag assembly

Apply strong adhesive to the narrow flap on the right in the photo above. Fold the bag flat in half so that you adhere the other side to this sticky flap.  I used Fast Fuse Adhesive.Gift Bag assembly

Decorate the gift bag how you like.  I made a banner out of the Falling in Love Designer Paper that the bag is made out of but a piece that had more hearts printed on it, with a layer of Blushing Bride behind it. For a greeting, I inked up the “Celebrate…” stamp from the Beautiful You Stamp Set with a Melon Mambo Stampin’ Write Marker so I could omit the “…” at the end of the stamp and used that color so it would show up better on the Blushing Bride cardstock. I just stamped this on plain cardstock first and then punched with the Sweetheart PunchTo jazz up the little heart, I used the Silver Metallic Thread just wrapped around my fingers and then adhered down a little bit on the back of the heart and then adhered to the banner on the bag. I also punched two holes in the top of the bag and tied a bow with the Silver 1/8″ Ribbon.

You can adjust the size of any bag you want to make by doing a little math.  Leave the bag open at the top if you like.  I almost did on this bag because the inside is so beautiful.

The Stampin’ Up! computers and systems are up and running today so if you are ready to order from the new Occasions Catalog (and who isn’t??!) and get your Sale-A-Bration rewards FREE with each $50 purchase, go right ahead!  If you have any questions or problems, just let me know and I will try to help!

Shop Stampin’ Up! Online Here!

Happy Festivus! Last Minute Christmas Ideas!

Rudolph the Red Nosed Reindeer Gift Bag

Click for Information!l

If you were a Seinfeld fan back in the day (and still are!) as we were, you must know that December 23 is Festivus! Festivus is a non-commercial holiday celebration with a Festivus dinner (meatloaf), an unadorned aluminum pole, the “Airing of Grievances” and more. My only “grievance” today is lack of time before our kids arrive this evening!

Since many of you probably feel the same way, I thought I would pull up some past Christmas ideas from last year that might help with tags and bags for wrapping gifts at the last minute (I haven’t started!). Maybe you have these stamps and paper as opposed to some newer ones from this year. Just click on the photo to go to the blog post if you need the instructions and information!

Tree Punch Christmas Tree Tag

Embellished Ornament Christmas Card

Easy Christmas Tree Punch Gift Bag

Festival of Trees Christmas Tags

Christmas Candy Bar Wrapper Ideas

Snowman Christmas Tags

Christmas Fudge Candy Bag

Hope these last minute Christmas ideas give you some inspiration for today! If you are celebrating “Festivus” today, just “air your grievances” for a minute and then get back into the holiday mood!  Do what you can and let the rest go! If you need more ideas from my blog, just click on the drop down box in Categories and select Christmas!

Merry Christmas and Happy Holidays!


A Couple of Things About Paper Pumpkin by Stampin’ Up!

Paper Pumpkin December 2016 Kit

In case you haven’t heard, Paper Pumpkin is the papercrafting kit that comes to you in the mail once a month! Each month is a surprise, and as you can see by the December 2016 kit it is not always cards!  This December kit is designed to be made into a mini scrapbook of sorts, or whatever you would like, but you could make cards with the pieces as well. Usually you receive an ink spot and an exclusive stamp set, but for the first time, they are instead including in the kit this rotary stamp and a black marker with which to ink up the words on the rotary stamp.

Now, it is too late to subscribe for the December Kit, but if you subscribe for the January 2017 Kit, you can go back and purchase any of the past kits or refills that are available. And right now Stampin’ Up! is offering the full December kit, #143596, so you don’t have to wait, but you do have to subscribe!  Past kits are only available to current subscribers. So join Paper Pumpkin HERE and then put the December 2016 Kit on your order! You’ll also find more information at that link. Please choose me as your Demonstrator.

Paper Pumpkin Subscription Flyer

If you need a last minute gift for someone, consider the Prepaid Subscription to Paper Pumpkin. Add your choice to your order and you will receive an email from Stampin’ Up! telling you how to activate your account, plus a printable Gift Certificate! You can forward this to your gift recipient if you like.

Or maybe it is for YOU! Just show your husband or mother or daughter or son or whomever the link, either for joining month by month or for the Prepaid Subscription. Let them purchase it for you and print out the gift certificate!

Here’s a video showing how to assemble the December Kit!

Here is Carrie from the Home Office telling more about the kit and showing alternative ideas for the kit if you don’t want to make the album.

JOIN PAPER PUMPKIN TODAY!

Easy to Make Suite Seasons Christmas Gift Bag

Easy to Make Suite Seasons Christmas Gift Bag

Today is the first day of Winter and only four days until Christmas!!  Are you ready??  If not, maybe it is because you need a few more gift bags! When you need a few more gift bags and wrapping for your last minute gifts, don’t run out to the store, just look in your collection of bags you know you have. Find a plain bag or even one with the store’s printing that you can cover up and decorate as simply or as elaborately as you like!

For this bag, I found one in my utility room (You can also buy a bunch at the craft store!) and covered the store label with my card stock. I used a piece of Real Red cardstock, covered with a layer of Candy Cane Lane Designer Series Paper (sold out).  This is often a good time to use up some of your older designer paper you are hoarding! Stamp a greeting, as I did from Suite Seasons, punch or die cut and add a layer underneath!  I used the Stitched Shapes Framelits Dies (coming back in mid-January!) and layered on a scalloped circle from the Layering Circles Framelits Dies.   The ribbon is a lovely retired one that I happened to have out on my table. Now you could add even more things to decorate your bag, but I was keeping it simple and last minute.

Don’t forget the Stampin’ Up! Year-End Closeout Sale! Unless you expedite, it’s too late for Stampin’ Up! ordering, but you can always make up a gift certificate or “IOU” if you want to gift someone!

Go make some easy Christmas gift bags so you will have some ready for those last minute gifts!

Stampin’ Up! Lovely As a Tree Christmas Card and Christmas Tags

Lovely As a Tree Christmas Card and Christmas Tags

What would Christmas be without a Lovely As a Tree Christmas Card and matching Christmas Tags?!  Lovely As a Tree is a classic stamp set, maybe the oldest stamp set that Stampin’ Up! carries. It’s been around as long as I’ve been a Stampin’ Up! Demonstrator. There was a funny moment at one Stampin’ Up! Convention when Shelli Gardner was on stage stamping and she couldn’t believe Lovely As a Tree was still a current stamp set! I’m not sure, but I think most all of us prefer to keep Lovely As a Tree around for a lot longer because it just works so well for many cards and projects. If you google this stamp set, you will find the most gorgeous, creative cards!  I think it was one of the first stamp sets I ever bought as a customer!

To make the card, I tore a piece of computer paper to make a rough edge and laid it down along the bottom of the Thick Whisper White card base. Then I just sponged on some ink – Soft Sky at the bottom and Marina Mist farther up. Use a light touch because you can always go back and apply more ink.Torn Edge Sponging

For the fun part of stamping the evergreen tree, I used Pear Pizzazz, stamping once and then stamping again without reinking to get that lighter look.  The stamped greeting is from the Wondrous Wreath Stamp Set. For a finishing touch, although you cannot see it in the photo, I used the Clear Wink of Stella Glitter Brush for some shimmer and shine on the trees and here and there on the snow at the base of the card.

As long as I had my materials and stamps out, I thought I would make a couple Christmas tags. The smaller one is punched with the Scalloped Tag Topper PunchIf you prefer a different look, you can use the Ornate Tag Topper Punch which happens to be on sale in the Year-End Closeout.  The little banner is from the Sweet Home Photopolymer Stamp Set as is the word “Merry”. It’s easy to cut out by hand with Paper Snips. The second tag I just cut by hand to make it wider. Again I sponged the snowy ground and sky with a scrap piece of cardstock that just happened to be curved. To make the snowflakes, I put down dots of glue with the Fine Tip Glue Pen and sprinkled on Dazzling Diamonds Stampin’ GlitterAgain, the Dazzling Diamonds Glitter is a long-time product of Stampin’ Up!, we have used it forever, and I personally hope they keep it around for a long time.  So easy to use, although I have to say I miss the retired Glue Pen we used to use on the trees. Using the Fine Tip Glue Pen gives a bit of a 3-D look, which worked well with the tiny snowflakes.

If you don’t already own the Lovely As a Tree Stamp Set, please put it on your next order!  You won’t be disappointed and will get lots of use out of it.  I have the original wood-mount stamp set, but now you can also buy it in Clear-Mount. It’s great for masculine cards, Christmas cards, all-occasion cards, birthday cards, you name it!

Don’t forget to check out the ongoing Year-End Closeouts Sale!

Shop Stampin’ Up! 24/7 in my Online Store!

Reindeer Christmas Gift Tags

Reindeer Christmas Gift Tags

What a fun day I had yesterday! In the afternoon one of my customers, who has become a dear friend to me, and her little girl came over and we made these Reindeer Christmas Gift Tags for a children’s group for their stockings. Since we were making 24 tags and for both boys and girls, we needed something relatively easy to make, something that appeals to either a boy or a girl, and something for different ages.

Right away I thought the Cookie Cutter Christmas Stamp Set was probably the way to go, with lots of choices of stamps and creative possibilities, not to mention the coordinating Cookie Cutter Builder Punch which would make assembling the tags easy by punching instead of cutting with a scissors. Before I knew exactly what design I would come up with, I looked in my retired “stash” and found  the Season of Style Paper Stack with 24 sheets of each of two patterns so I knew we would have plenty of the same paper! As it turned out, I found an idea online for tags that just had strips of paper on the sides of the tag, so we had no problem with the amount of paper we needed. My friend had already purchased some large white tags, 6″ x 3″, so at first it was a bit of a challenge to decorate a large tag.  But it can be done! If you need a large tag for a gift, just cut one the size you need from cardstock and play until you find the right decoration for it!

The reindeer is stamped with Memento Black ink on Crumb Cake cardstockWhat reindeer would be complete without a glittery red nose, so we used a 1/2″ Circle Punch with Red Glimmer Paper and snipped off just a top portion of the circle to fit the stamped portion of the nose. The bow is also in the Cookie Cutter Christmas Stamp Set and the bow can also be punched with the Cookie Cutter Punch! Easy peasy!  My friend’s daughter, Miss Elsie, did a lot of the work on these tags, adhering the strips of paper on the sides of the tags, cutting and gluing the noses on the reindeer, and stamping the little hearts in the background for just a little something extra. She’s been stamping since she was little, even teaching how to stamp in her preschool class a few years ago!!

The greeting is from the Tin of Tags Photopolymer Stamp SetThis stamp set is on sale right now in the Stampin’ Up! Year-End Closeout SaleI would recommend you pick up this set now at a discount because it has great Christmas greetings, but if you look closely, you will notice that there are other greetings you can use any time! Really, there are just four stamps that I would say are only for Christmas, and if you used careful “markering” on certain words in those stamps, you might be able to use them for other occasions! And for fun, go ahead and get the Tin of Tags Project Kit, also on sale, either for yourself or to give as a gift.  If you are giving it to a non-stamper, you can make the tags yourself and then put them in the cute red tin for the gift. As I’ve said before, I LOVE that red tin!

One of the best things about Stampin’ Up! are the people that you meet, and yesterday afternoon is a perfect example! Just by me being a Stampin’ Up! Demonstrator and this customer finding me online, back in the day when the Demonstrator Website was a fairly new thing, I have come to know her family, her mother, and one of her best friends who usually stamps with us. What a perk from just being associated with Stampin’ Up!

Spinach & Phyllo Dough

Spinach & Phyllo Dough

And in the morning, I attended a Holiday Cooking Class given by my neighbor!  If you are in the Houston area and are interested in learning either how to cook or some new ideas, check out Chef Ellen!  Follow her on her Facebook page www.facebook.com/chefellenhouston or her website at http://chefellen.weebly.com/.  She’s doing another Holiday Cooking Class December 18th with different foods. Just in time to give you new ideas for your holiday dinners or parties!

What fun and what delicious food she showed us how to cook, some of which we cooked ourselves! It was a lot of balls in the air at one time, but she pulled it off and we had so many samples to try and some to take home that I’m not sure I can even remember what all we made! I wasn’t taking photos with the intention to post on my blog, just to help remember the things we made, so they are “real” photos, nothing staged! The photo below is a brie wheel with a delicious sauce of cranberries and pears in a sugar syrup. Yum! The first photo above is spinach with a phyllo dough topping.

Brie Cheese & Cranberries and Pears

Brie Cheese with Cranberries & Pears Sauce

Cranberries & Pears

Cranberries & Pears Sauce

Biscotti-like Cookies

Biscotti-like Cookies

Mushroom Soup

Mushroom Soup

We made delicious mushroom soup, learned about artichokes and roasted one, crab cakes with a super-delicious sauce, a ricotta cheese appetizer, desserts, and more!

So if you are looking for some new cooking ideas or would like to book your own personalized class with Ellen, email her at chefellen@earthlink.net.  I’ve know her a long time, our daughters have been friends since they were little girls and still see each other whenever possible. Get out of your cooking rut and try Chef Ellen!

Cooking and Stamping!  It’s all about creativity and new ideas!

Shop the Stampin’ Up! Year-End Closeout and other current Stampin’ Up! products!  You may want some boxes or cello bags to package your holiday food you may be giving as a gift!

Tin of Tags and Christmas White Gift Box

Tin of Tags Assortment and White Gift Christmas Box

The Tin of Tags was one of the things that first caught my eye in the Stampin’ Up! Holiday Catalog because of the red tin!  Essentially I bought the red tin and the tag kit came with it!!  You can make 30 tags, 3 each of 10 designs! You do also need the Tin of Tags Stamp Set, unless you want to use other greetings you already have or even make some of the tags for other occasions.  You get the embellishments, baker’s twine, and washi tape in the tag kit!  And the best news, the Tin of Tags and the Tin of Tags Stamp Set are both discounted right now during the Stampin’ Up! Closeout!  Don’t hesitate in case other people also think this is a great deal, now that we are getting close to “wrapping season”!

While you are ordering the Tin of Tags and stamp set, put the White Gift Boxes on your order as well! They are perfect for small gifts or treats but they are not teeny. They are 3″ x 3″ x 3″. You can decorate them so many different ways and for any occasion.  Good to have on hand! For this gift box, I just made a belly band from the Warmth & Cheer Designer Series Paper Stack.  I cut each strip 2″ wide and matched the patterns (pretty well) on the sides since one obviously did not go all the way around.  This paper is even on sale half-price!!!  Gotta have it! I also tied the Real Red 3/8″ Stitched Satin Ribbon around the middle.

Tin of Tags and Christmas White Gift Box

Watch Donna Griffith at the Stampin’ Up! Home Office talk about the Tin of Tags in this video!

Scoop up your red tin, I mean the Tin of Tags Project Kit and Tin of Tags Stamp Set, while you have plenty of time!

Shop Stampin’ Up! Online HERE!

Rudolph the Red-Nosed Reindeer Mini Treat Bag

Rudolph the Red-Nosed Reindeer Mini Treat Bag

Last year I decorated a kraft gift bag much like this Rudolph the Red-Nosed Reindeer Mini Treat Bag and it was quite popular. This year I thought I would try something similar with one of my favorite products, the Mini Treat Bag Thinlits Dies!  I loved this project because you can use the treat bag as a treat holder, a small gift holder, or as a Christmas card! If you look closely you can see the top of the card I inserted in the treat bag with a strip of the Candy Cane Lane Specialty Designer Series Paper.

Rudolph the Red-Nosed Reindeer Mini Treat Bag Card

To make the mini treat bag, of course I used the Big Shot and the Mini Treat Bag Thinlits Dies. I made this bag out of our Kraft 12″ x 12″ Cardstock. Rudolph’s antlers are punched with the Tree Builder Punch.  The eyes are punched with the 1 1/4″ Circle Punch out of Whisper White and the black pupils with the 3/4″ Circle PunchI marked a little “highlight” on the eyes with my White Stampin’ Chalk MarkerThe Red Glimmer Paper nose is punched with the 1″ Circle Punch.  And I had to tie a bow on the reindeer with the Real Red 3/8″ Stitched Ribbon.

The card is cut from Whisper White Cardstock to fit inside the treat bag. I adhered a strip of designer paper to the top and stamped a greeting from the Tin of Tags Stamp Set. You don’t have to have the Tin of Tags in order to make good use out of this stamp set. It stands on its own!

LAST DAY For STITCHED FROM THE HEART STAMP SALE!!

Stamp Set Sale Nov 2016

Today, November 30, is the last day for the Stitched From the Heart Stamp Sale! Check out the list one more time (click HERE) and see if you can pass up any of these great stamp sets at 25% off!

Year End Closeout 2016 Banner

New Announcement!

Check back tomorrow, December 1st (if you can believe that December will be here tomorrow!!!) to see the list of all items from the 2016 Holiday Catalog that are retiring and will no longer be available for purchase after January 3, 2017.

I don’t know yet what is on the list!  We will all find out tomorrow! Check back here on my blog or at my Online Store HERE.  I’m sure you will be able to click on the banner you see there to see all the products!

I hope you got a kick out of the Rudolph the Red-Nosed Reindeer Mini Treat Bag and can use this inspiration for one of your own projects!

SHOP STAMPIN’ UP! ONLINE HERE!

White Gift Box Santa Wrap

White Gift Box Santa Wrap

Stampin’ Up! recently had these White Gift Boxes on sale on the Online Extravaganza, so yours might be on their way if you ordered them, or you might have already purchased them, or sale or not, they still are a good product to have on hand!  Look at just one way you can decorate them, like this White Gift Box Santa Wrap.  You can also add a greeting or tag to the top.

To decorate this White Gift Box, I creased all the folds and assembled the box. Depending on what cardstock you have, you can do this one of two ways – or maybe even three ways. Since I had Real Red 12″ x 12″ cardstock, I cut a 3″ x 12″ wide strip and wrapped it around the box. You might think it would fit exactly, but those folds on the box just take up a little bit of space, so you do end up a little short at the back of the box. Now if you cut a piece from regular size cardstock, you could make it 3″ x 11″ and still do the same on the back that I will explain. Or you could cut 3″ x 3″ pieces for each side of the box.

White Gift Box Wrapping

Where I came up short on the back of the box, I just cut a 3″ x 3″ piece to cover it. I used Multipurpose Liquid Glue to adhere the cardstock to the box because it gave it that little bit of time to position the paper exactly right on the gift box.

To keep that little half circle where the tab tucks into the gift box,  traced the opening onto the Real Red piece that would be on the front and punched with the 3/4″ Circle Punch (or just cut out with your Paper Snips). Yes, that tiny bit of white shows, but I decided it wasn’t important. If you don’t like that bit of white, then adhere a strip of Real Red onto that tab.

To make it look like a Santa coat, I cut a 1 1/4″ x 11″ strip of Basic Black. This I began gluing at the back of the box because I knew the belt buckle would overlap the part that didn’t reach on the front portion, Who would know?? For the belt buckle, I used a 2″ x 2″ piece of Gold Foil Sheet. Instead of cutting and putting the “belt” through the buckle, just cut a 1 1/4″ square piece of Basic Black (same width as the belt) and glue it in the center of the foil, making sure it lines up with the belt!  Neat trick, huh?!

To finish off the box, I glued a 3″ x 3″ piece of Real Red cardstock on the lid of the box. After that you could add a stamped greeting or tag or whatever to the top.

These White Gift Boxes also come with a clear plastic sleeve to go around the box, but I didn’t use that this time. While these boxes are not large, they are not teeny either, so they’re pretty practical to keep on hand for any occasion.  You could even decorate all the boxes in the package ahead of Christmas and then your gift-wrapped box is ready for the gift inside, like this Santa Wrap idea!

To purchase your White Gift Boxes and any other Stampin’ Up! products you need, please visit my Stampin’ Up! Online Store HERE!

Don’t forget:  Today and tomorrow are the last days for the Stitched From the Heart stamp sale!