Category Archives: 3-D, Gifts & Things

Sour Cream Container Birds

Sour Cream Bird

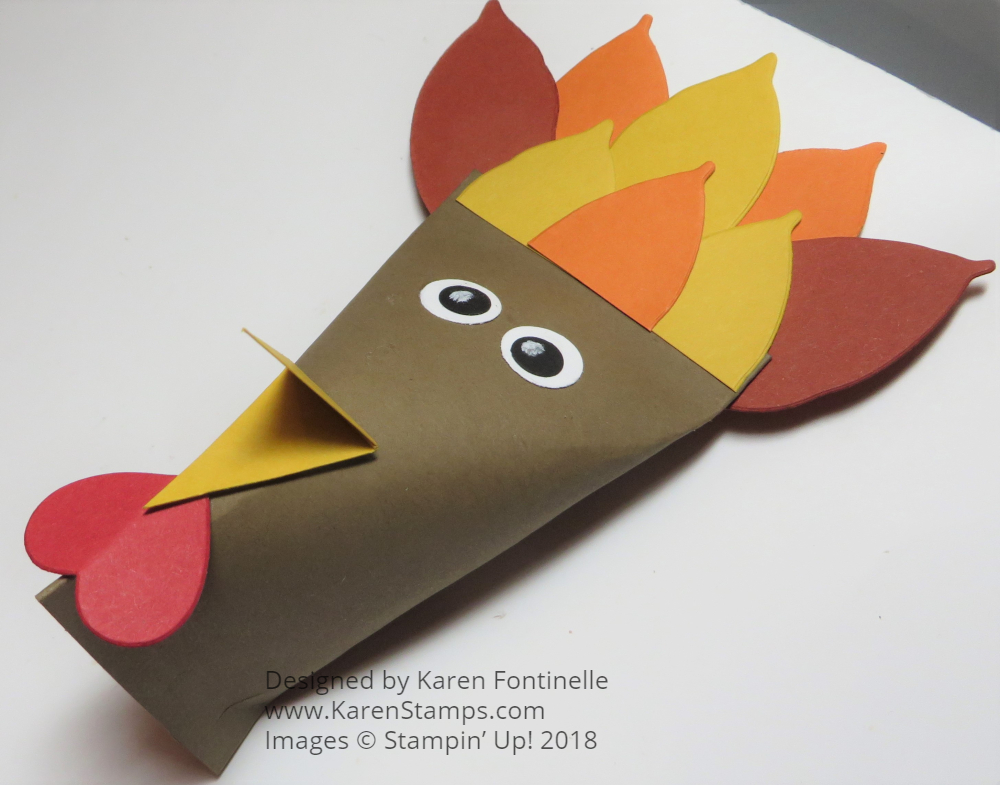
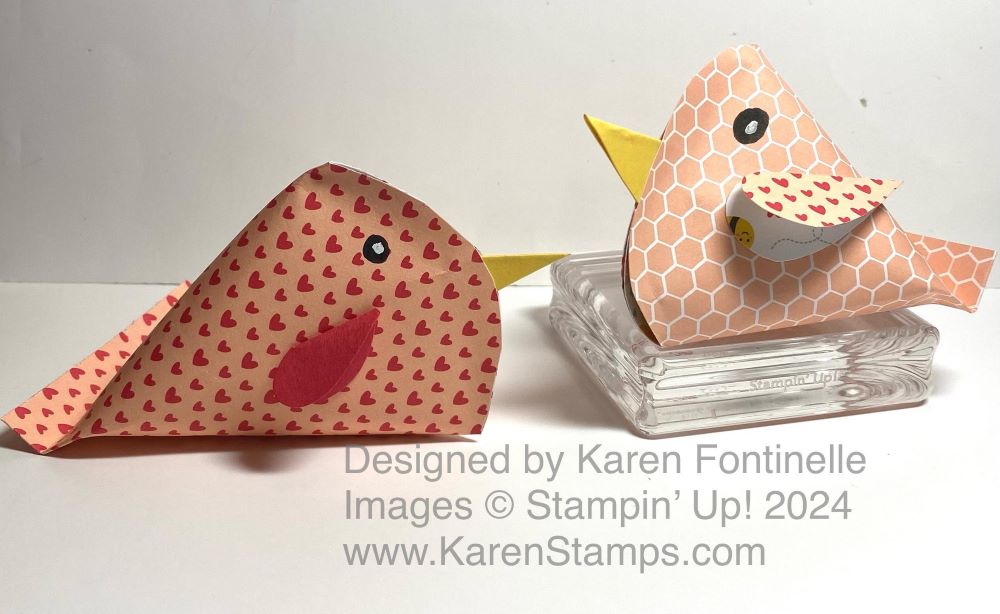
Here’s a fun idea you might like to try for a Valentine treat or a fun little bird! The other day I saw a reel on Instagram of someone using short toilet paper rolls and forming them into a little bird shape. I thought it was very cute, but then I realized it looked like what most of us in stamping have made before, a sour cream container! I don’t know if real sour cream containers exist in this shape but I think they used to. It was kind of a twisted container, crimped at both ends. For years, we have made “sour cream containers” to hold candy for a holiday or party favor. After watching this reel of making this bird with a toilet paper roll, I thought why not use designer paper instead? Of course, you could also use cardstock and decorate that.

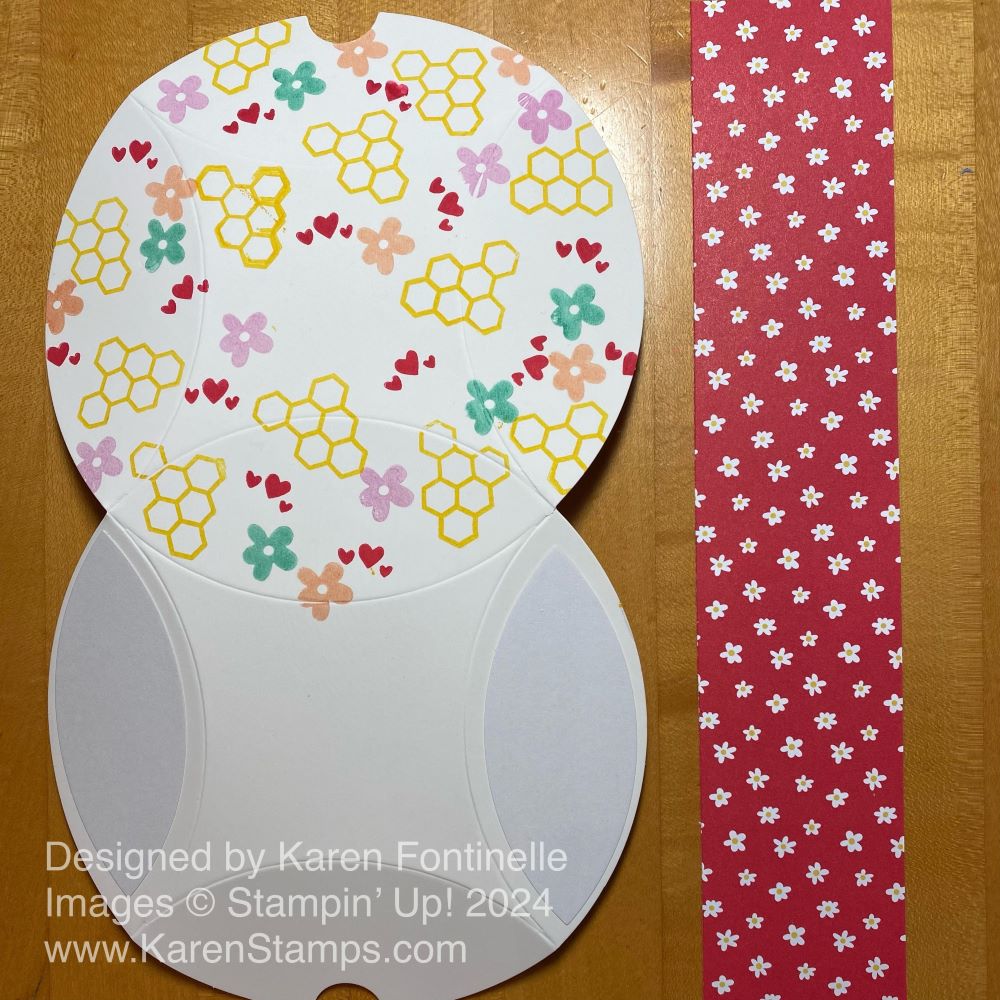
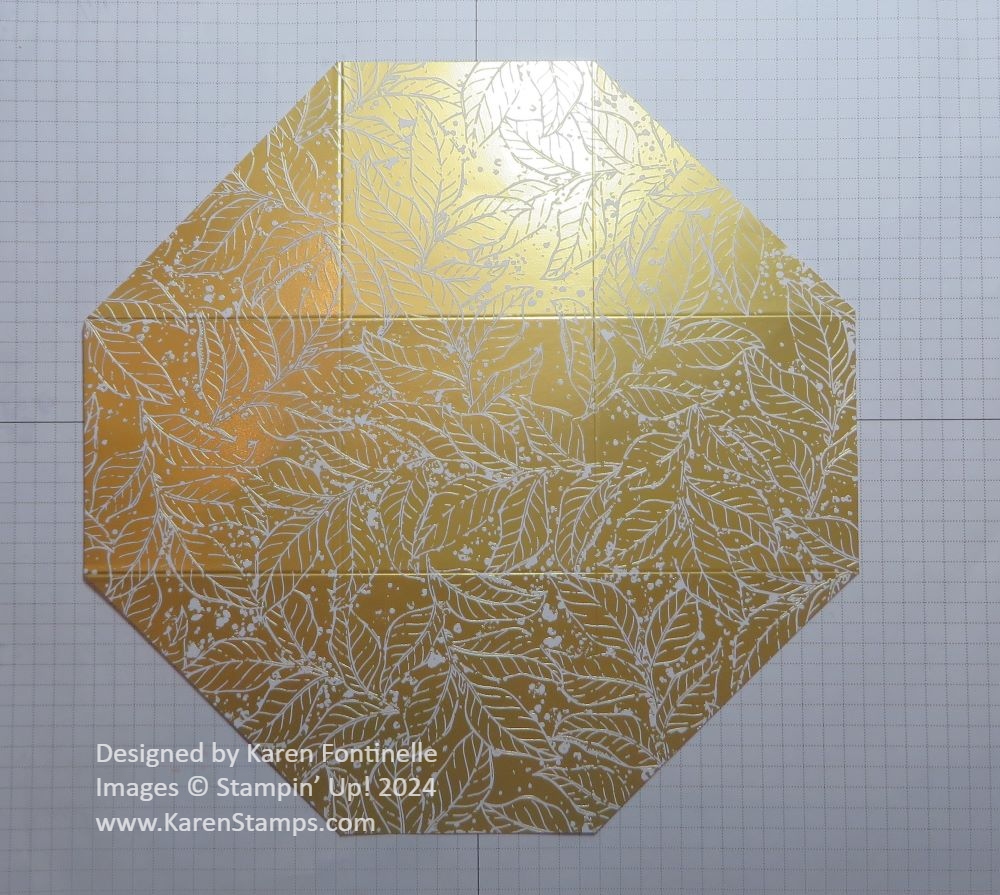
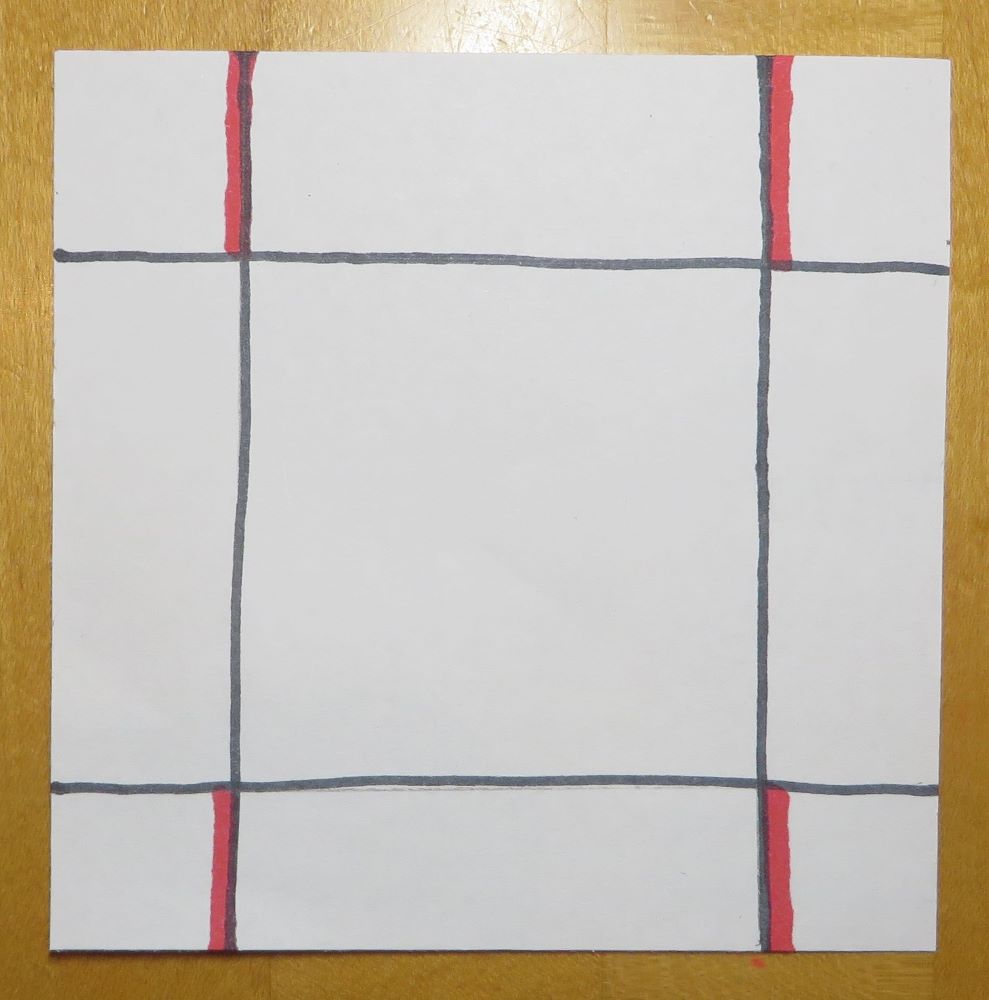
You can vary the size of your bird. Cut a paper rectangle about 4 1/2″ x 6″ or maybe a little smaller at 4 1/4″ x 5 1/2″. You can experiment with the size you want in the end. Apply Tear & Tape or Stampin’ Seal on one short side and one long size.

Sour Cream Bird Paper

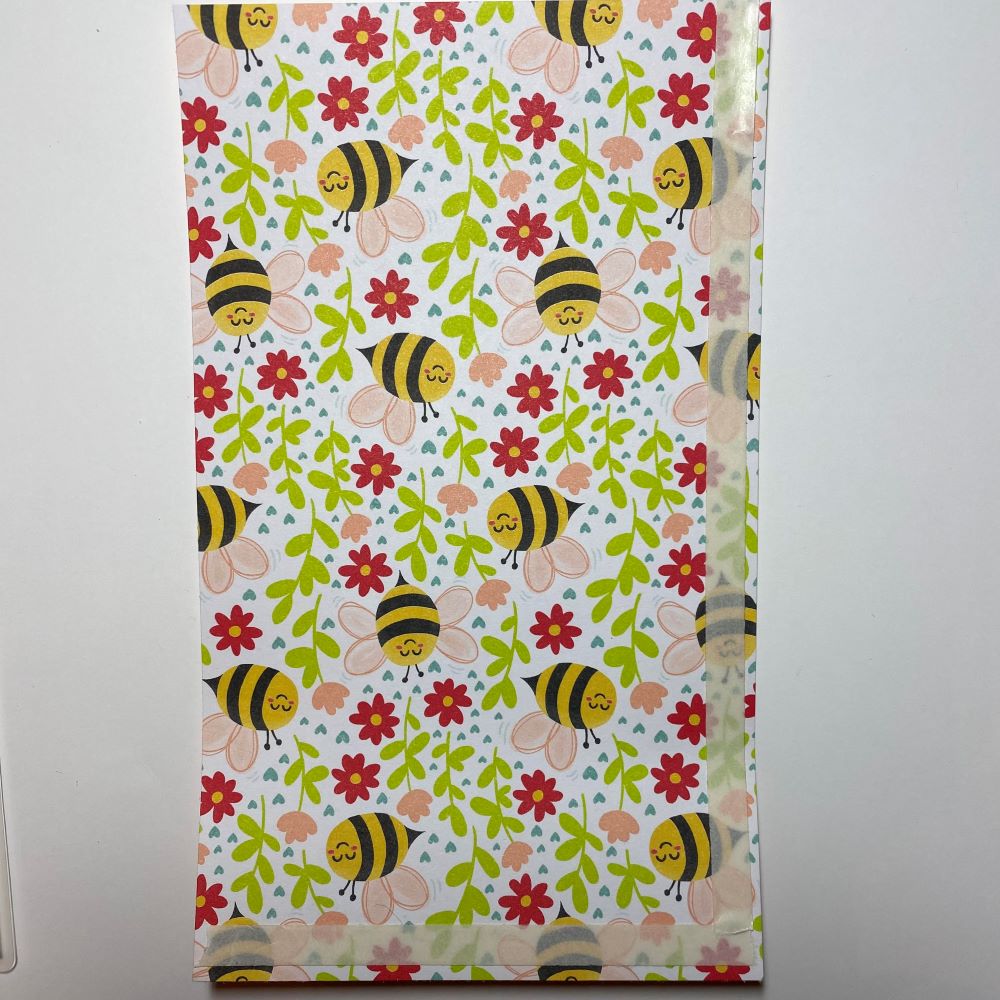
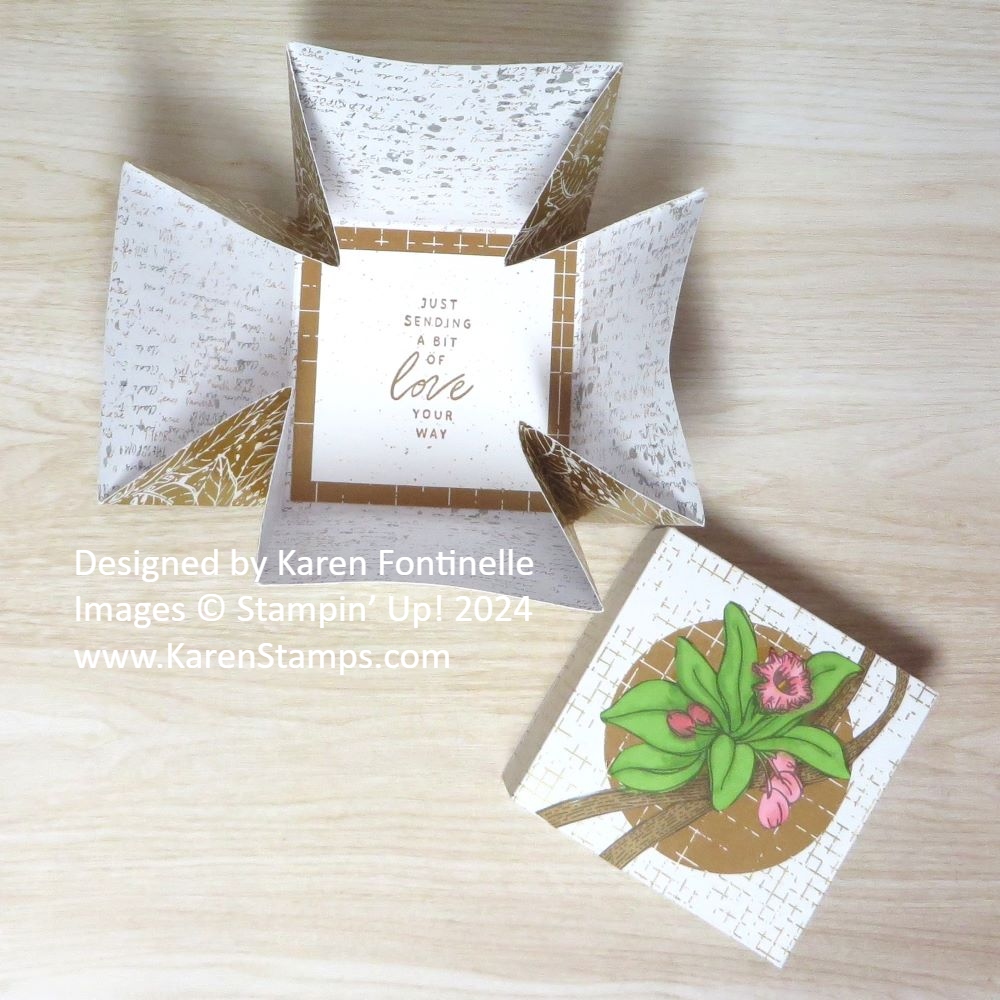
It’s a little easier to roll the paper up if you have a curved surface or edge of a table or something just to get it loosened up to roll up easier. Remove the liner on the tape on both sides and make a roll to adhere to the other short side. You can overlap the edges however much you want. Then squeeze together the end that has the adhesive on it. Fold that adhered end up to make the bird’s tail feathers!

Sour Cream Bird Paper roll

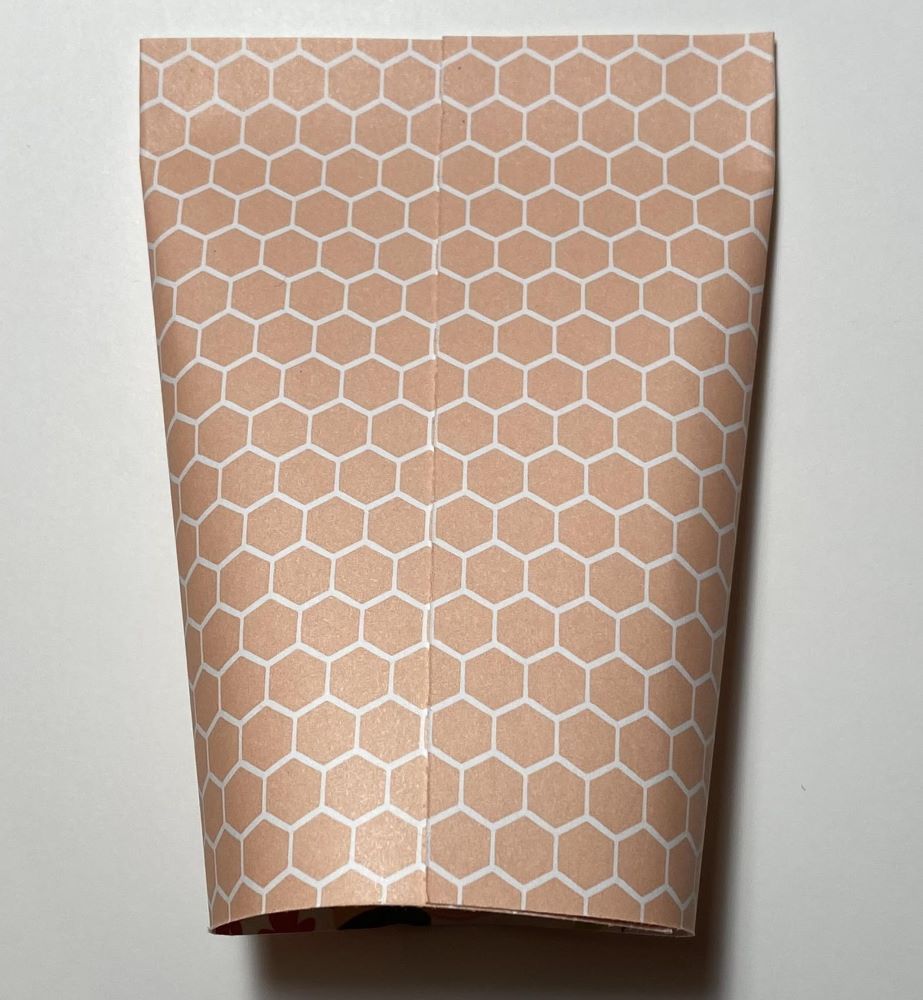
Then squeeze the other end together but going in the opposite direction of the tail. If you are putting candy inside, put it in there now. When we made these as just a candy holder, we would adhere and/or crimp the edge. But for the bird, we still have some work to do. In the photo above, instead of squeezing the top and bottom of the open end together, you will push the sides together so that the end is going in a different direction than the top.

Before you adhere that end, cut along the edge in a curve. Then cut a little beak out of scrap paper. Cut a triangle out of Daffodil Delight and then fold in half to make a beak. Glue the inside and then glue the beak into that curved edge.

Punch out some black dots for eyes or just draw them on with a black marker. If you have a white gel pen, put a dot for the “whites of his eyes”.

For the wings, just punch out, diecut, or cut out by hand two hearts. Fold those in half and glue a folded wing onto each side of the bird. Don’t adhere the two sides together as you did for the beak.

Add a little glue to the inside edge after getting the bird all made, although it will be adhered at the point where the beak is.

That’s all there is to it to make these cute little birds! Just kind of a silly little project you can try on a Saturday afternoon!

Bee Mine Square Pillow Box Valentine Treat

Bee Mine Square Pillow Box Valentine Treat

Wondering what to do with the Square Pillow Boxes in the Spring Mini Catalog? You can do many things with them, including decorating one for specific holidays such as this Bee Mine Square Pillow Box Valentine Treat. It is a little bit differently shaped box but holds a fair amount of candy or a small gift. These are easy to put together and already come with the adhesive on the sides. All you have to do is crease on all the score lines, and then in more of a squeezing kind of way, push it into the pillow shape, and then remove the adhesive covers making sure the sides are lined up properly.

Before assembling this box, you may want to color it with ink using Blending Brushes or stamp on it, as I did on this box. You do want to make sure the ink is dry. I found that mine dried very quickly, but immediately you don’t want to smear it. I think this is applicable if your ink pad is very juicy and the layer of ink is wetter and thicker.

I used the Bee My Valentine Stamp Set to stamp various images over the front and sides of the box. I didn’t do the back side of the pillow box but you could. Also, if you wrap around a belly band, it will cover some of the stamping. I stamped the honeycomb in Daffodil Delight, the hearts in Sweet Sorbet, and the flowers in Pool Party, Petal Pink, and Fresh Freesia. You can see in the photo below how I chose to stamp so as not to stamp on the sides that would be hidden on the inside of the box or the back of the box which I did not want to stamp.

Bee Mine Square Pillow Box Valentine Treat Stamping

The strip of Bee Mine Designer Series Paper I chose for the belly band is 9 1/2″ long. Originally I cut the one in the photo at 2″ wide but later cut it narrower at 1 1/4″. You don’t even have to have a belly band to decorate the box.

When I watched a Facebook Live with Sara Douglass, CEO of Stampin’ Up! the other day when she made some Valentine pillow boxes, she placed her belly band around the box so that the opening was at the top of the box and not blocked by the belly band. This way the box can be opened without removing the belly band. However, you can run the belly band the other way if you feel you want the opening of the box to have that extra security to keep it closed.

For the belly band, I used this pattern with the tiny white flowers at 9 1/2″ x 1 1/4″. You can just cut the whole strip across the 12″ width of the designer paper and then shorten it after you see how much you want on your box. But 9 1/2″ seems to have plenty of overlap. Rather than scoring it ahead of time, just wrap it around the box and crease the band with your fingers at each edge. It won’t be a “perfect” fit since there are curves but it is very close.

To decorate my box and belly band, I stamped a greeting in the Bee My Valentine Stamp Set and die cut with a stitched circle in the Stylish Shapes Dies. I made the bee by using the Bee Builder Punch, punching out the bee body shape out of Daffodil Delight, and stamping the stripes and face with Memento ink. The wings were stamped on Petal Pink cardstock and with Petal Pink ink. The antennae are stamped in Memento black on Basic White. Then I used the Bee Builder Punch for the antennae (the heart shape), the wings, and some Sweet Sorbet and Petal Pink hearts.

There are lots of ways to decorate these boxes! Just play with them and see what you come up with. The boxes feel very sturdy. In my January stamping newsletter, I made a box that was embossed with the new Layered Florals 3D Embossing Folder first and then decorated with stamps and die cuts in the Painted Lavender Bundle in the Spring Mini.

Hopefully, you already own some of these Pillow Boxes so you can make some Valentine’s treat boxes, but you will have plenty of opportunities to use them in your papercrafting and gift-giving in the future if you order them now.

SHOP STAMPIN’ UP! ONLINE HERE!

Nature’s Sweetness Easy Explosion Box

Nature's Sweetness Explosion Box with Lid

This Nature’s Sweetness Easy Explosion Box is something fun and easy to make and makes a cute little gift or favor for someone. There are variations of this little project but I came across this idea while cleaning out some old computer files! You never know what you might find!

Some explosion boxes have sides that fall open when you remove the lid. I’ve made that kind too which can be used well as kind of a folding scrapbook or photo album. This one I made has sides that just fold in. Put a greeting on the inside, maybe a little treat or gift. You could write messages on the sides inside or adhere some small photos.

This explosion box uses the Nature’s Sweetness Specialty Designer Series Paper. For my box, I used a very gold pattern for the box and a white and gold pattern for the lid. These papers have another design on the other side. You do want to pay attention to the direction of any patterns on your paper choice.

Start with a 7 1/2″ x 7 1/2″ square of paper for the box. Score at 2 1/2″ on all sides, like a tic tac toe board. Or think of it as scoring at 2 1/2″ and 5″. After you have done the scoring, cut off all four corners on a diagonal. You can use your Paper Trimmer, just lay the two points on that cutting groove.

Nature's Sweetness Explosion Box Scoring
Nature's Sweetness Explosion Box Base

Fold and crease all the score lines and by hand, fold the corners to the inside to form a box. Give those fold lines a good crease with your fingers or lay on the table and use your Bone Folder.

For the box lid, cut a square 4 1/4″ x 4 1/4″. Score on all four sides at 7/8″. Then make four snips as shown in red below to make the flaps. Cut toward the outside of the scoreline a tiny bit. I think this gives just that tiny bit of extra room for the lid to fit over the top of the box without pinching in the sides. I didn’t do mine as perfectly as I should have but it turned out all right.

Diagram for Explosion Box Lid

Fold and crease all the score lines and then fold in the flaps and adhere to make a lid.

On the inside of the box, you can put a little greeting of any kind. I cut another square of one of the designer papers and then layer a greeting or message on top of that. I stamped a greeting from the Lovely & Sweet Stamp Set.

Nature's Sweetness Explosion Box Inside

You can decorate the top of the lid, or if you prefer tie a ribbon around the box with a bow on top. For mine, I roughly cut out this flower and leaves from the gold embossed sheet in the Nature’s Sweetness DSP. The image is colored with Stampin’ Blends and then cut out with one of the dies in the Lovely & Sweet Dies. I layered the diecut on a circle punched out with the 2″ Circle Punch.

This is an easy little project so give it a try! Some designer papers are heavier than others or you might want to try using cardstock which you can stamp on or add layers of designer paper to decorate. The sky is the limit! Have fun!

Stay In Touch With the Stamping With Karen Mailing List!

Valentine Mailbox

Have you signed up for my Stamping With Karen Mailing List yet? If you like visiting my blog or if this is your first time here, please join us by signing up in the Mailing List Sign Up Box!

You will receive an email newsletter each Tuesday with the latest Stampin’ Up! news and any special offers, plus at least one tutorial for a card or another project or tip. Stampin’ Up! updates us on Tuesdays so that is a good day to get in touch with you!

If you like getting new stamping ideas, this is for you! These projects are exclusive to my newsletter. 

As a special gift for signing up, you will receive a PDF called “A  Dozen Creative Gift Wrap Ideas”.

Keep on top of all things Stampin’ Up! and learn how to use those great products in papercrafting!  Sign up in the Mailing List sign-up box in the upper right corner of my blog or the pop-up box! If you are on your phone, the red signup box may be at the bottom of this post.

Here is a link to sign up also!

February 2024 Paper Pumpkin Kit

Paper Pumpkin February 2024 Kit Sweet Springtime

The February Paper Pumpkin Kit, Sweet Springtime, is ready for you to subscribe to! I know some(?) of us have just put away our Christmas decorations (okay, me!), but do you realize Easter is March 31? So with springtime and Easter coming up rather soon, it is time for us crafters to begin our springtime cards and projects. And what would be more fun than bunnies, chicks, flowers, and everything spring?!

Get this Sweet Springtime Kit in the mail in mid-February if you join Paper Pumpkin by February 10th. Even if you are not sure about Paper Pumpkin, try this kit, which looks to be very cute and fun, and then you can decide. Each month you can skip a kit if you need to or get the one that is automatically coming with your subscription. Certainly, there is no obligation, and you can cancel at any time. Just make your choice known by the 10th of any month when Stampin’ Up! bills the kit and sends it out. Stampin’ Up! guarantees all Paper Pumpkin kits.

Here is the information about this Kit:

Celebrate Easter and Spring with adorable cards and treat boxes!
• Makes 9 projects: 3 each of 3 designs
• Projects include printed cards, coordinating envelopes, and gift boxes (not food-safe)
• Precut paper pieces, baker’s twine, and embellishments
• Coordinating colors: Petal Pink, Daffodil Delight, Granny Apple Green,
Berry Burst, Early Espresso (Classic Stampin’ Spot), Crumb Cake

PLUS: Stampin’ Up! is doing something different this quarter! The first three months’ kits all coordinate with a set of dies you can purchase separately! They will be in the Stampin’ Up! Online Store while supplies last!

—Add dimension to your crafting projects with The Love of Spring Dies! Choose from a leaf sprig, daffodil, “Love” sentiment, or label to give your cards or tags that extra special touch. The best thing about this add-on is that it coordinates with not just one but three kits (Lovely Lavender, Sweet Springtime, and Memorable Meadows). (Please note that the Stampin’ Cut & Emboss Machine is not included and can be purchased separately.)

The Add-on details:
· Item number: 164396
· Name: The Love of Spring Dies
· Price: $12.00 USD
· Availability: Available in the Online Store while supplies last.
· Includes: 4 dies

I don’t know about you, but I can’t wait to get this kit! The box already sets the tone and it looks like a very cute and useful kit. Even if you don’t celebrate Easter or send out cards, you can use the contents for baby cards, springtime cards, or any-time cards! Plus, you will have variety in the projects with regular size cards, slimline cards, and milk box treat boxes! So fun!

Join Paper Pumpkin TODAY so you won’t forget and miss out!

JOIN PAPER PUMPKIN TODAY!

Last-Minute Christmas Ideas

Wrapped_Christmas_Candy_Bars

Here are some Christmas ideas from years past in case you need some! Use whatever paper and materials you have!

Wrapped Christmas Candy Bars

Just wrap up some regular-size chocolate bars with cardstock or designer paper and decorate a little! Keep it simple!

Christmas Votive Home Decor

Christmas Votive Home Decor

You most likely have a plain glass votive holder somewhere in your house. Take it out and decorate it for a Christmas home decor item or give it as a gift.

Santa Suit Christmas Gift Bag

Santa Suite Christmas Gift Bag

Need a fun gift bag? Cover a plain gift bag with red cardstock and turn it into a Santa Suit!

Reindeer Candy Cane Treat

Reindeer Candy Cane Treat

You can use the retired Tag Topper Punch if you have it to make the reindeer face, but if you don’t have it, just cut a little chin for the reindeer and it will be fine.

Santa Treats

Santa Treats

Just follow the directions in my blog post to make one of these! They are made much like a 2-4-6-8 box. Then just wrap a belt and buckle around! Fill with candy or a small gift!

Snowman Gift Bag

Snowman Gift Bag

This is such an easy gift bag to make and so much fun! Use what you have to make any kind of snowman you like!

Gingerbread Gift Bag

Gingerbread Gift Bag

I’ve been seeing gingerbread designs all over the internet in various forms and I don’t mean cookies! Finally, it dawned on me that I could get a pen and play, too, so here is one of my Gingerbread Gift Bags! It is not stamping but it is papercrafting and something quick and easy you might like to do!

Crafty people have been buying any little 3D house or building they could find anywhere, especially the dollar stores, spray painting them a gingerbread brown color, and then using some white paint pen to add the “gingerbread” design! Maybe Pottery Barn started it with expensive decorations and people came up with their cheap knockoffs as we all like to do!

But then I started seeing this technique used on paper and cards or building their own houses out of cardboard! And when I found a stash of plain kraft gift bags in the closet, the lightbulb went off for what I could make! I ordered a set of 8 paint pens on Amazon! I wasn’t sure exactly what people online were using (and I always want to know ‘exactly’), but I found this package of 8 white acrylic paint pens (White Paint Pen for Art – 8Pack Acrylic White Paint Marker) for a good price, even though I only needed one. And I could get them the next day which was fantastic! You could also use a chalk pen or even real chalk or a white gel pen. I loved watching short videos on Instagram of people drawing designs like this on cards or paper decorations, etc. It was mesmerizing! One person said not to be too exact, she liked the wonky look better!

With that, I got out a kraft bag, primed my paint pen (shake it and press the tip down on a piece of scrap paper to get the ink flowing), and started drawing on the bag! The first one I made I completely copied from someone and it only took a few minutes! Then I got out another two bags for gifts and drew on those! The photo above is one of them. My table was so heaped with craft stuff and wrapping paper that there was no decent place in my dark house to take a good photo….so I just placed it on the carpet which didn’t produce a good background! But you get the idea!

This is like drawing when you were a kid and drawing houses all the time! Remember? You didn’t worry if it was perfect or even or crooked, you just drew the house, the windows, the door, and then maybe spiffed it up a bit with curtains or bricks or shingles or plants. That’s all you have to do here, just add the gingerbread features.

I can’t wait to make more real Christmas gift bags. You could draw a small version on a card or a tag if you need some last-minute things! Have fun making a gingerbread gift bag!

Candy Bar Homemade Christmas Fudge

Candy Bar Homemade Christmas Fudge

I’m bringing back an oldie but goodie! This Candy Bar Homemade Christmas Fudge poem and idea has been around probably as long as I have been a Demonstrator, which is a long time! But no matter how old it is, it will look updated with current designer paper and is always a funny gift to give!

You can modify this idea to whatever size candy bar you have, but my chocolate candy bar is 4.4 ounces and says “XL” on the label. You might even find a gigantic candy bar you could use!

I wrapped a piece of Real Red cardstock around the candy bar, and cut the correct length to cover the candy bar, without scoring. Since the candy bar has some thickness it probably works better to wrap, unless you want to figure out the score lines. The measurements all depend on the size of your candy bar. I think I used a piece about 7″ x 7 1/4″. Then I measured just the top of the bar and cut a piece of designer series paper almost like a card, leaving a slight red margin around the edges. I used the Merry Bold & Bright Designer Series Paper with the cute little light bulbs.

After typing and printing out the poem (you can do it on computer paper or Basic White cardstock if that works in your printer) I cut it down to a narrow size and layered it on a slightly larger piece of Real Red cardstock so it would stand out from the designer paper. I even stamped a few little ornaments in Real Red ink from the Merriest Trees Stamp Set. For the finishing touch, I added a Real Red & Gold Dotted Ribbon bow to the top of the poem.

You will find a few different versions of this poem online, but they are basically the same. Feel free to change it up for your personalization if you are good at poetry!

If I knew how to share a link to the poem I would, but you can type it up and make it whatever size and font you like.

Have fun with this project! I hope you find some giant chocolate bars!

Last Minute Thanksgiving Ideas!

We’re almost out of time because tomorrow is Thanksgiving! If you are still looking for some inspiration for a treat to take to someone, table decorations or favors, a card, or something else, here are some of my past ideas from the archives! You can update with the paper or stamps you have now or dig around in your stash and find something you have that will work! Just click the title below each photo to go to the blog post!

Thanksgiving Wine Bottle Label w Flowers

Thanksgiving Wine Bottle Label

Maybe you are taking a bottle of wine or some other drink to a Thanksgiving dinner or just want to decorate your own bottled beverage. Make a simple decoration to hang over the neck of the bottle. It’s almost like a giant tag with a hole in the top! Check out my blog post for the measurements and details to get your started making your own!

Blackberry Beauty Thanksgiving Card

Blackberry Beauty Thanksgiving Card

This card really caught my eye as I was looking back for past projects! It certainly is the gold foil accents that makes the card so beautiful! You don’t need to use this exact same paper, just use some other paper you love with a Thanksgiving greeting (or something generic) across the front with a little glimmery embellishment.

Hello Harvest Pumpkins Card

Hello Harvest Pumpkins Card

Oh, how I loved this Hello Harvest Stamp Set from last year! You can make a similar card with the Pick of the Patch Stamp Set we have currently, or go look for the Hello Harvest Stamp Set from last year’s Holiday Mini Catalog! I loved coloring in the pumpkins with Stampin’ Blends.

Turkey Sour Cream Treat Holder Side View

Turkey Sour Cream Treat Holder For Thanksgiving

This is one of those “sour cream holders” that we have probably all learned to make from the time we learned about stamping! Put some candies inside and put one by everyone’s place at the table! Read the blog post for the directions if you aren’t sure! Then decorate your turkey with whatever punches or dies you have for feathers!

Turkeys

Little Thanksgiving Turkeys

I can’t resist! You may not have the ingredients on hand but maybe you’ll remember for next year! I learned how to make these from a friend back when my kids were little and in preschool! I made them lots of years to take to school for treats or to simply have as place setting decorations at our Thanksgiving table at dinner. I don’t know why, but I love them! Just soften a few caramels at a time in the microwave, stick the cookie on the back end, then smoosh in a candy corn on its side!

Enjoy Your Thanksgiving!

Thanksgiving Candy Holder Favors

Thanksgiving Candy Holder Favors

It’s down to the wire for Thanksgiving, as hard as that is to believe, but there’s still time if you want to make some little Thanksgiving Candy Holder Favors. These are really easy and will hold two chocolate kisses or a chocolate nugget. Think how cute these would be by everyone’s plate at Thanksgiving dinner for a little favor!

To make these little candy holders, cut a strip of cardstock approximately 5″ long by 1 3/4″ wide. You can change up the measurements depending on what kind of candy you want to put inside. Score these strips at 2″ and 3″. Crease and fold on the score lines. You can use different colors and images on the front or make them all match.

After you have your candy inside, you can punch a hole in the top and tie a ribbon through the hole or use a couple of Mini Glue Dots to hold them closed. If you have any kinds of clips you could use those to hold them closed. You can also attach a greeting or a guest’s name to use each favor as a place card. I used to love to make place cards when I was young for family dinners!

I started with the pumpkin and the Pilgrim hat but I got a little carried away with the turkey! The pumpkin is stamped from the Pick of the Patch Stamp set and just a little diecut greenery that was already in a pile of scraps on my table.

The Pilgrim hat is made with Early Espresso for the hat and the brim. The hat is a 1″ x 1″ square and the brim is 1/4″ x 1 1/2″. The Basic Black band on the hat is 1/4″ x 1″. The buckle is made with a 1/2″ x 1/2″ square of Gold Foil with a center of Basic Black 1/4″ x 1/4″ to look like the band going through the buckle.

The turkey is made with two circles of Pecan Pie cardstock. The feathers are die cut greenery in the Joy of Noel Dies! Just use whatever you have or come across! The red turkey waddle is a diecut holly leaf from that set! The eyes are punched with my old Crop-a-Dile and colored in with black.

These are just fun little candy favors, so unless you want to, you don’t need to go to a lot of trouble making these!

Happy Thanksgiving!

Get the November Paper Pumpkin Kit Today!

Paper Pumpkin November 2023 Sq Ad1

The November Paper Pumpkin Kit, the papercrafting kit that comes to you in the mail every month, is called “Warm Wishes” and is a kit to make holiday treat boxes! Always fun things for the holidays! The holiday Paper Pumpkin Kits are usually my favorites.

You only have today and tomorrow left to sign up for Paper Pumpkin to receive this month’s kit! Friday, November 10th is the last day, and soon after that Stampin’ Up! will begin sending out the kits that you will receive in your mailbox! What a treat!

I always say Paper Pumpkin is the gift you give yourself (and maybe someone else too!). It actually seems like a gift when you open it, especially the holiday kits with the specially decorated box. Inside you’ll see the little ink spot and the exclusive stamp set. Then wrapped in tissue paper, just like a gift, is a package with all the materials you need and the instructions!

“Light up the Christmas season with this month’s Paper Pumpkin kit! With traditional Christmas home designs and warm Christmas wishes, spread the light of Christmas with a gift box! Plus, you can get the Warm Wishes Cards & Envelopes Add-On to take your Christmas crafting even further (available while supplies last).” (You can only purchase these cards and envelopes if you are a Paper Pumpkin subscriber.

Kit Details:

This kit includes:

8 boxes; 4 each of 2 designs
1 Mossy Meadow Stampin’ Spot
Iridescent glitter accents on paper
Precut paper pieces
Linen thread
Treat bags
Warm Wishes photopolymer stamp set


Completed box size: 4-1/4″ x 4-1/2″ x 1-1/2″ and 4/1/4″ x 3-3/4″ x 1-1/2″


Coordinating Stampin’ Up! colors: Balmy Blue, Blueberry Bushel, Cherry Cobbler, Crushed Curry, Daffodil Delight, Lemon Lolly, Mossy Meadow, Night of Navy, Old Olive, Pecan Pie, Real Red

Sign up for a Paper Pumpkin subscription today!

No risk, no obligation. Cancel or Skip a month now and then if you need to.  Sign up by November 10th! 

As a bonus you can purchase when you are a subscriber:

Paper Pumpkin Add-On

ADD-ON DETAILS

Warm Wishes Cards & Envelopes (163985)
 

While supplies last.
$14.00 USD

This add-on includes:
• 20 Cards & Envelopes 
• Iridescent glitter accents on paper
• Folded card size: 5″ x 7″ 

These look like beautiful cards AND envelopes that will help you get your Christmas cards out to the mailbox quickly!  Just add a nice greeting to the card and stamp or write a personal message inside!

SUBSCRIBE to the November Paper Pumpkin by November 10th! Click HERE!

Get the 12 Weeks of Christmas Today!

Christmas Truck

Every year I send out the 12 Weeks of Christmas holiday emails only to my Mailing List subscribers as a thank you for following me on this stamping journey! They also get a newsletter every Tuesday with Stampin’ Up! news and offers plus at least one stamping project idea or tip. But when we start counting down to Christmas, I send out a special email on Wednesdays with an exclusive holiday project that I don’t post anywhere else!

We are already on Week 5 of the 12 Weeks of Christmas!! You missed the first four weeks, but you can still get the rest of the holiday emails if you sign up right now before 1:00 PM CT today!

Here’s how to get on my Mailing List! If you are on a computer, you probably will see a red box on the right side at the top. Just fill in your name and best email address.

If you are on your phone, you may have to scroll to the bottom of the screen.

Or just click here to go to my Mailing List Sign Up page!

Last Minute Past Halloween Ideas!

If you are still looking for last-minute Halloween ideas, here are a few from past years! You can update with our newer products or maybe you still have some of these older products from years past! Whatever you like! Click the title above the photo to go to that blog post for directions. Don’t miss the last idea at the bottom of the post – a new one I had to stick in because it’s so fun! I usually make one of these every year! Save that paper towel roll!

Make a Cute Halloween Votive Candle Holder

Make Easy Sour Cream Containers for Halloween Treats

Make Easy Sour Cream Containers for Halloween Treats

Halloween Chocolate Candy Treat Bag

Halloween Chocolate Candy Treat Bag

Triangle Treat Box For Halloween

Triangle Treat Box For Halloween

Halloween Night Candy Bars

Halloween Night Candy Bars

Witch’s Boots

Here’s an updated idea I made this year but I’ve made lots of these in the past!

I didn’t stuff any candy in there yet but I will! The Witch’s Boots are made with a paper towel roll cut in half. Wrap the roll in designer paper or cardstock. I used the Merry Bold & Bright Designer Paper, the pattern with the stripes that look like socks! Yes, you can use Christmas paper for a Halloween project!

Take a piece of Basic Black Cardstock however high you would like it to be to wrap around the bottom of the roll to start making the “boot”. Cut it so the ends meet in the center of the front of the boot and then you can fold back the top corners. Make it tall enough to add the buckle, especially if you want a big one.

Cut a piece of Basic Black in a long triangle to make the bottom of the boot. You want it to be as wide as the roll but you can trim around it to make it rounded in the back. You can cut it longer than you want and then curl up the toe with just a pencil or something however you like it.

You can make a cheater buckle by just adhering a square of black in the center of a square of Gold Foil. Then put some candy in a cello bag or add it to the “boot” as is. Just have fun with this idea

I hope these ideas are helpful and fun for you! Each one of these is my favorite thing that I love to make! (Maybe, especially, decorating these large candy bars??!!!)

Have fun and be safe on Halloween Night!

Them Bones Skeleton Triangle Treat Box For Halloween

Them Bones Skeleton Triangle Treat Box

One of my favorite types of treat boxes is this triangle treat box. You can make them for any occasion such as this Them Bones Skeleton Triangle Treat Box For Halloween. This kind of treat box is really so easy to make! You will be surprised if you haven’t made one yet!

You can vary the size of these triangle boxes. All you have to do is follow the basic pattern. You can use cardstock or designer paper. You can leave the cardstock plain, stamp on it, or add designer paper or embellishments. And these boxes aren’t just for candy or food. They can hold a small gift, or even money or a gift card.

Here is the basic pattern and the size I used for this Halloween Triangle Box. I used a piece of Them Bones Designer Series Paper to make this box. Obviously, cardstock would be a little bit sturdier if you needed that. My paper is cut at 4″ x 8″. If your paper has a pattern you need to pay attention to which way you cut the paper so the pattern won’t be sideways or something.

Triangle Box Drawing

After cutting the paper to the size you want, the rest is scoring. The blue lines on the diagram above are the score lines. Score the length of the paper in half, so if your paper is 4″ x 8″, score at 4″ in the middle. Measure the mid-point on the ends (2″) and lightly mark with a pencil.

The “tricky” part is scoring on the diagonal but it is easy. In that awkward position with your Paper Trimmer, score from that 2″ middle point at one end down to the middle score line which will be on a diagonal. Do that on both sides of one end, then turn the paper and score at the other end in the same way. When you do it, you’ll see how it goes. Here you can see the other side of the paper, which I could have used instead of the bones pattern. You can see what the score lines look like, really from midline to midline. Then you’ll punch holes in each corner, preferably holding the ends together when you do it so they match up.

Triangle Treat Box Scored

After you do the scoring, crease all the score lines and fold the box together to see how it goes. Then hold the ends together on each side and use a hole punch of whatever size you like to punch holes through the two papers on each side. After you decorate your box and put the treat inside, you can tie the box together with ribbon or twine.

This box is simply decorated by cutting out the skeletons from another sheet of paper in the Them Bones DSP and adhering them to the box. You could also add a greeting or some other embellishments. I tied my box closed with the Black & White 1/4″ Gingham Ribbon.

Here is what the box looks like from the side:

Them Bones Skeleton Triangle Treat Box Side

Here’s a triangle box I turned into a Witch’s Hat for Halloween….nine years ago! Wow!

Try one and you will see how easy it is to make a triangle treat box. And you just might need one or more for Halloween night maybe for family treats or for a few special trick-or-treaters!

Happy Halloween in a few days!

OnStageAtHome2023 Gift Box!

OnStageAtHome2023 Box

Stampin’ Up! is having a virtual event on the second Saturday in November called OnStageAtHome 2023 and I was one of the lucky “several thousand” people who registered early enough to get this free gift box! It just arrived late yesterday and was so much fun I had to show you all the things in it!

You still have time to sign up to be a Demonstrator with Stampin’ Up!, get the special deal offered until October 31, and get to “attend” this virtual mini-convention on your computer FREE of charge! You will automatically be registered, and even if you can’t attend, you can watch a recording later. (But you won’t get a gift box, sorry!) And get previews of the upcoming Spring Mini Catalog!

OnStageAtHome2023 Box Inside

Inside is a 500-piece jigsaw puzzle and all kinds of things!

OnStageAtHome2023 Box Contents

Even a pair of Stampin’ Up! socks!! There are pens, a pin, photo props, and a quality notebook with little stickers!

OnStageAtHome2023 Box Open
OnStageAtHome2023 Notebook

OnStageAtHome2023 Box Props

I knew it was coming, but it was such a nice surprise when it arrived on my porch! I just had to show you all the goodies! And now I have a new pair of socks to wear! And don’t all of us papercrafters just go crazy over notebooks and pens?!! I always have!

We are all still very much in holiday mode, but it won’t be long until we’ll be looking forward to a change of pace and be ready for new spring products! It will be fun at this virtual OnStage to see what some of the new products will be! One of the best perks of being a Demonstrator!