Category Archives: 3-D, Gifts & Things

Coaster Board Magnets

Coaster Board Magnets

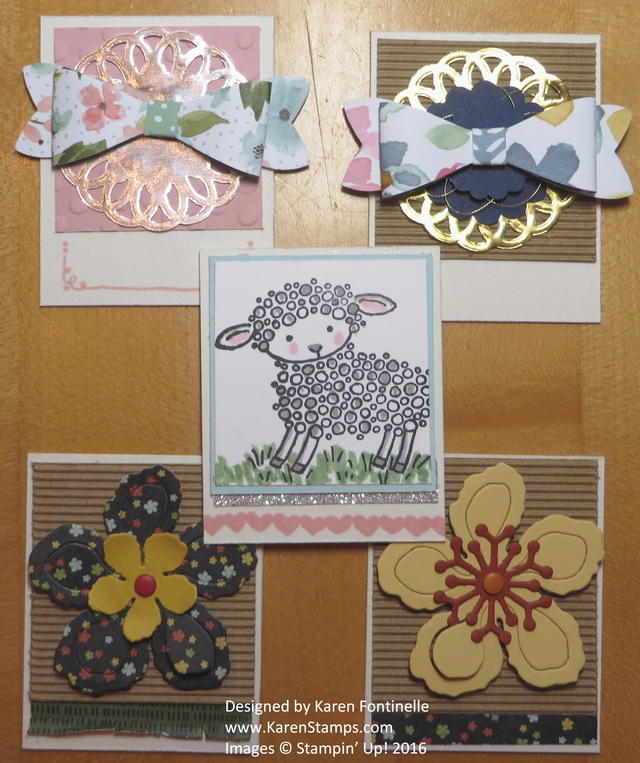
These little Coaster Board magnets are an idea that I found in our latest issue of Stampin’ Success, a magazine sent to us demonstrators every quarter. I’ve mentioned this magazine a lot in the past, one of my favorite perks of being a Stampin’ Up! Demonstrator!  We used to get an issue every month, but unfortunately, times change, and now we get it once a quarter. But it is still a fun source of stamping ideas and business tips.

You might not even know what Coaster Board is or that Stampin’ Up! carries it! What in the world is Coaster Board??! Stampin’ Up! describes it as thinner than chipboard but sturdier than cardstock. It makes it the perfect material for any projects where you want something stronger than cardstock. You can stamp it, die cut it, and make 3D projects with it.

These magnets are cut 2 1/2″ x 2″. Of course you can make yours any size you want. I was going for small and cute! Decorate the front like a tiny card or adhere a photograph, attach embellishements or do some stamping on them! Then just attach a magnetic strip on the back (you can pick up all kinds of magnets for crafts at a craft store). This is a good way to use up some of your small scraps, leftover embellishments, etc. etc. Just have fun with it!

Coaster Board also works really well with the Berry Basket Die to make baskets that are stronger than cardstock. You can see the basket I made and the details HERE in this post.

Berry Easter Basket Wildflower Meadow

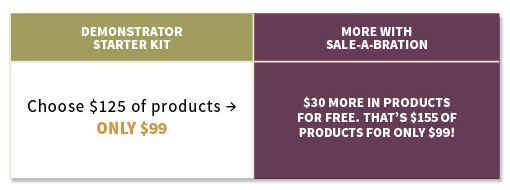
And if you would like to receive the magazine for Stampin’ Up! Demonstrators, Stampin’ Success, plan to join the Stampin’ Up! family yourself, especially now during Sale-A-Bration! Purchase the Starter Kit for only $99 and during Sale-A-Bration, get an extra $30 in product! Than means you will get $155 in product for only $99! Run your business as big or little as you like. You also receive some Stampin’ Up! Catalogs and business supplies to get you started!Sale-A-Bration Starter Kit Special

For more information and to answer your questions, just email me at Karen@KarenStamps.com or click HERE on the website for more information.  Signing up is easy!  You can do it online in a matter of minutes and have your Demo number to start looking around the Stampin’ Up! website for Demonstrators while you wait for your Starter Kit to arrive!

Put some Coaster Board on your next Stampin’ Up! order and make some cute Coaster Board magnets and other projects with it!

St. Patrick’s Day Gift Bag and Tag

St. Patrick's Day Gift Bag and Tag

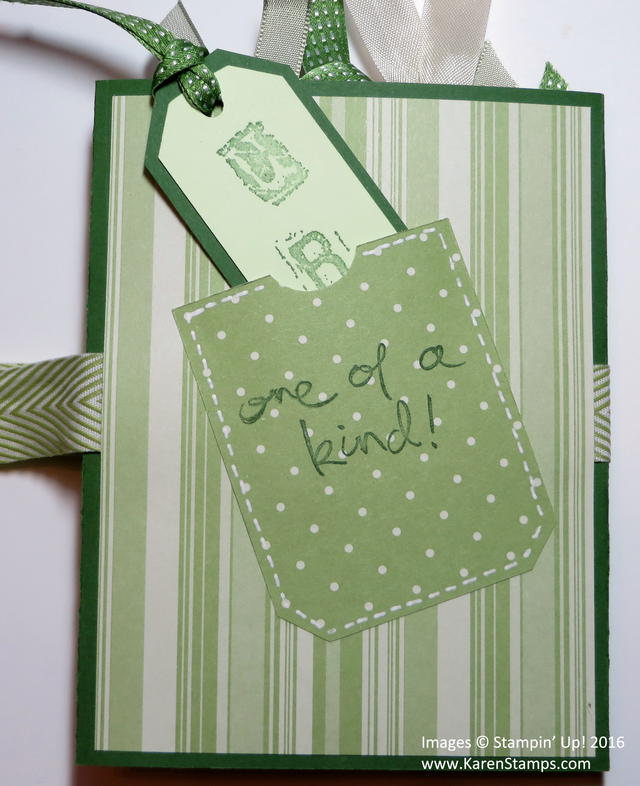
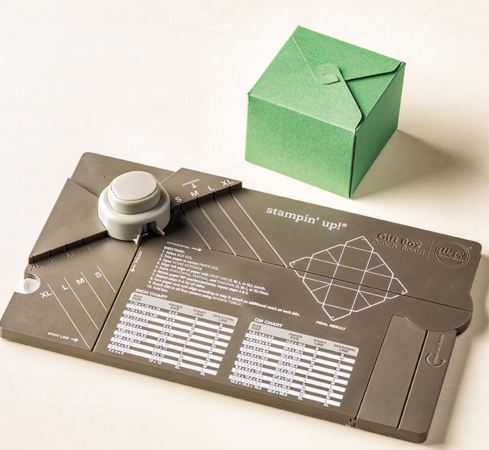
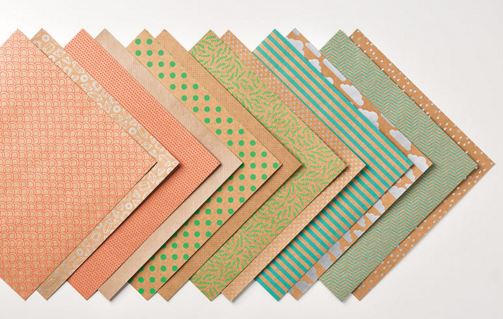
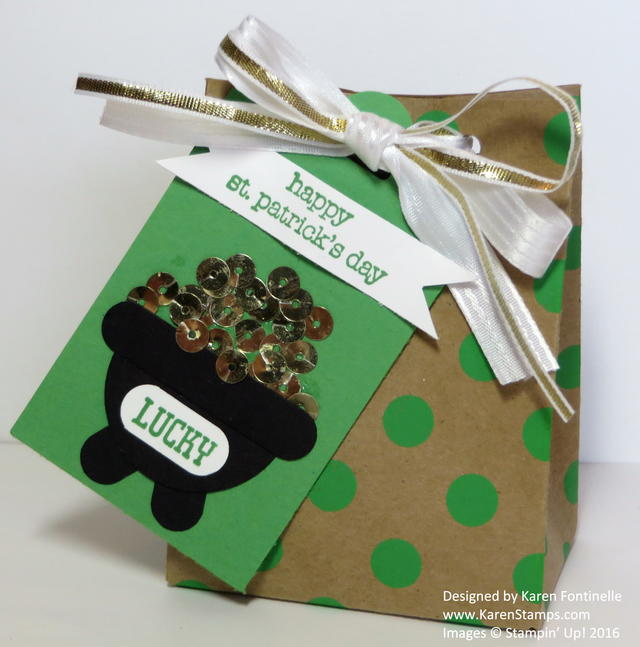
If you have a little treat for someone today on St. Patrick’s Day, you might want to make a little St. Patrick’s Day Gift Bag and Tag like this one!  I pulled out the Stampin’ Up! Gift Bag Punch Board and the Shine On Specialty Designer Series Paper.  This paper has a printed pattern on one side and shiny pattern on the other side, so that presents a dilemma of which side to use because you will like both sides! This is heavier kraft paper so great to use for boxes and bags and such.

The tag is first punched with the Scalloped Tag Topper Punch with Cucumber Crush card stock which matches the Shine On DSP. To make the little pot of gold, I punched a circle of black with the 1 3/8″ Circle Punch and cut it in half. You could use a larger circle punch or even a large oval punch if you wanted a bigger pot.  The rim and two legs on the pot are punched from the Word Window Punch.  What would we do without the Word Window Punch?!! For the gold coins, I pulled sequins off the Gold Sequin Trim.  The greeting is from the Teeny Tiny Wishes Stamp Set and the word “lucky” is from the And Many More Stamp Set. I inked up only the word Lucky on the stamp (it says Lucky You) and punched it out with the Word Window Punch. To make it smaller, I inserted the punched out piece back into one side of the punch coming in from the top so just the one end would get punched. It fits perfectly on the pot of gold!

So there you go! Make someone a St. Patrick’s Day Gift Bag and Tag and surprise them!

Shop Stampin’ Up! Online HERE!

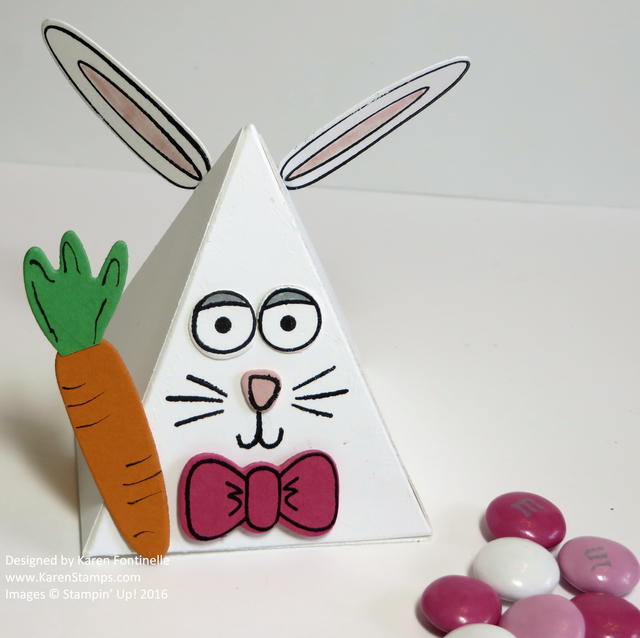
Playful Pals Easter Bunny Pyramid Treat Box

Playful Pals Easter Bunny Pyramid Treat Box

If you get the Playful Pals Photopolymer Bundle, which includes the Playful Pals Stamp Set and the Pyramid Pals Thinlits Dies, and you spend some time playing with it, you will just become more and more creative playing with all the stamps and dies and thinking of all the possibilities, such as my Playful Pals Easter Bunny Pyramid Treat Box.  I didn’t even know if there were proper “ears” in the set, but there were, and then I die cut a bunny ear out of orange card stock for a carrot and a green piece that is probably most like a frog’s foot for the leafy top of the carrot. I just drew in the little lines on the carrot and the leafy top with a black marker.  A lot of times I find that the more I sit and play with my stamps and accessories, the more ideas I can come up with.

Bunnies aren’t just for Easter!  You could make Playful Pals bunnies out of other colors, even designer paper, just for fun.  How cute will they be for babies or baby showers or gifts?! Little kids will like them as a birthday party favor.

With this Playful Pals Photopolymer Bundle, you can just stamp on the pyramid box or you can stamp and use die cuts to make things a little more 3D. So many possibilities! You can copy ideas you find online, but I also challenge you to just play and stamp and stamp and play and see what you come up with all the little pieces and parts!

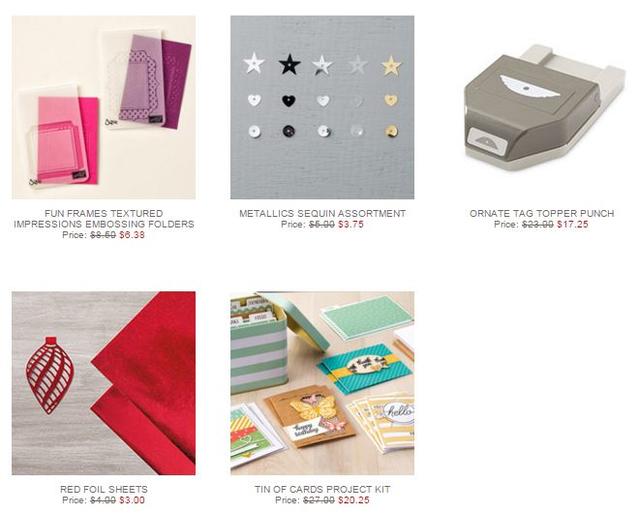
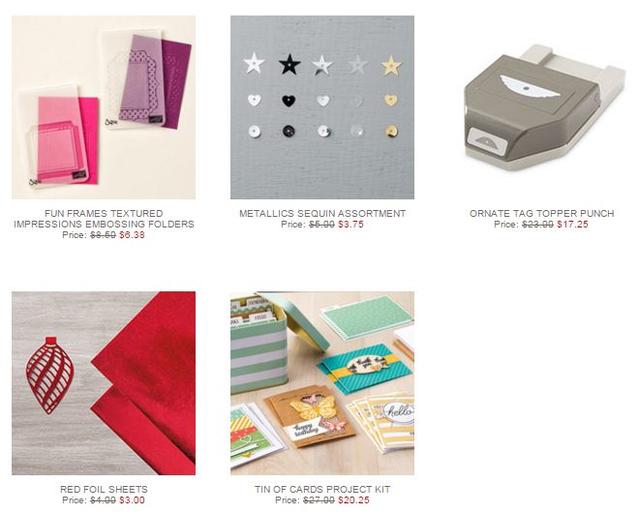
Don’t forget the Stampin’ Up! Weekly Deals that end tomorrow!  You might for sure want the Ornate Tag Topper Punch and especially the very cute Tin of Cards Project Kit by Stampin’ Up! You might also want to add the Tin of Cards Photopolymer Stamp Set that has great greetings and little doodles that I’ve used on other projects, not just the Tin of Cards.

If you want to make fun little animals and other projects like my Playful Pals Easter Bunny Pyramid Treat Box, be sure to check out my Stampin’ Up! Online Store HERE.

Shop Stampin’ Up! Online 24/7 or email me at Karen@KarenStamps.com if you would like me to put in your order for you.

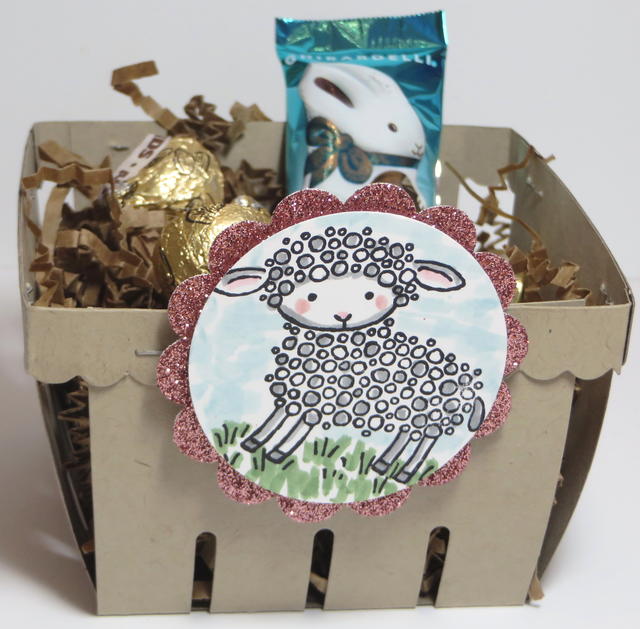
Make an Easter Basket with the Berry Basket

Easter Basket with the Berry Basket

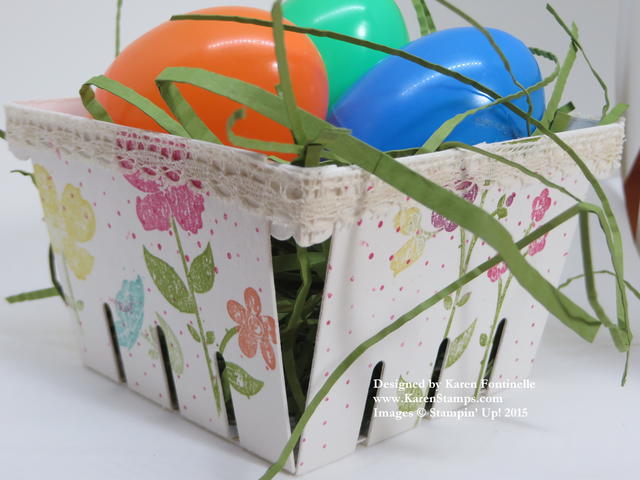
Make an Easter Basket with the Berry Basket Die and the Big Shot! Choose your favorite card stock color for the basket and die cut. Decorate the outside of the basket however you like, and fill with some grassy material.  Just like that, you have a cute little Easter Basket for a gift, a decoration, or a table favor.

This Easter Basket is made with Crumb Cake card stock to be neutral and then I used the Easter Lamb Stamp to decorate it along with some Blushing Bride Glimmer PaperI absolutely love this little lamb stamp! It’s just one single stamp, which makes it so cute just by itself! I just colored in a bit with some Stampin’ Write Markers and punched out with the 2″ Circle Punch. The Blushing Bride Glimmer Paper is punched with the 2 3/8″ Scallop Circle PunchSo easy and so cute!  Fill your basket with candy!

Don’t forget about the Stampin’ Up! Weekly Deals, good through Monday, March 7.

Stampin' Up! Weekly Deal Mar 1 2016

Shop Stampin’ Up! for stamp, ink, paper, and accessories for making all kinds of fun cards and projects such as this easy Easter Basket made with the Berry Basket Die.


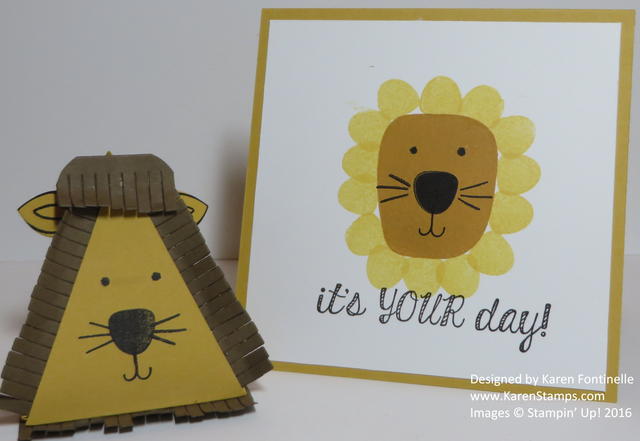
March Comes in Like a Lion Playful Pals Card and Pyramid Box

March Comes in Like a Lion Playful Pals Card and Pyramid Box

The saying goes, “March comes in like a lion and goes out like a lamb.” I don’t know if that saying will be true today or not for where I live and where you live, but I made some lions with the Playful Pals Photopolymer Bundle of stamps and dies in honor of March 1st.

***************

Help Bring Birthdays Back!

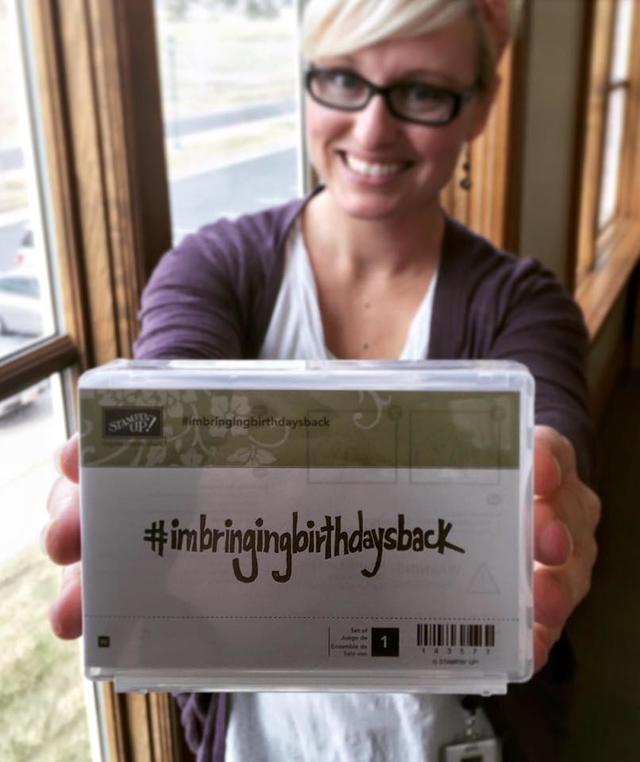
Maybe you recall THIS STORY posted on the Stampin’ Up! blog a little while ago about Shannon West, an employee at the Stampin’ Up! Home Office, realizing that people were just posting their holiday and birthday greetings on social media and not sending cards, and she decided to do something about it.  Stampin’ Up! joined in and now we have a new stamp that you can purchase and use on your cards or envelopes as Shannon is doing!

Here is a photo Sara Douglass, Interim CEO of Stampin’ Up!, posted on Facebook yesterday of the new stamp.  You can put Item #143573 on your Stampin’ Up! order.  The cost is $12.00. Right now it says the stamp is on backorder, but if you want it, I would put it on your order anyway. Maybe they just don’t have them all delivered to the warehouse yet for shipping.

imbringingbirthdaysback


***************

Stampin’ Up! Weekly Deals
Stampin' Up! Weekly Deal Mar 1 2016

Here are the new Stampin’ Up! Weekly Deals for March 1 through Monday, March 7, 2016. I think the main thing I would want if you don’t already have it is the Tin of Cards Project Kit. This kit is featured on the front cover of the Annual Stampin’ Up! Catalog. As soon as I saw the tin, I knew I wanted the kit, and the cards are cute too!  You can make the cards and then wait to attach the greeting for when you need a card and then you can choose what you need. The tin also has dividers so you can store additional cards.  All the other products make stamping more fun, too!

***************

Shop Stampin’ Up! Online for all the best in stamping and papercrafting products!

Botanical Gardens Gift Bag

Botanical Gardens Gift Bag

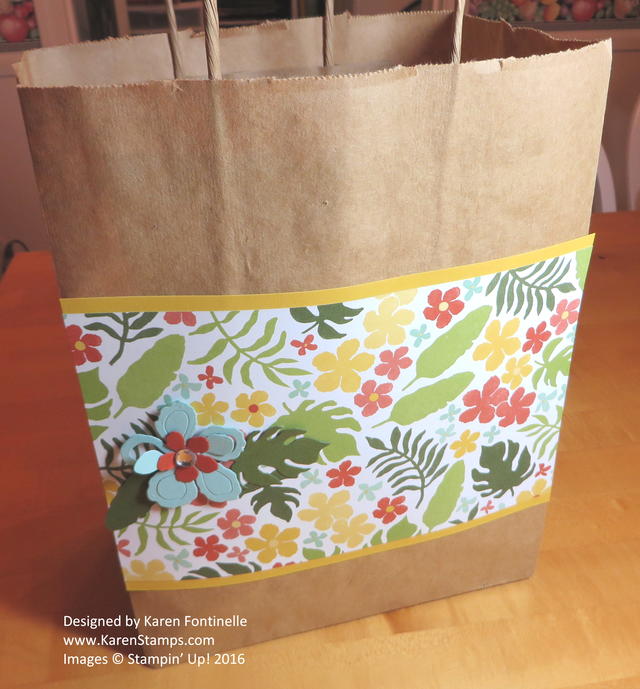
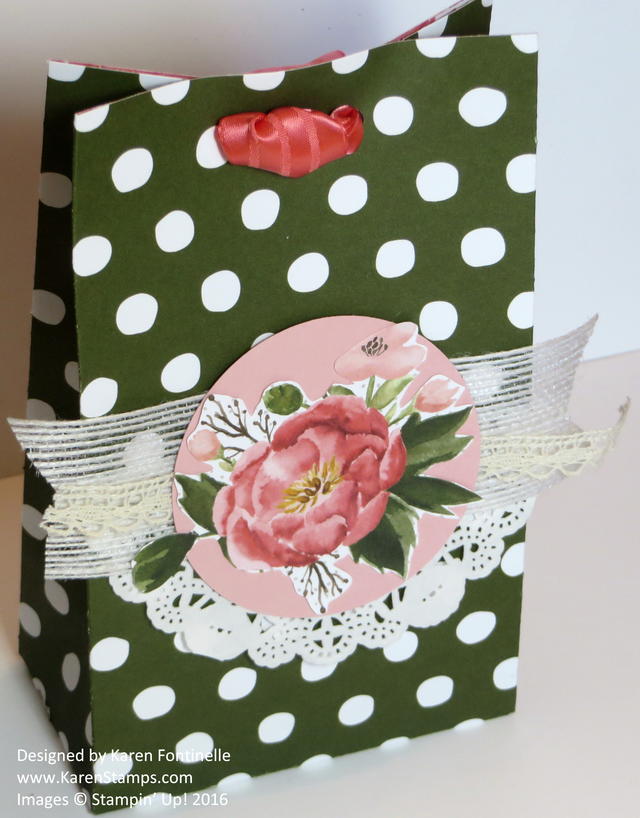
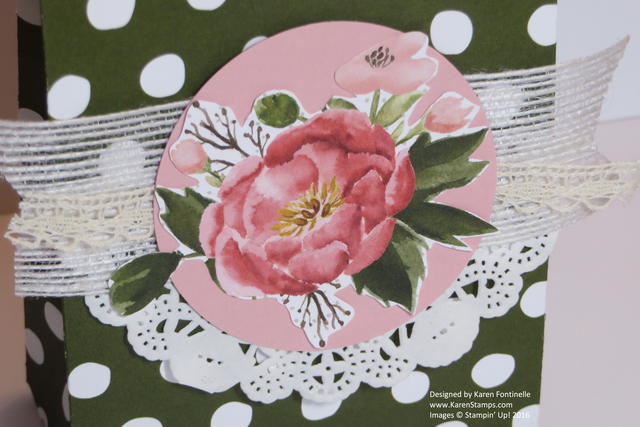
If there was one thing that made me purchase the products in the Botanical Gardens suite in the Occasions Catalog on page 26, it was the gift bag sample using this paper!  I guess it was the black background that really stood out to me. Actually, all the samples at the top of page 26 are so darn cute!  Did you realize the “plant” in the flowerpot is really stamped paper leaves??

Although this gift bag is not exactly the same as the one in the catalog, I used my Gift Bag Punch Board to make it with the paper from the Botanical Gardens Designer Series Paper. The Gift Bag Punch Board makes it easy to make a small gift bag, especially if you want one with the creases in the side. The instructions are written right on the Punch Board and a diagram, but rest assured there is also a Stampin’ Up! video if you need a more visual reminder of how to make your gift bag!  I’ve posted it below.

To make the tag, I just cut a 2″ wide piece of Whisper White cardstock and stamped the greeting from the set Enjoy the Little Things. This is the stamp set that coordinates with the Enjoy the Little Things Project Kit, but it’s also a good stamp set to have on its own! Then I punched the corners with the Curvy Corner Trio Punch. I sponged the edges of the tag with Pool Party Ink just for fun.  The greeting is stamped with Mossy Meadow Ink. Since I had some spare die cut flowers, it was easy to add a little flower to my tag. The leaves to embellish the tag were stamped with the veins in the Botanical Blooms Stamp Set and die cut with the Big Shot and the Botanical Builder Framelits Dies. The ribbon is the soft and pretty Pool Party Glitter Ribbon.

The Stampin’ Up! Annual Catalog and the Occasions Catalog are certainly good places to start when you are looking for inspiration or need ideas for a project you want to make. If you don’t want to copy it exactly, just change out the paper, or the colors, or the stamp set to make it your own.

It’s always handy to have some gift bags made up and ready to go, such as this Botanical Gardens Gift Bag which is perfect for spring and summer coming up!

Get your favorite stamping and papercrafting supplies at my

Stampin’ Up! Online Store!

(Spend $50 or more and choose a FREE Sale-A-Bration product now through March 31, 2016!)

January 2016 Paper Pumpkin Valentine Treats

January 2016 Paper Pumpkin Valentine Treats

I’m getting some Valentine treats ready made from my January 2016 Paper Pumpkin Kit. This kit makes a banner for Valentine’s Day and  these heart-shaped treat bags. All you need is some chocolate candy to put inside. (Candy purchased for professional purposes only, of course!!!)  All supplies came in the kit including the strips of adhesive used to glue the sides of the hearts together. You can use the included stamp set to personalize your hearts and you can even write a messsage of love on the back!

Today is the day!  If you would like to get the next Paper Pumpkin Kit in your mailbox in February, subscribe today or add a prepaid subscription to your Stampin’ Up! order.  The 10th of any month is the date by which you need to subscribe or pause or cancel your subscription because in a few days the next kits will go out!  I can picture the red boxes all stacked up in the Stampin’ Up! warehouse right now!

No worries!  If you miss the 10th today and join Paper Pumpkin later on, you will just get the next kit! It’s all good! Paper Pumpkin is for experienced and unexperienced crafters and stampers, old and young, girls and boys, grandmas and grandchildren, nieces and nephews, friends and college students – whoever is looking for a little break in our busy lives to just sit down and play with a surprise project once a month without having to design something or go out and buy supplies, etc.  It all comes in the red box! Maybe you need some glue and scissors, but maybe you won’t.

If you have any questions, just ask!  Email me at Karen@KarenStamps.com. If you are ordering from Stampin’ Up! anyway, then add on the 3-month Prepaid Subscription and earn a free Sale-A-Bration product for your subscription because you are spending over $50. It may even boost your order up to Hostess Rewards. And if you just want to try it for a month or two and see how you like it, join HERE or click to get more information.

I hope you will treat yourself for Valentine’s Day by joining Paper Pumpkin so you will start receiving your happy red box in the mail!

Chinese New Year Red Money Envelopes

Chinese Red Envelopes

Happy Chinese New Year!  This Chinese New Year is the Year of the Monkey. There are twelve animals in the Chinese Zodiac and the monkey is the ninth animal in the cycle. To celebrate, red envelopes are given with money inside. Someone asked me if I could make some for her, so here are some of the envelopes I came up with. I didn’t have any Chinese stamps, but I started off choosing flower stamps that I thought would work.  I did find a monkey stamp, and although I thought it might not be the right thing, the lady I was making them for liked having a monkey on some of the envelopes.

Chinese Red Envelopes 3

I used the Stampin’ Up! Red Envelope Paper that is no longer available and really gave the Envelope Punch Board a workout! I also gave the Heat Tool and Gold Embossing Powder a workout as well! Some of the stamp sets I used are retired. Even though they take up too much space, sometimes it is nice to have a huge selection of stamps to choose from when you have a custom project to make for someone!

These envelopes went all the way to China which is pretty exciting! I hope everyone who receives one enjoys their gift!

Check out the Google image today of the monkeys to celebrate the Lunar New Year!

Mini Treat Bag Thinlits Valentine Heart Treat Bag

Mini Treat Bag Thinlits Heart BagIf you have ever considered getting the Mini Treat Bag Thinlits Dies from Stampin’ Up! now is the time because they are discounted on the Weekly Deals! Quickly and easily make cute little treat bags for candy, gift cards, small gifts, or even as an envelope to hold a card. They can be for any occasion and thanks to creative people who figure these things out, you can even make them into different sizes!  You just need to die cut with the Big Shot the one main front piece that has one of the back sides attached, plus the other back side. Score, fold, and glue and you have a cute treat bag!

As a bonus, you get all kinds of extra pieces to die cut to make embellishments for your treat bag or to use on other projects.

Mini Treat Bag Thinlits Dies Pieces

My Mini Treat Bag I made with Rose Red card stock because it coordinates with the Love Blossoms Designer Paper Stack that I used inside the heart window.  I used the heart die to cut that window and then just adhered a piece of the Love Blossoms paper on the inside before I glued the bag.

Mini Treat Bag Window Inside

Mini Treat Bag Window

Next just decorate your treat bag with any embellishments or die cut some of the pieces that came in your set for whatever occasion you are making this for! This bag I made could be for Valentine’s Day but doesn’t have to be. Make a separate card to slip inside and have the whole thing be a card rather than a bag. Fold over the top and make a bellyband to make it an enclosure. Just have fun with it and you will!!

Check out the Stampin’ Up! Weekly Deals and all the good products of Stampin’ Up! HERE in my Online Store!

Pyramid Pals Valentine Treat Box

Pyramid Pals Valentine Treat Box

The Pyramid Pals Thinlits Dies weren’t something I initially thought I would purchase, but the cute animal samples in the Occasions Catalog were a little hard to resist!  And I knew that after Demonstrators and other stamps started making things with these dies that I would see all kinds of cute ideas.

So for my first try with these dies, I just made a little Valentine box! You need to cut two pieces to form the box. There is an extra triangle piece in there that I used to cut the pieces of patterned paper from the Love Blossoms Designer Series Paper Stack  (really cute papers, by the way!) to glue onto each side. You can use Tear & Tape Adhesive to  adhere the sides of the pyramid together, but don’t forget to leave one side open so you can put your treats or gift inside! To make mine easy and for a Valentine treat, I just used the Sweetheart Punch to punch out a Red Glimmer Paper heart for the front.  The greeting is from the stamp set Bloomin’ Love. For each side I used the heart punch in the Itty Bitty Accents Punch Pack to punch a red cardstock heart for just the two sides.

I could do even more to this Pyramid Pal Valentine Treat Box but sometimes you have to know when to stop! So I stopped. Lots of potential with these Pyramid Pals Thinlits Dies and the coordinating Playful Pals Stamp Set. But if you would like to save 15%, buy the Bundle!

Shop Stampin’ Up! Online!

Easy Valentine Candy Jar

Easy Valentine Candy Jar

I saw this idea for an easy Valentine candy jar in an online feature from Country Living and I had to try it since it looked so easy!  All you need is a doily of some kind, a heart, and some Baker’s Twine or similar! I used just a dab of SNAIL Adhesive to hold the doily in place and the heart while I wrapped the Cherry Cobbler Baker’s Twine around and around the jar. And then the best part – filling the jar with Valentine candy!! Give it fora  Valentine gift or keep it for yourself!

Paper Pumpkin January 2016 by Stampin’ Up!

Don’t look if you haven’t received or opened your Stampin’ Up! Paper Pumpkin Kit yet!

Mine is still unopened in the box, but it was a busy week and I think this weekend might be a good time for some Paper Pumpkin time! Don’t delay too long with your kit as there is a time factor involved! And I have to remind myself of this, too — you can use the stamp set that comes in the kit for other stamping projects! I often use it for the kit project and then put it away!  I missed out on using the greetings in one kit on other cards for a holiday because I just didn’t think about it!  Some people store their photopolymer Paper Pumpkin stamps in the Project Life by Stampin’ Up! Photo Pocket Pages and then in an album for easy access. I think I need to get organized and do that!

OK, so if you are still reading then you probably want to see what the Stampin’ Up! January 2016 Paper Pumpkin Kit is all about!  Here is the Stampin’ Up! video that shows how to put the kit together. Keep in mind, with each kit you can follow the directions….or not!  Sometimes you can make part of the kit as they describe and then make alternate projects with the remainder of the pieces.  It just depends. Each month’s  kit is different! And I love that Stampin’ Up! provides a video to watch, if you want, for each kit. So besides reading the directions, you can also watch how to make the kit.

If you would like to receive a Paper Pumpkin Kit in your mailbox once a month (or whenever you choose), the best deal right now during Stampin’ Up!’s Sale-A-Bration promotion is to order the 3-Month Prepaid Subscription and save $5. This will qualify you for a free Sale-A-Bration item from the Sale-A-Bration Brochure! I recommend adding some other products to your order because you will be paying the normal $6.95 minimum Stampin’ Up! shipping for your free SAB item. Might as well get some adhesive and Paper Snips or ribbon or cardstock along with it to make the shipping worthwhile! That’s my opinion anyway!

When you order before the 10th of any month, you will receive that month’s kit!  So order before February 10th and get the February kit.  Order later in February and you will receive the March kit.  Whatever you prefer.  Once you have subscribed, if you want to pause (or, heaven forbid, cancel!) your subscription, just do it before the 10th of the month because Paper Pumpkin starts shipping out around the middle of the month.

You can order extras for gifts! On the prepaid kits, you will receive an email from Stampin’ Up! telling you have to set up and activate your account with a special code.

If you prefer, there is still the monthly subscription HERE.

Either way, I think you will really enjoy the thrill of getting that Paper Pumpkin box in your mail every month!  And who doesn’t need some “happy mail” once a month!

Save $5 on a 3-Month Prepaid Paper Pumpkin Subscription

Click for more information!

Don’t forget the Stampin’ Up! Weekly Deals for this week and always check the Clearance Rack! And for every $50 you spend with Stampin’ Up! through March 31, 2016 you will get to choose a FREE Sale-A-Bration product! (Some products are only available until February 15th and then a few new products will be introduced!)

Stampin’ Up! Envelope Punch Board Card Boxes

Envelope Punch Board Card Boxes

I’ve owned the Envelope Punch Board by Stampin’ Up! since it came out, but I had never tried making one of these card boxes.  I was gifting some cards to a couple friends and wanted to give them a nice presentation. I watched some tutorials online to figure out how to make these and then got to work. Once I figured it out, it was easy and I was pleased with the result. You do need 12″ x 12″ paper to make this size which starts with 9″ x 9″ paper – not that I didn’t pull out a regular size piece of cardstock since it was 9″ x 9″ and I didn’t need something as large as 10″ x 10″ or something!  Duh!!  This is a good time to pull out some old designer paper to practice on (I know, I can hear the gasps, but surely you have some old paper and patterns you aren’t that crazy about anymore!).

This is how I made my card box although it may be difficult to understand without a video.

  • Place a 9″ x 9″ piece of paper in the Envelope Punch Board lined up with the 3 1/2″ measurement.  Punch and score. Move the paper over to the 4 1/2″ measurement, punch and score.
  • Turn the paper around to the opposite side and repeat the above directions.
  • Turn the paper to one of the sides that hasn’t been scored and punched. On this side, match up each of the score lines with the guide as you would normally do to make an envelope, punch and score.
  • Turn the paper to the last side and repeat the above directions of lining up the score lines with the guide.
  • Fold lightly on all the score lines to see how your envelope box is going to go together. Making sure it is in a landscape position, determine which flap is the top of the box and, if you want, punch the tip to round using the Envelope Punch Board.
  • Now that you know which side is the top, trim off the tabs from the top flap and cut slits for the bottom to make tabs just to make the bottom a little stronger with the tabs. (See photo)
  • Adhere the flaps to form the box, making sure the box is lined up well.
  • If you want to stamp on the box, do this before putting the box together.

Envelope Punch Board Scoring

Envelope Punch Board Card Box Cuts

Envelope Punch Board Card Box Scored

Envelope Punch Board Card Box Folded

Try this and you will probably find making this card box fun to make with the Envelope Punch Board! And any time we can get more use out of our tools and products, it’s a good thing!

Shop Stampin’ Up! Online!  Get a FREE Sale-A-Bration product with each $50 purchase!

Stampin’ Up! Sale-A-Bration and the Occasions Catalog Begin Today!

Stampin' Up! Occasions Spring 2016 Catalog

Sale-A-Bration 2016 Catalog

Today is the day!  The Stampin’ Up! Spring Occasions Catalog 2016 has gone live as well as the biggest Stampin’ Up! promotion of the year, Sale-A-Bration!  Be sure to check out these online catalogs today!  If you would like hard copies and do not have a Demonstrator, I would be happy to mail some to you.  Just email me at Karen@KarenStamps.com.

Sale-A-Bration has long been a very special promotion from Stampin’ Up! And boy, has it grown in the years I have been a Demonstrator! During Sale-A-Bration, for every $50 you spend on catalog product (from ANY of the current catalogs, my Online Store, or Clearance Rack and Weekly Deals), you get to choose a FREE product from the Sale-A-Bration (SAB) Brochure! And who doesn’t love free??!!

To clear up some confusion:  You do not have to purchase any specific products listed in the SAB Brochure in order to get a certain free product. Where it lists current product, those are just suggestions for the sample project. Just spend $50 with Stampin’ Up! and choose anything marked FREE in the SAB Catalog.

This year there are some products only available until February 15 and then there will be some new products coming February 16th!  Just to keep things fresh and exciting! I’ll remind you so you don’t miss out!

Have a workshop with your friends or place your own big order of $250 or more and receive an extra $25 in Stampin’ Rewards!!

JOIN STAMPIN’ UP! DURING SALE-A-BRATION!

Want to join the Stampin’ Up! family? Purchase the Starter Kit for only $99 and choose $125 worth of products. But there’s more!! During Sale-A-Bration choose an EXTRA $30 in product! That’s $155 in Stampin’ Up! products for only $99! Email me if I can answer any questions for you or CLICK HERE for more information!

OK, enough reading, go look at the catalogs and go shopping!  Have fun!!

Shop Stampin’ Up! for new products in the Occasions Catalog and then choose your FREE Sale-A-Bration items for EVERY $50 you spend!  No limits!