Category Archives: 3-D, Gifts & Things

Back to School Big News Awesomeness Gift

Back to School Big News Awesomeness Gift

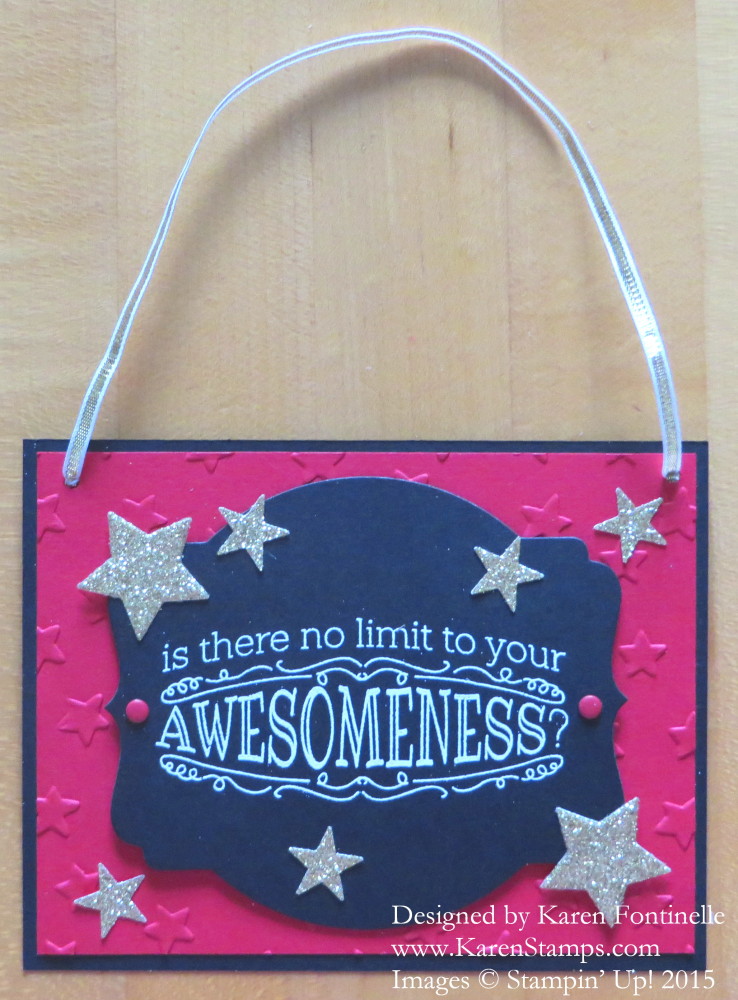
Tomorrow is Back to School time in Houston and probably lots of other places. If not tomorrow, probably very soon! Maybe you are looking for a little card or something for your child’s first day of school to encourage them, surprise them in their lunchbox or backpack. Rather than make this a card, I chose to tie some ribbon across the top to make it a hanger. Now the child can hang it up in their room or school locker and be inspired everyday and know you were thinking of them!

We have yet another power outage at our house as I am writing this so I’m not even sure how the colors are showing up. The base is Basic Black with a Real Red layer embossed with the Big Shot and Lucky Stars Embossing Folder.  The sentiment from Big News is stamped with Versamark Ink and heat embossed with White Stampin’ Emboss Powder and the Heat Tool. Be sure you have the Embossing Buddy to wipe across the card stock before stamping and applying the embossing powder because it helps eliminate the static that makes specks of embossing powder cling to the paper where you don’t want them! This embossed piece is cut out with the largest of the Deco Labels Framelits DiesYou could also just trim it whatever size you wanted to fit the card base. The smallest stars are punched out with the star in the Itty Bitty Punch Pack and the smallest star in the Stars Framelits DiesOf course the Gold Glimmer Paper is perfect for this as would be the Gold Foil Sheets. And I had to use a couple of Brights Candy Dots because they are so cute!

While you could easily copy this and make it a card in the usual fashion, I inserted some Gold 1/8″ Ribbon for a hanger. Any little thing you can make for your child for back to school I’m sure will be appreciated, even a note in their lunchbox!

Be sure to check the Stampin’ Up! Weekly Deals that end Monday night, August 24 as well as the Clearance Rack.

And if you are in the USA and do not have a Stampin’ Up! Demonstrator that you work with and don’t have access to the gorgeous new Holiday Catalog coming September 1st, please contact me at Karen@KarenStamps.com and  I will send a catalog out to you! I’m always happy to assist people in discovering and enjoying the fun and creativity of stamping and the products of Stampin’ Up!

Visit my Stampin’ Up! Online Store HERE!

Save Your Sanity On a Plane

Relaxation Travel Kit

As the end of August approaches and people try to fit in a vacation or one more trip before school starts, I thought I would suggest a way to save your sanity on the plane ride! As we all know, flights these days are super-crowded and we’re packed into our seats like sardines.

I read yet another article this morning about coloring books for adults as a way to relax while traveling. The article says it can be like art therapy, a way to relax and to express feelings. You might choose bright or dark colors depending on your mood or maybe the more subtle pastel colors. Just doing the coloring can enhance our creativity. If nothing else, it’s something to do while you are crammed into your seat on a plane, nervous about flying, or trying to ignore the crying babies or the person edging in to your seat space. It can take your mind off whatever is troubling you or at least distract you a little bit! And that might be enough to get your through the plane ride!

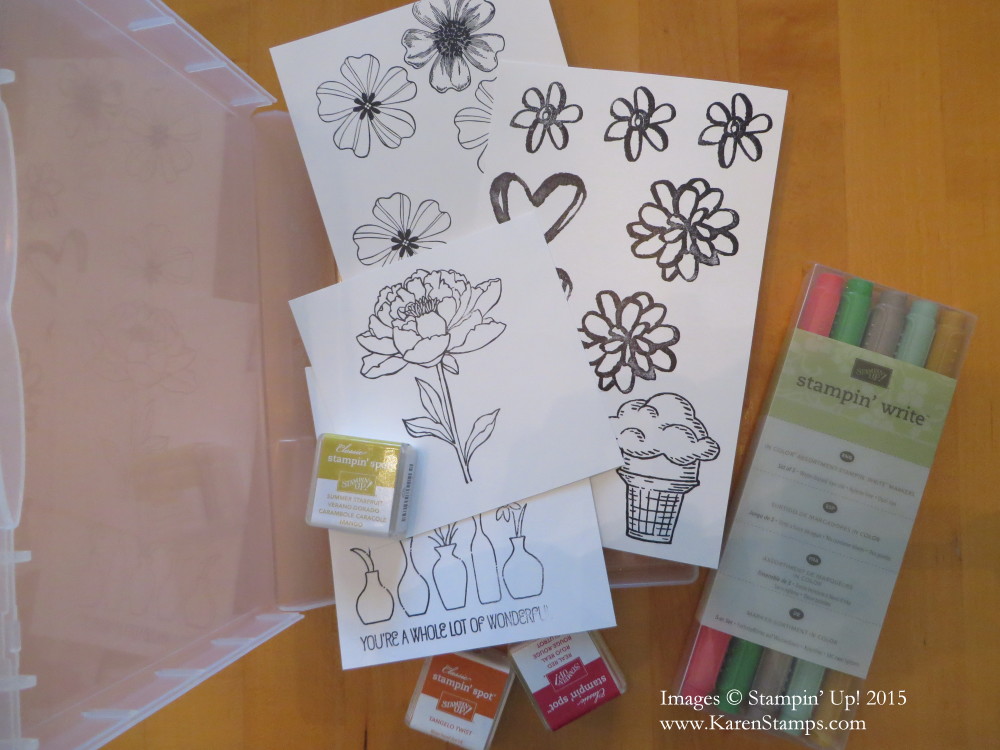
Instead of going out and buying adult coloring books, some of which are quite expensive, I’ve noticed, just use your stamps! Before the trip, stamp some images on Whisper White with Stazon Ink. Then take along your choice of coloring – Stampin’ Write Markers, a Blender Pen, Aqua Painter, ink spots (if you have some from way back or are getting them in Paper Pumpkin KIts) – whatever you like. The Stazon ink will not run (and stay tuned for the new Basic Black Archival Ink coming in the Holiday Catalog!!)

Use an empty stamp case to keep your supplies in.  You could even use the case for a tabletop if you needed to! You can purchase these cases in the Stampin’ Up! Online Store, 4 cases for only $4.00.  They are very handy for more than just storing stamps.

When you get home or to your destination, maybe you can cut out or punch those images you colored and use them on cards or projects.  But the real purpose is relaxing by coloring while you are traveling!

So before you pack your clothes in your suitcase, stamp some outline images first, gather your coloring supplies, and stick all those things in an empty stamp case.  Now you are ready to travel and save your sanity on the plane!

Make a Tea Light Birthday Cake

Tea Light Birthday Cake

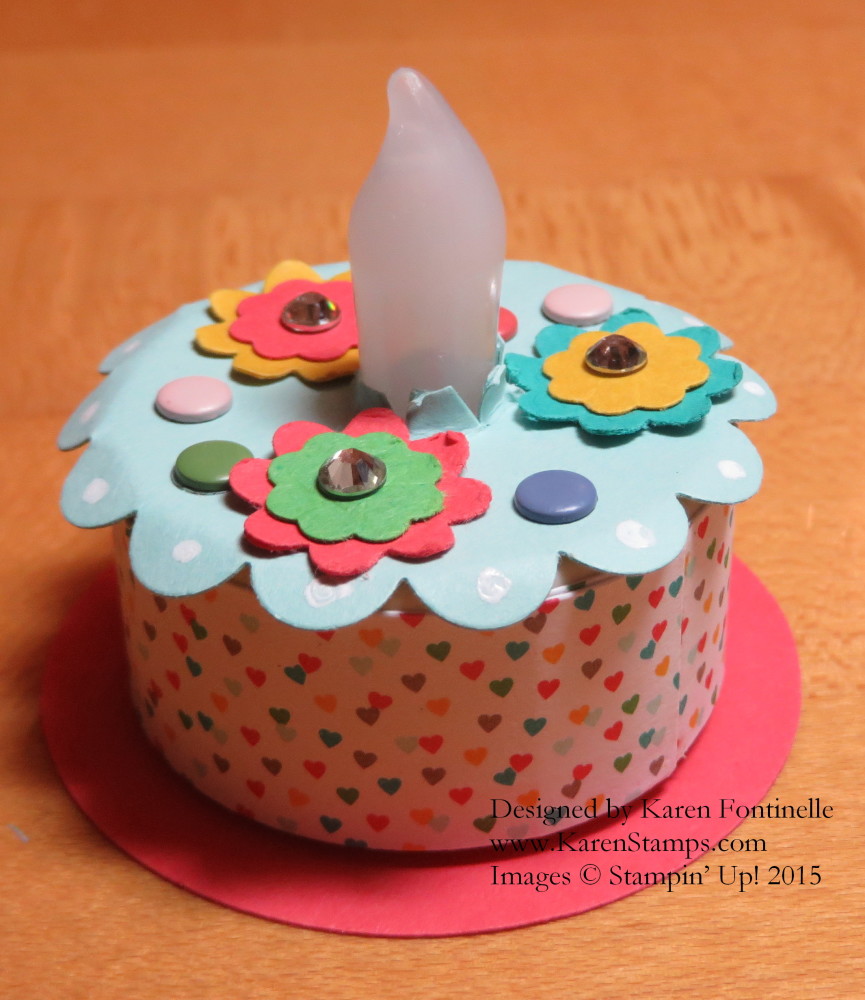
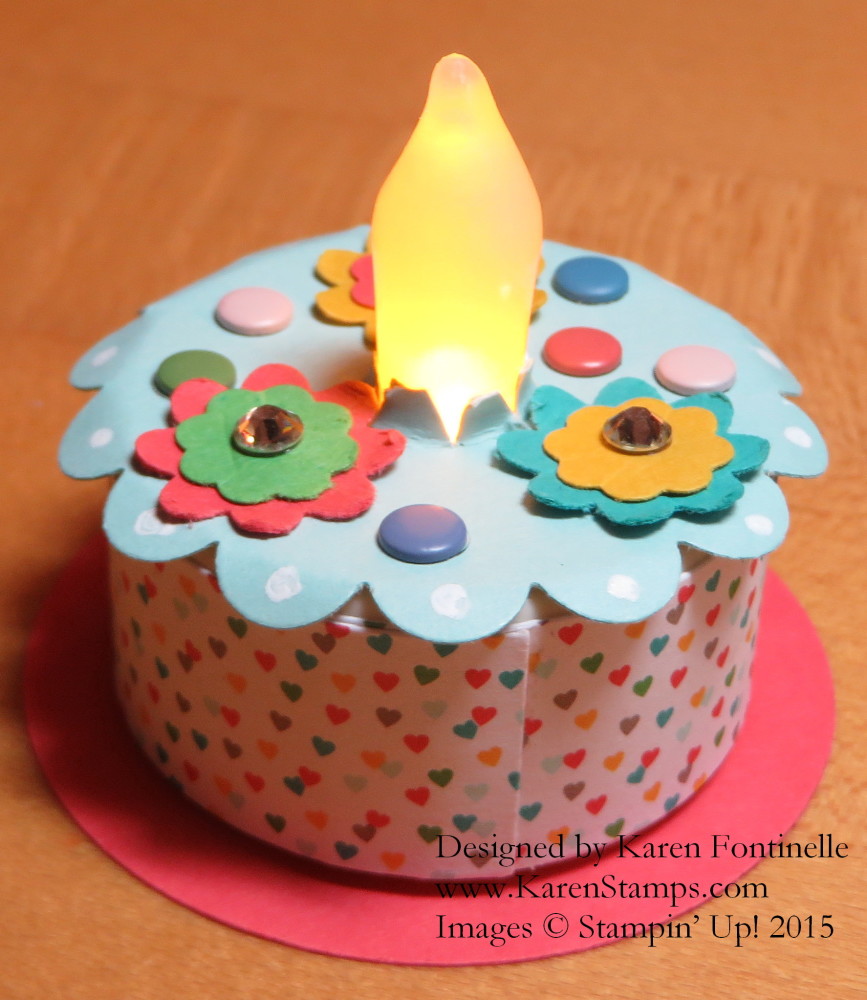
When I needed a fun little gift for a friend, I thought of this cute tea light birthday cake! It’s so easy to just wrap a piece of designer paper or washi tape around the side of the tea light and then decorate the top with a 1 3/4″ Scallop Circle PunchPoke a hole in the center of the scallop piece, cut some little slits so the scallop will slip over the light bulb, then decorate to your heart’s content! I punched the little flowers with some retired punches, but you can use whatever you have in your stash or perhaps stamp a design on the top. I also added some Candy Dots and Rhinestone Jewels, plus a little doodle dot on each scallop edge with my White Signo Uni-Ball Gel Pen. There are lots of fun ways to decorate these little tea light cakes! You just have to purchase some tea lights at the craft store and play with them!

I also made some kind of box to package the cake in, but I failed to take a photo so we’re out of luck on that one!

The only tricky part of this project is the little switch on the bottom of the tea light.  If you want to set the tea light on some kind of base, perhaps resembling a plate, then you have to cut or punch a hole to allow access to that switch (and if yours has it, don’t forget to pull out the little piece of plastic protecting the connection so that it won’t get accidentally turned on before you buy it!).

Tea Light Birthday Cake and Box

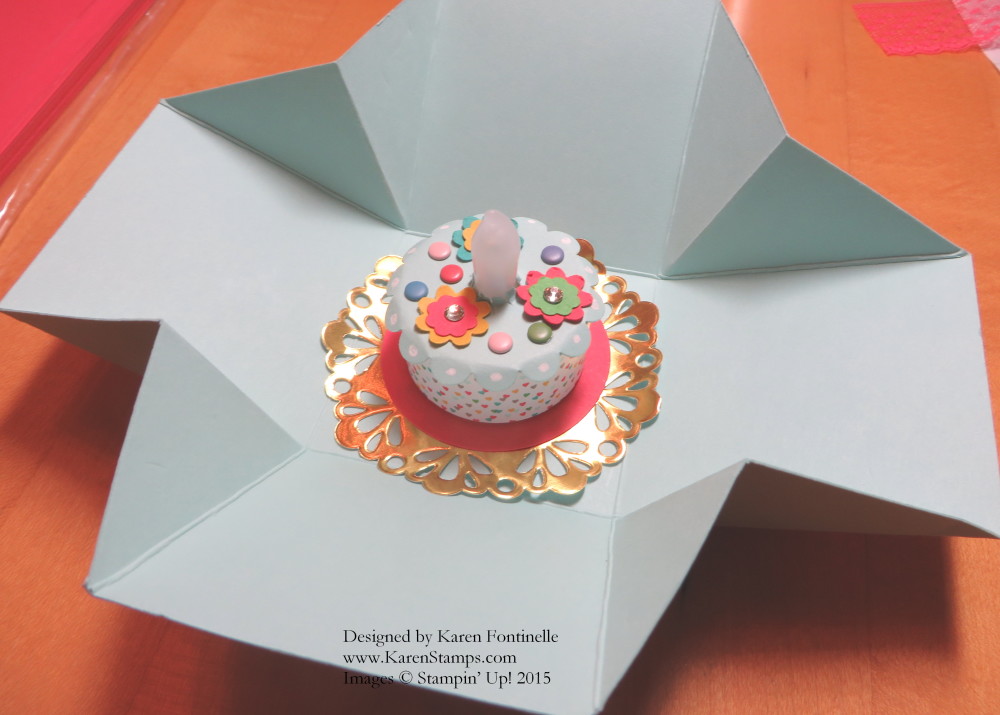
I added a Metallic Foil Doily in Gold for the presentation! I think I adhered the Watermelon Wonder card stock to the base of the tea light but then just added a tidbit of adhesive for the doily to hold the cake in place in the box.

Tea Light Birthday Cake Lit

Here you see what it looks like with the tea light lit. I also happened to photograph it from the backside in my rush, but at least you can see how I adhered the piece of paper from the Cherry on Top Designer Series Paper Stack.

This is a really fun project to make, quick and easy really. Just keep a few cheap tea lights on hand and you’ll be ready to go! It’s always good to have things on hand that you can make an easy gift or card with and impress your friends and family!

For the best in papercrafting supplies, please visit my Stampin’ Up! Online Store! Or contact me if you need assistance or would like me to put your order in for you. Try this Tea Light Birthday Cake project soon!

Mini Muslin Gift Bag Stamped

Muslin Gift Bag

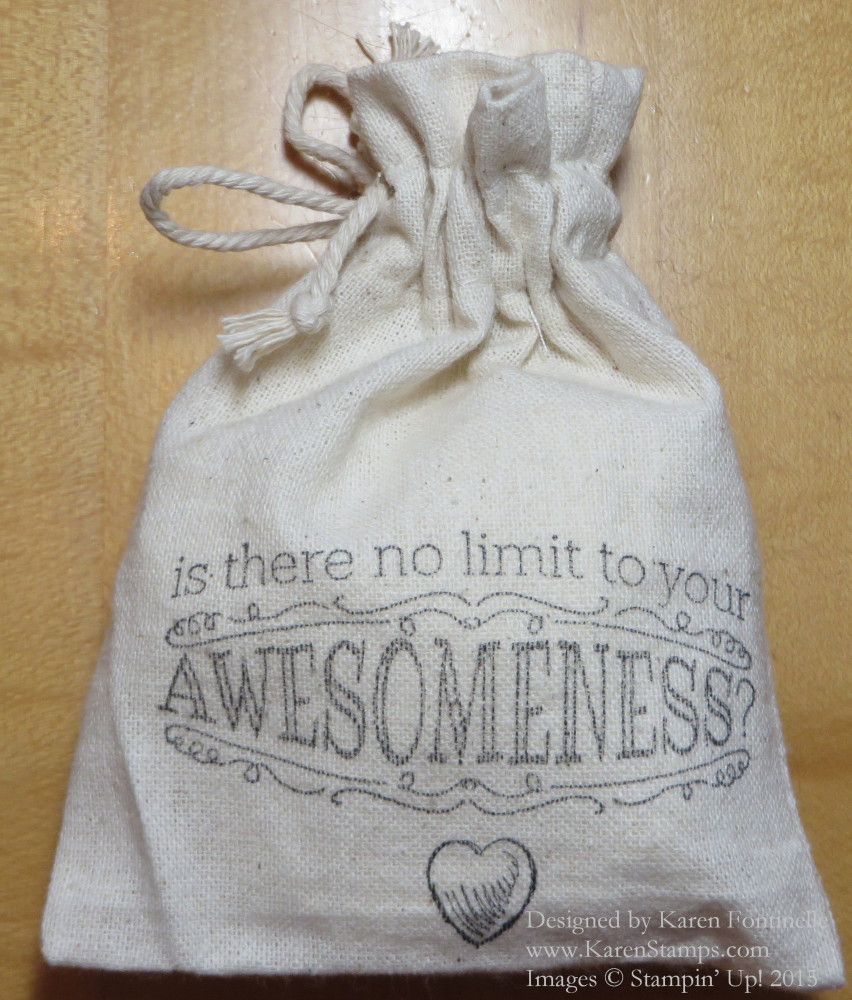
Talk about a quick and easy stamping project! You can’t beat this Mini Muslin Stamped Gift Bag!  Keep some of these Mini Muslin Gift Bags on hand and when you have a small gift that will fit inside, make a unique packaging by stamping or otherwise decorating the front of the muslin bag.

You never know where inspiration will come from, and in this case, it came from a Christmas magazine I was about to throw out! I saw some little bags that looked like this one that held dark chocolate pecans (Yum!) and the printing on the front reminded me of our stamp set Big News. So I got out my Mini Muslin Gift Bagsslipped a piece of cardboard inside to give a stiffer surface on which to stamp and to prevent the ink from going through, just in case. I chose this sentiment from Big News and stamped using Stazon Ink. I also added the little heart in the stamp set.  I thought about coloring it in, but decided I liked the look of just the ink and no color. Then just add your gift inside! If it is food, I would put it in a cello bag first. There could not be a faster way to decorate a gift bag!!!

There are even more packaging supplies and ideas in the Stampin’ Up! Catalog! Check them out! And if you don’t have a Demonstrator and need a catalog, please contact me and I will send you a catalog.

Today is the last day for the current Weekly Deals!  Check them out as well as the Clearance Rack to add to your order.

Shop HERE at the Stampin’ Up! Online Store if you need  the Mini Muslin Gift Bags to keep in your stash! They do come in handy!

4th of July Uncle Sam Scalloped Tag Topper Treat Holder

4th of July Uncle Sam Scalloped Tag Topper Treat Holder

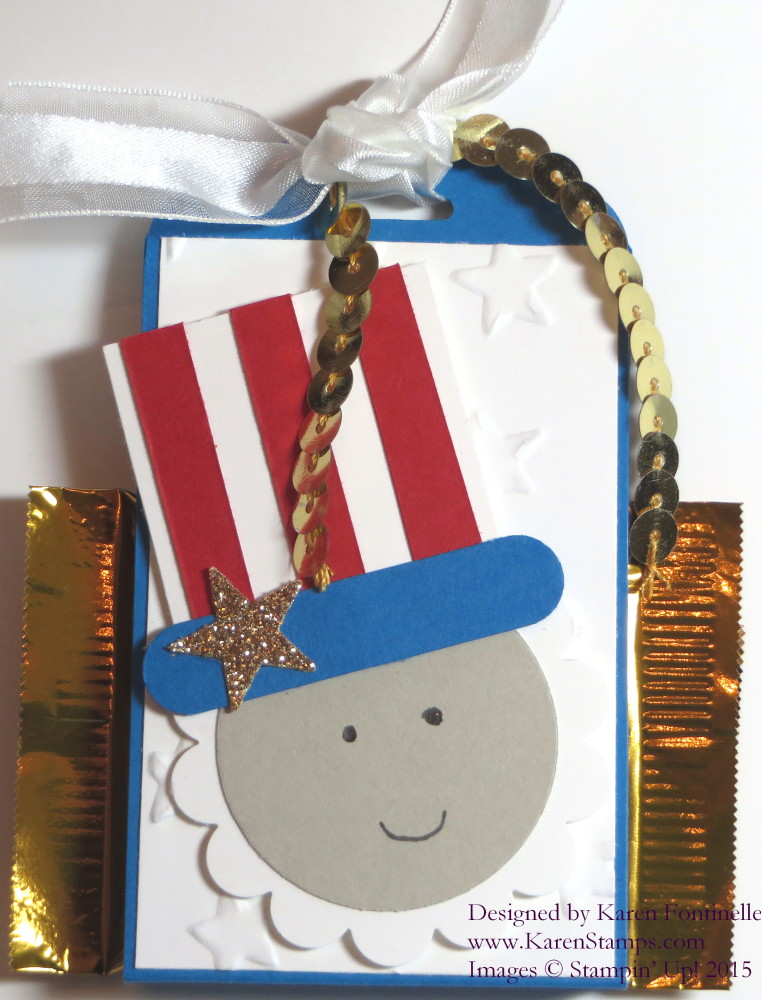
If you are looking for a fun little party favor or table decoration for your 4th of July party, you might have fun making this 4th of July Uncle Sam Scalloped Tag Topper Treat Holder. It’s just a single strip of paper, scored to hold a piece of candy inside, with the top tied together and decorated on the front!  You can use this basic idea for any size or any occasion! But this one will be very cute for a 4th of July Independence Day celebration!

This treat holder is made with a 2″ x 8″ strip of Pacific Point card stock.  I found the center (4″) and then measured equal distance from that to allow room for my single Ghirardelli candy, so I didn’t need it to be very wide. I probably scored it about 1/2″ off the center on each side. Then I used the Scalloped Tag Topper Punch at the top of each end. Next I measured a piece of Whisper White card stock to fit in the space on the front of the treat holder. It looked too plain so I embossed it with the Lucky Stars Embossing Folder.

The Uncle Sam is made with several punches and you could make yours larger. The hat is made with a 1 3/8″ square of Whisper White, and I just cut some narrow strips of Real Red and glued them on the hat. The hat brim is made with the Word Window Punch.  The beard is made with the 1 3/4″  Scallop Circle Punch and the face is Sahara Sand punched with the 1 3/8″ Circle Punch. The Gold Glimmer Paper star is punched with the star in the Itty Bitty Accents Punch Pack.  I tied the package with my favorite ribbon, the Whisper White 5/8″ Organza Ribbon and a piece of Gold Sequin Trim for a little bling!

You have time!  Make a few little 4th of July decorations or treats for your guests or neighbors or kids for your celebration or fireworks viewing!

Don’t forget the Stampin’ Up! Weekly Deals (a couple sold out on the special price already) and the new items (and old) on the Clearance Rack. Also, remember the Watercolor Wishes Card Kit is now available, in the catalog on page 80). Be sure to put THAT on your list!

I hope my 4th of July Uncle Sam Scalloped Tag Topper Treat Holder will inspire you to copy this idea or come up with your own to celebrate the Independence Day holiday!

Making Mini Treat Bags with the Mini Treat Bag Thinlits

Watch Donna Griffith from the Stampin’ Up! Home Office make cute mini treat bags with the Mini Treat Bag Thinlits Dies! She shows some really cute ideas, plus watch for the tip about the little heart embellishment!  I never heard that one before!

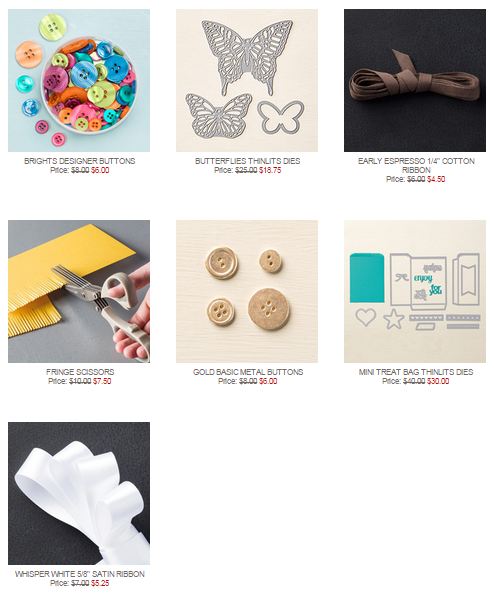
The Mini Treat Bag Thinlits Dies are on sale during the Stampin’ Up! Weekly Deals through Monday June 29, 2015.  I also love the Silver Glimmer Paper and the embossing folders on this deal, not to mention the buttons and the ribbon!  It’s all good!

Altered Folded Mini Treat Bag

Altered Folded Mini Treat Bag

One more idea for using the Mini Treat Bag Thinlits Dies, which are $10 off through Monday night on the Stampin’ Up! Weekly Deals. Make the regular mini treat bag, then fold over the top edge. Add a belly band to hold it in place and you’ve got a cute little envelope for a card and/or treat! Don’t forget all the cute embellishments that come in the set of dies, such as the strip of stars, hearts and dots, the heart and star, the words, etc. You can decorate your Altered Folded Mini Treat Bag any way you like!

For this project I just used a 6″ x 6″ piece of paper from the Cherry on Top Designer Series Paper Stack.  No cutting involved.  But you do need to to place the large treat bag die carefully on the paper and make sure it is properly placed as you cover it with the cutting plate before running through the Big Shot Die-Cutting Machine.  The Magnetic Platform helps hold it in place but you can also use some post-it type notes or washi tape to hold the die in place.  As you can see, there is very little paper waste!

Die Cut Mini Treat Bag

Make the mini treat bag, then fold over the top.  You can just do this or you can score first about 3 1/2″ from the bottom edge of the bag. Just figure out what size you want the bag/envelope to be.

Mini Treat Bag Folded

Go to my Stampin’ Up! Online Store and check out all the Stampin’ Up! Weekly Deals! Then if you liked my Altered Folded Mini Treat Bag, be sure to place it on your order before 11:50 pm MT Monday June 29, 2015. All the other items on the Weekly Deals are really great too so be sure to look!

Stampin' Up! Weekly Deal June 23 2015

Smaller Mini Treat Bags

Cherry on Top Mini Treat Bags

I’ve let go of Christmas today and have another way to use the Mini Treat Bag Thinlits Dies I think you will find useful!  The die pieces include one large one which forms the front of the bag, and we used two of them to make the larger gusseted bags. Today we will use the smaller die piece which normally forms the back of the bag and cut two of those to make these Smaller Mini Treat Bags!

Cut two of the small bag die pieces.

Cherry on Top Mini Treat Bag Pieces

Fold the score lines made by the die to form the bag.  Since the bottom edges of these pieces are just straight, trim off a little bit, maybe 1/2″ from the bottom of one that will be the back piece of the bag. On the other piece, make a 1/2″ score line and fold (maybe even trimming the corners off as shown.  This piece will be the front piece of the mini treat bag.

Cherry on Top Mini Treat Bag Folds

Apply adhesive of your choice as shown.  I used the new Tear & Tape Adhesive.

Cherry on Top Mini Treat Bag Tape

The Mini Treat Bag on the left is made with the Cherry on Top Designer Series Paper Stack. Such a cute stack of colorful papers! As you can see the front and back top edges are the same length. The heart and words are die cuts in the Mini Treat Bag Thinlits Dies. Not only do you get the mini treat bag dies but you get extra dies that cut embellishments for your projects.

The treat bag on the right is made from the new In Color Envelope Paper. On this bag, the front piece is folded down a bit and I tied a string of the Burlap Ribbon around the top edge. The star is a die cut in the set of thinlits dies.

 Mini Treat Bags

Remember, the Mini Treat Bag Thinlits Dies are on the Stampin’ Up! Weekly Deals through Monday night, June 29. You can save $10 when you purchase these dies! To see some other altered  Mini Treat Bags I have made, check out this post and this post. To see some of the “regular” mini treat bags you can make with the Mini Treat Bag Thinlits Dies, please click HERE.

Place your order at my Stampin’ Up! Online Store!

Mini Treat Bag Altered Christmas Gift Bag

Mini Treat Bag Altered Christmas Gift Bag

Do you realize that six months from today is Christmas Day?! That means there are less than six months to get ready for Christmas! Now that the Mini Treat Bag Thinlits Dies are on sale this week, $10 off, on the Stampin’ Up! Weekly Deals, I thought I would learn how to make an altered size bag, rather than just the flat kind of treat bag into which you would slip a card or gift card or something not very thick. Since it is only six months today until Christmas, I thought I would make a Mini Treat Bag Altered Christmas Gift Bag!

Here is a little tutorial for you:

Mini Treat Bag Pieces

Instead of cutting the two different pieces to make the bag like you would normally, cut two pieces with the large bag die. This one piece would normally be the front of the regular Mini Treat Bag. Then just trim off that extra little piece as shown. Just snip it off with a scissors. That side of the bag will be the gusseted side of the bag when assembled.

Mini Treat Bag Pieces Scored

Now score just that right side of the large piece at 1/2″ and 1 1/4″ as shown. There will also be a score line made from the die. For the bottom of the bag, cut one or two pieces of paper  1 1/2″ x 3 5/8″. I say one or two because it depends on what kind of paper you are using and how strong and sturdy you want the bottom of the bag to be. With card stock probably just one piece is fine; with designer paper you probably want to glue two pieces together.

Mini Treat Bag Pieces Folded

This is how you will fold on the score lines on both pieces to form the gusset for the side of the bag. If you just want the side flat, then just score at 1/2″ and use the score line made by the die. You won’t need the center one. Play with the two pieces and see how they will fit together so you have the folds going the correct way.

Mini Treat Bag Pieces Glued

Adhere the bottom piece to the bottom tab and all the sides to form the bag.  I like using the Multipurpose Liquid Glue because it gives you time and slip to be able to move the pieces to exactly the right positions. But Fast Fuse or Tear & Tape Adhesive.

Mini Treat Bag Altered Christmas Gift Bag

Next comes the fun part of embellishing the Mini Treat Bag! I used a piece of the In Color Envelope Paper, the Cucumber Crush color, to make a banner.  I stamped a Christmas greeting with a stamp in the Wondrous Wreath Photopolymer Stamp Set in Real Red ink, then punched it out with the 2 1/2″ Circle Punch. I die cut a piece of Silver Glimmer Paper with the Circles Collection Framelits Dies for a layer behind the greeting.  The little bow is a die cut in the Mini Treat Bag Thinlits Dies package! So many cute and useful extra dies in that collection! I would also suggest putting a Rhinestone Jewel on the center of that bow. (I forgot!)

There you have it!  Really the process is pretty easy to make a Mini Treat Bag Altered Christmas Gift Bag. Take advantage of the $10 savings on this die this week.  Weekly Deals are good through Monday night, June 29 until 11:50 pm MT. Shop for these Mini Treat Bag Dies and any other stamping and art supplies you need at my Stampin’ Up! Online Store HERE.  PS:  That Silver Glimmer Paper is also on sale this week on the Weekly Deals!

Altered Mini Treat Bag

Altered Mini Treat Bag

With the Mini Treat Bag Thinlits Dies on sale for $10 off this week on the Stampin’ Up! Weekly Deals, I thought I would make an altered Mini Treat Bag so you can see some versatility with this die! By just doing  a few different things, you can make a larger gusseted treat bag with the same dies! You can make a smaller one too!  And this die comes with so many different pieces and coordinates with a new stamp set in the new Stampin’ Up! Catalog. That stamp set is You’re So Sweet on page 57.

The negative image of the word “Enjoy” is leftover from something else I made with the word cut out that I just happened to save and it came in handy for this bag!  I had a scrap piece of the same Bohemian Designer Series Paper so I just turned it over and glued it to the front of the bag with a scrap strip of Gold Glimmer Paper across the front. I also used the star die in the package to cut out the star out of the Gold Glimmer Paper. So easy!

Tomorrow I will take a few more photos and show you have to make this altered Mini Treat Bag.

Be sure to check out the Stampin’ Up! Weekly Deals for the week of June 23, 2015. These are good through Monday night, June 29. Every item on there is worth having!  But I know you’ll have fun with the Mini Treat Bag Thinlits!

Mini Treat Bag Thinlits Dies

Stampin' Up! Weekly Deal June 23 2015

Click to Shop!


Cherry on Top Cotton Paper Mini Treat Bag

Cherry on Top Cotton Paper Mini Treat Bag

When I broke out my new Cherry on Top Cotton Paper in the new Stampin’ Up! Catalog I decided to make a treat bag with it using the Big Shot and the Mini Treat Bag Thinlits Dies. I love the Mini Treat Bag Thinlits because you get so many pieces with it, and of course other people have figured out ways to alter the size of the treat bags and things you can make with the bag die. So it is a little pricey but you get a lot with this set.

But back to the Cotton Paper! It’s a little heavier, I would say, than tissue paper. It is lightweight but sturdy. I love my treat bag I made with the Cucumber Crush color, but I did find it a little difficult to work with in making the bag. It was a little bit difficult to fold on the score lines since the paper is lightweight.  I found using SNAIL adhesive to not work with it at all – seems the paper was too slick for the SNAIL to catch on to.  But the Fast Fuse worked great and I imagine the new Tear & Tape Adhesive would work great. After making the treat bag, I cut a piece of Whisper White card stock to fit inside and stamped it with Watermelon Wonder ink with a birthday greeting from the Amazing Birthday Stamp Set. (You can also buy a Bundle with the matching Banners Framelits if you like and save 15%.)

To decorate the bag, I punched ten flowers with the Pansy Punch from the Watermelon Wonder Cotton Paper. I could also have used the Floral Frames Collection Framelits Dies. Just stack the flowers together, staple in the center with the Stampin’ Up! Handheld StaplerThen just smoosh each layer up and toward the center to make the flower! The Cotton Paper works well for this! Just smoosh and fool with it and get it to your liking. If you are mailing it, you can flatten the flower and tell the recipient to fluff up the flower when they receive it! I also stamped a banner from the Amazing Birthday stamp set to decorate and applied a piece of Cherry on Top Washi Tape over a strip of Whisper White card stock since the tape is transparent. Then I just adhered it to the bottom of the treat bag. And since I had an already stamped and die-cut leafy image from the other day, I stuck that on behind the flower.  So cute!

Cotton Paper

Cotton Paper Stapled Flowers


Cotton Paper Flower


If you need any of these supplies, you can find them at my Stampin’ Up! Online Store HERE.


Gift Bag Punch Board Bohemian Gift Bag

Gift Bag Punch Board Bohemian Gift Bag

One of the new products in the new Stampin’ Up! 2015-16 Annual Catalog is the Gift Bag Punch Board,  With this punch board, you can create many different sizes of gift bags, using card stock or designer series paper. There are three sizes of bags listed on the punch board, based on the size of the bottom of the bag. But then you can make the bag as tall or short as you like. It also punches holes in the top to thread ribbon through to tie closed, but I didn’t make this bag that way. On this bag, I also scored about an inch across the top so I could fold the paper over at the top to see the pattern on the other side. You could also make a decorative top edge. You can bet people will figure out many ways to make different sized bags and who knows what projects with this Gift Bag Punch Board! The sides can be straight and plain, or they can be gusseted to fold in a bit. And then of course, the possibilities of decorating are endless, especially for Stampin’ Up! papercrafters!

This gift bag is made with a pattern in the Bohemian Designer Series Paper. You could use any of the papers, any side. With some patterns of paper, you probably want to pay attention to which way the pattern is going before you cut your paper for the punch board. Don’t score too hard with designer paper so as not to tear the paper. It will probably hold up pretty well, though. The tag is made with the Scalloped Tag Topper Punch and the new Delightful Dijon card stock  and the greeting is from the Bravo Photopolymer Stamp Set.  What a fun greeting set to have on hand!

There are directions that come with the Gift Bag Punch Board and they are even printed on the board itself, But the best bet is to watch this Stampin’ Up! video to really get a feel for it.  Make a bag or two with some scrap paper to get the idea and you will be all set!  Not that hard!

Watch this Stampin’ Up! video!

Then visit my Stampin’ Up! Online Store to order yours today!

Sara Douglass Farmers Market Party Ideas

Sara Douglass Party

Don’t you love these cute party ideas with the Stampin’ Up! Farmers Market Designer Paper , the All About Sugar Stamp Set, and four other products and accessories?! Sara Douglass, Shelli Gardner’s daughter, was featured on a local TV show in Utah, Good Things Utah, and showed how anyone can make a few simple party decorations to jazz things up! These are really cute and super simple to make!  Just change the designer paper to suit the theme of your party or gathering!

Watch the video below, and visit the page HERE.

Here are the products Sara used. Now you can start planning your party decorations!

138684 – All About Sugar Stamp Set
138448 – Farmers Market Designer Series Paper
101650 – Very Vanilla 8-1/2” x 11” Cardstock
138315 – Kraft Tag a Bag Gift Bags
138417 – Hello Honey 5/8” Striped Cotton Ribbon
132708 – Memento Tuxedo Black Ink Pad

To read the article and see a few more photos of the party decorations, visit the Stampin’ Up! website HERE and find the article “Sara Douglass on Good Things Utah”.

When you have your party planned, just visit my Stampin’ Up! Online Store HERE to make your purchases! Looks really fun to me!!

Last Days for Retiring Stampin’ Up! Products!

Stampin' Up! Retirement List Banner 2015

I can’t believe it is the end of May and the beginning of June tomorrow! Where does the time go? And so it will be the end of these retiring stamps and accessories from Stampin’ Up! on Tuesday, June 2nd. Be sure to peruse your outgoing Stampin’ Up! Catalog a few more times and make sure you have everything you can’t live without!

On June 2nd you will be able to order anything available from the current Stampin’ Up! Catalog, the Occasions Catalog (also ending that day), and the NEW Stampin’ Up! Catalog. It should be available online that day if you do not have a copy. It’s the only day you will be able to order old and new! But that’s it for the outgoing catalog.

Here are some of the products I think I will miss!

For The Birds Little Red Wagon Card

For The Birds Little Red Wagon Card

The For The Birds Stamp Set and the Perfect Polka Dot Embossing Folder.

Hi There Hey There Card

The Hi There Stamp Set and the Word Bubbles Framelits Dies. I loved making this card!

Hi There Hey There Card

Label Love Happy Birthday Card

The Label Love Stamp Set, the matching Artisan Label Punch and the Retro Fresh This and That Washi Tape.

Label Love Happy Birthday Card

Modern Medley Black Houndstooth Petite Purse

The Petite Purse Die, great for little gifts and party favors.

Modern Medley Houndstooth Petite Purse

Starburst Sayings and Retro Fresh

Make The World a Better Place Card

I have loved the Starburst Sayings Stamp Set and the matching Framelits.

Petite Petals Top Note Thinking of You Card

Petite Petals Top Note Thinking of You Card

And my goodness, the Top Note Die! We used that for everything when it first came out!

Valentine Top Note Purse Candy Treat Bag

Valentine Top Note Purse Candy Treat Bag

Holly Jolly Top Note

Two Top Note Dies together to make a pocket card for Christmas!

And of course:

My Digital Studio Banner 2015

The digital papercrafting software from Stampin’ Up!  The software is ridiculously priced now, has so much content, and you can purchase any extra downloads you want for 30% off!

My Digital Studio

Shop now through Tuesday, June 2nd for any retiring Stampin’ Up! products! Don’t miss out!

Shop Stampin’ Up! Online 24/7

May 2015 Paper Pumpkin Kit

If you didn’t join Paper Pumpkin by May 10th, this is what you missed! And if you did get your Paper Pumpkin kit in the mail already, you might like to watch this video to see how it goes together – OR you might want to wait and be surprised when you open your kit! I don’t know what is coming in the June kit, but you need to sign up by June 10th to get your kit shipped by mid-June!

Take advantage of the 50% off special for the first two months! It’s for new subscribers so join NOW! Good through June 10, 2015. Use Promo Code SAVE50

JOIN PAPER PUMPKIN

Watch the video and see how fun and easy the kits are!