Category Archives: 3-D, Gifts & Things

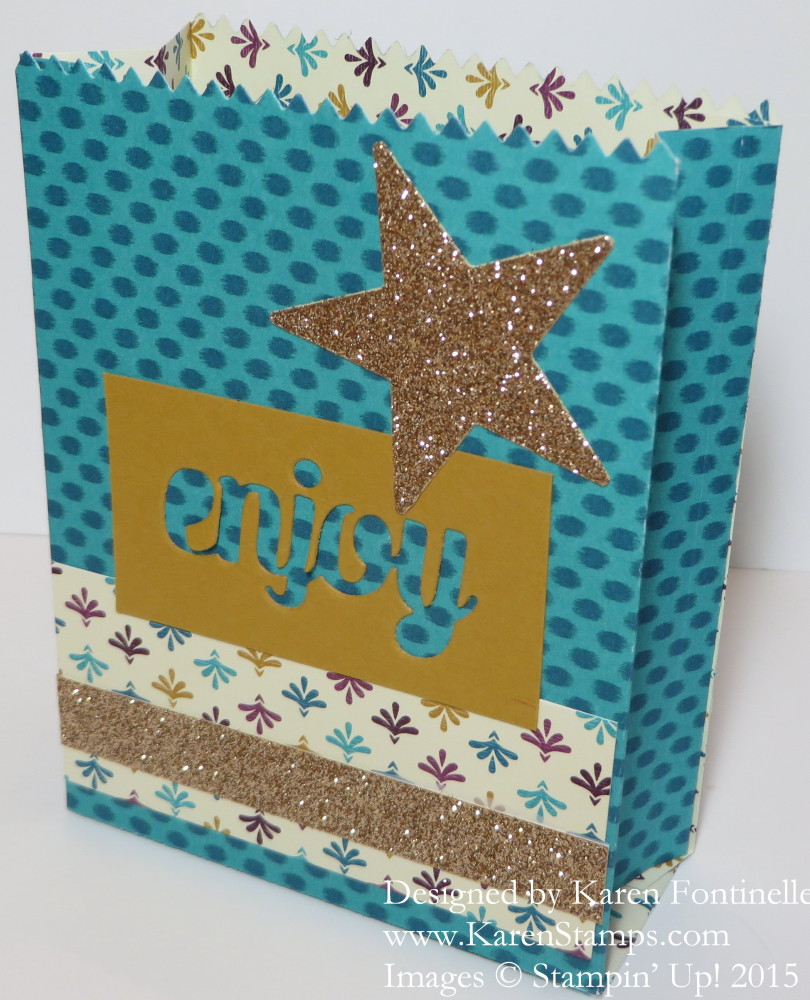
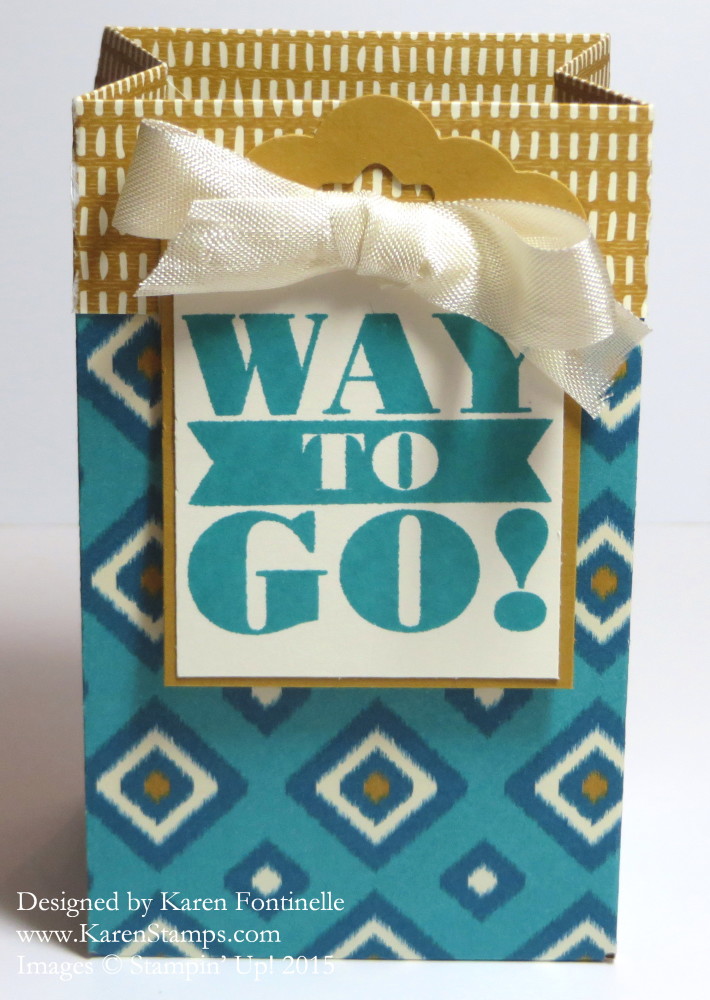
Mini Treat Bag Card or Gift Card Holder for Mother’s Day

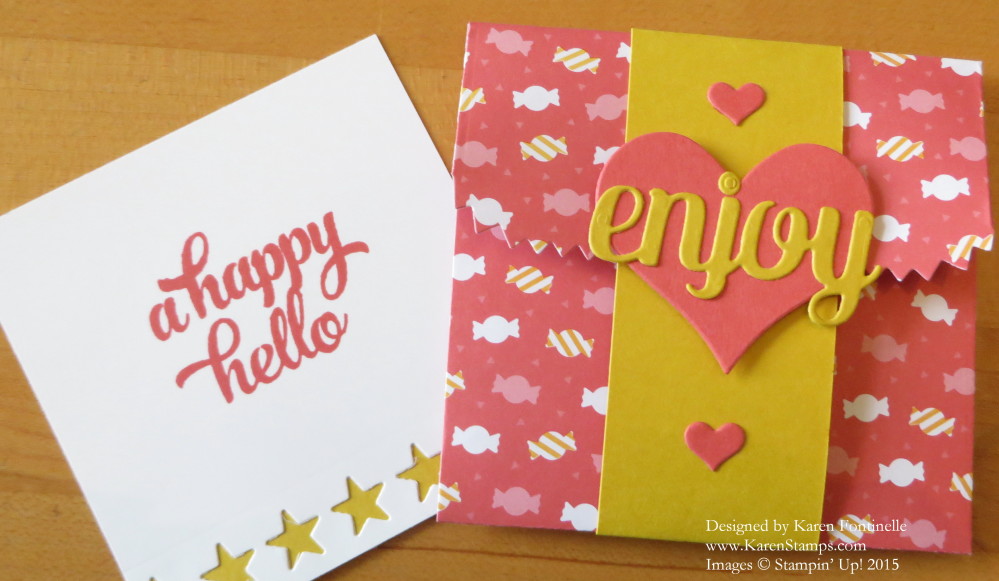
Mini Treat Bag

Happy Mother’s Day!  

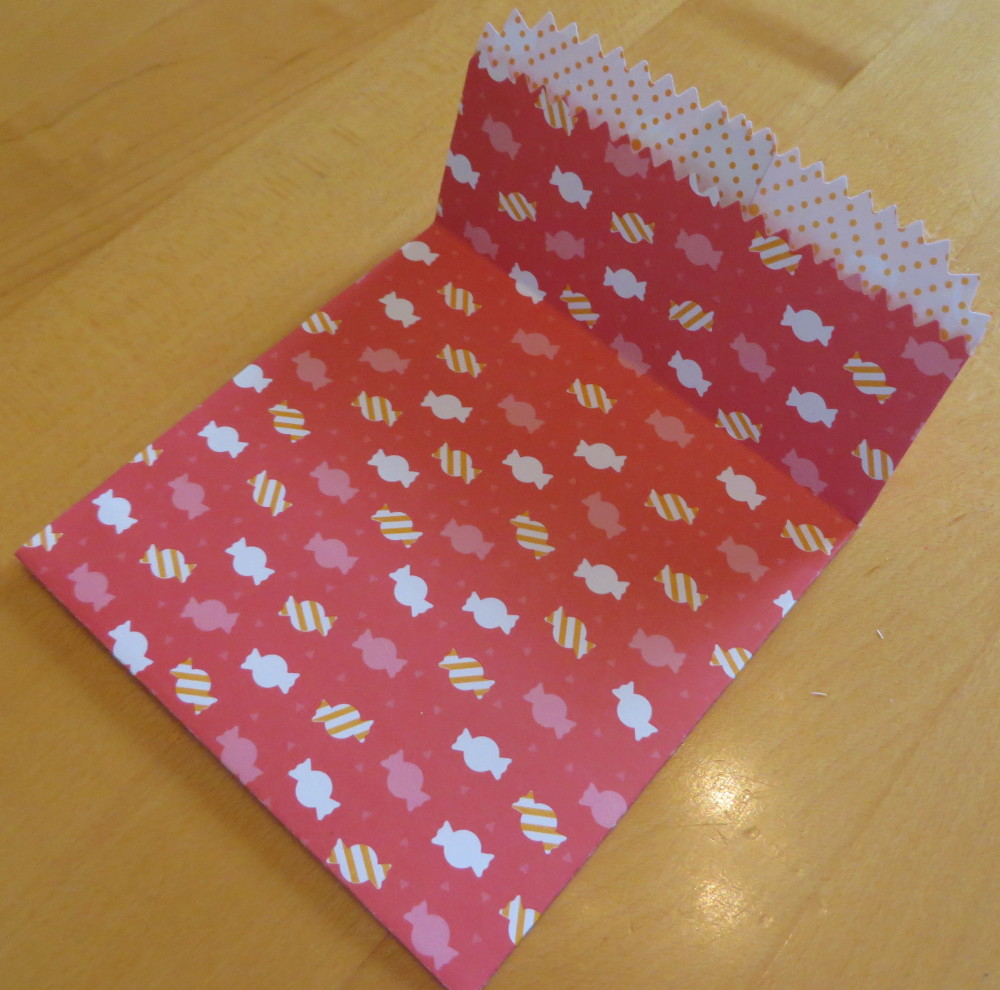
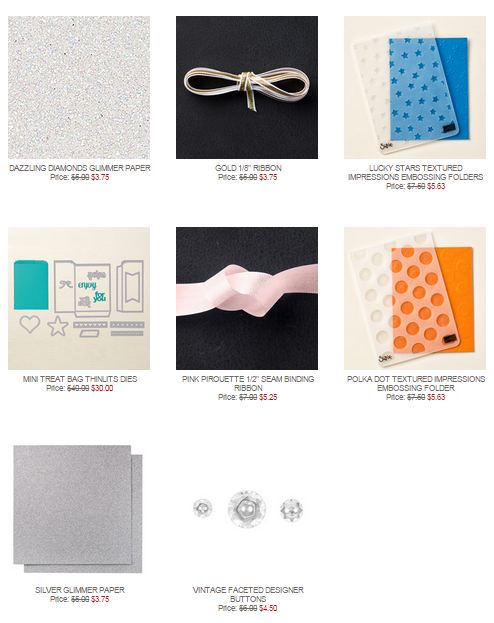
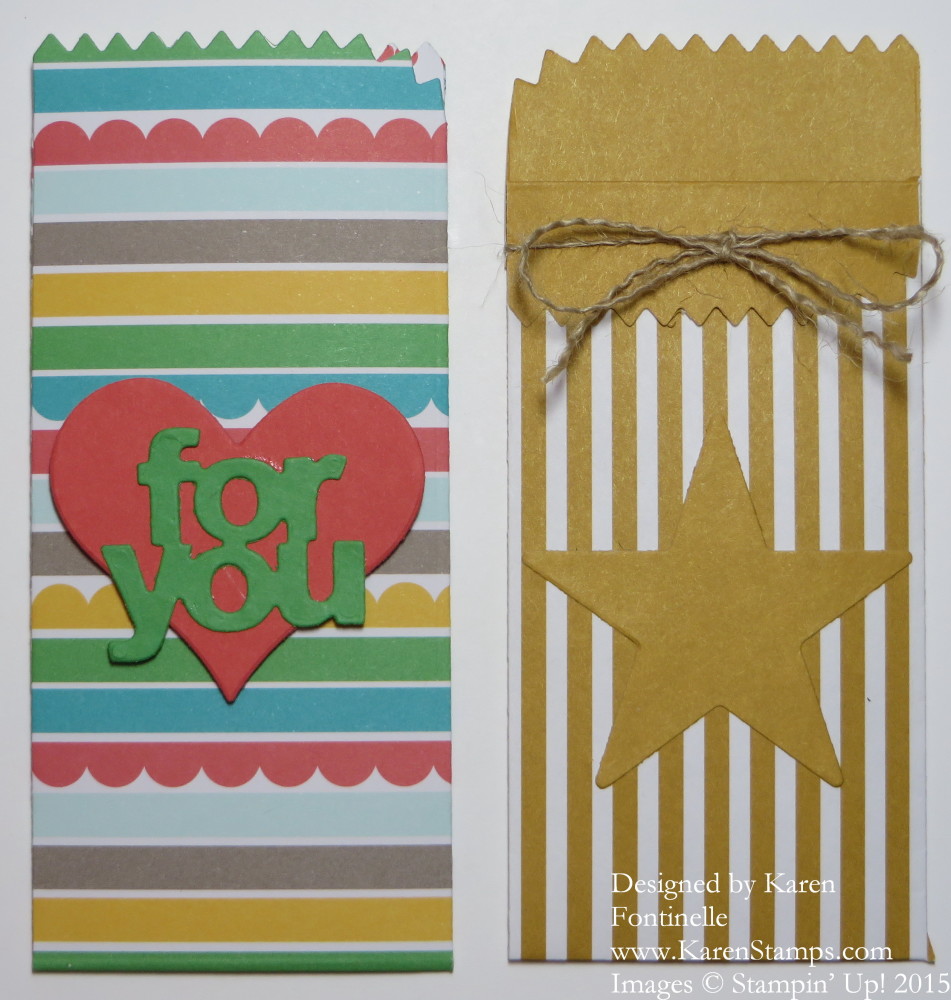
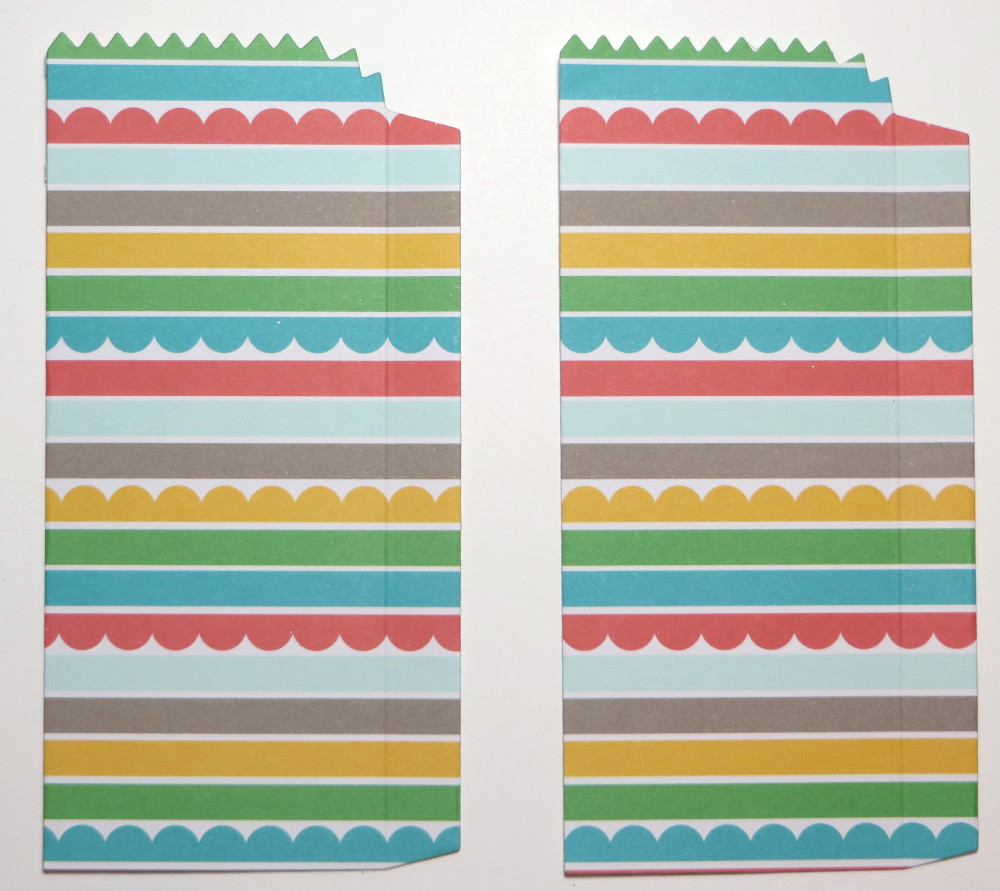
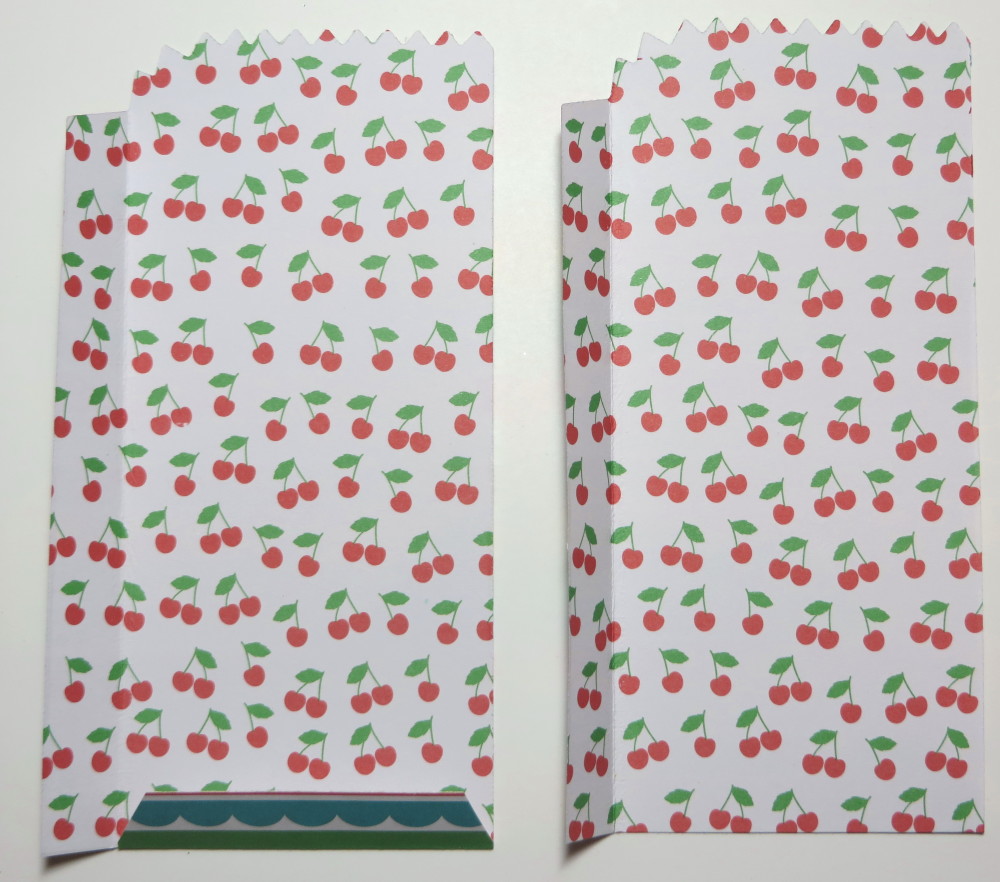
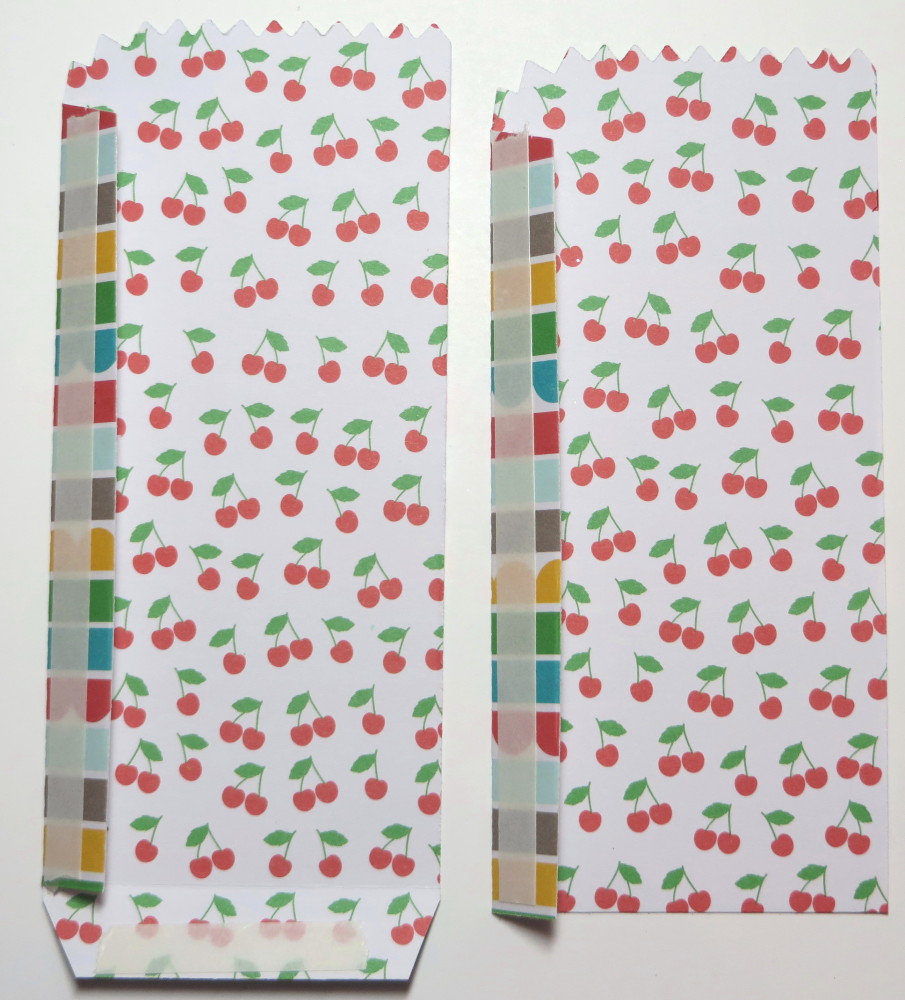
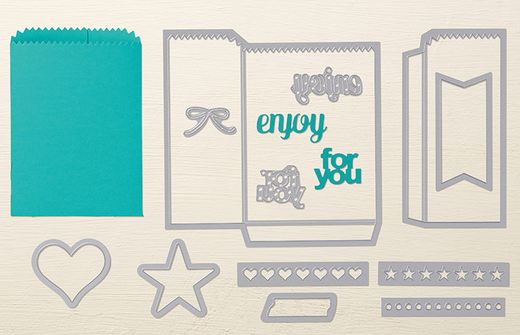
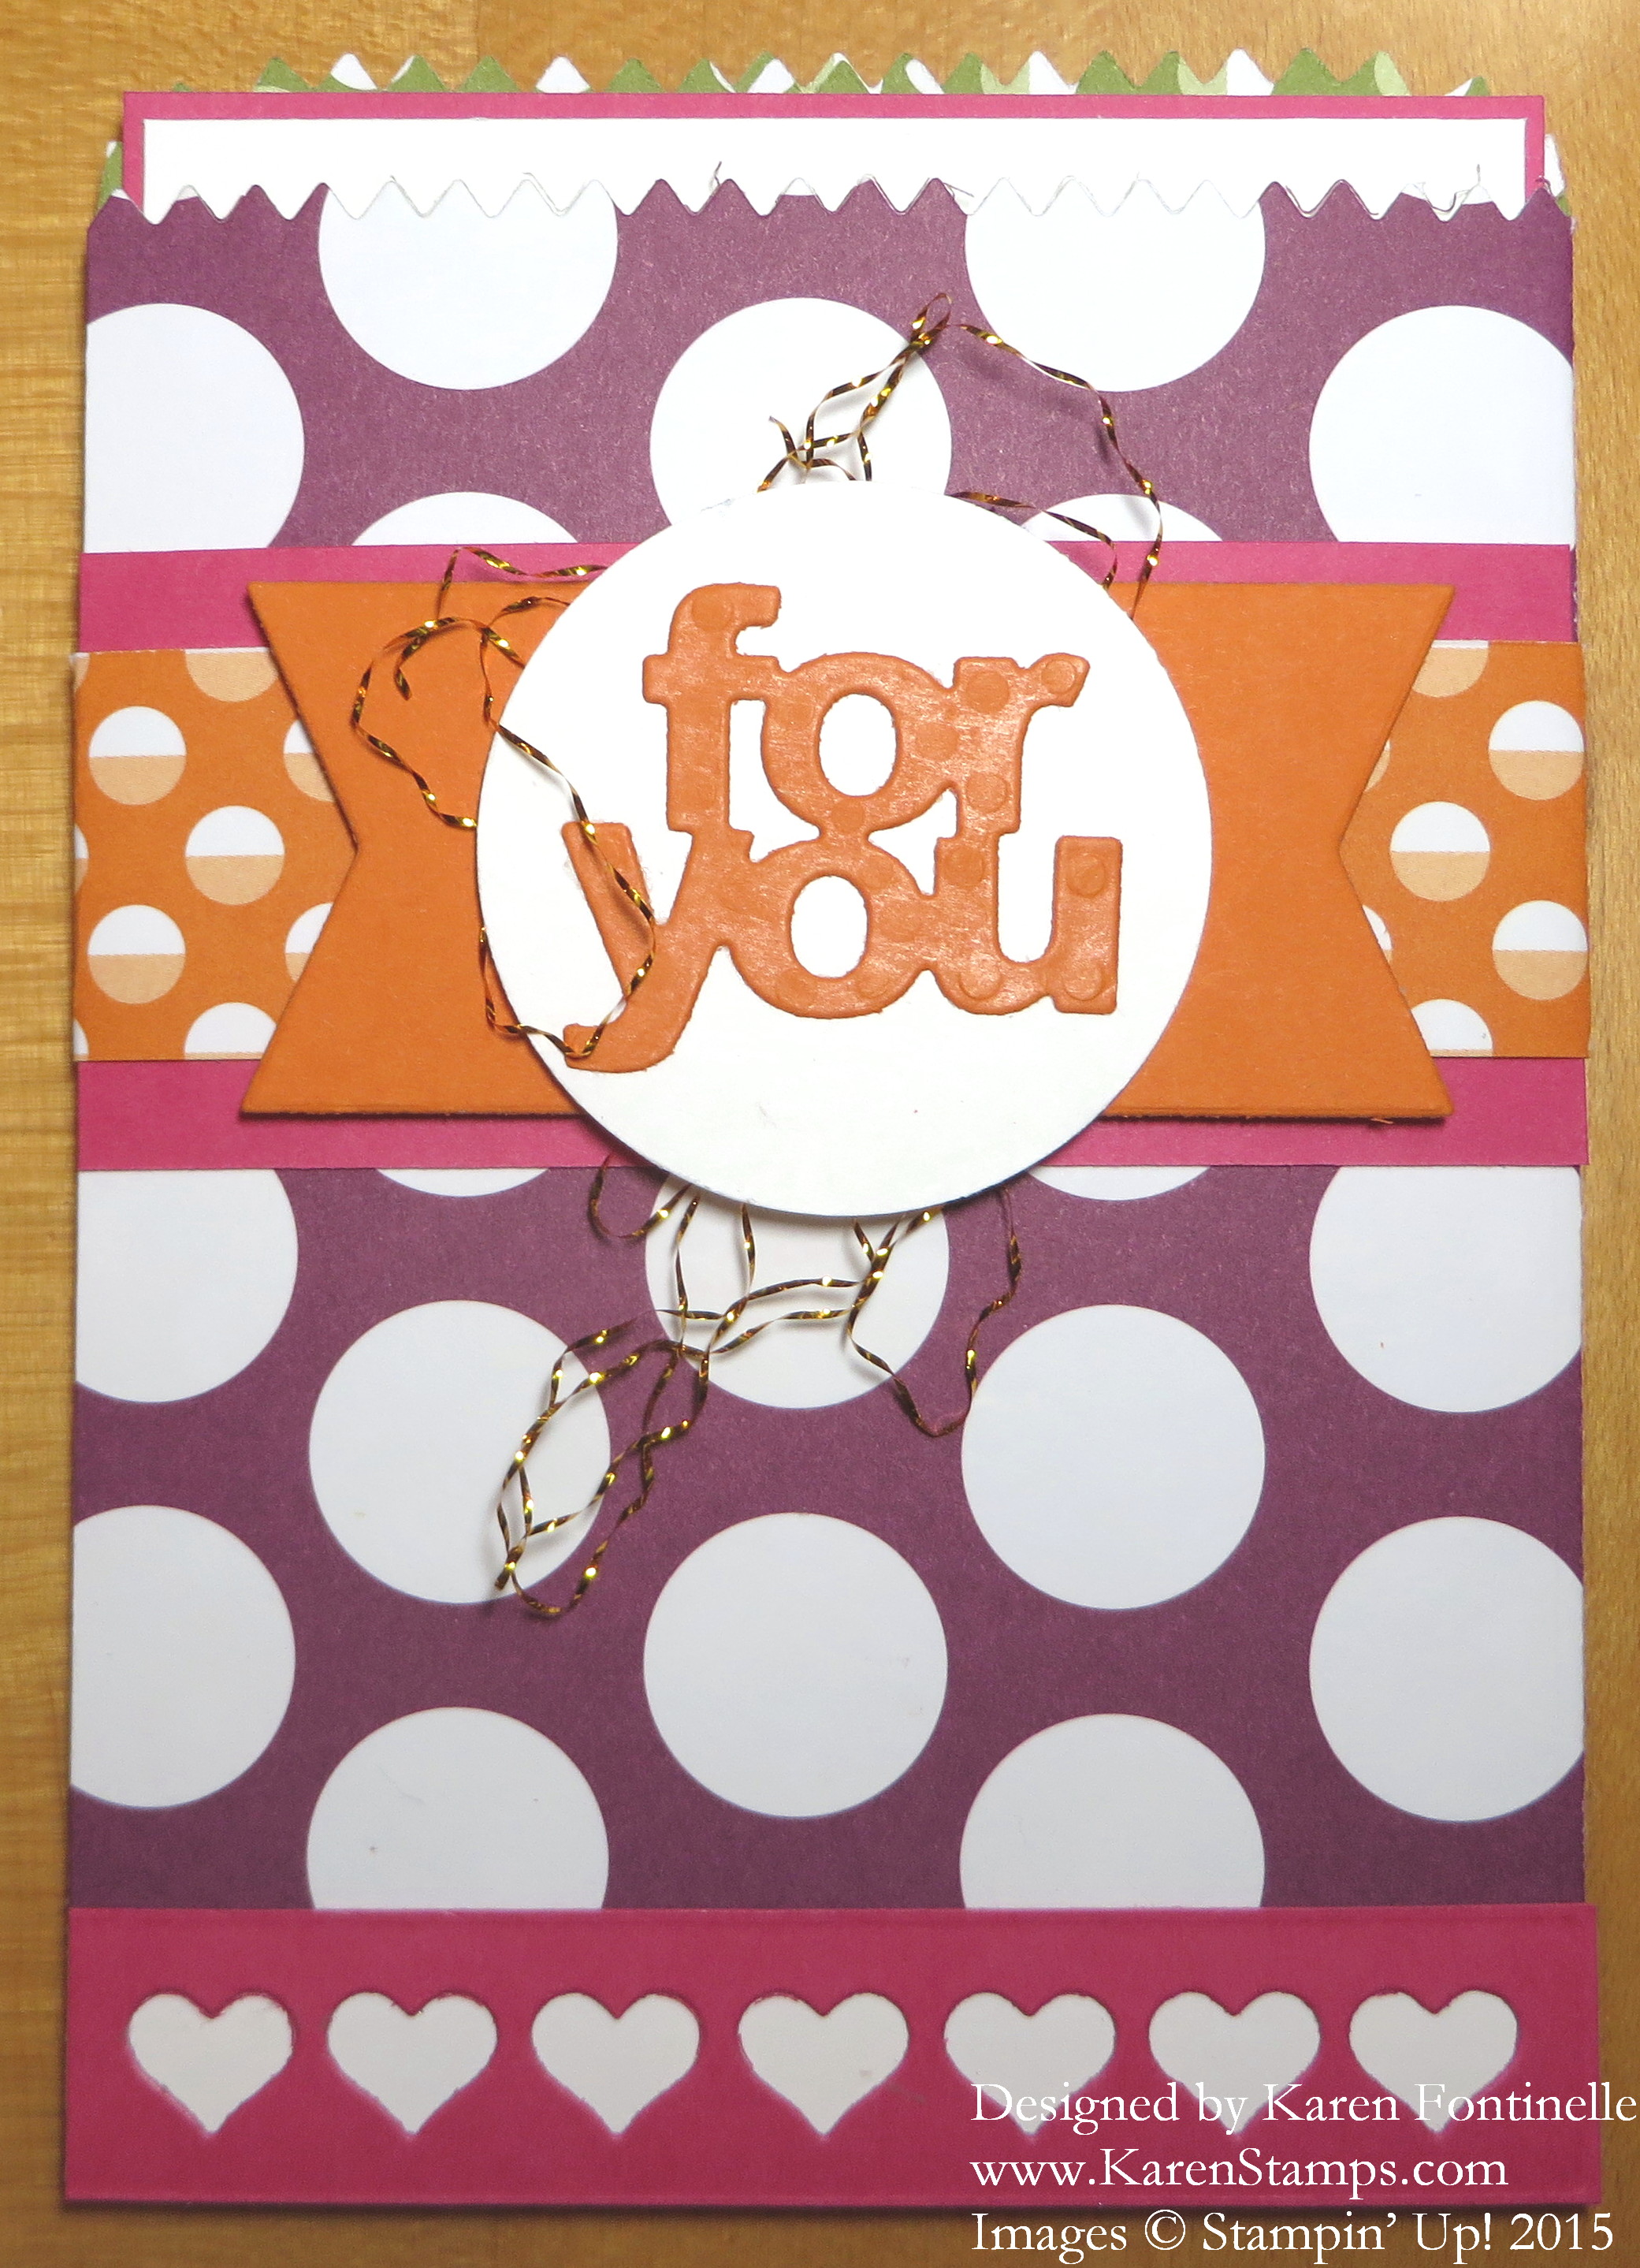
Maybe you still need a quick card or something in which to put a gift card for your mother or special someone. The Mini Treat Bag Thinlits Die is great for this! It die cuts two pieces with which to make a little bag and comes with plenty of extra die pieces, such as the heart strip on the bottom, the Pumpkin Pie banner piece and the “For You” words.  I went kind of bold with this, choosing a large polka dot pattern from the Sweet Taffy Designer Series PaperIt’s such happy paper, cute patterns and is on sale through tomorrow night on the Stampin’ Up! Weekly Deals!  Grab some while you can! I added a strip of Melon Mambo across the top with a belly band around the bag with another paper in the Sweet Taffy pack. The little metallic threads are pulled out of the Gold Baker’s Twine! It seems to be the “in” thing to just  adhere some circles of twine or threads behind another element on a card.
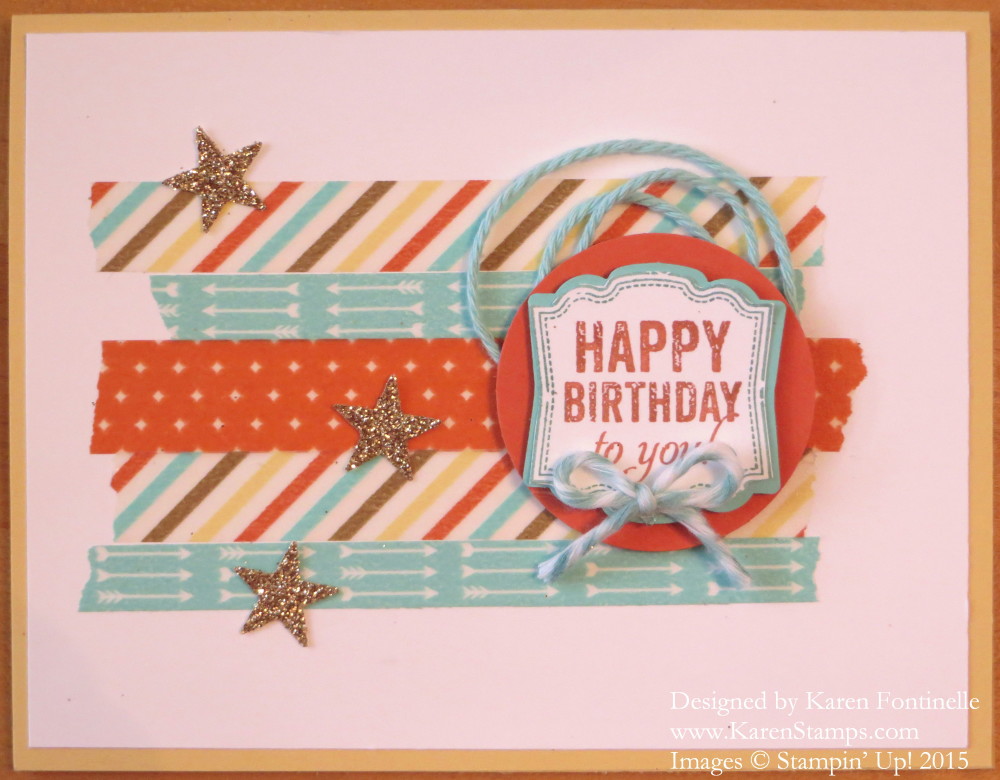
You can slip a card inside with a greeting or you put a gift card!  Either way this makes a great unexpected card or gift holder. And you can use it for many occasions!

Stampin’ Up! Weekly Deals good through Monday night, May 11th!

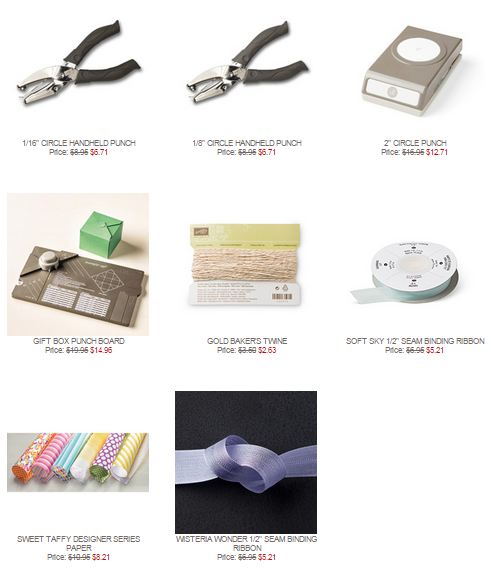
Stampin' Up! Weekly Deal May 5 2015

Click to Shop!

Make a Pretty Box With the Gift Box Punch Board

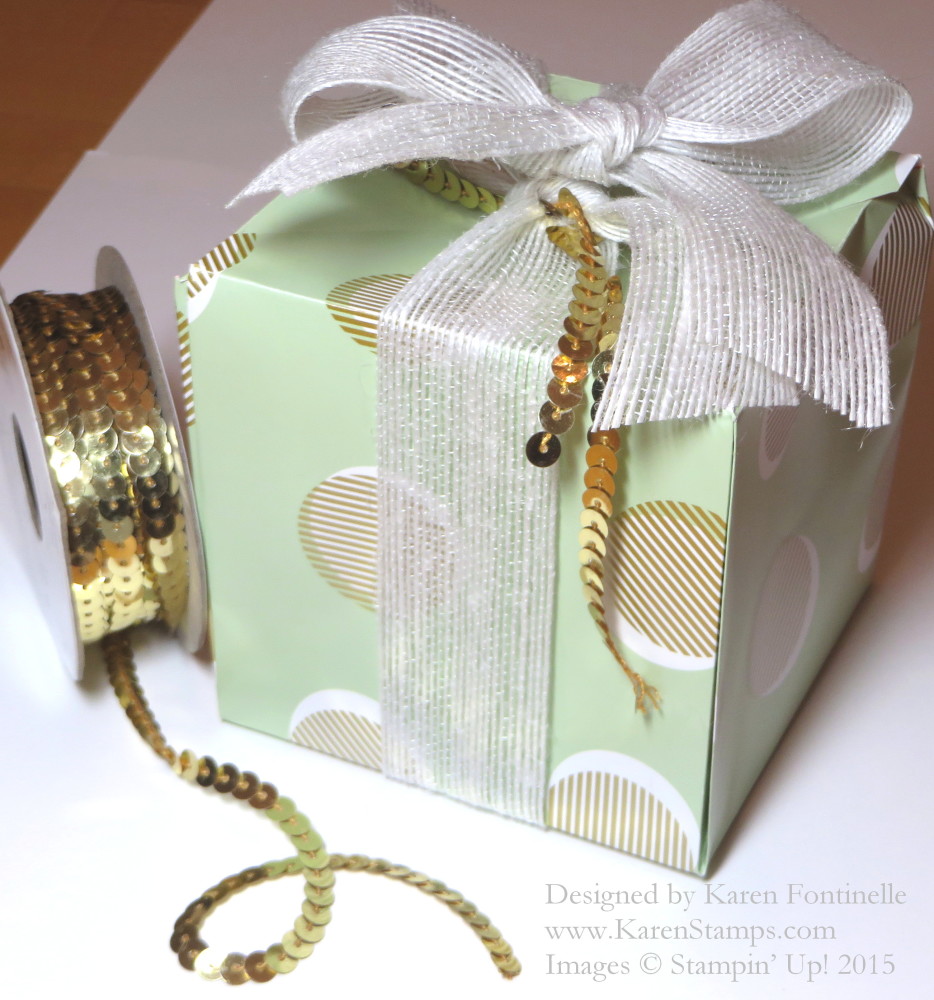
Gold Soiree Punch Board Gift Box

Make this pretty gift box with some designer series paper and the Gift Box Punch Board in just minutes! I chose the Gold Soiree Designer Series Paper because of the pretty gold pattern and because the patterns inside and out didn’t matter which way they ended up going! The Gift Box Punch Board, although it may look confusing at first, I think after you make one or two boxes you will totally have the hang of it. This is the largest box, 4 inches on each side, and uses a
12″ x 12″ piece of paper. I used designer paper so the inside would also be decorative, but you can also use card stock if you wanted a solid color.

To trim the gift box, I used the White 1 1/4″ Jute Ribbon in the Occasions Catalog. For an extra-special accent I added some Gold Sequin Trim.  This could be for any nice occasion!  Add a tag if you like or a gift card.

And for a special treat, the Gift Box Punch Board happens to be on the new Stampin’ Up! Weekly Deals this week!  Save $5!  You can watch a video HERE to see how to use the punch board. Order your punch board by Monday, May 11.

A Handmade Berry Basket for Easter

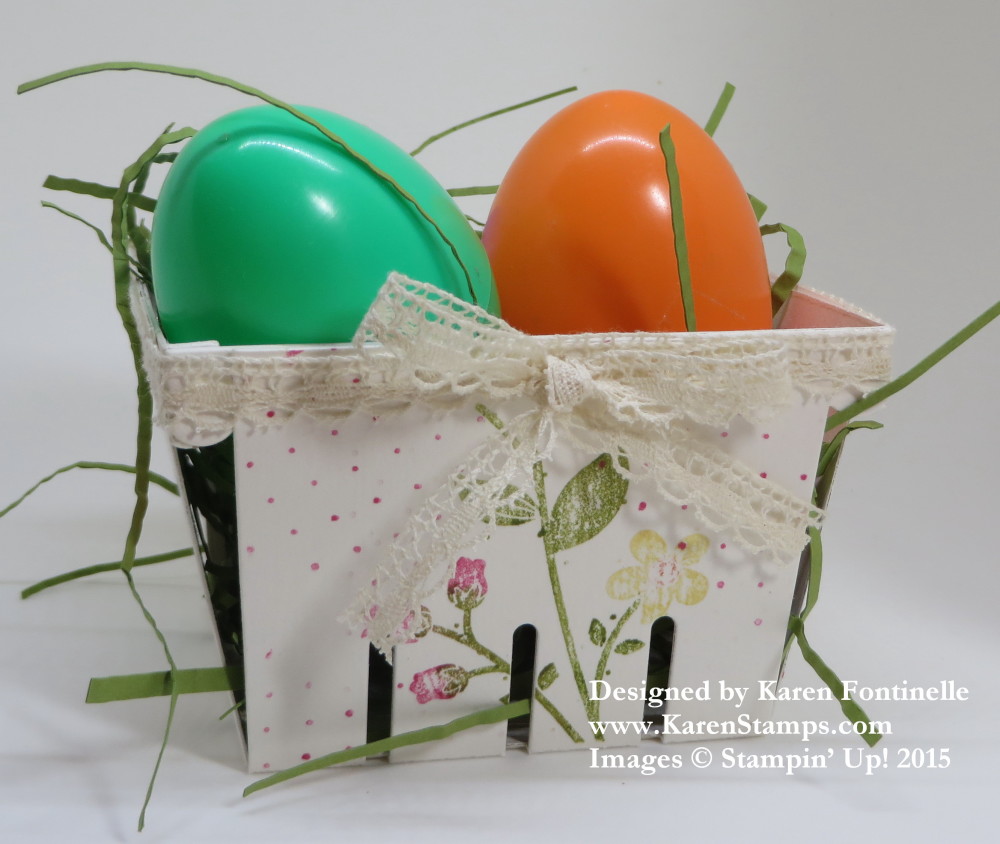
Berry Easter Basket Wildflower Meadow

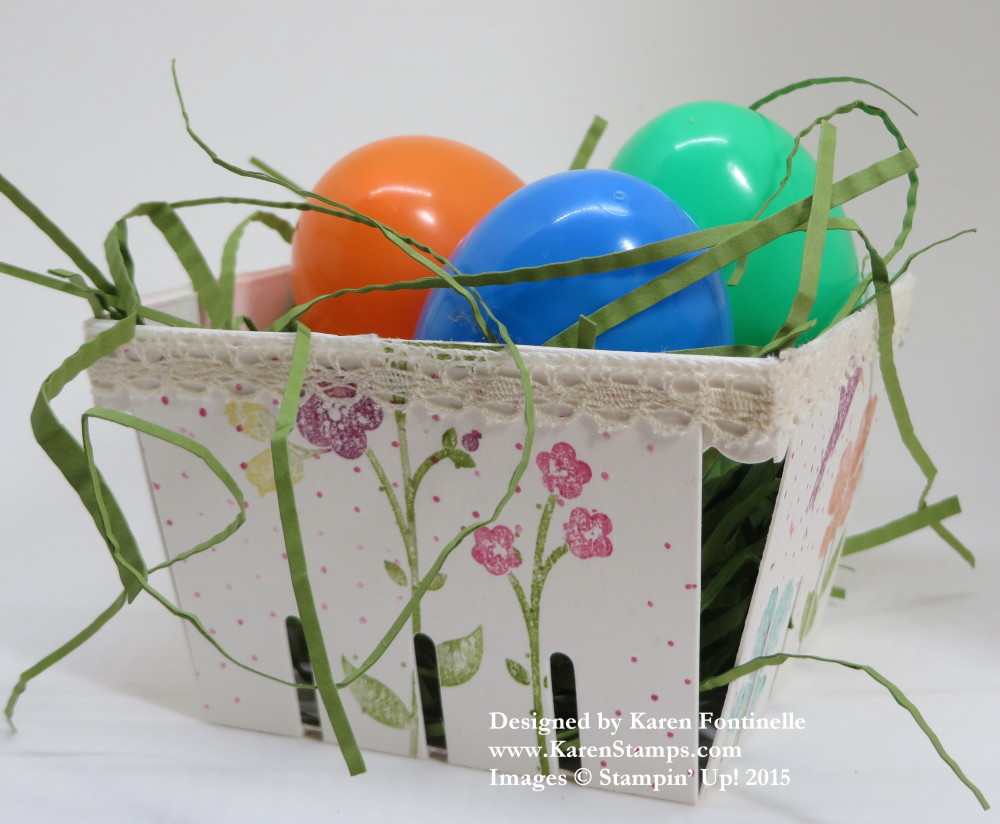
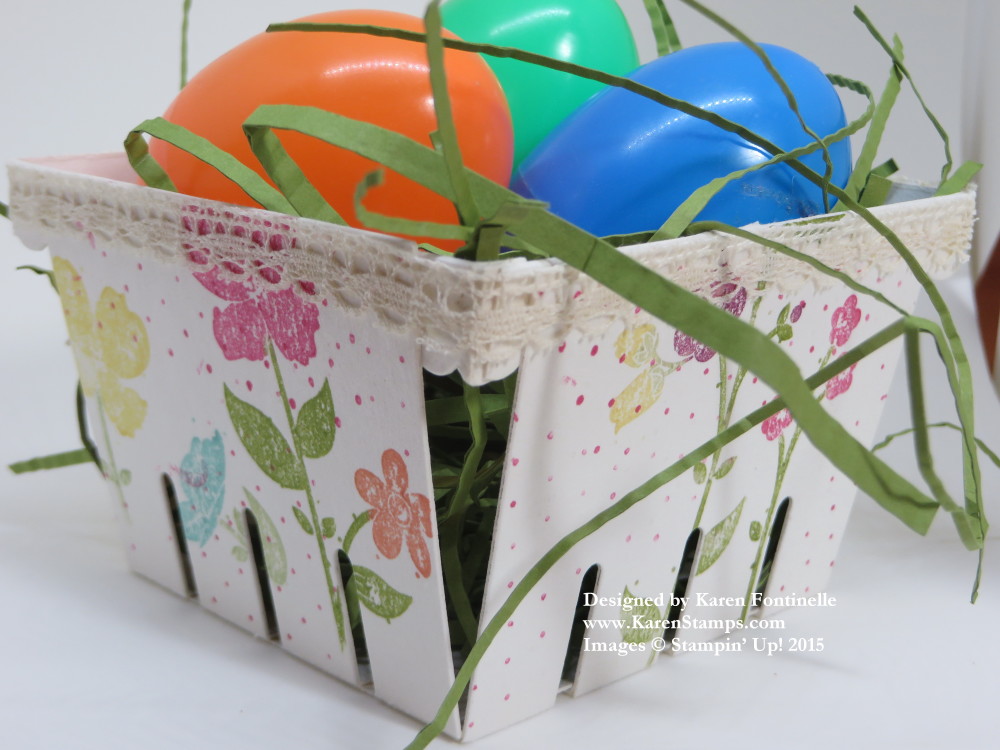
If you own the Berry Basket Die, you are all set for making cute little Easter baskets! My other berry baskets have been made with card stock or designer paper, but this one is made with Coaster Board and is much sturdier. The Vanilla Coaster Board is described as thinner than chipboard and sturdier than card stock.

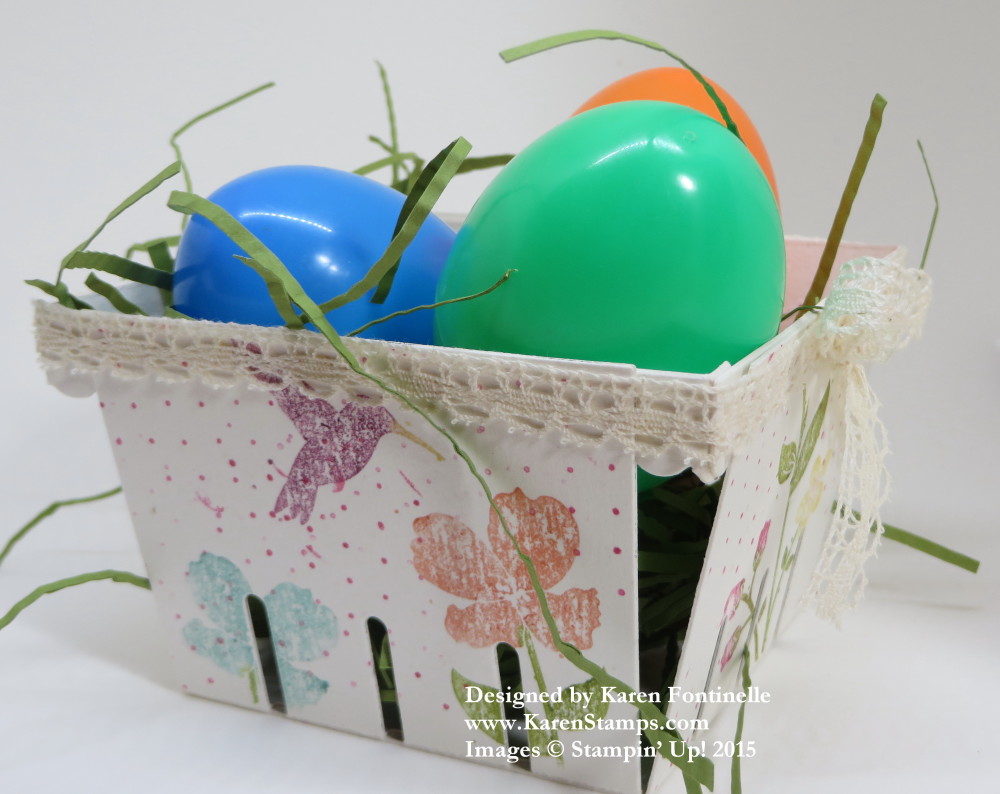
I decided to stamp mine with the Wildflower Meadow Stamp SetThis is one large background stamp, which I would recommend you purchase in the wood-mount. Those large stamps are just easier to manipulate on the wood block than sticking on the very large clear block. I colored the flowers and leaves with various Stampin’ Write Markers and then pressed the Coaster Board pieces, after they were die cut, onto the Wildflower Meadow stamp. I had to cover the portion of the Coaster Board basket that I didn’t want stamped.  And think about which way your pattern is going. I stamped different portions of the large stamp on each side of the basket.

Once it was all stamped, I realized that if I attached the usual basket edges around the top, they would cover up some of my stamping!  So I adhered the basket edges to the INSIDE of the basket to hold it together and adhered the Venetian Crochet Trim around the outside top edge of the basket. I tied a separate bow and adhered it with a Glue Dot to the front. I love the way it turned out, if I do say so myself!

Berry Easter Basket Wildflower Meadow

This berry basket won’t even be just for Easter! It’s pretty for any time, especially spring!

Berry Easter Basket Wildflower Meadow

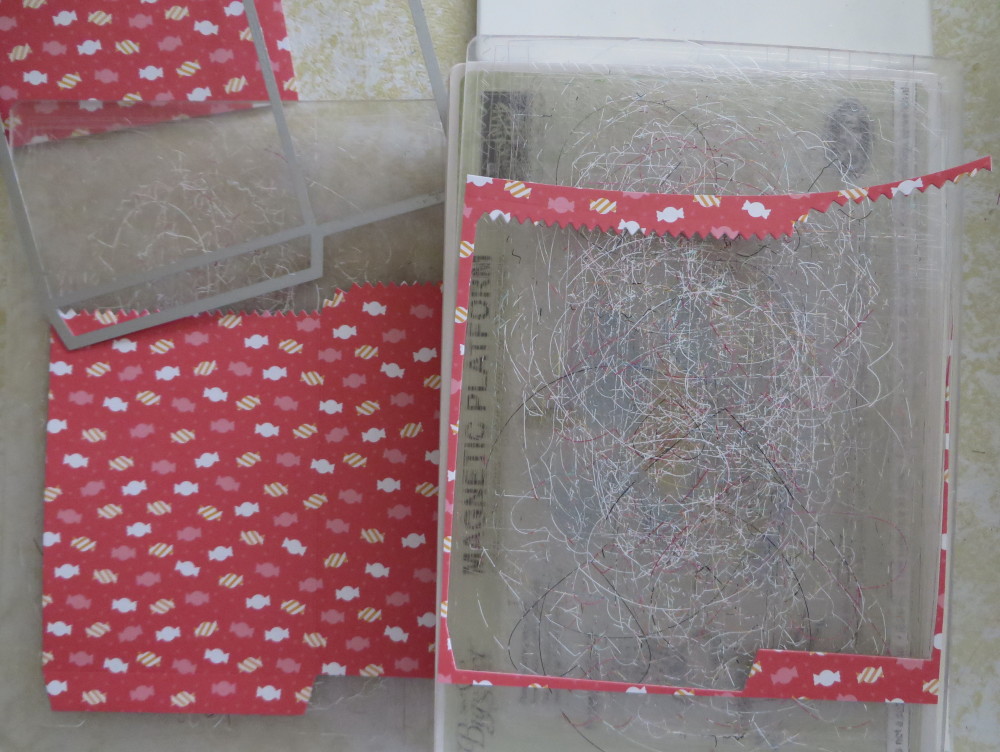
If you are interested in the Berry Basket Die, you can also purchase the Magnetic Platform for the Big Shot to use with framelits and thinlits on Monday, taking advantage of FREE SHIPPING and the Weekly Deal discount ending on Monday!  Hey, with free shipping all next week (Mon, April 6 – Friday, April 10) you can order the Weekly Deals you want on Monday and then order again if there is something you want that comes out on Tuesday!

Shop HERE at Stampin’ Up!

Berry Easter Basket Wildflower Meadow

Stampin’ Up! Coloring Techniques for You!

Maybe this is the end of your Spring Break, or the beginning.  Maybe you are snowed in or rained in. Maybe you are having a relaxing and lazy Sunday and would just like to sit back and watch some videos!  Here are some that Stampin’ Up! released the other day showing various coloring techniques that you might enjoy.

Coloring Techniques with Sale-a-Bration Papers:

Watch Carrie use the Sale-A-Bration Irresistibly Yours paper that is already embossed AND the printed Sheer Perfection Vellum Paper Stack!

Watercoloring with Blender Pens – A Happy Thing Stamp Set

When I first started stamping, Blender Pens were one of the main things we used! They are still tons of fun to use with ink pads or ink refills in many ways!  Get re-acquainted with your Blender Pens or order new ones!

Watercolor Wash Technique – For Being You Stamp Set

Have some fun by embossing with White Embossing Powder and the Heat Tool, then use the Aqua Painter and ink to do a watercolor wash!

Order any of the current Stampin’ Up! products and with a $50 purchase you qualify for a FREE Sale-A-Bration product!  Remember, besides the Sale-A-Bration Brochure, new Sale-A-Bration products were added! And a few more were added last week!!

SHOP HERE!!

Make Yourself a Triple Berry Basket

Berry Basket Die Triple Basket

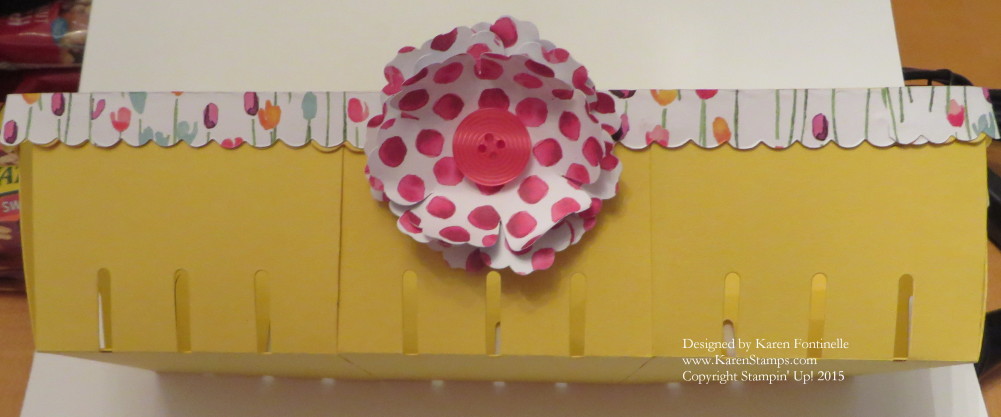
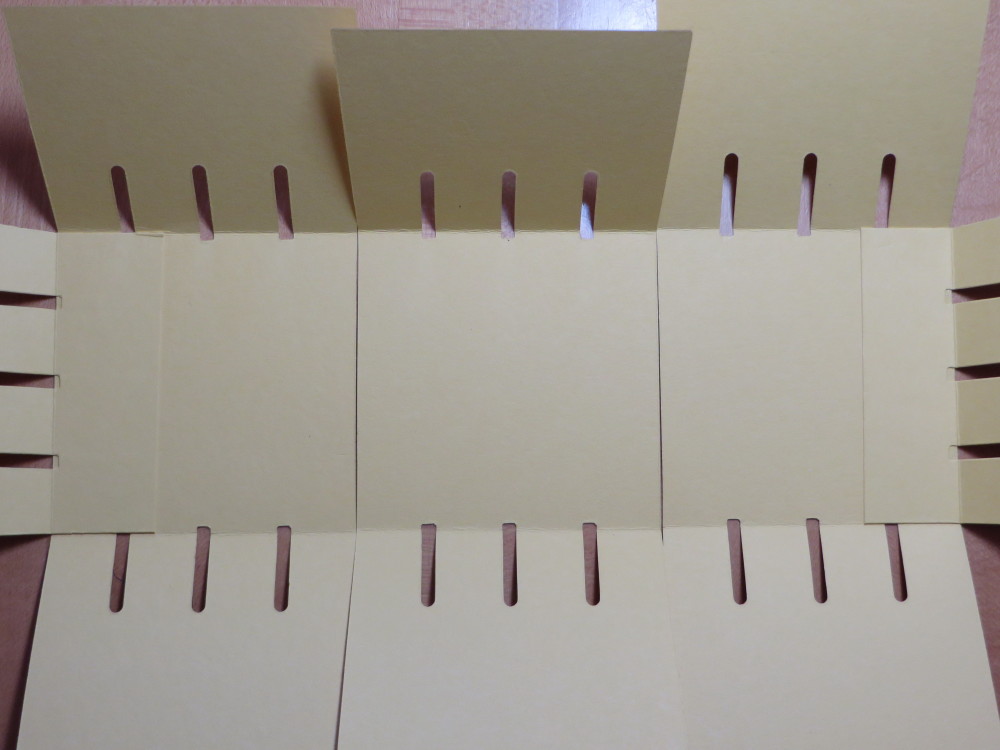
A few weeks ago, after playing around a little with my new Berry Basket Die, I wanted to try to make a larger basket to actually hold some cards on my desk. Some I saw online were actually two or three baskets put together but I didn’t want the divider inside. So I figured out this arrangement:

Berry Basket Die Triple Basket Inside Assembly

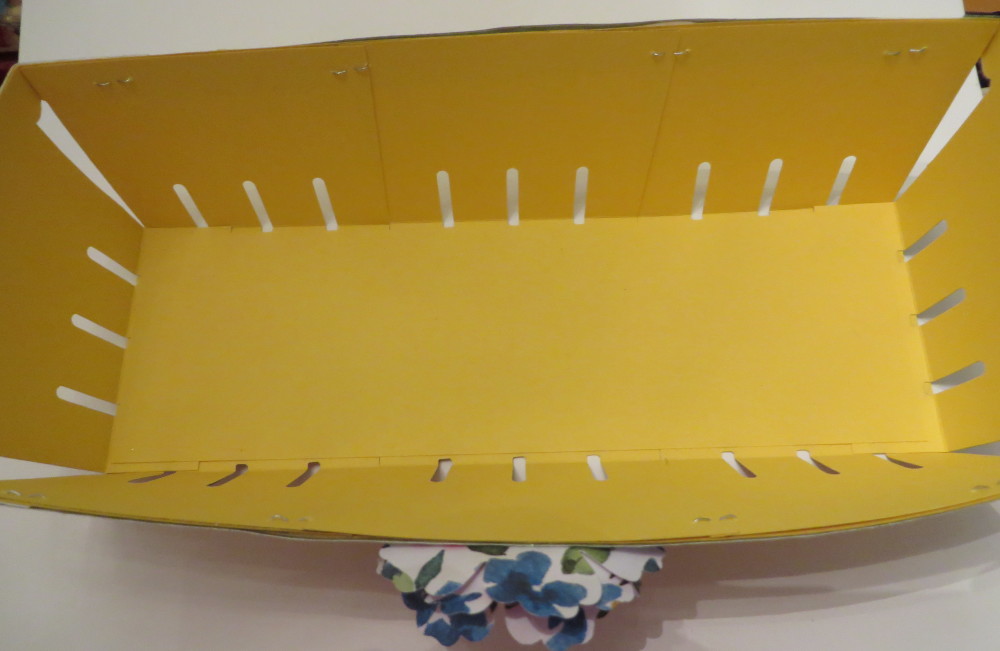
You can see I cut off some of the basket sides in order to assemble this and glued two sides at the ends. I also took the strips that would be the handles and cut them to adhere the pieces together in the basket bottom. Then I covered the inside bottom of the basket with a piece of card stock that fit the length and width to give it a more finished look inside.  You’ll have to measure to get the best fit.

Berry Basket Die Triple Basket Inside

Then my berry basket was decorated with the pretty Painted Blooms Designer Series Paper, along the trim and for the flower.

I highly recommend trying the Coaster Board for making these baskets.  It will be a lot sturdier and stronger than card stock.  However, the card stock is cute and handy to use, too!

Get the Berry Basket Die and have fun making small baskets! How great they will be to make for Easter and spring!  The Handheld Stampin’ Up! Stapler is very fun to use with these baskets and makes them look like real baskets!

Don’t forget to check the Weekly Deals, too!  Last Day!

Shop Online 24/7 at my Stampin’ Up! Store! 


Easter Bunny Tag

Easter Bunny Tag

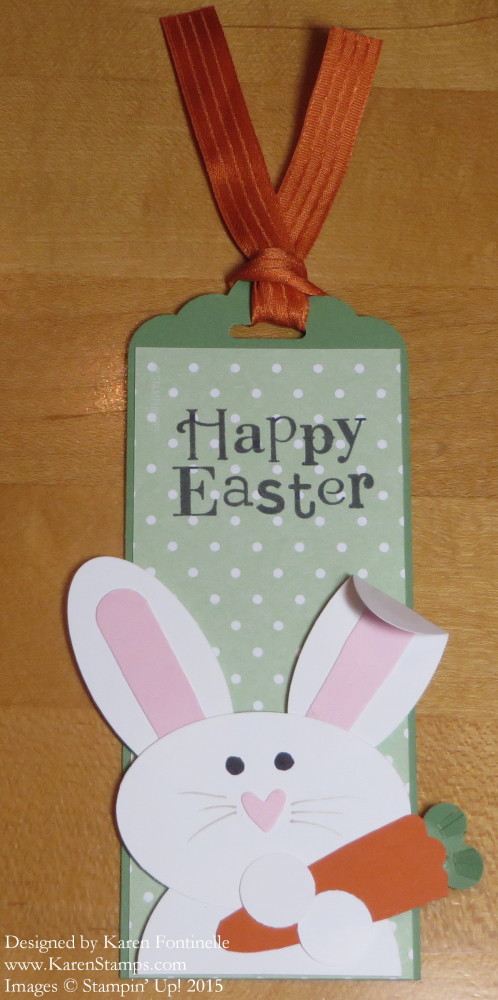
Last weekend I had SO much fun making twenty-four of these fun Easter tags with two of my customers/friends and one cute little girl for a group of children. I found the idea for the punch art bunny on Pinterest somewhere and fortunately the bunny fit just right on a tag made with the Stampin’ Up! Tag Topper Scalloped PunchI added some designer paper on the tag for the background and stamped the Easter greeting from a retired Hostess set (sorry!) right on the paper. We played with different combinations, like stamping on cardstock and punching out a shape, but in the end we just liked it stamped on the paper. That’s how you have to play around sometimes with rubber stamping until you just “know” you have the right design!

This is how you make the bunny:  The head is the Extra-Large Oval Punch. The body is the 1 3/4″ Circle Punch, cut in half. The ears are the Large Oval Punch with the pink insides made with the Word Window Punch.  We opted to fold down the top of the ear for cuteness!  The cute little heart nose is punched with the Owl Builder Punch. The eyes are just drawn in with a black marker and Miss Elsie did the whiskers with some wispy strokes with the Crumb Cake Marker! The rabbit paws are just 1/2″ circles.  The carrot is punched with the Modern Label Punch and then just trimmed down with Paper Snips. With the heart punch in the Itty Bitty Accents Punch Pack you can make the carrot topper and even fringe it with the Paper Snips if you want to make it look real.

The ribbon on the tag is the Tangelo Twist 3/8″ Satin Ribbon. It really goes well with the tag.

Hang this tag on an Easter basket or put the tag on a card for Easter. Or just make the punch art bunny on an Easter card.  Have fun with it.

If you need any of these supplies, you might be able to earn a FREE Sale-A-Bration product with a $50 purchase. Due to the Blendabilities not being available any more, other Sale-A-Bration items may sell out so if there is something you really want, don’t delay.

Don’t forget about the Weekly Deals and New Arrivals.

Shop at my Stampin’ Up! Online Store!


Paper Pumpkin Leftovers: Make an Easter Treat!

 February Paper Pumpkin Alternate Idea Easter Treat

If you don’t use up all the materials in your monthly Paper Pumpkin Kit, just save them and you might come up with alternate ideas in the future. Here I used  extra supplies from my February Paper Pumpkin Kit to make an Easter treat!  The kit contained these cello bags, the foldover tags for the bag topper, the cute clip, the pretty pink and gold baker’s twine, and the little banner tags. I stamped the Easter greeting with a stamp from Teeny Tiny Wishes (a must have word stamp set in my opinion!).

Then just add a cute bunny to the foldover tag! While that tag was used for Valentine treats as designed, it CERTAINLY is pretty for Easter – pink and gold! The punch art bunny is just made from the Small Oval Punchthe 3/4″ Circle Punch, and the Petite Petals Punch. Two of the petals from that punch make cute ears – just cut off the extra petals so you have enough to glue to the bunny head. The little pink bunny tail is made with a retired punch but you can use something similar. And top it off with a Basic Pearl Jewel Embellishment.

To start Paper Pumpkin coming to your house I recommend purchasing a 3-month subscription on a regular Stampin’ Up! order. It is on sale right now during March during Sale-A-Bration!  And since it is a $50 purchase, you will earn a free Sale-A-Bration product. I also suggest adding some other items to your order to take advantage of the shipping. More and More people are getting on the bandwagon, so don’t miss out!! It’s fun that comes in your mailbox!  Give one or more for gifts!

As a storage tip, some people like to keep their Paper Pumpkin stamps in extra Clear-Mount Stamp Cases for each kit and make a label to slip inside the stamp case cover. Or keep several sets in a larger Full Case for Wood-Mount Stamps.

Butterfly Berry Basket

Butterfly Berry Basket

I may not have the fancy dishes and table decorations that I saw on the Houston Azalea Trail last Friday, but at least I can make my own basket with the Berry Basket Die and decorate with the Butterflies Thinlits Dies #137360.

I got this idea from the sample in our demonstrator magazine, Stampin’ Success. Mine is made a little differently, but I copied the main elements. Stampin’ Up! made their sample with Coaster Board, a heavier material that would truly be better for making a sturdy basket. Rather than stamping a smaller butterfly, I just die cut the Best Year Ever Designer Series Paper available during Sale-A-Bration. The larger butterfly is die cut from the paper in the Sweet Taffy DSP.

Here are the new Stampin’ Up! Weekly Deals!
Stampin' Up! Weekly Deal Mar 10 2015

It’s always fun to see the new Weekly Deals! Stock up on two colors of Baker’s Twine and the bright and happy All Abloom DSP Paper Stack. If you’re looking for spring, get the Wildflower Meadow Stamp Set and matching embossing folder. There’s also Gold Glitter for pizzazz and you’ll love the Cotton Ribbon!
The Butterflies Thinlits Dies, as  I write this, are backordered and they can’t be ordered at this time. As soon as Stampin’ Up! gets more in stock, they will turn the number back on.

In the mean time, you can purchase the Berry Basket Die and any of the Weekly Deals in the Stampin’ Up! Online Store!

New Stampin’ Up! Weekly Deals

Stampin' Up! Weekly Deals Mar 3 2015

Click to Shop!

Here are the new Stampin’ Up! Weekly Deals for March 3 – Monday, March 9. You have a digital download for My Digital Studio or any design software on your computer to help you make some St. Patrick’s Day decorations! Did you know you can purchase the software download for My Digital Studio, receive it immediately since it is a download (no shipping!) and you get a ton of content to use with it? You don’t have to be a knowledgeable digital scrapbooker to use it, it’s very easy to use and learn and there are plenty of videos to help you at www.mydigitalstudio.net.
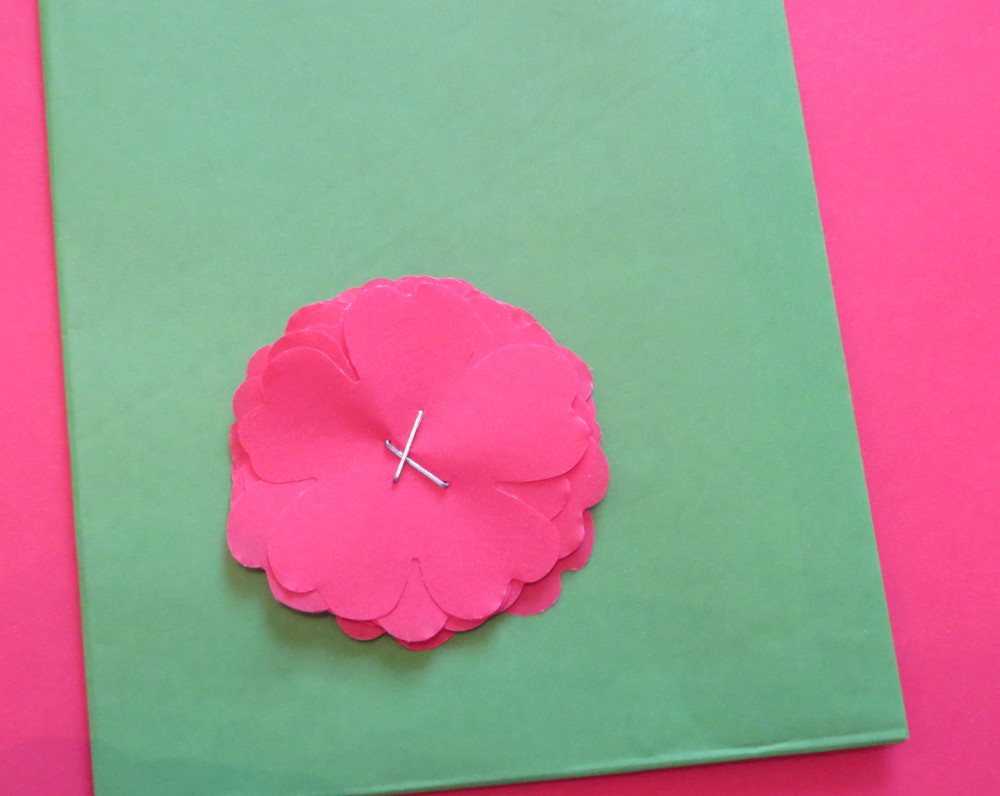
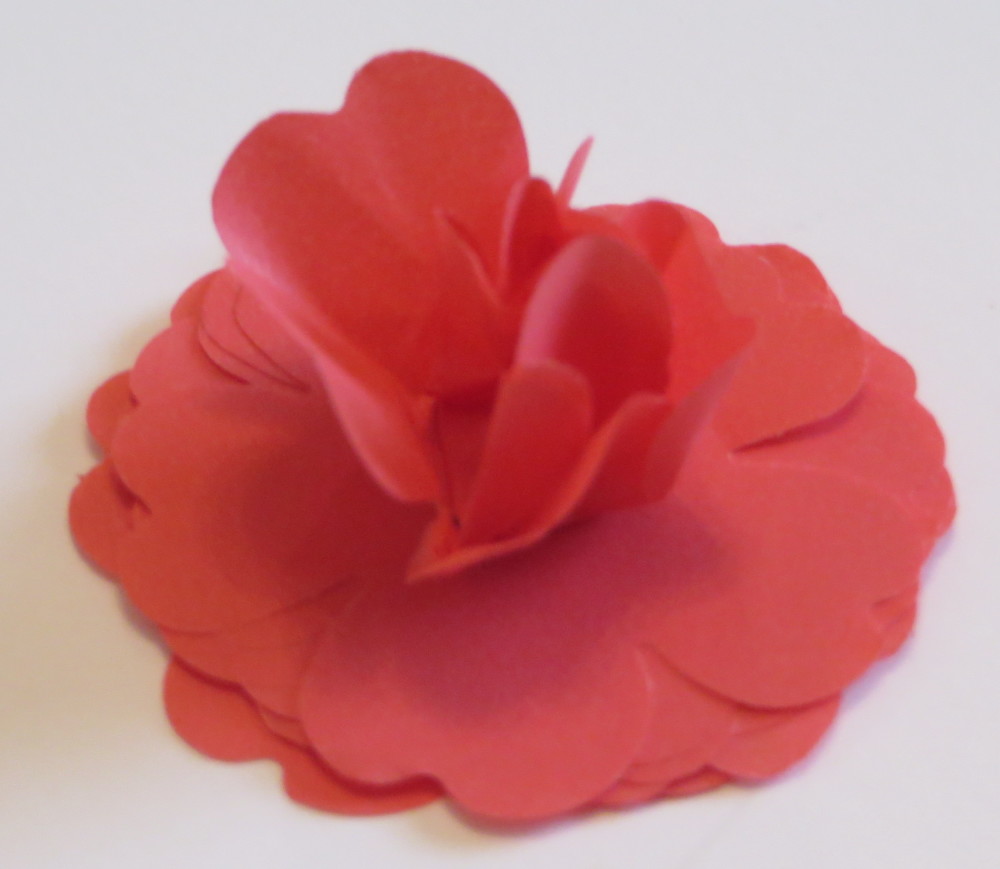
The other products on the Weekly Deals can be used for packaging treats or gifts.  The Filter Paper can be used to make those tissue flowers we used to make in school or cut it in strips and moosh up to make Easter grass or paper shred in a box or package. Stampin’ Up! products are usually so versatile you can use them for things other than what they obviously are intended.
Remember we have four extra products to choose from for your FREE Sale-A-Bration product with a $50!

New Sale-A-Bration Products March 2015

New Sale-A-Bration Products March 2015

Just visit my Stampin’ Up! Online Store and you will see all your choices!

Stampin’ Up! Berry Basket Cuteness!

Berry Basket Card HolderI recently ordered the Stampin’ Up! Berry Basket Bigz L Dieand I think it holds lots of potential for cuteness in our papercrafting! Maybe even true usefulness as it can be used to hold some of our stamping supplies! Think about cute little Easter baskets or spring baskets coming up (if it ever stops snowing in some parts of the country!). Just add a handle and some “grass” and you’ve got it. You can even use up your paper scraps along with your Fringe Scissors or Paper Trimmer to cut narrow strips of paper than can be wadded up and crinkled to look like that grass or paper shred you can buy in the store.

Use the Berry Basket Die to cut two sheets of card stock and fold on the score lines. The basket itself goes together easily, and then you can choose the straight edge trim or the scalloped edge trim. Stamp or embellish as you like! So many possibilities! The top of the basket is wider than the inside so as you can see from my top photo, the 3″ x 3″ cards fit perfectly inside, larger cards fit turned on a slight diagonal. But there are lots of possibilities for what will fit inside!

Berry Basket Card Holder 3x3

To keep this first Berry Basket simple, I just made the basket with Crumb Cake card stock and embellished it with the Bermuda Bay Sequin Trim and the Venetian Crochet TrimEveryone seems to like using the Stampin’ Up! Handheld Stapler on the basket to attach the trim edge. It just goes well with baskets!

I know I’m going to have fun trying out various kinds of baskets!  To get your Berry Basket Die, just place your online order on my Stampin’ Up! site!  Or you can always contact me to put the order in for you! Remember, with a $50 purchase you will also earn a FREE Sale-A-Bration product!


Last Minute Valentine’s Day Projects

Last Minute Valentine's Day Project Ideas

Looking for last minute Valentine project ideas?  Here are two Valentine cards and one Tiny Treat gift box decorated for Valentine’s Day.

If you have a small gift you are giving your Valentine, just use one of Stampin’ Up!’s many gift boxes, such as this Tiny Treat Box. Or use any box you have and get some inspiration for decorating from this box. Do a little stamping, embellish a little and tie on a pretty ribbon! I always keep some Stampin’ Up! packaging products on hand because you never know when you might need one, and once you have the box, it is easy to decorate! I used the You Plus Me Stamp Set and some coordinating Stacked with Love Designer Washi Tape.

The Wood You Be Mine Photopolymer Stamp Set is great for masculine cards with loving greetings that aren’t “too mushy”! I even WON this stamp set as a Prize Patrol from Stampin’ Up! during the Occasions Catalog Reveal that was livestreamed! Who would think you could win a prize sitting at your computer?! While I wasn’t crazy about this stamp set at first, you can’t but fall in love with this woodsman and his cute flannel shirt that you can stamp or color any way you want! Lots of possibilities with this stamp set, and of course it won’t just be for Valentine’s Day with different greetings. I cut out the woodsman with my Paper Snips so I could place everything on the card the way I wanted (copying a sample in the Occasions Catalog!). He was surprisingly easy to cut out so don’t be afraid! Of course using Paper Snips Scissors makes cutting easy! They REALLY make a difference! Every stamper should have a pair.

And for a fun Valentine, how about the Cheerful Critters Photopolymer Stamp Set?! These “critters” just make you happy no matter what project you are making!  And with their signs and arms up you can add any greeting you like. After coloring the bunny critter with the Blendabilities Markers, I cut out with Paper Snips and cut out her arms without the sign so she could hold up the heart, die cut with the Hearts Collection Framelits Die. The background is stamped with the little grouping of tiny hearts from the You Plus Me stamp set.  Just think of how often you can use those cute little hearts because hearts and stars are for any occasion!  Good to have on hand!

If you are making valentines at the last minute today, I hope these ideas inspire some creative ideas for you whether or not you have these exact stamp sets or materials.

Of course you can order any stamping supplies you need at your convenience online at my Stampin’ Up! Online Store by clicking this link! Remember, with a $50 purchase during Sale-A-Bration you get to choose a free Sale-A-Bration product! You will see the details at my Online Store.

Have a Happy Valentine’s Day!!!

Quick and Easy Valentine Top Note Purse Candy Treat Bag

Valentine Top Note Purse Candy Treat Bag

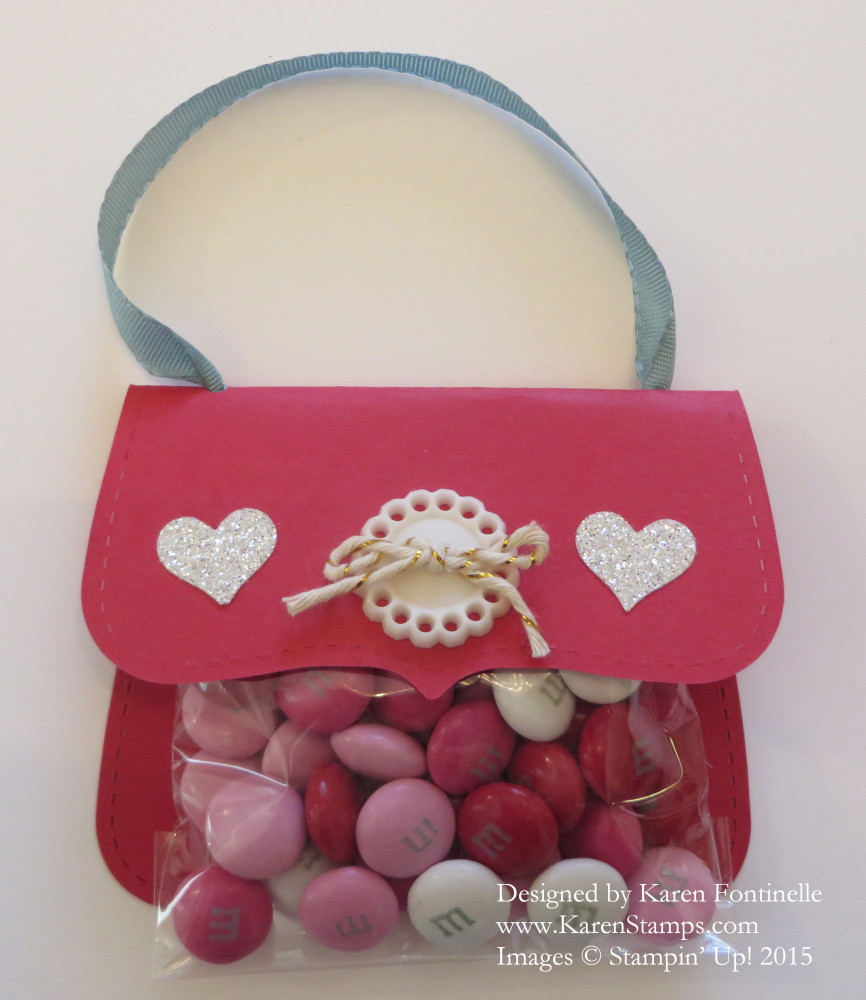
Looking for a last minute, quick and easy valentine treat?  Try the Valentine Top Note Purse Candy Treat Bag!  It’s very easy to die cut the Top Note Die with the Big Shot and the fold the one end over to look like a purse. Punch two holes in the fold to insert ribbon and tie knots in the ends or adhere to inside. I used the retired small cello bags from Stampin’ Up!, but if you had the medium Cello Bags you could turn the Top Note die the other way to fit the larger bag or just fold the bag down to the narrower size you want if it doesn’t quite fit. Fill the bag with candy or whatever treat you have and fold the top over. I adhered the bag to the inside of the purse using Fast Fuse and a little on the flap part of the purse to hold it down on the front.

Decorate the front flap of the purse to your liking! I attached a Very Vintage Designer Button with a few Glue Dots. The bow on it is made with the Gold Baker’s Twine, just attached with a Glue Dot. It was too difficult to try to get the twine through the button so I gave up, made a bow and just stuck it on! For a little more bling, I punched two hearts from the Dazzling Diamonds Glimmer Paper with the heart punch in the Itty Bitty Accents Punch Pack.

If you don’t own the Top Note Die, I would cut a piece of card stock in a rectangle and fold over similarly. Maybe round the corners.  Then I would go order the Top Note Die because it is one of the all-time favorites!

Time is running out to get those class valentine treats done and valentines mailed out! Here’s what your table can look like when you are making valentines!

Valentine Making DayIf you think any of your friends can use a valentine treat idea, please click on one of the social media buttons below this post to share!  Or send them this link!

Valentine Candy Bar Treat

Valentine Candy Bar Treat

Valentine’s Day is getting close!  Here is an easy idea!  Just wrap a candy bar, whatever size, in card stock and/or designer paper and decorate. You will easily have a Valentine Candy Bar Treat! Make it as simple or as embellished as you like! For class valentines, you need to keep it pretty simple, maybe just designer paper and a punched out heart or two. For your loved one, maybe go crazy!

This sample is wrapped in Real Red card stock and then wrapped with a piece of paper from the Stacked With Love Designer Series Paper Stack.  I stamped a greeting from the You Plus Me Stamp Set. I chose the “you’re sweet” sentiment since I was doing a candy bar! The little hearts are punched with the heart punch from the Itty Bitty Accents Punch Pack.

You can do any size candy bar, from the jumbo ones down to the little snack size.  Better buy extra, though, so you can eat one while you stamp!

Shop Stampin’ Up! Online HERE!

Spend $50 and get a free Sale-A-Bration product!

Make a Cute and Easy Album from a Kit

Stampin' Up! So You Project Kit

So You Project Kit Images (c) Stampin’ Up! 2015

I saw this new So You Project Kit in the Occasions Catalog on page 48 but honestly it wasn’t on top of my wish list – until I saw Sara Douglass on stage at the Stampin’ Up! Leadership Conference last week show the album she made of her daughter and her friends out on a special date. I think they were going to make one for each of the friends! Then I watched the video shown below by Stampin’ Up! talking about this So You Project Kit album and saw how many things that are included, not to mention examples for each page IN COLOR that you could use – but certainly do not have to. The album holds 4″ x 4″ photos so you could get your Instagram photos printed to keep in this album! It’s the perfect size for a trip or a party or a shower or a new baby or graduation, certainly any occasion or holiday. Or just start it in a generic way and when you get a special photo, just stick it in there! On the catalog page, be sure to check out the extra supplies you might want to have on hand and the coordinating stamp set you could use. Of course, depending on your use, you might already have stamp sets you can use with it. Even if your photos are 4 x 6, they can be cropped to fit, most likely. I think it looks like a fun album and I’m putting it on my order!

Don’t forget, you will also get Sale-A-Bration FREE products with every $50 purchase! No limit! And at $150 you ALSO get Hostess Benefits! Talk to your friends and see if there is anything they would like to add to your order!

This kit would also make a great gift for any stampers, scrapbookers, or potential papercrafters!

Watch this fun video by Holly Linford from the Stampin’ Up! Home Office talk about the So You Project Kit.

To order your kit, just go to my Stampin’ Up! Online Store and place your order! I appreciate your business!

For Moms: Valentine Treat Bag Idea

Valentine Card Treat Bag

Moms, are you looking for some kind of treat idea for your children’s Valentine class parties or maybe just Valentine treats for the teachers? This is an idea I got from watching the live stream from the Stampin’ Up! Leadership Conference last week.  Sara Douglass (Shelli’s daughter) presented this idea on stage:  Take a sheet from the Stacked with Love Designer Series Paper Stack, and cut it in half lengthwise. Fold in half and punch the top layer with the Sweetheart Punch (on sale this week on the Weekly Deals!). Then stamp a greeting on the inside layer to show through the punched out heart.  I used a stamp from the You Plus Me Stamp Set.  I really just eyeballed it but you could mark the inside or use the Stamp-A-Ma-Jig

For this project I used the Chevron Tag a Bag Gift Bag. Put a treat inside, fold down the top edge, fold a Tea Lace Paper Doily over the top and use the Stampin’ Up! Handheld Stapler to attach the little card and hold the bag closed.

Valentine Card Treat Bag card insideOn stage at Leadership, this is the project Sara showed.  She used the Petite Cafe Gift Bags and just placed the little card at the top edge of the bag. Then she just rolled down the top edge, which also held the card in place! Very simple and easy!

Valentine Card Treat Bags Leadership
You can really use this idea with any designer paper, make the card wider if you want, embellish the bag more. I had to “push myself away from the table” to keep it simple and not add any extra stuff that it really didn’t need to a Valentine Treat Bag.

The Stacked with Love Paper Stack has turned out to be one of the most popular items in the Occasions Catalog! And it won’t just be for Valentine’s Day either. Hearts are good for any time and certainly the black and white sides of the paper will be easy to use always.

Get your Stacked with Love Paper Stack and the Sweetheart Punch today. Shop at my Stampin’ Up! Online Store.