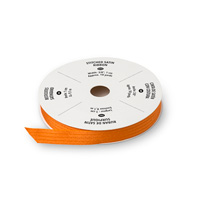
Category Archives: 3-D, Gifts & Things

Make Some Halloween Monsters with Lunch Sacks

Lunch Sack Halloween Monsters

You and your children (or just you!) can have fun with plain brown lunch sacks made into Halloween monsters! Just trim off about an inch of the top of the bag to get a smooth edge.  The go to town letting your Halloween imagination run wild!

Besides brown lunch sacks, this is what you will need:

Halloween Bag Paper

A bunch of paper!

Halloween Bag Punches

A bunch of punches!

Maybe a paper trimmer and some adhesive too!

Halloween Bag Witch

Lunch Sack Halloween Witch and Pumpkin

Lunch Sack Halloween Pumpkin

Lunch Sack Halloween Monster

Halloween Lunch Sack Monster and PumpkinHalloween Bag open

Here you can see how the lunch sack looks open.  Just fold a flap over from the top.  Or reverse the whole thing and make paper bag puppets for Halloween.

For any paper, punches and other fun supplies, please visit my Stampin’ Up! Online Store!

Make a Halloween Treat With the Tiny Treat Boxes

Halloween Tiny Treat Box

Make an easy Halloween treat or favor using the Tiny Treat Boxes and some stamping and paper! Don’t forget a cello bag of Halloween candy!  You could use this idea for any occasion, actually. The Tiny Treat Boxes are shown in the 2014 Holiday Catalog on page 12 as boxes to make into an Advent or count-down calendar. As you can imagine, you can use them for lots of other things – gift boxes for small gifts, a favor or treat for a birthday or holiday, anything you can imagine.

For this Halloween treat box, I cut a strip of the Confetti Celebration Designer Series Paper almost as wide as the box (about 2″).  I just wrapped it on to each side of the box, scoring with my fingers over each corner and then trimming off the excess paper in the back.  That way it would be sure to fit that box rather than scoring ahead of time. I glued it on with the Multipurpose Liquid Glue in case I needed to wiggle the paper a little to make sure it was fitting on correctly. I’m not even sure how I pulled out that paper!  I must have seen the orange and thought it was Halloween paper! But it worked great! Forgot to mention, I tucked in the side flaps of the box and adhered them to the inside (you wouldn’t have to do that because the bag of candy or gift would keep them inside). Or you could cut them off. The lid of the box I never folded on the score lines and just let it stand up as a background.  I put a piece of the Confetti paper on that background and trimmed off the top around the curved corners.

The ghost and pumpkins were stamped with the Fall Fest Photopolymer Stamp Set and cut out with the Big Shot and the Fun Fall Framelits Dies.  You can buy both the stamp set and framelits together in a Bundle and save 15%! For some reason, all I could think of was that I had to stamp the ghost and didn’t want to take the time to emboss him in white, so I inked him up in Smokey Slate, stamped off once lightly and then stamped him on Whisper White. It worked, and I added Rhinestone Jewels colored with an Old Olive Blendability Marker for the ghost eyes.  I should have just cut him out of Whisper White with the framelit, but then I guess he wouldn’t have the face! So do whatever you like!

The Happy Halloween greeting on the front is from the And Many More Stamp Setpunched out with the Word Window Punch. It seemed fine without a layer behind it! The bag is tied with the Tangelo Twist 3/8″ Satin Stitched Ribbon.

This was a quick and fun project!  Try the Tiny Treat Boxes and see how many ways you can use them!

Gift Box Punch Board Christmas Box

Gift Box Punch Board Box Chevron Ribbon

Images copyright Stampin’ Up! 2014

I hadn’t played with my Stampin’ Up! Gift Box Punch Board in a little while so I thought it was time to make a Christmas gift box! Then when holiday gift wrapping time rolls around, I’ll have an assortment of boxes ready to go!

Make an easy tag with the Merry Everything Bundle which includes the stamp set and the Note Tag Punch. Tie on with a little bit of Linen Thread, always good to have on hand. Do you recognize the ribbon?  It is the Natural 5/8″ Chevron Ribbon turned on the opposite side!

There are several steps to learn (or refresh your memory!) with the Gift Box Punch Board, but the directions are printed right on the board, and it is plenty easy once you do the first one! There’s something about it that I really like!  This box is made with the heavy-weight Under the Tree Specialty Designer Series Paper. This paper is great because one side is a design with the kraft color and the other side is colored. So whichever side you use, the inside and outside of the box both look good! Also, you do not need to use any adhesive with this gift box! It just folds together. Here is a photo of the inside. Those little folded-in flaps will push out of the way when you put a gift inside. You can glue them to the inside of the box if you really want to be neat about it, but it is not necessary.

Gift Box Punch Board Box Inside

Here the plain outside of the box, just assembled! Decorate to your heart’s content with ribbon, tags and whatever you choose!

Gift Box Punch Board Box Plain

The Gift Box Punch Board even punches those little slits on each corner of the lid so you can close it up with just those. Easy to make box, easy to assemble box! Handy to have the Gift Box Punch Board on hand for when you need it!

Don’t forget the new 2014 Holiday Supplement! Check it out and get your order in soon!

Hamburger Die Fall Box & Stampin’ Up! Weekly Deals

Hamburger Die Fall Box

The Hamburger Box Bigz XL Die isn’t just for hamburgers! It really is a fun little box to make and decorate, whether as a fall gift box or favor or certainly for any occasion. I’ve found that the easiest way to assemble the box is to cut on one side of those little inside fold lines that are scored for you. That makes a tab on all the corners that can be adhered inside the box. Use a strong adhesive,

The box is tied together with the Natural 5/8″ Chevron Ribbon  and the Tangelo Twist 3/8″ Satin Stitched RibbonDid you know you can turn the Natural Chevron Ribbon to the other side and just have a plain ribbon?  That is what I was going to do since I was putting the Tangelo Twist ribbon on top of it, but then I changed my mind!  You’re allowed to do that in stamping!

One of the reasons this became a fall box rather that a Christmas one was because when I was looking for my Real Red card stock and came across the Crushed Curry card stock, I remembered I already had some extra fall leaves stamped and cut out from the For All Things Stamp Set that I had made but didn’t use on another project. I also had the little circle punched with the acorns. So I just punched holes for the Gold Baker’s Twine and stamped a greeting tag with the set Good GreetingsI also attached a strip of Gold Foil that I found laying on the table.

Wouldn’t this box make a cute table favor for your Thanksgiving guests or part of a hostess gift?!

If you need the Hamburger Box Bigz XL Die or any fall colors of card stock to make it, please visit my Stampin’ Up! Online Store HERE.

And while you are there, please check out the new Stampin’ Up! Weekly Deals for the week of October 21 – 27. (Yes, I had to edit this as Stampin’ Up! had one wrong product on here earlier!)

Stampin' Up! Weekly Deal Oct 21 2014

Click To Shop!

Don’t forget the new 2014 Holiday Supplement!  

Get your stars quickly before they are gone!

Stampin' Up! Holiday Supplement 2014

Click to Shop!

Halloween Witch’s Boot Candy Treat

Halloween Witch's Boot Candy Treat

Save your next paper towel roll so you can make a Halloween Witch’s Boot Candy Treat like this! I saw this idea online and have no pattern or particular directions, but it is easy to just make according to your own size roll.  (I recommend using a paper towel roll rather than a toilet paper roll. (Just sayin’!) Maybe you could line the inside with some designer paper if you really wanted to get fancy.

I wrapped Rich Razzleberry card stock around the roll, adhered with Tombow Multipurpose Liquid Glue. Before I tried wrapping it, I pulled it over the edge of my kitchen table a few times, which has a rounded edge, just to break up the fibers a little bit and make it easier to roll. You could use a bone folder or just anything rounded to get the paper to “relax”. For the sock stripes, I used 1/2″ strips of Tangelo Twist card stock. For the top of the boot, I just wrapped around a piece of Basic Black and folded back the corners. The buckle is a piece of Dazzling Diamonds Glimmer Paper  (you could use any color Glimmer Paper) with a small square piece of Basic Black right in the center which makes it look like a buckle without having to actually MAKE a buckle! The “shoe” part is easy to make. Measure the roll diameter and then make the black paper slightly wider. Cut it at a diagonal as you see,  Put glue on the bottom of the roll and stick it on the black card stock. When the glue is dry, you can trim off the excess in the back.  Roll up the toe a little bit.  There you have it!  Put a little treat inside the boot.

This could be a little Halloween gift for someone, or a table decoration or party favor. Have fun making your Halloween Witch’s Boot Candy Treat!

Freaky Friends Cello Halloween Treat Bag

Freaky Friends Cello Halloween Treat Bag

If you want an easy Halloween treat bag, you can make this Freaky Friends Cello Halloween Treat Bag in about one minute! This uses a  Cellophane 4″ x 6″ Bag filled with candy, the top folded over, and then a stamped Freaky Friend adhered to the front of the bag.

Just stamp one of the Freaky Friends and put a layer or two behind it. I used the Postage Stamp Punch and then the 1″ Square Punch behind the monster stamped in Rich Razzleberry. You could also stamp a Halloween greeting on a little banner and adhere it to the front of the bag as well. Add some googly eyes to your Freaky Friend if you have some.

What trick-or-treater or co-worker or friend wouldn’t love getting a little bag of candy decorated like this for Halloween and it only took you a minute!

For the Freaky Friends Stamp Set and more, please visit my Stampin’ Up! Online Store HERE.

All Is Calm Kraft Gift Box For Christmas

All Is Calm Kraft Gift Box For Christmas

I just recently ordered and received this beautiful ribbon you see wrapped around this All Is Calm Christmas Kraft Gift Box. It is the Real Red 3/8″ Satin Woven Ribbon in the Stampin’ Up! Holiday Catalog. It is gorgeous!!  Of course I do love red, but I did think this ribbon was really pretty! I chose a paper in the All Is Calm Specialty Designer Series Paper to cover the Kraft Gift BoxI wrapped the Real Red Satin Ribbon around the box with the ends adhered on the bottom of the box. The bow is tied with an extra piece of ribbon slipped under the ribbon on the top of the box, with a little of the Gold 1/8″ Ribbon curled with a scissors at the ends. I used to love to watch my mother work her magic with that curling ribbon wrapping a package! I didn’t know if this Gold Ribbon would do this, but it did! I just tied that in with the bow for a little extra decoration. The tag is stamped with the Merry Everything Stamp Set and punched with the Note Tag Punch. (You can buy that stamp set and Note Tag Punch together in a Bundle and save 15%!)

Such an easy way to wrap a package using the Kraft Gift Box, some designer paper and some beautiful ribbon! Stampin’ Up! even offers a larger gift box that might be handy for you. Just check all the Packaging options in my Stampin’ Up! Online Store!

Tag A Bag Fall Gift Box

Tag A Bag Fall Gift Box

There are some birds, squirrels or critters having a party in our tree that are causing a lot of small branches and leaves to fall in our front yard, and as I was picking them up one day, I thought maybe I could use some in a crafty way.  Well, today was the day as I decided a small real branch might look good on a fall gift box made with the Tag A Bag Gift Box. These are really nice quality boxes and clear plastic lids, worth picking up on your next order!  I think at a previous Stampin’ Up! Convention we made similar boxes as a make & take so it was easy to use the idea in another way.

The Crushed Curry card stock is just folded over the lid the of the box. The measurements are 4 3/8″ x 6 7/8″, with the two long sides scored at 1″ each side. I cut a piece of Burlap Ribbon to put on there and had a piece of Tangelo Twist 3/8″ Satin Stitched Ribbon tied around to hold the lid on. The leaves are stamped with the set For All Things in the Stampin’ Up! Holiday Catalog and cut out with Paper Snips. The tag is from the stamp set Merry Everything and punched out with the Note Tag Punch. If you want both the stamp set and the punch, you can buy a bundle and save 15%! The tag is tied on with a bit of Linen Thread, another must-have in your stash!

While this Tag A Bag Gift Box makes it real easy to present a lovely gift to someone, you can also use the wrap design on any package.

For any packaging supplies, visit my Stampin’ Up! Online Store HERE.  Quite a few gift box ideas or make your own with the Gift Box Punch Board!

Festival of Trees Holiday Votive Holder

Festival of Trees Holiday Votive Holder

Here’s a quick and easy holiday votive holder decorated with the Festival of Trees stamp set. It is made with just one 8 1/2″ x 3″ strip of Real Red card stock, with an area punched out and covered with a piece of vellum card stock so the little tea light inside can shine through.  Of course you would want to use a battery-operated tea light this close to paper!

I scored the strip of card stock at 2″, 4″, 6″, and 8″.  That left a little 1/2″ tab to adhere after you have folded all the score lines to form the little votive holder. There is no bottom piece. You would have to make more of a box pattern to get a bottom. To get the vellum panel, I figured out which panel would be the front and punched out a sticky note so I could stick that on the card stock for a guide for exactly where to stamp.  You may or may not need that step.  I used the new Note Tag Punch in the Stampin’ Up! Holiday Catalog to punch the opening.

Votive Holder Assembly

For the window, I cut a piece of Vellum Card Stock just slightly smaller than the panel. I stamped it with the Christmas tree (something embossed would be beautiful, too!), colored some Rhinestone Jewels with the dark Cherry Cobbler Blendabilities Marker and adhered them to the tree.  Then I used Mini Glue Dots in the corners of the vellum to attach inside the opening. Although it kind of covered up my punch shape, I stuck on a small Gold 1/8″ Ribbon bow adhered with a Glue Dot.

With a little electric tea light inside, here is what the holiday votive holder looks like!

Votive Holder Lit

I’ve been cleaning up and organizing all my craft stuff this week and in going through my swaps from recent Stampin’ Up! conventions and Leadership Conference I found this little votive sample. That’s where I got the idea to make this. The sample is punched with the Decorative Label Punch and just has a piece of regular card stock inserted in the opening, not vellum. You can see you could make these in larger sizes, taller, different colors and stamps for different occasions.  Very versatile!

Votive Holder Swap

Try your hand at making this very simple little votive holder for an electric tealight.

For any stamping supplies you need, please visit my Stampin’ Up! Online Store!

Don’t forget the Stampin’ Up! Weekly Deals!  And check the Clearance Rack, too, for bargains!

Stampin’ Up! Frightful Wreath for Halloween

Stampin' Up! Frightful Wreath

This weekend I finally got busy and made my Frightful Wreath Simply Created Kit for Halloween, since time is getting close! This is a great kit!  It came together real easily as far as just the wreath and rosette are concerned! Complete directions are included with the kit, plus Stampin’ ! has a video. All you need is a hot glue gun.  The Stampin’ Up! Silicone Craft Sheet is really handy to have when you are using a hot glue gun plus for making the rosette.  The rosette piece comes already scored, all you have to do is accordian fold, adhere the ends, put a glob of hot glue on the silicone sheet and plunk the rosette down with the center in the hot glue to hold it. Then you get to ink up the doilies (I still have the black fingers and fingernails to show for it!) and finish off the front.  I neglected to purchase the coordinating stamp set, Frightful Wreath Photopolymer Stamp Set, so I had to dig out a retired Halloween set for a greeting that worked, plus I added to stamped images from Freaky Friends on the ends just for fun!

The kit also contains all the beads and wires to make the spider for the wreath!  I was anxious to make it, but when I started, I thought, “This is why I am a stamper and not a bead person!” But with the directions plus the video, plus a little patience on my part, it didn’t take long until I was moving along getting all those beads on the spider legs! I like the way my spider turned out.  I just placed him on the wreath for the photo, not sure if I will glue him on or let him dangle!

Frightful Wreath Beaded Spider

Now if you want to see a real spider web, much like one I found on my bushes last year, here is one I discovered this weekend when I was taking pictures of our pretty flowers in the backyard. When the breeze blew just right, I could see the web glistening in the sunlight.  It started up at the edge of the garage and went at a diagonal all the way down to the yard!

Garage Spider Web

So there you have it! Pretend spooky spider and real spider and web!

Don’t forget:  Today is the last day for the Stamp, Stock & Save Sale! Be sure to look it over.  Do you have all the foam ink pads yet?  If not, this is a good chance to get all of them at a discount!  All individual ink pads are 15% off! You can get assorted card stock families 15% off, as well as Medium Envelopes, Whisper White card stock, Fast Fuse Adhesive and refills, plus a few stamp sets at 20% off. Don’t miss it!  Last day, Monday October 6!

It’s also the last day for the Stampin’ Up! Weekly Deals!  Good stuff!

One more thing!  My 12 Weeks of Christmas” emails have started! If you don’t want to miss any more of them, please sign up for my Mailing List in the red box on the right of my blog. Next issue comes out on Wednesday!

Alternate Ideas for the September 2014 Paper Pumpkin Kit

Alternate September Paper Pumpkin Kit Halloween Card

If you read my post the other day about the September 2014 Paper Pumpkin Kit and all the materials that came in the kit and all the cute burlap treat bags I made with it, you knew that I still had materials left over.  Here are the extra projects I made with the tags from the kit and a few extra materials from my stash.

For the Halloween card, I used a Tangelo Twist card base and added a Basic Black layer that I embossed with the Decorative Dots Textured Embossing Folder. Then I added a piece of the White & Tangerine Tango Two-Tone Trim. After I tied on the knot (separately) I decided to fray the ends and see how that looked! And I used a tag I had already made from the Paper Pumpkin Kit.

Alternate September Paper Pumpkin Kit Halloween Candy Treat

Here’s a little candy treat holder, made with the Tag Topper Scalloped Punch and a 2″ wide piece of Crumb Cake card stock. You can put a couple of Ghirardelli chocolates inside or some other treat. I tied some ribbon at the top with a piece of the sequin trim from the kit and added the tag I had already made with the kit. And I just had to add another one of the little adhesive bats from the sticker sheet!

Alternate September Paper Pumpkin Kit Halloween Lunch Sack Treat Bag

Here’s an easy project, with or without the Paper Pumpkin Kit!  Just find one of those lunch sacks in your pantry, cut a little off the top and fold the top edge over a couple of times. I used a little SNAIL Adhesive to hold it down. Then I took one of the Tea Lace Paper Doilies and sponged a little Rich Razzleberry ink on it for some spookiness. The tag, of course, is from the Paper Pumpkin Kit. The bag needed something so I just used the 1″ punch to punch out some circles to glue to the bag!

Did you know once you are a Paper Pumpkin subscriber, you can usually purchase extra kits or refill kits depending on availability of past kits?

Join Paper Pumpkin now (for sure before October 10th!) and enjoy getting that fun red box in your mailbox!

Freaky Friends Halloween Treat Box

Freaky Friends Halloween Treat BoxIf you were wondering what I did with the Back To Black Designer Series Paper that I colored in with Blendabilities Markers yesterday, I made this Freaky Friends Halloween Treat Box! You can see the designer paper wrapped around the box which was originally just black and white until I colored in random dots with the markers. It was so much fun!

First of all, I had fun making the box itself with the new Gift Box Punch Board, now available in the Stampin’ Up! Holiday Catalog. The top pieces lock together with the little slits you can punch in them with the Gift Box Punch Board, but they won’t stand up to a lot of wear and tear so try to put your gift or treat in there before hooking those together! You can make different sizes of boxes with the punch board. Be sure to watch the video below if you haven’t seen it yet or if you want a refresher, The board may seem confusing at first, but once you see the video and make a box, you won’t have any trouble.

The Frankenstein guy is stamped in Black Stazon from the Freaky Friends Stamp Set, also available in the Holiday Catalog. I colored in his face and legs with a green Stampin’ Write Marker.  I used the Labels Collection Framelits to cut him out and also the Tangelo Twist layer behind. I thought the layer needed something, so I just used one of my Project Life Journaling Pens to draw some squiggles and dots around the border. The little banner is stamped with a “Happy Halloween” greeting from the And Many More Stamp Set. This is a stamp set like the Teeny Tiny Wishes stamp set that is so useful making cards and other projects when you want just the right greeting.

And to finish off the cute little Freaky Friends Halloween Treat Box I just tied the Tangelo Twist 3/8″ Satin Ribbon around it!

Need any stamping or papercrafting supplies?  Just visit my Stampin’ Up! Online Store!

Don’t forget the Weekly Deals!!  Today is the last day for these!

Learn to Use the Stampin’ Up! Gift Box Punch Board

One of my favorite new items in the Stampin’ Up! Holiday Catalog is the Gift Box Punch Board. At first glance I didn’t think I “needed” it, I’m not even sure why I put it on my order! But I did, and I like it! I think this Stampin’ Up! video will help you see how to use it because there are some steps involved – but once you get the idea, it isn’t hard. If you can fit your gift or treat inside without gluing the flaps down inside the box, it is really super simple. Otherwise, you can add some glue or glue dots or Sticky Strip to make the inside neater and more structured.

Use the new Under the Tree Specialty Designer Series Paper, cardstock-weight kraft sheets with a colored design on one side and white printed design on the other side to make sturdy boxes – but other kinds of paper are fine, too! Wait until you hear what Holly Linford from Stampin’ Up! says you can do with this paper!

Under the Tree Specialty Designer Series Paper


To purchase any of these exciting new products from Stampin’ Up!, please visit my Stampin’ Up! Online Store or contact me with your order and I’ll be happy to put it in for you!

Motley Monsters Halloween Treat Box

Motley Monsters Halloween Treat Box

It’s fun playing with the new Gift Box Punch Board to make a Halloween Treat Box with the Motley Monsters Designer Series Paper.  To make the tag, I stamped the bird from the Freaky Friends Stamp Set. The words are from the new special set Good Greetings that you can get FREE with a $300 party or order.  I added a little Linen thread to tie the tag on to the box, a strand of the Burlap ribbon for some interest and some Gold Sequin Trim. The box itself is made with the new Kraft 12″ x 12″ Card Stock in the Stampin’ Up! Annual Catalog. It’s a little bit heavier than regular card stock.

It’s going to be fun playing with the new goodies in the Stampin’ Up! Holiday Catalog! What do you think?  Is it the best one yet??

To purchase any of the Holiday Catalog products, please visit my Stampin’ Up! Online Store!

It’s Time For the Stampin’ Up! Holiday Catalog!

Stampin' Up! Holiday Catalog 2014

Did you wonder if this day would EVER get here?!  The day the Stampin’ Up! Holiday Catalog goes live?! Let the ordering begin so you can get on with your holiday cards and projects! Not just Christmas, but fall, Thanksgiving, Halloween and other fun things! Lots of kits for those who don’t have time or supplies! New products, such as a Gift Box Punch Board!

Here’s a little gift tag card I made in minutes with the Festival of Trees stamp set, some Brights Candy Dots, Silver 1/8″ Ribbon, and a greeting stamp called Good Greetings that you can earn FREE! Just host a $300 party or place your own $300 order!

Festival of Trees Tag Card

Don’t miss the Festival of Trees Bundle with the stamp set and NEW Tree Punch!

Good Greetings Free Stamp Set

Contact me if you want to have a Christmas card party or other fun night or day out with your friends! Now go enjoy the brand new Stampin’ Up! Holiday Catalog! If you are one of my regular customers and didn’t receive a catalog, please let me know.  And if you don’t have a demonstrator and are interested in Stampin’ Up! products, please contact me at Karen@KarenStamps.com.  I would be happy to get a catalog to you!

Today is the LAST DAY for the Short & Sweet Offer:  Become a Stampin’ Up! Demonstrator by purchasing the Starter Kit for $99 and choose an EXTRA $25 in product!  Get $150 in product of your choice for only $99 (regular offer $125 in product)! Click HERE for my link to get started!  It only takes minutes to purchase your Starter Kit online and become a Demonstrator. Then you will be emailed a password to get in to the Demo Site and begin your training and look around and see all the resources available to you to start your own business! Choose items from the Holiday Catalog for your Kit if you like!

Shop my Stampin’ Up! Online Store for all your stamping needs!