Category Archives: 3-D, Gifts & Things

Stampin’ Up! Convention Make & Takes

This year at the Stampin’ Up! Convention Make & Takes were just ONE of the many activities we could choose from to do.  Since I usually get frazzled at Make & Takes, I chose to do mine at home and partake of the other demonstrations and things going on, as well as taking pictures of the display boards.

We always get stamp sets at Convention with which to do the Make & Takes.  This year we received the “Hello, Lovely” Stamp Set, Gorgeous Grungeand the Ronald McDonald set, Tag It. With each purchase of the Tag It stamp set, Stampin’ Up! donates $3 to the Ronald McDonald House Charities.

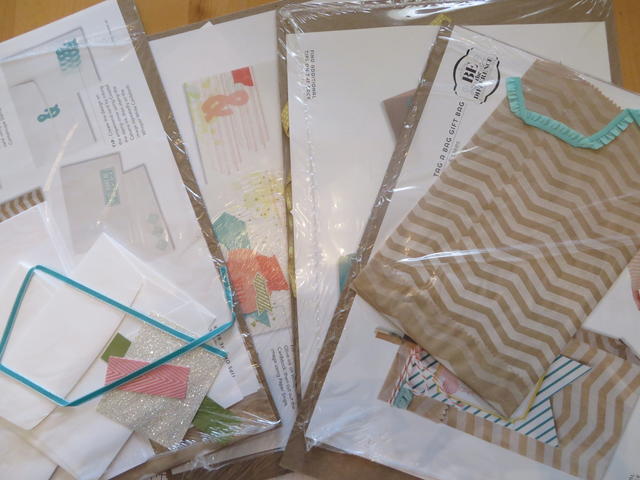
Here are the packets we received with all the materials to make the projects!

Stampin' Up! Make & Takes

And here are the projects completed!

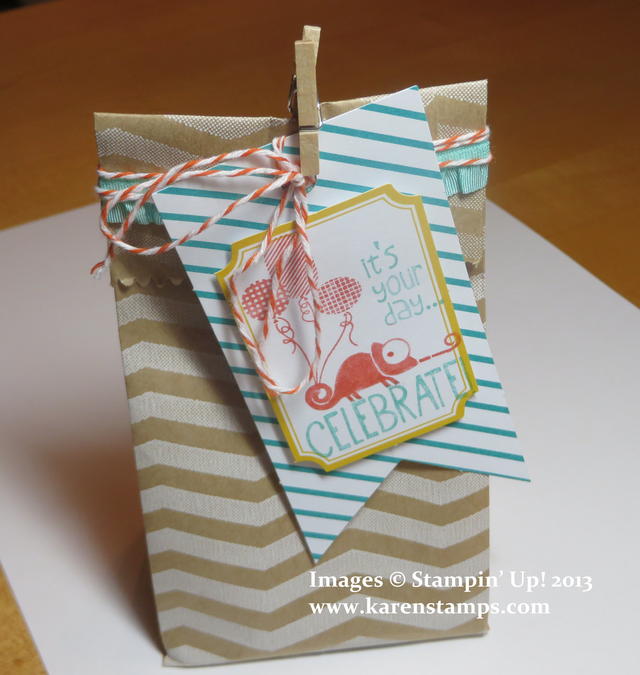
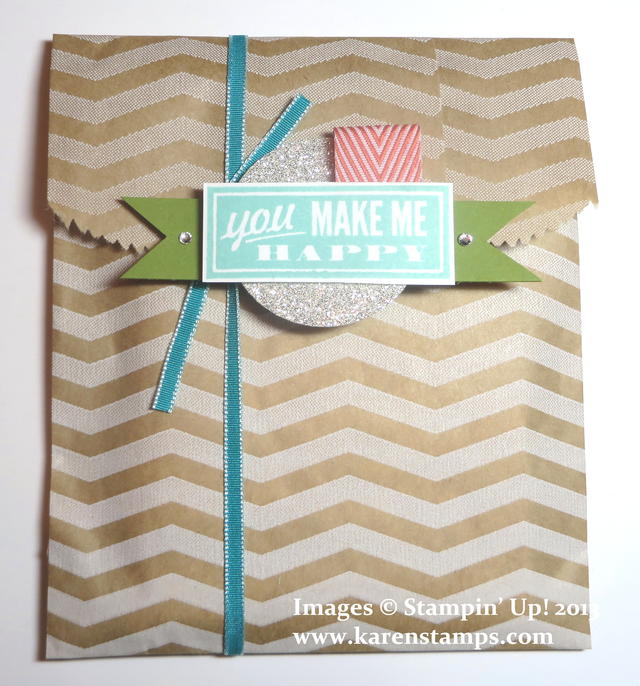
Tag a Bag Gift Bag

You can trim and score the Tag a Bag Gift Bags in order to make them stand up rather than just be flat. This one has a tag made from the Tag It stamp set and the Tag a Bag Accessory Kit plus some of the new Coastal Cabana Ruffle Stretch TrimYou can make lots of cute little gift bags with these tags and bags and buy them as a bundle.

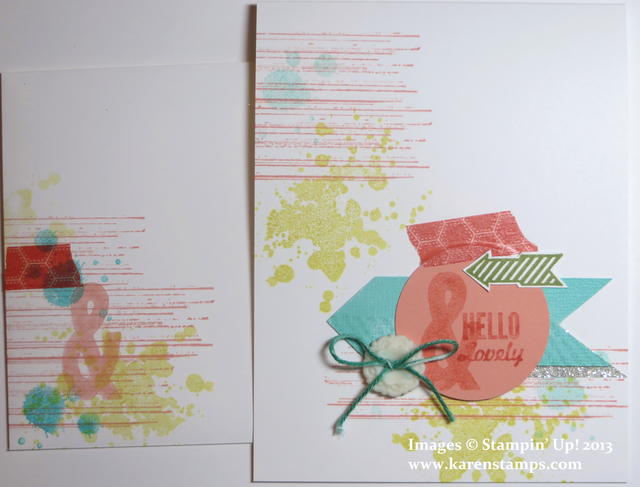
Hello Lovely Card

This was a fun card made with the Hello Lovely Stamp Set plus the Gorgeous Grunge Stamp Set.  The Gorgeous Grunge stamp set reminds me of the stamp set we had long ago, I think it was called “Itty Bitty” – something.  It was very handy for just adding a bit of texture or interest when you needed it.  This card and envelope also has a bit of Epic Day Washi Tape on them. And the little Baker’s Twine thread in the Vintage Button was dyed by holding the twine down on the ink pad with a piece of sponge and then pulling the twine through. Not sure I would want to bother doing this very often, but if you need a certain color, you can do that.

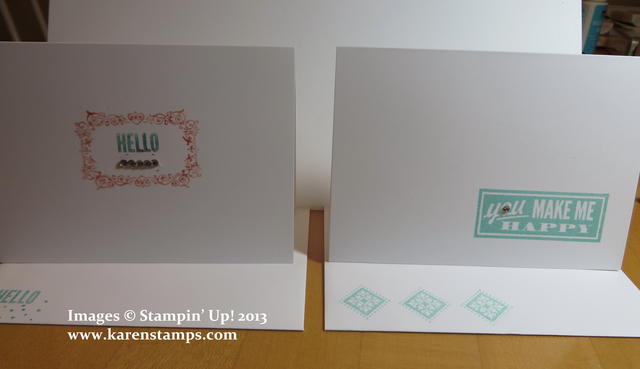
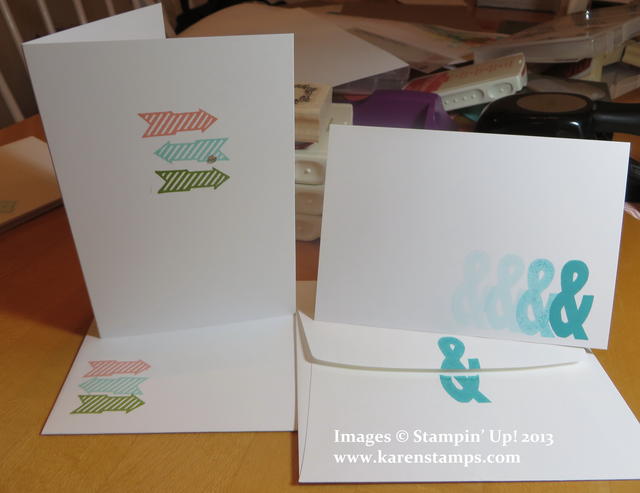
And here are several note cards and envelopes that go in the cute gift bag.

You Make Me Happy Notecards and Envelopes


You Make Me Happy Notecards


You Make Me Happy Notecard Gift Bag

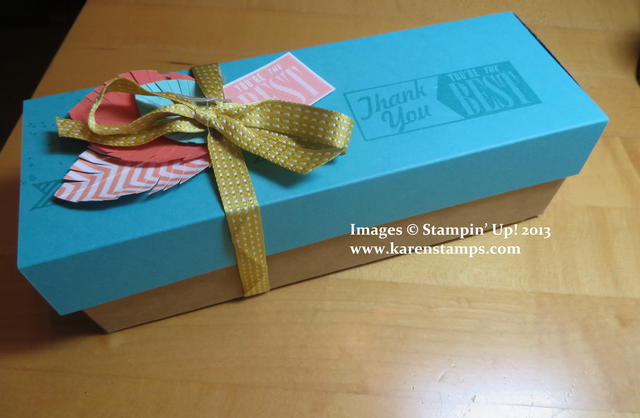
And here’s an easy box to make with the Tag a Bag Gift Box.

Tag a Bag Box

These boxes are going to be so good to keep on hand for those little gifts and things when you need something special.

For these or any other great Stampin’ Up! stamping supplies, please shop with me at my Stampin’ Up! Online Store!

Display Boards at the Stampin’ Up! Convention

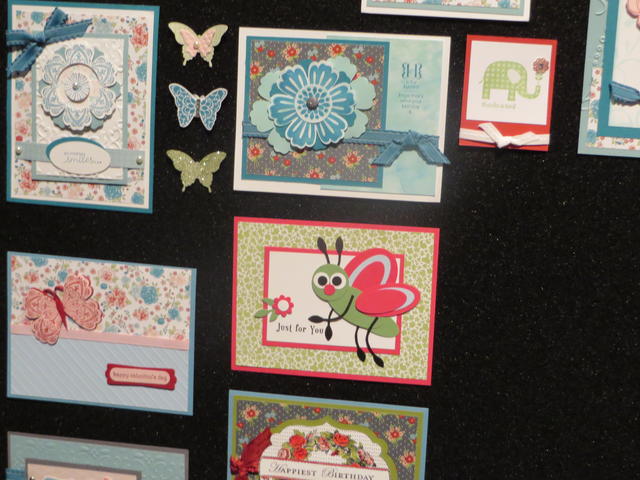
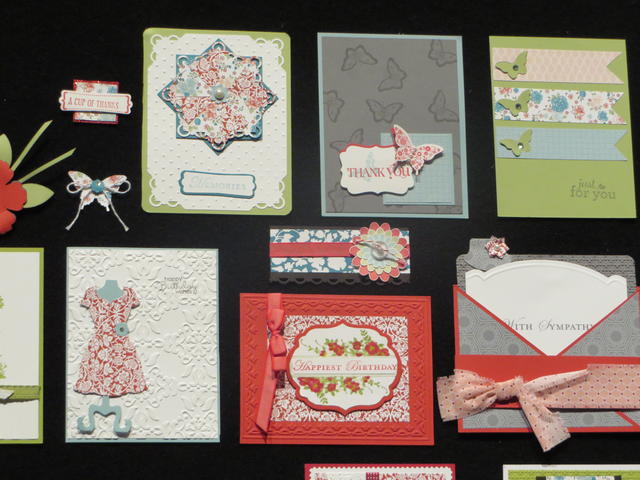
One of my favorite parts of any Stampin’ Up! Convention is looking at all the display boards with projects galore! Here are just a FEW photos of where I started photographing cards and projects on the display boards.  Yes, the paper and some embellishments might be retired but they are still fun to look at and perhaps you already have those materials and can duplicate some of these or get ideas for using new papers and products! Click on the pictures to enlarge.

All images copyright Stampin’ Up! 2013

Stampin' Up! Convention Cards on Display

Stampin' Up! Convention Cards on Display

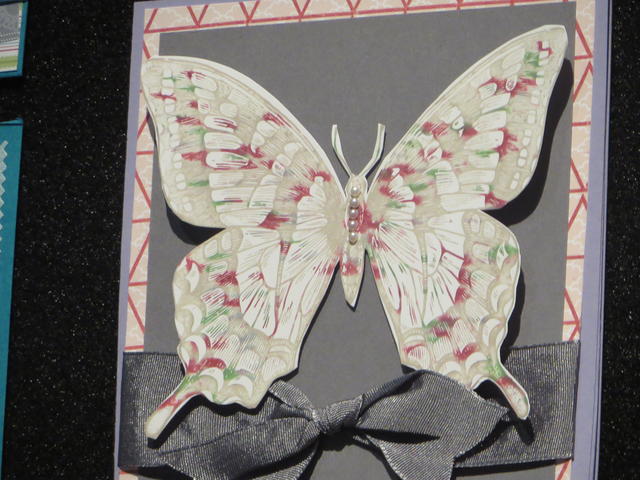
Swallowtail Stamp Set Butterfly Card

Beautiful Swallowtail

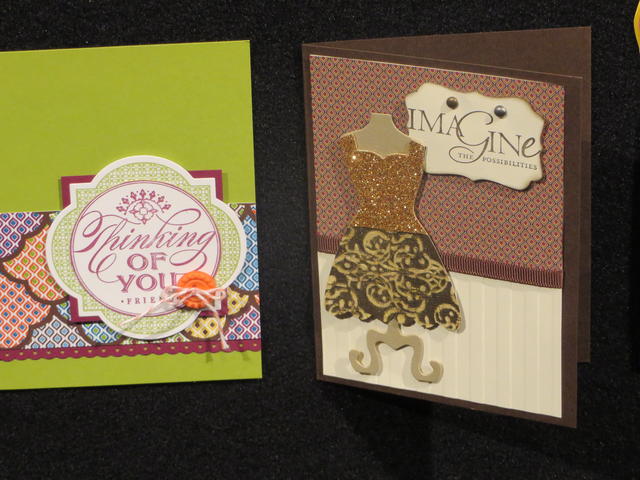
Beautiful Dress with Champagne Glimmer Paper and Core'dinations Card Stock and Dress Up Framelits

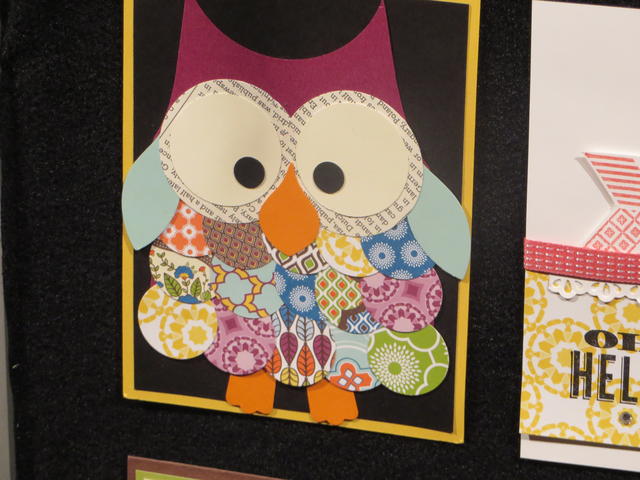
Beautiful Dress with Champagne Glimmer Paper and Core’dinations Card Stock and Dress Up FramelitsPunch Art OwlCute punch art owl!Stampin' Up! Display Boards at Convention

All Cute Projects!
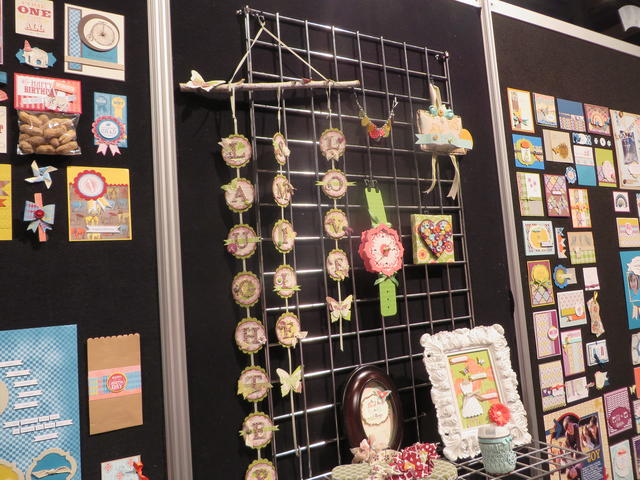
Stampin' Up! Display Boards at Convention

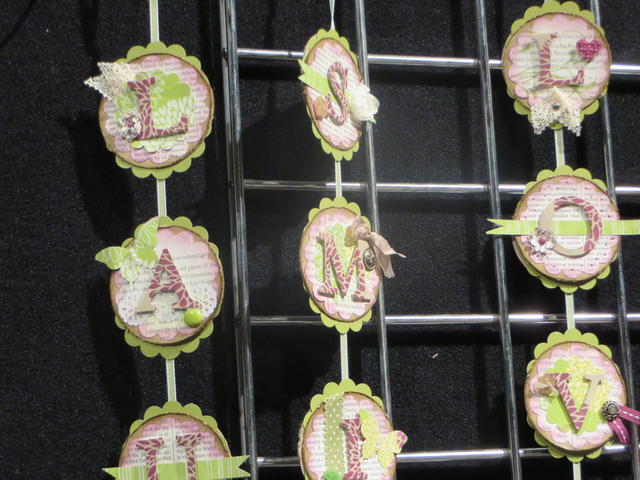
Close-up of hanging wordsDecorate your flip flops

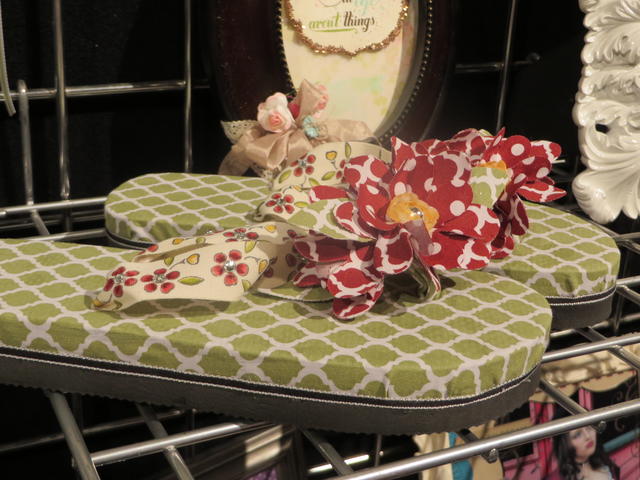
Cute Flip Flops!
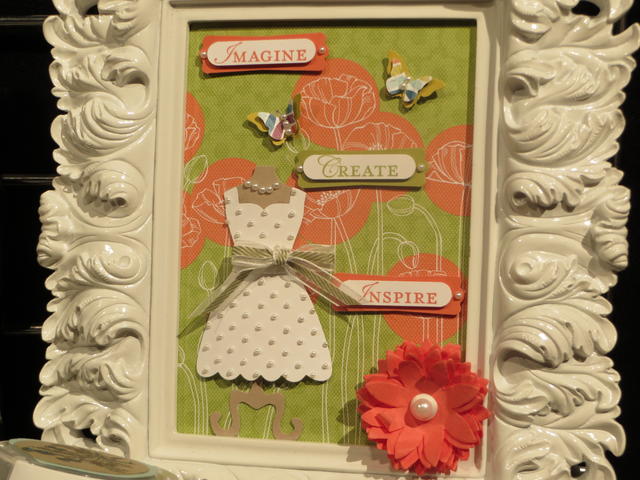
Dress Up Framelits art in a frame

Cute framed paper art

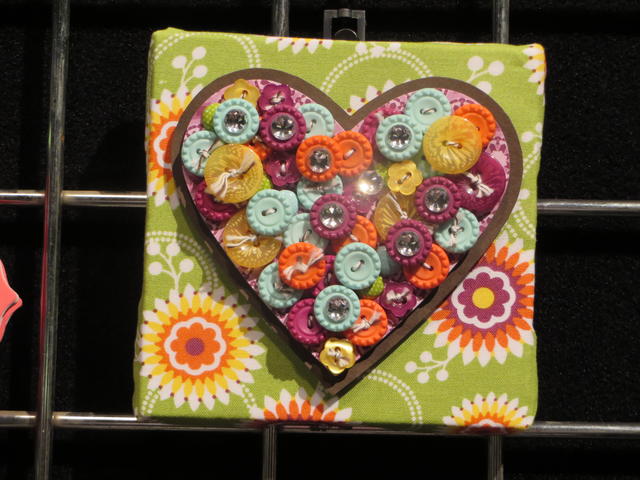
Use Stampin' Up! Buttons to decorate box

Cute way to decorate top of a box!

If this is getting you in a stamping mood, you can order more stamping and scrapping supplies at my Stampin’ Up! Online Store HERE.


Stampin’ Up! Convention Mini Class Projects

MDS Thanks Card Using Hexagon PunchMDS Thanks Card Using Hexagon Punch

I’ve said before I always get flustered doing Make & Takes at the Stampin’ Up! Convention and usually end up just bringing the packets home and doing them at my leisure at my kitchen table. This year they did still have Make & Takes but you had to fit them into your own schedule and there were too many things to choose from.  But there were two mini classes, each with a very quick and easy project.

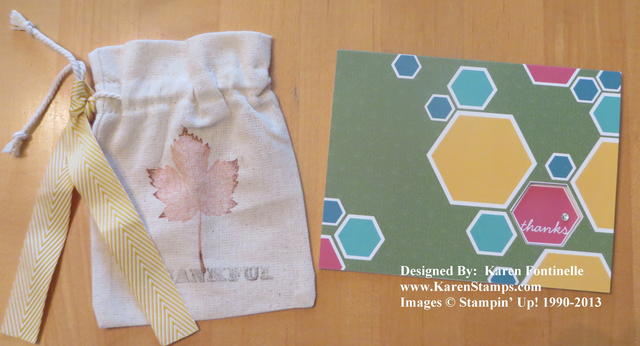
The first one I went to was called the Thankful Sack.  These are all new products coming in the Holiday Catalog August 1st.  We just stamped a maple leaf on a small muslin bag and added the word “Thankful”. We did the “rock and roll” technique with the leaf stamp, where you ink up the stamp in a light color and then roll just the edges of the stamp in a darker color to get a two-tone look.  My first one didn’t come out too well, but just like paper, a small muslin bag also has two sides and it doesn’t hurt to have a leaf on each side, does it??  The cutest part, I think, was tying the piece of Crushed Curry Chevron ribbon around the tie that already comes on the bag!

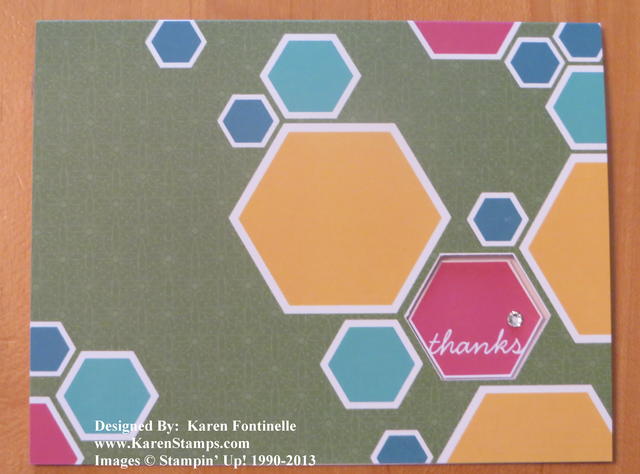
The second project was a My Digital Studio card.  The card was already made in MDS and printed. At first I didn’t know what we were going to be able to do with this card except put a rhinestone on it. But what we did was punch out the greeting with the Hexagon PunchSince it was then the exact same size as the hole, we trimmed the edges just a bit with Paper Snips and fit it back into the hole but adhered it to the inside of the card with a Stampin’ Dimensional. Then we added a Rhinestone Jewel as a finishing touch!

Here you can see the card close-up and hopefully see how we did the punch.  This makes an MDS card into a “hybrid” which is part digital and part traditional.

MDS Thanks Card

MDS Thanks Card

If you are interested in any Stampin’ Up! traditional products or the My Digital Studio digital papercrafting software, please visit my Stampin’ Up! Online Store right here!
A Fun Visit to the Stampin’ Up! Home Office

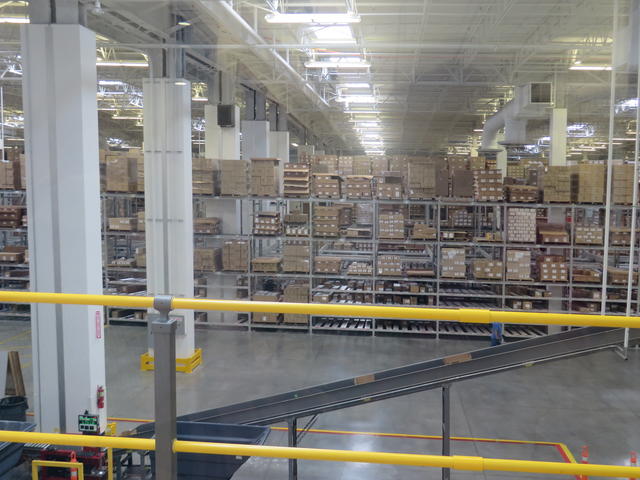
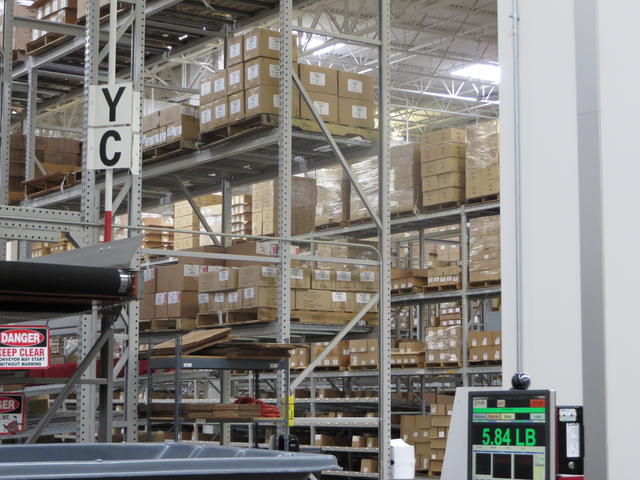
The first day of Convention, Stampin’ Up! provided buses for us to ride out to Riverton, Utah to tour the home office.  It was about a 25-minute ride and oh so beautiful out there! I could turn in a circle and see mountains everywhere! No wonder they picked that spot for the home office! This is where the offices are and the Distribution Center where our orders are packed.  However, the stamps are manufactured a few hours away at Kanab, Utah.
After being greeted by some Stampin’ Up! employees when we got off the bus, we went inside!

Stampin' Up! Home Office Tour

 the history of Stampin' Up!

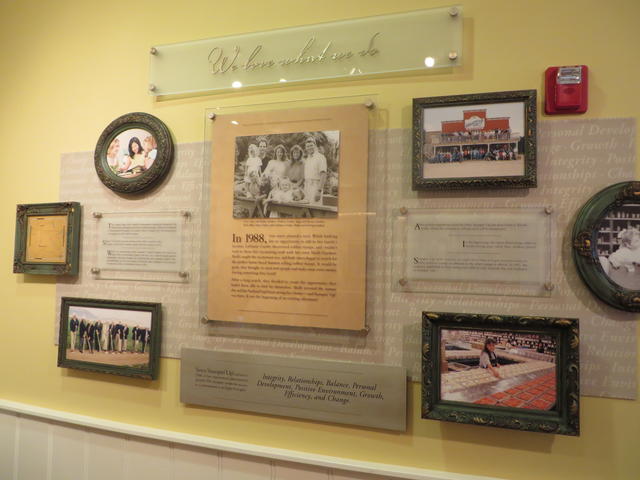
In the Legacy Room, the History of Stampin’ Up!

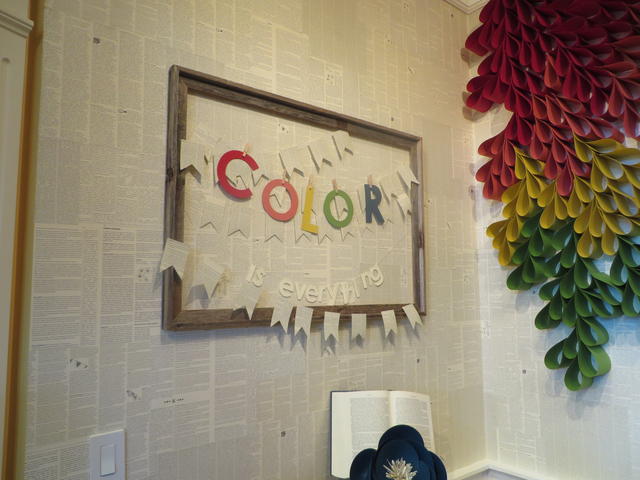
Covering walls with designer paperUsing (retired) First Edition Designer Paper to cover the walls

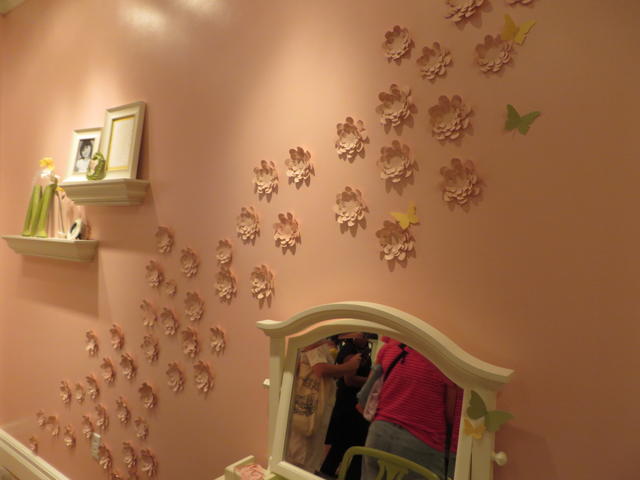
Decorate your wall with die cut flowers

Decorate your wall with die cut flowers

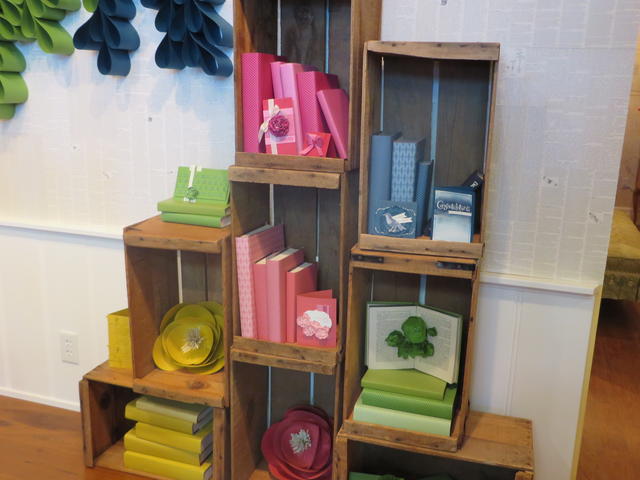
Books covered with designer paper

Books covered with designer paper

Getting the Stampin' Up! boxes ready to pack

Getting the Stampin’ Up! boxes ready to pack

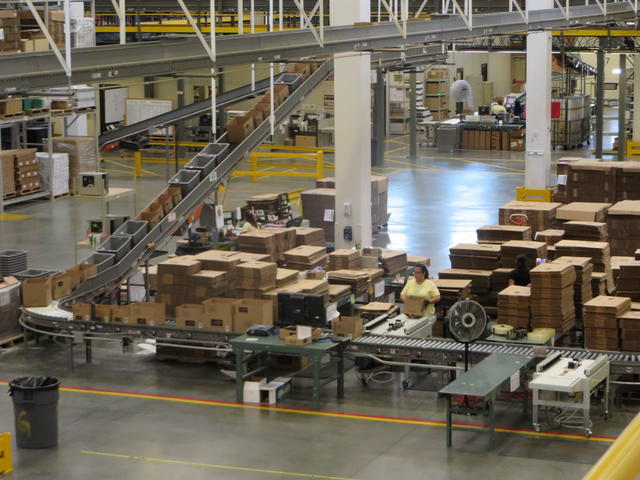
Stampin' Up! Distribution Center

Stampin’ Up! Distribution Center

Stampin' Up! Distribution Center

Where our orders get packed!

The Stampin' Up! Rock

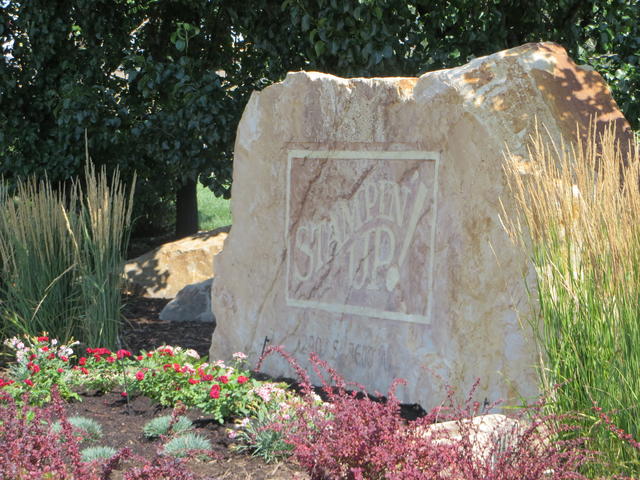
The Stampin’ Up! Rock

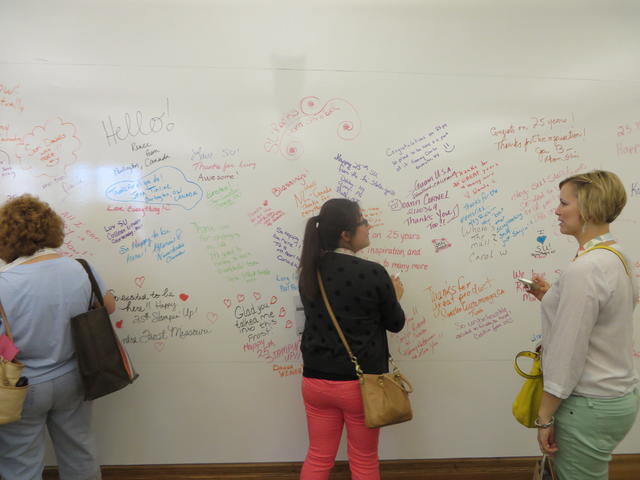
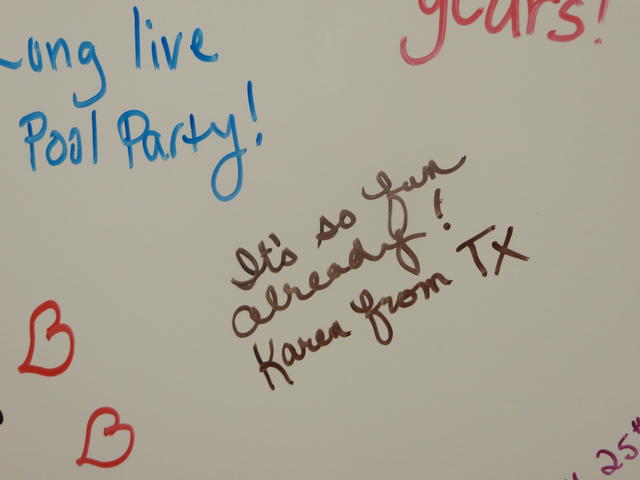
And I still have plenty of photos I would love to show you that I took at this place! I have to figure out how to make a gallery of photos! But at least this gives you an idea of the home base of Stampin’ Up! and what a lovely work enviroment they have. I also have photos of “The Idea Room”, a large room with bean bag chairs, a piano, games, stamping supplies, and one room where all the walls are those dry erase boards, I suppose for brainstorming.  Of course demonstrators had fun writing all kinds of messages all over the walls!

Writing messages in the Idea Room

Writing messages in the Idea Room

Writing on the Board in the Idea Room

Writing on the Board in the Idea Room

Even if you’re not a demonstrator, if you’re on vacation in the Salt Lake City area, you might call Stampin’ Up! and see if you could pay a visit to see the beautiful home office in Riverton, UT.


First Day of the 2013 Stampin’ Up! Convention

The schedule for the Stampin’ Up! Convention this year is rather different.  I’m not sure I have it all straight in my head yet.  But I do know first thing today is a bus tour out to Riverton to see the Stampin’ Up! Home Office!  I have been there before several years ago and it is a wonderful place (would Stampin’ Up! have an office that wasn’t wonderful??!) so I’m anxious to see it again.  As I remember, there were several rooms to walk through and see stamping ideas and even some Stampin’ Up! history.  The first General Session will begin about 5:30 pm tonight.  The excitement will be palpable!  Just flying in yesterday we were getting more excited the closer we got and when I got to my hotel I thought, “OH, it’s just across the street over there!  So close!”  So much excitement that will happen and so many memories we will all make!  My trip here was fun because I met one demo I already knew a little bit and enjoyed her company, plus we met two other ladies who were fun to be with as we ate lunch together in the Denver airport and rode the shuttle together over to the hotel.

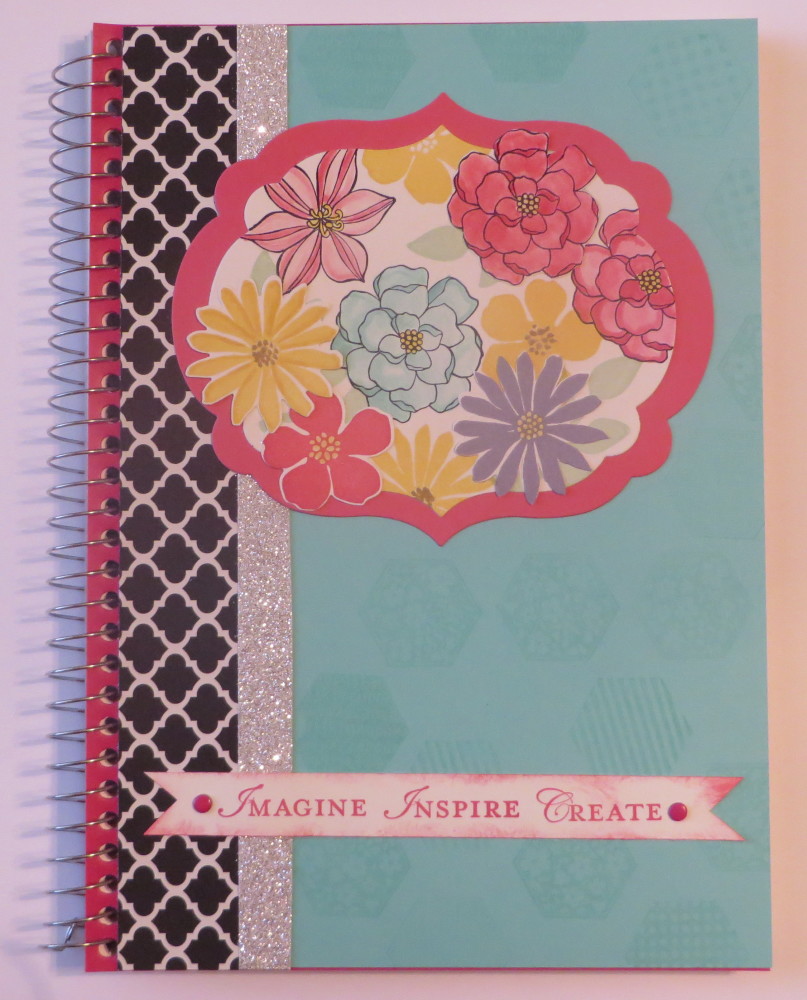
For Convention I always like to take my own notebook, even though they give us a workbook of sorts, but I like to decorate the cover and have plenty of writing and drawing space.  So this is what I came up with close to the last minute!

Convention 2013 Notebook

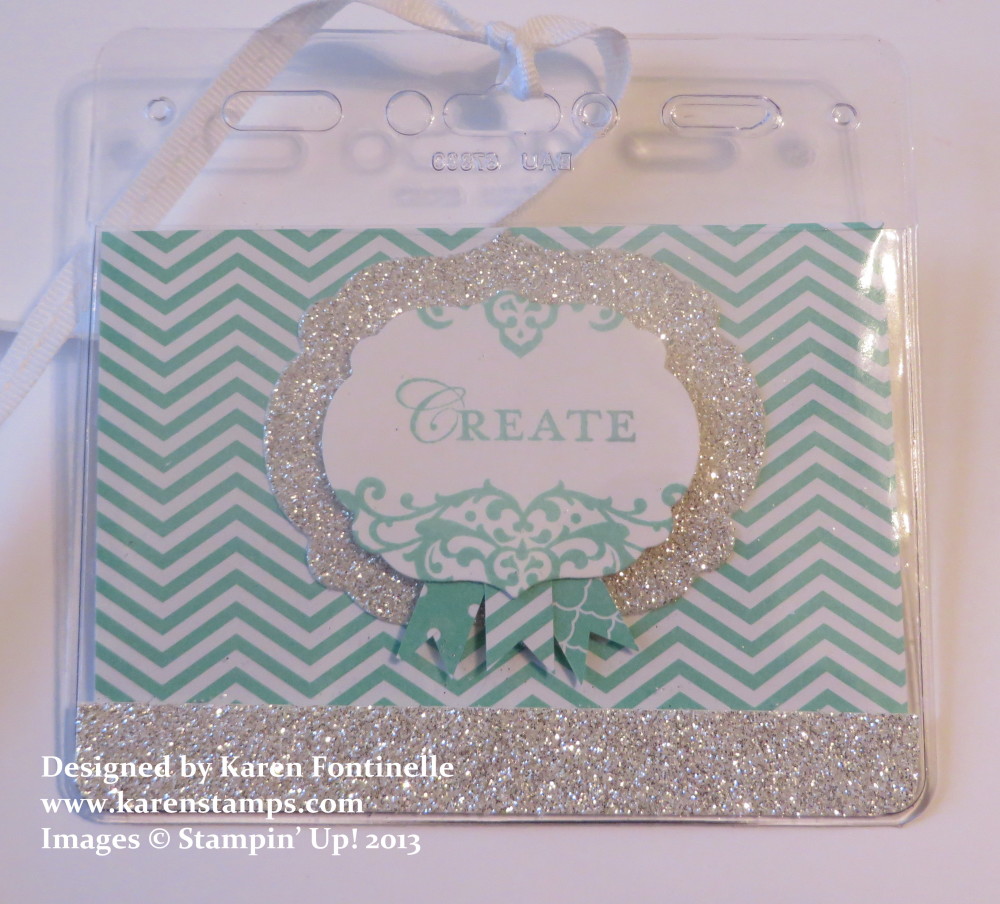
And since all 5800 of us will get the same bag, it’s a good idea to make some kind of tag that hopefully helps you keep track of your own bag.  Here’s the one I made, not knowing what the bag will look like!

Convention Bag Tag

That’s all I know so far!  Follow me on Twitter at www.twitter.com/karenstamps and especially my Facebook business page www.facebook.com/stampingwithkaren.  I’ll try to remember to post there now and then.

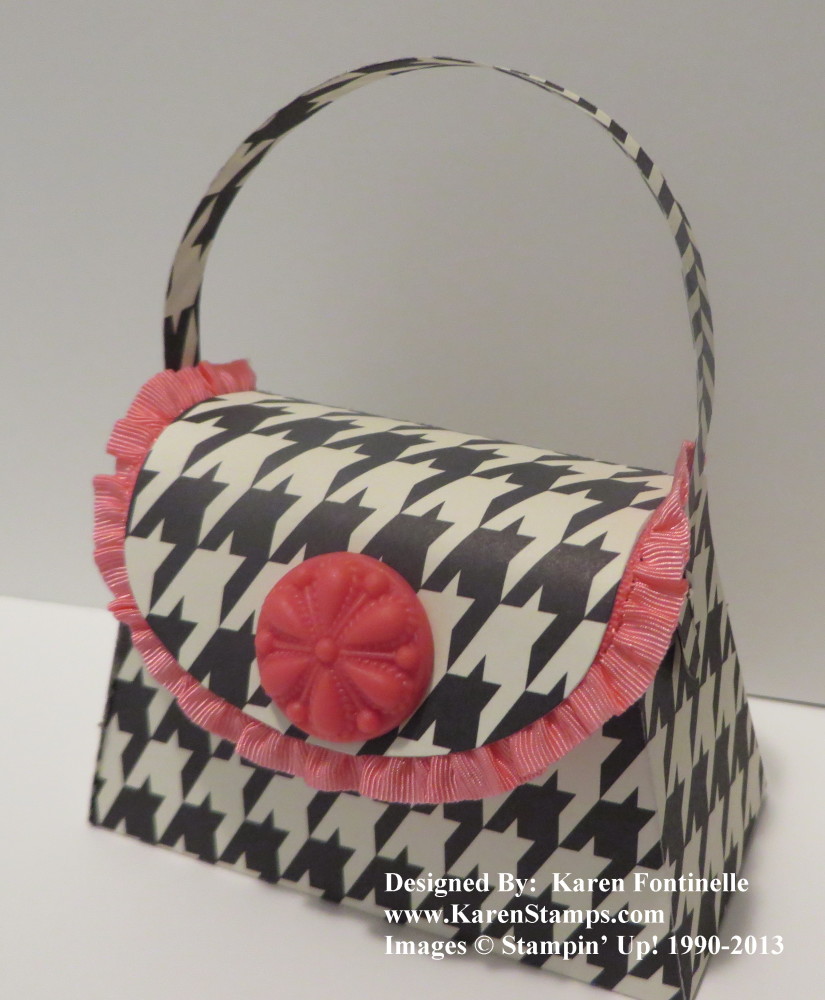
Modern Medley Houndstooth Petite Purse

Modern Medley Black Houndstooth Petite Purse

Use the new Stampin’ Up! Modern Medley Designer Series Paper to make a stylish purse with the Big Shot and Petite Purse Die! This is one of the new designer papers in the current Stampin’ Up! Annual Catalog. I added an edging of the new Stampin’ Up! Strawberry Slush Ruffle Stretch Ribbon. This is really pretty ribbon in one of the new Stampin’ Up! In Colors and SO easy to work with because of the stretch.  You will love it! Before I added the ribbon, I snipped off the little tab that would insert into the slit in the front of the purse in order to fit the ribbon. I also added an embellishment from the In Color Boutique Details package. These look like buttons without the holes! This one is a Strawberry Slush color.  I adhered it with a couple of Mini Glue Dots. In order to hold the purse flap closed, I adhered a small piece of velcro on the flap and on the purse so that it can be opened and closed.

This purse is very small but can be used decoratively or to hold a few little favors, perhaps a couple of chocolate nuggets or candies or some other little gift.  The die is easy to use. The paper is scored and easy to fold into the purse shape.  The little handle is a separate piece on the same die that cuts out at the same time.  I have attached it to the purse on the sides with Silver Mini BradsWhen designer paper is used, it may be difficult to see the score lines but using the die as a guide as to where the score lines are, you can easily feel them and then fold them.  It all works quite nicely.

If you are looking for a way to make cute little gift containers or party favors, this Petite Purse Die will make your job easy and fun!

You can find the Big Shot and all the dies, etc. to use with it as well as beautiful designer series paper at my Stampin’ Up! Online Store.  Don’t forget to take advantage of the special offer on Designer Series Paper this month!

Frame the Card You Make!

Five-Way Flower Framed

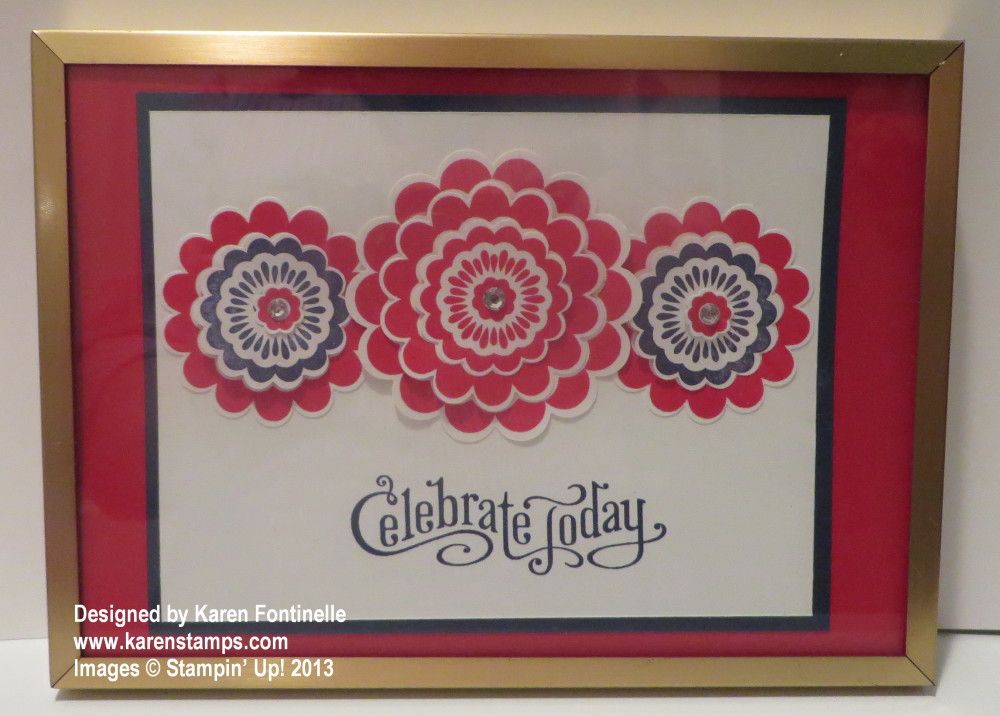
Yesterday when I made this card to put on my Facebook Page here I thought it didn’t HAVE to be just for the 4th of July, it could be for anything. Then I decided it would be cute just in a little frame! I found this plain gold one, made a larger Real Red mat to adhere the card to and slid it in the frame. There was room to leave the glass on the front, hence the glare, but I could have framed it without the glass.

The card is made with the single stamp, Five-Way Flower.  If you stamp the flower several times, you can use all your scallop circle punches to punch out different size scallops of the flower and then layer them one on top of the other, popping each layer up with a Stampin’ Dimensional.

The greeting is from the Perfectly Penned stamp set.

Think about whether the card you make could also be a piece of art to be framed!


Stampin’ Up! My Digital Studio New Downloads!

Stampin' Up! My Digital Studio

Hey! Here’s a great idea for your summer!  Buy the My Digital Studio software for only $19.95 and start creating your summer scrapbooks, summer party favors, invitations, fun things for the kids to make, whatever you want! It won’t take you long at all to “get the hang of it” with MDS. And if you have the kids home for the summer, you KNOW they will be able to help you with anything digital! Let them create some things as well, then print them out at home or at the office supply store or send off to Stampin’ Up! for printing if it is a special keepsake. Let them help you digitally scrap any photos from the past school year! Or make an album together to get ready for the upcoming school year and have it ready to drop the photos into during the school year! There’s so much potential for you and the kids to work on during the summer and have fun together…..indoors and in the air-conditioning I might add!

One of the best parts is that every Tuesday Stampin’ Up! releases new downloads you can purchase (and on occasion some free ones!). Here are the newest downloads released this week:

My Digital Studio Newest Downloads for June 18th!

View the PDF with all the details!

I suggest purchasing the software because the price has dropped from originally being $79.95 to only $19.95 and you will not believe all the content you get with that full version software!! And when you are ready, you can purchase extra downloads that come out every Tuesday from Stampin’ Up! to suit your projects. But you won’t “need” anything for a long time with all the artwork you receive in the software.

If you really do not want to spend the money without trying, you’re in luck because you can take the MDS 30-Day Free Trial! Get a trial version…..the full software with some artwork to use……and work with it for 30 days. If you want to purchase the full version, do it just before your 30 days ends to make installation a little easier.  If you aren’t interested, the program will end after 30 days.  No obligation.

My Digital Studio is certainly not just about scrapbooking!  So if you are not into scrapbooking, don’t think this program is of no use or joy to you! Experience it!  Take the Free 30-Day Trial!

 My Digital Studio Software or Free 30-Day Trial!  You Choose!

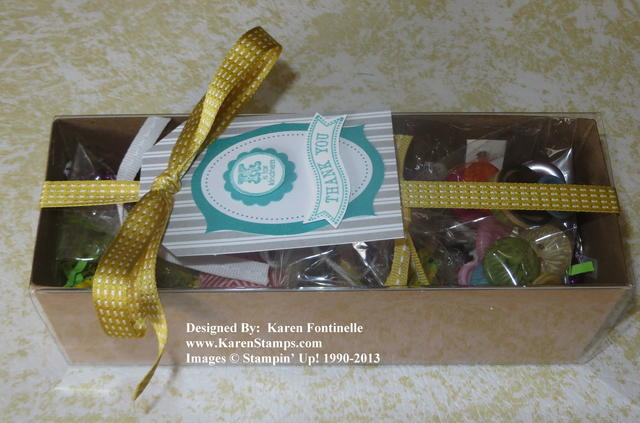
Tag a Box Kraft Gift Box with Acetate Sleeve

Tag a Box Gift Wrap

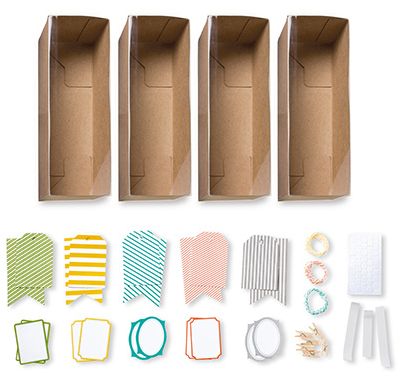
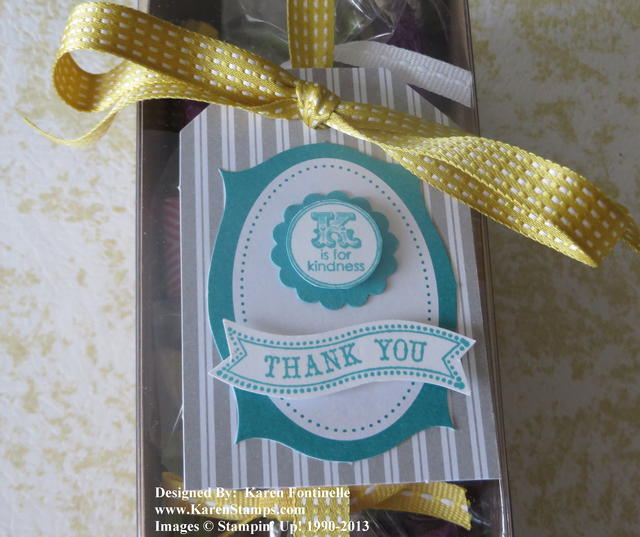
This is a fun new product in the new Stampin’ Up! Annual Catalog!  You can buy just the box, the Tag a Box, which is a sturdy kraft box with an acetate sleeve. Before I opened the package, I thought the acetate was going to be a lid that I would have to assemble.  But it is a sleeve that just needs to be made 3D from being folded and then slid right over the box.  Love it! The box comes flat and then you easily assemble. Then the fun begins, filling it with whatever treat or gift you want to put in there! Since I was giving this to a stamper, I added three small cello bags of new and old ribbon, buttons and other embellishments….plus a few chocolates! I tied the Summer Starfruit ribbon around and added a tag. You can buy JUST the Tag a Box Gift Boxes, but I recommend purchasing the Tag a Box Bundle, which comes with the boxes and the Tag a Bag Accessory Kit.

Tag a Box Bundle

 * 10 large base tags
* 10 medium builder tags
* Baker’s Twine, 20′ each of 3 colors: Crushed Curry, Tangerine Tango, Bermuda Bay
* 10 mini clothespins
* 5 Smoky Slate self-adhesive
strips, each 12″
* 40 Stampin’ Dimensionals

Here’s a close-up of the tag. As you can see, I used a base tag and builder tag plus punched or cut out two images from stamps to put on the tag.  The “K is for Kindness” is from A Round Array, punched out with the new 7/8″ Scallop Circle Punch (I cut out the center by hand).  The “Thank You” is stamped with Itty Bitty Banners and just cut out by hand with my Paper Snips, although there are Itty Bitty Framelits you could use.

Tag a Box Bundle Gift TagTo purchase these or any other Stampin’ Up! products, please order online at my Stampin’ Up! Online Store or contact me at Karen@KarenStamps.com and I’ll be happy to put your order in for you. These gift boxes would be great to have on hand for those unexpected occasions when you need a cute little gift for someone!

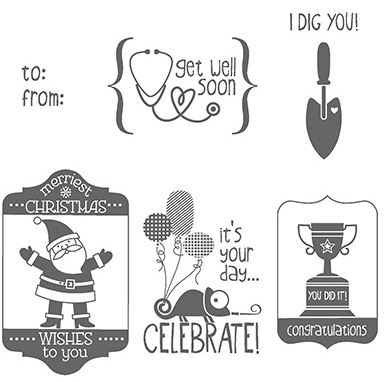
Help a Charity with the Stampin’ Up! Stamp Set “Tag It”

Tag It Stamp Set

There’s one stamp set in the new Stampin’ Up! Annual Catalog that you can feel GOOD about purchasing! Doesn’t matter how many stamp sets you already have or how full your craft room is or how much paper you are hoarding!  The purchase of the “Tag It” stamp set from Stampin’ Up! will help the Ronald McDonald House Charities program because for the sale of every Tag It stamp set, Stampin’ Up! will donate $3 to the charity!

Tag It is a great stamp set, one of those versatile ones that you can use for lots of occasions AND the new Chalk Talk Framelits will also work with it. You won’t have to cut out the tags by hand!

For the first time, the Ronald McDonald House set is available in four different languages: English, Spanish, French, and German. If another language appeals to you, now you have a choice!

To purchase this Tag It stamp set and have Stampin’ Up! donate $3 for each one sold, just go to my Stampin’ Up! Online Store here and place it on your next order!


A Father’s Day Paper Napkin Necktie

Paper Napkin Necktie

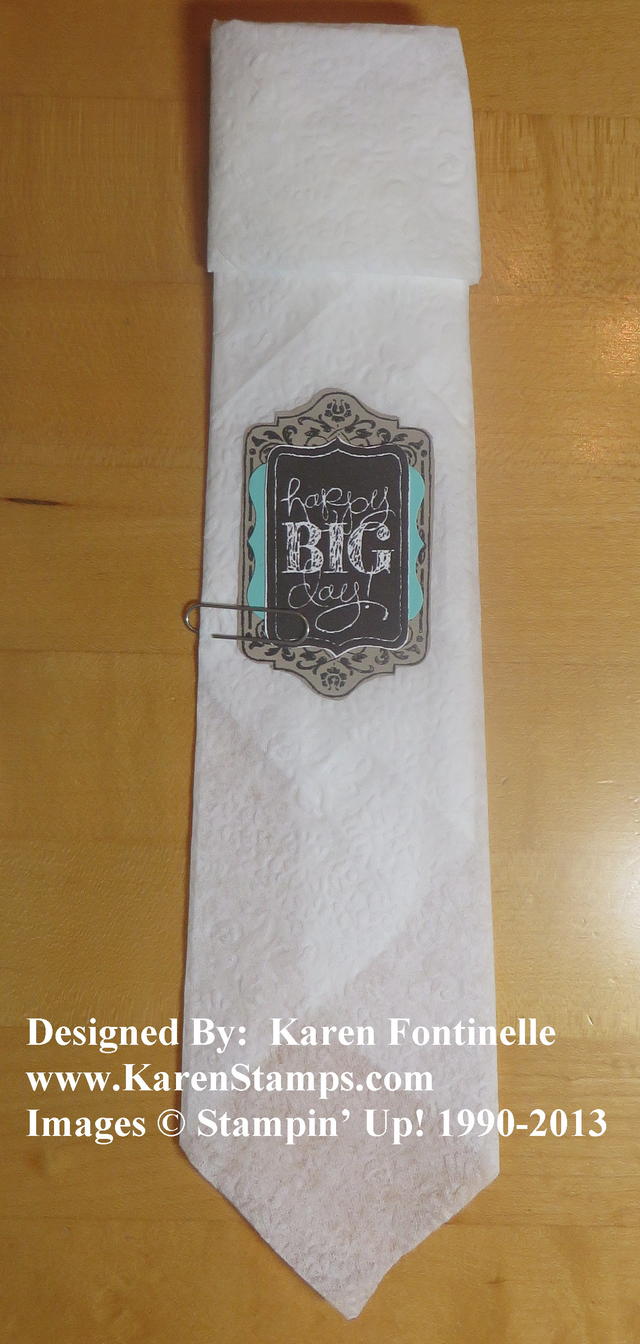
I received an email from Chinet, a company who makes paper table goods, that had a cute idea for folding one of their square paper napkins into a necktie shape for Father’s Day. To finish theirs off, they wrote on a paper tag the menu for Father’s Day. I thought it was a cute idea but used some Stampin’ Up! stamps, ink and paper to make a cute tag and attached it with a paper clip (like a tie clip!) The paper napkin necktie is pretty easy to make (only took me three tries!). You might call it simple origami! It would make a cute table decoration for Father’s Day. You can watch the video below.

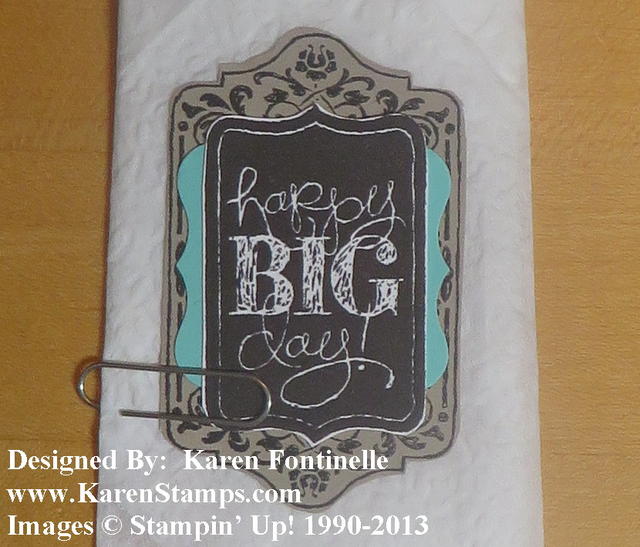
For my tag, I stamped the images in Early Espresso, one on Crumb Cake and one on Whisper White with the Chalk Talk stamp set.  There are matching Chalk Talk framelits, but I don’t have them yet, so I just cut them out by hand. (There’s also a Chalk Talk Bundle to save you 15%!)  I also used the Curly Label Punch to add that extra colorful layer. I used the new In Color, Coastal Cabana.

Chalk Talk Tag on Paper Napkin Necktie

Shop the Stampin’ Up! Online Store Here!

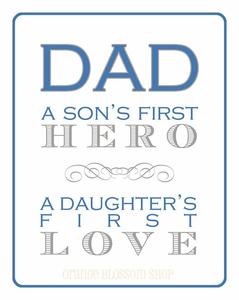
Quotes and Sayings About Fathers for Father’s Day

A Saying about a DadFather’s Day is this weekend and I thought you might enjoy or be inspired by some sayings and quotes I found about fathers. I hope you will take some time to make a card for your father, grandfather, or husband and/or help your children make something special for their dad.  Make a scrapbook page or a mini album.  Decorate a picture frame. Make a gift bag for Dad. This is why we all have our stamps, ink and paper!  Let’s take the time to use them.  It’s faster than going to the card shop!

**************************

Any man can be a Father, but it takes someone special to be a dad. — Anne Geddes

The most important thing a father can do for his children is to love their mother.” — Rev. Theodore Hesburgh

The greatest gift I ever had came from God; I call him Dad! — Author Unknown

A truly rich man is one whose children run into his arms when his hands are empty. — Unknown

A father carries pictures where his money used to be. — Author Unknown

When I was a boy of fourteen, my father was so ignorant I could hardly stand to have the old man around. But when I got to be twenty-one, I was astonished at how much he had learned in seven years. ~ Mark Twain

A good father is one of the most unsung, upraised, unnoticed, and yet one of the most valuable assets in our society. ~ Billy Graham

Fatherhood is pretending the present you love most is soap-on-a-rope. – Bill Cosby

“We never know the love of a parent till we become parents ourselves.” – Henry Ward Beecher

“It is a wise father that knows his own child.” – William Shakespeare

New My Digitial Studio Downloads

Yesterday Stampin’ Up! released several new downloads for My Digital Studio.  It’s always fun to check on Tuesdays and see what they have come up with! Click HERE to see the PDF with all the details about these new downloads or click on each image to view them in my Online Store.

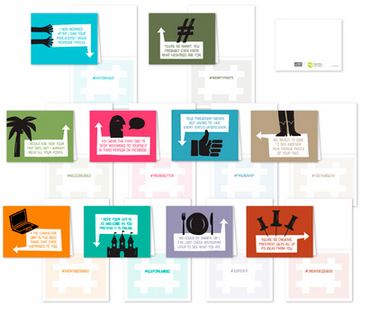
Hash It Out Greeting Card Digital Kit

Hash It Out Greeting Card Digital Kit

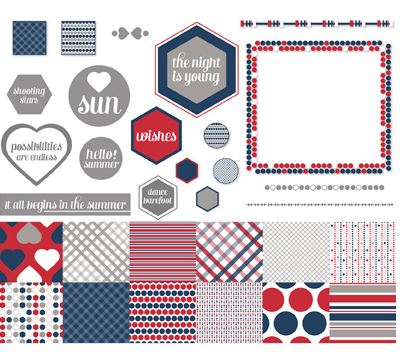
Summer Possibilities Digital Download

Summer Possibilities Digital Download

Label It Stamp Brush Set

Label It Stamp Brush Set

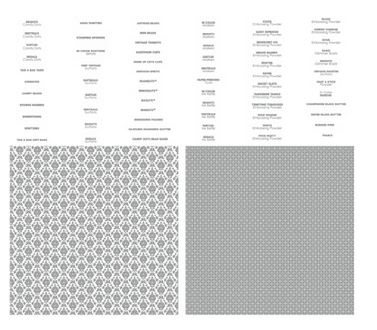
Venetian Romance Designer Series Paper

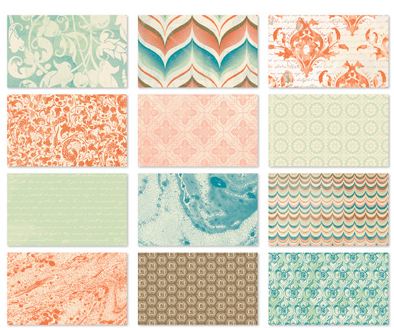
Venetian Romance Designer Series Paper

Don’t forget!  There is a download and printing sale going on with less than a week remaining! Check it out HERE!   Click one of the buttons below to share!

Gift-Wrapping with Stampin’ Up! Washi Tape

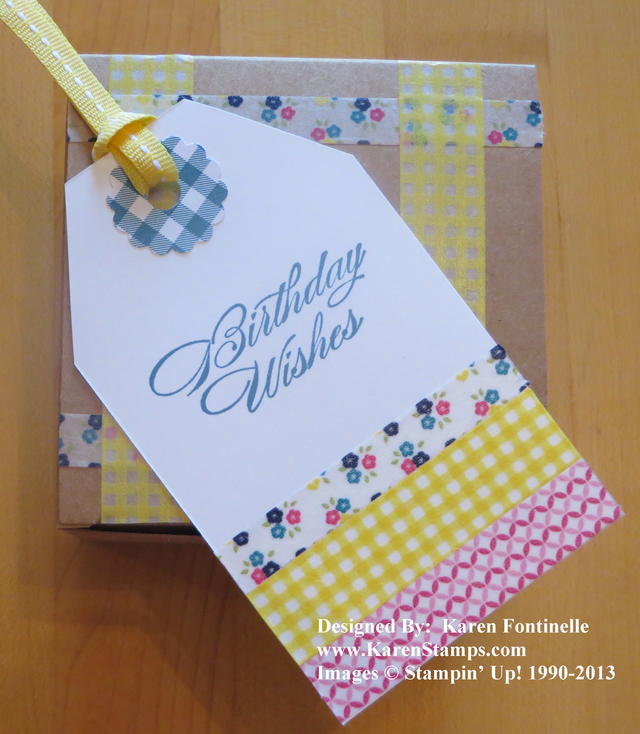
Gingham Garden Designer Washi Tape Birthday Tag and Gift

Now that Stampin’ Up! sells washi tape, we will find lots of ways to use it. You can easily decorate a Kraft Gift Box with strips of our new Gingham Garden Designer Washi Tape. It’s even repositionable, so I was able to lift one part up and put one strip underneath on the top of the box. You could also wrap the tape around the sides of the box or add matching designer paper.

The birthday tag is made by just snipping off the top corners of a scrap of Whisper White card stock.  I added some strips of Gingham Garden Washi Tape to the bottom of the tag.  Since you usually just tear washi tape, I let the lengths be longer than the tag by just a bit and then trimmed off the excess with my Paper Snips on each side.  Washi tape is translucent so keep that in mind when you are deciding on what colors of paper to use.  The surface you stick the tape to will show through somewhat.

To decorate the hole of the tag, I just punched a small scallop with the 7/8″ Scallop Circle Punch, adhered it to the tag, and then used a regular hole punch to punch the hole for the tag. To tie on the tag, I used the Daffodil Delight 1/4″ Stitched Grosgrain RibbonYou could hand write your greeting or your “To” and “From” on the tag or stamp something, or both!  I stamped a birthday greeting from Bring on the Cake in Island Indigo, one of the coordinating colors of the Gingham Garden Washi Tape.

If you want to try out some of the new Stamping’ Up! Washi Tape, just go to my Stampin’ Up! Online Store here.

New Stampin’ Up! Catalog Day is Here!

The NEW STAMPIN’ UP! ANNUAL CATALOG BEGINS TODAY AT NOON MT!!

Stampin' Up! Annual Catalog 2013-14

View the Catalog online (Flash)

View the Catalog PDF

View the Stampin’ Supplies

This is the day we’ve all been looking forward to!  Stampin’ Up! will be transitioning the website over to the new catalog until noon MT today You can also order any retiring items, as well as from the Spring Catalog, while supplies last!  People are calling it the “trifecta of ordering” because you can order from all three catalogs at once…the old, the new, and the Spring Catalog!  Have patience because there will be a LOT of people ordering and sometimes there are glitches when everything is new!

Stampin’ Up! New Catalog goes live at:

  • 11:00 am Pacific Time
  • Noon Mountain Time (Stampin’ Up! Home Office Time)
  • 1:00 pm Central Time
  • 2:00 pm Eastern TIme

I always like the see the time written in my own time zone so I don’t have to keep figuring it out!

And that’s not all!!!!

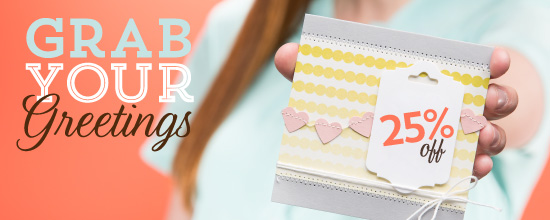
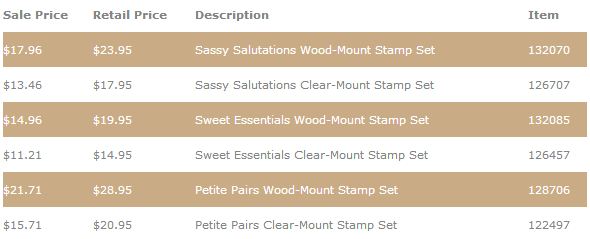
Grab-Your-Greetings sale

Three greeting stamp sets are on sale for 25% off starting today and going through June 30!  We always need another greeting set!  This is an easy add-on to your order!

Grab Your Greetings Chart

____________________________________________________________________

The Bracket Stamp personalized name stamp with 5 lines (item 131138) will not be available in time for the May 31 catalog launch, but we anticipate that it will be available soon. However, the other versions of Bracket Stamp, with 1-4 lines, will be available to order once the catalog is live.

________________________________

Remember……Ordering begins today at Noon MT (Stampin’ Up! Time!)

Current Catalog          NEW CATALOG           Spring Catalog

The Spring Catalog will END tonight at 11:50 pm MT!!!!!!!!!!!

Just go to my Online Store after Noon MT today and you can start placing your order!  If you have any questions, please contact me at Karen@KarenStamps.com or call at 713-981-7662.

If you plan to shop for your Stampin’ Up! supplies with me and want a brand new catalog to hold in your hands (even though it is online!) please email me or call with your contact information and phone number.