Category Archives: 3-D, Gifts & Things

New Paper Pumpkin Kit For November!

Paper Pumpkin Banner 3 Nov 2022

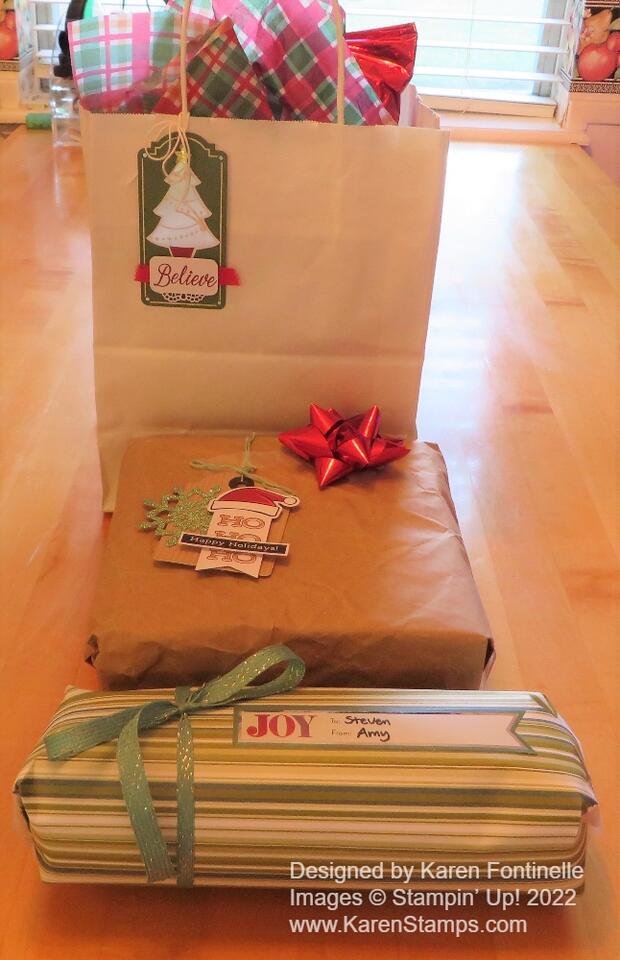
This November, Paper Pumpkin delivers this and more with its one-of-a-kind, holiday-themed crafting experience. This festive kit includes 12 fun, sparkly gift tags and (as always!) an exclusive stamp set—plus everything you need for a successful holiday crafting experience. 

This kit includes:

  • This month’s kit contains enough elements to create 12 tags—4 each of 3 designs. This all-inclusive kit includes printed die-cut paper pieces, twine, adhesive, and more!
  • Includes a Cherry Cobbler Classic Stampin’ Spot!
  • You’ll love decorating your gift tags with snowflakes and banner die-cut pieces on our Mint Macaron glitter specialty paper (a Paper Pumpkin exclusive).
  • Create festive gift tags for all your packaging needs this holiday season with classic Christmas colors and designs.
  • Finished gift tag size: 2″ x 3″ (5.1 x 7.6 cm)

Coordinating Stampin’ Up! colors: Basic Black, Cherry Cobbler, Crumb Cake, Mint Macaron, Shaded Spruce, Sweet Sorbet

If you need unique Christmas packaging to round out your gifting, you will be able to purchase these exclusive North Pole Sacks add-ons in the Online Store under Paper Pumpkin Past Kits, for subscribers only. Available now.

Join Paper Pumpkin by November 10th to receive this kit!

SUBSCRIBE NOW!

Painted Christmas 2-4-6-8 Gift Bag

Painted Christmas Gift Bag

I was inspired to make something different than a card so I looked through my designer paper and this pinecone paper is what jumped out at me! I thought it would be perfect for an easy little gift bag for the holidays, like this Painted Christmas 2-4-6-8 Gift Bag. You know the holidays will be here before we know it!

There’s almost nothing easier to make than a 2-4-6-8 gift bag! And so versatile! you can leave the top open or you can pinch it closed, as I did. Make a lid if you like. All this one takes is a piece of paper – cardstock or designer series paper – cut at 5 1/2″ x 8 1/2″. I used the Painted Christmas Designer Series Paper which was around last year and has returned this year in the Holiday Mini Catalog so you may have some! Put it in your Paper Trimmer or Simply Scored board to score at 2″, 4″, 6″, and 8″. Make sure you pay attention if there is a pattern so you have the design going the right way and not upside down or something. Then turn the paper lengthwise and score at 1 1/2″ or 2″ to make the bottom flaps of the bag. You can vary the height of the bag if you make it wider than 5 1/2″. Then cut those score lines for the flaps up to the horizontal score line. Also, cut off the tiny little 1/2″ piece at the end. Check out the paper below.

Painted Christmas 2-4-6-8 Gift Bag

To assemble, crease all the score lines with a Bone Folder for a good fold, and then see how the bag is going to go together. Apply adhesive (Multipurpose Liquid Glue gives you some wiggle room to get the paper lined up but Tear & Tape or Stampin’ Seal+ is good, too!) to that narrow 1/2″ piece on the end. You don’t really have to hold the bag up in the air to adhere the other side to that 1/2″ side. Just lay it flat on the table and carefully fold over the opposite side to adhere to that 1/2″ side. Then just fold in the flaps, trying to not have seams showing on the front side of the bag. Apply some adhesive to the flaps and always stick your Bone Folder or something down inside the bag to put pressure on all those flaps and make sure they have fully adhered together. If you want the top of the bag closed AFTER you put your gift or treat inside, just pinch in on the sides and then close the top with ribbon through some punched holes, a staple, or some kind of clip. Whatever you like!

To decorate the bag, I used a little diecut rectangle out of Crumb Cake Cardstock and die-cut some evergreen branches out of Evening Evergreen Cardstock using the Christmas Banner Dies. I had a scrap of the Real Red Glimmer Paper in the 6″ x 6″ Pack so I diecut some red berries just in case I wanted to use them. The “joy” is stamped in Real Red ink from the Brightest Glow Stamp Set. You can purchase the whole Brightest Glow Bundle with the stamp set and some fancy dies, but if you just need some more or some Christmas greetings, you can just get the stamp set.

This little Painted Christmas 2-4-6-8 Gift Bag started out with some not real exciting pinecone paper and got turned into a real Christmasy bag for a small gift or treat! Time to get ready for the holidays!

Time To Get Spooky With Paper Pumpkin!

OK! Here is what I have been waiting for!! Halloween crafting!! Just look at this Paper Pumpkin box for September! I almost wanted to squeal with excitement when I saw the photo!

Get your Halloween crafting on with the Spooky Treats Paper Pumpkin Kit. This month’s kit includes everything you need to make 18 absolutely adorable (and just the right amount of spooky) treat boxes—that’s 6 each of 3 unique designs! No need to let the season creep up on you; subscribe and order your kit today.

ABOUT THE KIT
Name: Spooky Treats

This kit includes:

  • This month’s kit contains enough elements to create 18 treat boxes—6 each of 3 designs. This all-inclusive kit includes printed box bases and tops, die-cut paper pieces, adhesives, and more!
  • The Spooky Treats Paper Pumpkin Kit includes an Orchid Oasis Classic Stampin’ Spot!
  • This kit’s stamp set puts the TREAT in trick-or-treat with fun, Halloween-themed sentiments and designs. Embrace the spooky season with ghost, bat, spider, and star images.
  • This kit also includes a special peek-through box top on one of the box designs.
  • Finished box size: 2-1/2″ x 3″ x 1″ (6.4 x 7.6 x 2.5 cm)
  • Coordinating Stampin’ Up! colors: Basic Black, Gray Granite, Orchid Oasis, Fresh Freesia, Crushed Curry, Pumpkin Pie
WHAT IS PAPER PUMPKIN?

Paper Pumpkin is our monthly One-Stop Box™ that offers a unique variety of paper projects for subscribers of any skill level to enjoy! These thoughtfully themed and all-inclusive craft kits encourage Stampin’ Up! customers to explore their creativity, try new techniques, and discover their potential in papercrafting. I say it’s a gift you give yourself, to find that special box in your mailbox each month, just for you! Try it! No risk or obligation to continue for any length of time! You can even skip a month when you need to!

JOIN PAPER PUMPKIN TODAY!

Rings of Love Gift Bag and Tag

Rings of Love Fall Gift Bag

During the Stampin’ Up! Creativity Now virtual stamping event for Demonstrators, one of the projects was a gift bag made with the Splendid Day Designer Series Paper. It was beautiful using that foil paper! Since I watched the recording a couple of weeks later, I had already cut up some of my designer paper. When I made a mistake scoring one of the sides of the bag, I had no extra matching designer paper to use! But a few days later I gave it another try rewatching the video and just used some different designer paper, the Rings of Love Designer Series Paper in the Sale-A-Bration brochure! This pretty fall paper is even FREE with a $50 purchase during Sale-A-Bration.

We’ve all made gift bags before. All you do is cut the paper and score it for folding and forming the bag shape according to the size and style you want. There are just different details. Will the top be open or closed, the sides straight or pinched in, tall or short, wide or narrow, the top closed with ribbon, a clip, staples, or something else? You have lots of options when you make any basic gift bag design!

This gift bag starts with two pieces of designer paper cut at 7″ x 9 1/2″. Pay attention to the pattern of the paper so you know which end of the paper you want for the top and which for the bottom.

  1. Score the paper that will be the top of the bag at 3/4″ on both pieces with the paper horizontal in the Paper Trimmer. Then score at 8″ to make the bottom flaps for the bag. This will leave a 1 1/2″ area at the bottom of the bag.
  2. Turn the paper lengthwise and score at 1/2″, 5 1/2″, and 6 1/4″. On the 6 1/4″ score, don’t go all the way to the horizontal score line at the bottom. Stop before you get there! This will be the line to pinch in the sides of the bag eventually. Do the second sheet the same way. Make sure both paper designs are going the same way. The two papers should be scored exactly the same way.
  3. In the bottom left corner of both papers, cut away that small rectangle formed by the score lines. Over on the right bottom of the paper, cut a slit along the 5 1/2″ score line just up to the horizontal score line.
  4. Fold and crease all the score lines, gently using the Bone Folder. Apply Tear & Tape adhesive as shown in the photo below. You can also check your score lines and cutting using that photo. The adhesive is placed differently on the two papers so look closely. On the left paper, put adhesive along that first scored section and one small piece on that bottom right square piece next to the slit you cut. On the right paper, put adhesive on the same side section, then pieces on the bottom flap and the small bottom right section as on the first sheet. The adhesive goes on the side of the paper you want to show on the outside.
Rings of Love Gift Bag Assembly

5. Adhere the sides together after the lines are creased and then do the bottom flaps. You’ll be able to see where everything goes. Try to have all the seams toward the back of the gift bag.

6. Once the bag is assembled, fold on the top score lines to close by folding to the front or to the back. I folded mine toward the back but you can do either. Be sure you put your gift inside before closing up with the ribbon!

7. Tie ribbon around the gift bag from top to bottom to hold the top closed. I used the Gold 1/4″ Shimmer Ribbon on my gift bag. Add a gift tag if you want. (Directions for my tag are below.)

Rings of Love Gift Bag side

For my gift tag that you see hanging on the front of the bag, I used another sheet of the Rings of Love Designer Series Paper that had the tree ring slices on it. I cut out a circle from the Stylish Shapes Dies in the Annual Catalog from Soft Suede cardstock and adhered one of the tree ring slices on it that I cut out by hand. The greeting is stamped on the half circle die in the Splendid Stems Dies in Poppy Parade ink. I also cut out a segment of the colored leaves from the designer paper as well as a die-cut stem from the Splendid Stems Dies to tuck under the greeting a bit. I poked a hole in the tag off to the side and tied on an Open Leaf Trinket and tied this around the bow. You can have fun making any kind of tag that suits the occasion.

The front of the gift bag turns out to be 5″ x 8″ and about 1 1/4″ wide. You can place a few cards inside or a small gift or treat! Try this Rings of Love Gift Bag and Tag using this designer paper or whatever you have on hand for the occasion!

SHOP STAMPIN’ UP! ONLINE HERE!
July 4th Red White & Blue Treat Box

July 4th Red White & Blue Treat Box

Tomorrow will be July 4th and if you are looking for a little treat box or even a decoration or a card for the 4th of July, you can use this July 4th Red White & Blue Treat Box idea! It’s always fun to make a little something for every holiday!

For this project, I used one of the Sweet Little Boxes (which just retired from the Spring Mini but you may have one around!). You can use whatever box you have or make one! You could make a little 2-4-6-8 bag and decorate it this way! I simply used pieces of red, white, and blue cardstock to decorate the front of the box – Real Red, Basic White, and Starry Sky.

For a decoration, I always like stars, but for this box, I die cut a gold foil circle from the All That Dies. Then I used the retired Playful Alphabet Dies to cut out the U, S, and A. The little red hearts are die cut from the Teacup Dies. And since I still had the Resin Stars from the Hey Sports Fan Suite that just retired in the Spring Mini, I added a few of the yellow stars to the front of the box.

Inside the box, you can put a cookie or piece of candy or some other little small gift. Or just use it for a decoration for the 4th of July! Or, copy the front of the box and make it into a card. Whatever you think of!

Just have fun making a little something patriotic before you go out to watch fireworks!

Happy 4th of July tomorrow!

Decorated Sweet Little Box

Decorated Sweet Little Box

If you remember seeing the Sweet Little Boxes (157628) in the retiring January-June 2022 Mini Catalog, you might have thought they were only for Valentine’s Day and the designer paper in the Suite was also only for Valentine’s Day. But here I have decorated this assembled Sweet Little Box with “Valentine” paper and a brand new stamp set. So you can stock up while they are half-price and have them on hand!

These Sweet Little Boxes are on page 9 of the Spring Mini in the Sweet Talk Suite. The boxes are a small size and are food safe. You can stick a gift card inside, a small gift like a necklace or earrings, or maybe some candy or a small cookie. The boxes assemble easily and even come with adhesive on the sides! I cut a piece of the Sweet Talk Designer Series Paper, the purple stripe, which can be for any occasion. This paper is on sale for 50% off, by the way. I cut a piece 3 3/8″ x 7 1/4″ and wrapped it around with the seam at the back of the box. You could also cut a front and back piece to just glue on the front and back of the box. I also cut a very slim piece for the top of the box, 2 1/2″ x 1/2″.

I stamped some flowers and leaves from the True Beauty Stamp Set to decorate the box. This is a new stamp set and Bundle with the dies in the new Stampin’ Up! Annual Catalog. I used Blushing Bride and So Saffron ink for the two large flowers and Melon Mambo for the small ones for a pop of brighter color. The leaves and stem were all stamped in Granny Apple Green ink. Then I used the Organic Beauty Dies to cut them all out. The little greeting is also in the True Beauty Stamp Set.

For embellishments, I used a little Brushed Brass Butterfly and some of the Iridescent Pearl Basic Jewels on the flowers. I love how this little box turned out! Just remember, during the Last Chance Sale you can save 50% on both the Sweet Talk Designer Series Paper and the Sweet Little Boxes!

SHOP STAMPIN’ UP! ONLINE HERE!
Cup of Tea Teabag Holder

This Cup of Tea Teabag Holder is really an old project I have made many times through the years, but the Tea Boutique Suite Collection is perfect for it! As you will see, this little card opens up to be more than a card! It is a card but holds a teabag inside in a side pocket.

When you open the card, there is a decorated panel on the left on which you can write a message and on the right is space for a teabag or if you wanted, a piece of chocolate or another treat!

It’s really very easy to make one of these holders. Start with a piece of cardstock 11″ x 3 1/2″. I used one of the new In Colors, Sweet Sorbet. Score this strip of cardstock at 3 1/2″, 7″, and 7 1/2″. Crease all the folds. On the third section on the right, cut that piece on a diagonal as you see in the photo below. When you fold that diagonal over, that will make the pocket to hold the teabag.

Tea Bag Holder scoring

Now all you have to do is decorate the teabag holder however you like for the occasion.

For the cover of the teabag holder, I added a layer of Basic White, cut at 3 1/4″ x 3 1/4″ with a layer of the Tea Boutique 6″ x 6″ Designer Series Paper, cut at 3″ x 3″. The white helps the designer paper and the teacup stand out better.

The teacup is diecut from a floral pattern of the Tea Boutique Paper with the Teacup Dies. It reminds me of many old teacups I have from my grandmother. She used to have a tier table full of teacups and saucers that oddly enough, she said my grandpa brought home from birthday parties as favors! Then there is also a collection of handpainted teacups that my grandpa’s sister painted when my grandparents got married.

But back to making the teabag holder – the greeting is in the Cup of Tea Stamp Set. I wanted to use it because it was small enough to fit in the space. With the stamp set and dies, you can stamp and cut out the lemon slice, the little hearts, and even the tag on the teabag. There are two teabag dies so you could layer them, but the word “enjoy” only fits on the larger tag but I didn’t want that large of a tag on this project, so I just cut it down smaller by hand. I added a small piece of white baker’s twine to look like it is attached to the teabag inside the cup brewing tea.

On the inside panel, I just used another pattern in the Tea Boutique Designer paper, and added a small piece of Basic White on which to write a message or sign your name. I didn’t want to cover up much of that cute paper so I made it smaller than a regular layer.

To make the diagonal pouch on the right side, I used a piece of Tear & Tape just on the bottom of the diagonal. I also cut a piece of the designer paper in a 3 1/4″ square and then diagonally cut it to layer on the pouch.

This is really a fun project to make. The extra scoring in the center leaves space for the thickness of the teabag of candy, whatever you put in there. The only thing I forgot to do was put ribbon around the whole thing to tie it closed. You would likely adhere it underneath the layers so that it would tie on the side to hold it closed. But it’s okay as is, really. If it is presented in an envelope, it’s not going to fall open anyway until the person opens it themselves! There are no mistakes in stamping!

Check Out the New Branded Merchandise!

Show your love for Stampin’ Up! with these new branded products! Some match some product images and some match the new In Colors! Have Stampin’ Up! in your life even when you’re not stamping! LOL!

These new products match the Abigail Rose Suite and Cottage Rose Stamp Set! See pages 56-57 in the Annual Catalog. Choose from a poster, hoodies, file folders, grid paper, and In Color Tumblers!

Share What You Love Poster Branded Merch
Grid Paper Branded Merch
Abigail Rose File Folders Branded Merch

Check out this new merchandise, for Demonstrators and Customers, in the Online Store for different sizes and color choices!

SHOP THE STAMPIN’ UP! BRANDED MERCHANDISE IN THE ONLINE STORE!

Easter Bunny Treat Basket

Easter Bunny Treat Basket

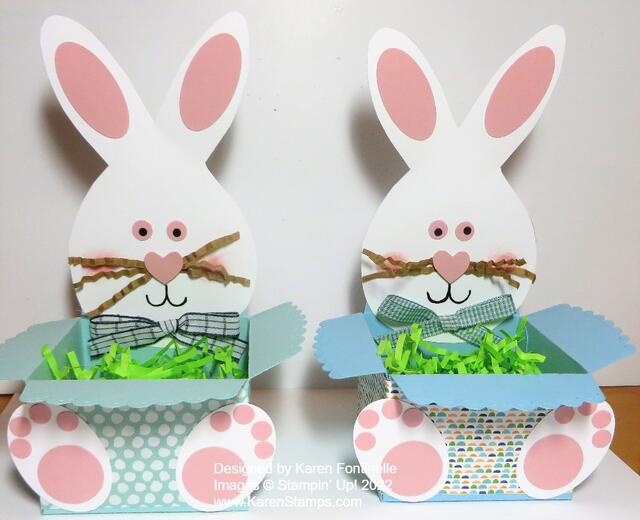
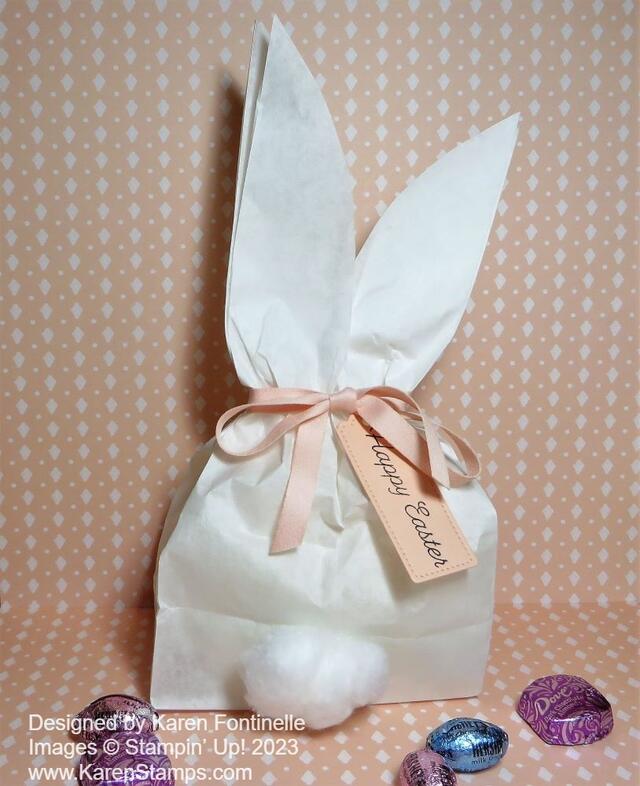
I was asked to make two Easter treat baskets for two little boys. I had kind of a normal little basket idea with a handle (made of cardstock, of course, not a real basket! but when I got home, I saw one of my Easter decorations on my fireplace mantel that I made years ago. I just copied myself and made these two Easter Bunny Treat Baskets! Plenty of room to put some chocolate candy and other treats inside!

To make these baskets, I pulled out a lot of my retired Stampin’ Up! products! The main thing I used was the Sizzix Scallop Envelope Die, I think it is called. It was one of those first dies we had with our Big Shot, the black thick platform kind of die with the cutting blades inside the die. I cut four pieces, cut off one tab on one side of the envelope piece, laid them side by side, adhered them together, and folded in the bottom flaps to form the basket. So if you have been die-cutting for a long time, you may have this die. We could make a lot more things than just an envelope with this die. The bunny on the back of the basket is simply a sketched bunny shape. There may be a template somewhere online. I traced the one I’d already made on my basket. The bunny feet on the front of the basket are made with the retired large oval punch, the 1″ circle punch, and some smaller punched circles. There were several punches I had that could make those, like the Owl Punch and the Gingerbread Man Punch (not sure that’s the correct name). For the ears, I punched oval shapes but you could color them in with a marker. The face can just be drawn in or just small circle punches for the eyes, a small heart, or a circle for the nose. Add a little blush to the cheeks! Draw on some whiskers or use some crinkled strips of paper or this crinkled shred that I happened to have.

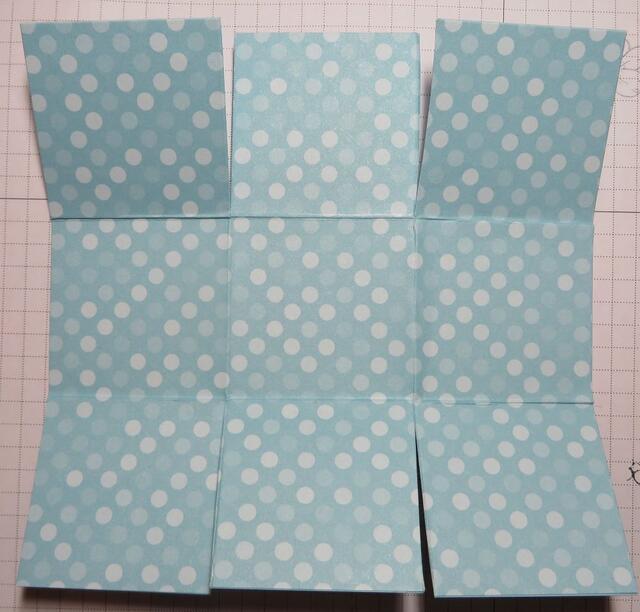
If you do not have the Scallop Envelope Die, just make some little kind of square box. Just take a square piece of paper, score it like a tic tac toe board, fold and crease, then cut the flaps at the bottom and the top down to the horizontal scoreline. Fold in all the sides to form a box.

There are so many ways to make bunnies, too! If you are uncomfortable drawing a bunny like mine and cutting it out, just use some circle or heart shapes to put one together! Use dies or cut freehand.

Since these were boy bunnies, I tied bows and attached them to the bunny chins rather than on their ears! You could also make kind of a paper necktie if you wanted! Just have fun with the project! Nothing has to be perfect!

Here is my original bunny I made a few years back I guess!

Easter Bunny Treat Basket Pink

If you need one more Easter idea, this Easter Bunny Treat Basket might be just the thing to inspire you!

HAPPY EASTER!

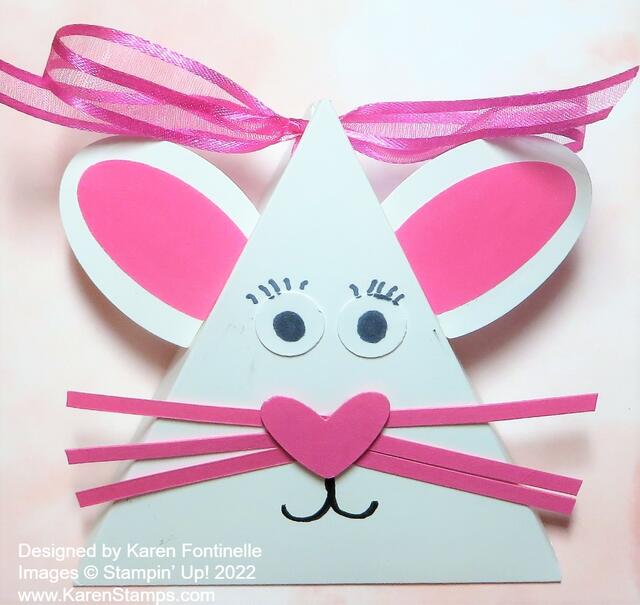
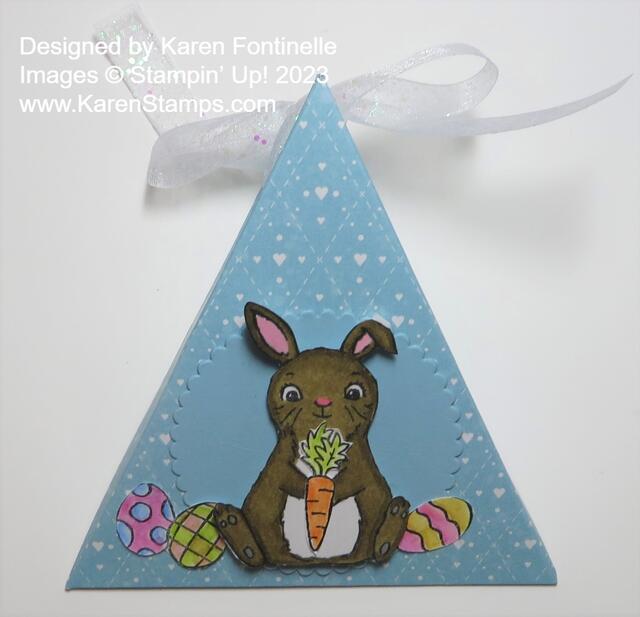
Triangle Box Easter Bunny Treat

Triangle Box Easter Bunny Treat

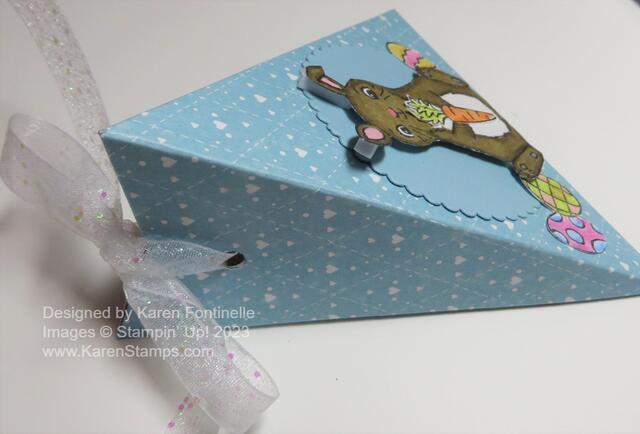
These triangle boxes are so fun and easy to make. I have made lots of them over the years for different holidays or occasions but I may not have ever made one for Easter like this Triangle Box Easter Bunny Treat. All you need is a piece of paper and then score it according to directions. You can vary the size of the paper depending on what size treat box you want. Put some candy or a small gift inside for a fun treat!

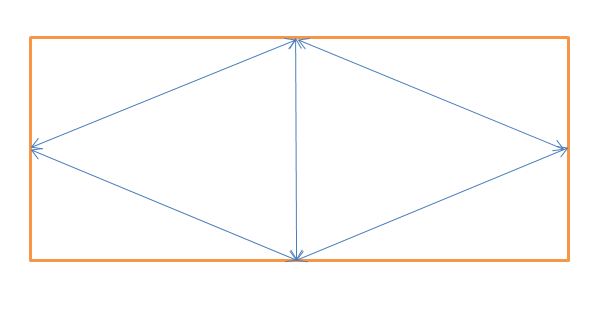
My Basic White cardstock is cut at 4″ x 8″. Use the diagram below to see how to score, but it is simple! At each end of the cardstock, put a light pencil mark at the halfway point which in this case would be 2″. Score the paper in half at 4″. Then in that awkward manner, with your Paper Trimmer, score from that 2″ middle point at one end down to the middle score line which will be on a diagonal. Do that on both sides of one end, then turn the paper and score at the other end in the same way.

Triangle Box Drawing

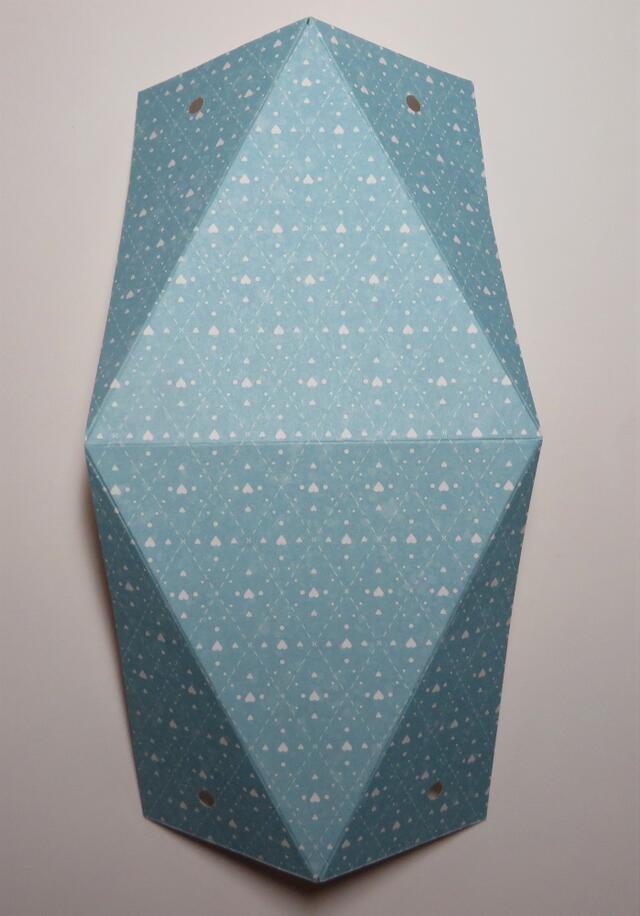
Now fold and crease all the score lines. You will see how it will fold together to make the triangle box. Determine which side will be the front or top of your box that you will want to decorate and how the flaps will go so that the top view of the box will have the fold of the flaps showing and not the open side. Once you see how it folds together how you like, you can use any hole punch to punch holes in the sides near the top. You want the two holes on each side to align. This is how your paper should look creased and with holes punched.

Triangle Box diagram

To decorate my Easter Bunny treat box, I used punches that are retired now but you can use whatever you have. There is the Double Oval Punch or maybe you have retired punches and dies that you can use….or simply cut out by hand! For the ears, I punched a large oval for the white ear and then I found the 2021-23 In Color Shimmer Vellum that I have and have barely used! It’s on the Last-Chance List and even on sale! To attach the ears to the box, I simply scored a bottom portion of the ears and folded then adhered each to the box. You can use Multipurpose Liquid Glue but you will have to hold it in place for a few moments.

For the eyes, I punched 1/2″ circles with my old punch and colored in the black portion. I had originally drawn them right on the box but later I smeared the ink somehow so I covered that mess up with the punched eyes! “There are no mistakes in stamping!” I think it looks better this way! The nose is a little larger than I planned on but I used one of the hearts in the Sweet Hearts Dies. I had to have something a little large since I attached these whiskers. If you have been papercrafting for any length of time you probably have a heart die or punch somewhere in your stash or you can just cut one by hand. The mouth is just drawn on with the Black Stampin’ Blend marker.

Triangle Box Easter Bunny Treat Side

After putting your treat or gift inside the box, you can tie it closed with either an inconspicuous piece of ribbon or do as I did and use a larger bow that matches my bunny colors that looks somewhat like a bow tied on the bunny’s head! My pink colors are the In Color Polished Pink in the paper and ribbon. The ribbon is the 3/8″ Open Weave Ribbon. Such pretty ribbon in all the In Colors! Luckily these In Color ribbons are carrying over into the new Annual Catalog!

Triangle Box Easter Bunny Treat Top

That’s it for making a triangle box! Here is another example in THIS POST. Just decide on the size of paper you want to use, score in half, score on the diagonal to each end from that scoreline, punch holes if you want to be able to tie it shut, and decorate as I did in this Triangle Box Easter Bunny Treat.

Woven-Look Easter Basket in Cinnamon Cider

Woven-Look Easter Basket in Cinnamon Cider

I’ve made a few paper Easter baskets in the past, but I hadn’t tried this fun-looking design. I called this the Woven-Look Easter Basket in Cinnamon Cider to differentiate the kind of basic ones like I made recently in this post. I don’t know what design it would really be called! It is made by cutting strips on parts of the paper and then adhering them one by one, side by side to the front and back of the basket. Somehow it turns out like this! Who thinks of all these ideas?!

I have a lot of photos to hopefully show you how to make one of these baskets!

Start with a piece of cardstock cut at 7″ x 6 1/2″. You will also need a basket handle later cut at 3/4″ x 6″ or whatever size you like. If you want to cover it with designer paper, cut it just slightly narrower and just as long. You can also add designer paper to the sides of the basket if you like, or even each strip that we will make. Or just keep it plain and simple!

With the 7″ side at the top of the Simply Scored Scoring Tool or the Paper Trimmer, score each of the four sides at 2″. (See the red lines.) Then with the 7″ side at the top, on the two outer squares, score from the top only down to the horizontal score line. (Green lines.) Score at 5/8″, 1 1/4″, 5 3/4″, and 6 3/8″. Then turn the paper with the other 7″ side at the top and do the same thing.

Woven-Look Easter Basket Diagram1

In preparation for assembly, add pieces of Tear & Tape to each end of those scored strips as you see in the diagram. You could use Multipurpose Liquid Glue but you would have to hold each strip in place for a moment, so Tear & Tape is really easier. You “could” apply the tape across all three strips at once because you are going to cut them apart next anyway.

Next, use scissors to cut on the scored (green) lines just up to the horizontal score line. Also, cut the red line, just up to the red score line, so that you have three “fringe-like” pieces on each side (all four corners).

Woven-Look Easter Basket Diagram2

In that middle section, top and bottom, you see a dotted line. That is where you will fold over just about 1/4″ to the inside of the basket. Score it first if you like. Adhere well. Tear & Tape works best if you make it as wide as the tape. The Liquid Glue you have to hold a few moments. (That squiggle over on the right is a boo-boo! Ignore it!)

Now you will assemble the basket by removing the Tear & Tape one strip at a time. Pull the inside strip over toward the center of that center section, adhering it about 1/4″ below the top edge. Next do the strip on the left side, also 1/4″ below the top edge.

Woven-Look Easter Basket Diagram4

Next, go to the next (middle) strip on the right, remove the tape and pull it over adhering it right about at the top edge of that middle section. Do the same with the one on the left.

Woven-Look Easter Basket Diagram5

Now you are on the last strip. Pull that over so that it is fairly level and straight with the top of that middle section. Now do the last one on the left, also making it straight with the top. That’s it! As you take a look at the basket, you will see that curve that developed! Don’t worry if everything isn’t lined up perfectly because you are likely to be covering this side (and maybe the back section, too) with a decoration. Do all the same steps on the other side of the basket.

Woven-Look Easter Basket Diagram6

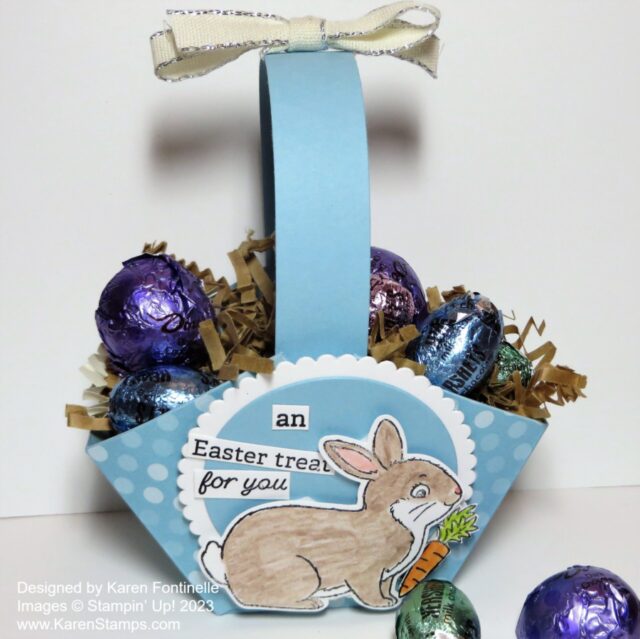
Try to stick the end of the handle down in between the layers of the basket if you can or just adhere wherever you like. Add whatever decoration you want, whether a greeting or some layered circles, punches, rectangles, whatever. Tie on a ribbon if you like. Decorate both sides or just one. Add some small pieces of designer paper on the basket sides if you want. I stamped the little bunny in the Friends of the Forest Stamp Set and layered it on a piece of the Hand-Penned Designer Series Paper on top of Mint Macaron cardstock.

Woven-Look Easter Basket in Cinnamon Cider Side

Here is the back side. I almost stamped a “Happy Easter” greeting for the back but I didn’t. I thought just decorating the front was fine!

Woven-Look Easter Basket in Cinnamon Cider Back

If you want to decorate the sides of the basket with designer paper, just cut two pieces 2 1/4″ x 1 3/4″. Make sure you have any design going in the correct direction if there is a pattern. This Hand-Penned Designer Series Paper is on the Last-Chance List of retiring products so if you need more, be sure to get it while it is available! And the Cinnamon Cider cardstock is also retiring as it is one of the outgoing In Colors!

Make a few Easter baskets either for your own decoration around the house or as a decoration at each place setting at your Easter dinner table!

SHOP STAMPIN’ UP! ONLINE HERE!
Expressions in Ink Easter Baskets

Expressions in Ink Easter Baskets

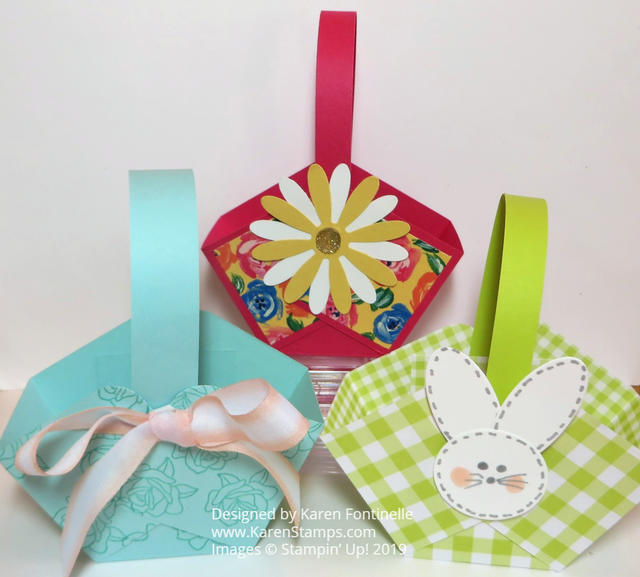
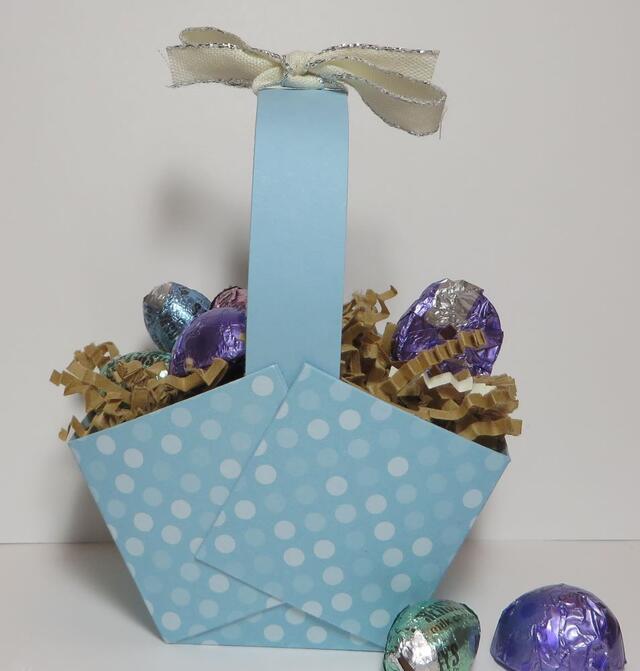
Easter will be here soon, less than a month now, so you might be thinking about making some little Easter decorations such as these Expressions in Ink Easter Baskets. These little baskets are super easy, you have probably made them before. After you make them with designer paper or cardstock, just decorate and embellish however you like.

I had the idea to make these Easter baskets a little “fancy” by using the Expressions in Ink Specialty Designer Series Paper. I love the watercolored look of all the designs on the paper plus the gold foil accents on some of the papers. It is incredibly beautiful paper! If you want a sturdier basket I would suggest making the basket with cardstock, maybe even the Basic White Thick Cardstock, and then adhering designer paper on the cardstock to decorate. My baskets are just made with designer paper and then the inside is also gorgeous!

To make the basket, cut a piece of paper at 6″ x 6″ and score like a tic-tac-toe board. Score at 2″ and 4″, then turn the paper and score again at 2″ and 4″. Cut up on the two vertical score lines up to the horizontal score line. Do the same on the opposite side. See the photo below. Cut a handle of about 8 1/2″ x 1/2″.

Score and Cutting on Easter Basket

Here’s how to fold the sides in and how to overlap them. If you want to round the corners, you can do that with and corner rounder punch you have or the current Detailed Trio Punch. The photo below from a couple of years ago shows how I folded the sides. You can mostly eyeball where they go or make a pencil mark on the inside of the basket at the 1″ mark since each section is 2″ wide and you can use that mark as a guide to see how far in the sides should go to be even. Use a brad on each side or just some decent glue to hold the basket together.

Easy Paper Easter Basket Assembled

On the basket I made on the left side with gold stripes, I die cut the flower out of a piece of the designer paper using the Artistic Dies. It didn’t match exactly but it was pretty close and looked fine. Then I also cut out some leaves with the greenish portions of the designer paper.

On the green basket, I simply cut out the flower and leaves by hand. It doesn’t have to be exact because the flowers are so “flowy” anyway, there isn’t an exact image line. On both baskets, I popped the flowers up with Stampin’ Dimensionals.

If you don’t have “Easter grass”, you can make some but cutting narrow strips of green cardstock and then running it through a Paper Crimper if you have one (mine is from long ago when I first started stamping) or just crush and crumble it in your own hands and that will work too! In the other basket, I found a piece of green tissue paper and just wadded that up in the bottom of the basket.

The fabric-covered egg in each basket is handmade from @sewafineseam on Instagram that I purchased last year!

Here are some other Easter baskets made three years ago if you need more ideas!

It’s time to start making Easter cards, treats, decorations, and these little Easter baskets would serve as a treat or a decoration for your home or your Easter dinner table. Have fun making some! Bet you can’t make just one!

Sunshine & Rainbows Note Cards & Gift Box

Sunshine & Rainbows Note Cards Gift Box

Recently I needed a birthday gift for someone, and after finding a little notebook at the bookstore that nearly matched our Sale-A-Bration Sunshine & Rainbows 6″ x 6″ Designer Series Paper, I got an idea! I bought the notebook and then made four note cards to match! Next, I needed some kind of box or bag to put the note cards and envelopes in so the photo above is the top of the gift box I made.

To make these cards I just used the Note Cards & Envelopes which made it so easy! You should really keep a package or two of these on hand! I have used them many times. The designer paper on the note cards are two different patterns in the Sunshine & Rainbows Designer Paper that was available during Sale-A-Bration which just ended. Perhaps you already have some from Sale-A-Bration. I die cut the rainbow pieces with the Brilliant Rainbow Dies. You can use whatever colors of cardstock or designer paper that you like. I used Poppy Parade, Crushed Curry, Bermuda Bay, and Gorgeous Grape. I was trying to copy the colors in the rainbows on the notebook as best I could. I also die cut the little clouds with the dies. I adhered the rainbows to a scalloped rectangle die cut, one of the Scalloped Contours Dies. I also added some Iridescent Rhinestone Basic Jewels to each note card.

After I had the note cards made, I wanted a cute bag or box to put the note cards and envelopes in. There are lots of box ideas out there online and once you know the basic principles you can vary the size box and lid that you need to make. I found one from the Paper Pixie that was specifically made for note cards so I used those measurements and then, of course, decorated the box lid to match my cards.

Here is the diagram, basically the same idea for the box bottom and the lid. Each has different measurements but you score and cut the same way on each. I tried making a more professional sketch on the computer but it was a mess and this was easier to just draw it!!

The box bottom starts with a piece of cardstock that is 7 3/4″ x 9 1/4″. Score at 1″ and 2″ on all four sides.

The box lid measures 6 3/8″ x 7 7/8″ but just a “smidge” less on each measurement, just a sliver! Score at 5/8″ and 1 1/4″ on all sides.

Crease and fold all score lines on the box and the lid. Use a Bone Folder if you have one to get a good crease. Then open the folded cardstock back up and following the diagram above, cut from the bottom up to the scoreline on each red line with the arrow. Turn the paper and do the same to the other end. Then cut off the squares where the X’s are. After that, you can see how the sides and tabs will fold in and form the box and the lid.

It’s probably best to use Tear & Tape to adhere the box and lid, but Multipurpose Liquid Glue works, too. Or use Stampin’ Seal+ to hold everything together. Apply the Tear & Tape to the outside edge of all the sides. You can use a bit of Multipurpose Liquid Glue on each tab to hold those in place first.

Before you assemble the box lid, you might want to decorate it first, but you could assemble it first, too. For my lid, I used a layer of Crushed Curry Cardstock under a layer of the Rainbow & Sunshine DSP. Then I die cut the rainbow with Basic White and fit it over one of the big rainbow patterns in the package. Just cut out a full rainbow carefully, they are placed closely together! Just cut a rectangle shape of the rainbow, don’t cut out the actual rainbow. Place the die-cut white piece over the DSP rainbow and adhere carefully. I also layered this on a piece of the DSP that matched one of the cards. To embellish I die cut a couple of white clouds and added some Iridescent Rhinestones.

Making a box is easier than writing about it so just give it a try! It’s handy to know how to make a box out of cardstock in case you need one for a gift or storage.

Sweet Talk 2-4-6-8 Valentine Gift Bag

Sweet Talk 2-4-6-8 Gift Bag

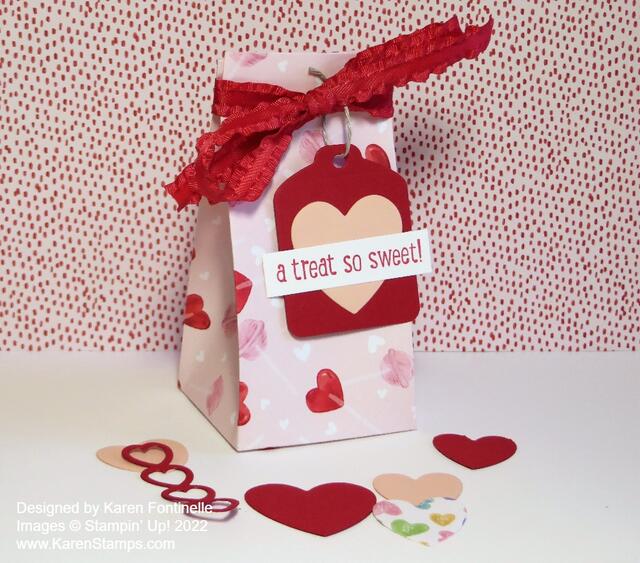
If you want a quick and easy little Valentine treat or gift bag, this Sweet Talk 2-4-6-8 Valentine Gift Bag is perfect and easy to make! It’s a great way to keep using that cute Sweet Talk Designer Series Paper for Valentine’s Day and even afterward for other occasions and projects.

Once you hear about and learn about stamping and papercrafting, you probably will pretty quickly learn how to make a 2-4-6-8 bag! It’s a basic thing that’s been around as long as I have been stamping! There are variations if you would like a different size so you can always change it up.

Cut a piece of designer paper or cardstock 8 1/2″ x 5 1/2″ for this sample. Score at 2″, 4″, 6″, and 8″. Then turn the paper lengthwise and score at 1 1/2″ to make the bottom flaps. If your paper has a pattern and direction to it, be sure you are scoring it so the images will not be upside down!

Sweet Talk Gift Bag Unassembled

Once the paper is scored, cut the bottom flaps apart with scissors. I like to angle my cut just a tiny bit, not cutting directly on the score line. Sometimes this helps the flaps fold together a little better without that extra paper. That last little 1 1/2″ x 1/2″ piece is cut off, as you can see in the photo above.

Here is a good diagram with all the lines marked.

Diagram 2-4-6-8 Box

Crease all the folds and see how the bag will go together. The adhesive will go on that 1/2″ area on the end. You can use Tear & Tape or Multipurpose Liquid Glue. The glue gives you a little maneuvering time if you need it! Just fold the opposite side over to the narrow flap where the adhesive goes and make sure you have everything straight. You can do this with the paper flat on the table. Then fold the flaps in at the bottom, using a little bit of adhesive where the paper flaps meet. I like to stick my Bone Folder (the rounded end, not the point) down inside the bag and press it around to make sure they are all adhered well.

After everything adheres well and your bag is assembled, pinch in the sides to bring the top together. Often I punch holes in the top through which to run my ribbon to hold it closed, but this time, I just wrapped some Real Red 3/8″ Mini Ruffled Ribbon tightly around the top. You can add a Mini Glue Dot to hold the ribbon in place if you need to. I tied a bow.

To decorate, I die cut a tag from the Sweet Hearts Dies and tied it onto the red ribbon with a bit of Linen Thread. I added a pink die cut heart to the tag and stamped a greeting on a narrow strip of Basic White cardstock. The greeting is from the Banner Year Stamp Set.

Once you know how to make a 2-4-6-8 bag (or box) you are ready to go! You can make them for any occasion, out of cardstock, stamped or unstamped, or designer paper. Decorate as you choose for the person or the occasion. Here is another Valentine 2-4-6-8 gift bag I made two years ago! You can search for other 2-4-6-8 bags on my blog. There are many!

You can even leave the top open and have it be like a box or make a little lid for it. So many choices. I hope this Sweet Talk 2-4-6-8 Valentine Gift Bag will give you ideas for what you can make yourself!

SHOP STAMPIN’ UP! ONLINE HERE!
New Magnet Board Kit in Kits Collection!
Here’s something really new and different from Stampin’ Up! The new Kit in the Kits Collection is the Celebrate Today Magnet Board Kit! What?!

With the Celebrate Today Magnet Board Kit, you can create and customize your very own magnet board with included stickers to organize daily tasks and sentiments of positive affirmations. Since when have daily chores looked so cute?

Watch this video by Sara Douglass and see how the kit works. Of course, you are free to customize your magnet board however you like!

DETAILS


  • Kit includes one framed magnet board
  • Includes sticker sheets, double-sided cards, and double-sided paper to decorate with
  • Includes six magnet clips and two pocket envelopes to attach things to your board
  • Finished magnet board size (inside of frame): 12″ x 12″ (30.5 x 30.5 cm) 
  • Coordinating colors: Basic Black, Blushing Bride, Flirty Flamingo, Melon Mambo, Mint Macaron, Smoky Slate
Magnet Board Kit

Today, Tuesday, February 9 is the first day to purchase this kit! I’m guessing it will be very popular so you might want to grab one early! Remember, Sale-A-Bration is going on the rest of this month so this kit will help you earn FREE Sale-A-Bration products!

SHOP FOR THE MAGNET BOARD KIT HERE!