Category Archives: Big Shot

Petal Passion Pink and Black Card

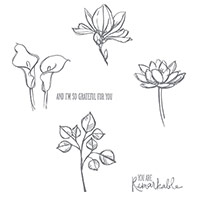
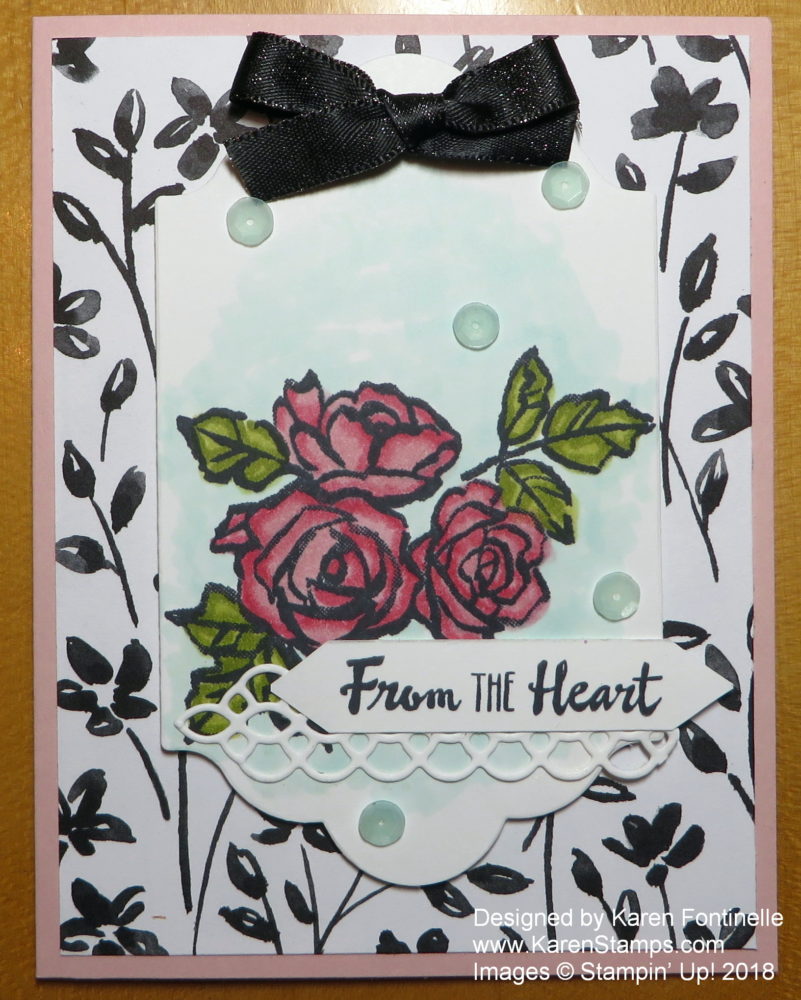
Petal Passion Pink and Black CardThe Petal Passion Suite of products in the Occasions Catalog is an interesting group of products.  The Petal Passion Designer Paper is pretty in its own right in black and white, but you can also do coloring with various mediums of the images or backgrounds.  There is also the matching stamp set, Petal Palette, with its artistic images that are ready for watercoloring if you like!

We are under a Winter Storm Warning here in Houston, Texas, which is highly unusual for our area (even if we did have some snow a month ago! Check out this blog post for my snow day photos at my house!), so these Petal Passions flowers really brighten things up!  The local news is on non-stop right now talking about road conditions and weather reports. People even went crazy at the grocery stores yesterday like they do in northern climates or here during hurricane season, buying all the bread and milk and standing in long lines!  It might be bad here today and maybe tomorrow but by Saturday we will be back up to 70 degrees!  All the schools and universities are closed, my husband even stayed home from work because once this moisture freezes later conditions will get worse. Right now it’s just raining at our house, but I went out to get the newspaper and the plastic wrap had ice on it and the mailbox is covered in ice.  I have to say, I love a good SNOW DAY when we are home and don’t have to go anywhere!  It’s a great day to stamp, although there will probably be plenty of distractions with the weather and a husband home!

My card base is the In Color Powder PinkThe layer is the Petal Passion Paper, which looks like I could have stamped it.  Then I die cut a piece of Whisper White with the largest framelit in the Lots of Labels Framelits Dies.  I stamped the group of flowers and leaves in the Petal Palette Stamp Set in Memento Ink so I could color in with my Stampin’ Blends markers. I could have used my regular Stampin’ Write Markers or my Watercolor Pencils or Aqua Painter and reinkers, etc. So many good choices for coloring!

After coloring in the flowers and leaves with various Stampin’ Blends markers, I colored in the background a little with the Light Pool Party color.  When you use these markers, just play!  You don’t have to stick with the pairs of colors, maybe use a pink and a light coral or a blue and a green and blend.  There are no rules!

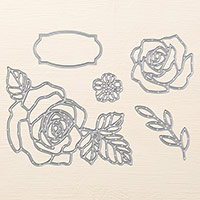
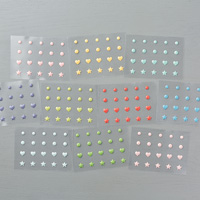
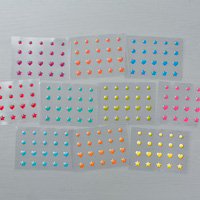
For embellishments, I used a die cut from the Petals & More Thinlits Dies. Such a pretty little piece, maybe like a trellis, to use in so many ways.  The greeting comes from the stamp set, and I just hand cut the pointy ends. For fun I tried out the Tutti-frutti Adhesive-Backed Sequins!  How fun are these in bright, cute colors! And to make it easy, they already have adhesive on the back, like our Rhinestones or Pearls, so you just have to stick them down! No fooling with a dot of glue and getting the sequin in the right spot! And for a final touch I tied a bow with the Basic Black 3/8″ Shimmery Ribbon.

If my card looks a little bit familiar, it’s because I did “copy” a sample in the Occasions Catalog on page 22. I changed several things, but got the inspiration from the beautiful sample in the catalog. These are designed by the Stampin’ Up! artists, so you can copy and feel like a real artist yourself! If you aren’t sure what to stamp, start with a sample in one of the catalogs and that will get your creative juices flowing.

There are even more coordinating products in this Petal Passion Suite!  Check it all out in my Stampin’ Up! Online Store in the Occasions Catalog!


Picture Perfect Party for New Year’s 2018

Picture Perfect Party for New Year's 2018

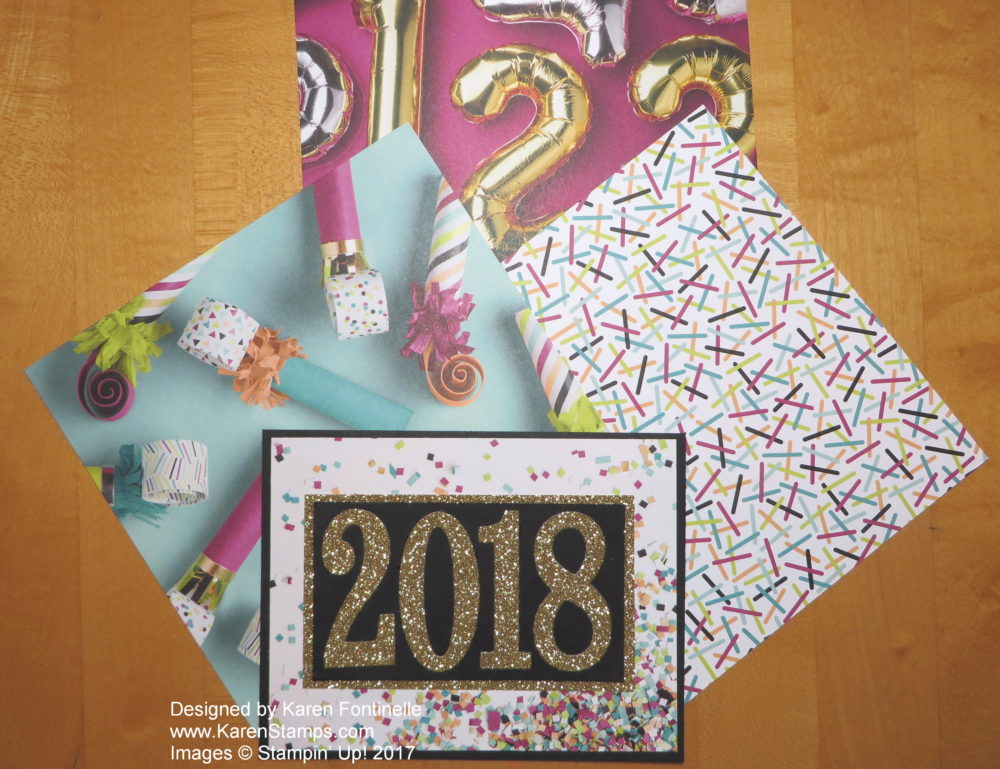
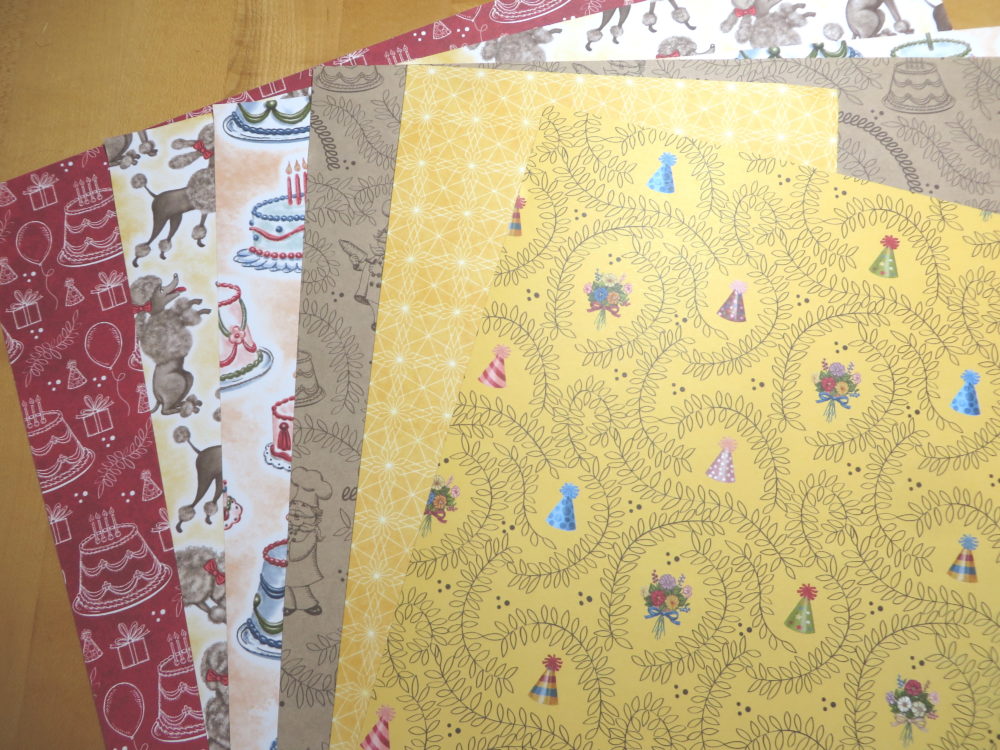
Happy New Year!! When I wanted to make a card for the New Year, I didn’t have to look any further than the Picture Perfect Party 6″ x 6″ Designer Series Paper, coming SOON in the Occasions Catalog!  In fact, I had so many paper choices that I had to add a few to my card photograph!

My card base is Basic Black because that is elegant for New Year’s Eve, when I was making the card!  The paper appears to have confetti all over it, so how perfect! But look at just a few of the other sheets I also could have used that would be “partyish” for this card! This is a really fun pack of paper!

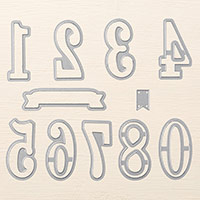
During the free shipping Stampin’ Up! offered awhile back, I purchased the Large Letters Framelits Dies but I already owned the Large Numbers Framelits Dieswhich certainly are perfect for New Year’s! Very easy way to cut out the numbers for the new year!  Also great for birthdays and anniversaries! I cut the numbers out of Gold Glimmer Paper and adhered them to a piece of Basic Black layered on a piece of Gold Glimmer Paper. It was that easy!

I hope you had a fun and safe New Year’s Eve and now are celebrating the beginning of a New Year!  The time sure seems to fly by!

The Occasions Catalog goes live Wednesday, January 3, and you’ll be able to get your hands on this fun Picture Perfect Party Paper as well as the coordinating Picture Perfect Birthday Stamp Set and all the embellishments! It’s all very cute!  Great for birthdays, anniversaries, all kinds of party themes!

If you need a Stampin’ Up! Demonstrator and would like the new Occasions Catalog plus Sale-A-Bration Brochure, just email me at Karen@Karenstamps.com and let me know.  I’d be happy to mail you the catalogs plus the Annual Stampin’ Up! Catalog if you don’t have one already! It’s going to be so fun to switch over to non-holiday colors and products after the Christmas holidays! In the meantime, be sure to check if you want anything that is retiring from the Holiday Catalog before the last day, January 2, 2018.

HAPPY STAMPING NEW YEAR!!

Coffee Cafe Cards For a Gift

Coffee Cafe Cards

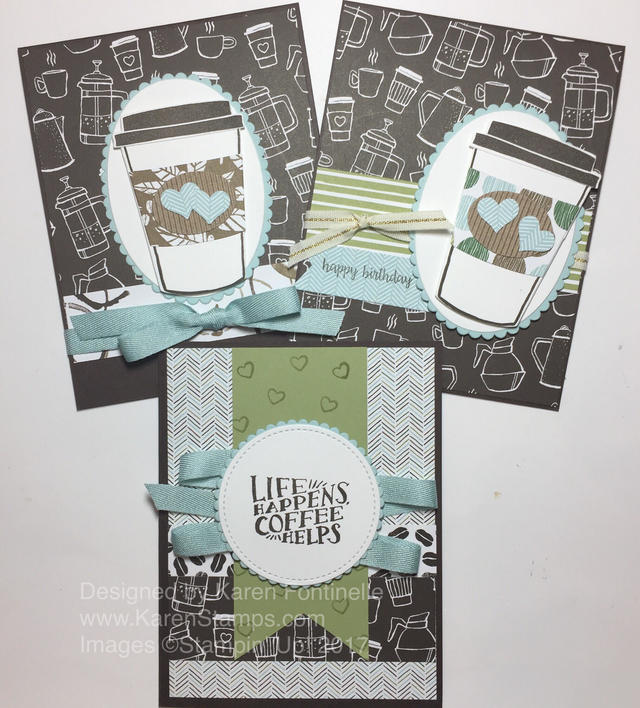
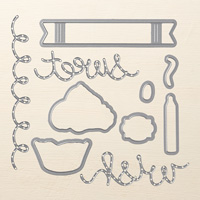
Here are some fun Coffee Cafe Bundle cards I made someone for a Christmas gift! You can purchase the stamp set Coffee Cafe and the Coffee Cups Framelits Dies separately or in a Bundle and save 10%! Since I’m not really a coffee person, even though I could see these were popular products, I didn’t purchase them until right before Christmas when I realized making these cards for someone would be a perfect gift. They were so fun to make, too!

You will also want the Coffee Break Designer Series Paper to match and for fun, the Corrugated Elementslittle corrugated kraft paper designs.

Notice the kind of fun new way to do ribbon on the last card – just kind of squiggle it back and forth underneath a greeting or design element instead of just tying it around the card!

LAST CHANCE TODAY!!

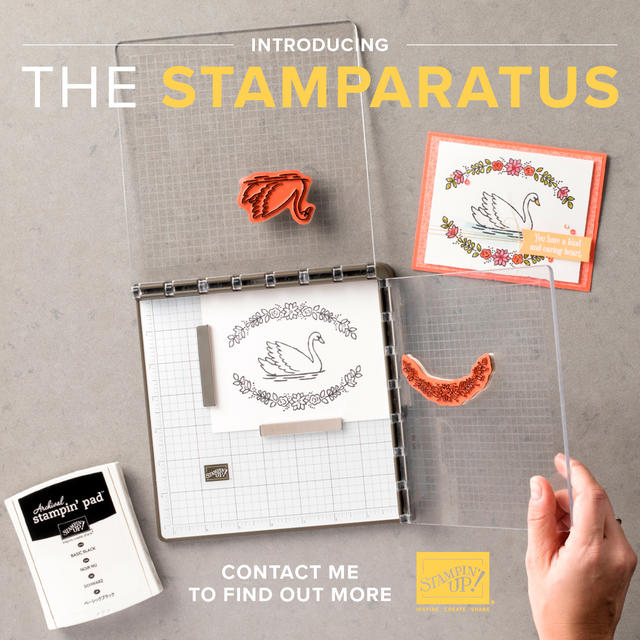
While I was doing my Christmas cards, I sure wished I would have had the new Stamparatus coming out in the next Stampin’ Up! Annual Catalog!  I could have placed my stamp, inserted each card and stamped exactly in the same proper place where I wanted my greeting!
If you want to get your hands on this Stamparatus Stamp Positioning Tool, the window closes TODAY, Dec. 30th!  Go to my Online Store HEREsign in to your account, then scroll down just a little until you see the Stamparatus on the right.  You will see the button to click to reserve yours. Click and then fill out your information and make sure you see at the bottom that you DID reserve a Stamparatus.  You will also receive an email within a few minutes confirming your reservation. When Stampin’ Up! gets yours in stock, they will place it in your Shopping Cart and email you that it is available (probably mid-March or later). At that time, if you complete your order like usual, adding any other products you may want (maybe it will be early enough to take advantage of Sale-A-Bration!) and at that point your credit card will be charged for the Stamparatus and anything else you ordered.  Your credit card will not be charged just for the reservation. It’s like you are reserving the opportunity to pre-order one before the Annual Catalog comes out!

AND…….

Stampin’ Up! Year-End Sales Event thru January 2, 2018

Stampin’ Up! Clearance Rack 

Star of Light Christmas Card

Star of Light Christmas Card

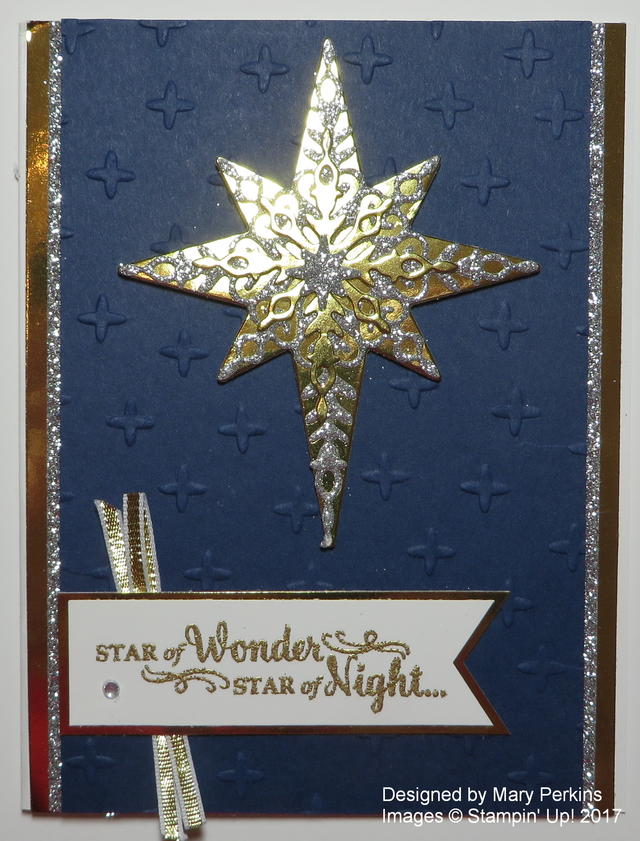
One of my downline sent me this Star of Light Christmas Card, and I want to tell you it is an absolutely beautiful card!  Just stunning in real life!  The photograph doesn’t really do it justice because of the glare from the gold foil. The Star of Light Stamp Set is a perfect one for the Christmas season, not only with beautiful artwork but lots of sentiments to use.

The card starts on just a Whisper White base, layered with a piece of Gold Foil. The top layer is Night of Navy embossed with the Sparkle Embossing Folder.  Underneath this Night of Navy layer are strips of Silver Glimmer Paper on each side, very narrow margins. It just looks beautiful along with the Gold Foil and Night of Navy cardstock!  The Star of Wonder is made with the Starlight Thinlits Dies using the Gold Foil and the Silver Glimmer Paper in all the layers.

The greeting is embossed in gold and layered on Gold Foil with a bit of the Gold 1/8″ Ribbon folded behind. There is also a small Rhinestone Jewel on the front.

For texture, shine, and eye-catching beauty, this card really can’t be beat! All the elements are there from the embossing folder, the Gold Foil and Silver Glimmer Paper and the beautiful die-cutting and layering of the star with the Starlight Thinlits Dies. Really pretty!

You will find this Star of Light Photopolymer Stamp Set and Starlight Thinlits Dies in the  Stampin’ Up! Annual Catalog on page 122, so it can be ordered any time.  Perhaps you will want to get a head start on NEXT Christmas by making this card in January! This Star of Light Christmas card is one that will turn out beautifully!

Christmas Card With Foil Frenzy Christmas Trees

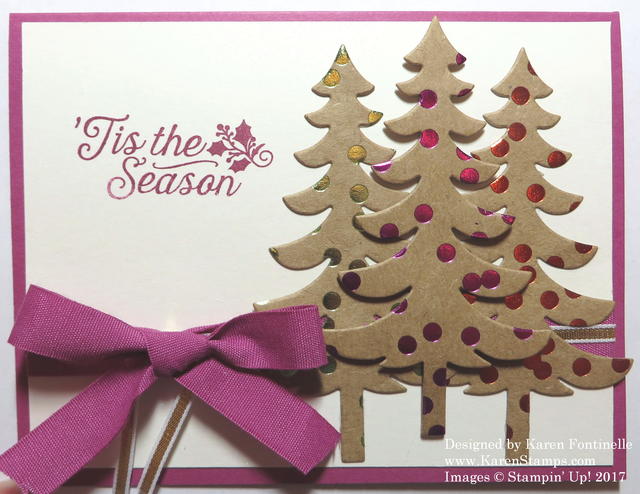
Christmas Card with Foil Frenzy Christmas TreesIn keeping with my Christmas trees theme of yesterday, I got the idea to die cut Christmas trees with the Foil Frenzy Specialty Designer Series Paper to make a Christmas card. Using this colorful paper with foil colors and patterns makes for a more whimsical card! The foil patterns are printed on heavyweight kraft paper so besides cards, this paper is good for making boxes and other 3D projects for any occasion, not just Christmas! Check out the Foil Frenzy Paper!

One of the coordinating colors of the foil is Berry Burst, one of the In Colors, so I used that color for my card base.  The card layer is, again, Shimmery White. After I die cut the three Christmas trees with the tree in the Santa’s Sleigh Thinlits Dies, I decided to slide them all over to the right and add a bow to the side. The card is wrapped with the Berry Burst Ribbon, and I also added a piece of the 1/8″ Gold Ribbon for an added accent. The bow is a “cheater bow” – I adhered the strip of ribbon around the card layer but then tied the bow separately and adhered it to the ribbon with several Glue Dots. Makes it a little easier to just attach the bow rather than to tie it actually on the card!

The greeting is one from Oh What Fun and I simply stamped the whole thing with Berry Burst ink.  Another thing you can do with markers is to color right on the stamp, coloring different areas different colors.  After the coloring and before stamping, be sure to “huff” or breathe on the stamp to remoisten the ink, then stamp!  This will give a slightly lighter inked image than if you inked up with an ink pad directly, but it is a good technique to use sometimes.

Even when you start with an idea of what you are going to stamp, often another idea comes to mind while you are creating.  Just go with it and see what happens! If it doesn’t work, just keep working on it and you probably will find just the right combination of what looks good for your project!

Be sure to check out my card from yesterday in THIS POST to see the more typical way to use the Santa’s Sleigh tree die – or is there really a typical way to use any of our products?!  It’s all about the creativity!

SHOP STAMPIN’ UP! ONLINE HERE!

Santa’s Sleigh Christmas Tree Christmas Card

Santa's Sleigh Christmas Tree Christmas Card

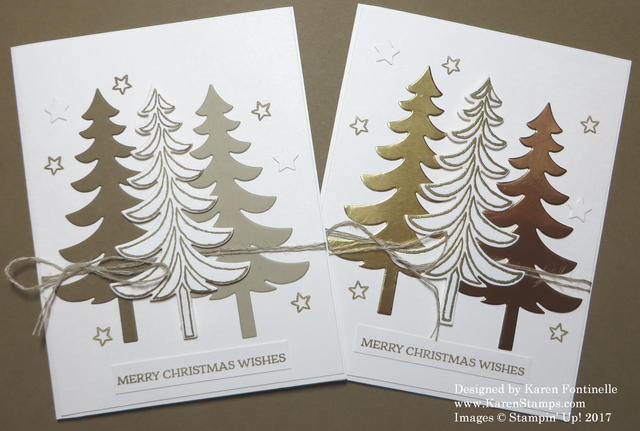
Can you tell the difference in these two Santa’s Sleigh Christmas Tree Christmas Cards?  I found this sample in a magazine we Stampin’ Up! Demonstrators receive from Stampin’ Up! quarterly, in an issue from last year, when the Santa’s Sleigh Stamp Set was new.  The sample was made pretty much like my card on the left. When I looked at it closely and looked at the list of supplies to make it, I was surprised that it wasn’t actually made like my card on the right!

The original sample, the card on the left, is actually made with some brown colors rather that metallics like my card on the right. In the sample, one tree is die cut with the Santa’s Sleigh Dies Thinlits out of Soft Suede Cardstock and the other tree out of Crumb Cake Cardstock. The center tree is stamped with Soft Suede Ink and die cut.  The card base and layer are made from the beautiful Shimmery White Cardstock. The center tree is made with this cardstock as well.  There are also some Soft Suede stamped stars and some die cut stars.

Since I originally thought the sample was made with metallics, I made another card with the Shimmery White cardstock.  The center tree is stamped with Versamark Ink and embossed with Gold Emboss Powder using the Heat Tool. The other two trees are die cut from the Gold Foil Sheets and the Copper Foil Sheet.

The center tree on both cards are popped up with both Stampin’ Dimensionals and the new Mini Stampin’ Dimensionals. In some cases, even the Mini Dimensionals are too large. If this is the case you can cut along the edges of the dimensional sheet as necessary.

To finish off the card, Linen Thread is wrapped around the card layer. On the metallic card, I tried some other ribbons, but mostly they were too large since the trees take up a lot of space. The greeting is stamped, in both cases, with Soft Suede Ink, although it could also be embossed in gold. In the original sample, the linen thread goes entirely over all the trees (not tucked under the center tree) and the greeting as well was adhered up by the trees and tucked under the linen thread. I chose to just put the greeting at the bottom of the card.

Both of these styles of Christmas cards are very pretty!  I would say using the embossing and foil steps it up a bit. I’m even going to try some other designer paper.  I think you could do many variations with this card!  Just get started and then see where your creativity takes you!  You can copy these samples of the Santa’s Sleigh Christmas Tree Christmas Card and see what you come up with!

SHOP STAMPIN’ UP! ONLINE!


Stampin’ Up! Online Extravaganza Is Here! 24-Hour Stamp Sale Today!


Online Extravaganza 2017 Ad2

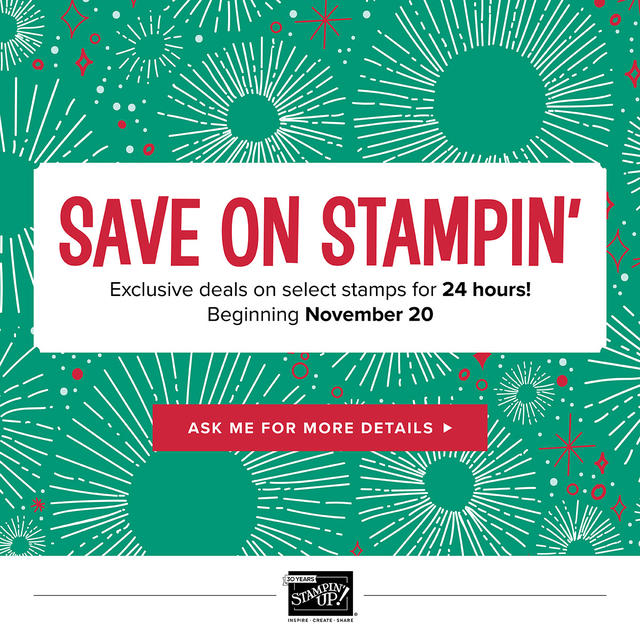
Today is the day!  The Stampin’ Up! Online Extravaganza begins! Check out all these sales! And today, for 24 hours only, these select stamp sets are 20% off! Stamp Sale starts November 20 12:00 AM and ends November 20 11:59 PM.

These are the regular catalog prices show here.  Take off 20% for the sale price! Or click any stamp set to see the sale price in the Online Store.

The next part of the sale are the Exclusive Deals for November 20-26. These are not the sale prices.  Click on any item to go to the Online Store to see the sale price. These products 10% – 40% off!!

Items offered may vary by market, based on inventory and availability.  Paper Pumpkin items only available while supplies last.

And the third part of the sale is a FLASH SALE on Monday, November 27!  We’ll have to wait and see what that turns out to be!

Click HERE for the PDF of the Extravaganza!

Time to go shop!  You can add any other regular-priced items to your order as well!  Remember, the stamp sale on these select stamps is today ONLY!

Shop the Online Extravaganza at Stampin’ Up! HERE!

Quick and Easy Birthday Card With Birthday Memories Paper

Quick and Easy Birthday Card with Birthday Memories

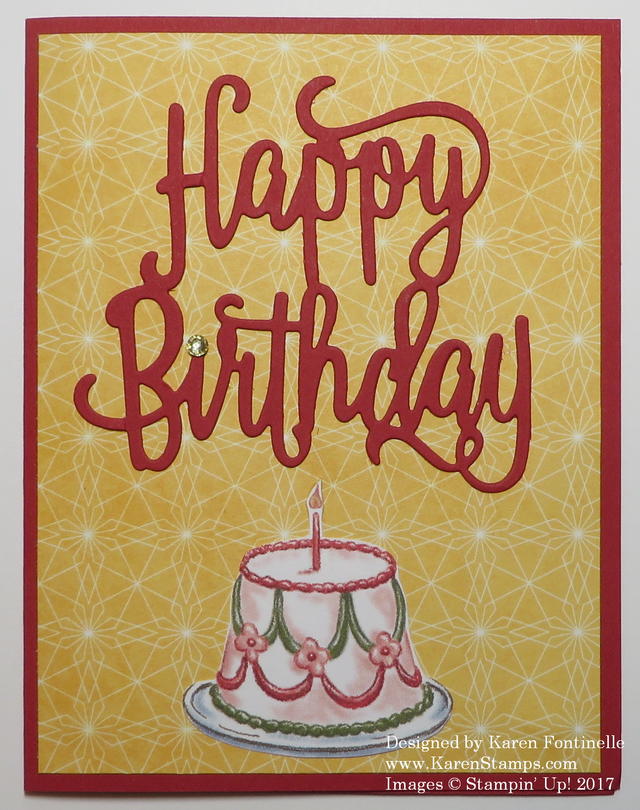
If you want to make a quick and easy birthday card, use the Birthday Memories Designer Series Paper and the Happy Birthday Thinlits Die!  I LOVE this die!  It is just perfect to put on so many birthday cards.

The card base is Real Red to match the Happy Birthday diecut. Actually I had already cut out this red diecut for another card, but it didn’t look right on that card so I just saved it. To make this card, I looked through the Birthday Memories Designer Paper and picked out this plainer background for this card. Real Red is one of the coordinating colors of this designer paper so it was perfect to use this diecut in red.

For something else on the card front, quick and easy, I decided to cut out one of the birthday cakes from one of the patterns in the Birthday Memories package.  I just cut it out by hand, only took a few seconds, and adhered it to the card front with the Multipurpose Liquid Glue.

You have a few options for gluing down the Happy Birthday diecut.  This time I just put tiny dots of the Multipurpose Liquid Glue all around on the back.  Very tiny. I could have also sponged on some of the glue. Or I could have used the Multipurpose Adhesive Sheets if I would have stuck one onto the back of the cardstock before I diecut it!

If you would like to see the Happy Birthday diecut on another card, there is THIS POST with one of my favorite cards ever because of the beautiful background paper!

That is all there is to this card!  Simply make the card base, adhere a plainer piece of designer paper, adhere the Happy Birthday Diecut, and cut out a birthday cake, or maybe some other image from the Birthday Memories Paper.  There you have a quick and easy birthday card with the Birthday Memories Paper!

Shop Stampin’ Up! for all you papercrafting and stamping needs!

Be Merry Christmas Card with Decorative Ribbon Border Punch

Be Merry Christmas Card with Decorative Ribbon Border Punch

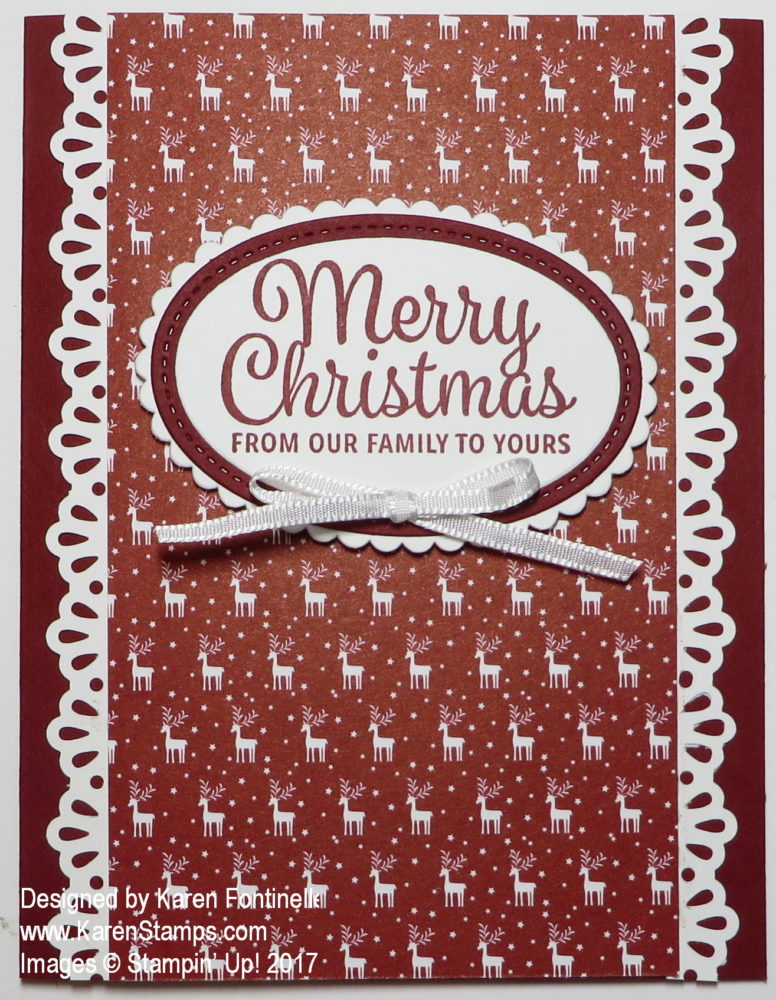
I love this cute little bitty reindeer pattern in the Be Merry Designer Series Paper package. This is a simple card to make, but the Decorative  Ribbon Border Punch makes it look pretty fancy.

Since one of the coordinating colors for the Be Merry Paper is Cherry Cobbler, I used that for the card base. I cut the designer paper 3 1/4″ wide x 5 1/2″ long so I would have space on each side. The Decorative Ribbon Border Punch makes it easy to add a fancy edge along the designer series paper panel.

The greeting is stamped with the Snowflake Sentiments Stamp Set.  I love the font in this stamp set! And it comes with a couple of nice sentiments to stamp INSIDE the card, plus a “To: and From:” plus snowflakes! The Bundle includes the stamp set plus Swirly Snowflakes Thinlits Dies.  These dies are beautiful but you can use the stamp set on its own.

I used the Big Shot and the Layering Ovals Framelits Dies to die cut the greeting plus make the scalloped oval in Whisper White for the bottom layer. The Cherry Cobbler layer is die cut with the Stitched Shapes Framelits Dies.  Love those! And for one final step, I added a small bow with a Mini Glue Dot using the Whisper White 1/8″ Sheer RibbonThis is a very narrow little white ribbon, perfect for a card like this when you just want a little something!

Don’t forget!!

World Cardmaking Day 2017

Tuesday, October 10 – Last day for World Cardmaking Day Sale! This sale has several stamp sets 15% off plus the packages of Note Cards & Envelopes 15% off. This sale originally included Fast Fuse, but the applicator and refills just FLEW off the shelves at Stampin’ Up! so they have to wait to until they restock to offer a “rain check” of 5 sale days sometime in the future!

Paper Pumpkin Season of Style Banner

Tuesday, October 10 – Last day to sign up for Paper Pumpkin in order to receive the October Kit which is a holiday kit that coordinates with the November Paper Pumpkin Kit!! Holiday kits are often very popular so you don’t want to miss this one!  Great opportunity to get the supplies and designed project with which to make cards or whatever the kit project will be without having to buy select supplies yourself. Just sit down, open the box, and start crafting!

AND

Don’t miss Week 2 of my 12 Weeks of Christmas holiday emails!

Get an idea and instructions for a new holiday project each week up until Christmas! I’m starting with cards, and then we’ll move on to some other things in a few weeks!  These holiday emails are FREE but only to my Stamping With Karen subscribers! Please join us and sign up with your name and email in the form right below! You’ll get a free gift besides plus my regular emails with Stampin’ Up! news and my exclusive project ideas.

Sign up by Wednesday, October 11 at 1:00 PM to get the next issue!


Subscribe to My Mailing List! 

Exclusive Projects

Stampin’ Up! News & Updates

FREE Welcome Gift!

We respect your email privacy


Fall Leaves Card For the First Day of Autumn

Fall Leaves Card For the First Day of Autumn

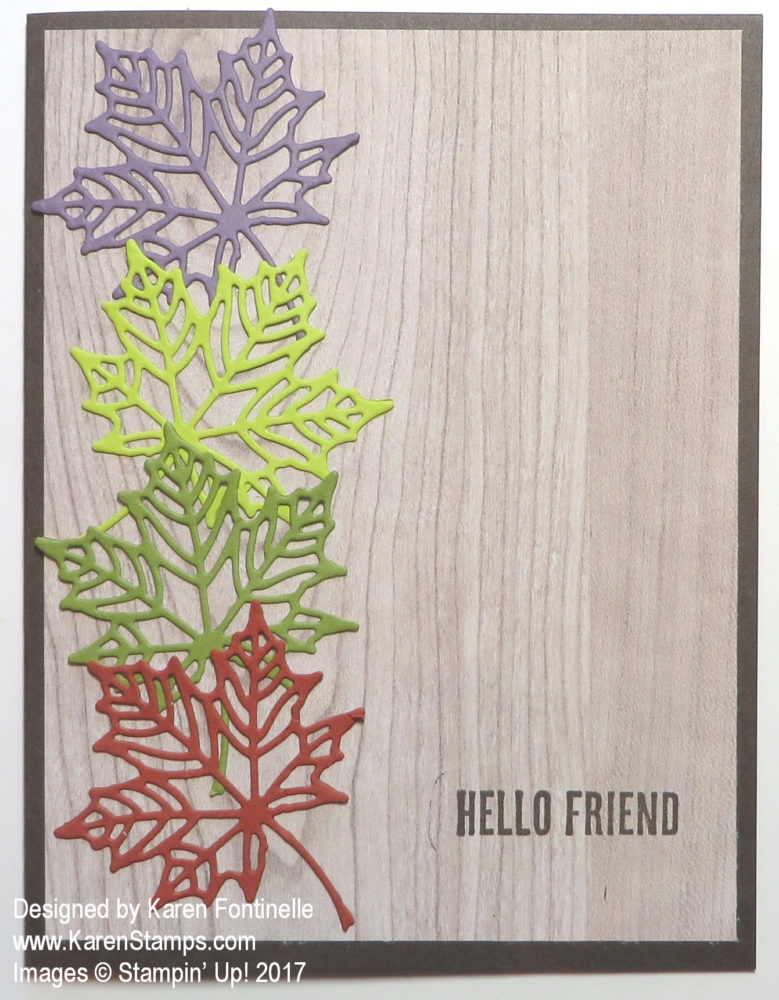
If you like fall colors, here is an easy fall leaves card for the first day of autumn.  If you have a Big Shot and the Seasonal Layers Thinlits Dies, you can easily make the beautifully die cut leaves for a card.  I love the delicate look of the leaves! The rest of the card is super simple, of course, except for maybe delicately gluing the leaves! But tiny dots of Multipurpose Liquid Glue and a Silicone Craft Sheet make that easier.

Yes, today is the first day of fall, not that there is ANY hint of it here in Houston, Texas where the heat and humidity is miserable!  So I have to make my own fall by using fall colors and thinking ahead to Halloween! And making the air conditioner cool the house down more! The weatherman promises(?) fall weather in a week from now.  We’ll see.  Even if we have it, no telling if it will last, and it most likely will not!  We had some lovely cooler weather after Hurricane Harvey, a blessing for those who had damaged homes and no power or air-conditioning. But now it is hot again….and worse, very humid.

This card is made with Early Espresso Cardstock for the card base and layered with a piece of paper from the Wood Textures Designer Series Paper Stack.  I wanted the colored leaves against the wood-look background.  The greeting is stamped with a stamp in the Wood Words Stamp Set. On the inside, I will probably put a piece of Very Vanilla Cardstock and adhere a small leaf or a strip of the Wood Textures paper along the side or at the bottom. When you have a dark card base like this one, you need to put a light layer of cardstock inside so you can write or stamp your message.

If you want to be precise, the 2017 Autumn Equinox today will be at 3:02 PM Central Time. Celebrate this afternoon by making your own fall cards or projects!  If you have the September Paper Pumpkin kit, this afternoon would be a good time to sit down and make the projects inside to celebrate autumn arriving.

Watch this video for extra inspiration, even if you don’t have the kit!  And if you don’t own the kit, subscribe to Paper Pumpkin today, and if any extra kits are available, you will be able to purchase one on your regular Stampin’ Up! order after you are officially a Paper Pumpkin subscriber. Besides, you won’t want to miss the coordinating holiday crafting kits coming in October and November!  Join Paper Pumpkin today!

Enjoy the first day of fall and look forward to the upcoming holidays!  Do some fall stamping today, on the first day of fall, whether just for a “Thinking of You” card or a card you will send over Thanksgiving.

Quick and Easy Christmas Card in Green and Black

Quick and Easy Christmas Card in Green and Black

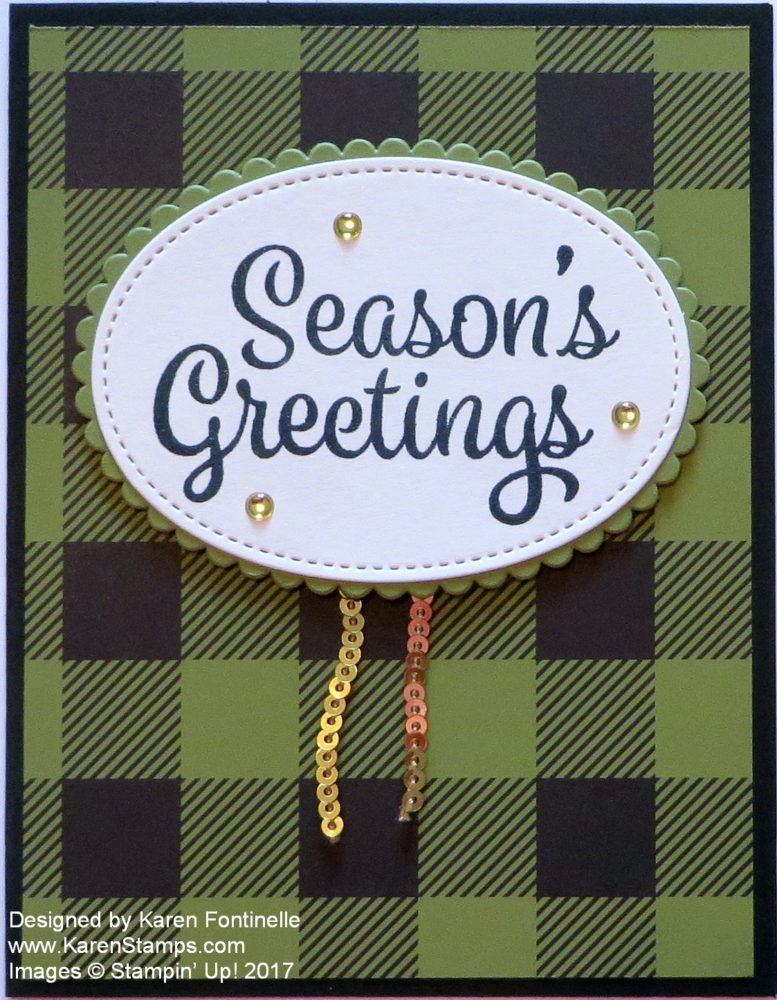
Here’s a quick and easy Christmas card made in the trendy colors of green and black.  What do you think? Often there are different colors and combinations of colors that pop up to use for Christmas just to get away from the traditional red and green. Sometimes there are really different colors like pink and light blue or purples, etc. So I think ultimately almost any colors CAN be used and can be very pretty and holiday-like, but maybe are just not what we are used to!

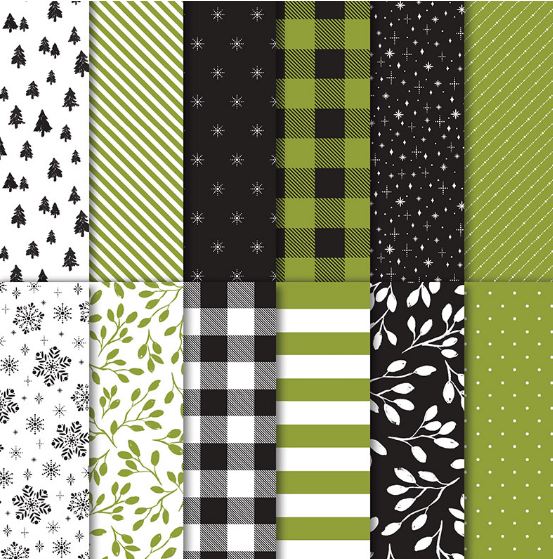
The Stampin’ Up! suite in the new Holiday Catalog is called Merry Little Christmas that has these colors in the designer papers. If you look closely at many of the patterns in the Merry Little Christmas Designer Series Paper you will see that they can be used outside of Christmas.  For example, the Basic Black and Old Olive plaid on the card above could be used for birthdays, invitations, masculine cards, and more.

The greeting is from the Snowflake Sentiments Stamp Set.  This stamp set is not in the Merry Little Christmas Suite but certainly can be used on any cards.  It is die cut with the Stitched Shapes Framelits Dies and layered on the Layering Ovals Framelits Dies.

For a little pizzazz, I added some Gold Mini Sequin Trim underneath the greeting as well as some Metallic Enamel Shapes in Gold adhered to the greeting.

If you need to make a lot of Christmas cards, you might consider just a basic card like this – a card base, a layer of designer paper and a nice die cut greeting!  Very quick and easy to make!

Take a look at the Merry Little Christmas Designer Series Paper!  Some of the patterns are more clearly for the holidays, but take a look at the stripes and the plaid, the polka dots and the leaves!  Those leaves can be used on spring cards with flowers!

Merry Little Christmas Designer Series Paper

Check out the entire Merry Little Christmas Suite!  There are so many fun products and embellishments to use on your projects!


Make a Fall Card With Painted Autumn Paper

Painted Autumn Split Card

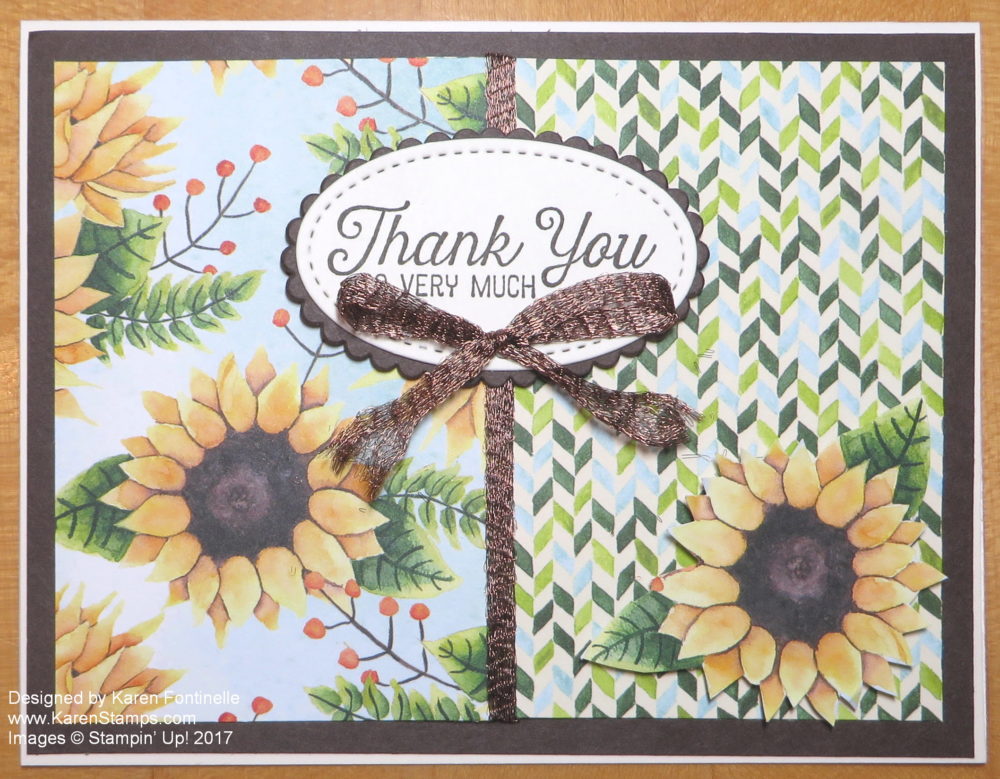
You can make a beautiful fall card so easily with the Painted Autumn Designer Series Paper in the Stampin’ Up! Holiday Catalog! I had been doing a lot of stamping with the flower stamps in the Painted Harvest Stamp Setbut there is this sheet of paper printed with sunflowers in the Painted Autumn paper package that I decided to use instead of stamping.
The card base is Very Vanilla with an Early Espresso layer over it. I had a slightly different idea for using the designer paper, but once I cut this sunflower paper, I saw that the other side of it had the blue and green patterned paper and thought maybe I could use it somehow. So instead of using a Very Vanilla pattern on the other side of the flowered paper, I used the other side of the patterned paper that coordinates. Before gluing down to the Early Espresso layer, I wrapped a piece of Copper Trim around the center of the designer papers.  It’s easier to either glue both pieces of designer paper down on to Very Vanilla cardstock or to make one piece larger so they can be glued together before layering.

I also cut out a sunflower from the patterned paper including the leaves and adhered that to the corner of the card, popped up with Stampin’ Dimensionals.  This gives a little interest to that plainer paper without overpowering the card. Paper Snips are great scissors to use for detailed cutting like this.

For the greeting I used a stamp in the Flourishing Phrases Stamp Set.  It is stamped in Early Espresso and die cut with the Stitched Shapes Framelit Dies.  This piece is then layered on a piece of Early Espresso die cut with the Layering Ovals Framelits Dies.  For an extra touch, I tied a bow with the Copper Trim and adhered it to the greeting with a Glue Dot.

The amazing thing about the 1/4″ Copper Trim is that you can pull it apart a little bit to give it a different look.  And if you don’t like it, just pull on it and it goes back to the original shape! Really fun!

You can see a card I made with another pattern of the Painted Autumn Paper here.

I’m sure once you take a look at the Painted Autumn Suite of products, pictured in the Holiday Catalog on pages 48-49, you will want to purchase many, if not all, of the beautiful products. You can make cards to send to friends and family for any occasion or for Thanksgiving or lovely gift bags for fall birthdays or hostess gifts.

Be sure to notice the Painted Harvest Photopolymer Bundle which includes the stamp set and Leaf Punch at a 10% savings.

Once you have some or all of these products in your hands, you will want to make lots of fall cards!

SHOP STAMPIN’ UP! ONLINE HERE!

Make a Nostalgic Birthday Card With Birthday Memories

Nostalgic Birthday Card with Birthday Memories

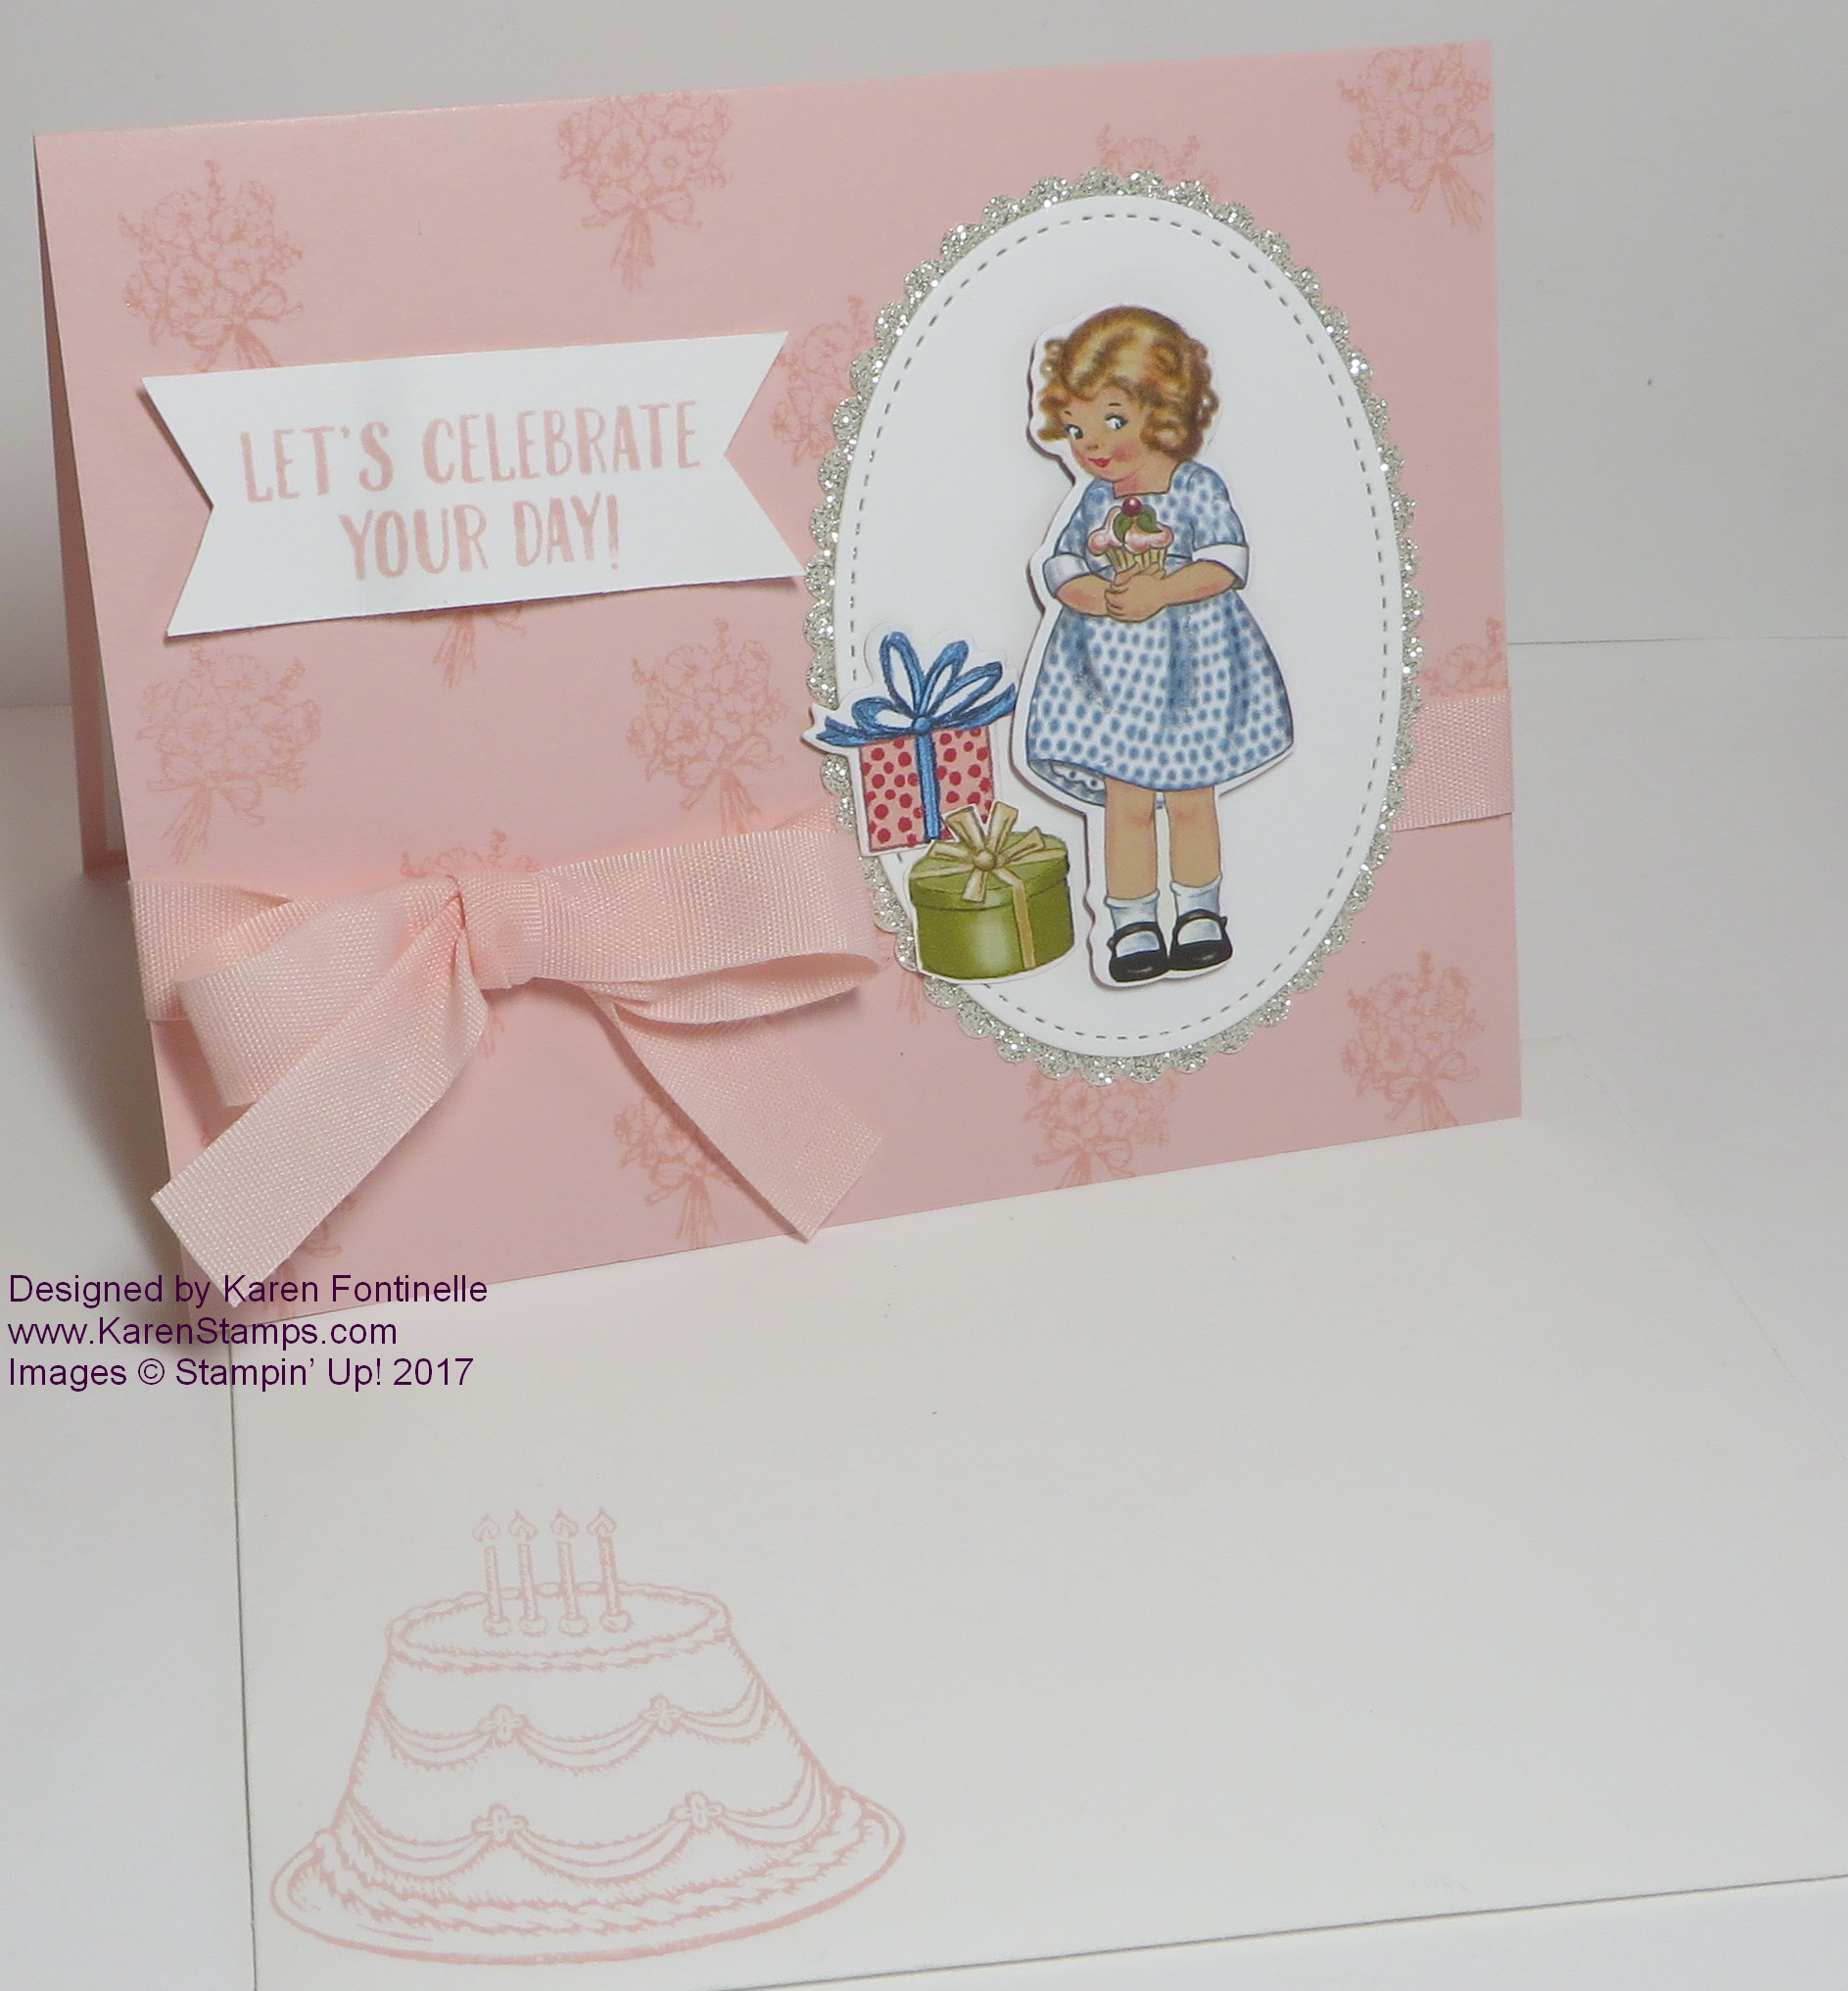
I love this Birthday Memories Designer Series Paper and the whole Birthday Memories Suite of products in the Annual Stampin’ Up! Catalog, so I thought I would make this card for a friend’s birthday. It was a “big” birthday for her and I debated what kind of special card to make for her. I just thought she would like this “vintage” look kind of card.

The card base is the new Powder Pink Cardstock, randomly stamped with the little bouquet in the Birthday Delivery Photopolymer Stamp Set with the same color ink.  This gives a little bit of interest in the background without taking away from the focal point. I used a piece of Powder Pink 1/2″ Finely Woven Ribbon wrapped around the card.

The cute little girl is die cut from the Birthday Memories Paper with one of the Birthday Friends Framelits Dies that fits the girl!  Also, the red polka dot package is die cut! The other little package I just cut out by hand with my Paper Snips. Something new that we can use the framelits to die cut images on the designer paper!  And very handy!

The little girl is adhered to a Whisper White oval die cut with the Stitched Shapes Framelits Dies.  This is layered on a piece of Silver Glimmer Paper die cut with the Layering Ovals Framelits Dies.  

The greeting is stamped from the Birthday Delivery Stamp Set. If you want to save 10%, you can purchase the Birthday Delivery Photopolymer Bundle which includes the stamp set and framelit dies.

I also stamped the envelope with a birthday cake in Powder Pink.  Stampin’ Up! has the best envelopes!  Try the Whisper White Medium Envelopes! Once you do, you’ll never go back to ordinary envelopes for your precious cards!  I can identify them by feel if I get a Stampin’ Up! envelope in the mail!!

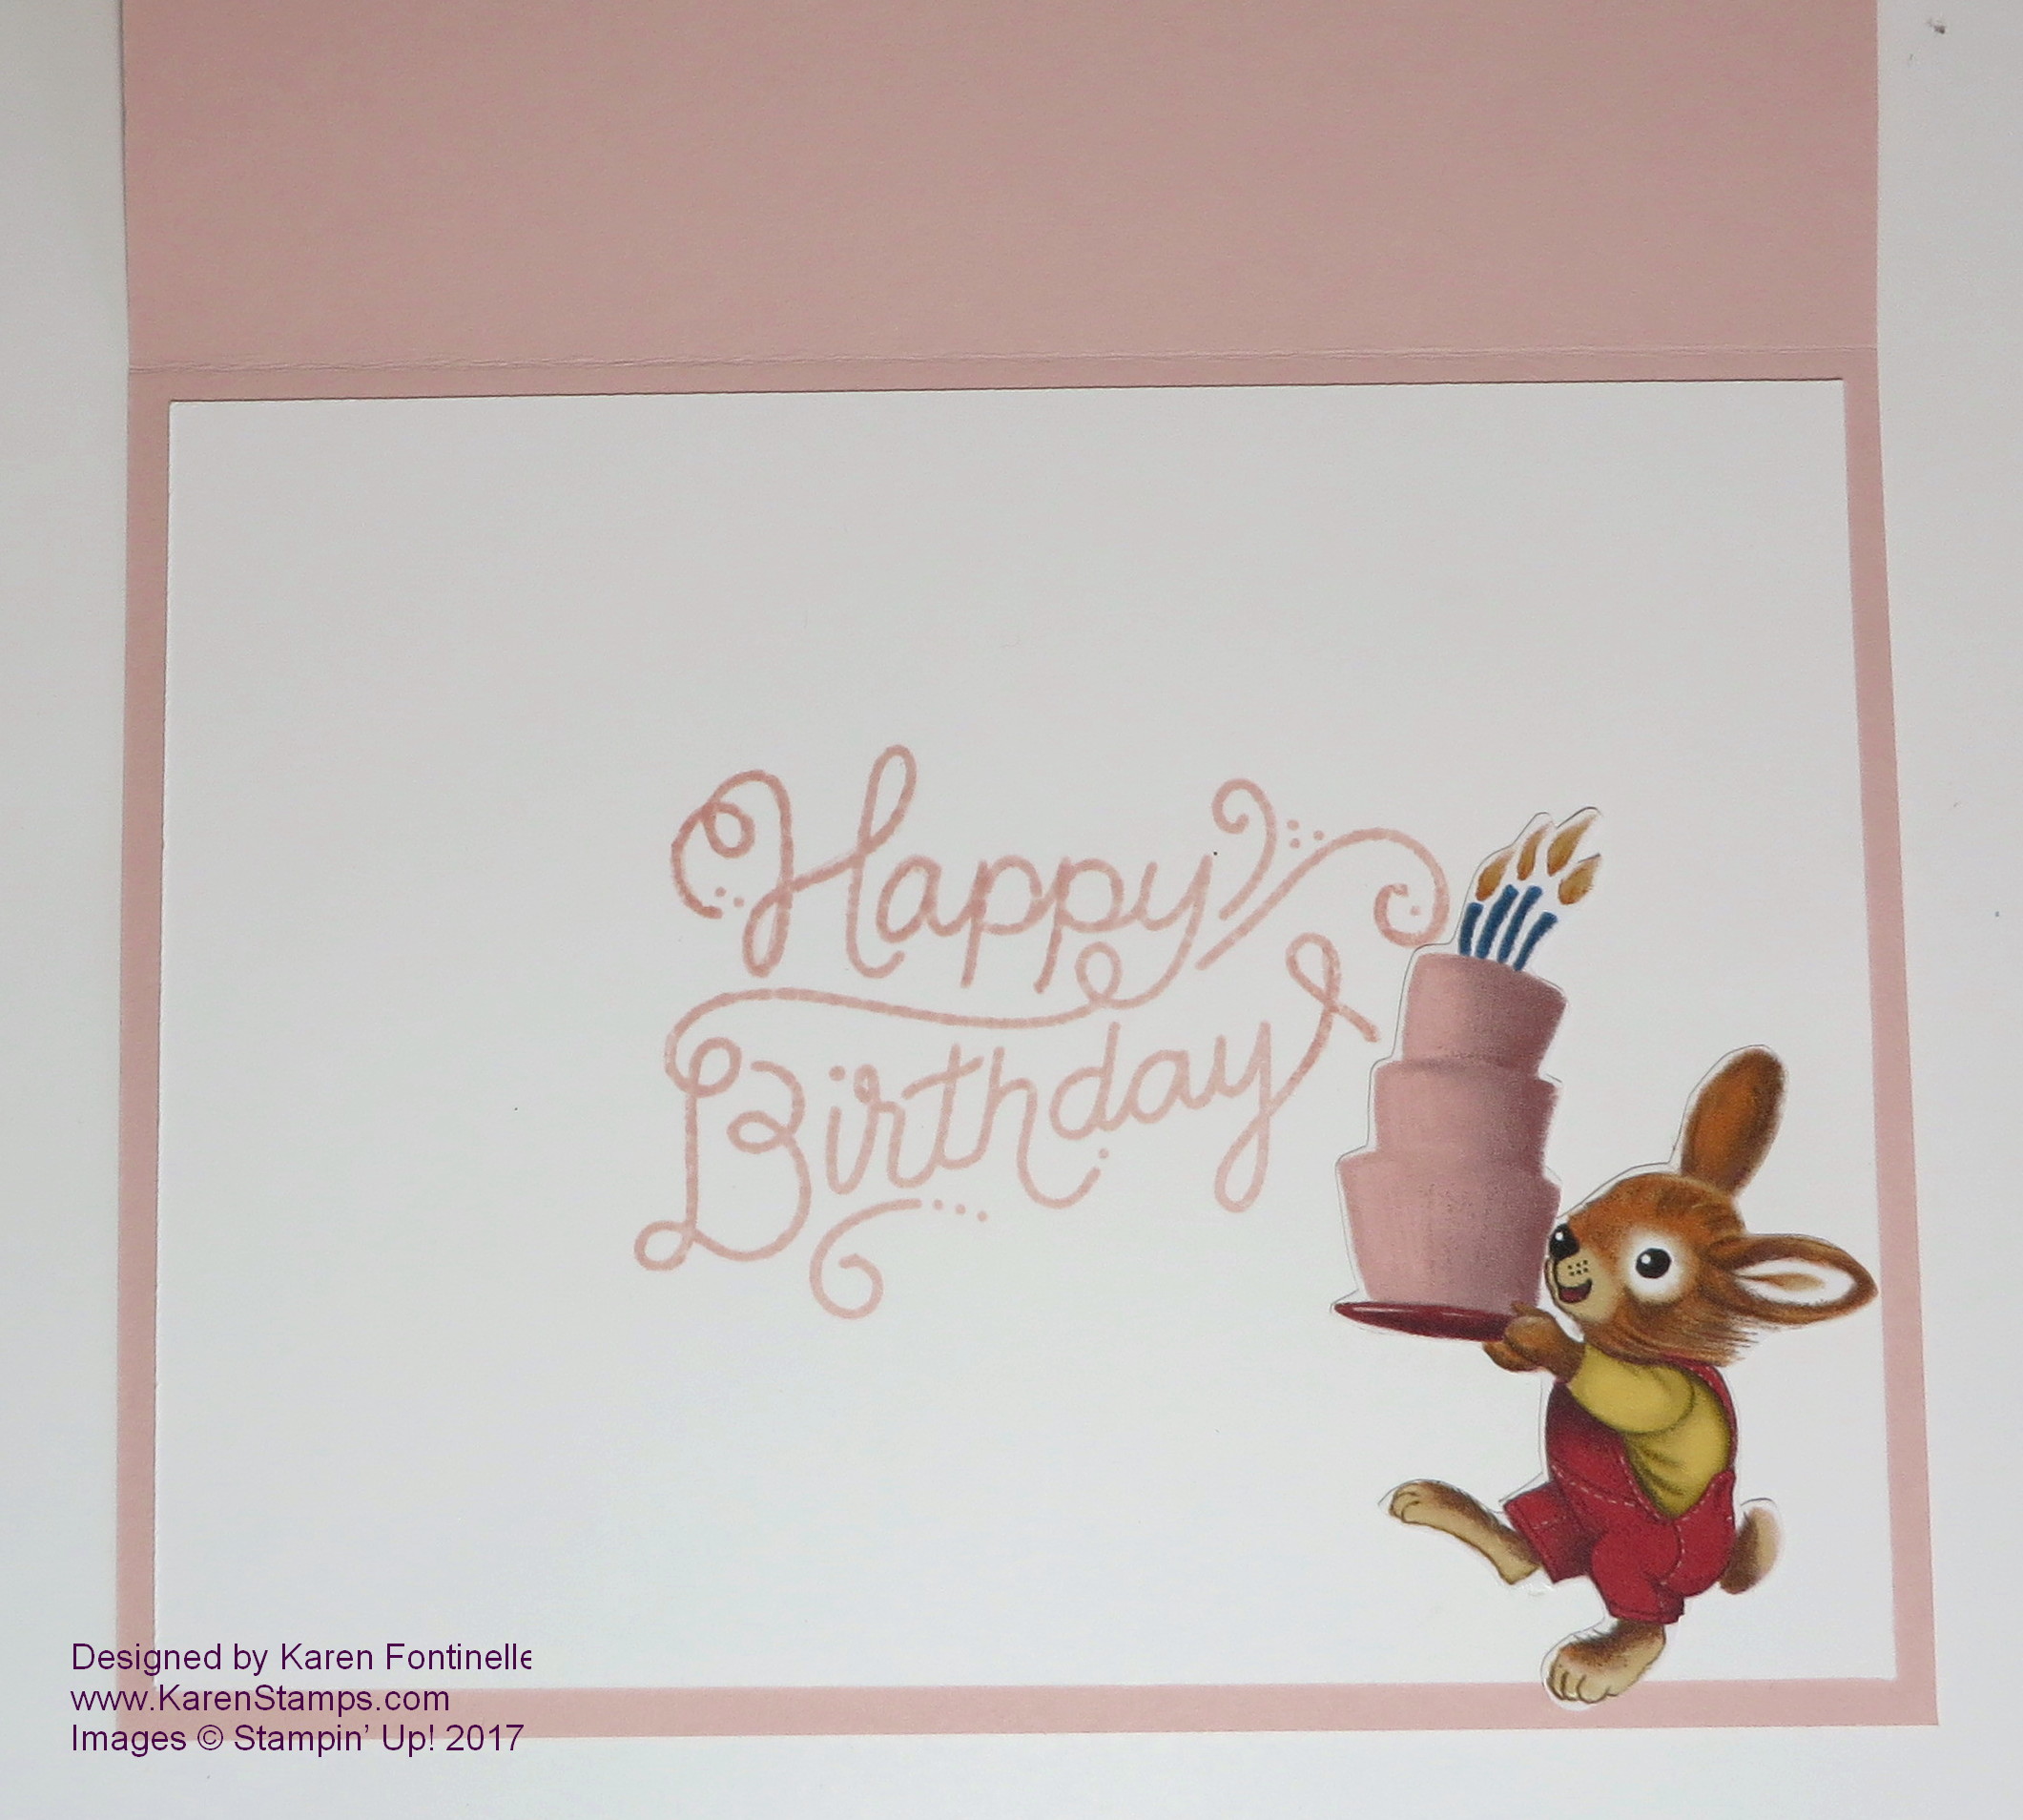
And here is a glimpse of the inside of the card!

I just die cut another character on the designer paper and adhered him inside the card on a piece of Whisper White!  So fun! I wrote a note to my friend saying we weren’t getting older, just “nostalgic”!  I knew she would enjoy the “vintage” characters!

Take a look at the Birthday Memories Suite in the Annual Stampin’ Up! Catalog and see if you can resist ordering it for making some fun cards and projects!

Shop Stampin’ Up! HERE Today!

Enjoy Some Stampin’ Up! Holiday Videos!

The new Stampin’ Up! Holiday Catalog is LIVE!  You can view it online and order from it! Start enjoying all its gorgeousness!  It really is time to begin thinking of the holidays and all the cards and projects we want to make.

Click HERE to View the Stampin’ Up! Holiday Catalog!
Click HERE to See the Holiday Catalog Products Online in the Store!

Summer has ended and now it is almost fall, at least that’s what Labor Day weekend tells us! Here in Houston we still have plenty of hot weather to go, although after the wrath of Hurricane Harvey last weekend, I think we are going to be treated to a little bit cooler weather for a few days. It’s hard to believe a week ago we’d had 3″ of rain with another 32″ to go by Sunday morning. And even as I write this post, people are still being evacuated from places that are still flooding and from places east of Houston where Harvey’s path took it after it hit here. By some grace of God, we are still fine in our home.

That’s why it is so good to have something to help us relax and take our minds off the troubles of the world for a little while. That’s why we say “Stamping is cheaper than therapy!” Of course a lot of stampers and other Demonstrators are still trying to save their stamps and papercrafting supplies from the flood or will have none left when this is all over with.  Stampin’ Up! has already stepped up to help some of those people.

Here are some Stampin’ Up! videos for you to enjoy and to get a better feel for some of the products in the Holiday Catalog!
When you look through the catalog, when you see that little “play” arrow near a product description, that means there is a video for that product or suite of products.

If you do not have a Demonstrator and would like a Holiday Catalog, it seems that our mail service is back up so I can send you a complimentary copy.  Email me at Karen@KarenStamps.com with your contact information and let me know if you would also like a copy of the Stampin’ Up! Annual Catalog.

Be sure to order your favorite products as soon as you can as some could go on backorder temporarily as we have seen in the past!  If something is backordered when you want to order it, I always think it is best to go ahead and add it to your order anyway rather than wait until the stock is resupplied because Stampin’ Up! will send it out to you as soon as they have it.

To check out some other Stampin’ Up! product videos, look at THIS POST.

Enjoy your Holiday Catalog and enjoy your Labor Day weekend!

SHOP STAMPIN’ UP! ONLINE HERE!

Quick and Easy Birthday Card with Birthday Memories

Birthday Memories Card in Red

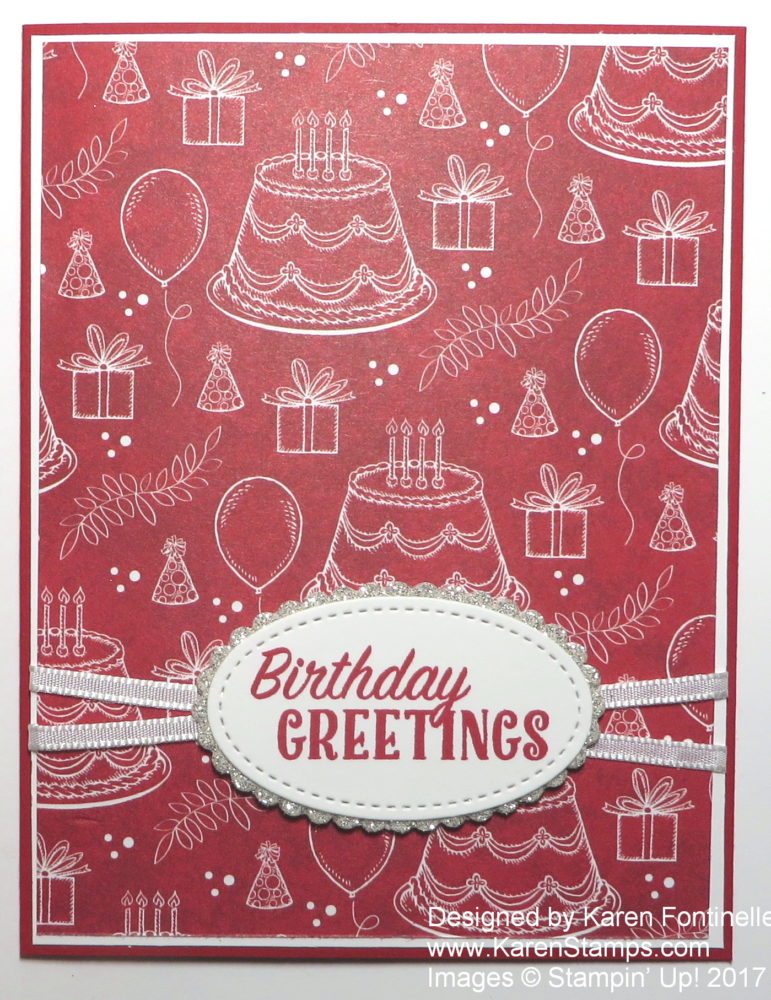
Want to make a quick and easy birthday card?  Then reach for the Birthday Memories red print in the designer paper package and make a card like this one!  I love the color red, and I thought this card might be a different one than a person would expect using this designer paper and stamp set. Just a quick and easy, simple birthday card to make in a couple of minutes!

Start with a card base of Real Red Cardstock.  Layer with Whisper White with just a thin border to help the Real Red patterned paper stand out against the red card base. The Birthday Memories Designer Series Paper has so many pretty papers in it, although most are colorful and filled with child-like or vintage type images. But this plainer red paper caught my eye and I thought I would make more of a monochromatic card with no much fuss so the paper can stand out on its own.

The greeting is from the same suite, from the Birthday Delivery Photopolymer Stamp Set. I stamped it in Real Red on Whisper White and cut out with the Stitched Shapes Framelits Die. Then I layered it on a scalloped oval die cut from the Layering Ovals Framelits Dies.  The paper is the Silver Glimmer Paper.  I think I just as easily could have left the greeting without the glimmer paper layer underneath and it would have looked fine.  The ribbon wrapped around twice is the Whisper White 1/8″ Sheer Ribbon.  It’s always good to have some basic white ribbon on hand because you can use it on most any project.

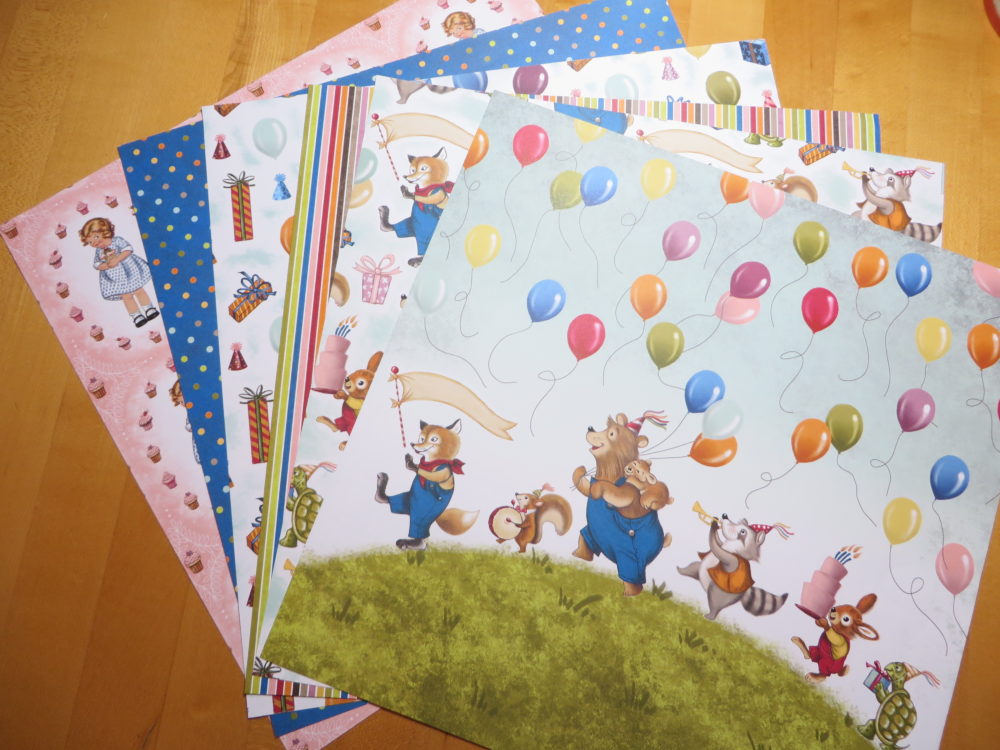
Be sure to check out this wonderful, happy Birthday Memories Designer Series Paper.

Birthday Memories Designer Series Paper

Birthday Memories Designer Series Paper

Order this amazing suite of products, the Birthday Memories Suite .  Save 10% by ordering the Birthday Delivery Photopolymer Bundle which includes the stamp set and framelit dies.  Add on the Birthday Memories Designer Series Paper and you are good to go!  Add any of the extra embellishments if you like.

Remember to use your Bonus Coupons that you earned in July before the end of August!  They will expire August 31.

Check out the Stampin’ Up! Clearance Rack as new items were added yesterday, although many sold out right away, but there is still a selection and you might find good things to go along with the upcoming Holiday Catalog!
Shop Stampin’ Up! Online Today!