Category Archives: Big Shot

Birthday Mini Treat Bag With Birthday Memories Die Cuts

Birthday Mini Treat Bag

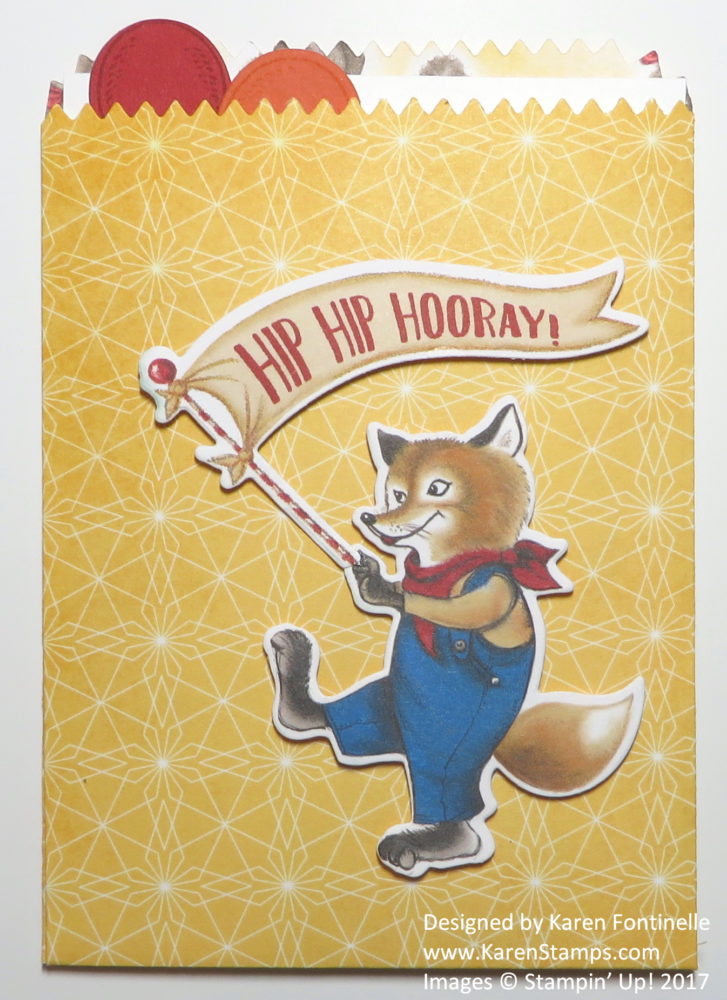
Isn’t this Birthday Mini Treat Bag With  the Birthday Memories Die Cuts such a cute way to send your Happy Birthday wishes to someone?  I have always loved making these mini treat bags and putting a card inside. But now that we have the new designer paper and stamp set in the catalog that I used here, we can do many more fun things with the treat bag!

Did you see the Birthday Memories Designer Series Paper in the new Stampin’ Up! Annual Catalog?  It is so fun and cute and almost a little vintage looking!  Perfect for young children but really for anyone!  I don’t know who wouldn’t smile upon receiving a card made with pieces of this paper.  The only problem with the paper is that you will hate to cut into and use it!

What’s even better is that there are die cuts that match the designer paper! The Birthday Friends Framelits Dies  will cut out several of the images in the paper, like this foxy guy and his banner!  I also stamped on the banner with the coordinating stamp set, Birthday Delivery Photopolymer Stamp Set.  Lots of cute images in the stamp set as well.  If you want to save 10%, get the Birthday Delivery Photopolymer Bundle that has the stamp set and framelit dies together.  You WILL want both!

You’ll be able to use this Birthday Memories Designer Paper and Birthday Delivery Stamp Set for more occasions that just birthdays.  It will be cute for party favors, invitations, and many other projects!

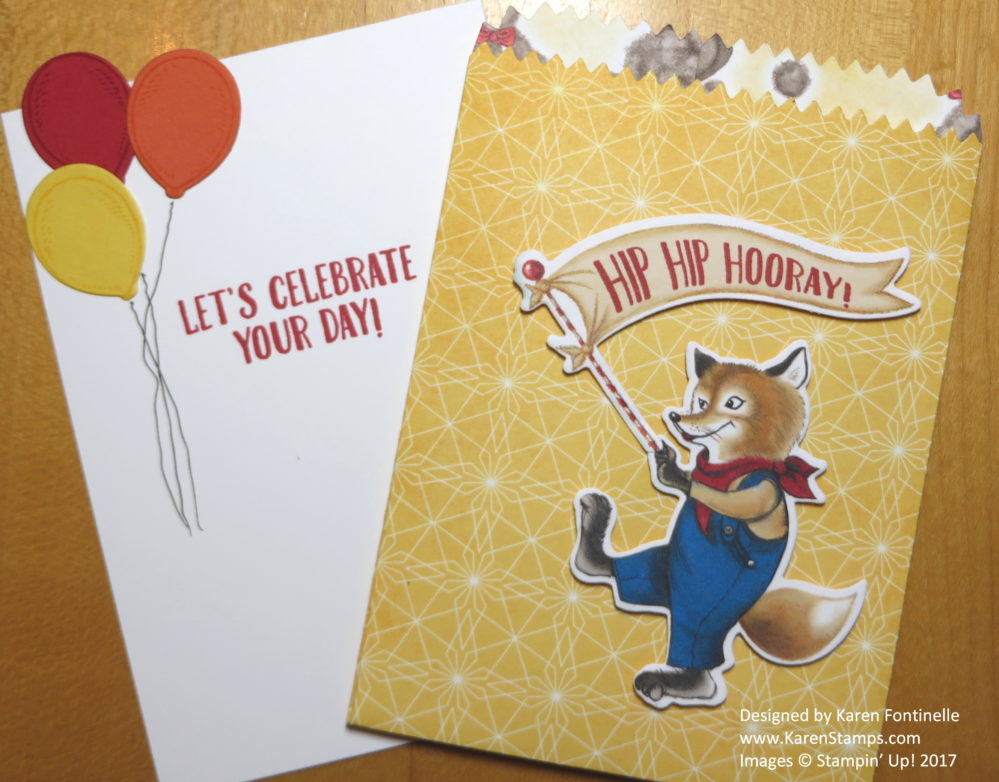
Birthday Mini Treat Bag Inside Card

This is what the inserted card looks like.  I stamped the balloons and die cut with one of the framelit dies in the set.  I purposely made them stick up at the top off the card a little bit so when it is inside the card, you will see the edge of the balloons and know to pull out the card. You can see how you could easily make this into a birthday party invitation or some other congratulatory occasion.

And let’s not forget to mention the Mini Treat Bag Thinlits Dies!  These have been in the catalog before and I have so much fun with them!  To make the bag, there are two dies, one cuts the front of the bag and part of the back.  The other die cuts the other half of the back portion plus the fold that adheres to the front of the bag. It’s so simple, plus the die set comes with so many other fun pieces. I chose to make this mini treat bag simple by just adhering the die cuts from the Birthday Memories Paper on the front.  I could have done lots more embellishing, but I thought this was cute enough as is!  There are even other options to make besides a basic gift bag, such as I made in THIS POST.

Be sure to check out the Birthday Memories Suite in the catalog.  You can order the Bundle and Designer Paper plus any other embellishments that you want so that you can make some fun cards and projects like this Birthday Mini Treat Bag With Birthday Memories Die Cuts.

Shop Stampin’ Up! Online HERE!

Happy Birthday Greeting Card Die Cut

Happy Birthday Greeting Card Die Cut

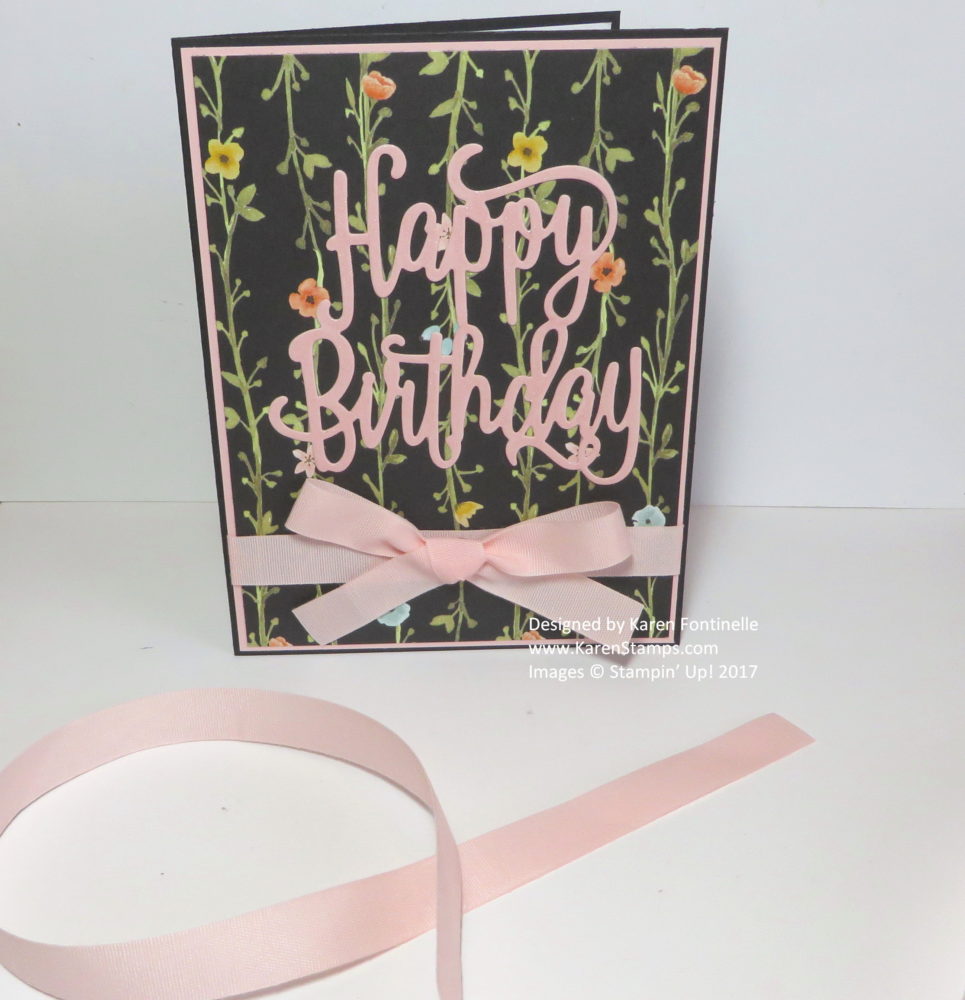
Today is MY birthday, but I have a friend who has a birthday tomorrow (and I don’t think she looks at my blog!) so this is the card I made for her! I was glancing through some cards I had made recently, and I LOVED a card I made with the Happy Birthday Thinlits Die and a watercolor background and I LOVED a card I made with this same Whole Lot of Lovely Designer Series Paper.  So I just combined the two ideas!

The card is made with Basic Black Cardstock so you do need to put a piece of Whisper White Cardstock inside so you can stamp or write a greeting or note. I glued a strip of this designer paper to the side of the Whisper White inside the card so I could decorate the inside a little bit. There is a layer of Powder Pink underneath the Whole Lot of Lovely DSP.

The greeting, of course, is just the Happy Birthday die cut!  I love the script, the size and everything about it!  Glue it down with just tiny dots of Multipurpose Liquid Glue or the Fine Tip Glue Pen.  Or try the new Multipurpose Adhesive Sheets.

I think the new Powder Pink 1/2″ Finely Woven Ribbon is just beautiful with this designer paper pattern and the card!  So soft and such a pretty pink!  I wrapped the strip of ribbon around the layer before adhering to the card.  Then I tied the bow separately with another piece of ribbon and attached it to that strip of ribbon with a few Mini Glue Dots . Sometimes that is easier than trying to tie a perfect bow with the whole piece of ribbon around the card!

I think this Whole Lot of Lovely Designer Series Paper is actually a whole lot of lovely!!  I suggest you put a package or two on your next order!  And if you ever make birthday cards (surely you do!) I would also get the Happy Birthday Thinlits Dies!

Since today is my birthday, I’m giving YOU the gift!  I’m celebrating all weekend (why not?!) so if you place a Stampin’ Up! order of $25.00 or more (before tax and shipping, of course!), I will send YOU a little grab bag of “stuff”!  And who doesn’t need more “stuff”?! Some might be new, some might be retired, but it will be a surprise! Order today through Sunday, August 13, 2017 at midnight.

SHOP STAMPIN’ UP! ONLINE HERE!


Naturally Eclectic Card For a Friend

Naturally Eclectic Card For a Friend
If you make this Naturally Eclectic Card For a Friend, be sure to mail it, because we never know when someone might especially need that card that comes from you in the mail. Not to mention that it is just fun to get some “real mail” because we seldom get anything but bills and junk mail!

I just love the Naturally Eclectic Suite in the new Stampin’ Up! Annual Catalog!  It is also the suite of products that are shown on the cover of the catalog!  I think the colors are all so pretty together and the flower designs are very nice to use.

With the Oh So Eclectic Bundle, which includes the Oh So Eclectic Stamp Set and the Eclectic Layers Thinlits Diesyou can save 10% over buying the two things separately, plus you will have everything you need…….stamps and dies!  And one of the dies is very artistic and different! You’ll enjoy it!

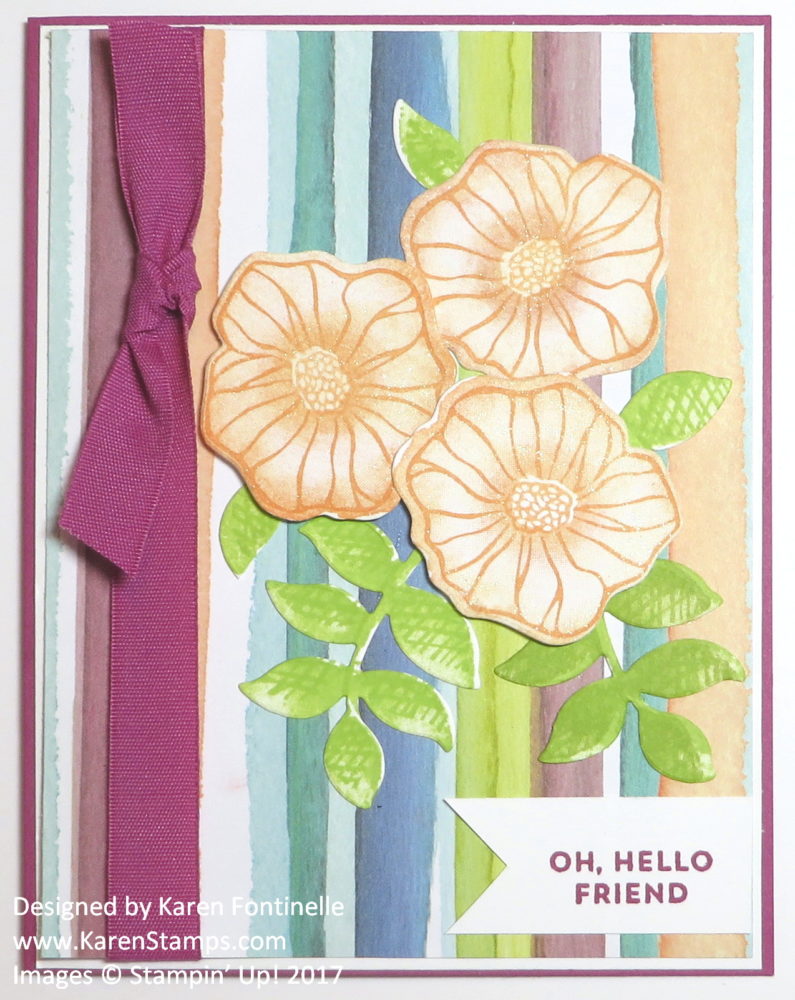
For this card, I used the Berry Burst Cardstock for the card base and Whisper White on top of that. Layered on top of that is the Naturally Eclectic Designer Series Paper.  Be sure to tie a strip of Berry Burst  1/2″ Finely Woven Ribbon around the designer paper before you adhere it to the card.

Stamp some flowers and leaves and die cut with the framelits dies and Big Shot. Arrange them how you like on the front of the card, popping up a few flowers with Stampin’ Dimensionals. I also added a bit of Clear Wink of Stella to all three flowers, but the shimmer doesn’t really show up in the photo. It is so fun to use the Wink of Stella!  And the name is incredible to me, too!  The greeting I used is also included in the stamp set.

Here is another card I made with the die cut flowers from the Eclectic Layers Thinlits Dies.  I love this die cut flower!  You can layer it on top of another layer or use it as is.

Be sure to check out this interesting suite of products, the Naturally Eclectic Suite, and maybe you will want to make a Naturally Eclectic Card for a friend!

SHOP STAMPIN’ UP! ONLINE HERE 24/7!

Carols of Christmas: Early Release From the Stampin’ Up! Holiday Catalog!

Carols of Christmas Banner

In September, the much anticipated Stampin’ Up! Holiday Catalog will go live!  In the meantime, the Carols of Christmas stamp set and dies have been released early for customers beginning today! When you saw information about this bundle last month, it was because the stamp set was part of a bonus offer for new Demonstrators who joined during July.

But now, the Carols of Christmas Stamp Set and the Card Front Builder Thinlits Dies are available separately AND as a Carols of Christmas Bundle if you would like both and want to save 10%!

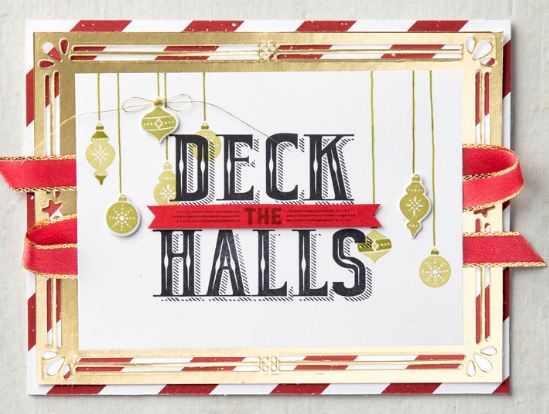
Here are samples of the beautiful cards you can make with this set! These are samples from Stampin’ Up! but I have seen many other samples from Demonstrators and everyone agrees this is a beautiful set. You will want to order yours as soon as possible!  Get an early start on Christmas cards!

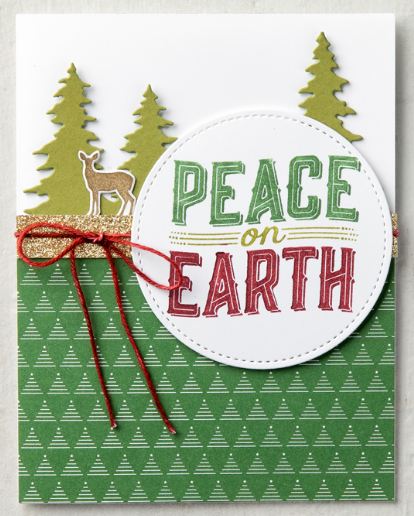
Carols of Christmas Card Peace on Earth

This card is fairly simple, using the die cut trees and deer and coloring the stamp with markers to get a multi-colored effect on the greeting.

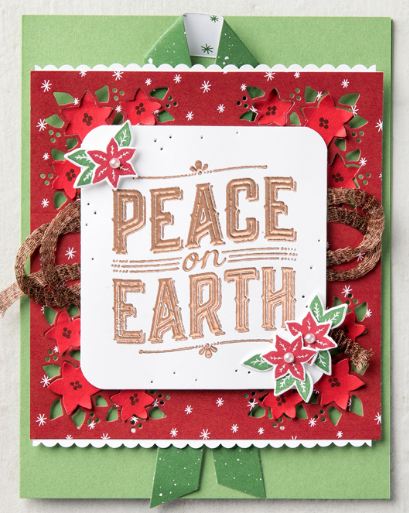
Carols of Christmas2

I love the red on this card paired with the green and a bit of Copper Trim Ribbon behind the greeting.

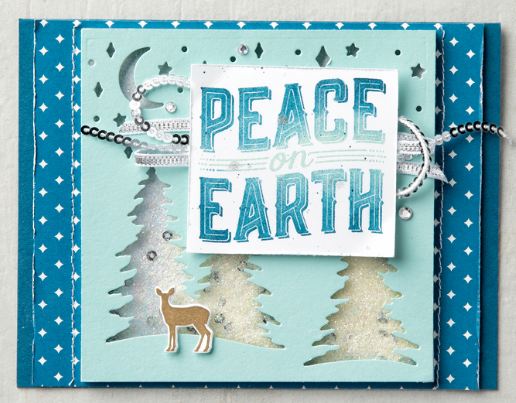
Carols of Christmas3

If you want a different color scheme, these blues are beautiful using silver ribbon and sequin trim. This card uses the negative piece of paper after the trees are die cut.

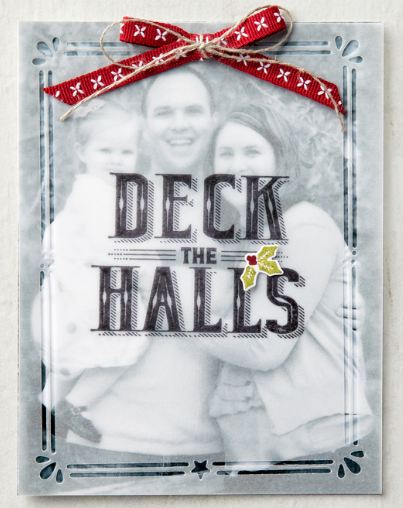
Carols of Christmas4

A lot of young families like to send photo cards at Christmas. Here is an example of dressing up the photo with a piece of die cut vellum and Christmasy greeting and ribbon on the top.

Carols of Christmas5

This is my favorite sample because of the red and gold! So elegant and festive!

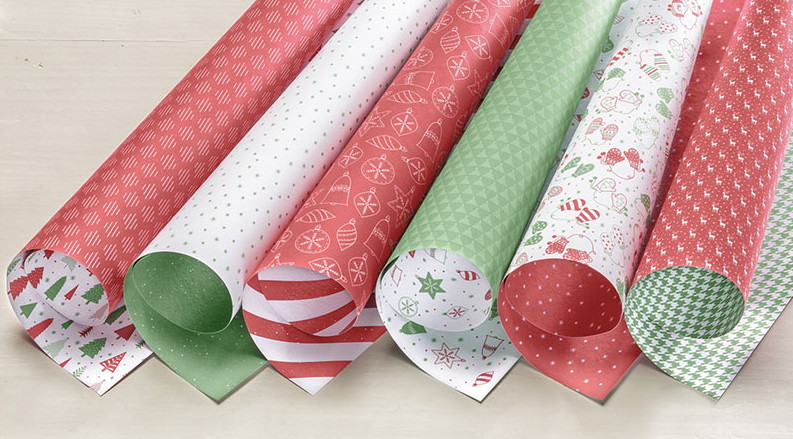
If you are wondering how you can make Christmas cards in August without Christmas paper, look in the Stampin’ Up! Annual Catalog on page 188 and check out the Be Merry Designer Series Paper!  This is very cute paper that will get you started until you have more choices in the Holiday Catalog!

Be Merry Designer Series Paper

It’s too hot in some places, like here in Houston, to do much of anything, so go ahead and treat yourself to this new Carols of Christmas Bundle and get a head start on Christmas! Put on some holiday music and pretend like it is snowing outside, as you run the a/c and wear your swimsuit or shorts!!

Remember to use your Bonus Coupons that you earned in July!  You should have received an email immediately after you ordered from Stampin’ Up! with your codes.  When you place your August order(s), you will see prompts on how to use your codes.

Shop for the Carols of Christmas Bundle at Stampin’ Up! Today!

Flowery Thank You Card With Beautiful Bouquet

Flowery Thank You Card With Beautiful Bouquet

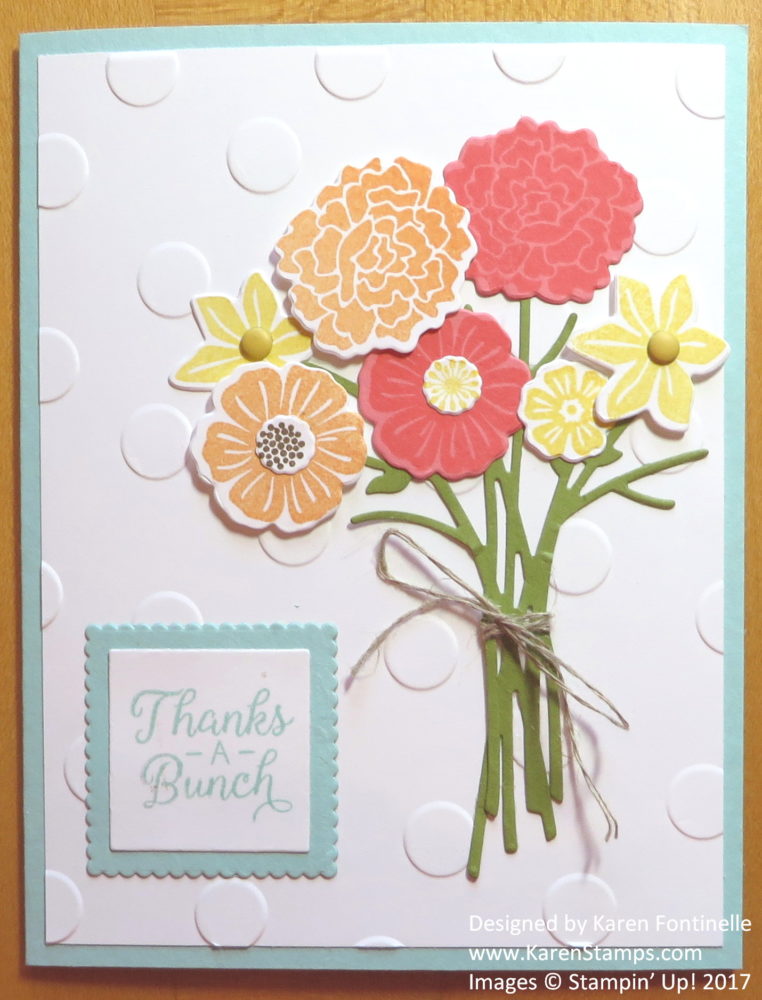
This flowery thank you card is made with the Beautiful Bouquet Bundle, and the variations you can make with this set are endless! This Beautiful Bouquet Photopolymer Stamp Set comes with a multitude of images and sentiments. There are 37 stamps in this set!  You can also purchase the Bouquet Bunch Framelits Dies which comes with 21 dies for all the different flower shapes, stems, and leaves.  Buy the stamp set and dies together in a Bundle and save 10%!

The card base is Pool Party Cardstock with a layer of Whisper White.  I embossed the Whisper White with the Polka Dot Basics Embossing Folder.  I like that this adds just a little bit of interest and texture to the background.  The greeting, of course, is from the stamp set, stamped in Pool Party ink, and die cut with one of the squares in the Layering Squares Framelits Dies . There are also scalloped edges squares in this set of dies and that makes a nice background layer for the greeting.

The flowers and flower stems are all die cut with the Bouquet Bunch Framelits Dies.  I will say that if you are making a lot of cards at one time with this Bundle, it will take some time to do all the die-cutting. The best way to approach this would be to stamp images using different framelits all on one sheet of paper if you can or at least place as many as you can on the Big Shot platform so that you can cut as many images as possible in one pass. If you run each flower and each leaf, one at a time, through the Big Shot, you will be doing lots of cranking away!

I really love the stems die cut because the stems are already arranged for you and all you have to do is adhere some flowers on top!  You con’t even have to hit every stem tip. Add as many or as few flowers as you like.

You can stamp the flowers on Whisper White with colored ink or on the same color of cardstock. You can see both examples on my card.  Add some flower centers, either stamped or with Enamel Dots or other embellishments.

Before I adhered the flower stems piece, I tied a piece of Linen Thread around it.  Linen Thread is one of those staples you should have in your supply. You may not use it a lot, but it is the perfect thing to use at certain times.

Purchase the Beautiful Bouquet Bundle today or tomorrow (by July 31st) and get a $5 Bonus Coupon to use in August on a Stampin’ Up! order!  Remember, Bonus Days end on Monday, July 31.  No limit to how many coupons you can earn, with each $50 purchase.

SHOP STAMPIN’ UP! TODAY AND GET YOUR BONUS COUPONS FOR AUGUST!

You’re the Best Greeting Card

You're the Best Greeting Card

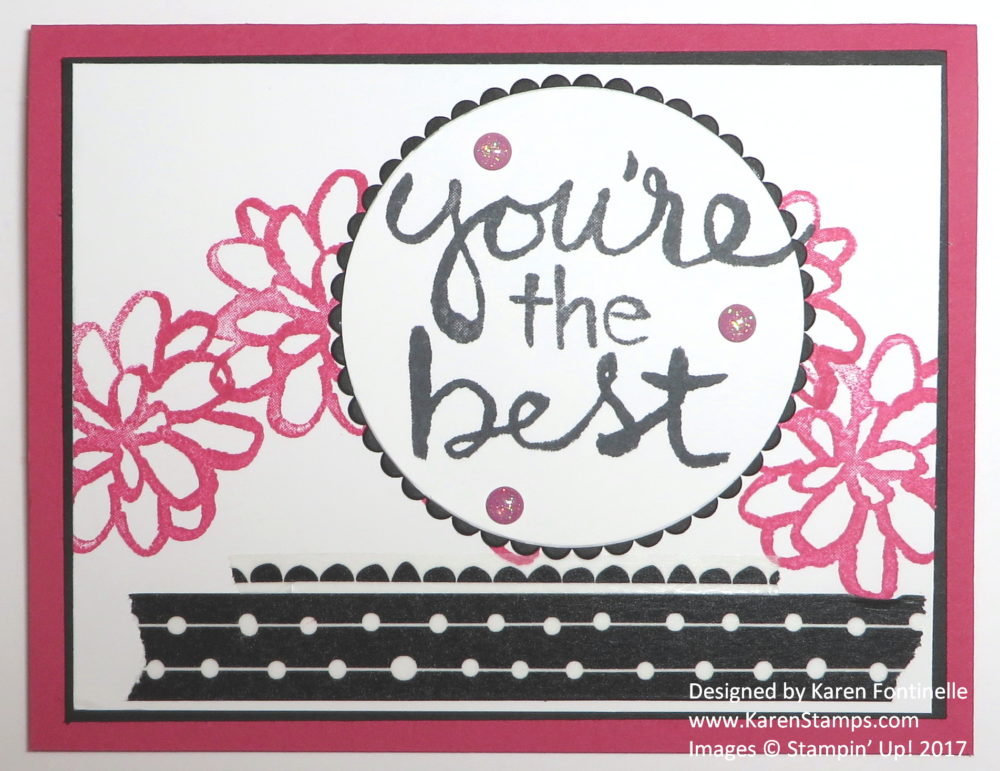
How about a “You’re the Best” greeting card to have in your stash for just the right occasion or person? I wanted to use my new washi tape, the Pick a Pattern Washi Tape so I looked in the new Stampin’ Up! Catalog for inspiration. I found a card sort of like this one, and this is what turned out! For the card design, I used the stamp set Watercolor WordsI’ve loved that stamp set ever since it came out!  Very easy to use in cardmaking and good sentiments as well!

The card base is Melon Mambo with a Whisper White layer, plus a layer of Basic Black behind the white.  I applied two strips of the washi tape at the bottom of the card layer and then stamped Melon Mambo flowers from the Watercolor Words Stamp Set across the front of the card. I actually stamped the greeting right over the flowers, but didn’t think it stood out well enough. If I was trying this card again, I might try stamping the flower each time off on scrap paper before stamping on the cardstock to get a lighter image. In that way, the greeting might show up better as the focal point on the card. But as it was, I just stamped the greeting on a new Whisper White piece of cardstock and die cut it in a circle and layered on a scalloped circle. These dies are the Layering Circle Framelits DiesSome are plain circles and some have the scallop edge.

And is a card without an extra little embellishment?  Just had to add some Glitter Enamel Dots!

Don’t forget!  The Stampin’ Up! Bonus Days are coming to an end on Monday, July 31.  For every $50 you spend on an order, you will be emailed a $5 Bonus Coupon to use on an order in August.  No limits!

Or better yet, become a Stampin’ Up! Demonstrator this month and get extra perks! Click here for more information and to join!  Just takes a little while to fill out the Demo Agreement and choose your products for your Starter Kit.  After you submit everything, you will be emailed your Demo number and you are official in minutes!

Use my “You’re the Best” greeting card design as inspiration to make your own card! As long as you have your stamps, ink and paper out, make several cards of the same design, then you’ll have them ready to go!


Eclectic Die Cut Flowers and Polka Dots Card

Eclectic Die Cut Flowers and Polka Dots Card

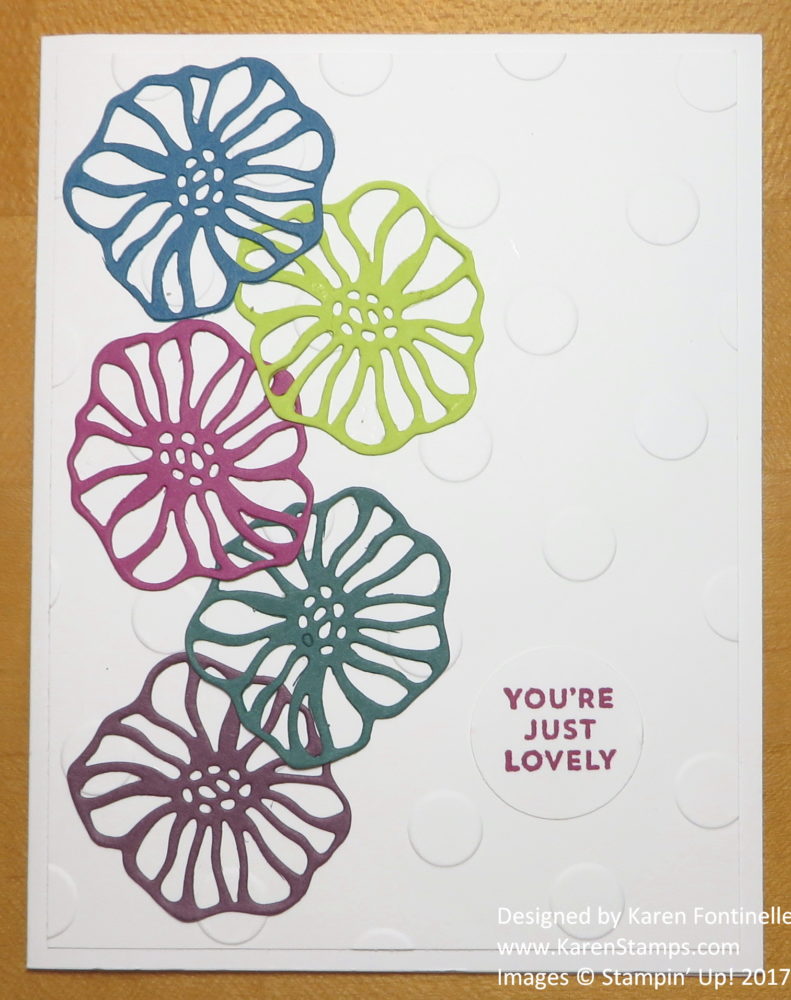
Want to make a simple yet elegant card for any occasion?  This Eclectic Die Cut Flowers and Polka Dots Card will fit the bill!  You will need a Big Shot in two ways to make this card. The top card layer is embossed with polka dots and the flowers are die cut with thinlits. Then just assemble it!

The card base is Whisper White, layered with another piece of Whisper White cardstock that has been embossed with the Big Shot and the Polka Dot Basics Textured Impressions Embossing Folder.  This is a great folder to have, polka dots work with a lot of designs and sometimes just add that little something that the card needs!  You could certainly also make this card with a card base the same color as one of the flowers instead of white.

The flowers were meant to be one of each of the new InColors, but I somehow got two of the same colors in there.  But there are no mistakes in stamping and this didn’t make a bit of difference. No one will say, “Oh no, she didn’t use the right colors!”  The flowers are die cut with the Eclectic Layers Thinlits Dies.  The greeting is stamped with an image in the Oh So Eclectic Stamp Set and just punched out. I think it works real well with this card.  It’s there but not real intrusive so you notice the flowers more.

Overall, the Oh So Eclectic Bundle (save 10%!) and the coordinating beautiful Naturally Eclectic Designer Series Paper make for a beautiful suite of products!  The samples on the cover of the Stampin’ Up! Annual Catalog are made with this suite of products.  You know they must be good if they are on the cover of the Stampin’ Up! Catalog!

If you would like to see another card I made with this suite, click HERE.

If you are interested in Stampin’ Up! products and would like a catalog, please email me at Karen@Karenstamps.com.  I have a few more catalogs left before I have to order more. It’s always better to have the hard copy to look at, in my opinion! I’d be happy to be your Demonstrator to help you in your stamping and papercrafting!

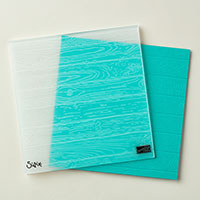
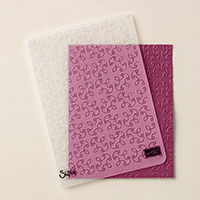
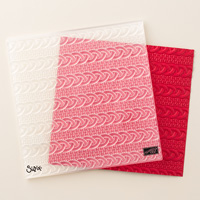
How To Use the New Stampin’ Up! Dynamic Embossing Folders

Learn how to use the new Stampin’ Up! Dynamic Embossing Folders with Donna Griffith from the Home Office!  I find it handy to write down the various sandwiches for the Big Shot, now that we have various tools and techniques (too many to keep in my head all the time!), on a post-it note or piece of paper and keep it right by my Big Shot. Some days I might remember and some days I might not, so that note is always there to remind me!

These Dynamic Embossing Folders came out in the last Holiday Catalog and are really something! It’s amazing what a different look it gives to embossing than the regular folders. It’s just a very strong, deep, dimensional image on your paper.

It is suggested that you spritz the paper a little before embossing and run through the Big Shot twice. It only takes a little and dries pretty quickly. Don’t soak the paper or get it too wet, just a spritz!  You can even order the Stampin’ Up! Spritzers, or several, to use in other ways as well.

Click here to see a card I made using the Cable Knit Dynamic Embossing Folder.

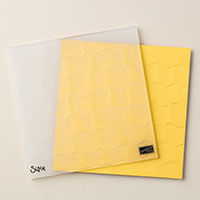
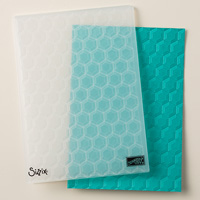
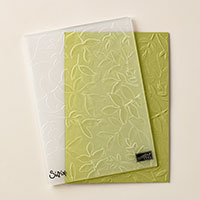
Just click on the images below to get more information on each Dynamic Folder.

Try at least one Dynamic Embossing Folder on your next Stampin’ Up! order! They are really interesting! Be sure to choose the ones with the word “Dynamic” in the name! They are mixed in with the regular embossing folders – and you might want to choose one or more of those as well! Embossing Folders are so great for adding just that little bit of texture or interest when your card or project needs a little something more.

SHOP STAMPIN’ UP! HERE TODAY!

Using Paper Scraps on a Birthday Card

Using Paper Scraps on a Birthday Card

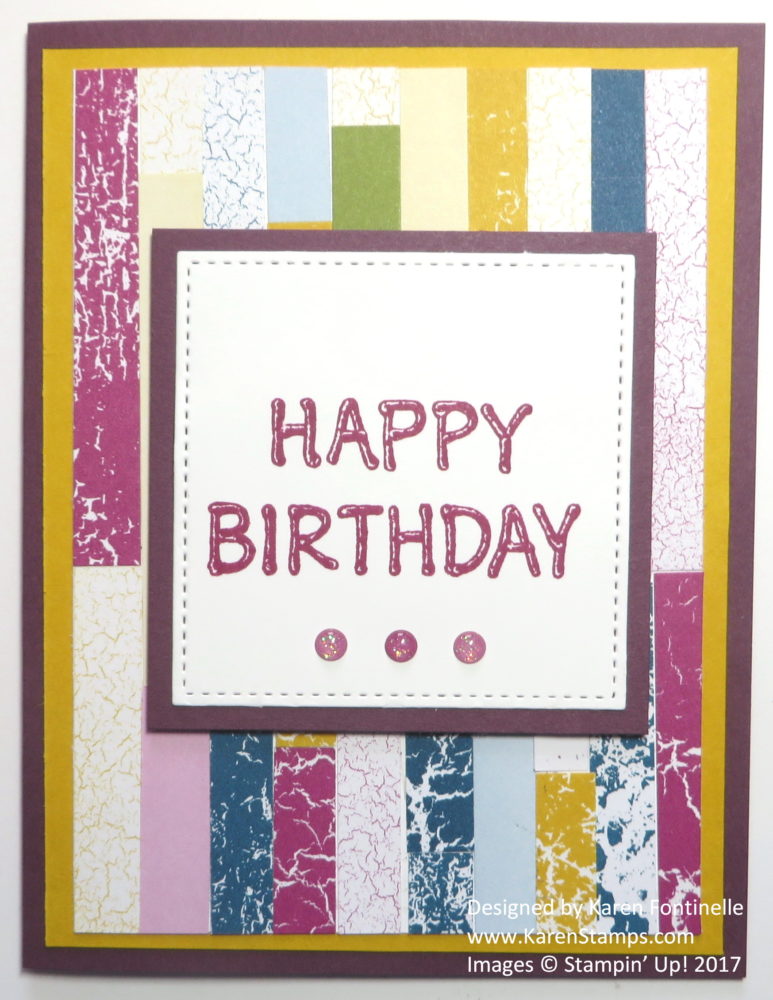
Here’s a fun way of using paper scraps on a birthday card!  The other day I cut into my Color Theory Designer Series Paper Stack and as scraps, I had these very narrow little scraps. They were at least several inches long.  Normally, I would throw those small scraps away (yes, I would!) but being as this was brand new designer series paper from the new Stampin’ Up! Catalog, I hated to do that!  But I couldn’t just leave the scraps laying around, so I decided to find a way to use them on a card.  You can see another example on THIS POST.

This card was a little more complicated.  I actually covered the front of the top card layer of Whisper White with all the little scraps. I laid them out in offset lines so it wouldn’t all be lined up perfectly.  Some scraps I put down lower and some higher, which then necessitated cutting some strips of paper shorter to fit in the empty spaces. Instead of measuring and guessing how long to make the shorter strips to fit, just glue them on in the empty space and trim them off later along the edge of the Whisper White.  Obviously you don’t want to adhere this layer to the card front until you have all the strips glued down.  Mine is off a tiny bit in a spot or two. Perhaps you can cover yours, if that happens, with a greeting or some other embellishment.

The greeting is from the new stamp set Icing on the Cake Photopolymer Stamp SetI die cut the greeting piece with the Stitched Shapes Framelit Dies, the square shape, obviously, but you could use whichever shape you liked. For a little accent, I had to add the Glitter Enamel Dots.

Another thing you could do with this card is after you have all the strips applied to the card front, you could run it through the Big Shot inside an embossing folder, which would give it a quilt-like look!  Try it and see!

Just have fun stamping and experimenting and see what you come up with! You don’t have to save all your paper scraps, but you might want to experiment with some once in awhile and see what unique creation you come up with. I’ve given you a way to use paper scraps on a birthday card, now it is your turn!

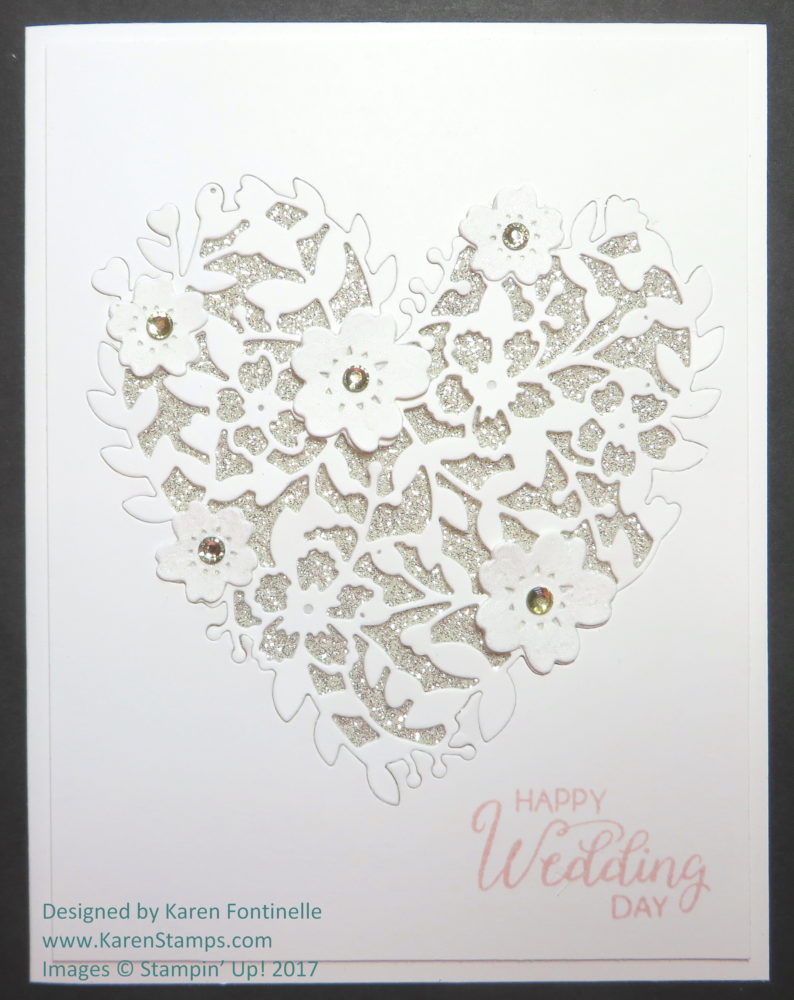
Wedding Card with Bloomin’ Heart Inlaid Design

Wedding Card with Bloomin' Heart Inlaid Design

You can make a beautiful, elegant wedding card with sparkle and glimmer just like this Wedding Card with Bloomin’ Heart Inlaid Design using the Big Shot and the Bloomin’ Heart Thinlits Dies.

This card came about because a customer asked me how a similar card she’d seen online was made. At first I thought there was some complicated technique to prevent the heart from being completely cut out of the paper. Then it dawned on me that it really was very simple! The heart was die cut out of the top card layer but NOT removed from the paper, as we typically do. Every card I have made with this die, I have separated the heart from the paper and adhered just the heart to another piece of paper. Here is an example of a card with just the die cut heart itself adhered to the front of the card.

To make this type of Bloomin’ Heart card, cut the piece of paper that you want to be on the card front, whether it’s a top layer or the card base itself.  This paper that I cut as  a normal layer is  4″ x 5 1/4″. Then using the Big Shot and the Bloomin’ Heart Thinlit Die, die cut the heart. When you pull off the die from the paper, use the Paper Piercing Tool or other sharp item or the Die Brush to just loosen a bit of the heart from the die without lifting the whole thing out of the paper. Get just enough of an edge so you can use your fingers or a the Piercing Tool or sharp scissors so you can pull the heart out of the die carefully while leaving the heart IN the paper.  In other words, pull the die off the heart, leaving the heart in place. Either use the Die Brush to carefully and lightly loosen the die cut bits in the heart to remove those or use your sharp tool to poke them out.

Next, there needs to be a layer behind the heart. On this wedding card, I adhered a layer of Silver Glimmer Paper to the Whisper White card base.  I cut this glimmer paper just slightly smaller than the die cut layer so nothing would show. Then I adhered the die cut layer over the glimmer paper making sure no edges were sticking out, making sure it was layered on straight on all sides. I only put Multipurpose Liquid Glue around the borders of the die cut heart layer although perhaps I should have put glue on at least a few of the inside die cut pieces, but then this allows the die cut areas to look a little more 3D not being glued down to the glimmer paper underneath.  You can decide how to do yours.

I had also die cut the little flowers to glue onto the heart. I added a little Clear Wink of Stella to them for a little shimmer on the flowers. Then I added Rhinestone Basic Jewels to the centers of the flowers.

Finally it was time for the greeting.  I might have used silver embossing for the greeting, but didn’t want to risk messing up the card at this point so I chose to just stamp with Powder Pink ink!  The greeting is from the Beautiful Bouquet Stamp Set. Lots of great greetings to use in that set!

As you can see by this Wedding Card with Bloomin’ Heart Inlaid Design, you can use the Bloomin’ Heart Thinlit Die to create a different look than perhaps you can done before!  Try it!

Order the Bloomin’ Heart Thinlit Dies at Stampin’ Up! Online HERE!

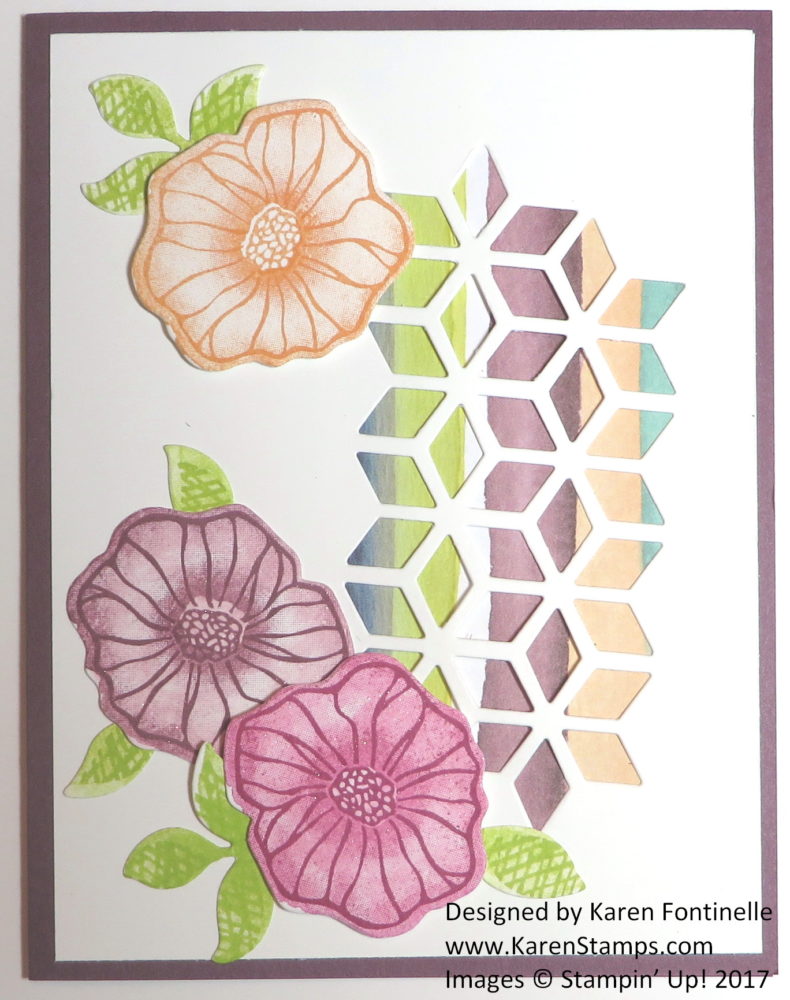
Oh So Eclectic Die Cut Design Card

oh so eclectic die cut design card

Sometimes it is fun to just get out one stamp set or suite of products and just play with those instead of combining several stamp sets, colors, dies, etc.  Here is one of the cards I made, the Oh So Eclectic Die Cut Design Card, using the some of the products in the Naturally Eclectic Suite.

I was quite interested to play with the oblong image in the Eclectic Layers Thinlits DiesI started with the card base of Fresh Fig and added a layer of the stripe pattern in the Naturally Eclectic Designer Series Paper  to go behind the die cut. This paper has the look of watercolored imperfect stripes. You can also leave the area plain behind that die cut (I don’t know what shape to call it!) if you have some other colored paper behind it or just the card base.  Then I stamped and die cut the three flowers and leaves and added a bit of Clear Wink of Stella, which gives a very subtle shimmer to the flowers, not picked up in the photo.

Since the stamps are clear-mount (or you can choose wood-mount), you can’t see through them to do the 2-step stamping BUT since it all has that watercolored look, nothing has to be perfect. And really, if you are die-cutting you will not notice at all that you didn’t overstamp perfectly. And not everything has to be perfect, remember, when you are making a handmade card!  It’s handmade, not machine-made!

I think you will be able to make lovely creations with the Naturally Eclectic Suite of products! If you would like to order some or all of them, you will find them in the Stampin’ Up! Catalog on pages 132-33. Just click the picture of the catalog on the right side of my blog to go to the Catalog PDF.  Or email me with your contact information and I would be happy to mail you a catalog and be your personal Stampin’ Up! Demonstrator!

Shop Stampin’ Up! Online 24/7 HERE!


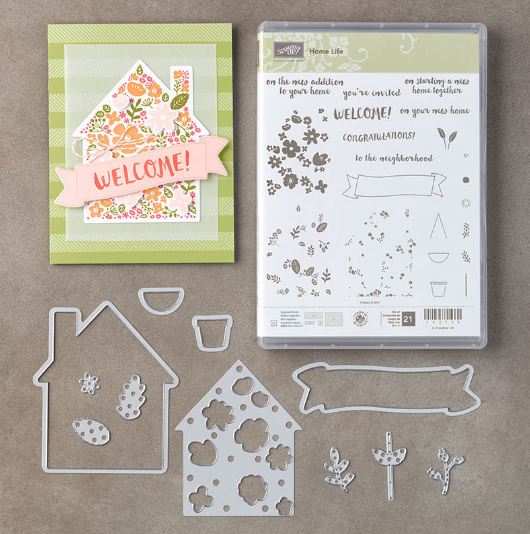
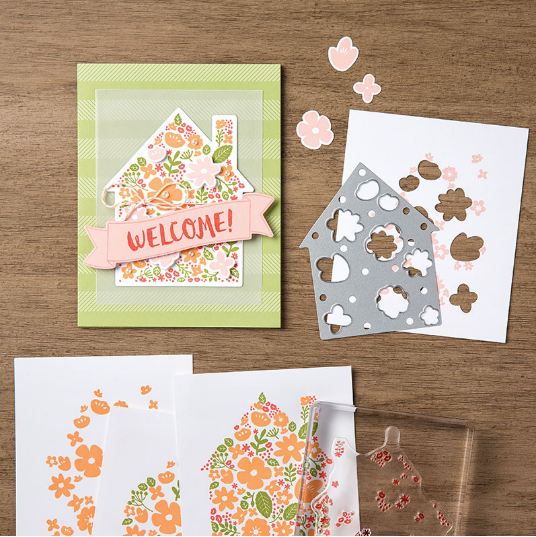
Stamp a Beautiful Home With the Home Life Bundle!

Hopefully you and your family had a fun and happy 4th of July, whether it started last weekend or was just today or maybe you are on vacation or celebrating the rest of this week! We had a quiet day at home until we went to a very nearby fireworks display with our friends that we always watch fireworks with. Amazingly, after a blistering hot day, the evening, at least by 8 pm was perfectly lovely out and with a nice breeze, so it was perfect weather to watch fireworks! I’d love to see the fireworks downtown, but I love being back home in a few minutes instead of in all that traffic!

Here’s a Stampin’ Up! video you will enjoy about the Home Life Stamp Set and Welcome Home Framelits Dies with Donna Griffith from the Stampin’ Up! Home Office. Not only does she talk about the stamp set and dies, but she gives lots of good tips for using this set.

Home Life Bundle  Home Life Bundle

Check it out in the new Stampin’ Up! Annual Catalog!  Lots of good things in there!  Let me know if you would be interested in a copy!  Email me with your contact information.

And remember, July is Stampin’ Up! Bonus Coupons to spend in August!  For more information, read this blog post HERE. With every $50 you spend on Stampin’ Up! products, you will be emailed a $5 coupon to spend in August! Be sure to keep track of the emails and codes! Purchase the Home Life Bundle and you will get a Bonus Coupon!

Shop Stampin’ Up! Online 24/7!

4th of July Patriotic Crate With Daisies

4th of July Patriotic Crate With Daisies

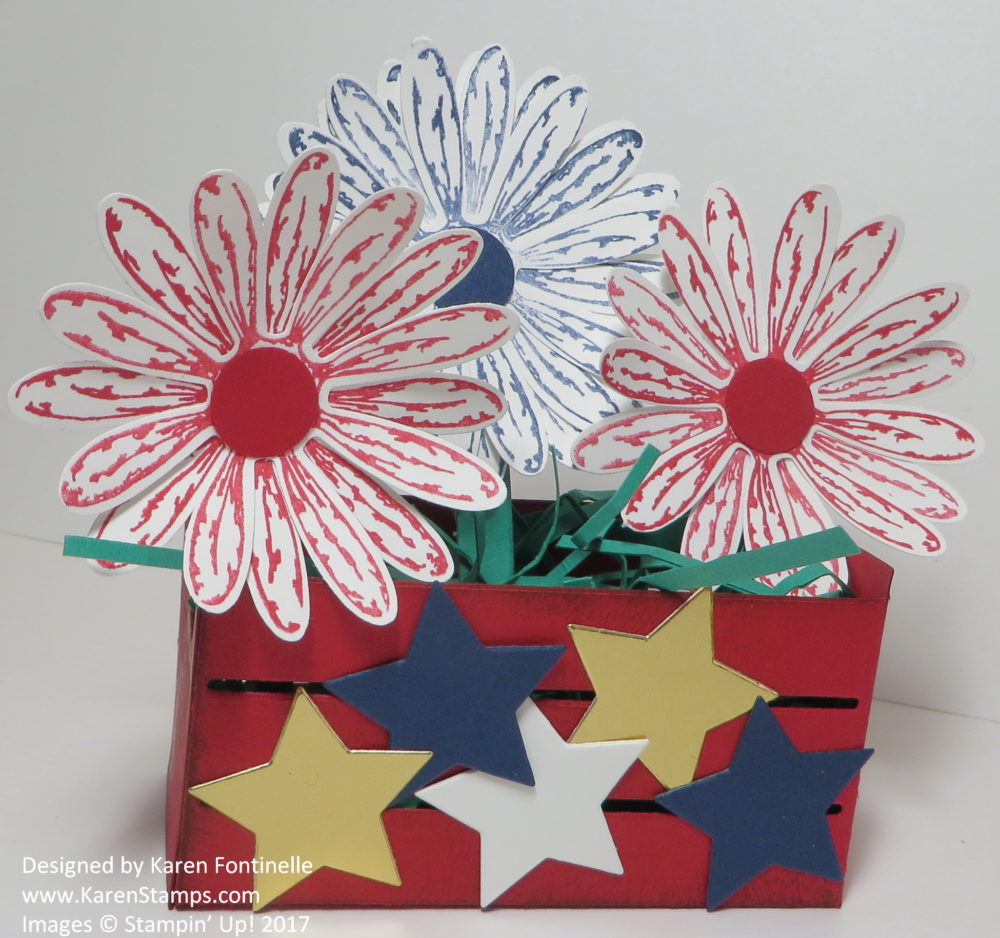
I saw a cute little white wood crate stamped with stars that inspired me to make this 4th of July Patriotic Crate With Daisies. I used Real Red Cardstock and aged it a little bit with some Soft Suede sponging on the edges and even the front and back. I loved how just the red crate turned out by itself!!  The Wood Crate Framelits Dies really make it easy to make this box for treats, gifts or little notecards. So cute!!  Check out the video below on how to use these dies!

To make my crate look patriotic for the 4th of July, I die cut some stars from the same framelits package out of the Gold Foil Sheets, Whisper White and Night of Navy paper. You want to be careful glueing something to the crate because of the slits in it, in between the “boards”, so something doesn’t stick from the inside!

Next I stamped daisies in red, white and blue to go in the crate.  I used the Daisy Delight Photopolymer Bundle to stamp and punch. The Daisy Punch is back in stock now after being SO popular that it was backordered for awhile! You will want to get one on your next order!

When you stamp the daisy, stamp it with one petal straight down, close to the edge of the paper, so that the punch will be in the correct position. Otherwise you will have to cut around your stamped image to get the punch to fit in right.  A lot of times the punch looks like it is never going to fit around that daisy exactly right, but if you are patient and just keep working with it, you will get it in the perfect position to punch the daisy.

To make stems, I covered a piece of scrap cardboard with some Emerald Envy green cardstock and then cut that into thin strips. I glued one end to the back of the flower and folded the other end back so there would be something to glue to the bottom of the crate. To make the filler stuff for the crate, I cut very thin strips of the green cardstock and then crumpled up the whole pile of it with my hands to get it “smooshed”.  You could also use a Paper Crimper.

Fun project!  Certainly the Wood Crate Framelits Dies can be used for lots of different occasions and purposes!  Here is another project I made in the beginning when I received the dies:  Click Here!

Watch this Stampin’ Up! video for more ideas!

It’s not too late to make a 4th of July Patriotic Crate With Daisies for your home 4th of July decorations, but if you don’t have the framelits yet, save this idea for when you do order them and then make this crate before you forget!

Shop Stampin’ Up! in July and Earn a $5 Bonus Coupon with Every $50 in Merchandise!

Make Your Own Gift Bag With the Gift Bag Punch Board

Make Your Own Gift Bag With the Gift Bag Punch Board

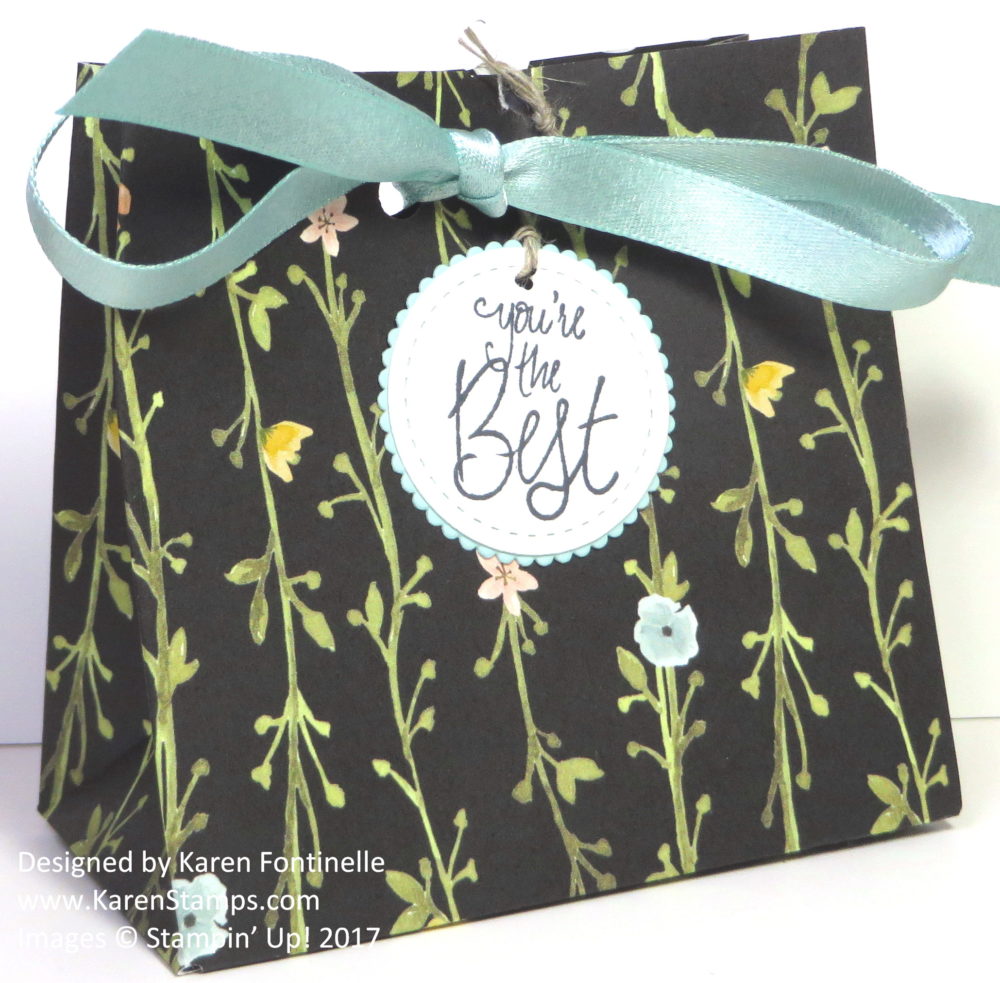
When I received my new catalog order the other day, as I quickly skimmed through the papers in the Whole Lot of Lovely Designer Series Paper, this pattern with the black background and little flowers just struck me that it would make a pretty gift bag! Of course the inside with the white polka dots is also really cute….which side to use??!

Instead of looking up directions online for how to measure, score, and fold  the paper to make a gift bag, I pulled out my Gift Bag Punch Board. The instructions are printed right on the punch board so I didn’t have to go looking for them. A scoring tool is tucked right into the board in a storage slot.  You can make the bag so that the sides are just straight, or you can score it as you make it so that the sides are gusseted and fold in a bit on the sides. This bag is basically a 3 3/4″ square size, but you can make various sizes with the punch board.

To finish off the bag, I just punched two holes in the top and threaded some new Pool Party Shimmery Ribbon through.  Very pretty ribbon! I also made a little tag using a stamp in the Label Me Pretty Stamp Set. I die cut that with the Stitched Shapes Framelit Die and layered the tag on a die cut scalloped circle made with the Layering Circle Framelit Dies. I used some Linen Thread to tie the tag onto the bag.  Linen Thread is a valuable product to have in your collection to use in many ways, sometimes as a visible accent and sometimes are something that doesn’t detract from the rest of the design.

Here’s the Stampin’ Up! video you can watch about the Gift Bag Punch Board and see how to use it.

I urge you to take a good look at the new designer papers in this new Stampin’ Up! Catalog because I think they are especially beautiful this year! I would say this Whole Lot of Love Designer Paper is my favorite, but then I’d say the Delightful Daisy paper is my favorite, but then I’d love the Foil Frenzy Paper, too!  So look them over and let me know which ones are your favorites!  Then try making your own gift bag with one of your favorite papers and the Gift Bag Punch Board!

SHOP ALL THE NEW PRODUCTS AT STAMPIN’ UP! ONLINE!

Quick and Easy Happy Birthday Card to Make

Quick and Easy Happy Birthday Card to Make

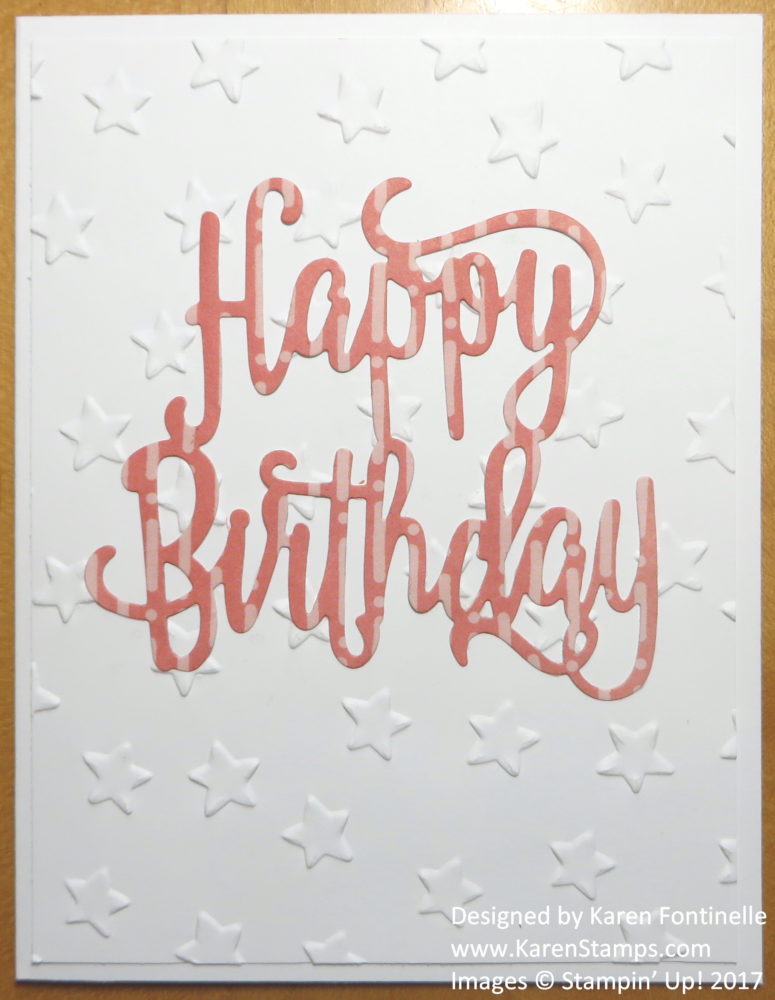
If you need a quick and easy happy birthday card to make, this is it!  You do need a Big Shot Die-Cutting Machine.  If you don’t own one, I’d highly recommend treating yourself to one. I’ve had mine since Stampin’ Up! started carrying them and use it practically everyday. It can do so much work and all you have to do is crank the handle!

For this card, I just used a Whisper White Cardstock base and a Whisper White layer. I think it gives a nice, elegant look!  I embossed the white layer with the Oh My Stars Embossing Folder, a new folder in the new Stampin’ Up! Catalog. The “Happy Birthday” is die cut with the Happy Birthday Thinlits Die.  It’s so simple to just have one die cut on the card but has such a fun impact!  I used a piece of the Delightful Daisy Designer Series Paper. You could also just used a piece of cardstock.

Now if you don’t own a Big Shot, the next best thing would be the Stylized Birthday StampIt’s  a single wood-mount stamp and quite cute for stamping a birthday greeting.

There are so many quick and easy way to make a birthday card, whether you own a Big Shot and accessories or just stamps, ink, and paper. Make those cards and mail them out! Real mail, real birthday cards, real cards to say I’m thinking of you can make a bigger impact on a person than you might imagine!

Shop Stampin’ Up! for the best selection of birthday stamps and accessories!