Category Archives: Big Shot

Make a Card For National Ice Cream Day

Make a Card For National Ice Cream Day

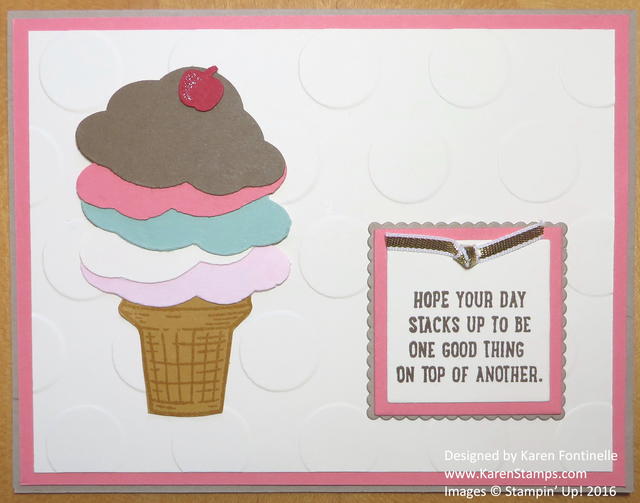
Today is National Ice Cream Day so why not celebrate by making a card about ice cream! Last year’s Ronald McDonald House Charities stamp set by Stampin’ Up! was carried over to the new catalog this year (which I think is a first, that I can remember) and is perfect to use to celebrate National Ice Cream Day! The Sprinkles of Life Stamp Set, with which you can make ice cream cones, also comes with a coordinating punch, the Tree Builder Punch by Stampin’ Up!,

I made the card with a card base of Crumb Cake card stock and a layer of the new In Color Flirty FlamingoThe background layer of the card is Very Vanilla embossed with the Polka Dot Embossing Folder.  The ice cream cone is stamped with Delightful Dijon Ink on Delightful Dijon Card Stock and just cut out with Paper Snips.  The ice cream scoops are punched with the Tree Builder Punch.  I made the flavors out of Pink Pirouette, Very Vanilla, Mint Macaron, Flirty Flamingo and Soft Suede.  The punch even has a little cherry (or in some cases it could be an apple!) to put on top of the ice cream! I added a little glimmer with the Clear Wink of Stella Glitter Brush to the cherry.  So fun to play with the Wink of Stella Glitter Brush!

The greeting comes in the stamp set and I layered it on the new Layering Squares Framelits Dies. Since I had a little space at the top, I added a little knot tied with the Gold 1/8″ Ribbon. This ribbon has been around for awhile and it is so useful.  It also comes in silver so be sure you have both!

What is your favorite ice cream flavor?  Be sure to celebrate National Ice Cream Day by eating a big bowl of ice cream with all your favorite toppings!  And if you must save calories, then make an ice cream card instead!

Shop Stampin’ Up! Online HERE!

Anniversary Card with Floral Thinlits and Floral Phrases Stamp Set

Anniversary Card with Floral Framelits and Floral Phrases

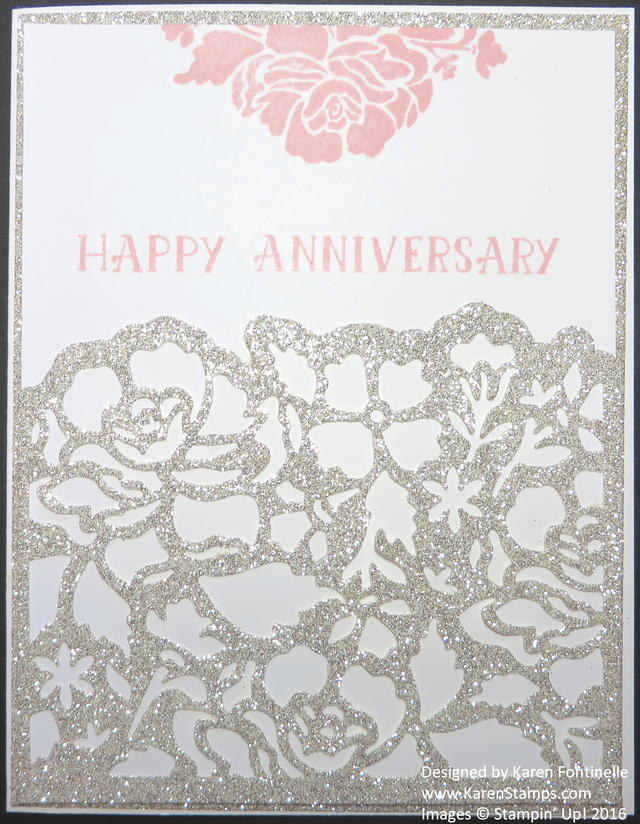
Sometimes an occasions calls for an extra-special card and the new detailed thinlits in the new Stampin’ Up! Catalog sure make it easy as with this Anniversary Card with Floral Thinlits and Floral Phrases. This was basically an easy card to make, just use your Big Shot and one of the new pretty framelits.

The card base is just Whisper White with a layer of Silver Glimmer PaperYou can cheat and cut out the center of the layer of glimmer paper to save and no one will be the wiser! Then another layer of Whisper White on top of that, although I recommend doing your stamping and gluing before adhering to the actual card. I used the beautiful new Detailed Floral Thinlits Dies, just the larger piece, cut off with the little curvy piece that goes across the top. I’m not sure it is necessary, but I did peel off the backing of the glimmer paper before die-cutting just in case it made it easier.  Be sure to roll through at least twice, forward and back, with the Big Shot. Then use the Big Shot Die Brush to get the die cut to release from the framelit and then to get the itty bitty pieces out of the glimmer paper.  Love that tool! If you don’t have that but you have a clean vegetable brush, someone told me that works too. But then you wouldn’t have the foam pad, too. I also used the new Big Shot Platform by Stampin’ Up! that comes with an adapter to use with the thin dies.

I found the “Happy Anniversary” greeting in the Number of Years Photopolymer Stamp SetAnd I couldn’t resist stamping part of the flower that comes in the Floral Phrases Stamp Set in Blushing Bride ink to match the flower.

Today is our 39th wedding anniversary so I will give this card to my husband, who will look at it, put it down, and later I will rescue it for my collection of samples! He never gets to keep his cards! Honestly, it is hard to believe we are even 39 years old, much less married for 39 years and if you add on the extra few years we dated beforehand, wow! Where does the time go??!

If you need a special anniversary card, wedding card, any kind of special card, you need these Floral Thinlits in your collection! You don’t have to die cut glimmer paper, any color paper will be beautiful and with embellishments you can dress it up even more or probably even dress it down. It is an impressive set to own, along with the Floral Phrases Stamp Set. Get them all in a Floral Phrases Bundle and save 10%! That will be just under $50, though, so add something else to your order so you can take advantage of Stampin’ Up! Bonus Days and receive a $5 coupon to use in August on another order!

Shop Bonus Days at Stampin’ Up! During July!

4th of July Flag Card with Swirly Scribbles Thinlits

4th of July Flag Card with Swirly Scribbles Thinlits

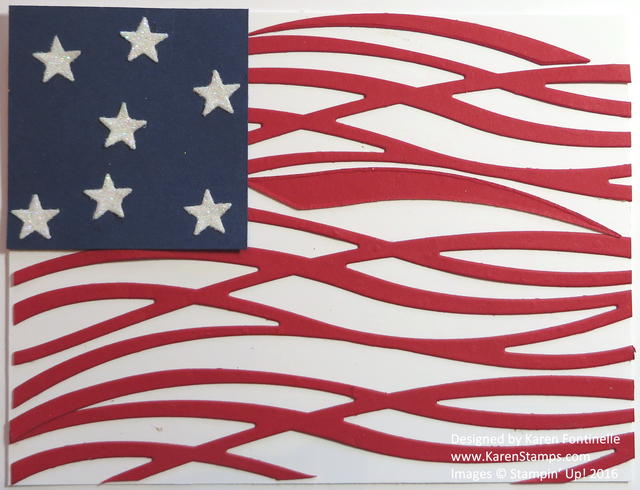
Today begins the 4th of July weekend here in the USA so I made this 4th of July Flag Card with Swirly Scribbles Thinlits to start the celebration! This is a big holiday weekend (as it falls this year) for families often with travel, family gatherings, picnics, and certainly fireworks! Be sure to fly your flag, if you have one. We have a realtor who always places American flags at every house in the whole neighborhood so it looks quite festive and patriotic!

I had seen versions of this card made with the Swirly Scribbles Thinlits, I changed mine just a little bit. These Swirly Scribbles Thinlits are just ripe for all kinds of creativity!  You just have to start die-cutting pieces in various colors and see what comes to your mind to make!  I cut about three strips of the wavy thinlit in Real Red to represent the flag’s stripes, adhered on Whisper White. You might need to add in some of the “scraps” from the die to fill in some empty space. I used the  Multipurpose Liquid Glue to adhere the thin strips.  Just put tiny dots of glue. For the star field I just cut a rectangle to fit in Night of Navy cardstock. The stars are diecut from the strip of stars in the Mini Treat Bag Thinlits Dies. (I keep telling you how much I love that batch of dies!!) I die cut them from the Dazzling Diamonds Glimmer Paper.

If you don’t need a 4th of July card, make this but adhere it to some layers and frame it for a home decor item for the holiday! Either way, just play with your new Swirly Scribbles Thinlits Dies and see if you come up with a card for the 4th of July or some other project!

Shop Stampin’ Up! 24/7

Flourishing Phrases Monochromatic Card

Flourishing Phrases Monochromatic Card

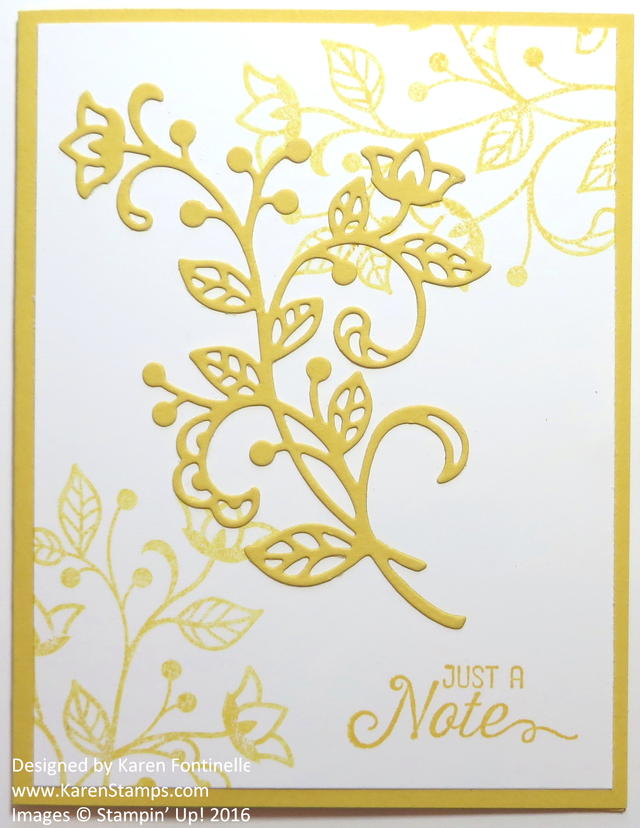
Not sure why I decided on this Flourishing Phrases Monochromatic Card, but it’s what I came up with while playing with the new Flourishing Phrases Stamp Set and the Flourish Thinlits Dies. I really thought I would stamp something randomly all over the background of the card, but then I ended up just stamping the two flower stems.  I actually the thinlit was going to cut out the stamped flower stem, but I was wrong! Which only makes sense since it would be very difficult to match up all those  flowers and stems inside the thinlit! That would have taken a “framelit” not a “thinlit”!

Anyway, when I die cut the flower stem, I was blown away by how beautiful and intricate it was! I have to say, with the new platform, the Precision Base Plate and rolling it through twice, the die came out perfect!  Then I used my Die Brush to get all the pieces out, and it was all very easy and quick!

I used Daffodil Delight for the card base with a Whisper White layer on the front.  I could have embellished the card further, maybe with pearls or rhinestones or glitter, but for today I just kept it simple. I think this will be a beautiful stamp set to work with along with the Flourish Thinlits Dies.

You can purchase the stamp set and thinlits dies in a Bundle HERE.

You, too, can make a beautiful card like this easy Flourishing Phrases Monochromatic Card.


Floral Thinlits Thank You Card in Peekaboo Peach

Floral Thinlits Thank You Card in Peekaboo Peach

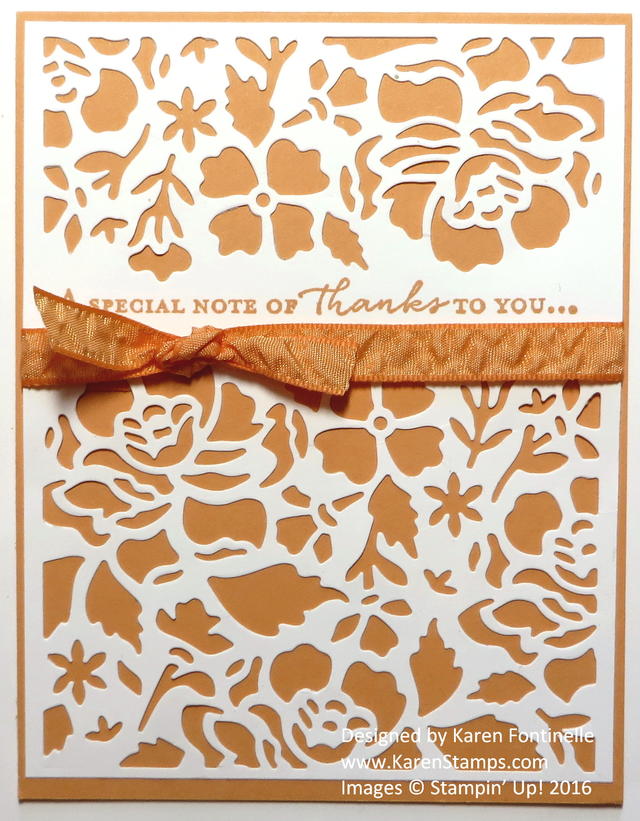
I was really anxious to play with the Detailed Floral Thinlits Dies and my Big Shot as soon as I got them, and this Floral Thinlits Thank You Card in Peekaboo Peach is one of the results. I actually started using the Floral Thinlits with the Floral Boutique Designer Series Paperbut of course these Floral Thinlits are beautiful with other colors as well, such as this new In Color Peekaboo Peach.  The Peekaboo Peach 3/8″ Ruched Ribbon is gorgeous to use on the card!  In fact, the ribbon is so gorgeous, that it is on backorder at the moment.  As I write this, it is due to be back in stock around July 11th. You really do have to get your hands on this beautiful ribbon as soon as it is available! The thank you greeting is stamped with the Floral Phrases Stamp Set.  Right now the Clear-mount version is backordered but you can purchase the Floral Phrases Clear-Mount Bundle and get both the stamp set and the Thinlits – and save 10%. You can also buy the stamp set in wood-mount.  While it is inconvenient and disappointing to have backordered products, it shows that Stampin’ Up! has some real hits in the new catalog!

If you would like a copy of the new Stampin’ Up! Catalog, please email me at Karen@KarenStamps.com with your contact information. Or you can view it HERE online.

With these new really intricate dies, if nothing else I would suggest you purchase the Big Shot Die Brush to help get out those little pieces from both the die and the die cut. And if you can take it another step, the Precision Base Plate might be beneficial to you. There is also the new Big Shot Platform that has a special adapter that comes with it and has a raised center portion to work better with these new dies. It probably all depends on your personal Big Shot and how it works for you. If it works on these fancy dies and you’re happy, then no need to purchase any of the newer accessories (except maybe the Big Shot Die Brush!). You can go from there and see what you need.

If you want to be able to make some really elegant cards, these Detailed Floral Thinlits Dies are for you for sure!  Check out the Floral Boutique Suite in the new catalog on pages 76-77 and the products online HERE.  You will be able to make cards like my Floral Thinlits Thank You Card in Peekaboo Peach and many other variations!

Shop Stampin’ Up! Online HERE!

Floral Boutique Thank You Card

Floral Boutique Thank You Card

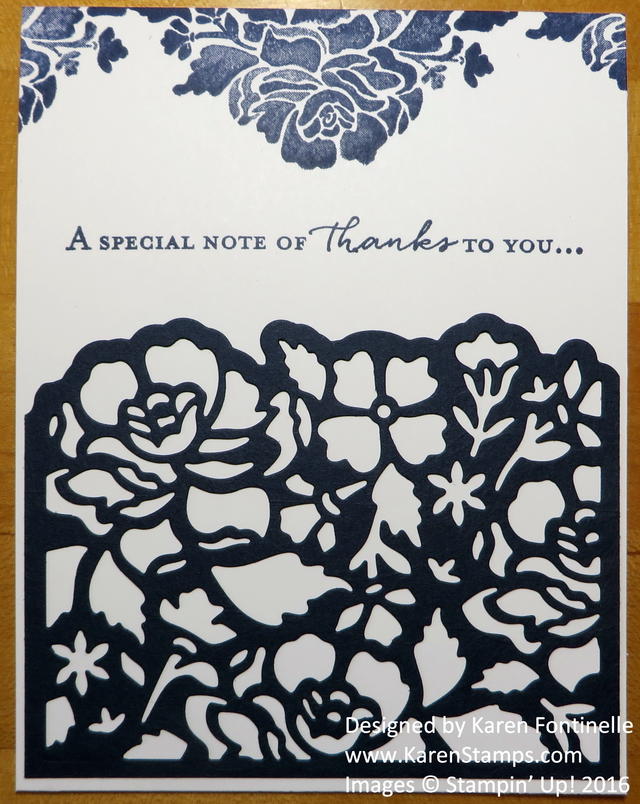
I think one of the most amazing collections of products in the new Stampin’ Up! Annual Catalog is the Floral Boutique Suite, and this Floral Boutique Thank You Card is one of my first creations from that suite. This new Stampin’ Up! Catalog, I think, has the most amazing products and display of samples and products on its pages. In this suite are a stamp set, intricate thinlits for die-cutting, Baker’s Twine, Washi Tape, and designer series paper. Everything you need to make amazing projects! Not that you have to stick with the colors shown. Do your own thing!  But the inspiration is there on pages 76-77 for the taking to get you started!

This card is just a piece of Whisper White Cardstock with the fold at the top (it would have been better to use the Whisper White Thick Cardstock if I would have thought of it!), so it is cut lengthwise at 4 1/4″ instead of horizontally.  Then I scored it at 5 1/2″.

After getting my first big order (of course, not counting my pre-order!) the night before, I spent yesterday afternoon experimenting with the new Detailed Floral Thinlits DiesOn this card, I only used the one large die cut on the bottom of the card and stamped with the Floral Phrases Stamp Set. When you stamp with this big flowery stamp, you may think it is not stamping properly, but it actually is designed to have lighter and darker areas, so don’t worry! It’s that “denim” look. After stamping the flower in the top center, I stamped the ends of the stamp on each side so that it would go all the way across the top of the card.

I used the new Big Shot Platform that comes with a Thin Die Adapter, kind of like a shim. If I didn’t use that piece, it didn’t come close to cutting. I also used the Precision Base Plate which is very helpful in cutting these intricate dies. I find the Die Brush to be indispensable! It’s not very expensive, so I would put that on your next order for sure. I tried to do various combinations of old and new platforms, Precision Plate, etc. but I got myself mixed up so I have no conclusions to share right now! I did find, that with MY Big Shot, cutting both the larger and smaller dies on cardstock on the same run through the Big Shot was VERY hard to go through the Big Shot but each one separately worked fine.  With all of these things, you will have to see what works best with YOUR Big Shot!  But these dies are beautiful and will make gorgeous cards and projects. If you don’t own a Big Shot yet, I would put that on your Wish List because I use my Big Shot all the time and you will want to get in on using these fancy new dies!

On the bottom of the inside of the card, I just adhered a strip of the Floral Boutique Designer Series PaperI could have used a piece of Washi Tape or added some Rhinestones to the front of the card. Lots of possibilities!

You will want to put this whole Floral Boutique Suite on your next order, if you haven’t already, so you can make a card like this Floral Boutique Thank You Card.

Shop Stampin’ Up! Online!


Affectionately Yours Mini Treat Bag Birthday Card

Affectionately Yours Mini Treat Bag Birthday Card

On Friday I needed a quick birthday card before I left town for the weekend, and I came up wtih this Affectionately Yours Mini Treat Bag Birthday Card.  I decided to combine the new Affectionately Yours Specialty Designer Series Paper with one of my favorite things, the Mini Treatbag Thinlits Dies.

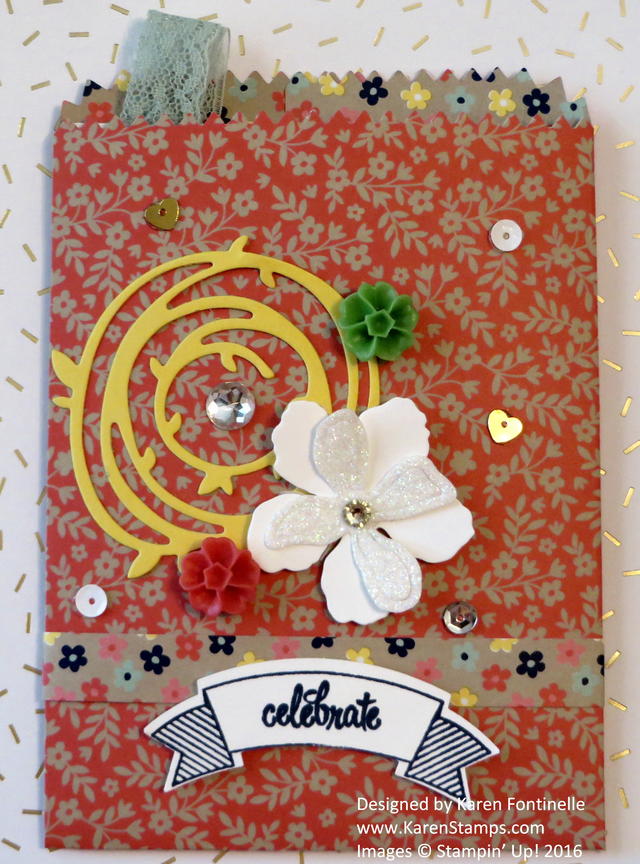
I used the Mini Treat Bag Thinlits and the Big Shot to die cut the mini treat bag out of this cute paper.  I love how the inside pattern is as cute as the outside and provides a good contrast. Out of a thin scrap, I made a belly band around the bag so I could showcase that pattern from the inside of the bag a little bit more. Then I die cut a Daffodil Delight piece of cardstock with a thinlit from the Swirly Scribbles Thinlits Dies to kind of look like  a flower and put a large rhinestone (retired) in the center. I already had the white flower pieces die cut from the Botanical Builder Framelits Dies in my pile of scraps so I used those and added sequins from the Metallics Sequins Assortment plus a couple of the retired In Color Blossom Accents since I was hand-delivering the card. They make mailing the card a little difficult!

I used the Thoughtful Banners Photopolymer Bundle (the stamp set and punch) to make the little greeting on the front. And on the top of the card inserted inside the treat bag I stapled on a piece of the retired lace to pull out the card. I used my favorite Handheld Stapler by Stampin’ Up!

I hope you are enjoying the new Stampin’ Up! Catalog.  If you need one and do not have a Demonstrator, please contact me.

Shop Stampin’ Up! Online 24/7.


Learn to Make These Cute Popcorn Boxes!

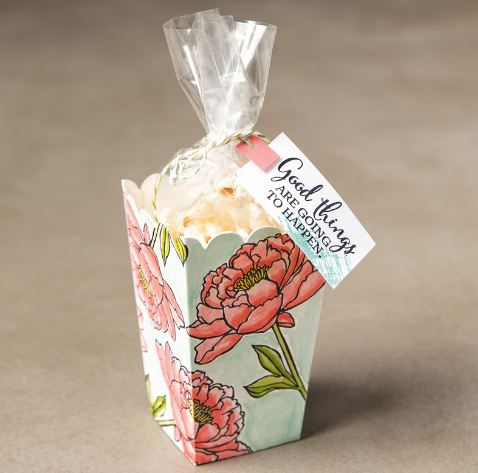
Popcorn Box Samples

Images (c) Stampin’ Up! 2016

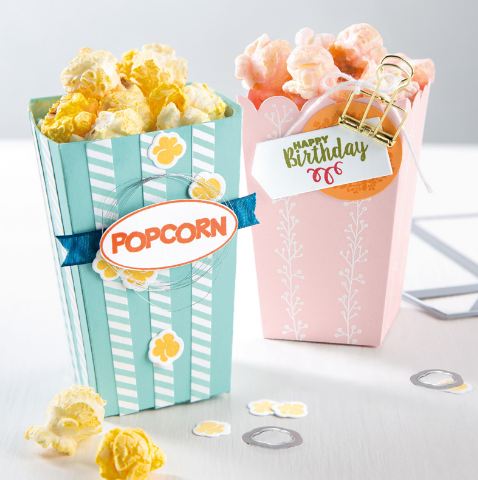
If you don’t want to get coerced to buy these Popcorn Box Thinlits Dies, then don’t watch this Stampin’ Up! video with Donna Griffith from the Home Office! I was NOT interested in these (well, I’m “interested” in every single product Stampin’ Up! sells, but being as I can’t have it all, I have to limit myself!), but then I watched this video and these Popcorn Boxes sure look cute!!!

Just think how cute these would be as party favors, teacher gifts, Christmas gifts, neighbor gifts, treat holders, even popcorn boxes!! Just think of how you could decorate them for Halloween parties!! Or something in red, white and blue for July 4th! Yep, they just might have to go on my next order!!

Popcorn Box Birthday Blooms Sample

Images (c) Stampin’ Up! 2016

Popcorn Box Thinlits Dies

Put these Popcorn Box Thinlits Dies on your Stampin’ Up! order!

Pop of Pink Swirly Scribbles Polka Dot Scalloped Tag

Pop of Pink Swirly Scribbles Polka Dot Scalloped Tag

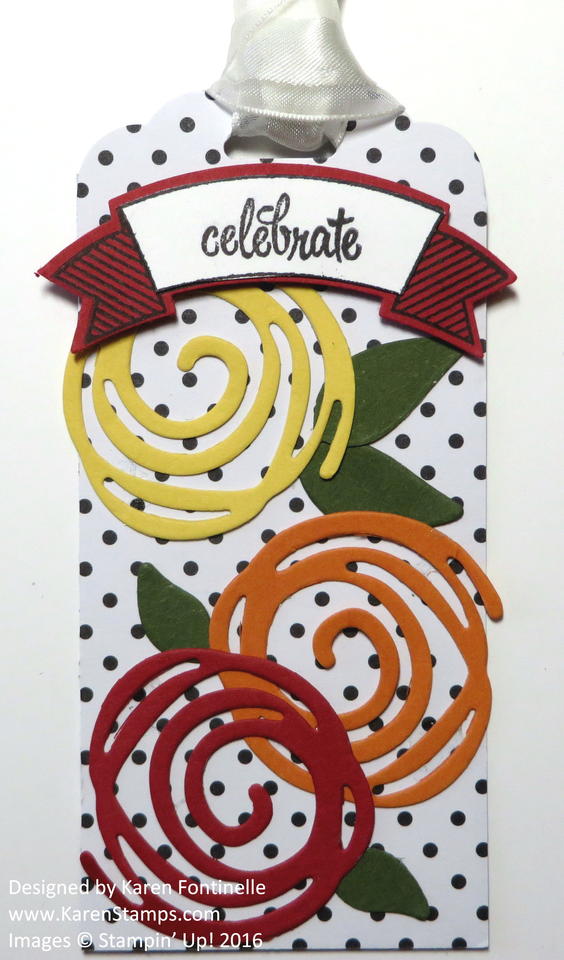
Here is a quick and easy project to make a Pop of Pink Swirly Scribbles Polka Dot Scalloped Tag. I simply punched a tag with the Scalloped Tag Topper Punch out of the polka dot pattern of one of the papers in the Pop of Pink Specialty Designer Series Paper. I first was going to use some other die cut flowers, but then I thought it might be fun to see how the Swirly Scribbles die cuts might work. I chose three colors in the Brights family:  Real Red, Pumpkin Pie and Daffodil Delight. I also die cut some green leaves.

The banner is stamped with the Thoughtful Banners Stamp Setboth on Whisper White and Real Red so that the greeting cut be cut and adhered to the Real Red banner. These were punched with the Duet Banner Punch. You can purchase this stamp set and the punch in a Thoughtful Banners Bundle and save 10%!

***Be sure to check out Paper Pumpkin today so you are ready for the FLASH SALE!  Purchase your first Paper Pumpkin Kit for only $5 beginning today, June 9th at 5:00 pm Mountain Time and ending on Friday, June 10th at 11:50 pm Mountain Time.

The first Paper Pumpkin Kit comes with a clear block on which to mount the stamps that come in the kit. Everything you need for the surprise project is inside the box!  Stamps, ink, and everything cut and ready to use!  You can follow the enclosed directions, watch a Stampin’ Up! video, or change up the project however you like.

Details

  • The price of the kit is $5 USD.

  • This offer is open to first-time subscribers only. Discount applies to one kit for June 2016. After the first month, the price for the subscription will return to $19.95 USD.

  • Offer starts on Thursday, June 9 at 5:00 PM (MT) and ends Friday, June 10 at 11:50 PM (MT).

  • Available for month-to-month subscriptions, not prepaid subscriptions.

JOIN PAPER PUMPKIN HERE TODAY!

Pop of Pink Mini Treat Bag

Pop of Pink Mini Treat Bag

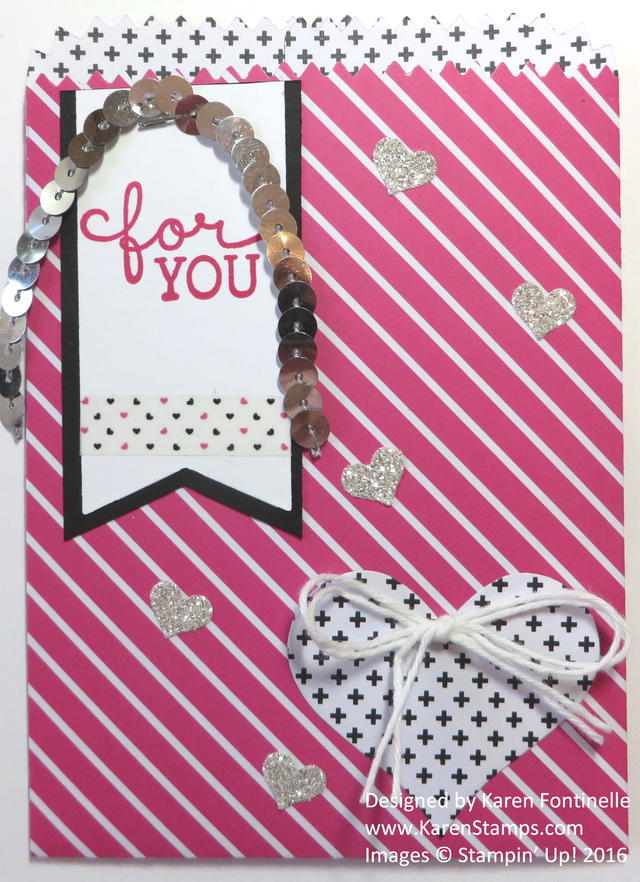
Today I thought I would make a Pop of Pink Mini Treat Bag with the pretty new Pop of Pink Specialty Designer Series Paper and the Mini Treat Bag Thinlits Dies. I have always loved this die set, so many opportunities for creativity! The die set contains not just the ones to make the treat bag, but also many dies for the extra embellishments, like hearts, a banner, star, bow, a couple of greetings and more. This can be a treat bag but it can also hold a card or gift card or monetary gift! There are even ways to modify this bag to make it more 3D.

I made the bag with the diagonal stripe pattern from the Pop of Pink paper and die cut a heart out of the same paper but turned it over on the other side. I die cut a banner, but cut off the one end so it would be straight and cut a slightly larger piece of Basic Black as a layer underneath the Whisper White banner. The greeting on the banner is from the Birthday Blooms Stamp Set. For a little interest I added a strip of Pop of Pink Designer Washi TapeI attached a piece of the Silver Sequin Trim with the Handheld Stapler. (Love this stapler by the way!) I die cut the strip of hearts from the Dazzling Diamonds Glimmer Paper and used the individual hearts for some embellishments and pizzazz. And for a  little something on the Pop of Pink heart, I took two strands of Whisper White Solid Baker’s Twine to make a bow and adhered with a rolled up Glue Dot.

The Pop of Pink Designer Paper  has been so popular it is backordered, but you can still order it now and when Stampin’ Up! gets more they will send it to you. A big supply is due in about a week so it won’t be long!

You can purchase the Mini Treat Bag Thinlits along with the You’re So Sweet Stamp Set in a Bundle and save 10% if you wish.

Check out the Mini Treat Bag Thinlits Dies and and Pop of Pink Specialty Designer Series Paper and consider ordering the dies to go with your Big Shot and have fun making the Pop of Pink Mini Treat Bag

Learn About the Big Shot by Stampin’ Up!

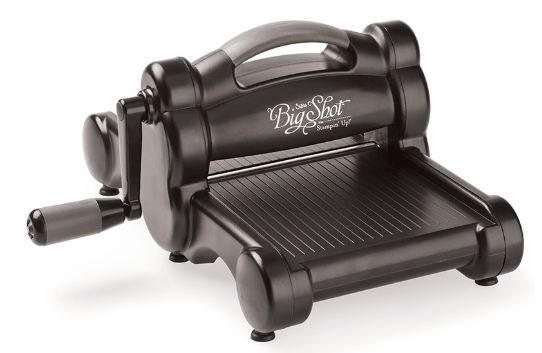
Big Shot Machine

If you already have the Big Shot, then you know what an amazing tool it is in making projects.  I use mine almost everyday! It is just left out all the time so that I can use it at a moment’s notice. Now that Stampin’ Up! is selling fancier and more intricate dies, there is a new platform for the Big Shot which they say will work better with the more detailed thinlits. This is great except it is starting to get confusing about what to use for a platform for which thing! I will be ordering the new platform, but I don’t have it yet.

I found some Stampin’ Up! videos that will help answer these questions!

These videos will give you some explanation of all these new-fangled things!

The new Big Shot Platform comes with an adapter for the thin dies. You can purchase this platform to go with the Big Shot Machine you already own. If you purchase a Big Shot, your new Big Shot will come with this new platform. They also recommend using the Precision Base PlateThe Precision Plate first came out in the Occasions Catalog. There is also the Magnetic Platform, which is useful for holding dies in place on your paper as they go through the machine.

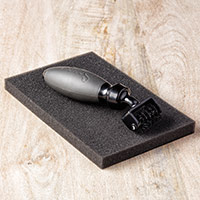
Another less expensive accessory for your Big Shot is the Die Brush. You can place the foam pad in an empty stamp case and then your pieces will fall into the stamp case and not all over your table! The die brush is handy for helping to release the die cut from the die or to help the design release from the paper.

Houston Flood Swirly Bird Boat Card

Houston Flood Swirly Bird Boat Card

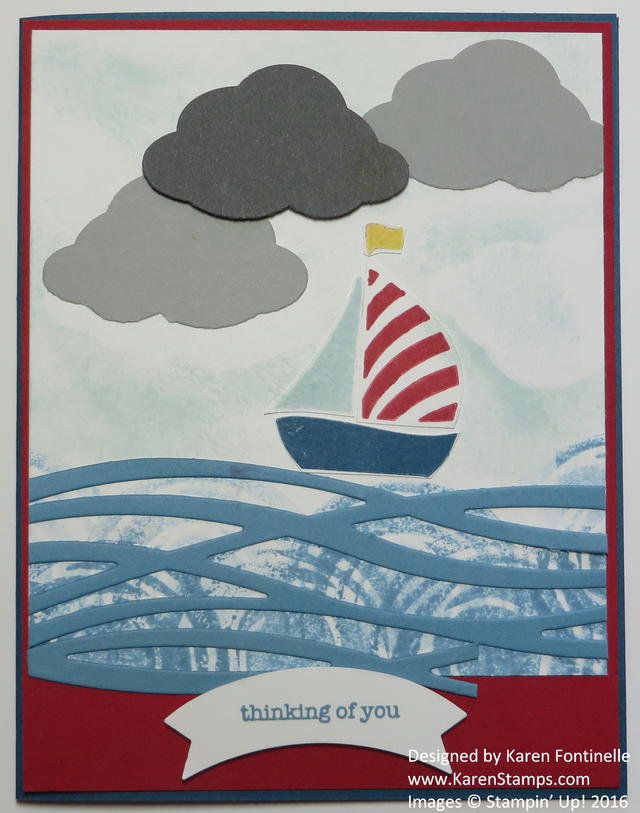
For many people in the Houston area and in other parts of Texas this week, this card made with the Swirly Bird Stamp Set and Swirly Scribbles Thinlits Dies represents the only way the people affected by the Houston flood have of getting around. While we are fine here in our neighborhood,  some of these other areas just outside of Houston are completely flooded and some neighborhoods an island unto themselves. I’ve seen videos of horses up on someone’s front porch to keep them out of the water, cattle being herded across a roadway and train track, and an airboat sailing through the water right next to a highway. It’s amazing.

It’s always good to have stamping to lift your spirits on a rainy day, so I thought making a boat and floodwaters with the Swirly Bird Bundle was a good idea. Of course if the rivers aren’t flooding where you live, you could make this same card and have it be a boat sailing along in calm waters! I stamped some of the swirly circle stamps for the water background and overlaid that with die cuts made with the Swirly Bird Thinlits. The pieces that make up the boat are stamped and cut out with Paper Snips. I added some dark clouds punched with the Tree Builder Punch. I also sponged some Soft Sky ink in the background.  The greeting is from one of my favorite stamp sets, Teeny Tiny Wishes and punched with a new punch, the Duet Banner Punch.

This Swirly Bird Stamp Set and Swirly Scribbles Thinlits Dies are proving to be some of the most popular items in the new catalog! It is a stamp set that will take some creativity to get full use of, but you can bet that plenty of Demonstrators and stampers will be coming up with lots of cute ideas that we can all copy! If you want both the stamp set and dies, you can purchase them together in a Swirly Bird Photopolymer Bundle  and save 10%. And if you didn’t want both, I would suggest just the Swirly Scribbles Thinlits Dies.  I think you will be able to do a lot just with those.

Hopefully all the rain in Texas will move on soon and people can get out of their boats and use the streets for cars again.  Then I can take the dark clouds off my Houston Flood Swirly Bird Boat Card and replace it with a swirly sun!

Shop the new catalog at Stampin’ Up!

Swirly Scribbles Die Cut Flowers Card

Swirly Scribbles Die Cut Flowers

Images copyright Stampin’ Up! 2016

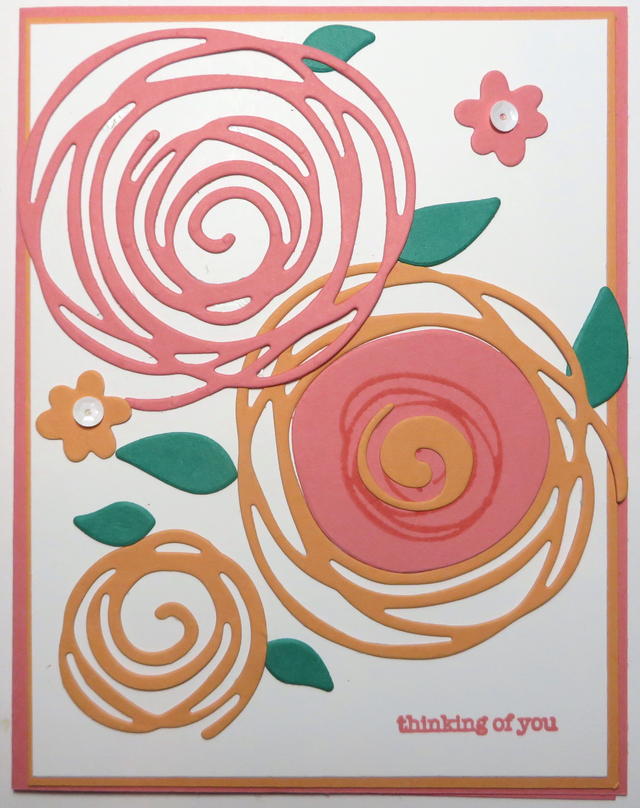
As you look through the new Stampin’ Up! Catalog, if you have one, or see the products online on June 1st, you might skip over the Swirly Bird Stamp Set (141749) and the Swirly Scribbles Thinlits Dies (141497), but now that I have played with them a little bit, I think these both are going to become favorites. I made the Swirly Scribbles Die Cut Flowers card mostly with just the die cuts .  I didn’t even have a real plan in my mind, just thought I would try out the Thinlits. I used the new In ColorsSweet Sugarplum, Peekaboo Peach, Flirty Flamingo, and Emerald Envy for the leaves. I used one stamp to stamp the center in the Flirty Flamingo flower center piece (which probably technically is a scrap from the die cut!) and added a couple of white sequins from the Metallics Sequin AssortmentI had to choose a small size greeting so I just went with the Teeny Tiny Wishes Stamp Set (one of my favorites!) and choose the generic “thinking of you” greeting.  I’m so happy that stamp set is carrying over to the new catalog!

You will be able to purchase the Swirly Bird Photopolymer Stamp Set and the Swirly Scribbles Thinlits in a Bundle page 152 (in the new catalog) and save 10% in the new catalog!

If you are interested in these wonderful products from Stampin’ Up! and do not have a Demonstrator yet, I would be happy to be yours!  Contact me if you would like a hard copy of the catalog. If you prefer looking at the catalog online, it will be up on Wednesday, June 1st! That’s less than a week!

Just a few days left to get any of the retiring products from the current catalog AND the Occasions Catalog!  Be sure to check out the Retiring Products List HERE or shop the Retiring Category in my Online Store HERE.  When the new catalog comes out June 1st you will be able to order the Swirly Bird Bundle and have your own fun making all kinds of creations, like this simple Swirly Scribbles Die Cut Flowers Card!

Shop Stampin’ Up! Online 24/7

Graduation Congratulations Card with Large Numbers Framelits

Graduation Congratulations Card with Large Numbers Framelits

It is hard to believe that it is graduation time for schools, so if you need a graduation card, perhaps this Graduation Congratulations Card with Large Numbers Framelits will help you out.  I wanted to use the Large Numbers Framelits Dies so I die cut the numbers with my Big Shot for the graduation year. I used the Gold Foil Sheets for the numbers.  I tried another idea on the card but it didn’t work so then I thought of stamping “Congrats” randomly on the background of the card. This stamp comes from the Tin of Cards Stamp Set. I stamped it with Smoky Slate Ink  because I wanted it to show up but still be kind of muted in the background. The banner stamp is also included in the Number of Years Photopolymer Stamp Set and can be die cut with the banner framelit in the Large Numbers Framelits Dies. The greeting is stamped from the Teeny Tiny Wishes Stamp Set, one of my favorites and most used stamp sets.  It fits perfectly inside this banner.

Now I did make a little graduation cap to put on the card but it didn’t fit very well, so I finally decided to just let it go, the card is fine without it.  Sometimes you have to stand back and realize that even if the card or project you are making isn’t as perfect or fantastic as YOU want it, someone else will not be looking at it as critically as you are. No one will open this card and say, “Why on earth did she not put a punch art graduation cap on the front??!”  You have to remember that when you are creating and don’t make stamping more difficult for yourself! And sometimes less is more!

You might want to consider purchasing the Number of Years Bundle of the Number of Years Stamp Set and the Large Numbers Framelits Dies so you are all set for making all kinds of birthday, anniversary, graduation and other cards, scrapbook pages, and who knows what?! Both items will be in the new Stampin’ Up! Catalog June 1st, but they will no longer be in a bundle, so get them now in a bundle while you can and save 15%!

Shop Stampin’ Up! Online or contact me to place an order!

Make a Birthday Bouquet Treat Bag with the Mini Treat Bag Thinlits

Birthday Bouquet Mini Treat Bag

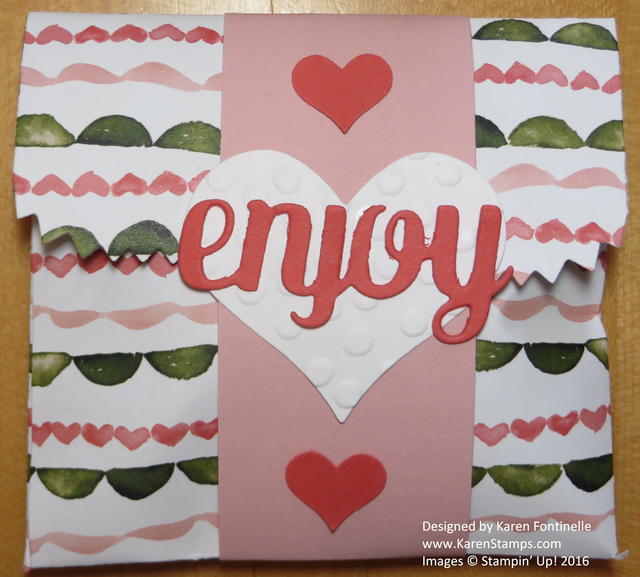
I’m back to one of my favorite projects, using the Mini Treat Bag Thinlits Dies to make a special treat bag with the Birthday Bouquet Designer Series Paper. I love using the Mini Treat Bag Thinlits Dies for lots of projects! The basic way to use the dies is to make a treat bag with an opening in the top like any little sack and then embellish it. But this one I folded the top over and added a belly band to hold it closed.  It is filled with two chocolates and a tea bag. The die cut heart also comes in the die collection. I embossed the heart with the Decorative Dots Embossing Folder just to add a little texture. The small hearts are punched with the heart punch in the Itty Bitty Accents Punch PackThe word “Enjoy” is also one of the die cuts.  You really get a lot in the Mini Treat Bag Thinlits Dies!  The belly band is 8 1/2″ x 1 1/2″ and just folded around the bag.  The bag is scored at 3 1/2″ from the bottom if you want a score line to help fold the top over.

There are so many variations to making these treat bags and embellishing them! Check out my post HERE to see the other similar one I made,

We’re moving along in May so be sure you check out the Retiring Stampin’ Up! products list to see what is still available and what you want before they are gone May 31. Stamps are guaranteed though May 22 since Stampin’ Up! manufactures their own stamps in Kanab, Utah. Other products are only available while supplies last.  If you see it in the Online Store, then it is still for sale!

Stampin’ Up! Retiring List

Shop Stampin’ Up! Retiring Products