Category Archives: Big Shot

Cherry on Top Easy Amazing Birthday Card

Cherry on Top Easy Amazing Birthday Card

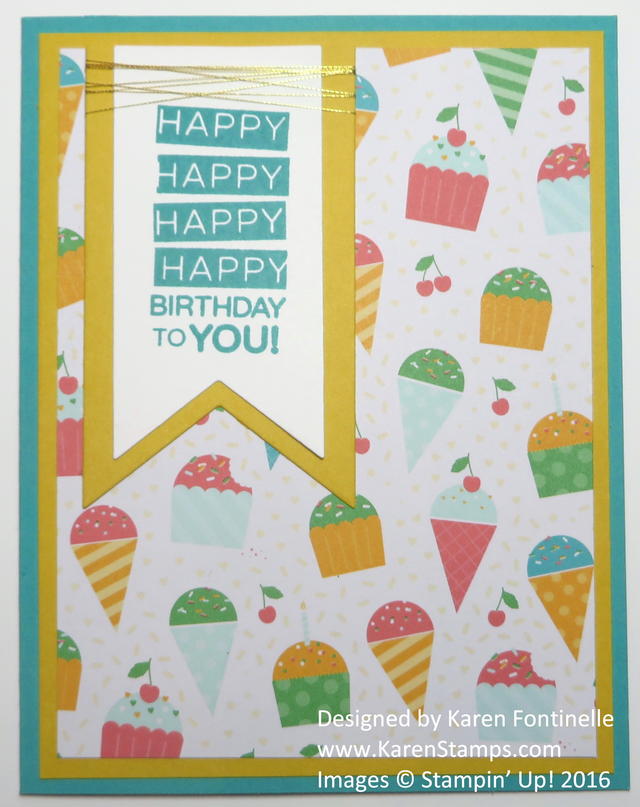
Here is a Cherry on Top easy Amazing Birthday card!  If you are looking for a simple birthday (or most any occasion) card to make, this is one you should try. All it takes is a change of paper and/or greeting to fit any reason to send a card!

One of the retiring stamp sets I am going to miss is the Amazing Birthday Stamp Set! It is even discounted on the Retiring Stamps List. It has birthday-specific stamps but some of the other stamps you can use for other occasions, too!

The card base is Bermuda Bay, with a layer of Crushed Curry, both of which coordinate with the Cherry on Top Designer Series Paper Stack. My Cherry on Top Paper Stack had gotten lost in the shuffle somehow so I was glad to think about it again, find it, and use it because it has some fun, colorful papers in it. It’s “Happy” paper to use!

I used my Banner Framelits Dies to die cut the layered banner on the front of the card. If you like, you can save 15% by purchasing the Amazing Birthday Stamp Set and the Banner Framelit Dies together in the Amazing Birthday Bundle.  I had forgotten these two products came together in a Bundle!

All Bundles are being retired right now, but that doesn’t mean all the products individually are being retiring.  They are just taking apart the Bundles to make room for NEW Bundles in the new catalog and perhaps one of the items in the Bundle is retiring, such as the stamp set or the designer paper.

For a final embellishment, I wrapped some Gold Metallic Thread around the top of the banner. This is not retiring but you may as well put it on your order to have on hand because it is an inexpensive, fun bit of pizzazz to add to any of your cards or projects.

Try making this Cherry on Top Easy Amazing Birthday Card or change it up with your own design!

Stampin’ Up! Retiring Products:  Stamps and Everything Else!

Mini Treat Bag Thinlits Balloon Birthday Card with Envelope

Mini Treat Bag Thinlits Balloon Birthday Card with Envelope

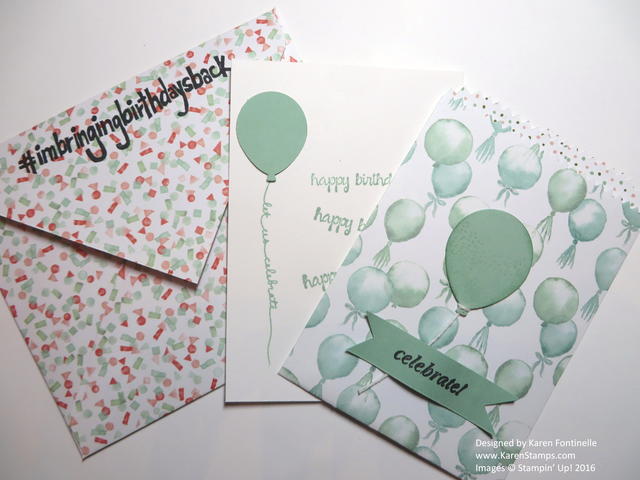
One of the items on the final week of Stampin’ Up! Weekly Deals is the Mini Treat Bag Thinlits! That is what I used to make this Mini Treat Bag Balloon Birthday Card!  I used the Birthday Bouquet Designer Series Paper to make the treat bag. Then I punched a matching “real” balloon with the Balloon Bouquet Punch. To turn this into a birthday card, I added a card of Whisper White to slip inside and stamped with the smaller balloon from the punch adhered to the card. The larger balloon is on the bag.  And to finish it off, I used the Envelope Punch Board to make a matching envelope with another pattern in the pack of designer paper.

The Mini Treat Bag Thinlits DIes have been one of my favorite dies!  Be sure to check it out and perhaps add it to your next order!

Order Stampin’ Up! Products HERE!

A Paper Quilt Card for National Quilting Day 2016

A Paper Quilt Card for National Quilting Day 2016

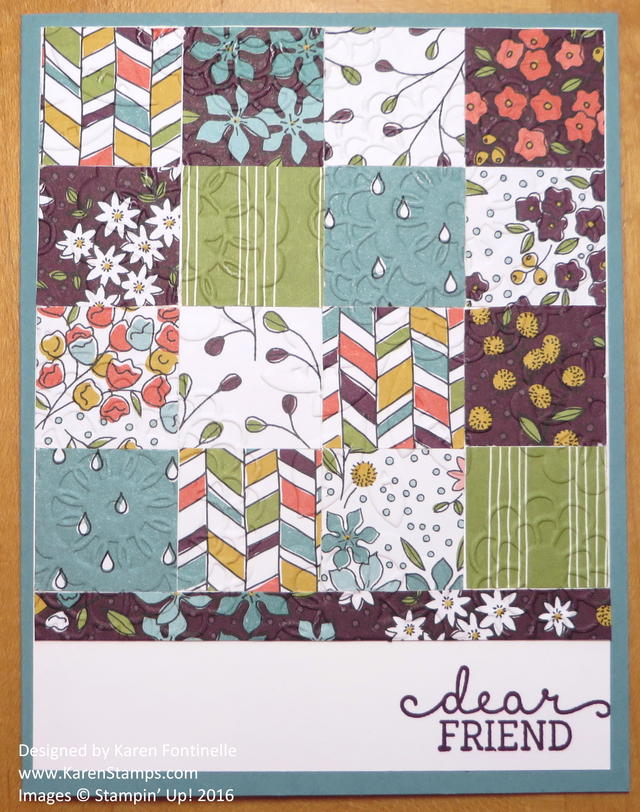
Here is a paper quilt card to help celebrate National Quilting Day 2016 today! This card demonstrates that we cardmakers can make something resembling a quilt. This is just a simple square block pattern I chose to make, but you can also make cards resembling the more complicated quilt patterns that are out there. If you look closely at the card photo, you will see that I also embossed the “quilt” with the Lovely Lace Textured Embossing Folder  and the Big Shot.  I think this gives the paper the look of actual quilting – but certainly is a lot easier on a card than a real quilt!  I urge you to use a quilt pattern today or sometime soon as inspiration for a card you are making!

The card base is the Lost Lagoon Card Stock with a Whisper White layer. I punched squares of paper with the 1″ Square Punch and adhered the squares to the Whisper White.  The greeting at the bottom is from the stamp set Birthday Blooms.  I love the greetings and design in this stamp set. The designer paper I chose to use for the “quilt” is from the Sale-A-Bration Brochure on page 12 called Wildflower Fields Designer Series Paper (#141022). You can earn this paper FREE with a $50 Stampin’ Up! purchase!

If you are a stamper or papercrafter, I bet, like me, you have also dabbled in other crafts, perhaps quilting. I did make a quilt years ago for my son when I found some antique-looking baseball fabric in a quilt shop. It is rather unusual to find fabric for boys so this caught my eye. I made the quilt top and had it machine quilted. The quilt top wasn’t perfect, but it was the one and only quilt I made from “scratch”.  I was just glad to get it completely finished! I think a lot of crafts have cross-overs, so it is possible to honor quilting on National Quilting Day even if our craft is stamping. Make a quilt card with your paper, ink and stamps instead of fabric! It certainly is easier!

Shop Stampin’ Up! for all your papercrafting supplies!

Make a St. Patrick’s Day Card

St. Patrick's Day Bloomin' Love Heart Card

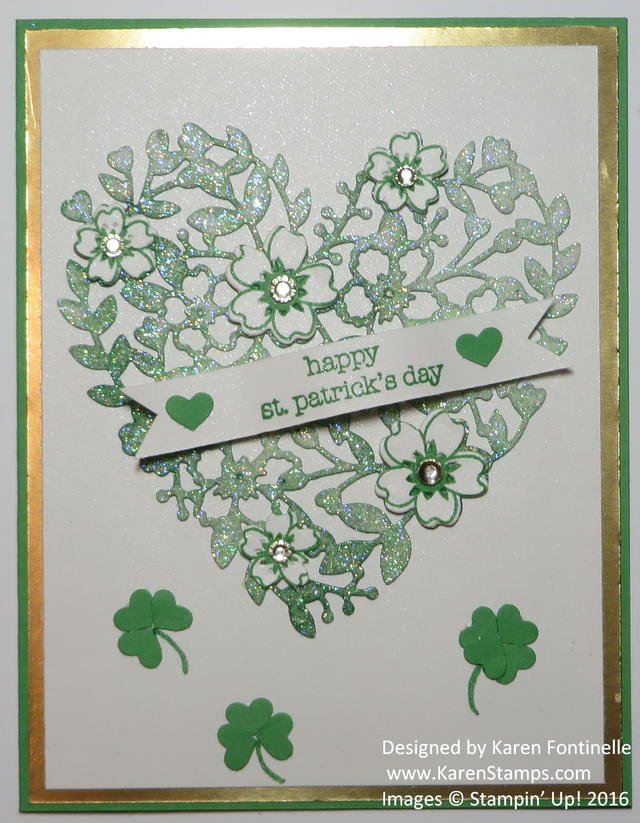
It’s time to make some St. Patrick’s Day cards if you are Irish or have some Irish friends or family! St. Patrick’s Day is Thursday, March 17 so it is coming soon! You don’t always have to have the exact stamp for the theme. If you just look through your supplies, you will almost always find something you can substitute that will still express the occasion. For example, I just had this Bloomin’ Heart Thinlit Die in mind for a St. Patrick’s Day card even though you might think it’s not quite the right thing.  But I colored it green, so I think it works perfectly!  And certainly is pretty in person!

I die cut the Bloomin’ Heart out of Dazzling Diamonds Glimmer Paper and then colored the heart with my Aqua Painter and Cucumber Crush Ink Refill. You can experiment with how light or dark you want to color your heart because it likely will dry a little lighter than the color goes on. But you can go back and add more color if you want. Most likely, it will come out a little varigated because you won’t get the exact amount of color over each area.

The card base is Cucumber Crush with a Gold Foil Sheets by Stampin’ Up! layer and Shimmery White on top of that.  I liked the Shimmery White to match the glimmer paper.  I also stamped some flowers from the Bloomin’ Love Photopolymer Stamp Set and die cut with the Bloomin’ Heart Thinlits Dies. They are adhered to the heart with Mini Glue Dots. To add a little bling, I added some Rhinestone Jewels to the flower centers.

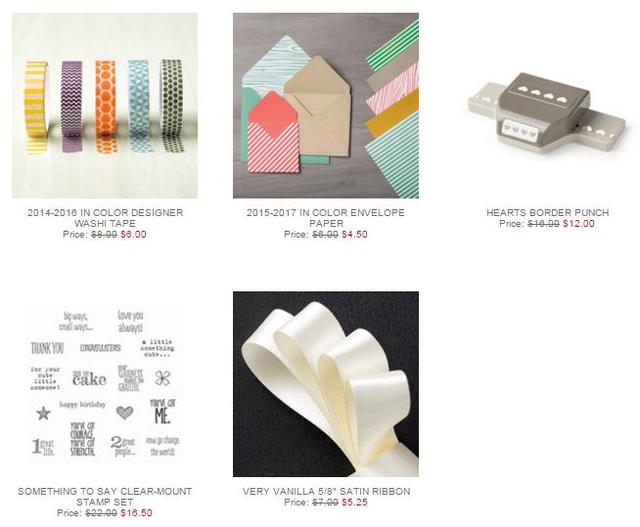
I didn’t have an shamrock stamps, but you can make your own shamrocks with hearts as I did on the bottom portion of this card. They are punched with the Hearts Border Punch. Just put three or four together and draw in the stem with a green Stampin’ Write Marker.

The greeting is from Teeny Tiny Wishes, one of my favorite stamp sets! It DOES have a “Happy St. Patrick’s Day” stamp, but if you don’t own this stamp set, you might have a difficult time finding that greeting. In another stamp set, I found the words “Lucky You” and I thought that would work also.  So if you ever don’t have the exact right thing, just look and see what you do have that will work just fine!

Remember, today is the last day for these Stampin’ Up! Weekly DealsPick up several packages of Rhinestone Jewels at a discount! Just add these deals to your order, and when you reach $50 or more, choose a FREE Sale-A-Bration item! And remember, there are three NEW Sale-A-Bration products you might like as well!

Sale-A-Bration New Products 1

Sale-A-Bration New Products 2

Shop at my Stampin’ Up! Online Store for your papercrafting supplies!

Playful Pals Easter Bunny Pyramid Treat Box

Playful Pals Easter Bunny Pyramid Treat Box

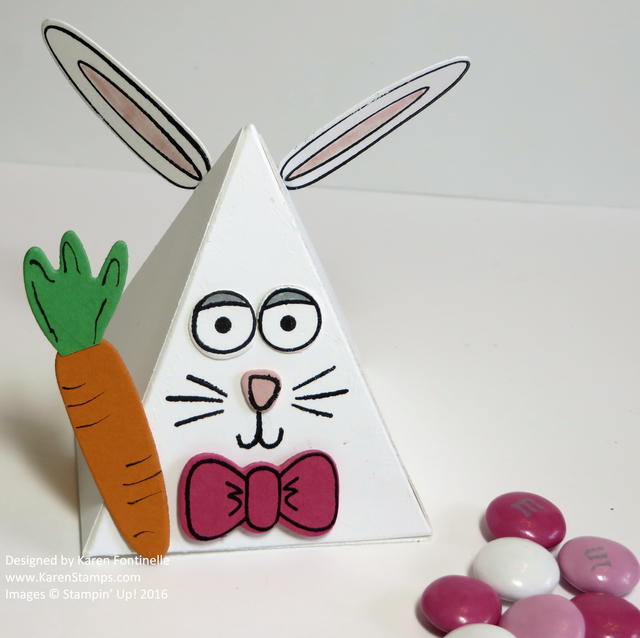
If you get the Playful Pals Photopolymer Bundle, which includes the Playful Pals Stamp Set and the Pyramid Pals Thinlits Dies, and you spend some time playing with it, you will just become more and more creative playing with all the stamps and dies and thinking of all the possibilities, such as my Playful Pals Easter Bunny Pyramid Treat Box.  I didn’t even know if there were proper “ears” in the set, but there were, and then I die cut a bunny ear out of orange card stock for a carrot and a green piece that is probably most like a frog’s foot for the leafy top of the carrot. I just drew in the little lines on the carrot and the leafy top with a black marker.  A lot of times I find that the more I sit and play with my stamps and accessories, the more ideas I can come up with.

Bunnies aren’t just for Easter!  You could make Playful Pals bunnies out of other colors, even designer paper, just for fun.  How cute will they be for babies or baby showers or gifts?! Little kids will like them as a birthday party favor.

With this Playful Pals Photopolymer Bundle, you can just stamp on the pyramid box or you can stamp and use die cuts to make things a little more 3D. So many possibilities! You can copy ideas you find online, but I also challenge you to just play and stamp and stamp and play and see what you come up with all the little pieces and parts!

Don’t forget the Stampin’ Up! Weekly Deals that end tomorrow!  You might for sure want the Ornate Tag Topper Punch and especially the very cute Tin of Cards Project Kit by Stampin’ Up! You might also want to add the Tin of Cards Photopolymer Stamp Set that has great greetings and little doodles that I’ve used on other projects, not just the Tin of Cards.

If you want to make fun little animals and other projects like my Playful Pals Easter Bunny Pyramid Treat Box, be sure to check out my Stampin’ Up! Online Store HERE.

Shop Stampin’ Up! Online 24/7 or email me at Karen@KarenStamps.com if you would like me to put in your order for you.

Make an Easter Basket with the Berry Basket

Easter Basket with the Berry Basket

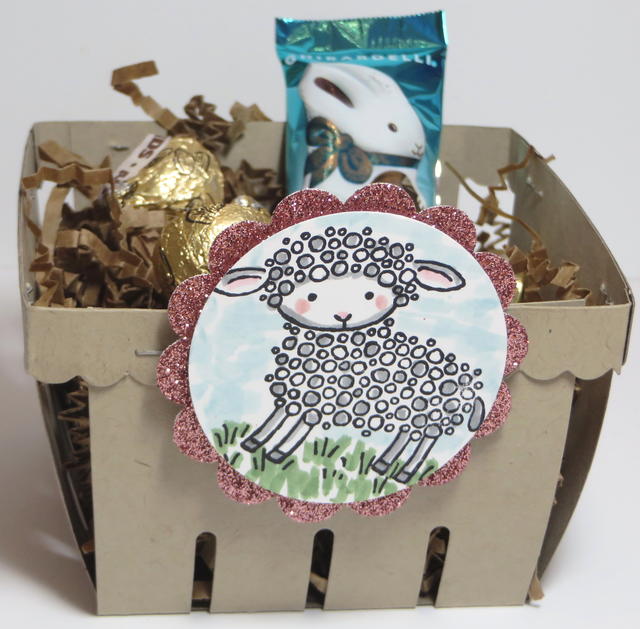
Make an Easter Basket with the Berry Basket Die and the Big Shot! Choose your favorite card stock color for the basket and die cut. Decorate the outside of the basket however you like, and fill with some grassy material.  Just like that, you have a cute little Easter Basket for a gift, a decoration, or a table favor.

This Easter Basket is made with Crumb Cake card stock to be neutral and then I used the Easter Lamb Stamp to decorate it along with some Blushing Bride Glimmer PaperI absolutely love this little lamb stamp! It’s just one single stamp, which makes it so cute just by itself! I just colored in a bit with some Stampin’ Write Markers and punched out with the 2″ Circle Punch. The Blushing Bride Glimmer Paper is punched with the 2 3/8″ Scallop Circle PunchSo easy and so cute!  Fill your basket with candy!

Don’t forget about the Stampin’ Up! Weekly Deals, good through Monday, March 7.

Stampin' Up! Weekly Deal Mar 1 2016

Shop Stampin’ Up! for stamp, ink, paper, and accessories for making all kinds of fun cards and projects such as this easy Easter Basket made with the Berry Basket Die.


March Comes in Like a Lion Playful Pals Card and Pyramid Box

March Comes in Like a Lion Playful Pals Card and Pyramid Box

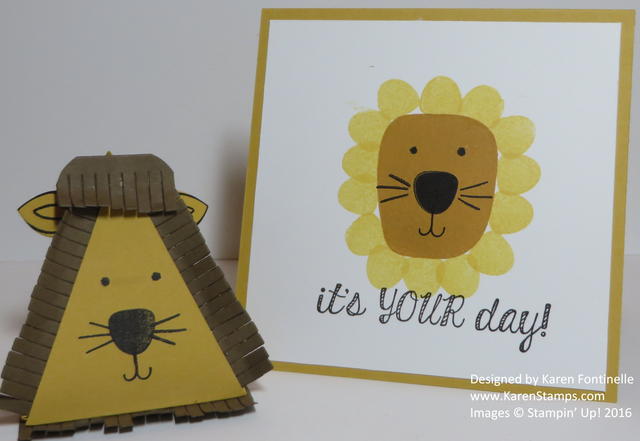
The saying goes, “March comes in like a lion and goes out like a lamb.” I don’t know if that saying will be true today or not for where I live and where you live, but I made some lions with the Playful Pals Photopolymer Bundle of stamps and dies in honor of March 1st.

***************

Help Bring Birthdays Back!

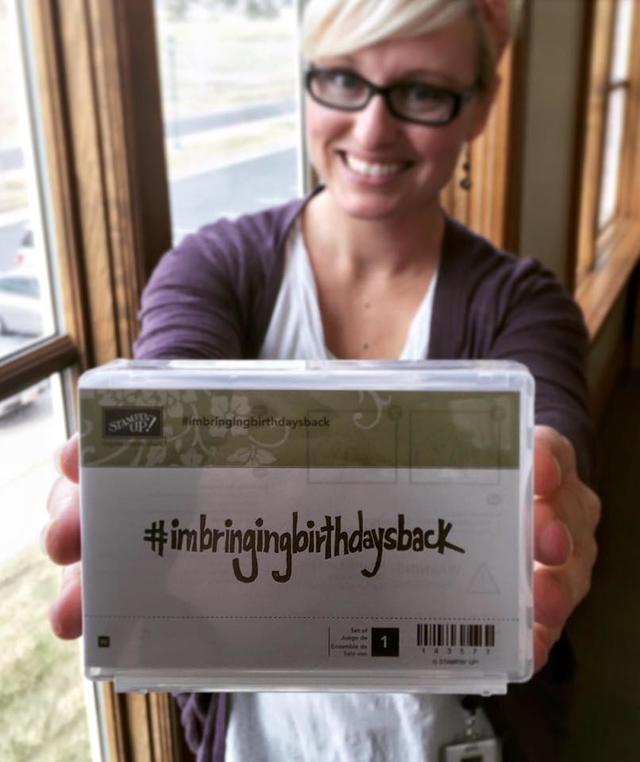
Maybe you recall THIS STORY posted on the Stampin’ Up! blog a little while ago about Shannon West, an employee at the Stampin’ Up! Home Office, realizing that people were just posting their holiday and birthday greetings on social media and not sending cards, and she decided to do something about it.  Stampin’ Up! joined in and now we have a new stamp that you can purchase and use on your cards or envelopes as Shannon is doing!

Here is a photo Sara Douglass, Interim CEO of Stampin’ Up!, posted on Facebook yesterday of the new stamp.  You can put Item #143573 on your Stampin’ Up! order.  The cost is $12.00. Right now it says the stamp is on backorder, but if you want it, I would put it on your order anyway. Maybe they just don’t have them all delivered to the warehouse yet for shipping.

imbringingbirthdaysback


***************

Stampin’ Up! Weekly Deals
Stampin' Up! Weekly Deal Mar 1 2016

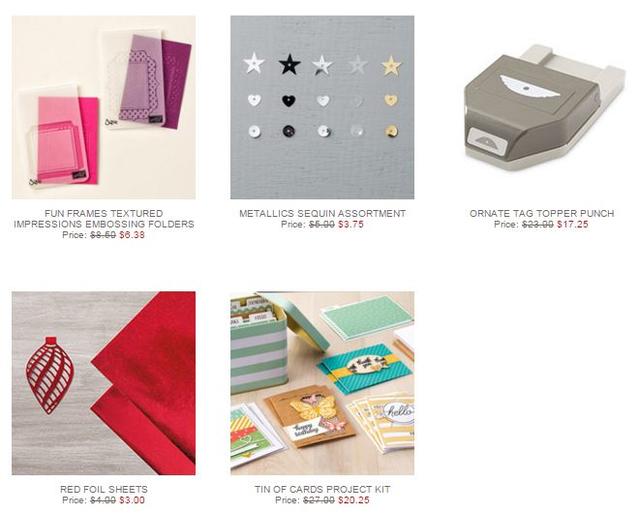
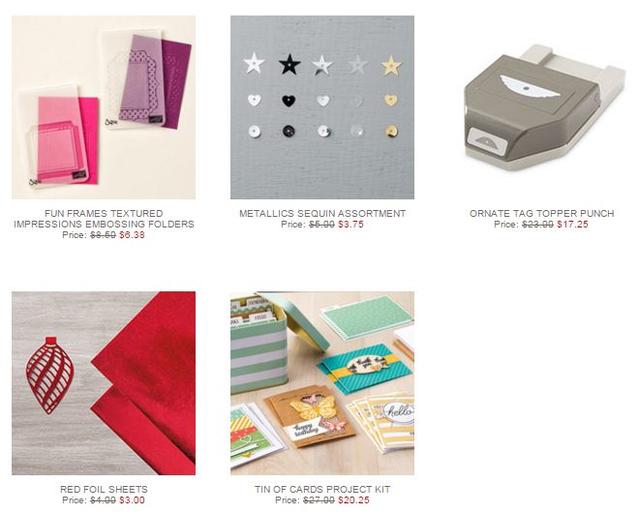
Here are the new Stampin’ Up! Weekly Deals for March 1 through Monday, March 7, 2016. I think the main thing I would want if you don’t already have it is the Tin of Cards Project Kit. This kit is featured on the front cover of the Annual Stampin’ Up! Catalog. As soon as I saw the tin, I knew I wanted the kit, and the cards are cute too!  You can make the cards and then wait to attach the greeting for when you need a card and then you can choose what you need. The tin also has dividers so you can store additional cards.  All the other products make stamping more fun, too!

***************

Shop Stampin’ Up! Online for all the best in stamping and papercrafting products!

Is Today Your Leap Year Birthday?

Playful Pals Frog Leap Year Birthday Card

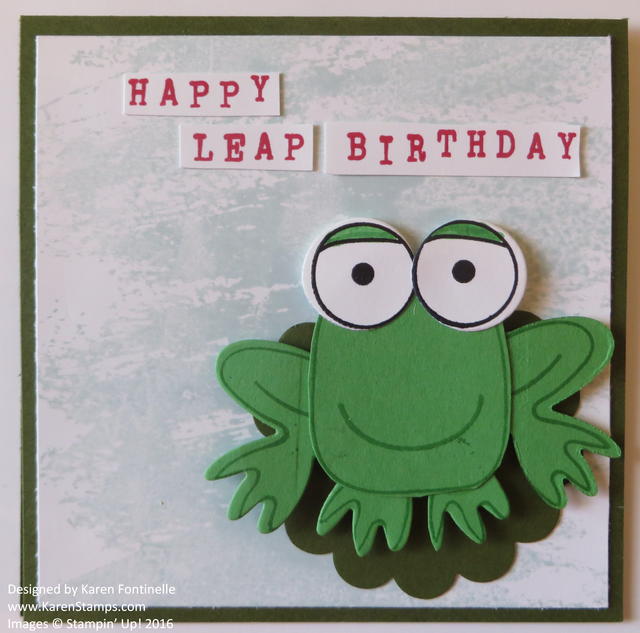
Is today your Leap Year birthday? If it is, then here is a Playful Pal Frog Leap Year Birthday Card for you! The rest of us can just celebrate having an extra day to do all those things we always want more time to do! It’s hard for me to believe it is the end of February already, even with the extra day.

I made this Playful Pal frog sitting on a lily pad using the Playful Pals Photopolymer Stamp SetYou can purchase the stamp set and the matching Pyramid Pals Thinlits Dies in a Bundle and save 15%. If you like either one, you will want both!

The card base is the same card stock as the lily pad, Mossy Meadow. The lily pad is punched with the 2 3/8″ Scallop Circle Punch. The frog is made by stamping pieces with the stamp set and then die-cutting some of the pieces with the Big Shot using the bright Cucumber Crush card stock. The background layer of the card is stamped with Soft Sky Ink on Whisper White with the Watercolor Wash Background Stamp.

Now to make the greeting, I happened to think of my Alphabet Rotary Stamp! Admittedly, I haven’t used it much, but it’s one of those things that comes in handy in the right circumstances. I just stamped each word on scrap paper and cut out each word. I think it’s a fun way to add a greeting to something, to just paste the single words.

I hope you will consider the Playful Pals Bundle which can be used for cards and projects such as my Playful Pal Frog Leap Year Birthday Card and of course the actual 3D pyramids for favors, gifts and treats.

Shop Stampin’ Up! Online! Earn FREE products during Sale-A-Bration!

Mini Treat Bag Thinlits Valentine Heart Treat Bag

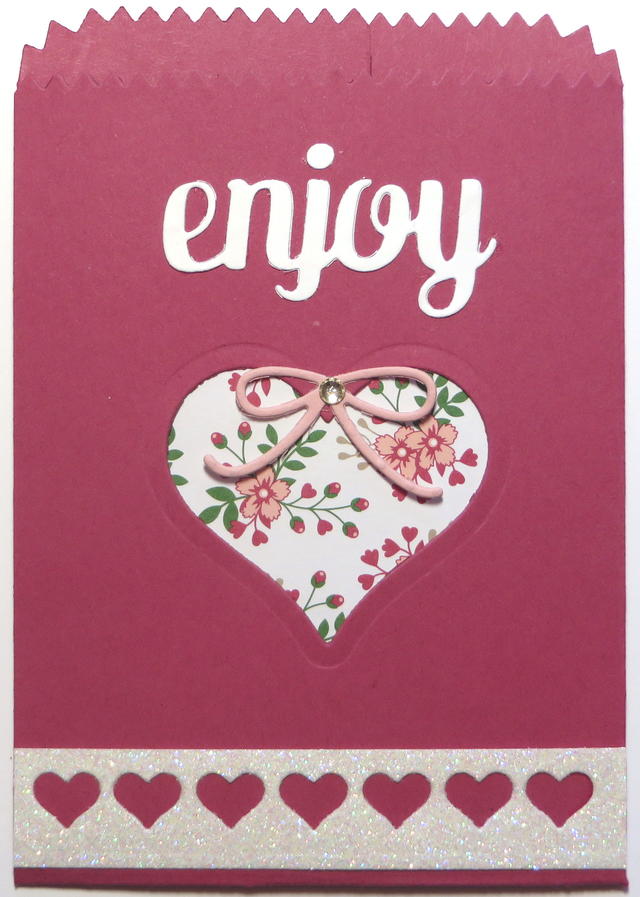
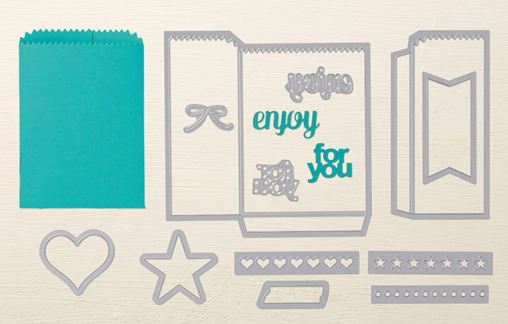
Mini Treat Bag Thinlits Heart BagIf you have ever considered getting the Mini Treat Bag Thinlits Dies from Stampin’ Up! now is the time because they are discounted on the Weekly Deals! Quickly and easily make cute little treat bags for candy, gift cards, small gifts, or even as an envelope to hold a card. They can be for any occasion and thanks to creative people who figure these things out, you can even make them into different sizes!  You just need to die cut with the Big Shot the one main front piece that has one of the back sides attached, plus the other back side. Score, fold, and glue and you have a cute treat bag!

As a bonus, you get all kinds of extra pieces to die cut to make embellishments for your treat bag or to use on other projects.

Mini Treat Bag Thinlits Dies Pieces

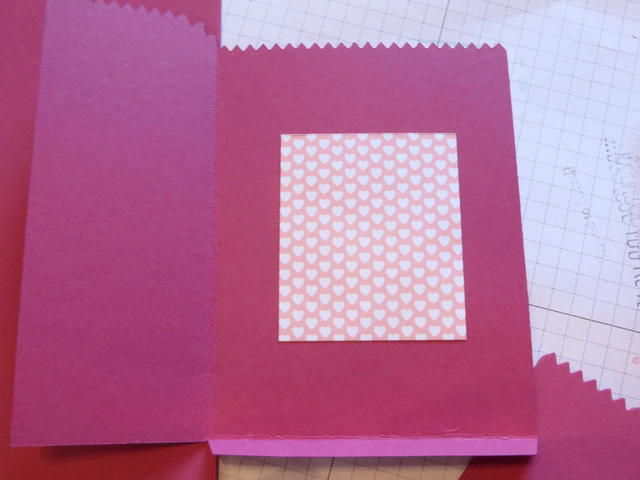
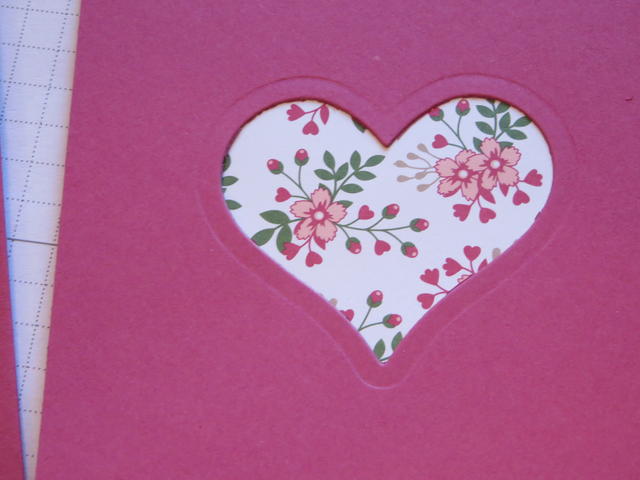
My Mini Treat Bag I made with Rose Red card stock because it coordinates with the Love Blossoms Designer Paper Stack that I used inside the heart window.  I used the heart die to cut that window and then just adhered a piece of the Love Blossoms paper on the inside before I glued the bag.

Mini Treat Bag Window Inside

Mini Treat Bag Window

Next just decorate your treat bag with any embellishments or die cut some of the pieces that came in your set for whatever occasion you are making this for! This bag I made could be for Valentine’s Day but doesn’t have to be. Make a separate card to slip inside and have the whole thing be a card rather than a bag. Fold over the top and make a bellyband to make it an enclosure. Just have fun with it and you will!!

Check out the Stampin’ Up! Weekly Deals and all the good products of Stampin’ Up! HERE in my Online Store!

Pyramid Pals Valentine Treat Box

Pyramid Pals Valentine Treat Box

The Pyramid Pals Thinlits Dies weren’t something I initially thought I would purchase, but the cute animal samples in the Occasions Catalog were a little hard to resist!  And I knew that after Demonstrators and other stamps started making things with these dies that I would see all kinds of cute ideas.

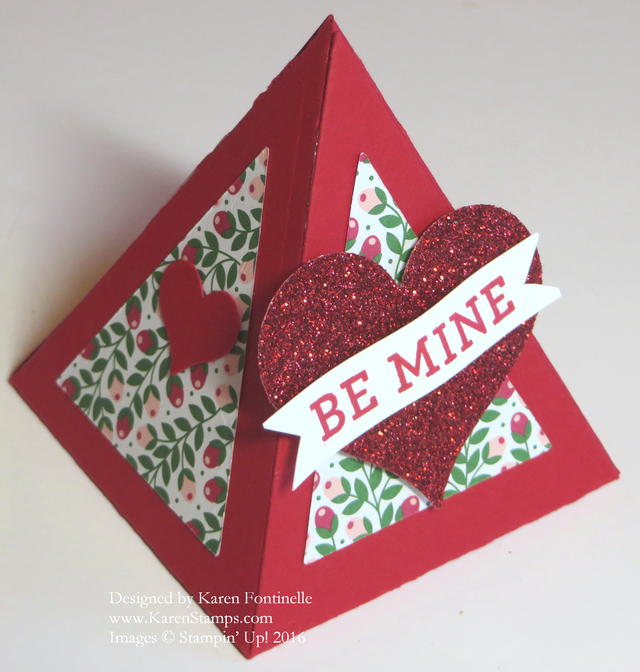
So for my first try with these dies, I just made a little Valentine box! You need to cut two pieces to form the box. There is an extra triangle piece in there that I used to cut the pieces of patterned paper from the Love Blossoms Designer Series Paper Stack  (really cute papers, by the way!) to glue onto each side. You can use Tear & Tape Adhesive to  adhere the sides of the pyramid together, but don’t forget to leave one side open so you can put your treats or gift inside! To make mine easy and for a Valentine treat, I just used the Sweetheart Punch to punch out a Red Glimmer Paper heart for the front.  The greeting is from the stamp set Bloomin’ Love. For each side I used the heart punch in the Itty Bitty Accents Punch Pack to punch a red cardstock heart for just the two sides.

I could do even more to this Pyramid Pal Valentine Treat Box but sometimes you have to know when to stop! So I stopped. Lots of potential with these Pyramid Pals Thinlits Dies and the coordinating Playful Pals Stamp Set. But if you would like to save 15%, buy the Bundle!

Shop Stampin’ Up! Online!

Birthday Card with Stars

Birthday Card with Stars

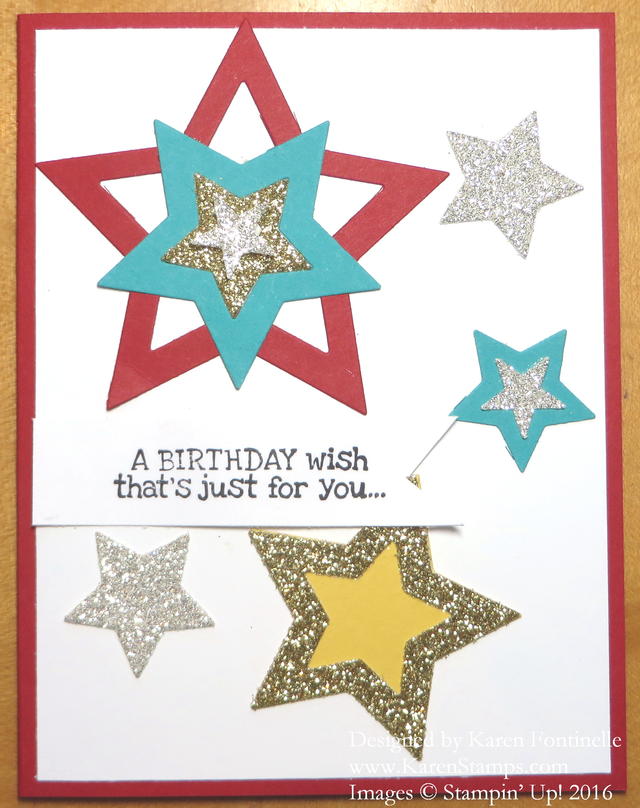
You never know what card design you might come up with from scraps on your desk, such as this Birthday Card with Stars. In order to make space for our Christmas tree, we have to move a desk to another room. This desk is where I heap lots of stamping stuff, not where I actually stamp. The Christmas tree has been down for a little while but we haven’t moved the furniture back where it belongs. Yesterday I was putting designer papers back in their packages which were in a holder (or not!) on this desk, when something tipped over, which knocked my ribbon storage things off the back of the desk with ribbon rolls going everywhere underneath the desk. Even when I tried to catch things and straighten everything back up, there was another domino effect with more stuff going crashing everywhere. It was almost funny except for the mess it was making! So I guess I need to do some major tidying up on that desk when we move it back!

But in the process of the little bit of tidying up I found all these stars I had already cut out with the Stars Framelits Dies so I decided to just go ahead and make a card with some of them! I placed the stars around on the card, adhered them, and then added a greeting from Remembering Your Birthday. I even decorated the inside a little bit with a couple small stars.

And here are the current Stampin’ Up! Weekly Deals, out today until Monday, January 25.

Stampin' UP! Weekly Deals Jan 19 2016

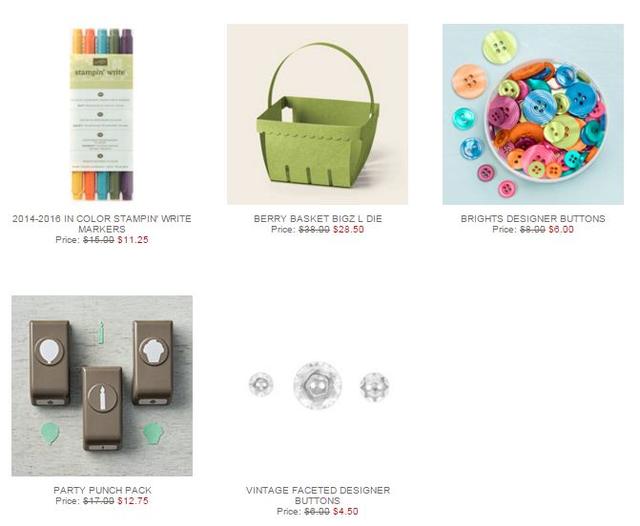
One exciting product on the Weekly Deals is the Party Punch Pack, which is in the new Occasions Catalog on page 4. If my math is correct, if you want the Party Punch Pack along with the coordinating stamp set Party Wishes, then it is a better deal to purchase the Bundle.  If you just want the punches, then the Weekly Deals discounted price is better.

And of course the other products on the Weekly Deals are all great. I think markers are very useful to have, especially if you don’t own the ink pads.  The Berry Basket Die is fun for lots of projects, and who doesn’t need plenty of buttons on hand for embellishing?!

Even the Weekly Deals count toward Sale-A-Bration, where you get to choose a free Sale-A-Bration item in the brochure with every $50 Stampin’ Up! purchase. Let me know if you have any questions about Sale-A-Bration and the product choices.

Shop Stampin’ Up! Online!

Stampin’ Up! Weekly Deal

Stampin' Up! Weekly Deal Jan 12 2016

It’s Tuesday so here are the new Stampin’ Up! Weekly Deals for January 12 – 18, 2016. Weekly Deals are your chance to get some great Stampin’ Up! products at a discount for one week! This week we have a great stamp set with multiple sayings to use on your projects as well as extra tools and embellishments to use to jazz things up!

One of the most interesting and fun new products in the Stampin’ Up! Occasions Catalog is the Playful Pals Photopolymer Bundle. You can purchase just the Pyramid Pals Thinlits Diesbut if you also purchase the Playful Pals Stamp Set in the Bundle (use the Bundle #) you will save 15% on everything! Of course you will also need the Big Shot for using the dies! It is an expensive item but I can almost guarantee you will use it a LOT! Mine is out and accessible at all times (sad to say, on my dining room table!) and I use it almost everyday. And if there is ever a good time to buy a Big Shot it’s during Sale-A-Bration when you will earn two free SAB products from the Sale-A-Bration Brochure right off the bat! Then if you add a few more products to use with the Big Shot you could be at a Hostess Level and be able to shop with Hostess Dollars!

Links to Use:

Stampin’ Up! Occasions Catalog

Stampin’ Up! Sale-A-Bration Brochure

Join Stampin’ Up!

Save $5 on 3-Month Prepaid Paper Pumpkin Kit in the Mail

Shop Stampin’ Up! Online


Mini Treat Bag Thinlits Birthday Card

Mini Treat Bag Thinlits Birthday Card

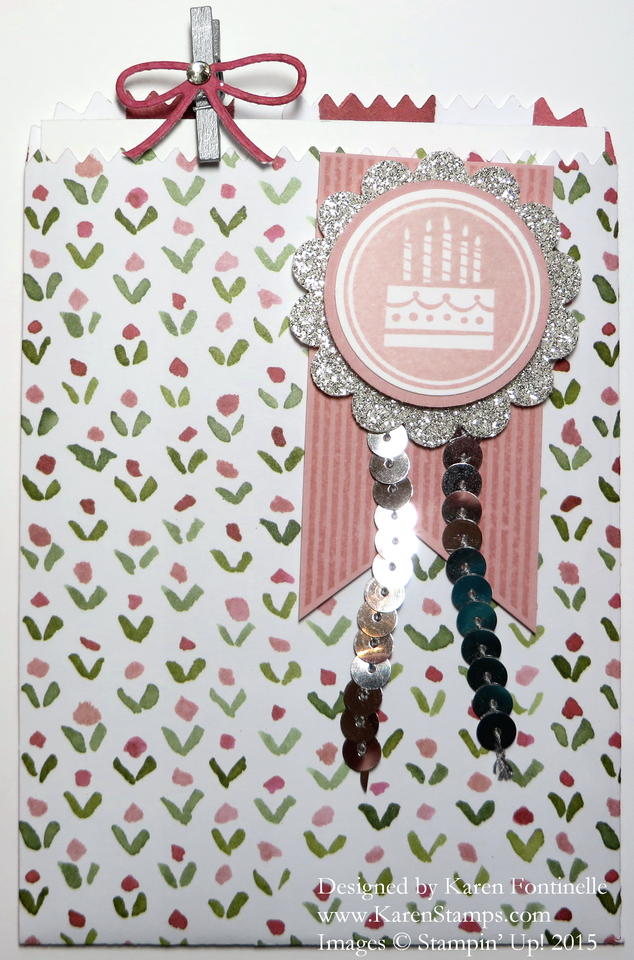
You know how I love the Mini Treat Bag Thinlits Dies and here I have made a Mini Treat Bag birthday card using one of the patterns in the English Garden Designer Series Paper collection.  I’m not sure I had noticed this particular pattern before, but it jumped out at me the other day.  I knew it was perfect for this project.  The other side is also nice, wide dark pink stripes, which you can barely see on the inside of the treat bag at the top. For the card part, I just slipped a piece of Whisper White that fit inside and stamped with a greeting from the Amazing Birthday Stamp Set.  I have used the “Happy Happy Happy Happy Birthday to you” greeting over and over again in birthday cards I have made. I attached one of the Mini Metallic Clothespins to the top of the card so it is clear that the recipient needs to pull out that inside card, and to make it stand out I die cut the little bow that comes with the dies and adhered that to the clothespin, along with a small Rhinestone Jewel. Why not?!

The front of the mini treat bag card is pretty simple.  I stamped the banner in the Amazing Birthday Stamp Set and just cut it out by hand. Then I stamped the birthday cake, punched it out, layered it on a larger circle punch, and then mounted it on the Silver Glimmer Paper scallop punch. For a little more pizzazz, I added a piece of the Silver Sequin Trim to dangle.

The Mini Treat Bag Thinlit Die card is perfect for slipping a gift card inside, too, if you like, or folding the top over and adding a belly band.  So many possibilities! And you get lots of pieces in the die package.  I love making cards and other projects with the Mini Treat Bag Thinlits such as this birthday card.

Shop Stampin’ Up! Online During Sale-A-Bration!

(One free Sale-A-Bration product with every $50 Stampin’ Up! purchase!)

Card For a Baby Shower

Baby Shower Card

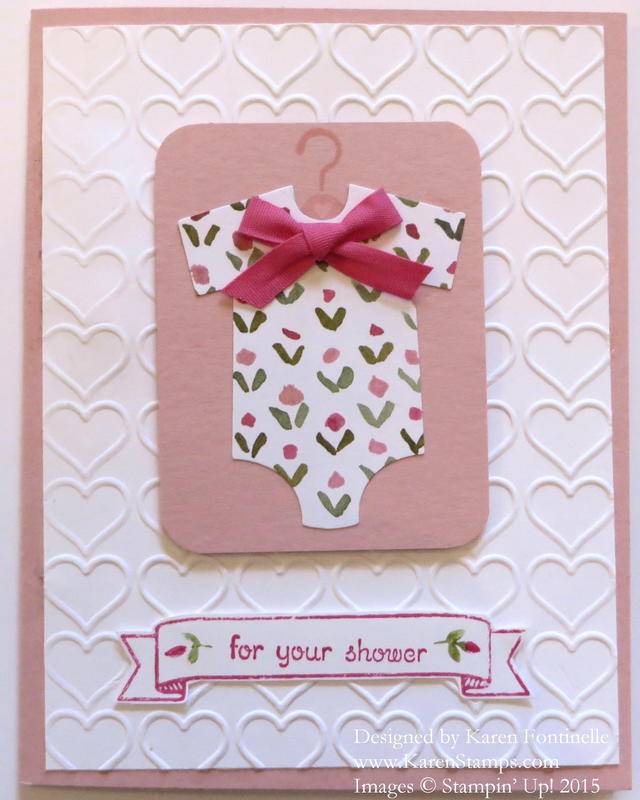
There’s a little bit of the new mixed in with the old on this baby shower card. The other day I had a fun afternoon stamping with a friend, and she wanted to make a baby shower card for a friend. Normally I would search online for at least 100 ideas and then look for 500 more just to be sure I had all the cutest ideas floating around in my head or one to copy. But this day, immediately the Something For Baby Stamp Set and the Baby’s First Framelits Dies popped into my head along with this cute paper, part of the English Garden Designer Series Paper. I love that simple but cute pattern on the paper! I think it reminds me of a comforter I bought for my daughter many moons ago.

The card base is Blushing Bride, which I seem to have used a lot recently! The Whisper White background is embossed with the Happy Hearts Embossing Folder.  The baby onesie is diecut with the Baby’s First Framelits, as I mentioned before. The little hanger is stamped with a hanger stamp from the Something For Baby stamp set. The bow is the Melon Mambo 1/4″ Cotton RibbonThe banner is from the new stamp set in the Occasions Catalog, Bloomin’ Love Photopolymer Stamp Set. I just colored it with markers so I could make the little leaves Old Olive and the rest Melon Mambo. The words come from Teeny Tiny Wishes, one of my favorite and most useful stamp sets of words.

Although I don’t have a photo of the inside of the card, my friend stamped the inside with the “Your little baby is big news” from the Big News Stamp Set. And she also grabbed the little heart from the Bloomin’ Love set and stamped that below the greeting.  We laughed about whether or not she should stamp more hearts randomly on the inside – you know, how you can go from something that is perfectly fine and then go crazy with a little too much stamping! Suddenly you have way too many hearts! As another friend who I used to paint with always said, “Know when to stop!”

All in all, my friend and I were pleased with this baby shower card we came up, just out of our own heads!

Shop Stampin’ Up! Online for all your stamping and papercrafting needs!

Holidays Fancy Foil Vellum Embellished Ornaments Christmas Card

Holidays Fancy Foil Vellum Embellished Ornaments Christmas Card

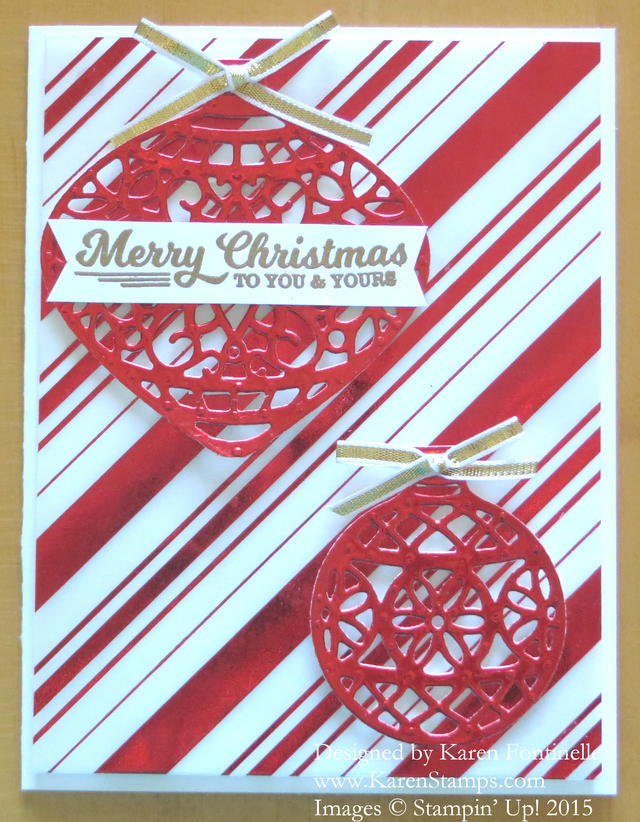
This Holidays Fancy Foil Vellum Embellished Ornaments Christmas Card adds some shine and bling to your Christmas cards.  All the shine makes it difficult to photograph and difficult to see the shine IN the photograph!  This is a pretty easy card, really, and yet looks very elegant.

I started with a card base made with the new Whisper White Thick CardstockIf you haven’t tried this “thick” cardstock, you should get some on your next order.  It’s just a little thicker and stronger than our regular Whisper White so it makes a good card base like all the colored card stock. Not that it matters that much, but it does feel a little better than just using the regular kind. Then I added a layer of the Holidays Fancy Foil Designer Vellum to a Whisper White layer using Glue Dots hidden behind the foil stripes on the vellum as best I could.  That’s the best way to hide your adhesive when using see-through vellum. Once the vellum was adhered to the Whisper White layer, I adhered this to the card base using Stampin’ Dimensionals to pop it up a little.

Next I die cut the ornaments using the Red Foil Sheets paper and the Delicate Ornaments Thinlits Dies with the Big Shot, of course!  I did the whole dryer sheets/waxed paper system and rolled the platform back and forth several times in the machine. Now I have ordered the Precision Base Plate to use with intricate dies such as these ornaments.  You will find the plate in the Holiday Catalog. In the beginning I heard mixed reviews about it, but recently I heard some rave reviews about it.  The only way to find out for sure is to try it for myself! So I will let you know! The purpose of the Precision Base Plate is to make cutting these intricate dies easier.

To finish off the card, I tied little bows with the Gold 1/8″ Ribbon (one of my favorites) and adhered them to the ornament tops with a Glue Dot.  You don’t always have to tie ribbon “around” something, just make it look like it is by adhering to the front with a Glue Dot or other adhesive.

To adhere the ornaments to the card, I cut tiny strips from the edges of the Stampin’ Dimensionals sheet to hide behind the widest areas of the ornaments. Yes, a little tedious but I felt it was the best way to adhere the ornaments to the vellum.  The greeting is stamped in Versamark and embossed with the Heat Tool and Gold Stampin’ Emboss Powder. The greeting is from the To You and Yours Too Stamp Set.

You can use this design idea in many ways, just by stamping ornaments on card stock or stamping and cutting out the ornaments and adhering them to the card front, or adding some different designer paper in the background.  So many easy ways to make a card!

I hope you are going to send at least a few handmade Christmas cards!  It is still plenty early to get them done.  Naturally you want to pick a design that is easy enough to duplicate. I am making several different designs of cards, maybe 5 or 10 or each design just because it is fun for me to make different ones.  So many great ideas out there!  Just stop the world and make cards!

There is still time to shop Stampin’ Up! It is suggested that you place your order by Dec. 17th in order to receive it by Christmas. Look through the catalog with different “eyes” and see what gifts you might be able to purchase for someone, or an assortment of items for a gift.

Check your supply of card stock and see if you need anything for your cards and Christmas projects! I had to order more Real Red card stock yesterday! How could I be low on Real Red?!

And here are the new Stampin’ Up! Weekly Deals!
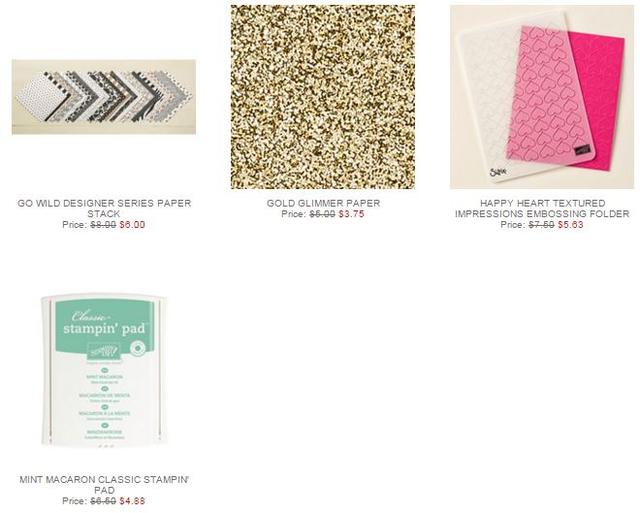
Stampin' Up! Weekly Deals Dec 1 2015

If you need any materials to make the  Holidays Fancy Foil Embellished Ornaments Christmas Card just Shop Stampin’ Up! Online or contact me to put in your order for you.