Category Archives: Big Shot

Online Extravaganza Bohemian Paper Gift Box, Card and Envelope

Online Extravaganza Bohemian Paper Gift Box Card Envelope

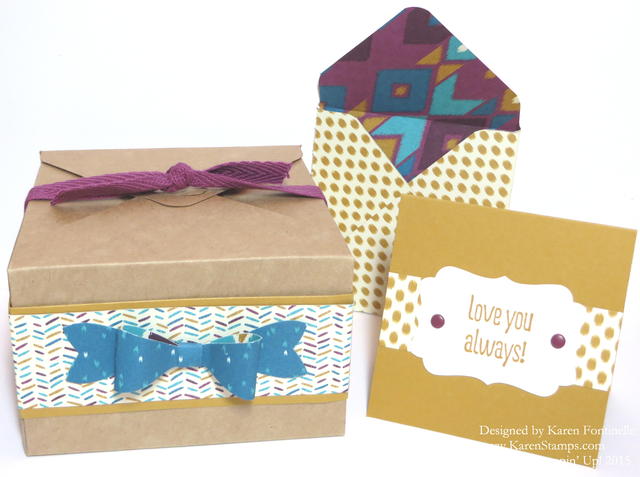
Today is the day, the day the Stampin’ Up! Online Extravaganza begins! And to show off some of the products available on the special, especially the first 24-Hour Flash Sale for Monday, November 23, I made a few projects with the Bohemian Designer Series Paper, the Gift Box Punch Board, and the Envelope Punch Board, plus the Bow Builder Punch!

Online Extravaganza Flash Sale Mon Nov 23

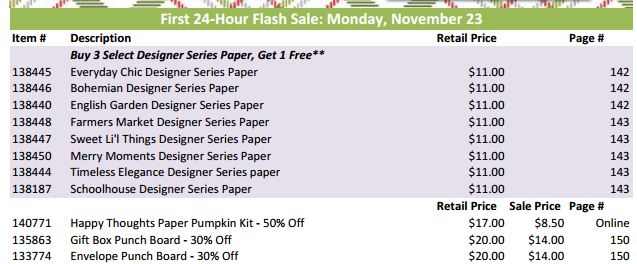
On the 24-Hour Flash Sale, you can purchase any 3 of the listed Designer Series Papers and then get a 4th one free! These are the designer papers shown in the Annual Catalog on pages 142-143.  You can also get the Happy Thoughts Paper Pumpkin Kit, even if you are not a subscriber (yet!) for half price!  What a deal! And the Gift Box Punch Board and Envelope Punch Board are also on sale for 30% off! Those deals are only available today, Monday, and only while supplies last.

This sale begins at midnight Utah time (Mountain time) and runs for 24 hours for the first Flash Sale, but through November 30th for the entire sale!  It’s Stampin’ Up!’s answer to Black Friday!

But there are LOTS of other products on sale on the Online Extravaganza so be sure to check the entire 3 page list!!  Think what you could give others as a gift or what items you could use for gift-wrapping (lots of things!!), or simply what things YOU want!

Stampin’ Up! Online Extravaganza List HERE!

Shop Stampin’ Up! Online HERE!

You can add any other items to your order as well, including products from the Holiday Catalog.  Be sure to check out the products that will retire at the end of the Holiday Catalog. Also check the Stampin’ Up! Weekly Deals and Clearance Rack!

For any more details, read THIS POST.

Check out the Stampin’ Up! Online Extravaganza Flash Sale today and make your own gift box, card and matching envelope, then place your order today!

Make A Delicate Ornaments Christmas Card

Delicate Ornaments Christmas Card

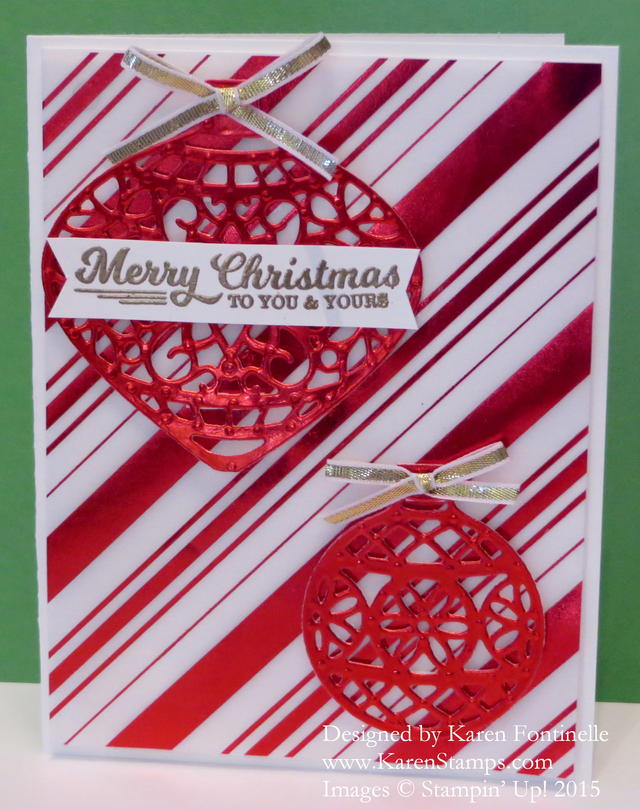
Make this beautiful Christmas card using the Delicate Ornaments Thinlits Dies with red-striped Holidays Fancy Foil Designer Vellum and the shiny Red Foil Sheets.  The card base is made with the Whisper White Thick Cardstock and layered with regular Whisper White Card Stock.  The striped vellum is then attached to the regular card stock using Glue Dots underneath the stripes to try to hide the adhesive. I popped up this layer (the Whisper White plus the vellum) on Stampin’ Dimensionals.

In order to cut the Delicate Ornaments with the Big Shot, I used the dryer sheet and waxed paper technique!  I do not (yet) own the Precision Base Plate in the Holiday Catalog.  I had heard both good and bad about it, and of course I had plenty of other products I wanted to order from the Holiday Catalog.  Even I can’t have everything! But recently I have heard very good things about this plate and might be inclined to put it on an order soon. It is supposed to help greatly cutting out these intricate dies with all the little pieces. But today I used this sandwich:

  • Magnetic Platform (or regular platform)
  • Dryer sheet (new) (can be used over and over)
  • Card stock (in this case, the red foil)
  • Wax Paper (you could also try Parchment Paper)
  • Thinlit (cutting edge down)
  • Top cutting pad

I ran this through and rolled it right back again, then ran it through and back again. This worked perfectly, I only had a very few pieces to poke out of the ornaments, no problem at all. The design is so intricate that you really don’t even notice if a few tiny pieces do not all come out. I used some tiny pieces I cut from Stampin’ Dimensionals to pop up the ornaments on the red striped foil. Then I tied little bows from the Gold 1/8″ Ribbon.  The silver ribbon would have been pretty also.

The greeting is stamped with Versamark Ink and embossed with Gold Stampin’ Emboss Powder using the Heat Tool.  The stamp is from the To You & Yours Too Photopolymer Stamp Set.

It’s time to be making Christmas cards, if you haven’t already! Try these intricate dies and shiny paper to make a Delicate Ornaments Christmas card that will wow your friends!

Find all these great products in my Stampin’ Up! Online Store!


Masculine Birthday Card with Glimmer Leaves

Masculine Birthday Card with Glimmer Leaves

It’s November! Did you remember to change your clocks?  Time to “Fall Back”!

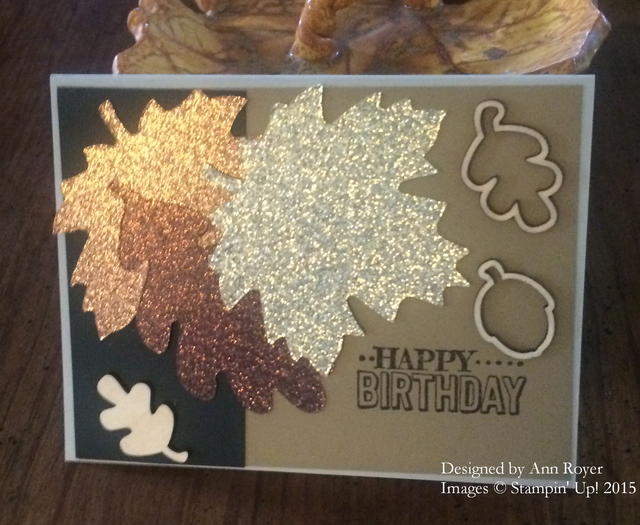
Today I have this beautiful masculine birthday card with glimmer leaves to show you that my husband’s cousin sent me in a text.  I thought it was such a beautiful card that I asked her if I could show it off on my blog!  She made it for her son’s birthday, so as you can see, it makes a great masculine card with the neutral background colors, the leaves, and the wooden elements. We are always looking for good cards to make for the men in our lives!

The leaves are made with three colors of glimmer paper, such as the Gold Glimmer Paper, and die cut with the Leaflets Framelits Dies using the Big Shot.  She also added some Autumn Wooden Elements (retired). Although this card is for a birthday, I think it would make a beautiful card for Thanksgiving or a Thinking of You Card or any number of occasions.

This masculine birthday card with glimmer leaves proves that you can use some glimmer and sparkle even for men!

Need some Glimmer Paper or a Big Shot to cut out those gorgeous leaves?  Just shop at my Stampin’ Up! Online Store or contact me to place your order for you.


Howl-O-Ween Treat Halloween Card

Howl-O-Ween Treat Halloween Card

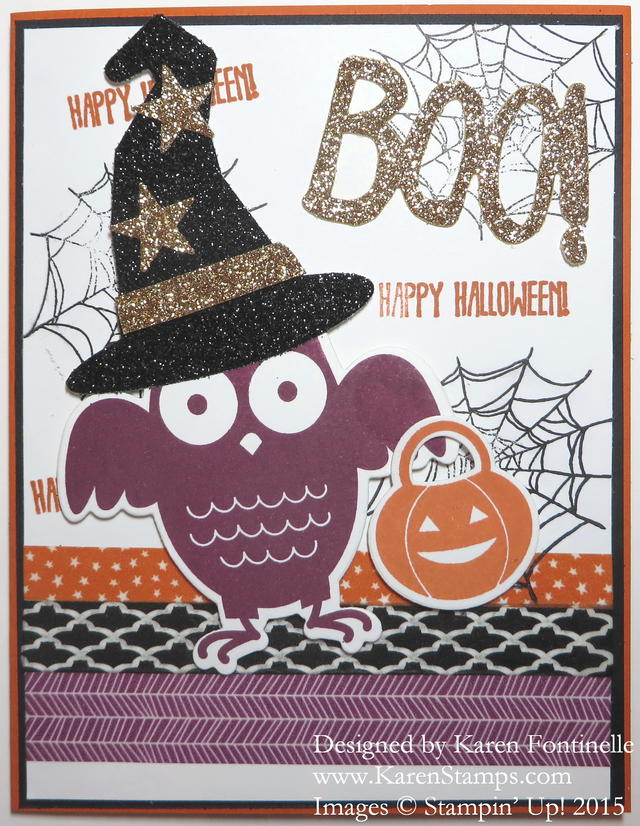
This Howl-O-Ween Halloween card may look like Halloween exploded! Somehow I felt compelled to add a lot of things on this card for Halloween! And it all started with wanting to use the Happy Haunting Washi Tape!  You never know what you will end up with when you start creating!

I applied the Happy Haunting Designer Washi Tape to the bottom of the card.  Then I stamped the owl from the Howl-O-Ween Treat Stamp Set and the pumpkin and die cut them with the matching Boo To You Framelits Dies and of course, the Big Shot. I die cut the hat from the Black Glimmer Paper in the Holiday Catalog. Then I added some Gold Glimmer Paper to trim the hat with the band and punched a few stars with the star punch in the Itty Bitty Accents Punch Pack.

The stamped spider webs in the background are from the Witches’ Night Photopolymer Stamp Set and the Halloween stamp is from the And Many More Stamp Set.  But I was liking the glitter and glimmer so I had to also die cut the “Boo!” in the Boo to You Framelits!  I used a piece of parchment paper in between the Glimmer Paper and the framelit and it came out of the die perfectly!  My best new tip!

There’s still time to order some Halloween stamping supplies to make this Howl-O-Ween Treat Halloween Card and lots of others!

Don’t forget the Stampin’ Up! Weekly Deals and Clearance Rack! Some good deals are to be had! Add them to your order!

Shop Stampin’ Up! Online HERE at my store!

New Stampin’ Up! Weekly Deals for Oct 6 – 12, 2015

Stampin' Up! Weekly Deal Oct 6 2015

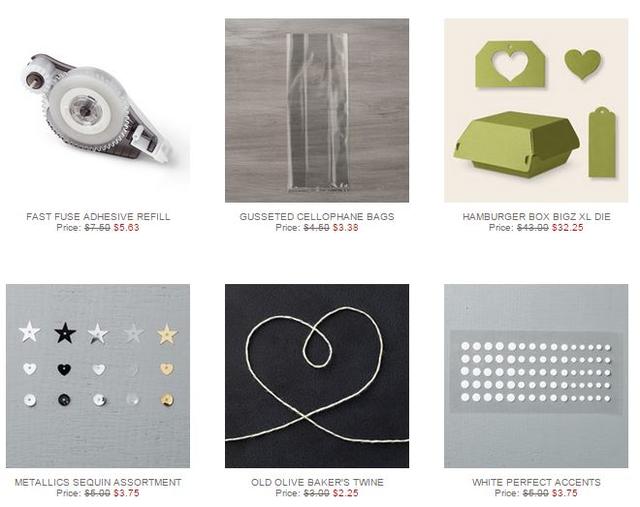
Here are the new Stampin’ Up! Weekly Deals! Purchase these items at a discount while supplies last today through Monday, October 12. These are always a good chance to pick up some accessories at a lower price!  Maybe you can use the Gusseted Cellophane Bags for Halloween treats or birthday parties or stock up for the holidays. And there are LOTS of ideas for using the Hamburger Box Die. Of course sequins are big right now as are metallics so you have both in the Metallics Sequin Assortment. And did you know the White Perfect Accents can also be colored with Sharpie Markers if you want accents in different colors than white? I admit, it took me awhile to get used to the Fast Fuse Adhesive, but now I really like to use it. Make sure you have the main Fast Fuse Adhesive before you stock up on the Refills available on the Deals! If you want some tape adhesive that HOLDS, this is it!

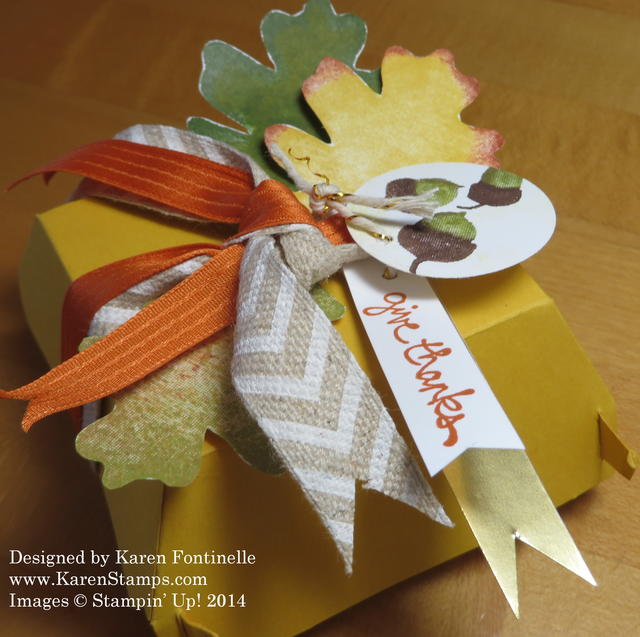
Here’s a fall box I made last year with the Hamburger Box Die and the For All Things Stamp Set.

Hamburger Box Die Fall Box For All Things

If you need any of these Stampin’ Up! Weekly Deals, please visit my

Stampin’ Up! Online Store!

How to Make Cotton Paper Flowers with the Floral Framelits


The Floral Frames Collection Framelits Dies are on the Stampin’ Up! Weekly Deal this week, and you will probably want them after you watch this video! This video uses the new Stampin’ Up! Cotton Paper in the new Annual Catalog, but you could also use card stock or colored tissue paper or whatever you like.  The Cotton Paper comes in an assortment of pretty colors as you see in this video.  It is lightweight but sturdy so good for a project like this where you want it to not be too heavy but hold up while making it!

We Stampin’ Up! Demonstrators who have seen Bonnie (in this video) present on stage just love her and her humor. But there is a catch to this video! Be sure to watch it all the way through! I think you will enjoy the project! It might even take you back to your childhood when you made paper flowers out of tissue paper or kleenex!

The Floral Frames Framelits will make making cotton paper flowers easy!

Shop Stampin’ Up! Online HERE!

Embellished Ornaments Picture Frame Ornament

Embellished Ornaments Picture Frame Ornament Front

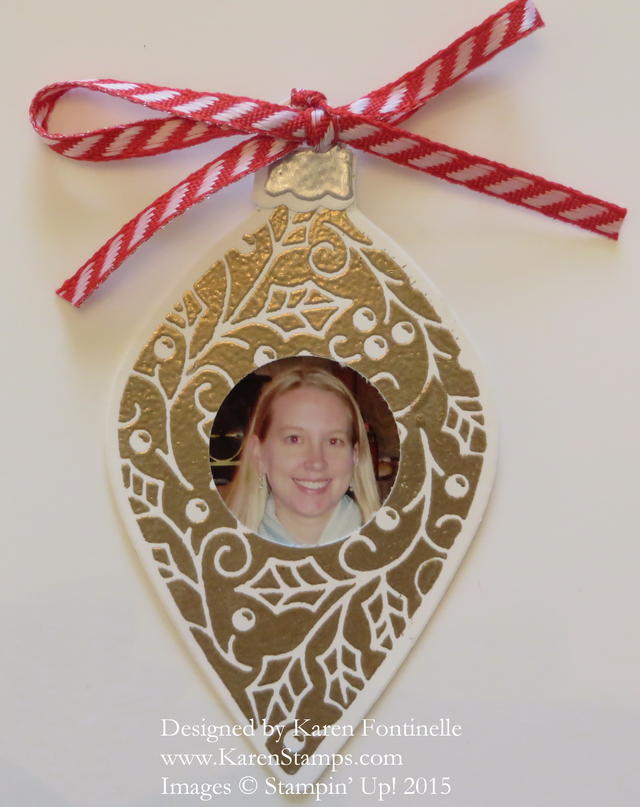
We go from the first day of autumn to an Embellished Ornaments picture frame ornament! Believe me, pretty quickly time will seem to go that fast when we get rolling here!  I saw something resembling this idea on some non-stamping website and it reminded me of this stamp set.

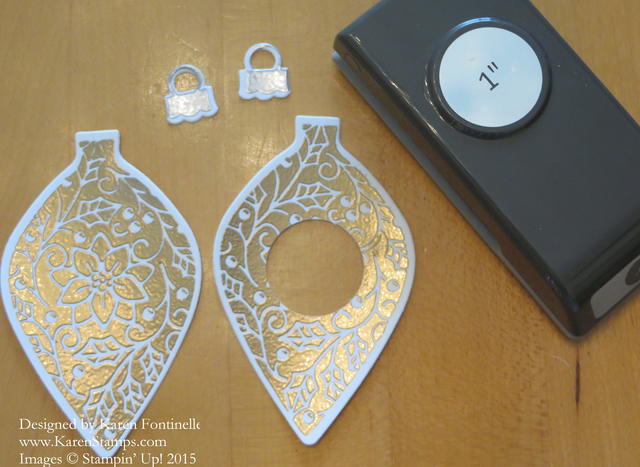
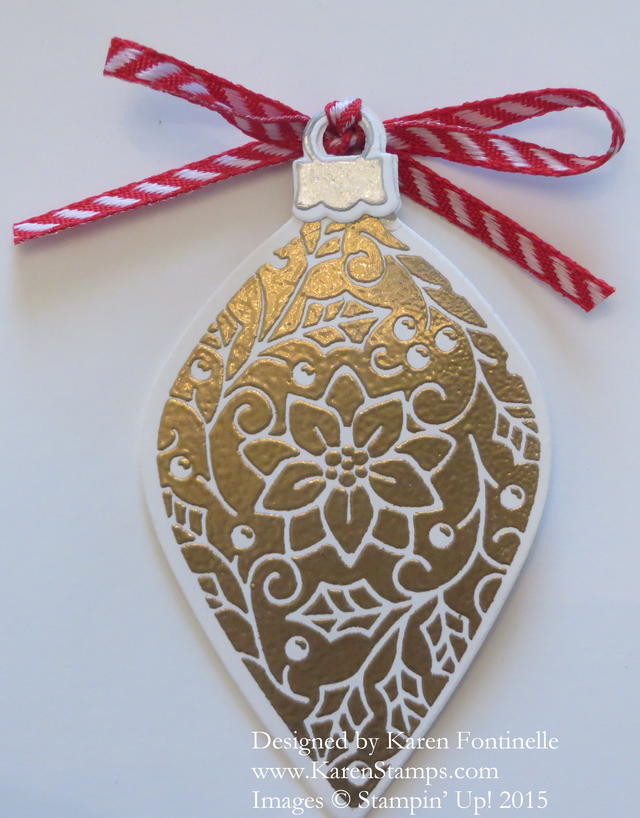
I stamped two ornaments in Versamark Ink and embossed with Gold Embossing Powder using the Stampin’ Up! Heat Tool. I also stamped the ornament hangers and embossed with Silver Embossing Powder. Then I glued the hanger on to the ornament with either a bit of Fast Fuse Adhesive or Multipurpose Liquid Glue.

To make this pretty ornament into a picture frame, I used the 1″ Circle Punch to punch a hole in the center of one ornament to fit a photo.  You might punch the hole and then make sure the photo you choose will fit in the area nicely, Cut the photo a little larger than the hole so it can be adhered on the backside of the ornament. Then glue together the two ornaments so you have a front with the photo and the plain back of the ornament.  Tie a bow around the hanger, perhaps with the Real Red 1/8″ Striped Ribbon.

Embellished Ornaments Picture Frame Ornament

There you have it!  I nice little photo ornament that you could hang on the tree, tie on a package for a tag, or even attach to a Christmas card. Very easy to make!  You could make it even simpler by just stamping with ink and not embossing.

Embellished Ornaments Frame back

You can do a lot with this Embellished Ornaments Stamp Set.  Make some ornaments fancy or plainer. No matter which you do, they will still look elegant on your projects and cards!

Embellished Ornaments Christmas Card with Gold Glitter

Embellished Ornaments Christmas Card with Gold Glitter

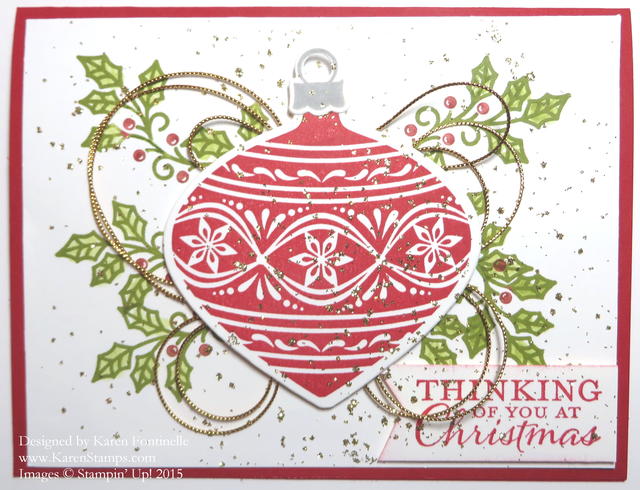
Yesterday I made a super simple, easy Christmas card for my stamping newsletter with this same stamp set, and today I made this more elegant Embellished Ornaments Christmas card with gold glitterI was actually copying a sample card in the Stampin’ Up! Holiday Catalog on page 15. I used the Embellished Ornaments Stamp Set for the whole card.  It also has a nice sentiment to stamp inside the card.

I stamped the holly leaves on the Whisper White card front layer overlapping in the center , which I knew would be underneath the ornament and not show. I inked up the leaves in Old Olive and then used a Blender Pen to remove the green ink from the berries and colored the berries with Real Red marker. Then I went back with the Blender Pen and colored the holly leaves in lightly with Old Olive ink.

The ornament is stamped with Real Red ink and cut out with the Delicate Ornament Thinlits Dies and the Big Shot Die-Cutting Machine.  The little ornament hanger/topper piece is also die cut after being stamped with Smoky Slate ink. You could also stamp this piece with Versamark ink and emboss with Silver Embossing powder. The sample in the catalog used the very thin, fine Gold Metallic Thread behind the ornament. I own it, but have lost it! So instead, I used the Gold Cording TrimI’d prefer the Gold Metallic Thread for a lighter look. The cording is just gathered haphazardly behind the ornament and stuck down with Stampin’ Dimensionals which then adhere the ornament to the card.

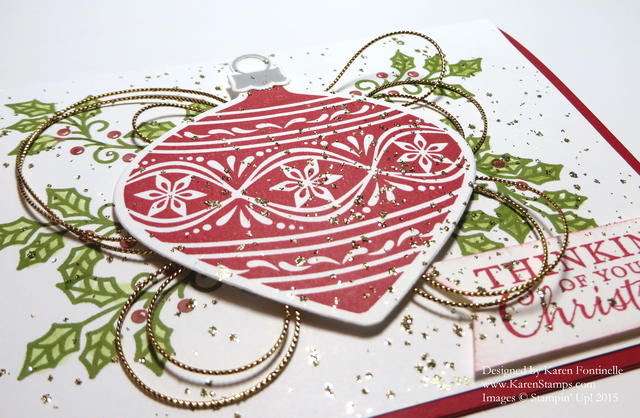
For a finishing touch, I used the splatter technique with the Multipurpose Liquid Glue diluted with water from my Aqua Painter as I did in THIS POST.   Since I didn’t look very closely to see my splatters, I kept splattering and got a little carried away!! If I had it to do over, I wouldn’t do quite so much splattering; but oh well, a lot of glitter on a festive Christmas card never hurt anybody! Once you have splattered with the watered down glue, shake on Gold Glitter to cover, then dump off the excess.  Voila!  You have a glittered splattered card!

Use your Holiday Catalog to shop but also to get ideas!  Copy the projects exactly or just take part of the idea for inspiration and make up your own creative idea! That’s why lots of samples are provided in the Holiday Catalog as well as the Annual Stampin’ Up! Catalog.  Enjoy!

Here is a close-up so you can see the glitter better.

Embellished Ornaments Christmas Card close up

If you need any supplies to make my Embellished Ornaments Christmas card,  please click this link to shop online at Stampin’ Up!

Stampin’ Up! Weekly Deals and Paper Pumpkin Breast Cancer Support

Stampin' Up! Weekly Deal Sept 15 2015

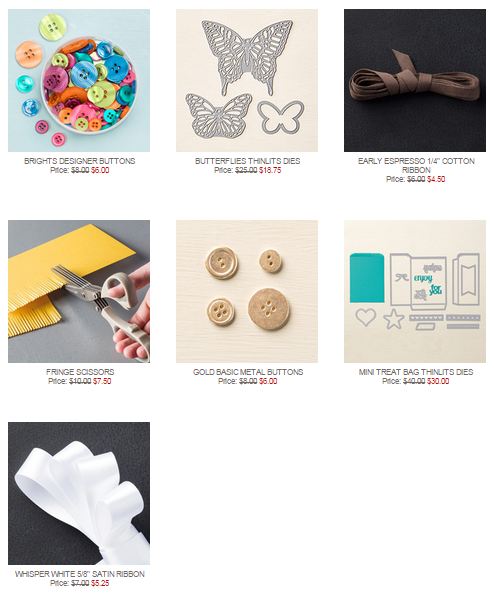
Here are the new Stampin’ Up! Weekly Deals for September 15-21, 2015. In my opinion, there are a couple of GREAT deals on here:  the Mini Treat Bag Thinlits Dies (one of my favorites!) and the beautiful Butterflies Thinlits Dies. If you don’t own these already, I really think you will like them and get a lot of use out of them. You can use the Mini Treat Bag Thinlits for Halloween coming up for treats, even for Christmas for candy treats, small gifts or gift cards. The sizes of the treat bags can even be varied.  Also, you get so many other pieces to use with the basic treat bag die. And of course I’m sure you’ve seen beautiful cards and projects made with the die cut butterflies. The other items are the buttons, ribbons and Fringe Scissors, all things you can use to enhance the look of your creations! Get the discount while it is available!

Don’t forget to check the Clearance Rack, too, for more bargains!

SHOP STAMPIN’ UP!

Stamp Out Breast Cancer with Paper Pumpkin

To show our support for Breast Cancer Awareness Month, we’re going PINK . . . or at least our October boxes are! And because we know our subscribers want to share the love too, we will be making a donation on their behalf to the Breast Cancer Research Foundation (BCRF).

To find out about Paper Pumpkin, the Stampin’ Up! papercrafting monthly kit that comes in the mail, click HERE.

Stampin’ Up! will donate:
$1 for every active Paper Pumpkin subscriber.
Plus, an additional $1 for every new subscriber.

Together, we will make a difference!

Here’s how you can help:

Subscribe! If you’re new to Paper Pumpkin, click here to get started. Your first kit will arrive in a limited-edition pink box that you’ll want to hold onto forever-and we’ll donate $2 because you’re new!
Stay active if you’re a subscriber so we can donate $1 for you. Only those who receive the October shipment will be counted for the donation.
Spread the word! Help us get as many new subscribers as possible. Every current subscriber adds $1 and for new subscribers it’s doubled, so let’s get the word out and raise as much as possible.
Remember, those who get the October kit will not only be donating to a good cause, but they will also get a one-time only, pretty pink Paper Pumpkin box! No one will want to miss it. Promise.

More About BCRF

The Breast Cancer Research Foundation (BCRF) advances the world’s most promising research to eradicate breast cancer. Founded by Evelyn H. Lauder in 1993, BCRF has raised more than $550 million to fuel discoveries in tumor biology, genetics, prevention, treatment, survivorship and metastasis, making it one of the largest non-governmental funders of breast cancer research in the world. This year BCRF has invested $58.6 million in research, to support over 235 researchers at leading medical institutions across six continents, including $11.6 million to the international Evelyn H. Lauder Founder’s Fund focused on metastasis. By spending 91 cents of every dollar on research and public awareness programs, BCRF remains one of the nation’s most fiscally responsible nonprofits. BCRF is the only breast cancer organization with an “A+” from CharityWatch, and has been awarded Charity Navigator’s highest rating of four stars 13 times since 2002. For more information, please visit: www.bcrfcure.org.

Additional Details:

New subscribers are those who signed up between September 11 and October 10, 2015 and have not been a Paper Pumpkin subscriber at any time in the past.
All funds will be donated in US dollars.
Mini spoiler alert! The October project inside the pink box is just as awesome as always, but we should probably let you know that it is not a pink project. That’s all we’re saying. 😉
Funds will be donated based on number of subscribers instead of boxes shipped. But, if you want more than one pink box, you can always increase your subscription quantity by logging into your account at PaperPumpkin.com before October 10.

JOIN PAPER PUMPKIN TODAY AND HELP OTHERS!

Howl-O-Ween Treat Mini Treat Bag Halloween Card

Howl-O-Ween Mini Treat Bag

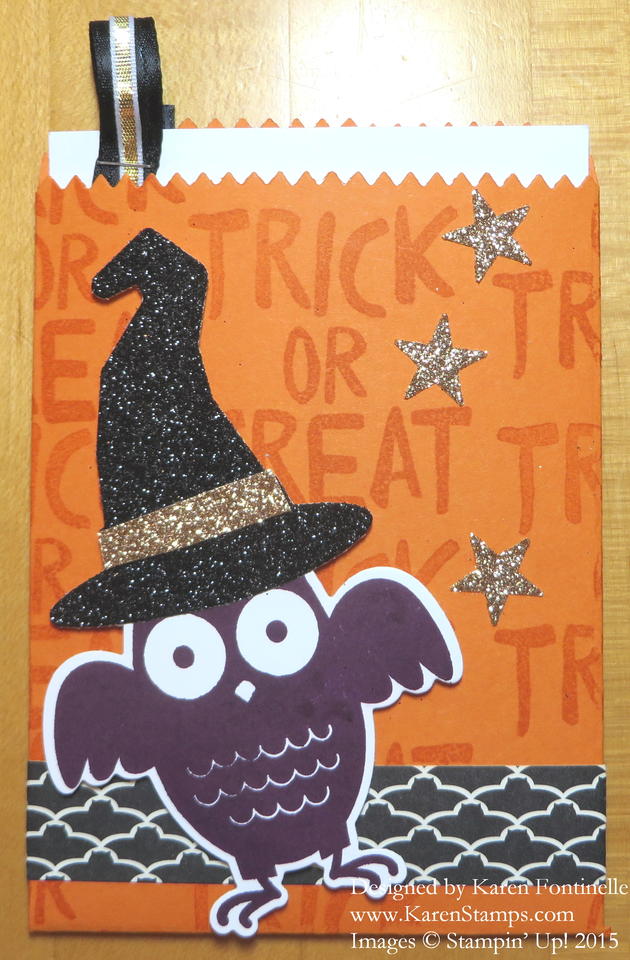
You know I love the Mini Treat Bag Thinlits Diesso for Halloween I made this Howl-O-Ween Treat Mini Treat Bag Halloween card.  I just used Pumpkin Pie card stock to make the treat bag with the die and the Big Shot and then I stamped the words “Trick or Treat” all over with matching Pumpkin Pie ink. That’s how you make your own designer paper! I wrapped a little strip of Happy Haunting Designer Series Paper around the bottom of the bag just for a little something.  The owl from Howl-O-Ween Treat Stamp Set is stamped in Blackberry Bliss and die cut with the Boo to You Framelits Dies.  I also die cut the witch’s hat from the Black Glimmer Paper in the Holiday Catalog and just put a little strip of Gold Glimmer Paper on the hat.  Then I also punched a few Gold Glimmer Stars with the star punch in the Itty Bitty Accents Punch Pack.  Easy to make a deluxe Halloween card!

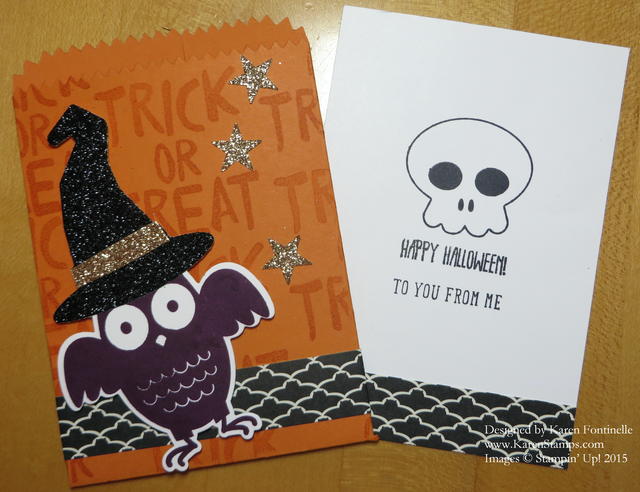
Here is what the inside card looks like.  I added two bits of ribbon, the Basic Black 3/8″ Stitched Satin Ribbon and the Gold 1/8″ Ribbon and stapled on with the Stampin’ Up! Handheld Stapler to help pull the card out.

Howl-O-Ween Mini Treat Bag inside

Notice the strip of Happy Haunting Designer Series Paper!  What do you see?  Just a black and white design?  Or do you see the bats?!  Cute, huh?!

Remember, this year you can buy a pack of card stock that coordinates with the designer series papers rather than buying separate colors, such as this Happy Haunting Cardstock Pack.

So the Mini Treat Bag Thinlits Dies aren’t just for bags or birthdays or treats!  They can be used to make a Howl-O-Ween Treat Mini Treat Bag Halloween Card!

Need anything?!  Shop online at Stampin’ Up! 24/7.

Jingle All the Way Bundle by Stampin’ Up!

Happy Labor Day!  If you are just relaxing at home today and perusing the internet catching up on ideas for the Stampin’ Up! Holiday Catalog, here is a Stampin’ Up! video about using the Jingle All the Way Bundle. I’m sure this will be a popular set as it is unique and fun! Watch the video for cute ways to use this Jingle All the Way Stamp Set and the Sleigh Ride Edgelits Dies. You will be able to make a stack of Christmas cards with just this Bundle (and of course a Big Shot!) The Bundle saves you 15% and also comes in wood-mount, of course. Be inspired for the upcoming holidays! Get an early start!

If you want a copy of the Stampin’ Up! Holiday Catalog mailed to you, just email me at Karen@KarenStamps.com.

If you love these ideas and want to shop for any of these great Stampin’ Up! products, please visit my Stampin’ Up! Online Store HERE. If you prefer, I can place an order for you.

Back to School Bravo Star Card

Back to School Bravo Star Card

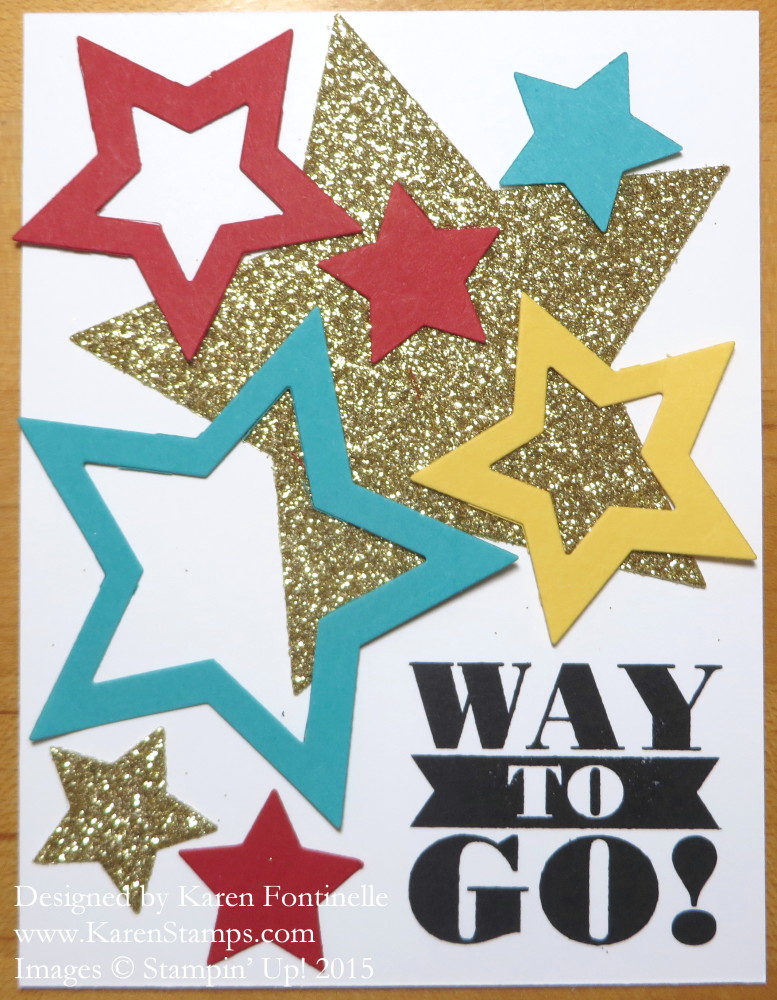
Here in Houston it is almost the end of the first week of school, so I thought maybe people would want to make a Back to School Bravo Star Card either for the student that has completely their first week of school or perhaps for the teacher who has completed a week (and probably more) of back to school! Use the Bravo Stamp Set and some stars cut with the Stars Framelits and Big Shot to choose an appropriate greeting. Change the greeting and make the card for someone getting ready to start school next week or after Labor Day!

For the card base I just used the new Whisper White Thick Cardstock. You will love the weight of this card stock if you would like to make a card with less layers. Then just die cut a bunch of assorted stars with the Stars Framelits and play around with the arrangement until you are happy with the placement of the stars and greeting.  Use a lot or use a few!  Place one framelit inside the other to make the stars with the center cut out.

I’ve always said everyone should have some star punches, star stamps, or in this case Star Framelits because stars can be used for just about anything. They are so good for congratulations, birthday, promotions, achievements, baby, thank you, anything special that you are making!

I loved making this simple Back to School Bravo Star Card using multiple stars and the Bravo Stamp Set! If you need any supplies, please visit my Stampin’ Up! Online Store!

Back to School Big News Awesomeness Gift

Back to School Big News Awesomeness Gift

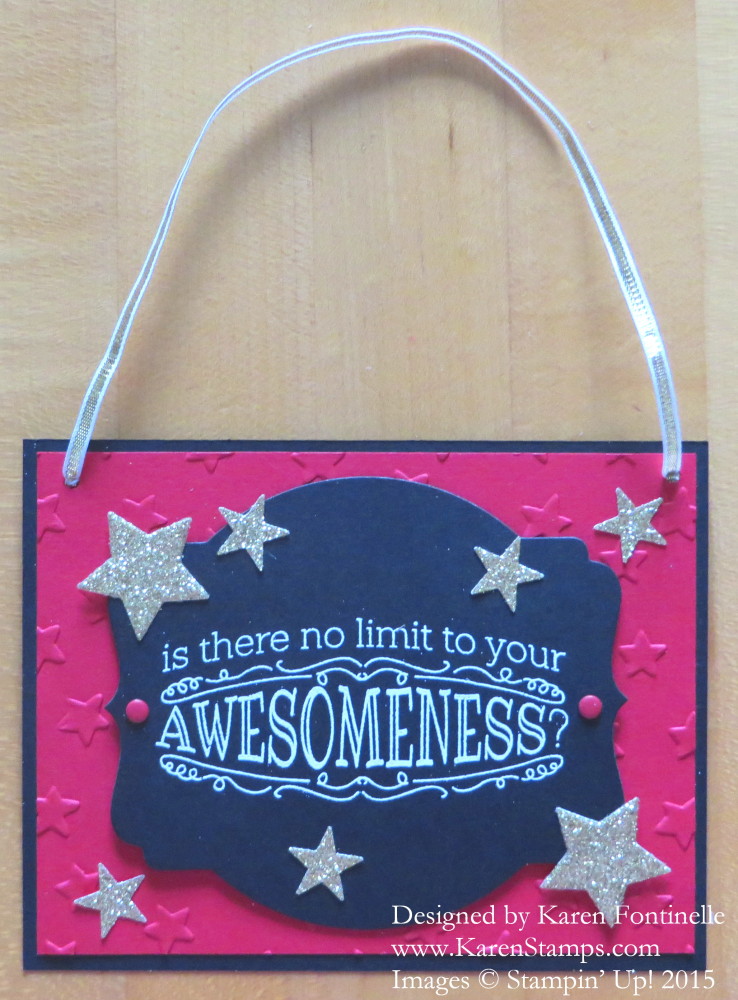
Tomorrow is Back to School time in Houston and probably lots of other places. If not tomorrow, probably very soon! Maybe you are looking for a little card or something for your child’s first day of school to encourage them, surprise them in their lunchbox or backpack. Rather than make this a card, I chose to tie some ribbon across the top to make it a hanger. Now the child can hang it up in their room or school locker and be inspired everyday and know you were thinking of them!

We have yet another power outage at our house as I am writing this so I’m not even sure how the colors are showing up. The base is Basic Black with a Real Red layer embossed with the Big Shot and Lucky Stars Embossing Folder.  The sentiment from Big News is stamped with Versamark Ink and heat embossed with White Stampin’ Emboss Powder and the Heat Tool. Be sure you have the Embossing Buddy to wipe across the card stock before stamping and applying the embossing powder because it helps eliminate the static that makes specks of embossing powder cling to the paper where you don’t want them! This embossed piece is cut out with the largest of the Deco Labels Framelits DiesYou could also just trim it whatever size you wanted to fit the card base. The smallest stars are punched out with the star in the Itty Bitty Punch Pack and the smallest star in the Stars Framelits DiesOf course the Gold Glimmer Paper is perfect for this as would be the Gold Foil Sheets. And I had to use a couple of Brights Candy Dots because they are so cute!

While you could easily copy this and make it a card in the usual fashion, I inserted some Gold 1/8″ Ribbon for a hanger. Any little thing you can make for your child for back to school I’m sure will be appreciated, even a note in their lunchbox!

Be sure to check the Stampin’ Up! Weekly Deals that end Monday night, August 24 as well as the Clearance Rack.

And if you are in the USA and do not have a Stampin’ Up! Demonstrator that you work with and don’t have access to the gorgeous new Holiday Catalog coming September 1st, please contact me at Karen@KarenStamps.com and  I will send a catalog out to you! I’m always happy to assist people in discovering and enjoying the fun and creativity of stamping and the products of Stampin’ Up!

Visit my Stampin’ Up! Online Store HERE!

Making Mini Treat Bags with the Mini Treat Bag Thinlits

Watch Donna Griffith from the Stampin’ Up! Home Office make cute mini treat bags with the Mini Treat Bag Thinlits Dies! She shows some really cute ideas, plus watch for the tip about the little heart embellishment!  I never heard that one before!

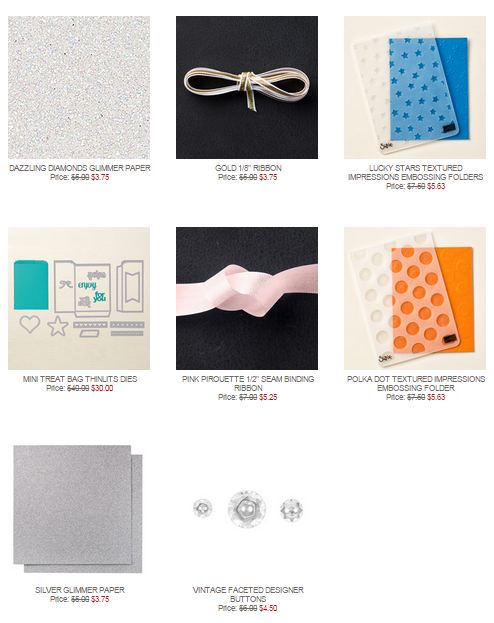
The Mini Treat Bag Thinlits Dies are on sale during the Stampin’ Up! Weekly Deals through Monday June 29, 2015.  I also love the Silver Glimmer Paper and the embossing folders on this deal, not to mention the buttons and the ribbon!  It’s all good!

Altered Folded Mini Treat Bag

Altered Folded Mini Treat Bag

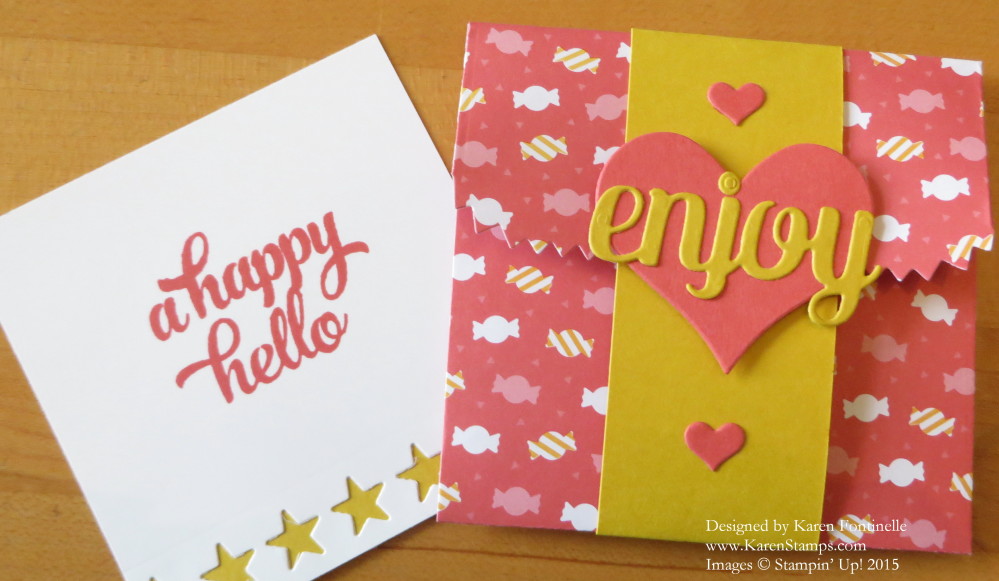
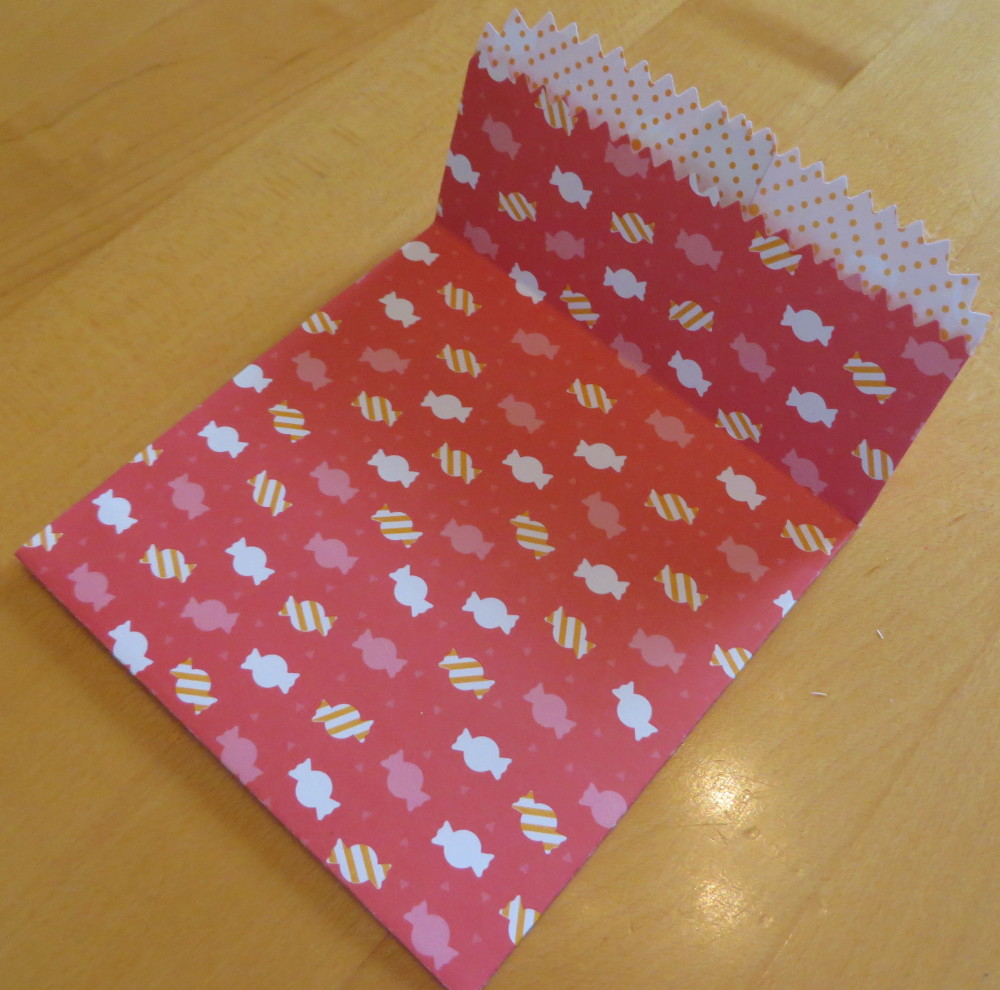
One more idea for using the Mini Treat Bag Thinlits Dies, which are $10 off through Monday night on the Stampin’ Up! Weekly Deals. Make the regular mini treat bag, then fold over the top edge. Add a belly band to hold it in place and you’ve got a cute little envelope for a card and/or treat! Don’t forget all the cute embellishments that come in the set of dies, such as the strip of stars, hearts and dots, the heart and star, the words, etc. You can decorate your Altered Folded Mini Treat Bag any way you like!

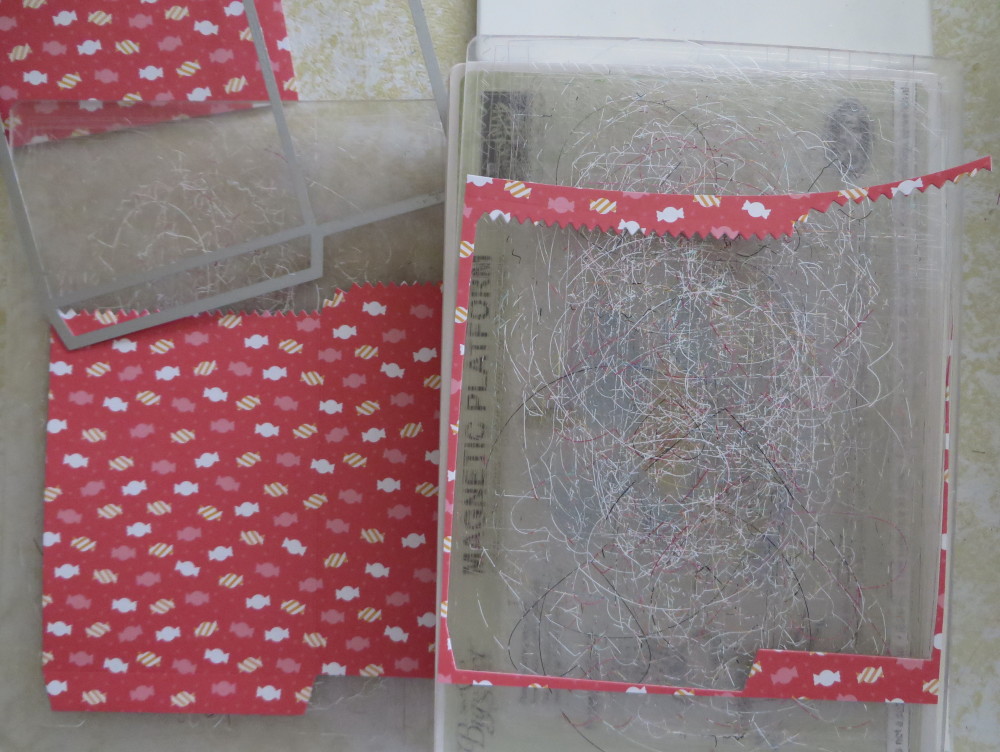
For this project I just used a 6″ x 6″ piece of paper from the Cherry on Top Designer Series Paper Stack.  No cutting involved.  But you do need to to place the large treat bag die carefully on the paper and make sure it is properly placed as you cover it with the cutting plate before running through the Big Shot Die-Cutting Machine.  The Magnetic Platform helps hold it in place but you can also use some post-it type notes or washi tape to hold the die in place.  As you can see, there is very little paper waste!

Die Cut Mini Treat Bag

Make the mini treat bag, then fold over the top.  You can just do this or you can score first about 3 1/2″ from the bottom edge of the bag. Just figure out what size you want the bag/envelope to be.

Mini Treat Bag Folded

Go to my Stampin’ Up! Online Store and check out all the Stampin’ Up! Weekly Deals! Then if you liked my Altered Folded Mini Treat Bag, be sure to place it on your order before 11:50 pm MT Monday June 29, 2015. All the other items on the Weekly Deals are really great too so be sure to look!

Stampin' Up! Weekly Deal June 23 2015