Category Archives: Big Shot

Smaller Mini Treat Bags

Cherry on Top Mini Treat Bags

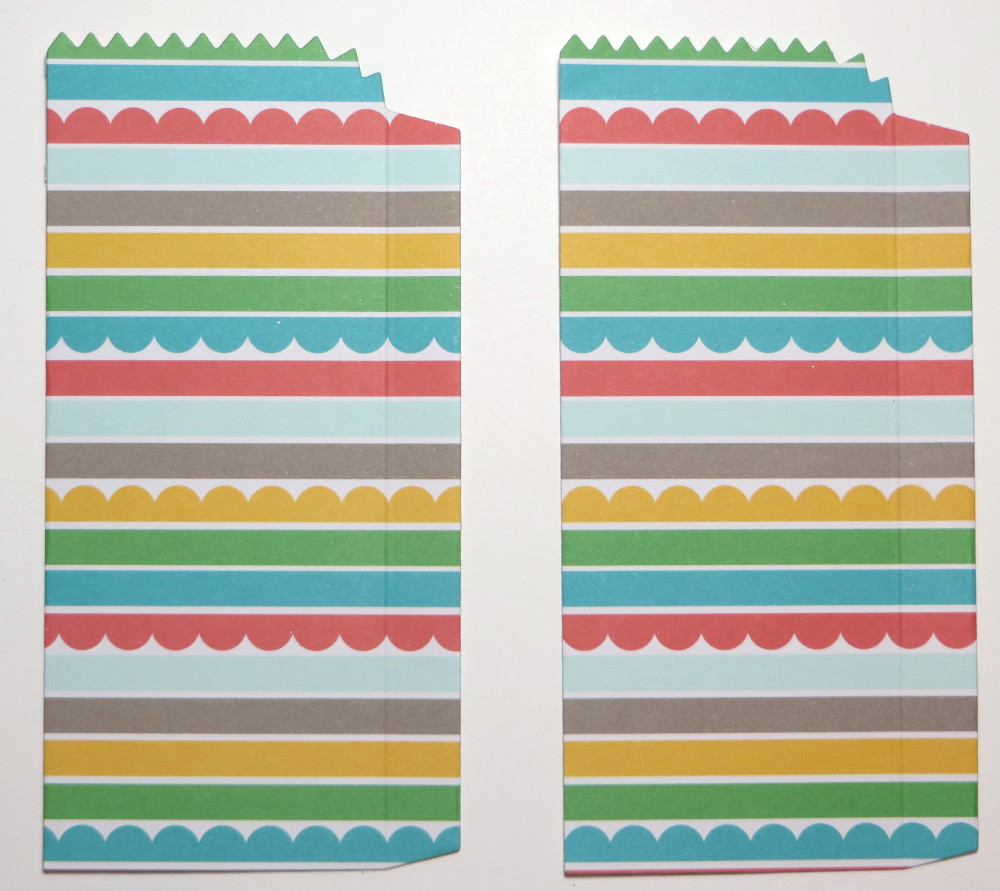
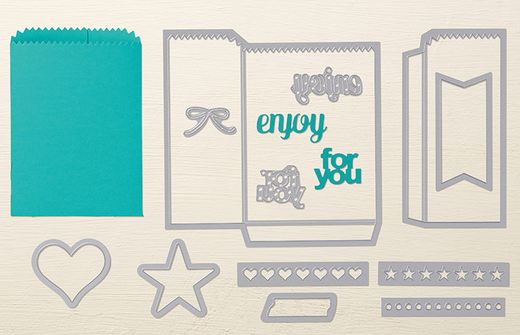
I’ve let go of Christmas today and have another way to use the Mini Treat Bag Thinlits Dies I think you will find useful!  The die pieces include one large one which forms the front of the bag, and we used two of them to make the larger gusseted bags. Today we will use the smaller die piece which normally forms the back of the bag and cut two of those to make these Smaller Mini Treat Bags!

Cut two of the small bag die pieces.

Cherry on Top Mini Treat Bag Pieces

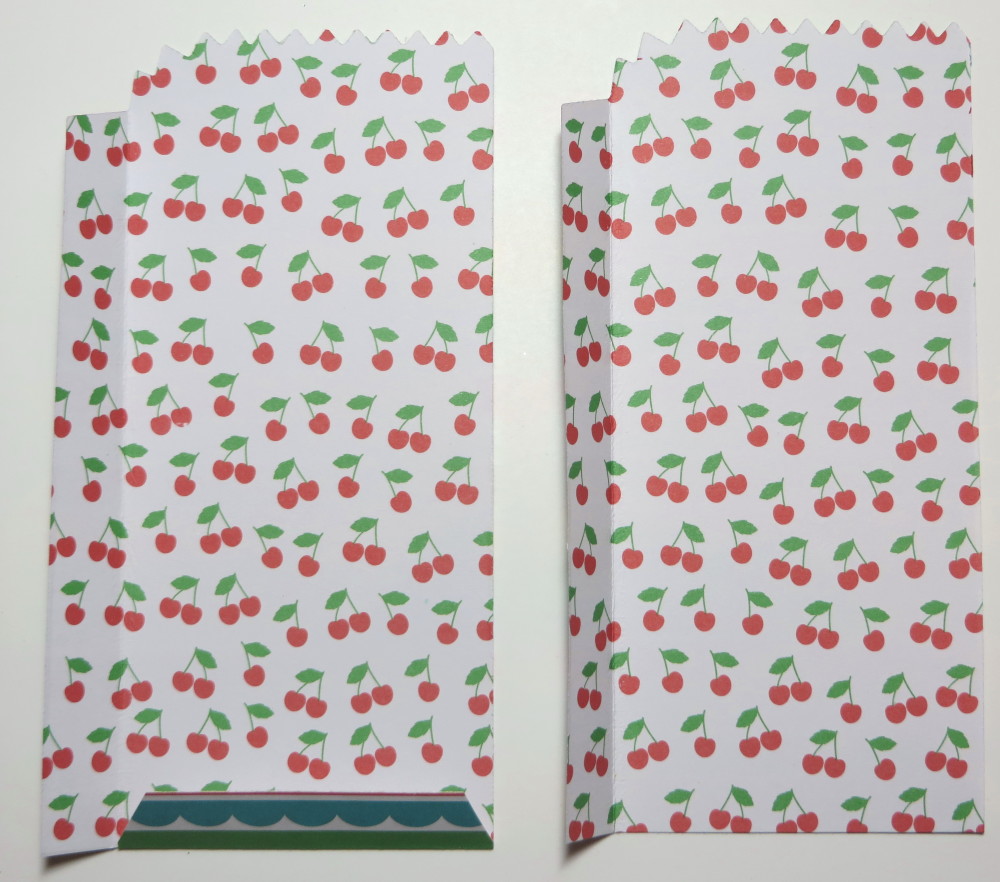
Fold the score lines made by the die to form the bag.  Since the bottom edges of these pieces are just straight, trim off a little bit, maybe 1/2″ from the bottom of one that will be the back piece of the bag. On the other piece, make a 1/2″ score line and fold (maybe even trimming the corners off as shown.  This piece will be the front piece of the mini treat bag.

Cherry on Top Mini Treat Bag Folds

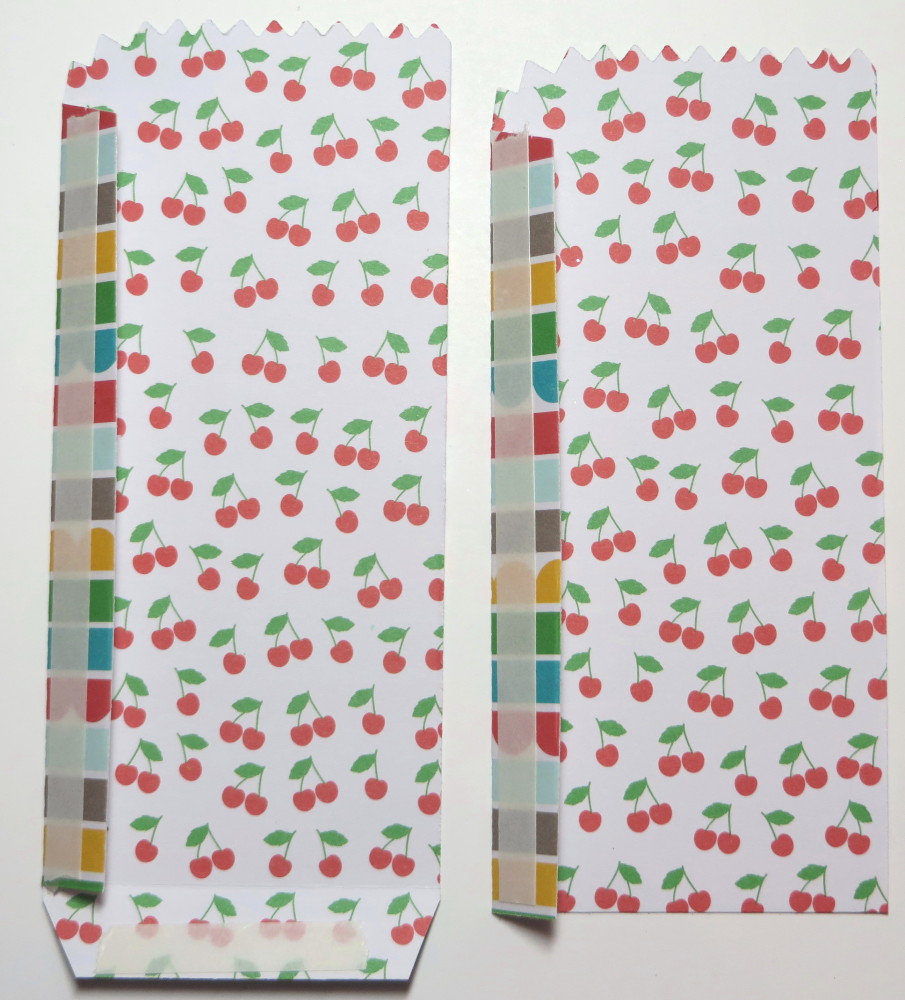
Apply adhesive of your choice as shown.  I used the new Tear & Tape Adhesive.

Cherry on Top Mini Treat Bag Tape

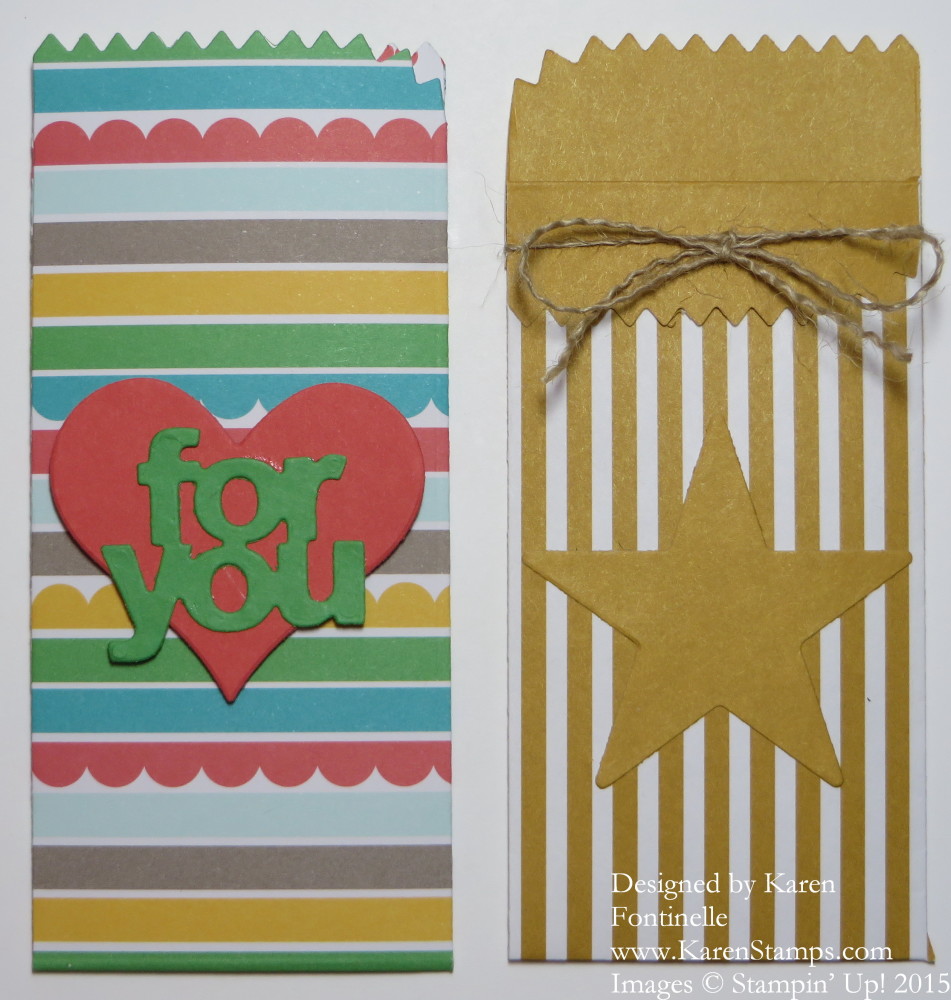
The Mini Treat Bag on the left is made with the Cherry on Top Designer Series Paper Stack. Such a cute stack of colorful papers! As you can see the front and back top edges are the same length. The heart and words are die cuts in the Mini Treat Bag Thinlits Dies. Not only do you get the mini treat bag dies but you get extra dies that cut embellishments for your projects.

The treat bag on the right is made from the new In Color Envelope Paper. On this bag, the front piece is folded down a bit and I tied a string of the Burlap Ribbon around the top edge. The star is a die cut in the set of thinlits dies.

 Mini Treat Bags

Remember, the Mini Treat Bag Thinlits Dies are on the Stampin’ Up! Weekly Deals through Monday night, June 29. You can save $10 when you purchase these dies! To see some other altered  Mini Treat Bags I have made, check out this post and this post. To see some of the “regular” mini treat bags you can make with the Mini Treat Bag Thinlits Dies, please click HERE.

Place your order at my Stampin’ Up! Online Store!

Altered Mini Treat Bag

Altered Mini Treat Bag

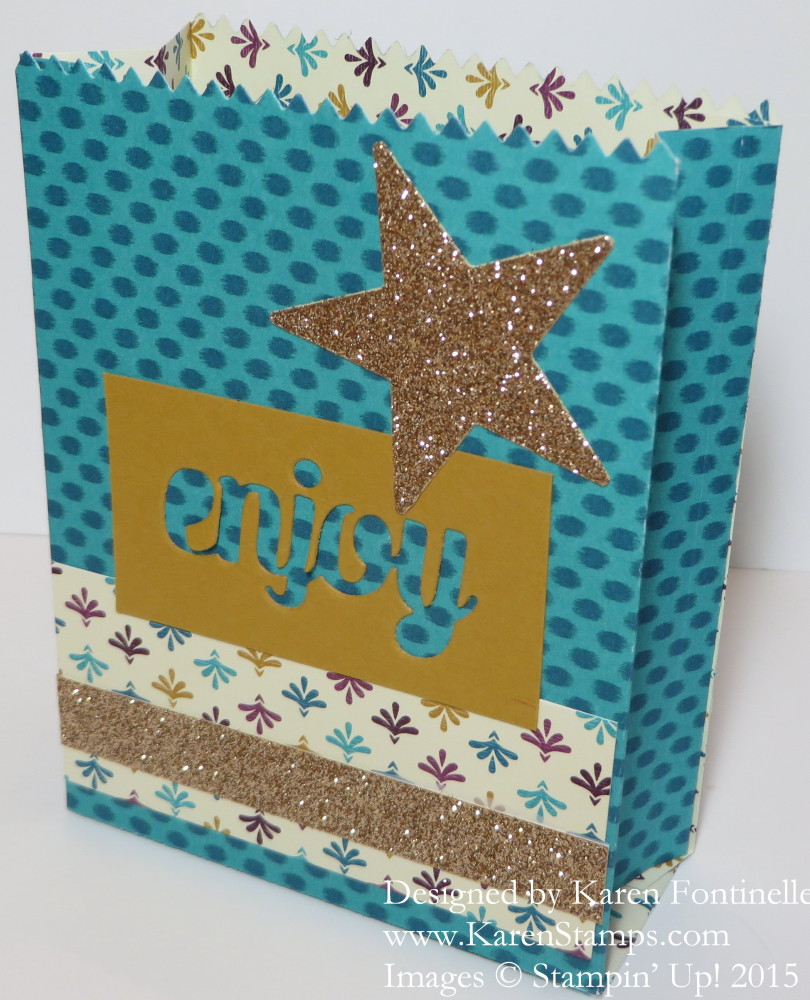
With the Mini Treat Bag Thinlits Dies on sale for $10 off this week on the Stampin’ Up! Weekly Deals, I thought I would make an altered Mini Treat Bag so you can see some versatility with this die! By just doing  a few different things, you can make a larger gusseted treat bag with the same dies! You can make a smaller one too!  And this die comes with so many different pieces and coordinates with a new stamp set in the new Stampin’ Up! Catalog. That stamp set is You’re So Sweet on page 57.

The negative image of the word “Enjoy” is leftover from something else I made with the word cut out that I just happened to save and it came in handy for this bag!  I had a scrap piece of the same Bohemian Designer Series Paper so I just turned it over and glued it to the front of the bag with a scrap strip of Gold Glimmer Paper across the front. I also used the star die in the package to cut out the star out of the Gold Glimmer Paper. So easy!

Tomorrow I will take a few more photos and show you have to make this altered Mini Treat Bag.

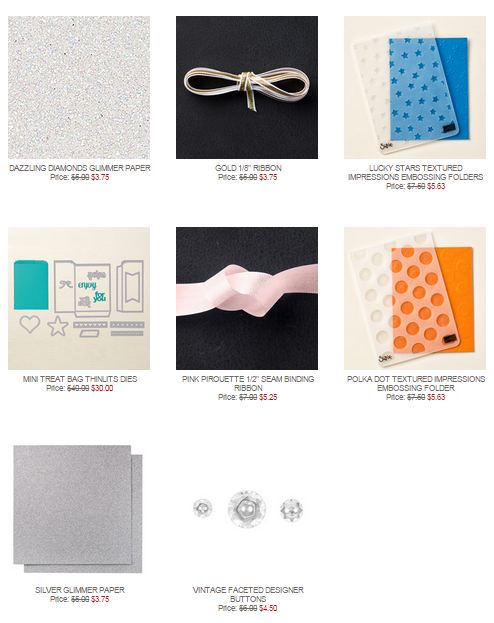
Be sure to check out the Stampin’ Up! Weekly Deals for the week of June 23, 2015. These are good through Monday night, June 29. Every item on there is worth having!  But I know you’ll have fun with the Mini Treat Bag Thinlits!

Mini Treat Bag Thinlits Dies

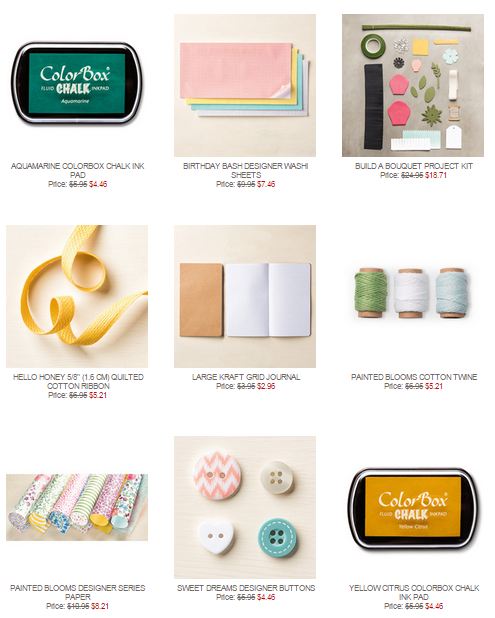
Stampin' Up! Weekly Deal June 23 2015

Click to Shop!


Cherry on Top Cotton Paper Mini Treat Bag

Cherry on Top Cotton Paper Mini Treat Bag

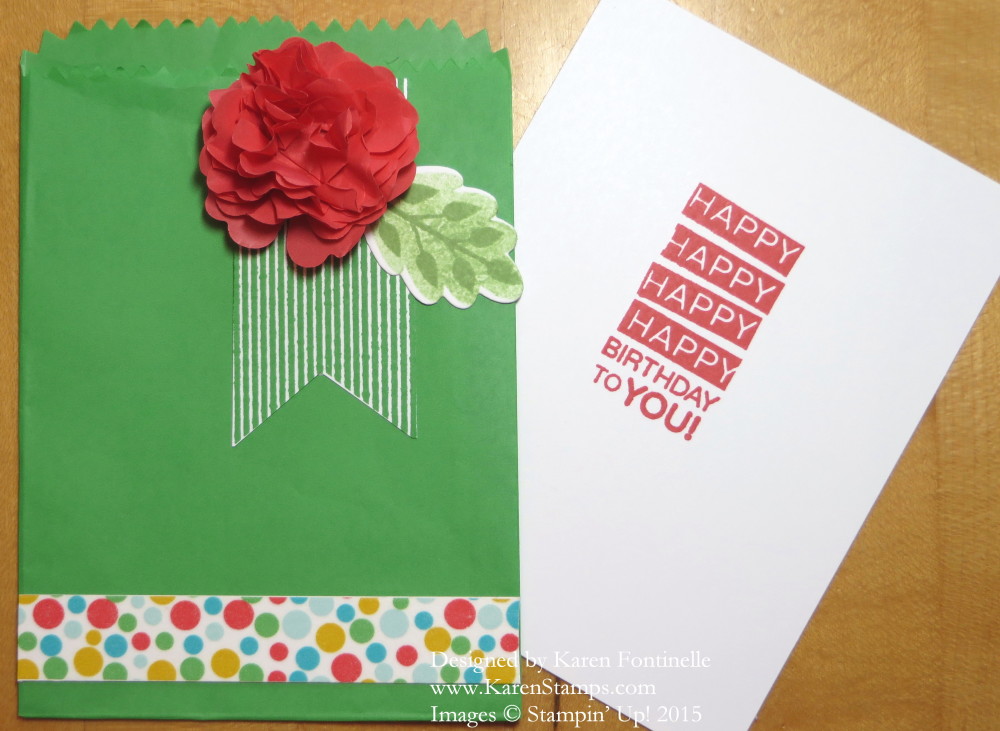
When I broke out my new Cherry on Top Cotton Paper in the new Stampin’ Up! Catalog I decided to make a treat bag with it using the Big Shot and the Mini Treat Bag Thinlits Dies. I love the Mini Treat Bag Thinlits because you get so many pieces with it, and of course other people have figured out ways to alter the size of the treat bags and things you can make with the bag die. So it is a little pricey but you get a lot with this set.

But back to the Cotton Paper! It’s a little heavier, I would say, than tissue paper. It is lightweight but sturdy. I love my treat bag I made with the Cucumber Crush color, but I did find it a little difficult to work with in making the bag. It was a little bit difficult to fold on the score lines since the paper is lightweight.  I found using SNAIL adhesive to not work with it at all – seems the paper was too slick for the SNAIL to catch on to.  But the Fast Fuse worked great and I imagine the new Tear & Tape Adhesive would work great. After making the treat bag, I cut a piece of Whisper White card stock to fit inside and stamped it with Watermelon Wonder ink with a birthday greeting from the Amazing Birthday Stamp Set. (You can also buy a Bundle with the matching Banners Framelits if you like and save 15%.)

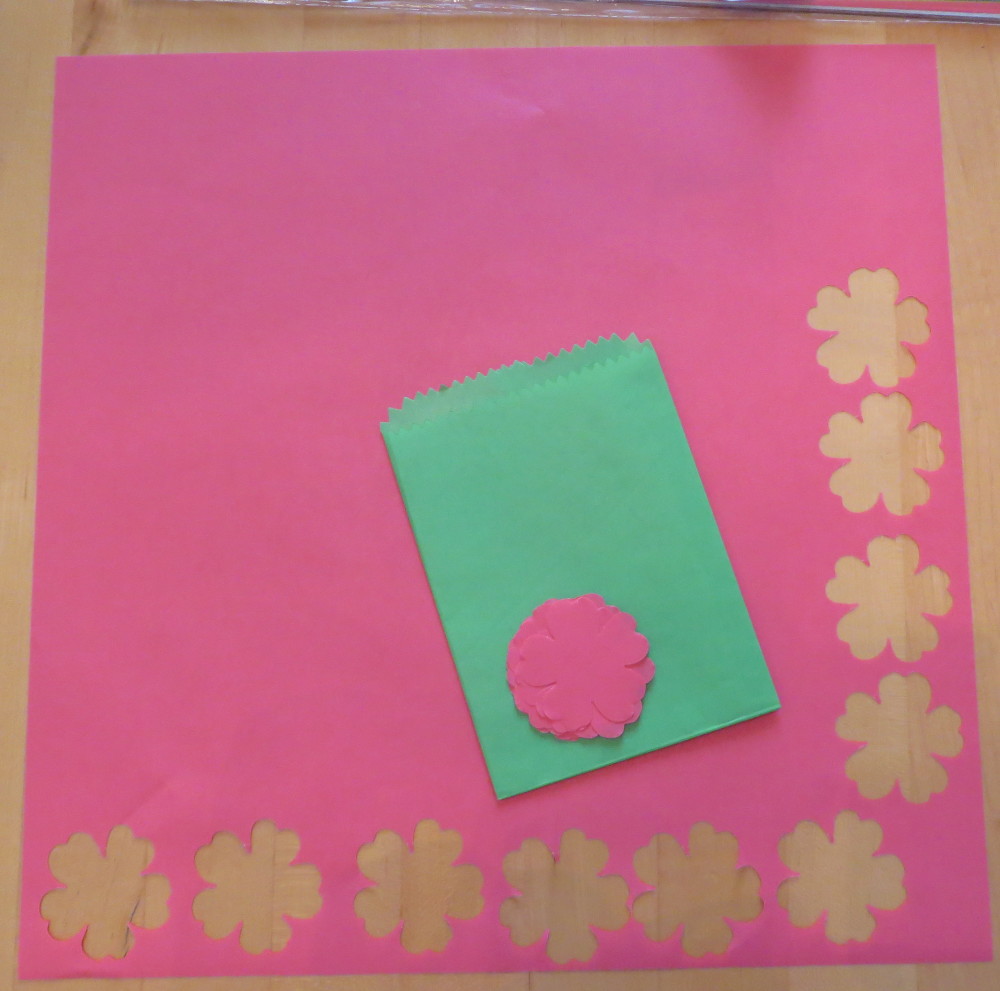
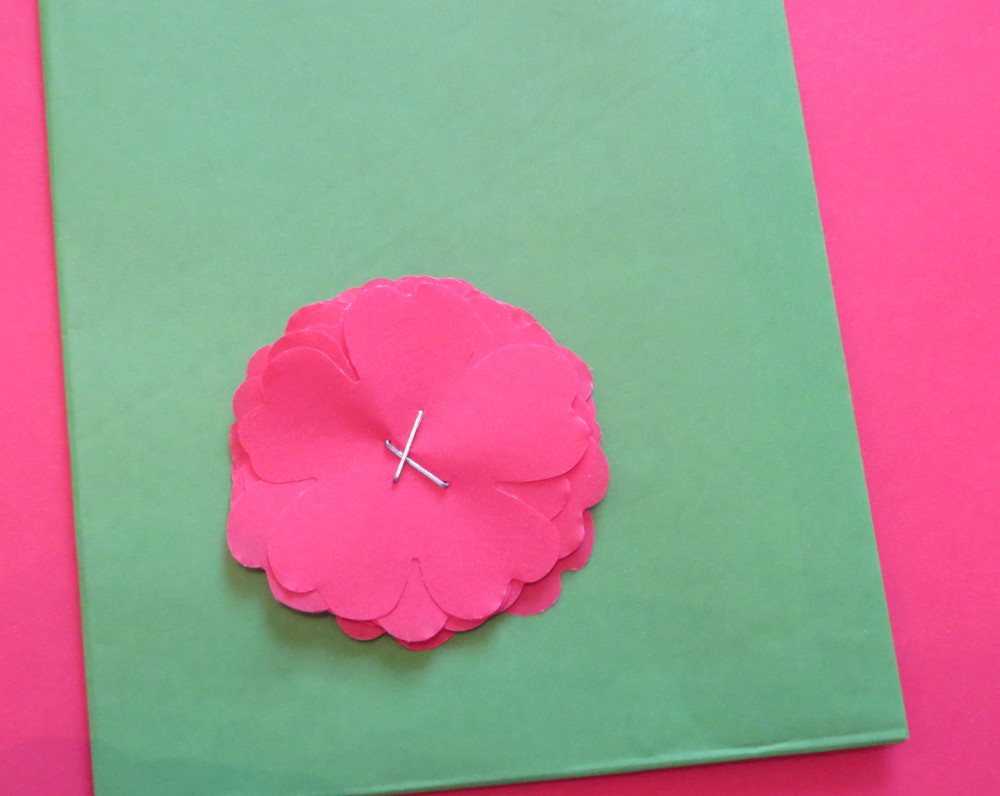
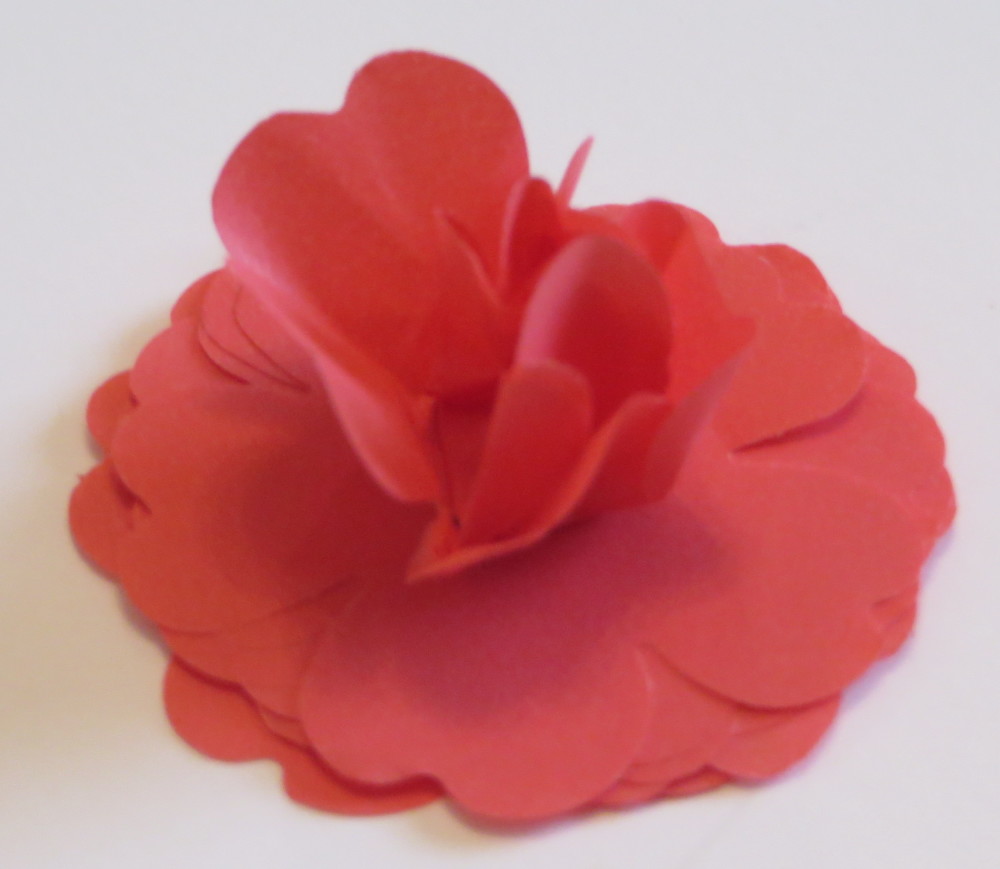
To decorate the bag, I punched ten flowers with the Pansy Punch from the Watermelon Wonder Cotton Paper. I could also have used the Floral Frames Collection Framelits Dies. Just stack the flowers together, staple in the center with the Stampin’ Up! Handheld StaplerThen just smoosh each layer up and toward the center to make the flower! The Cotton Paper works well for this! Just smoosh and fool with it and get it to your liking. If you are mailing it, you can flatten the flower and tell the recipient to fluff up the flower when they receive it! I also stamped a banner from the Amazing Birthday stamp set to decorate and applied a piece of Cherry on Top Washi Tape over a strip of Whisper White card stock since the tape is transparent. Then I just adhered it to the bottom of the treat bag. And since I had an already stamped and die-cut leafy image from the other day, I stuck that on behind the flower.  So cute!

Cotton Paper

Cotton Paper Stapled Flowers


Cotton Paper Flower


If you need any of these supplies, you can find them at my Stampin’ Up! Online Store HERE.
 

Chalk Talk Petite Petals For You Card

Chalk Talk Petite Petals For You Card

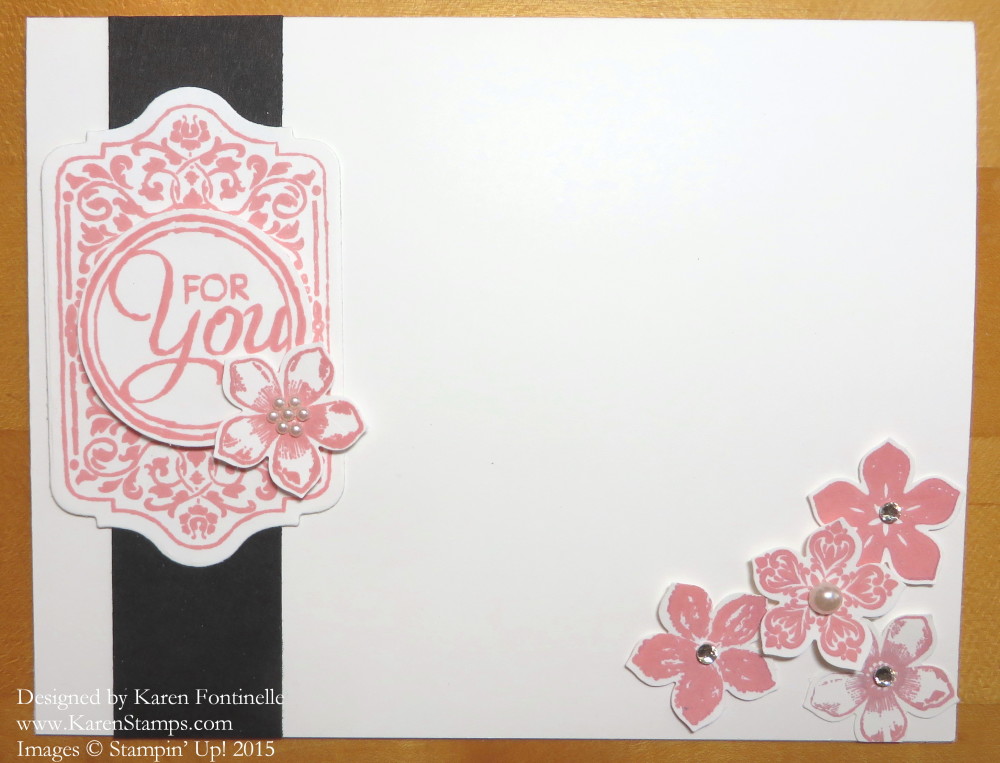
The Chalk Talk Stamp Set is one that I hate to see retire on June 2nd when the new Stampin’ Up! Catalog comes out. I decided to use it again on this all-occasion card. I think this card even has an elegant look to it that you could use for an invitation, maybe a wedding invitation, or a wedding card. I stamped it with the Rose Coral ColorBox Chalk Ink Pad which I especially liked stamped on the Whisper White card stock. The Chalk Talk Stamp Set also has matching framelits, the Chalk Talk Framelits and you can also buy the stamp set and framelits in a bundle. Surprisingly, and happily, the Chalk Talk Framelits are in the new catalog!

For some extra interest, I decided to also stamp the Petite Petals flowers with the Rose Coral Chalk Ink and punched out with the Petite Petals PunchI have found these little flowers and punch to be so handy on many projects when you just need a little something else. Both Petite Petals Stamp Set and Punch are carrying over to the new catalog! And then I added some Basic Pearls and Rhinestones to the little flowers.

Easy, elegant card to make for almost any occasion. If you are interested in the Chalk Talk Stamp Set be sure to order it by Tuesday, June 2. It is only available in the wood-mount at this point, but that is what I have. I like all three kinds of stamps that Stampin’ Up! carries, but it always feels good to hold a wood block in your hand to stamp!

Once again, here is the Stampin’ Up! Retired List (link below).  You will see an “x” in a box if the item is no longer available, but of course this can change at a moment’s notice.  So if you do not find it in the Online Store, then it probably is no longer available. But email me at Karen@KarenStamps.com if you need help finding something or have any questions.

Stampin’ Up! Retiring List PDF

My Stampin’ Up! Online Store

And don’t forget the Stampin’ Up! Weekly Deals that end Monday night June 1st.

Stampin' Up! Weekly Deal May 26 2015


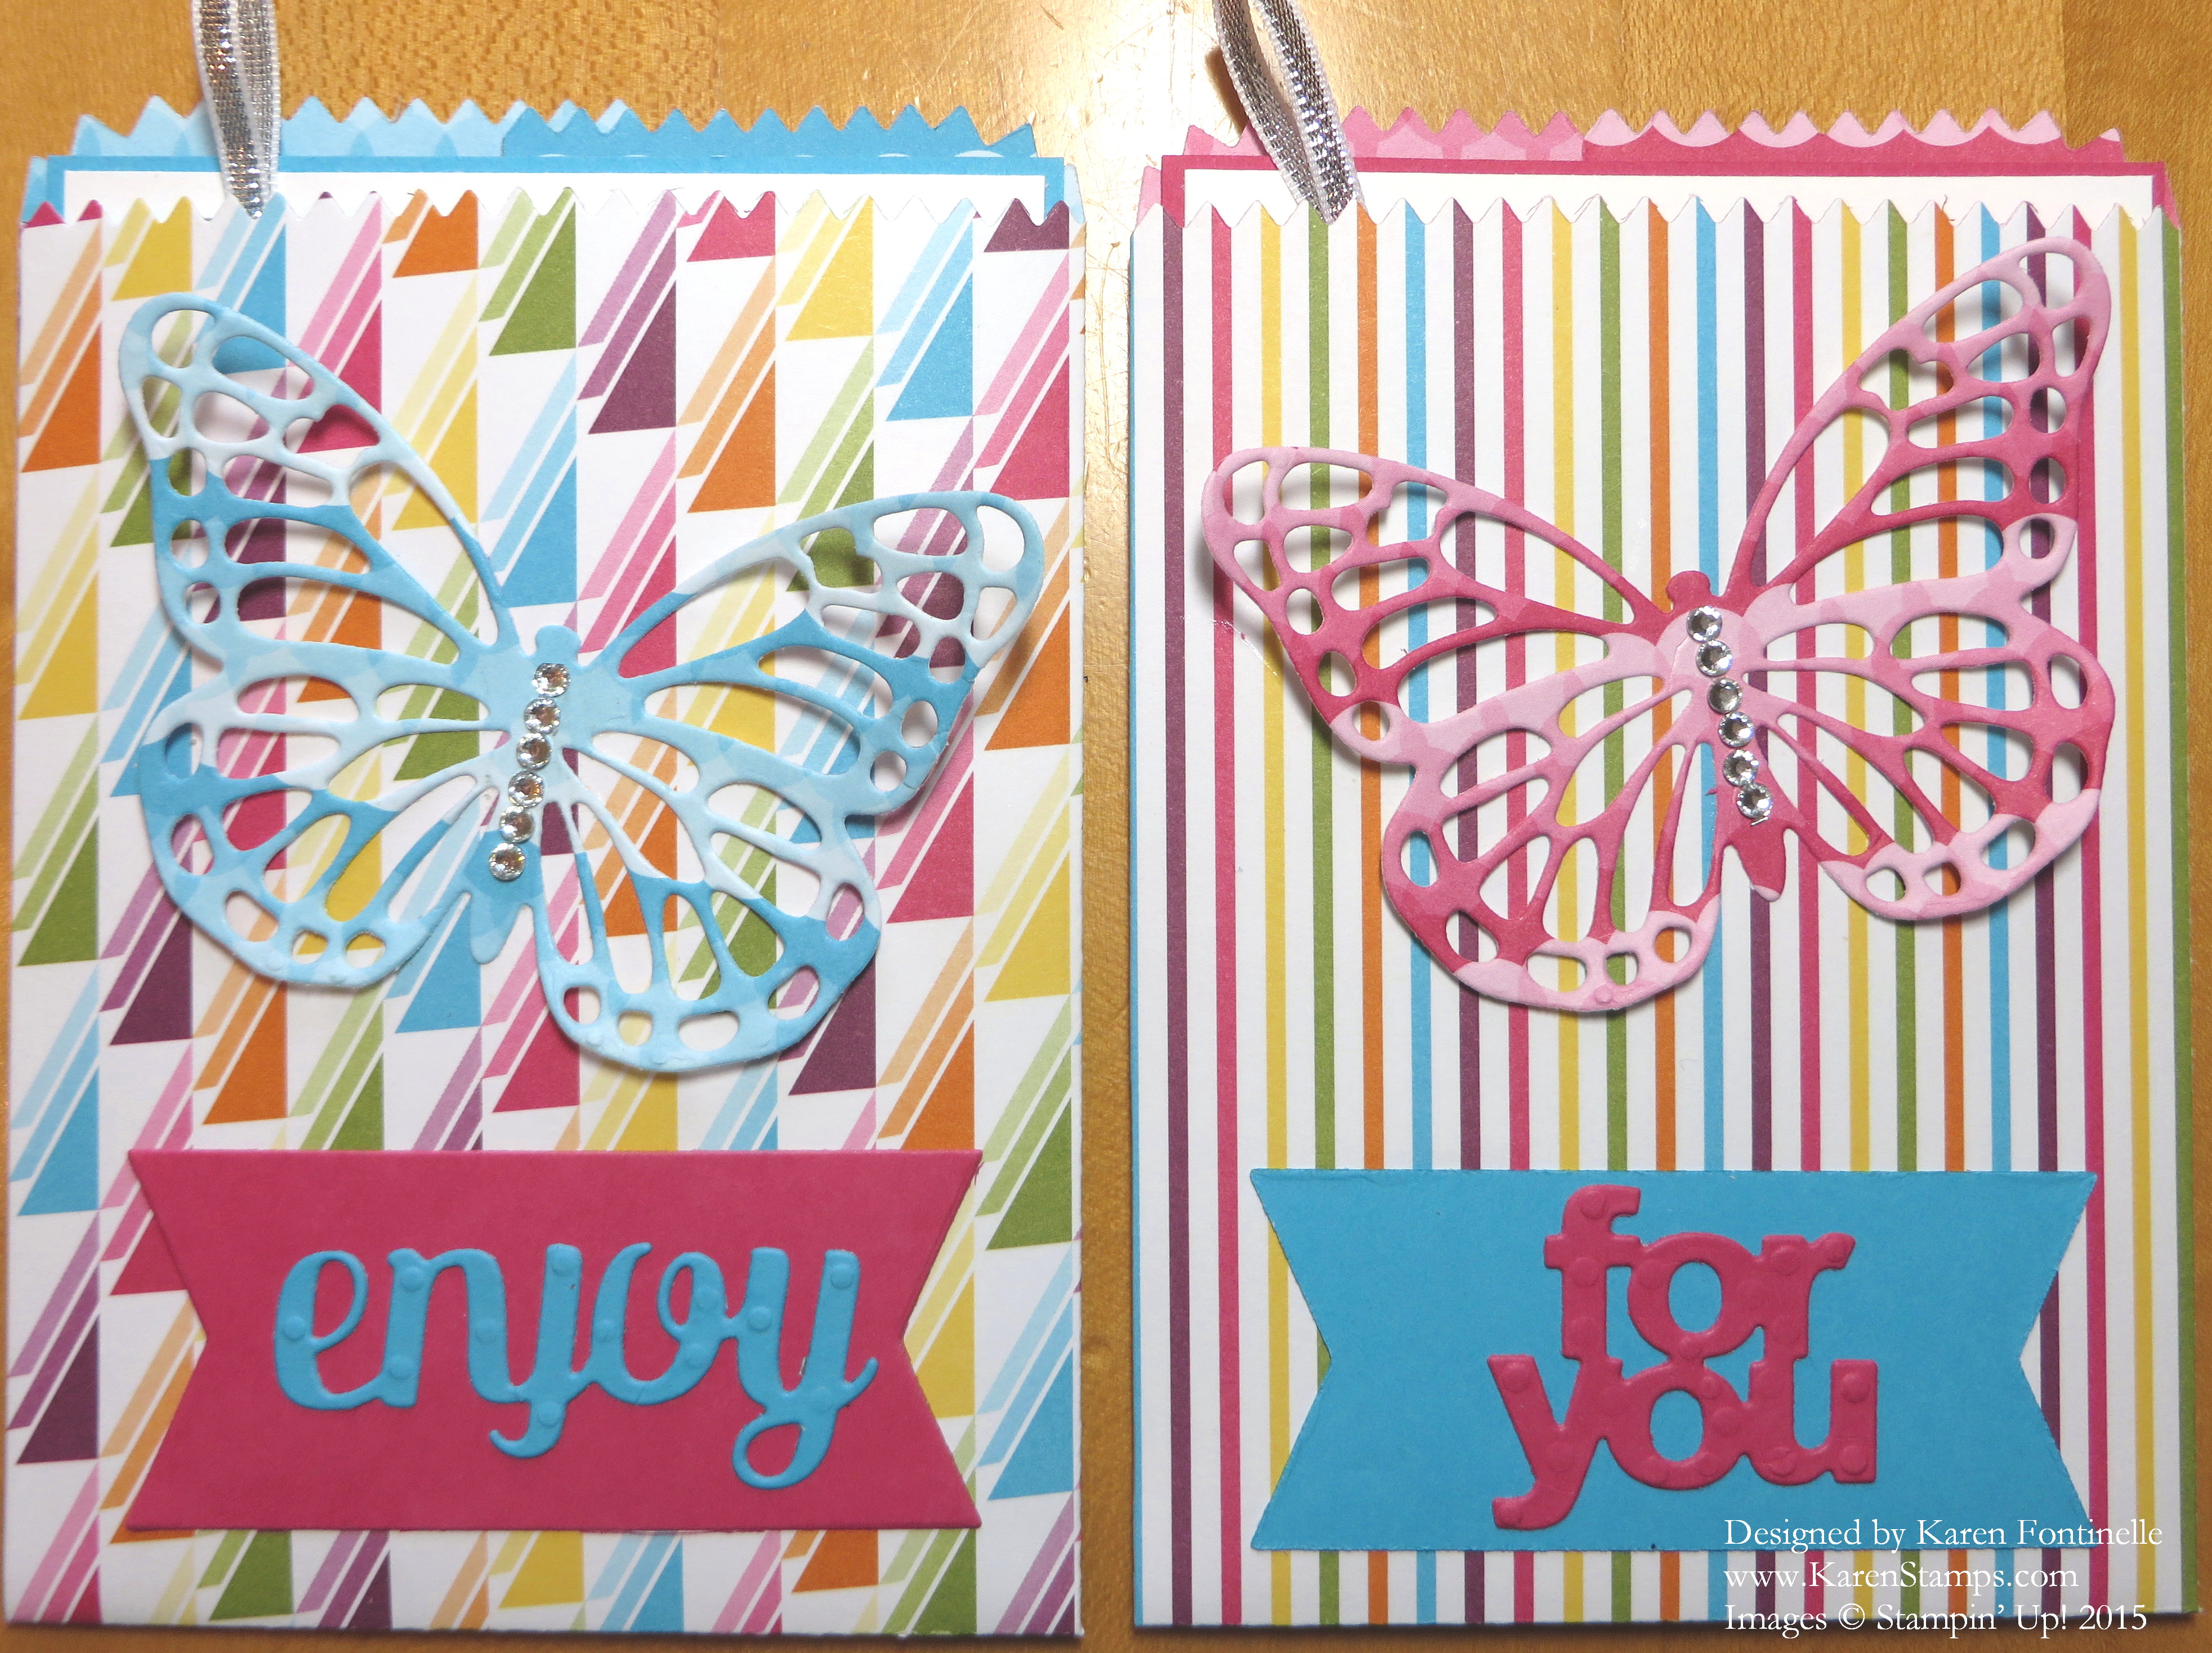
Butterfly Mini Treat Bag Birthday Cards for Twins

Butterfly Mini Treat Bag Birthday Card

My twin nieces had a birthday this week so I wanted to make them cards that were almost alike but slightly different. I made both of them pocket cards with the Mini Treat Bag Thinlits DiesThis die is a good investment because you get so many pieces with it besides the treat bag. And you can make more than just treat bags with it. Click the link to see all the dies that come in this set – words, shapes, strips!

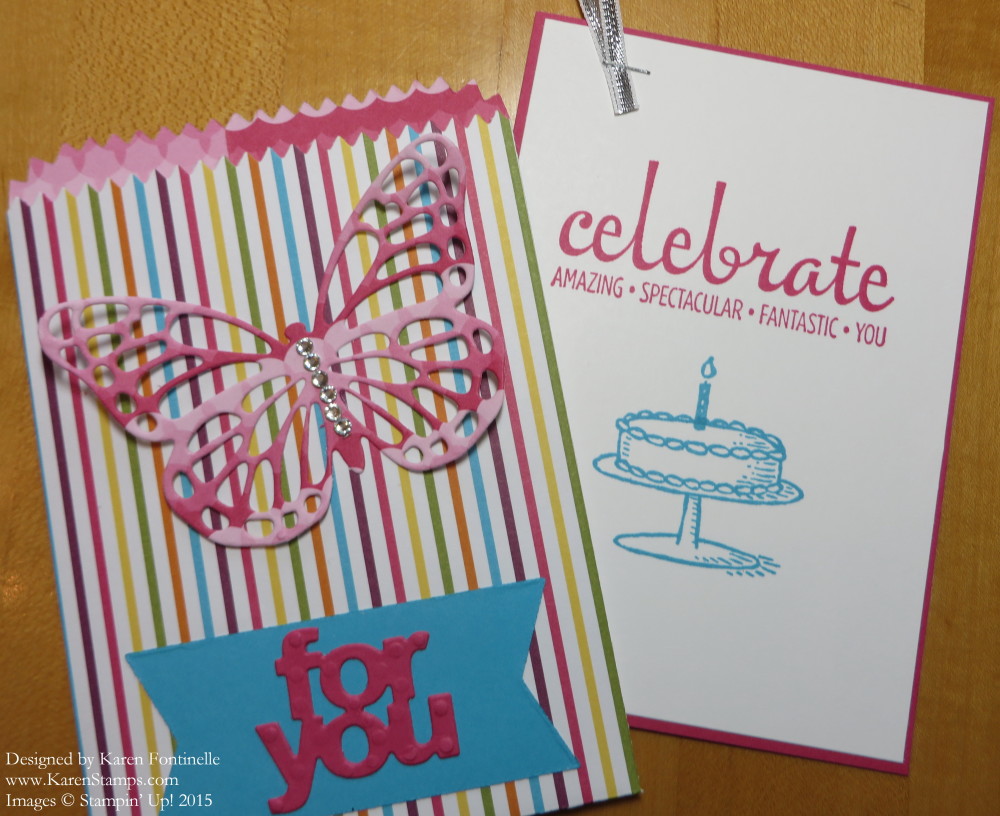
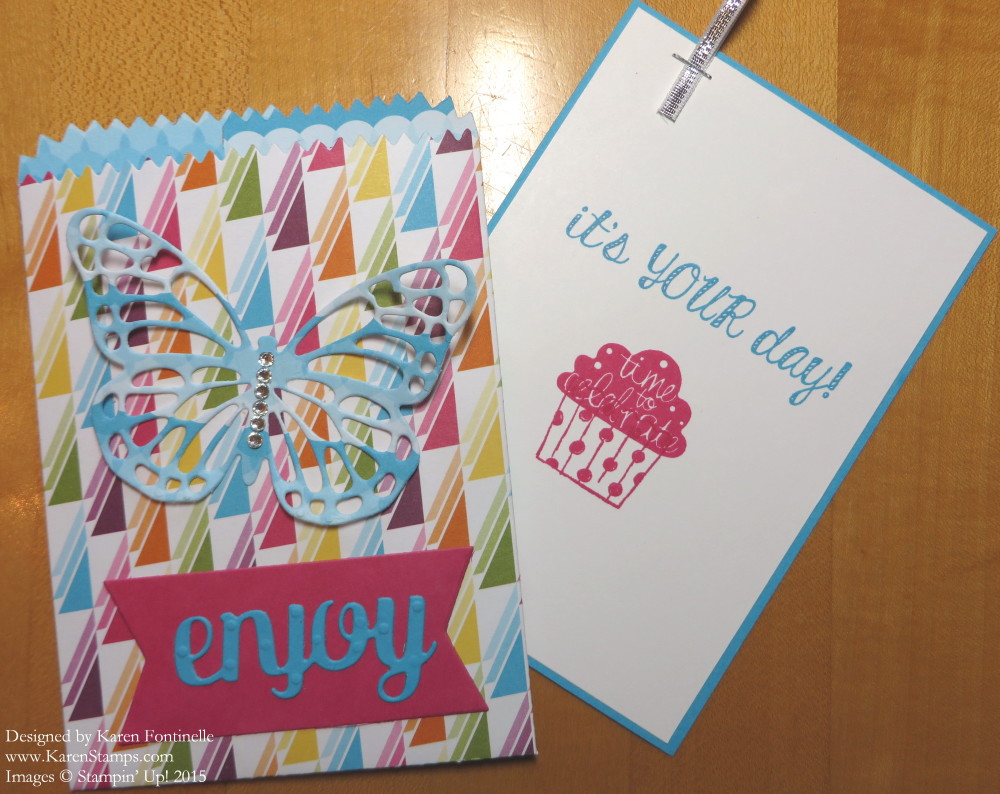
The bags are made with the Sweet Taffy Designer Series Paper. Such bright and fun patterns on these papers! The banner and the words at the bottom of the bags are from the same Mini Treat Bag Thinlits Dies.  The butterflies, of course, are from the Butterflies Thinlits DiesI cut them out of two of the papers in the Sweet Taffy paper and added some Rhinestone Jewels. There’s a little piece of Silver 1/8″ Ribbon attached to the inside card to indicate there is a card inside to pull out.

And here are the cards showing the inside card with birthday greetings!

Butterfly Mini Treat Bag Birthday Card For You

This card is stamped with the cake from a Sale-A-Bration stamp set and the greeting from Fabulous Four Stamp Set.

Butterfly Mini Treat Bag Birthday Card Enjoy

This card is stamped with a greeting from the Fabulous Four Stamp Set and the cupcake from Cupcake Party.

Be sure to notice the handy dandy Handheld Stapler from Stampin’ Up!. I love it! Order the box of Silver Mini Staples, too. It’s great for attaching tags or embellishments or pieces of ribbon like on these cards!

Don’t forget the Stampin’ Up! Weekly Deals which will end on Monday night. You might get busy with the holiday weekend and forget.

Have a wonderful Memorial Day weekend!

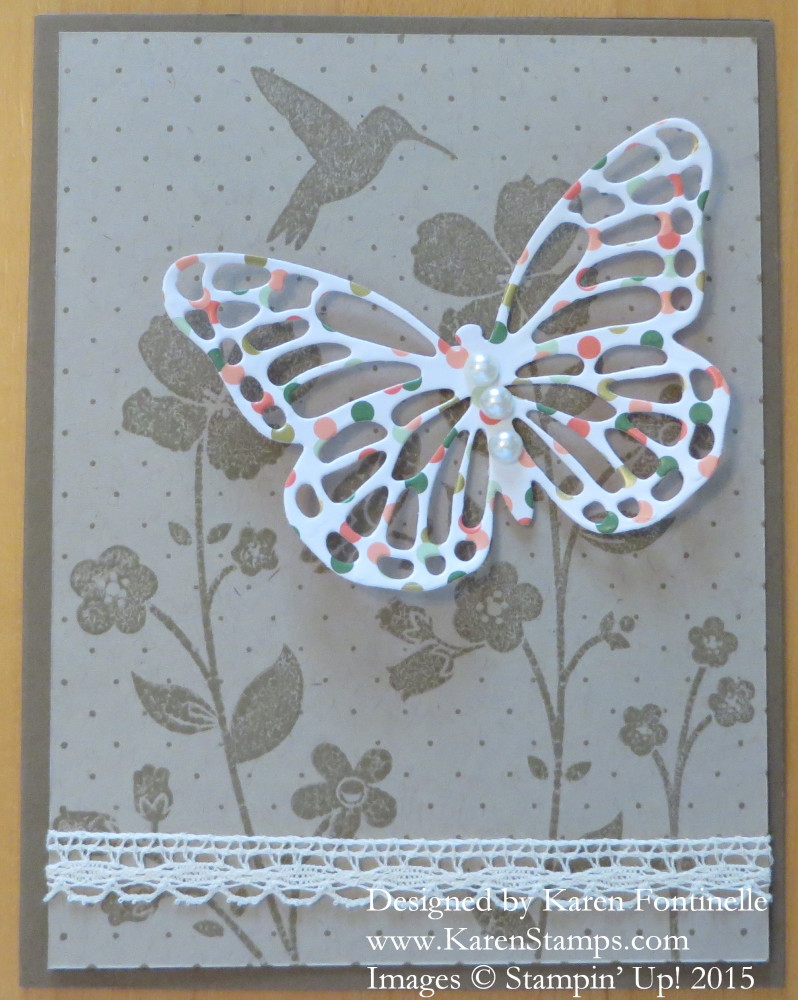
Wildflower Meadow Butterfly All Occasions Card

Wildflower Meadow Butterfly All Occasions Card

One of the retiring stamps is Wildflower Meadow with a matching embossing folder, Wildflower Meadow Textured Impressions Embossing FolderThey are discounted now on the Stampin’ Up! Retiring List so check them out! Wildflower Meadow is very pretty although I know I didn’t use it as often as I could have. It’s a large background stamp so I actually prefer the wood-mount verson which is a little easier to use I think.

I decided to use the Wildflower Meadow stamp in kind of a monochromatic look on this card, stamping the Crumb Cake card stock with Crumb Cake ink.  You could also use Versamark Ink for the same look. The card base is Soft Suede. I wanted to see a pretty background but I wanted a butterfly to be the focal point.

The butterfly is a piece of paper from the Gold Soiree Specialty Designer Series Paper which is so pretty with its Metallic Gold and is discounted 50% on the Stampin’ Up! Retired List also! The butterfly is die-cut with the Butterflies Thinlits Dies. I added a few Pearl Basic Jewels Embellishments for the butterfly’s body and just adhered it with a Stampin’ Dimensional (a thin scrap from the edge of the Dimensional page to fit) so the butterfly would look 3D. Then for just a little more embellishment I added a strip of Venetian Crochet Trim across the bottom.

This card could be used for almost any occasion so I decided to leave off a greeting until I need to send the card and see what I want to put on it. It certainly could be used for Mother’s Day which is coming up next Sunday, May 10, 2015. It could also be birthday, thinking of you, get well, graduation, sympathy, even a wedding card.

Go to my Stampin’ Up! Online Store now and see all the great products and certainly many discounted prices available!

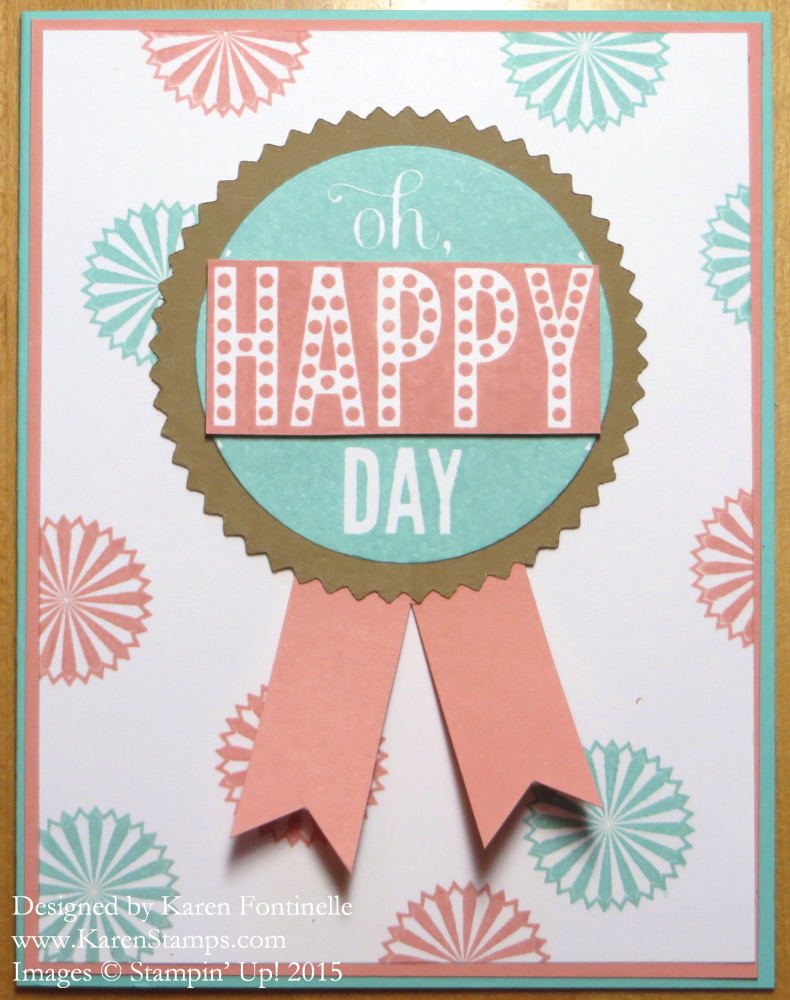
Starburst Sayings Happy Day Card

Starburst Sayings Happy Day Card

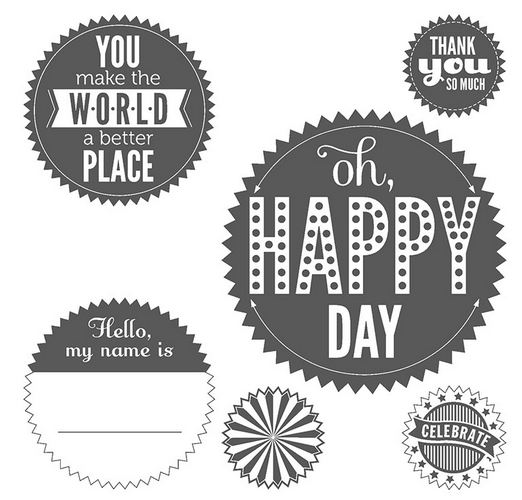
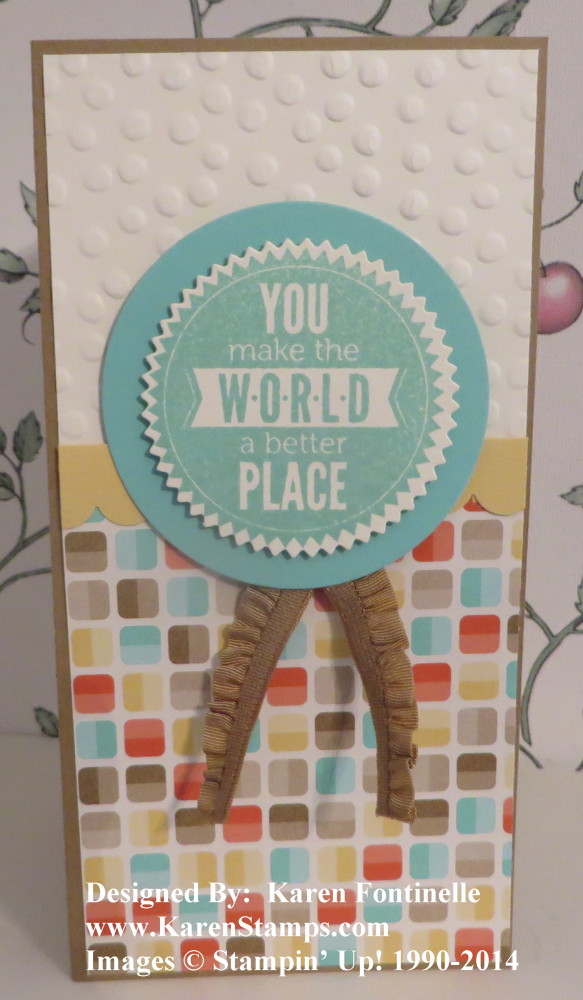
Starburst Sayings is one of the stamp sets on the Stampin’ Up! Retired List that I was so surprised to see on there! It’s a fun stamp set to use and can cover many occasions from congratulations, birthdays, anniversaries, new baby, encouragement, and even weddings. All it takes is using the appropriate colors, papers and embellishments.  Dress it up or dress it down, as they say! You can use circle punches with several of the stamps if you don’t mind punching inside the starburst edges.  Use the matching Starburst Framelits Dies to use with these stamps or just paper.

The Starburst Sayings Stamp Set is discounted on the Retired List right now or you can purchase the Bundle with the stamp set and the framelits and save a little money.

Starburst Saying Stamp Set Images

Here’s another card I made awhile back with one of the other sayings:

Starburst Sayings and Retro Fresh

This card is from last year and has retired paper and trim on it, but you can easily change it with something current.  You can read that blog post HERE.
To shop for any of the Stampin’ Up! Retired products, just go to my Stampin’ Up! Online Store HERE.  You can choose Stamps or Accessories. Click the View ALL dropdown box so that you can just scroll through all the products rather than having to go to the next page and the next.
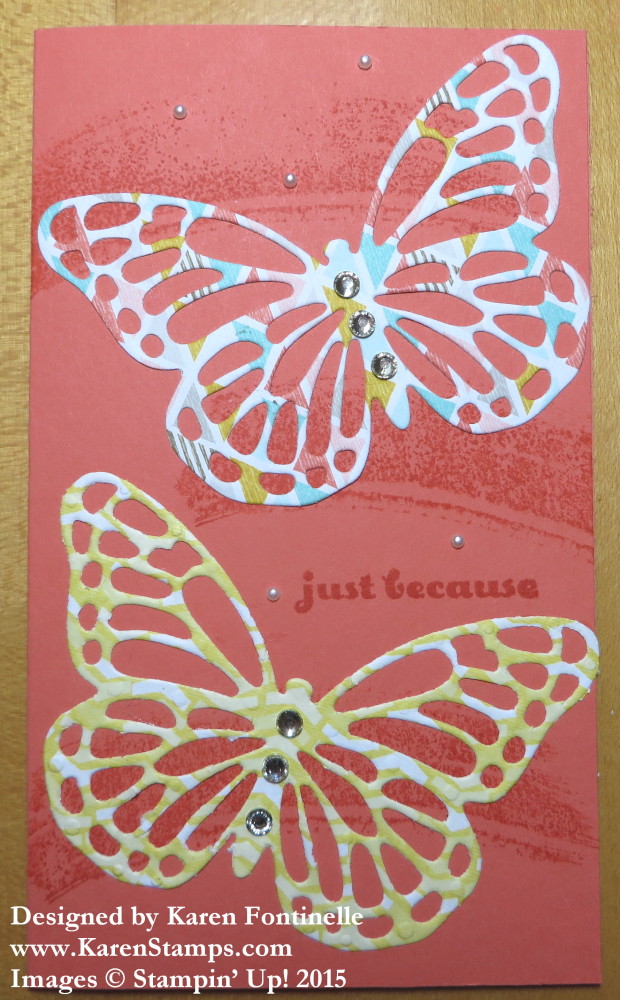
Butterflies Thinlits Just Because Card

Butterflies Thinlits Just Because Card

Stampin’ Up! was hoping these Butterflies Thinlits Dies would be available today, but not quite! Here is the update from Stampin’ Up! hot off the press:

We have received notice from our supplier that the container with the Butterflies Thinlits Dies was finally unloaded from the ship; however, there is a shortage of trucks, which has delayed the container being picked up. We have secured a truck to pick up the container, and, as of now, it is scheduled to be delivered to Stampin’ Up! on Friday. We will post an update as soon as they are available.

Thank you for your patience and flexibility as we continue to await their arrival!

So hang in there! Stampin’ Up! is trying as hard as they can!  I will continue to keep you updated.

In the meantime, I made this card the other day, playing with the butterfly thinlits and the Sale-A-Bration designer series paper, Best Year Ever.  Such an easy way to make multicolored pretty butterflies!  And once these butterfly thinlits become available, Stampin’ Up! will have a special offer for you:

  1. Get the Butterflies Thinlits at a 15 percent discount–just $21.20!
  2. Buy any of the Butterflies Thinlits Bundles at the already-discounted price and choose one of three FREE Sale-A-Bration items (only available while supplies last)
  • Best Year Ever Designer Series Paper (item 138633)
  • Best Year Ever Accessory Pack (item 138634)
  • Irresistibly Yours Specialty Designer Series Paper (item 138635)

My card is an odd size. The card base is 6 1/2″ x 5 1/2″, folded in half, so the card is 5 1/2″ x 3 1/4″. I don’t even know why I made this size, but there it is! I stamped a couple of swooshes on the background with Work Of Art before I adhere the die-cut butterflies. The greeting is stamped from the  And Many More Stamp Set, chock full of greetings just like my favorite greeting stamp set Teeny Tiny Wishes!  And I added some bling with both Rhinestones and Pearls!  Why not?!

Stay tuned for more updates about the Butterflies Thinlits Dies so you can purchase them or the Bundles as soon as they are available!

Shop at my Stampin’ Up! Online Store 24/7!

Colorful Butterflies Thinlits Dies

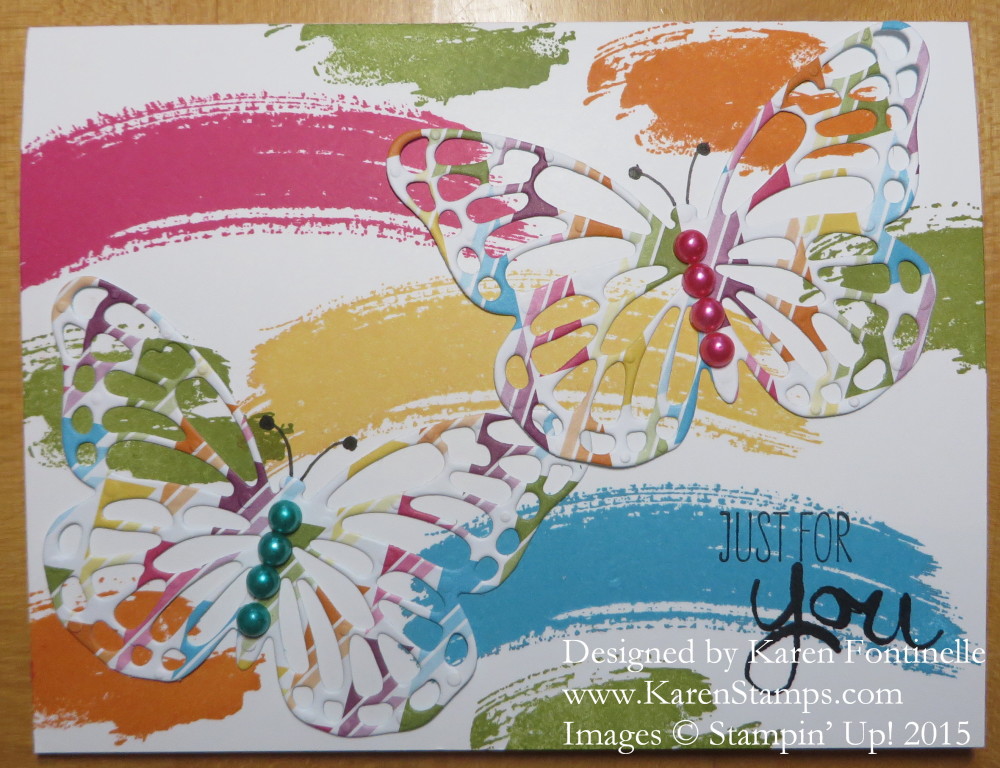
Work of Art Butterfly Thinlits CardYou never know what you will come out with when you start making a card, or any creative project! I decided to combine some “swaths” of color from the Work of Art Stamp Set with the Butterflies Thinlits DieI tried using some Sweet Taffy Designer Series Paper, the ombre turquoise pattern, and both sides of the butterfly I thought turned out beautiful! It was too hard to fit on three butterflies, so I ended up with just two and used the same pattern of the designer paper on both butterflies since I already had a colorful background. I thought the butterflies needed something to stand out a bit, so I drew in the antennae with a retired (I think) journaling pen and colored some Basic Pearls with my Blendabilities Markers and stuck those on along the body. Do you love it because it is so colorful and the butterflies so pretty or do you hate it because it is too busy??

The butterflies, made with the Butterflies Thinlits Dies are incredible embellishments to put on a project or card! Of course you need the Big Shot for the die-cutting.  I use mine almost every day for something. If you would like a Big Shot, think about purchasing it during Sale-A-Bration. Get the Big Shot, some accessories (dies, framelits, thinlits or embossing folders), maybe some card stock and if you reach $150 you will get all that plus 3 free Sale-A-Bration items, plus $25 in free Hostess dollars to spend! Best way to get more bang for your buck!

Visit my Stampin’ Up! Online Store now and choose your $50 bundles to earn a free Sale-A-Bration product!

Best Day Ever Happy Card

Best Day Ever Happy Card

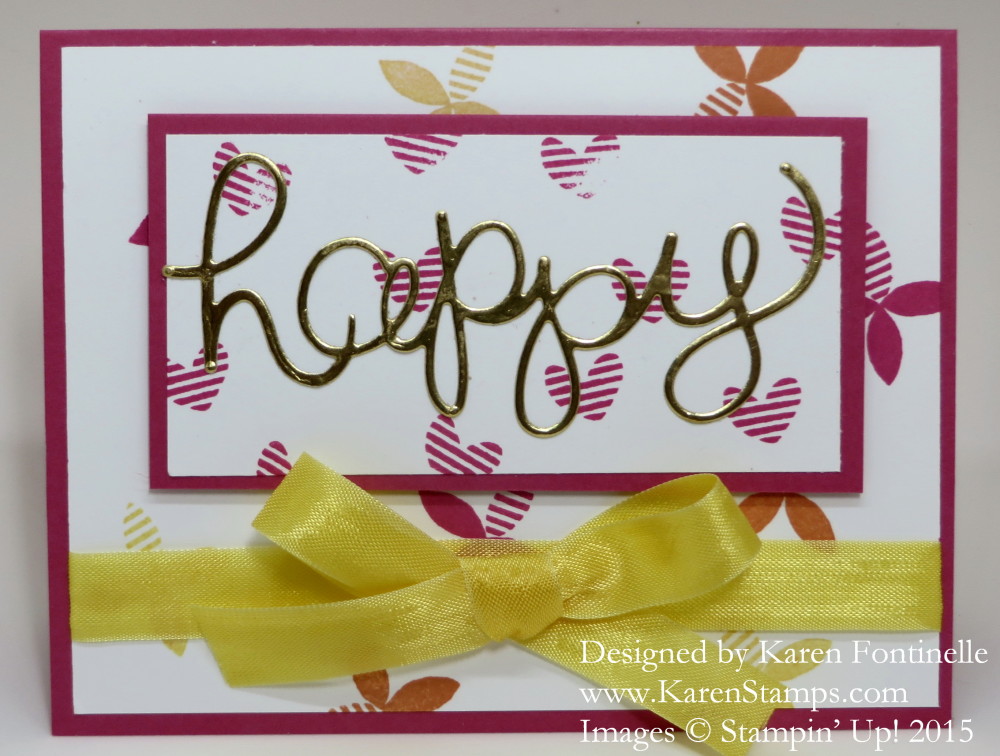
Use the Best Day Ever Stamp Set, available as a free product you can earn during Sale-A-Bration, and the Hello You Thinlits Dies in the Occasions Catalog, you can make a simple card in bright, happy colors to cheer someone for whatever reason.

To make this card I just grabbed the stamp set and the little flower-looking stamp, and stamped it in Melon Mambo to match the card base, Daffodil Delight, and Tangerine Tango randomly on the Whisper White card front. Then I die cut the “Happy” from Gold Foil. To make it show up better, I decided to adhere it to Whisper White layered on Melon Mambo. That layer is popped up on Stampin’ Dimensionals. And I stamped a few hearts from the Best Day Ever Stamp Set. The Daffodil Delight Seam Binding Ribbon adds a nice, bright embellishment to the card.

Stampin’ Up! Sale-A-Bration is at the halfway mark, ending March 31. To see all the items available with every $50 purchase, browse through the Sale-A-Bration brochure at this link! Look for the items marked “FREE”!

Quick and Easy Valentine Top Note Purse Candy Treat Bag

Valentine Top Note Purse Candy Treat Bag

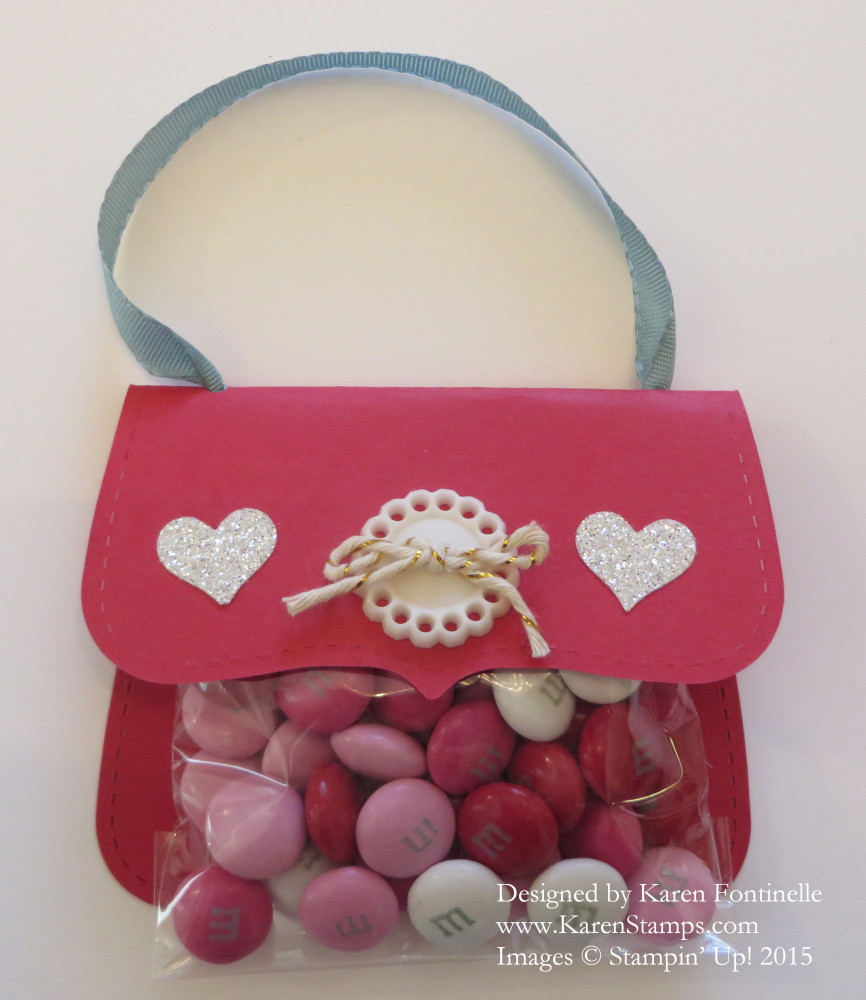
Looking for a last minute, quick and easy valentine treat?  Try the Valentine Top Note Purse Candy Treat Bag!  It’s very easy to die cut the Top Note Die with the Big Shot and the fold the one end over to look like a purse. Punch two holes in the fold to insert ribbon and tie knots in the ends or adhere to inside. I used the retired small cello bags from Stampin’ Up!, but if you had the medium Cello Bags you could turn the Top Note die the other way to fit the larger bag or just fold the bag down to the narrower size you want if it doesn’t quite fit. Fill the bag with candy or whatever treat you have and fold the top over. I adhered the bag to the inside of the purse using Fast Fuse and a little on the flap part of the purse to hold it down on the front.

Decorate the front flap of the purse to your liking! I attached a Very Vintage Designer Button with a few Glue Dots. The bow on it is made with the Gold Baker’s Twine, just attached with a Glue Dot. It was too difficult to try to get the twine through the button so I gave up, made a bow and just stuck it on! For a little more bling, I punched two hearts from the Dazzling Diamonds Glimmer Paper with the heart punch in the Itty Bitty Accents Punch Pack.

If you don’t own the Top Note Die, I would cut a piece of card stock in a rectangle and fold over similarly. Maybe round the corners.  Then I would go order the Top Note Die because it is one of the all-time favorites!

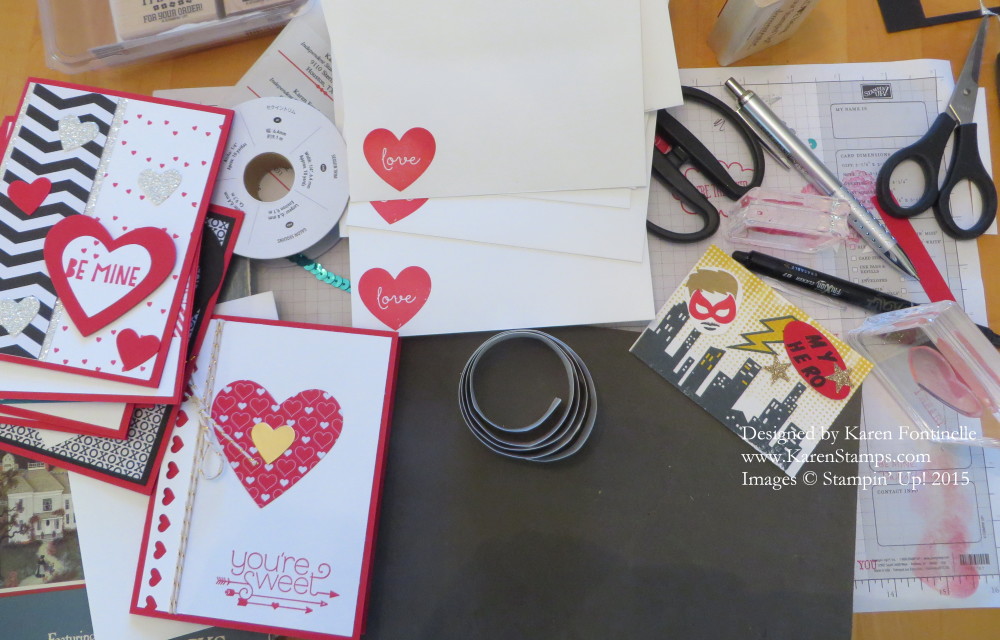
Time is running out to get those class valentine treats done and valentines mailed out! Here’s what your table can look like when you are making valentines!

Valentine Making DayIf you think any of your friends can use a valentine treat idea, please click on one of the social media buttons below this post to share!  Or send them this link!

Flip Up Valentine Card

Flip Up Valentine Card

Can you believe it is Valentine week?! Valentine’s Day is Saturday, February 14th, so it is time to get those valentines made and mailed! Doesn’t making valentines remind you of being in elementary school and decorating a shoe box or lunch sack to hold all your class valentines? Just thinking about valentines probably reminds you of construction paper and paste if you made some of your valentines!  Maybe you even had doilies or glitter or maybe stickers if you were lucky!

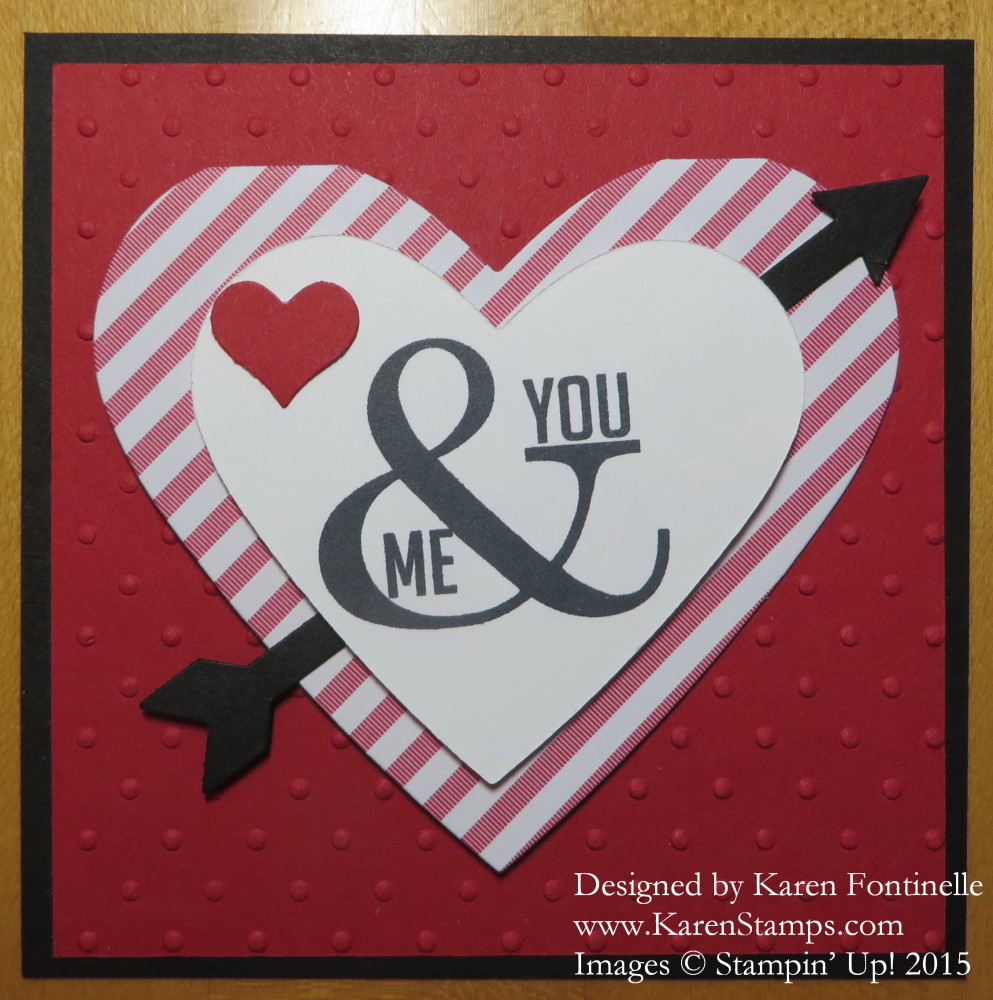
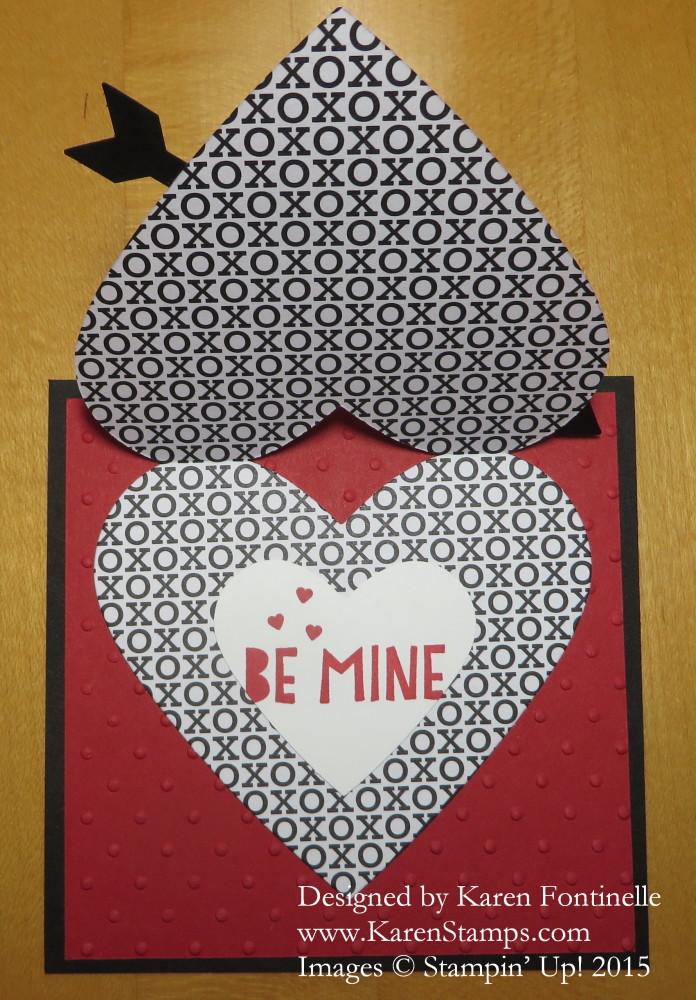
This valentine is made with high quality Stampin’ Up! card stock and sophisticated adhesive, not construction paper and paste!  I got the idea to fold a sheet of Stacked with Love Designer Series Paper Stack in half and die cut a heart from the Hearts Collection Framelits DiesThe die is placed just below the fold at the top of the paper (be careful of the pattern you are choosing so that the design will be going the right way!) so that you can open up the heart at the fold. I also cut a smaller heart from Whisper White and stamped with a greeting from the Perfect Pennants Stamp Set. The little red heart is punched with the heart punch in the Itty Bitty Accents Punch Pack. I also punched two Basic Black arrows from the What’s Up PunchOne is adhered so that the tail end shows and the other so that the front tip of the arrow shows. The white heart is popped up with Stampin’ Dimensionals.

The heart is adhered to a piece of Real Red card stock embossed with the Perfect Polka Dots Embossing Folder. The red card stock is layered on the Basic Black card stock.  When you open the heart, you can see the pattern from the other side of the sheet from the Stacked with Love Paper StackIn order to have a greeting inside, I die cut a smaller Whisper White heart and stamped with a greeting from the You Plus Me Stamp Set. I love the color scheme of black & white and Real Red, Crisp Cantaloupe and Calypso Coral.  You can buy the paper stack and stamp set together in a Bundle and save 15%!

Flip Up Valentine Card Inside

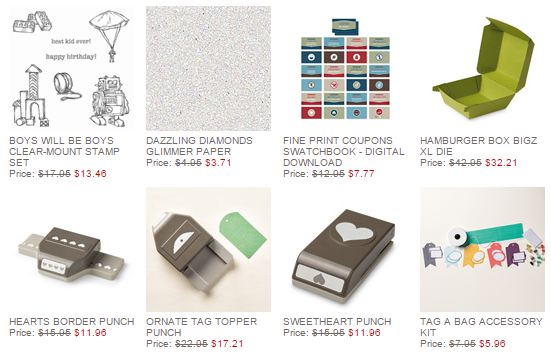
Today is the last day for the current Stampin’ Up! Weekly Deals!  Be sure to order before 11:50 pm Mountain Time tonight!

Stampin' Up! Weekly Deal Feb 3 2015

Shop for all your Stampin’ Up! products at my Stampin’ Up! Online Store HERE!

Try making a flip up valentine for someone and mail it today! Your friend will certainly appreciate it!

Make a Card of Hearts for Valentine’s Day

Card of Hearts

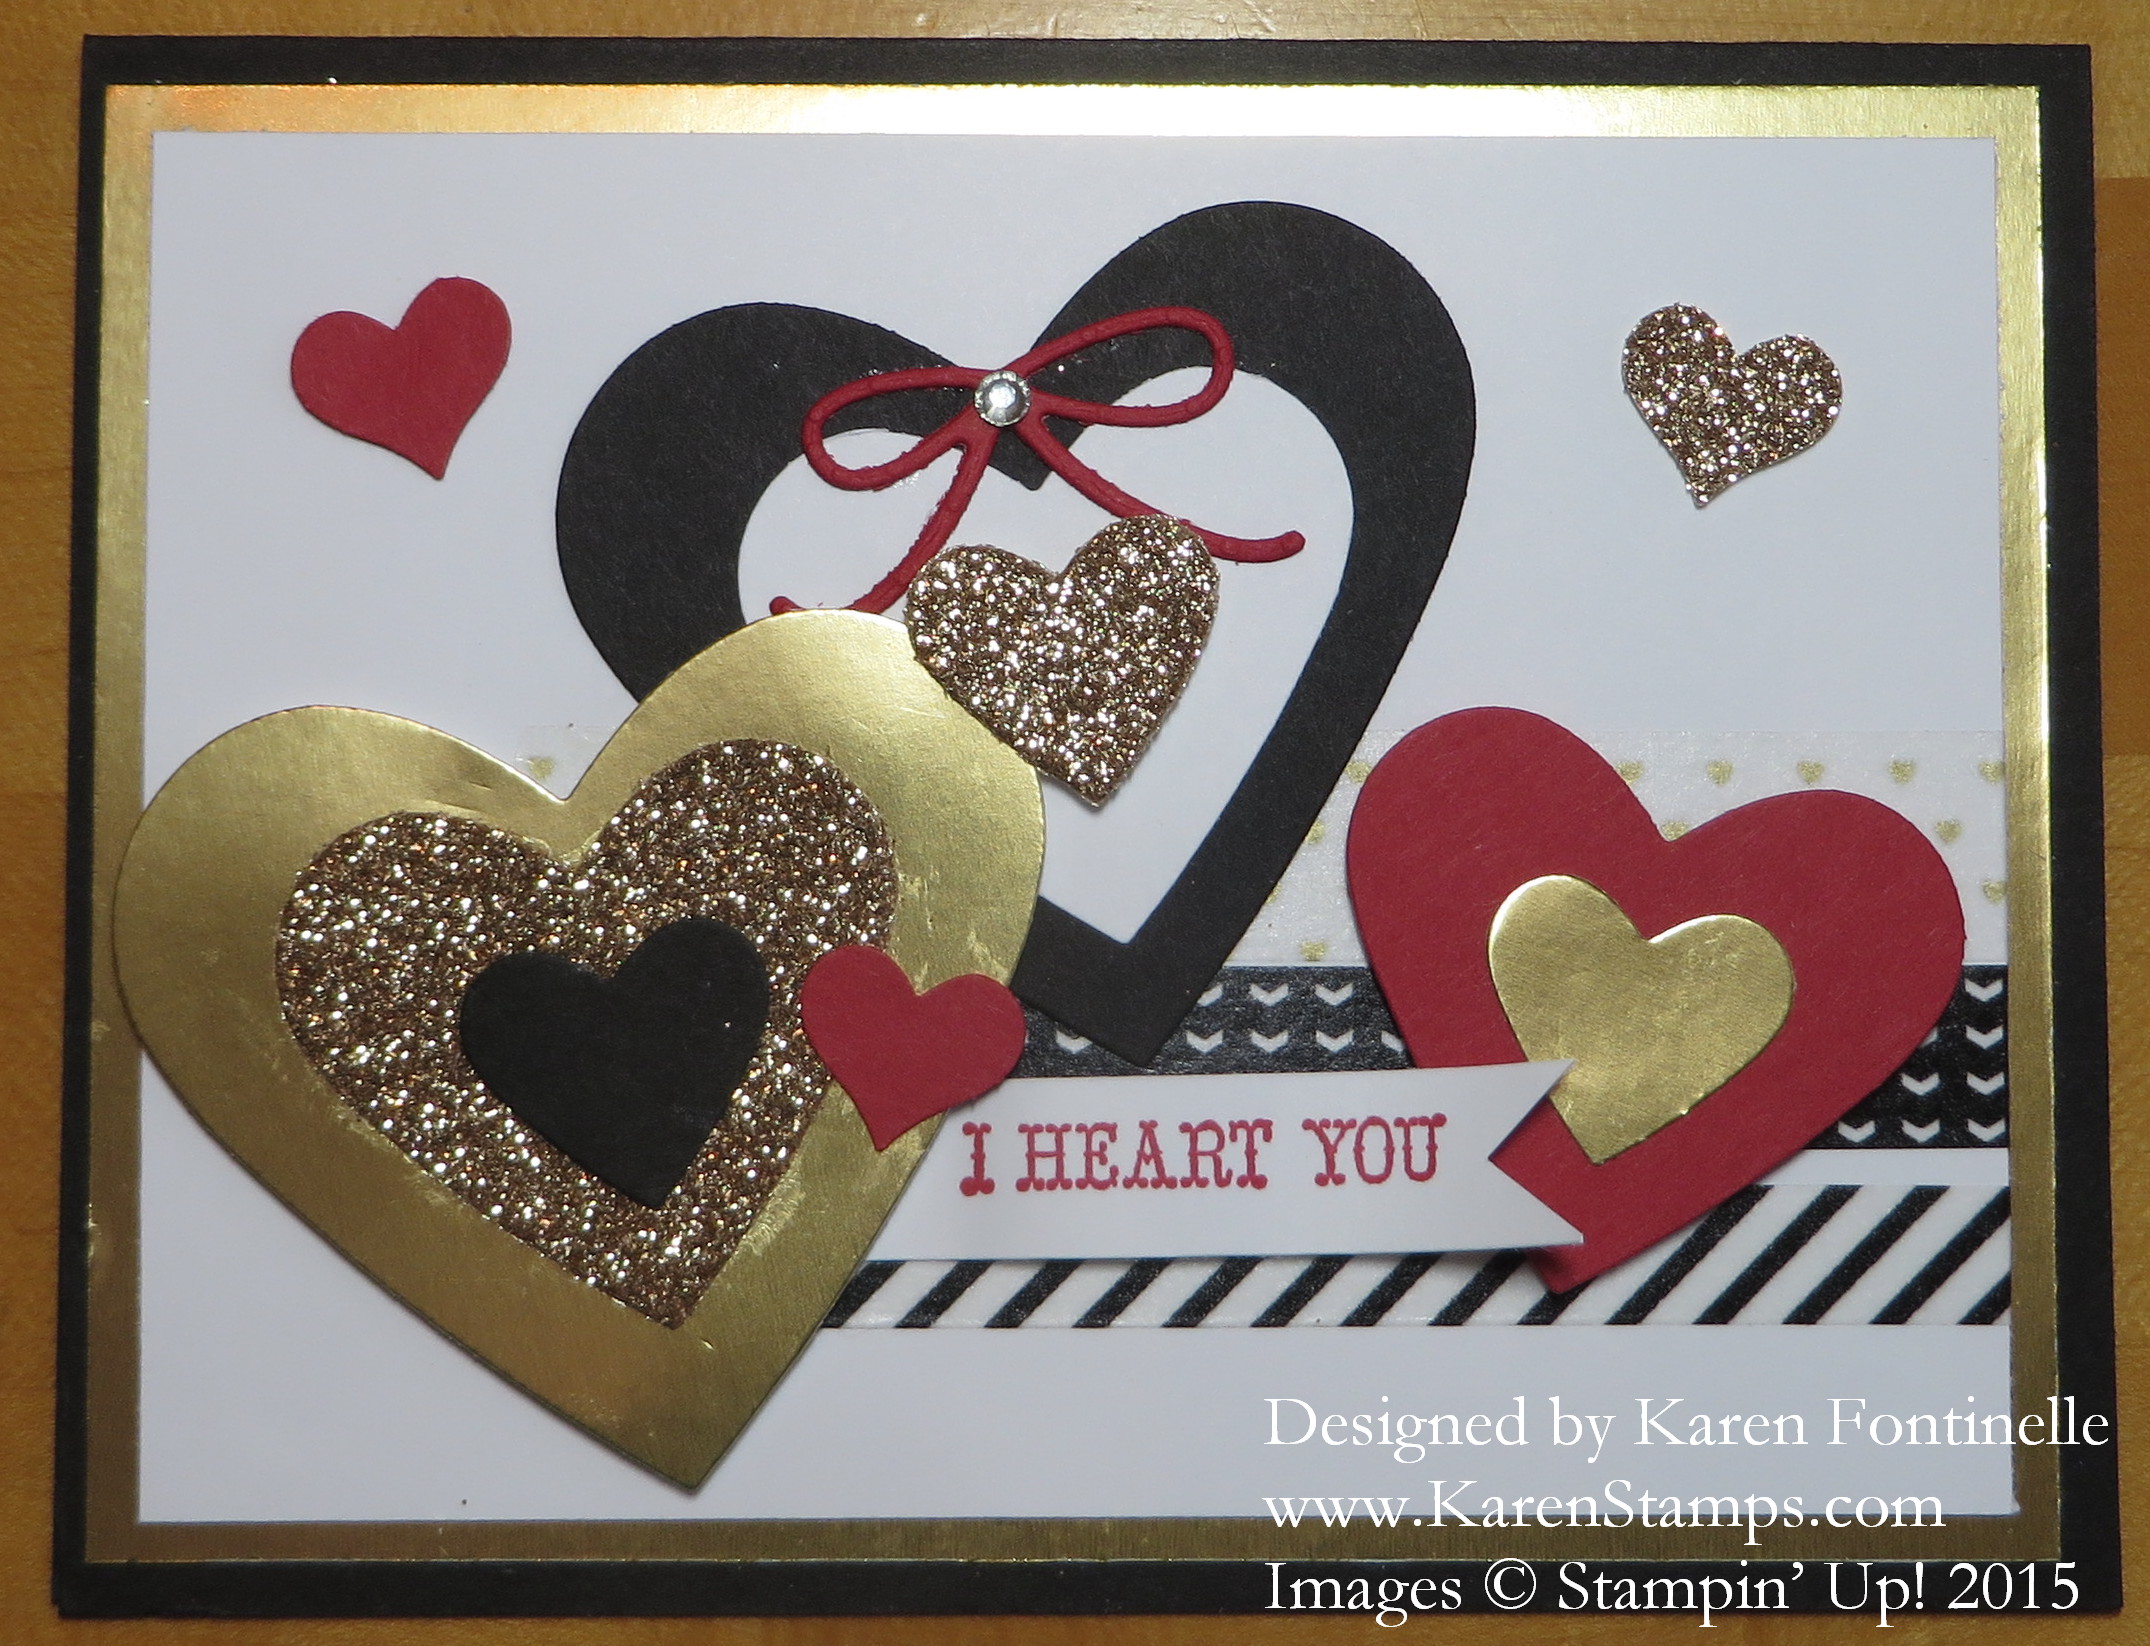
When coming up with this Valentine card, my main focus was using the Stacked with Love Designer Washi Tape. I’ve partially hidden it now with my hearts, but you can still see the black and white tapes and the  white with gold hearts. Washi tape is so fun and easy to use in many ways. And it’s forgiving because you can pull it back up and tape it down again. Just tear off the ends, no need to be perfect with the scissors or wrap around the edge of the card.

After getting the Washi Tape where I wanted it, I proceeded to die cut a bunch of hearts with the Big Shot and the Hearts Collection Framelits Dies I used Basic Black, Real Red, and Whisper White card stock as well as the Gold Foil Sheets and the Champagne Glimmer Paper  (or you could use the Gold). Then I just played around with the placement of the hearts until I was satisfied with the look. But THEN I got excess glue on the gold foil heart from the glimmer heart moving out of place when I put it upside down to add the Stampin’ Dimensionals – so I had to partially cover it with a small red heart! The greeting is from And Many Morea great stamp set with many phrases to use.

The card is layered on a Gold Foil Sheet and then onto Basic Black for the card base. If you are running short on the gold foil, you can cut out a piece of the center of the gold foil layer which will be hidden underneath the card layer.

Surprise your friends and loved ones by making a BUNCH of valentines and mailing them out! You never know what an impact a handmade card in the mail might make on someone! Everything these days is digital and email and text messages and all that, but a real card or letter in the mail is something special – and always has been. Make someone’s day special when they find a card from you in their mailbox!

Class Valentines for Girls & Weekly Deals

Two Hearts 3 x 3 Valentine

It’s about time to start thinking about class valentines for school parties! Over the weekend I had two moms come over and get an early start on valentines for their three school classes. Since I knew we would be making LOTS of valentines, I needed to keep them simple and doable. That meant we probably wanted to punch rather than crank the Big Shot fifty times, make sure I had enough supplies for that many valentines, and basically keep them fairly simple to make and remember that it would be little children receiving these who weren’t going to care how creative we were, who might only barely look at them before tossing aside.  YET we were making them and enjoying doing that so we didn’t mind putting in a little work!

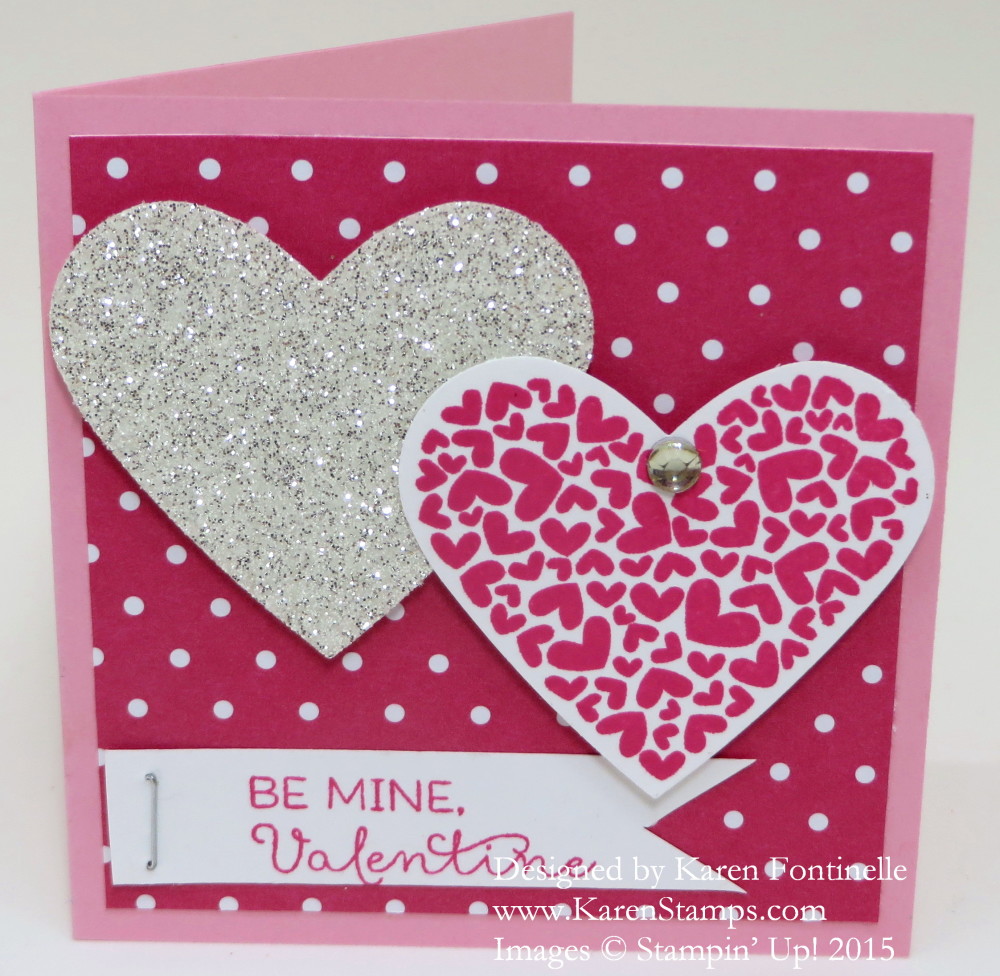
I knew Elsie liked pink and would want some bling and shine on her valentines for her all-girl 2nd grade class! I had some retired Pretty in Pink 3″ x 3″ notecards in my old stash so that saved cutting and scoring and were just the right size. Melon Mambo is a color that goes with Pretty in Pink so I made the layer from Melon Mambo paper in the Brights Backgrounds Designer Series Paper Stack.  The hearts are punched with the retired Heart Punch. One is made from the Silver Glimmer Paper and the other heart is stamped with a retired stamp set P.S. I Love You. The greeting is stamped on a little 1/2″ wide banner from a stamp in the January Paper Pumpkin Kit! The little staple from the Stampin’ Up! Handheld Stapler adds a cute little touch. And for some bling, we added a little Rhinestone Jewel to the heart. The hearts are popped up on Stampin’ Dimensionals.  The inside of the card is stamped with the “You’re the Best” stamp in the Just Sayin’ Stamp Set  that Elsie chose herself to use.

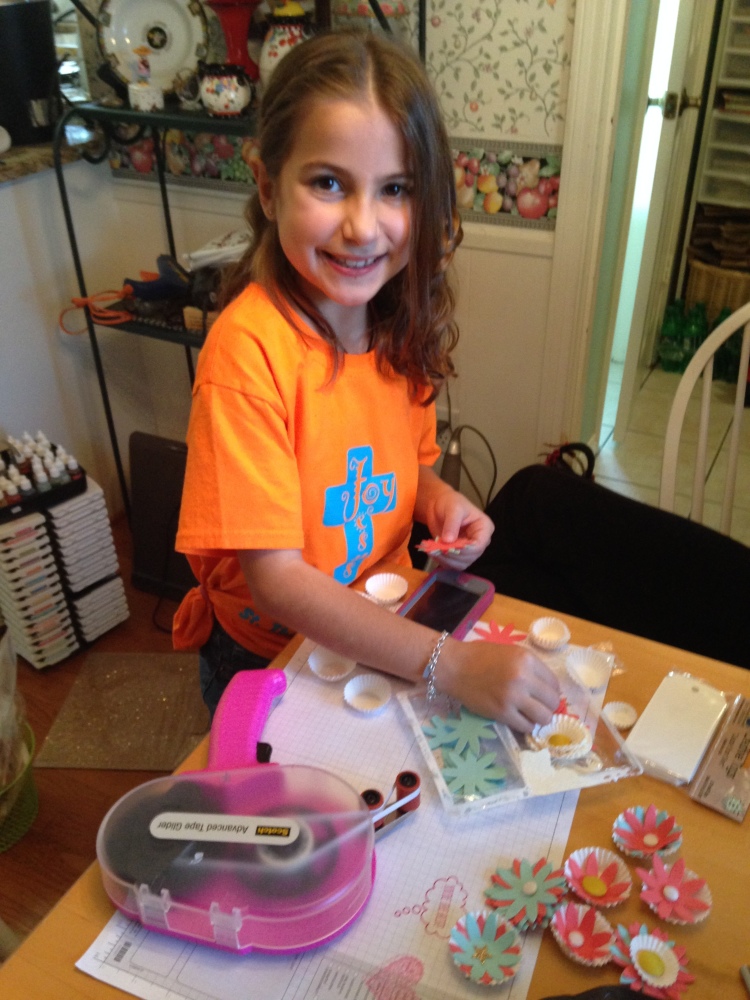
After the valentines, Elsie wanted to play (not with toys but with stamps!), and I had already spotted this past kit that I thought she might have fun with. In just a few minutes she had a whole bunch of flowers made! I have no doubt she can now use these flowers to embellish some other projects at home! She also made the popular rubber band bracelets for everyone in her class to give out with her valentines! Elsie is quite the stamper even at her young age.  She knew exactly what she was doing when she was helping us with the valentines, and I loved having a child’s touch to all the valentines for herself, her brother Wyatt, and her friend Carl. Isn’t she the cutest thing?!

Elsie

Don’t we all have the best memories of elementary class valentine parties, of decorating the shoe box or the bag, cutting hearts out of construction paper, using doiles, maybe even some glitter and glue?! I think I remember having a kit to assemble my own valentines rather than the typical store-bought valentines. So maybe it has all come full circle!

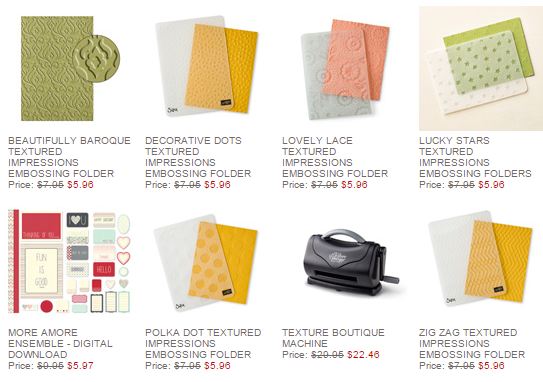
Here are the new Stampin’ Up! Weekly Deals for January 27 – February 2. If you like embossing with the Big Shot or the Texture Boutique, you will LOVE these deals!  Stock up on some embossing folders! The Texture Boutique is way less expensive than the Big Shot, but remember, you can only emboss with it. To do more, get the Big Shot, some paper, some embossing folders, whatever you like to total $150. Then get $25 in Hostess Dollars to spend on anything, plus 3 Sale-A-Bration items FREE!

Stampin' Up! Weekly Deal Jan 27 2015

Click to Shop!

Alter a Shopping Gift Bag for a Birthday Bag

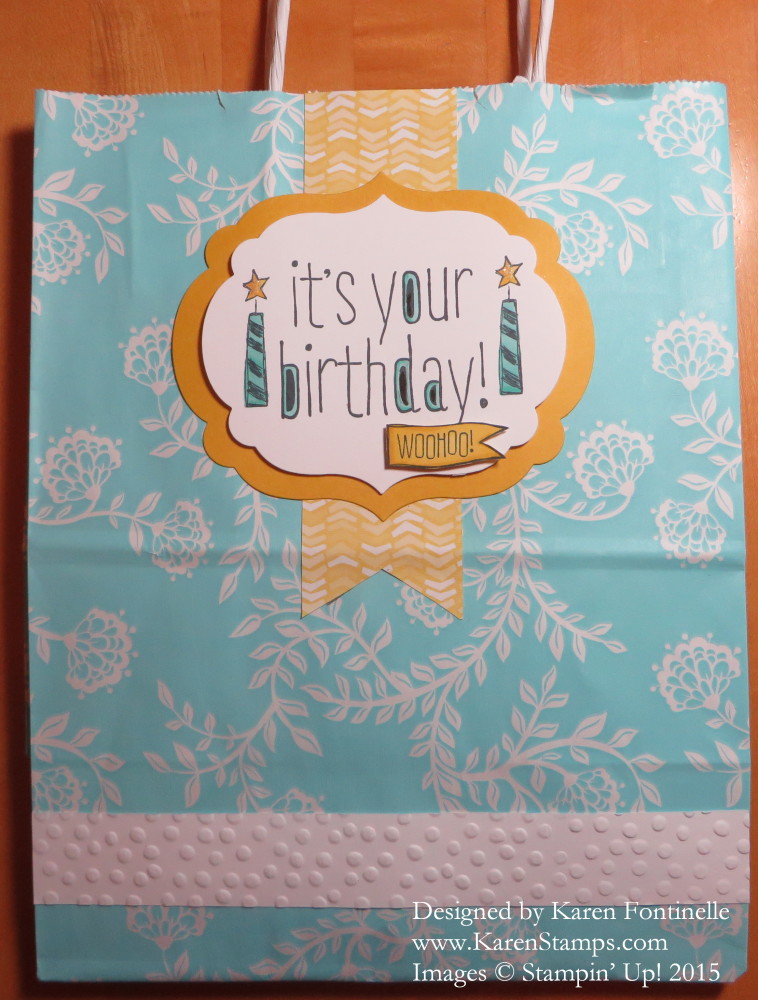
Altered Birthday Gift Bag

The other day I bought a birthday gift for a friend in a nice gift shop and got this pretty shopping bag. I wanted to create a large design to cover the store label on the front and back of the bag so I altered the shopping bag and turned it into a birthday gift bag! Since I needed a large design, I chose the Labels Collection Framelits Dies for the background. I also added a banner underneath from the Best Year Ever Designer Series Paper. You can choose a pack of this paper FREE during Stampin’ Up! Sale-A-Bration with a $50 purchase.

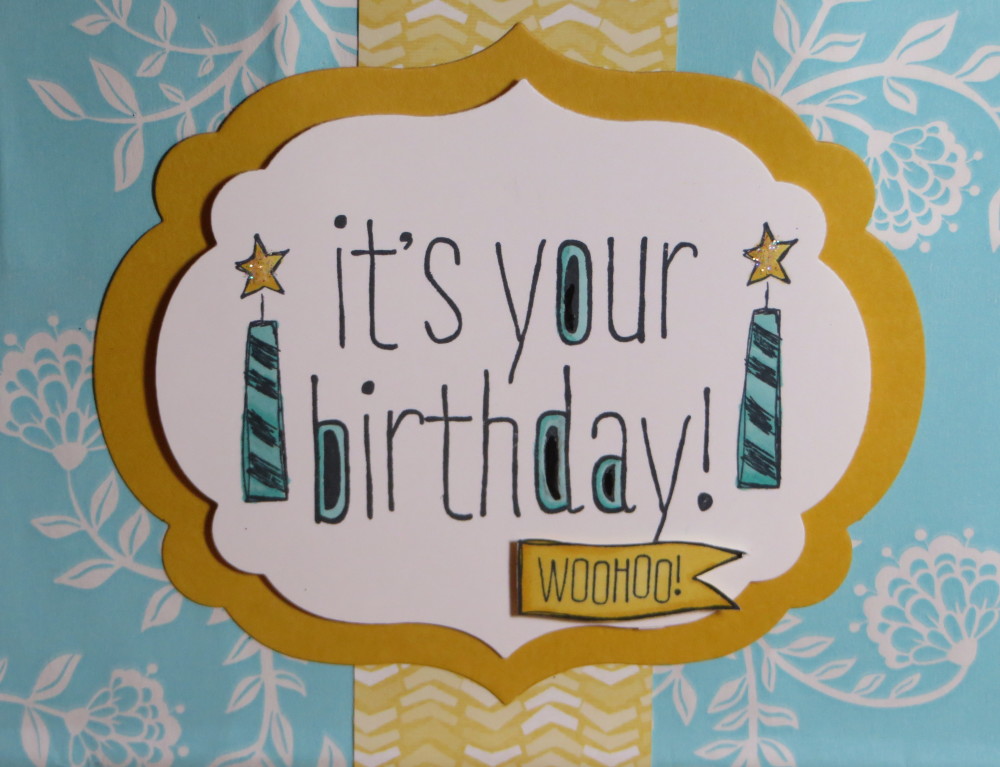
Next I needed a large stamp set for the design so I pulled out the Big News Stamp Set.  I stamped the greeting and put a birthday candle on each side of it.  I also stamped the “Woohoo” and cut it out by hand to add to the label. Everything was colored in with Blendabilities Markers, not so much for the blending opportunity but just because I love the feel of coloring with those markers!

There was some printing along a band at the bottom of the bag so I simply embossed a strip of Whisper White with the Decorative Dots Embossing Folder to adhere over the printing.

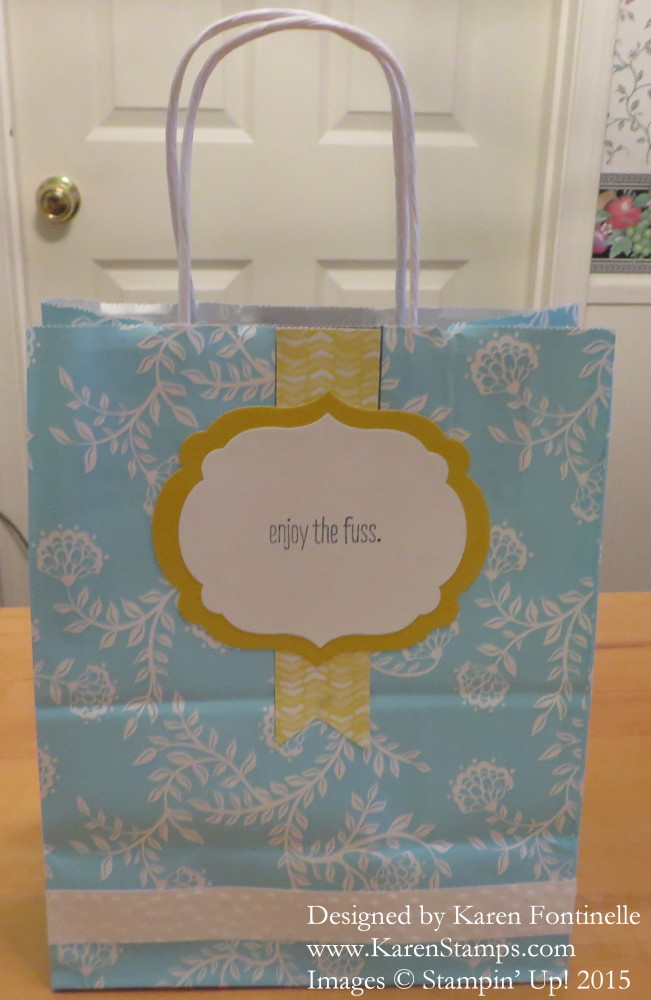
Since there was also some store printing on the back of the bag, I also covered the back to match.  I liked the saying in the stamp set “Enjoy the fuss.”  Great saying for enjoying one’s birthday!

Altered Birthday Gift Bag back label

Don’t forget Sale-A-Bration is underway so with any $50 purchase (before shipping and tax) you can choose a free product in the brochure.  Click on the link above. Look for the “FREE” label in the brochure to choose your product.  No limits, so with a $100 purchase you choose two products, with $150 choose three products and so on! Get together with some friends and submit the orders together and you, as a Hostess, with a $250 merchandise total will not only get the normal $40 in Hostess Dollars to spend, but during Sale-A-Bration you will also get an extra $25 in Hostess Dollars!

Shop at my Stampin’ Up! Online Store for everything stamping!

Find a shopping bag in your collection and see how you can alter it and turn it into a birthday gift bag instead! Recycling at its best! And most fun!

Altered Birthday Gift Bag Label Die