Category Archives: Big Shot

The All My Love Suite For Valentine’s Day, Weddings, and Love

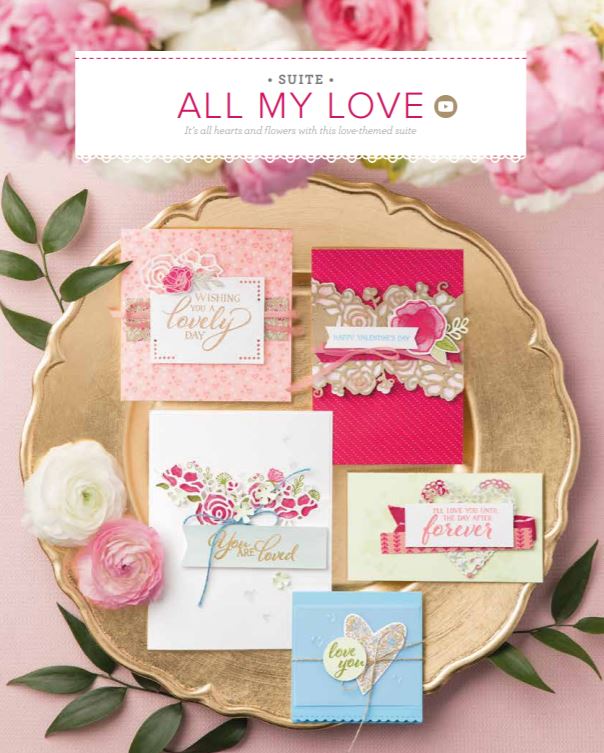
All My Love Suite

Image © Stampin’ Up! 2019

One of the most beautiful suites in the new Occasions Catalog is the All My Love Suite. And I would say one of the most useful suites!  We might immediately think of Valentine’s Day with this suite, but it’s also perfect for weddings, birthdays, anniversaries, engagements……lots of occasions!

This Suite actually includes two different Bundles, the Forever Lovely Bundle with a stamp set and dies that cut out the beautiful floral border, and the Meant To Be Bundle that includes a stamp set with hearts and dies that cut out those heart shapes.  Of course, there is also a lovely designer paper, All My Love Designer Series Paper and extra embellishments like the Heart Epoxy Droplets and the All My Love Ribbon Combo Pack.

Enjoy these two Stampin’ Up! videos about these products and then put them on your order right away so you can use them for Valentines and birthdays if you like.

Shop the Occasions Catalog and more in the

Stampin’ Up! Online Store!

2019 Occasions Catalog Video by Stampin’ Up!

I just love this new Stampin’ Up! video showcasing some of the new Occasions Catalog products!

The Occasions Catalog went live yesterday!  It’s always fun when there are new Stampin’ Up! stamping and papercrafting products to look at and order!  Think of all the great new cards and projects that will be created around the world with these few products……new stamps, new papers, new embellishments!  Something for everyone.

View the new Occasions Catalog HERE!

Shop the Occasions Catalog HERE in the Online Store!

Enjoy the Stampin’ Up! Occasions Catalog video

and enjoy shopping!


Stampin’ Up! Sale-A-Bration 2019 Begins Today! Earn FREE Product! Plus New Occasions Catalog!

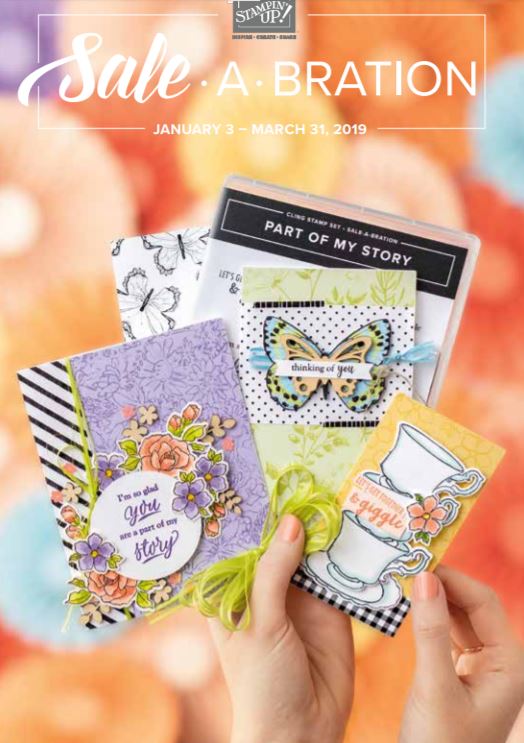
Sale-A-Bration 2019

Stampin’ Up!  Sale-A-Bration begins today! 

Stampin’ Up!’s biggest promotion of the year begins today, January 3 and runs through March 31, 2019.

Purchase $50 or more in products (before shipping and tax) and earn a FREE product from the Sale-A-Bration Brochure, pictured above!  Spend $100 and either choose two FREE products from the Sale-A-Bration Brochure or choose one of the special $100 products. No limit!

View the Sale-A-Bration Brochure Online!

See the Sale-A-Bration Choices in the Online Store!

Today is the day we’ve been looking forward to for another reason as well! Sale-A-Bration begins and the new Occasions Catalog is LIVE!  You can now shop from this beautiful catalog of new stamp sets and accessories!  And it all counts toward Sale-A-Bration!  Order from the Stampin’ Up! Annual Catalog, the Occasions Catalog, or even the Clearance Rack to reach $50 or more and earn a free Sale-A-Bration product!

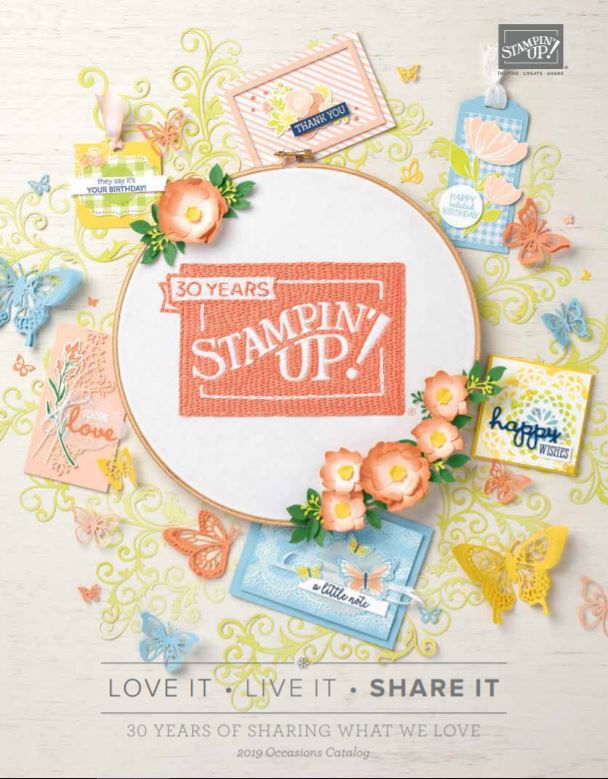
Occasions Catalog 2019

View Occasions Catalog Online!

SHOP Occasions Catalog Online!

There are even extra benefits during Sale-A-Bration 2019!

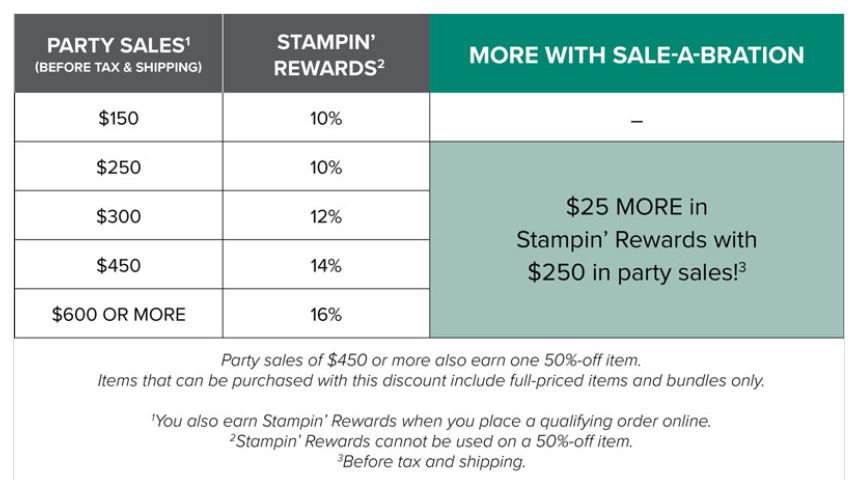
Have a party or combine your order with friends!  Reach $250 in sales and choose an EXTRA $25 in Stampin’ Rewards!

SAB Stampin' Rewards Chart 2019

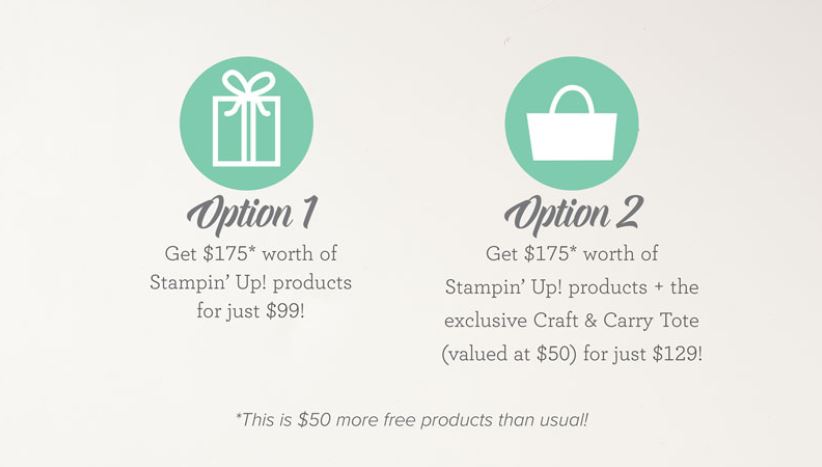
JOIN Stampin’ Up! during Sale-A-Bration for an extra-good value!

SAB Join SU 2019

Choose Option 2 and get this exclusive Craft & Carry Tote!

Now that you have read through these details and information,

GO SHOP!  HAVE FUN!

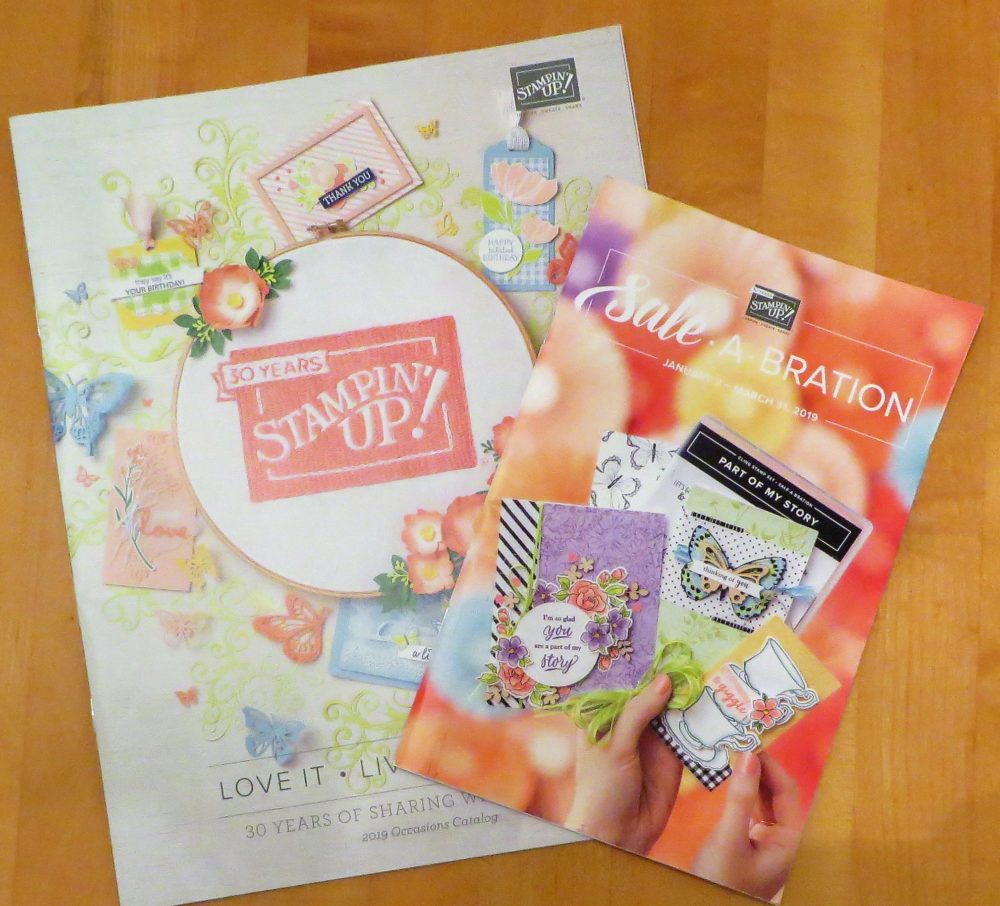
New Occasions 2019 and Sale-A-Bration 2019 Catalogs Go Live SOON!

Occasions 2019 and Sale-A-Bration 2019 CatalogsHere they are, the much-awaited Stampin’ Up! Occasions 2019 Catalog for spring and the Sale-A-Bration 2019 Brochure for the biggest promotion of the Stampin’ Up! year!  All of the fun starts January 3, 2019, after we get everyone sent back home and back to work and are ready to do something for ourselves!

Inside the Occasions Catalog, you will find beautiful stamp sets, coordinating dies, beautiful designer papers, new accessories and embellishments, ribbons, cardmaking kits, punches, supplies and ideas for Valentine’s Day (is the candy out already now that Christmas is over?!), masculine card ideas, cards for babies, pets, new Memories & More memory-keeping products, cactus(!), and did I mention butterflies?!

Sale-A-Bration is an exclusive promotion by Stampin’ Up! held annually for many years!  For every $50 you spend on Stampin’ Up! products, you get to choose a FREE product from the Sale-A-Bration Brochure!  Earn even bigger rewards when you spend $100 or more (all of this before tax and shipping of course!). No limit on the number of rewards. Even a special bonus when you JOIN Stampin’ Up!

Remember, the Holiday Catalog ends on January 2, 2019. Don’t forget to look through all your favorite things in there one more time. These sales also end Jan. 2nd.

SHOP the Stampin’ Up! YEAR-END CLOSEOUT SALE!

Retiring Products

Discounted Products

How do you get to see these fabulous catalogs??  On January 3, 2019 you will be able to view them online and the products in the Stampin’ Up! Online Store.  If you are a regular customer of mine, I have ordered both catalogs for you through Stampin’ Up! and you may or may not have received them by now. The catalog mail delivery is very irregular!  If you are new and do not have a Demonstrator you are currently working with, I would be happy to help you and send you complimentary catalogs so you won’t miss out!  Just send me your contact information so I can get them in the mail to you.  It’s always fun to start a new Stampin’ Up! catalog of any kind!

Let me know if you do not receive your catalogs in a reasonable amount of time. Personally, I received two SAB Brochures and not the Occasions Catalog in the mail! I don’t know what that means!!  But Stampin’ Up! will send out another catalog if customers did not receive theirs.

Hope you are still having a happy holiday season! Ours comes to an end tomorrow afternoon after the last of the kids leave!  So sad!  But it was fun while it lasted!


Decorate a Christmas Gift Bag

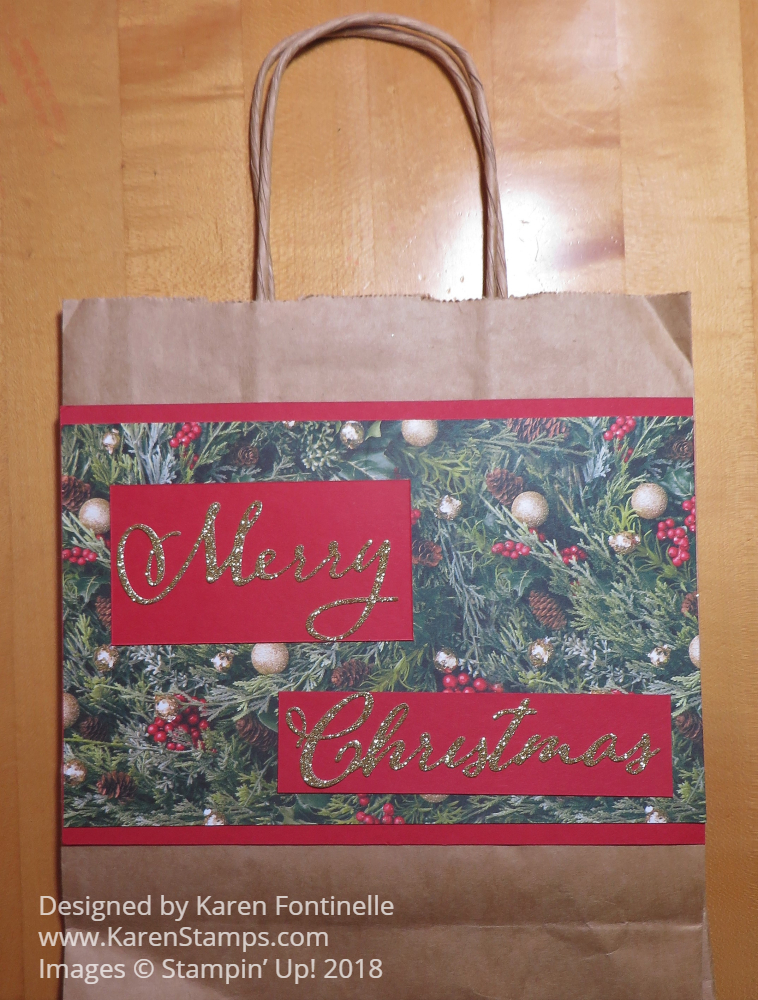
Decorate a Christmas Gift Bag

If you have finished your Christmas shopping or at least done a lot of it (I haven’t!), you might be ready to do some Christmas wrapping. (I’m not!) It’s very easy to decorate a Christmas Gift Bag that you just happen to have around the house.  If you don’t have one of the handled kraft gift bags from a store, you can also buy a package of them at a craft store and then you are all set.

It is so simple to decorate and personalize a gift bag for any occasion!  I wonder why stampers just don’t do this all the time for gifts! Often the store bag will have the store logo or name printed on the front.  Don’t let that stop you because you will just cover it up with paper.

For this Christmas gift bag, I chose to use the All Is Bright Designer Series Paper.  Another good choice would be the Dashing Along Designer Series Paper that was brought back by Stampin’ Up! from a previous promotion. Don’t forget, there is also some Christmas paper and stamps in the Annual Catalog such as the Under the Mistletoe Designer Series Paper. I have a layer of Real Red under the designer paper with the greenery.

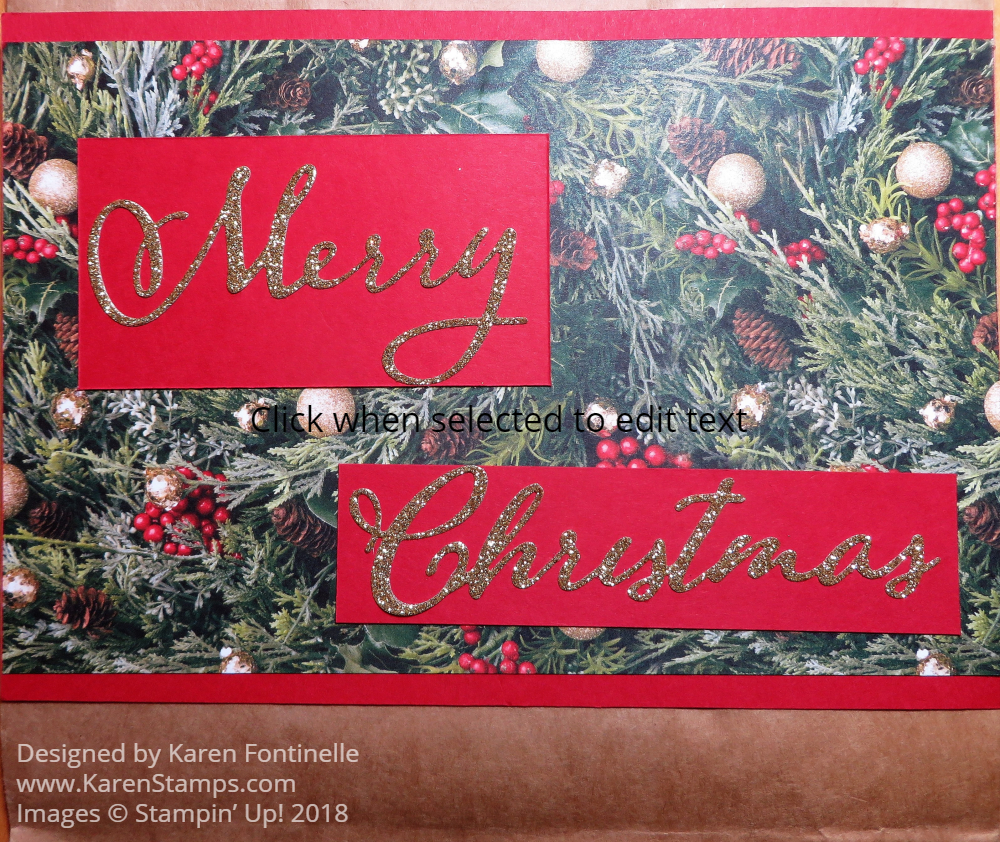
I die cut the greeting with the Merry Christmas Thinlits Dies using Gold Glimmer Paper.  When I placed the words on the designer paper, they barely showed up with the busy background.  To solve this problem, I layered the words on pieces of Real Red Cardstock and adhered these to the paper.  They don’t take up so much room that you can’t see the designer paper but they do make the words stand out.

That’s all there is to it.  You could also tie a bow around the handle. Make it all as fancy and pretty as you want.

Christmas Gift Bag Closeup

Congratulations if you are farther along with your Christmas shopping than I am and ready to do the gift wrapping!  Take a few minutes to decorate a shopping bag that you have and make your own gift bag!

SHOP STAMPIN’ UP! ONLINE HERE!

SHOP THE STAMPIN’ UP! YEAR-END CLOSEOUT SALE HERE!

Stampin’ Up! Online Extravaganza! Save 10% on Tools & Ink!

2018 Online Extravaganza Tools & Ink BannerThis will be a fun two days! Tools & Ink in the Annual Catalog are 10% off today and tomorrow, the last two days of the Stampin’ Up! Online Extravaganza.

Run, don’t walk to the Stampin’ Up! Online Store and check out all the merchandise that is on the sale!  Remember, quantities are limited!

I see:

  • Adhesives
  • Applicators
  • Cleaners
  • Cutting tools
  • Embossing folders
  • Framelits and thinlits
  • Ink Pads
  • Ink refills
  • Markers (Stampin’ Write & Stampin’ Blends and the full case of markers!)
  • Punches
  • Scoring Tools
  • Stamp blocks and cases

Who knows when some of these items might sell out because a lot are basics that we all need. I would advise shopping as soon as you can, just in case.

***Remember to order any of the Snowflake Showcase products that you want.  That offer ends Friday, Nov. 30th.

SHOP THE STAMPIN’ UP! ONLINE EXTRAVAGANZA!  LAST TWO DAYS!


Turkey Sour Cream Treat Holder For Thanksgiving

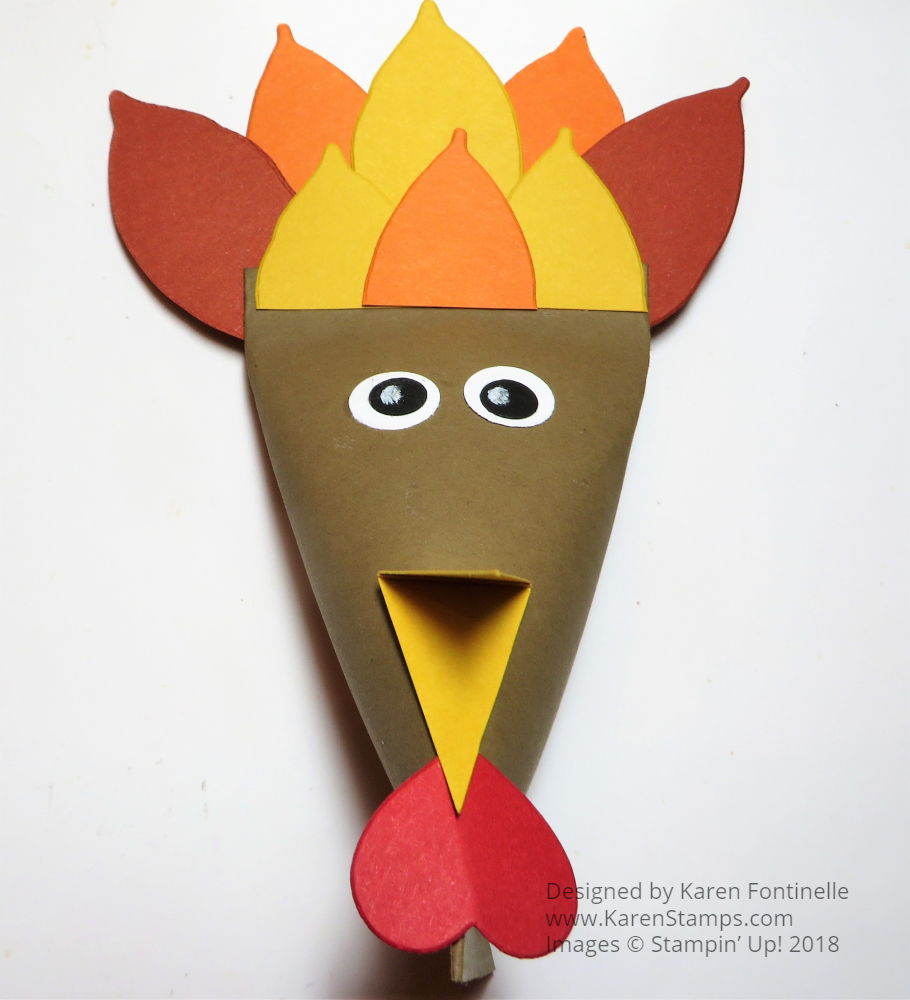
Turkey Sour Cream Treat Holder For Thanksgiving

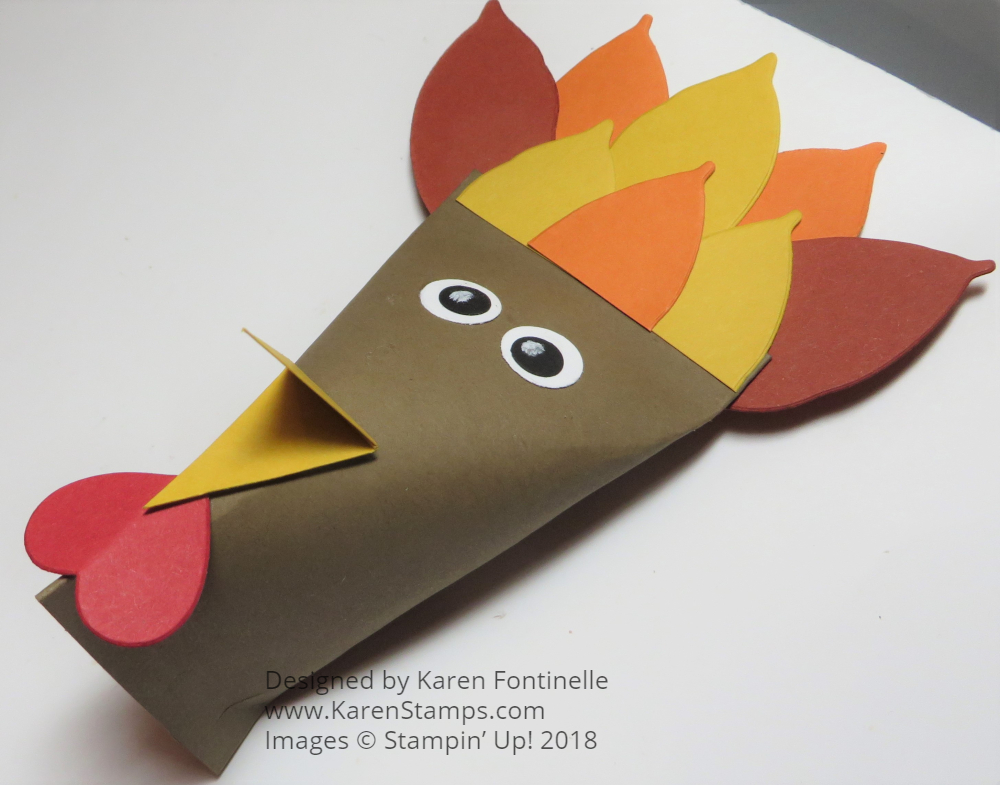
I believe “sour cream treat holders” have been a staple since I started stamping so here is my Turkey Sour Cream Treat Holder!  The basic concept is that this simple little treat holder is shaped like sour cream packets come in/used to come in??  The top side is closed one direction and the bottom side is closed another direction.  They are very simple to make and very popular in the papercrafting world!  You can make them for lots of occasions and decorate them to look like lots of different characters like this turkey.  On Pinterest (of course!) I also saw a Pilgrim and an Indian that were very cute for Thanksgiving.

Turkey Sour Cream Treat Holder Side View

Here is the turkey sour cream treat holder from the side.  Just be sure to put your treat inside before you seal up each end!  If you have a paper crimper like we used to sell but you can probably still buy in a craft store, it is handy to use that along with adhesive to close up those ends, and it looks very decorative.  I didn’t use mine on this turkey.

Here is a diagram from a past sour cream container in this post if you need more directions:

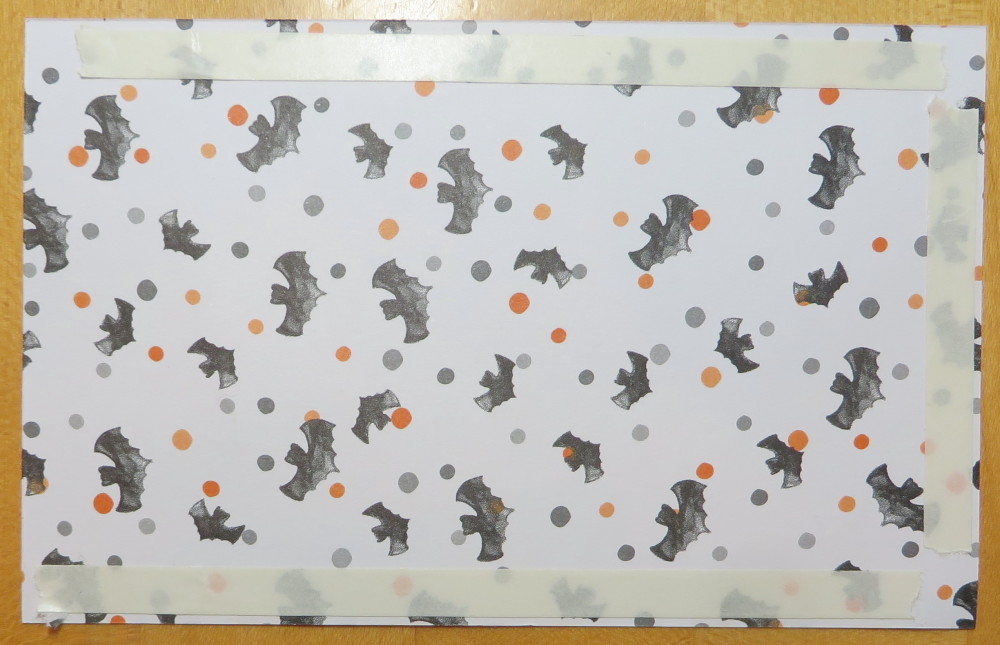
Make a Sour Cream Container with Tape

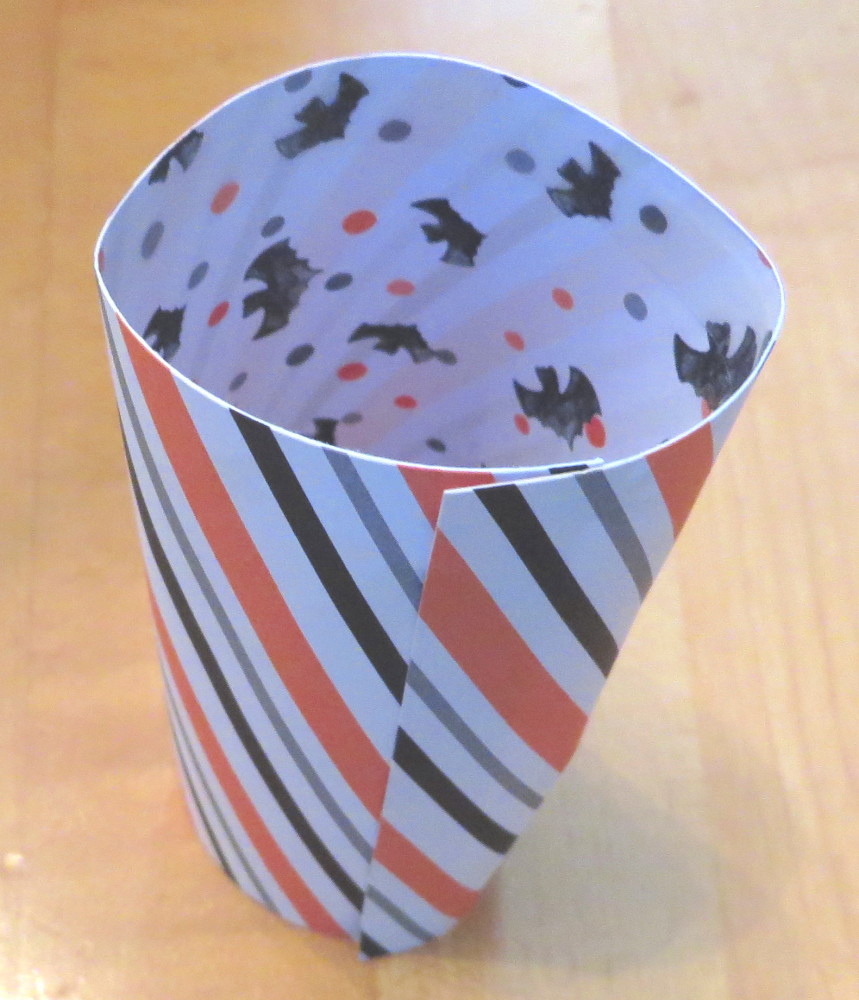
Make a roll out of the paper and adhere along the side.

Make a Sour Cream Container Roll

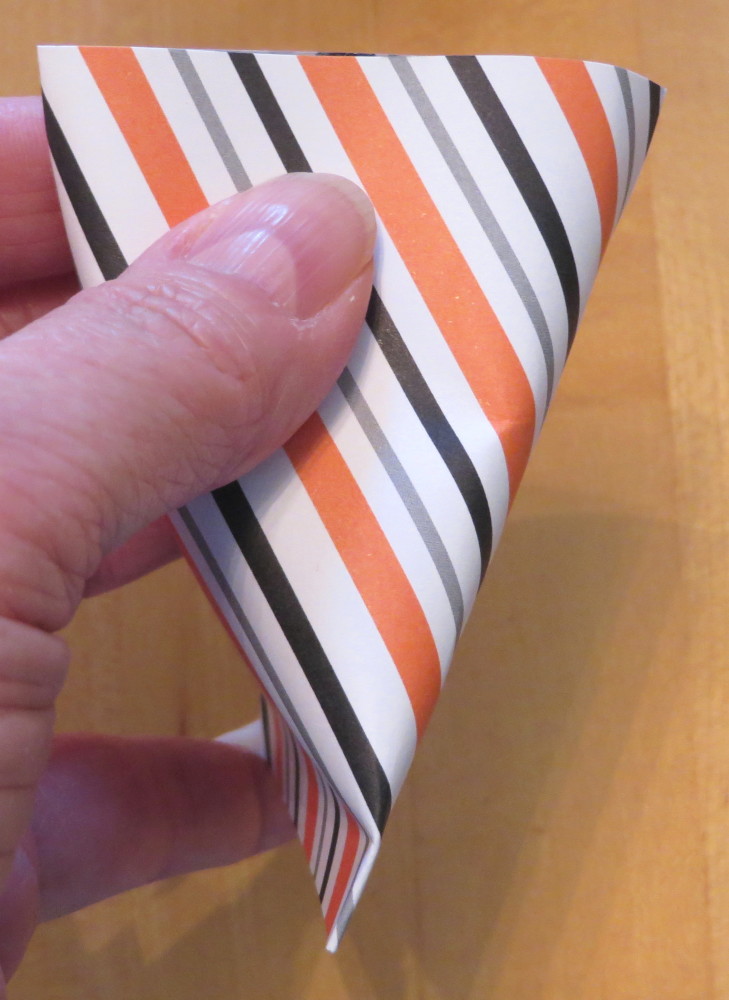
After adhering one end, pinch closed the opposite end going the other direction (after putting in your treat!).

Make a Sour Cream Container Other End

To decorate the turkey, die cut or punch some paper feathers.  I used the leaf die in the Nature’s Roots dies.  You can use any left shape or punch out ovals in different colors.  The beak is just a hand-cut triangle over a fold.  The waddle is just a die-cut heart or you can use a punch or just cut one out!  For the eyes, just punch out two circles, like with the 1/2″ Circle Punch and then two smaller circles from the Cookie Cutter Builder Punch.

So simple and yet you end up with a cute treat for Thanksgiving!

Be sure to check out the list of “Low Inventory” products from the Holiday Catalog that could potentially sell out soon.

SHOP STAMPIN’ UP! ONLINE!


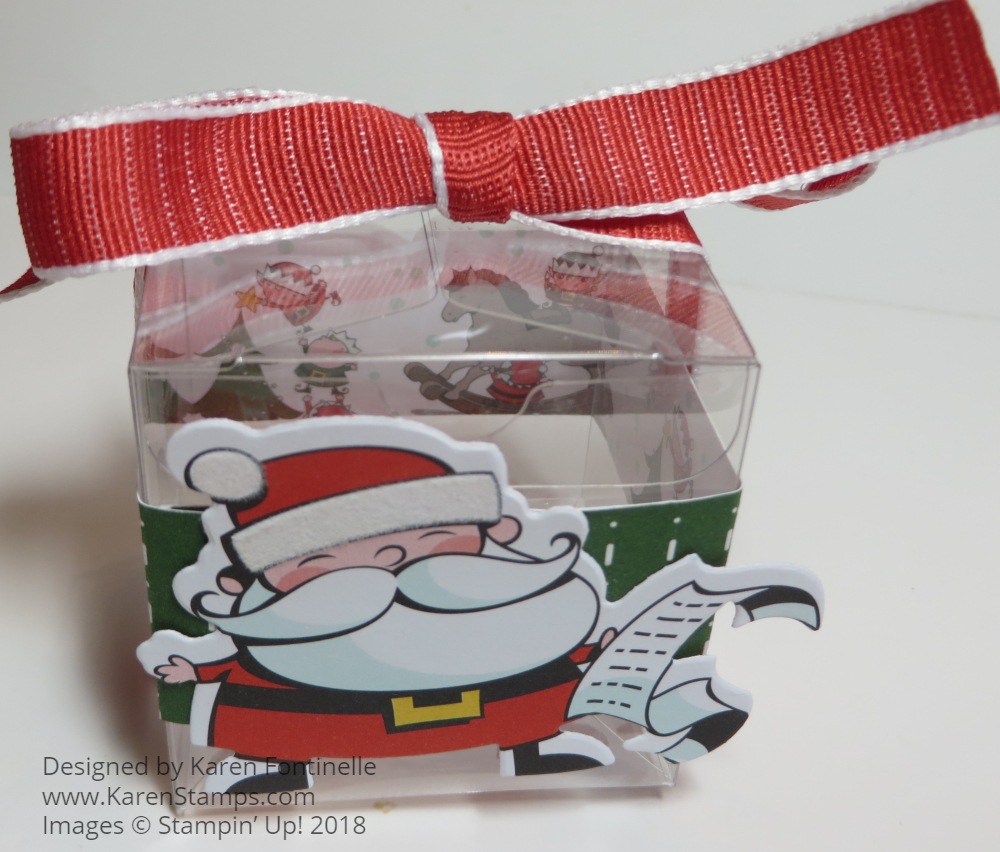
Santa Clear Tiny Treat Box

Santa Clear Tiny Treat Box

Looking for an easy way to make a little treat box?  Look no farther than this Santa Clear Tiny Treat Box!  I love the little Clear Tiny Treat Boxes that are so easy to decorate!  Have them for a little table favor at each place setting, as a party favor, as a little decoration, or to hold a small gift or treat. So many ideas and you can decorate for any occasion!

For this treat box, I used the Santa’s Workshop 12″ x 12″ Specialty Designer Series Paper.  This paper is called “Specialty” because it has some flocking on many of the images!  It just adds a nice, surprise touch to the paper.  You might be able to see in the photo that the Santa hat has some flocking on the little ball on the hat and on the brim.

These Clear Tiny Treat Boxes come flat and protected by a piece of plastic that you pull off.  Then just crease the score lines and assemble the box. I cut a strip of a plainer pattern of the paper to wrap around the box.  I find it best to estimate the length of the strip you need, then just wrap it around the box, holding it tightly while kind of creasing it with your fingers around each side of the box. THEN I use my Bone Folder to properly crease the lines.  Sometimes this assures a better fit than prescoring it.

The particular Santa I chose can be die-cut with one of the Santa’s Signpost Framelits Dies.  If you don’t own the dies, just cut out the Santa by hand with the Paper Snips.  Adhere to the front of the box.  I also added a ribbon tied around the box, the Poppy Parade 1/2″ Textured Weave Ribbon.  

One of the fun things that happened accidentally was that if you look closely at the photo, you can see the images from inside the box on the opposite side of the paper band! It just happens to be cute little images that I happened to cut so that they would show.

Now all that’s left is to put some Christmas candy in the box or some shred and a little gift. Put a Thanksgiving image on the front and put at each place setting for your Thanksgiving dinner.  It will be both a table decoration and party favor. Put a package or two of the Clear Tiny Treat Boxes on your order and have them on hand.  You will be glad you did!

SHOP STAMPIN’ UP! ONLINE HERE!

Winter Woods Red Plaid Christmas Card

Winter Woods Red Plaid Christmas Card

Here’s my Winter Woods Red Plaid Christmas Card that I made with the Winter Woods Stamp Set, the In the Woods Framelits Diesand the Buffalo Check Stamp. I think it turned out kind of antique-looking or old-fashioned and I think I like the look for something different!

The card base is Garden Green Cardstock. The Real Red layer is stamped with the Buffalo Check Stamp, which is one big background stamp, as we used to call them. I usually find with these background stamps that it is better to lay the cardstock face down on the stamp itself which is laying on the table, stamp side up.  Then I take a scrap of computer paper and place that over the cardstock being stamped.  This way I can run my fingers all over the paper without getting inky fingers and I can make sure every portion of the large stamp inks the paper.  I could also use the Stamparatus and stamp more than once if necessary to make sure everything was stamped well.  If you stamp black ink on a piece of Real Red Cardstock, you get this red plaid design!

The tree from Winter Woods is stamped in Garden Green Ink and then die cut with the Big Shot and the tree framelit die. Of course the die leaves a narrow white border around the die cut tree, which I didn’t like against this red plaid background.  I took a piece of Sponge and Crumb Cake Ink and lightly sponged the edges of the tree and even on top of the tree.  This gave it a antique or aged look, not bright white. I also tied on some 3/16″ Braided Linen Trim to also give it that antique or country look.   I added just three tiny little Red Rhinestone Jewels to the tree.  I thought it needed a tiny bit of pizzazz but not much bling.  These little tiny red rhinestones fit the bill!

The greeting is in the Winter Woods Stamp Set and is die cut with a Layering Oval Die and that layered on top of a scalloped Oval Die.  I stamped it with Real Red Ink and also sponged a bit of Crumb Cake Ink to take away some of that bright white.

If you are looking for an easy card to make, something like this Winter Woods Red Plaid Christmas Card will fit the bill!

SHOP STAMPIN’ UP! ONLINE HERE!

Winter Woods Vellum Trees Christmas Card

Winter Woods Vellum Trees Christmas Card

I can’t believe I have had this Winter Woods Bundle for awhile and only now am I getting around to making this Winter Woods Vellum Trees Christmas Card. You can make all kinds of beautiful cards and projects with this stamp set and framelits dies.

Since I was trying this out for the first time, I used the Holiday Catalog samples for inspiration. The Stampin’ Up! catalogs are always the best places to go when you are looking for an idea! Of course I changed it up a little bit partly by turning the card sideways instead of vertical.

The card base is Garden Green with a Whisper White layer and a couple of snowdrifts made from Sparkle Glimmer Paper.  There is a curved die in the set of framelits that can be used to cut out snow, but I just used some scissors! I made two layers so I could place the vellum trees in between.  The Whisper White layer is first embossed with the Softly Falling Embossing Folder.

The trees are cut from Vellum Cardstock and placed in the snowdrifts. It would have been handy to use the Multipurpose Adhesive Sheets before die-cutting the trees so the adhesive would already be on them, but I didn’t think of it ahead of time.  The next best thing to use with vellum so the adhesive doesn’t show is to sponge on some Multipurpose Liquid Glue very lightly.

Next I stamped the evergreen tree from the stamp set with both Pear Pizzazz and Garden Green inked on the stamp. Then it was die cut with the tree outline in the In the Woods Framelits Dies Set.  There is also a die to cut out a stamped tree with little bunches of branches that you can pop up.

This very nice greeting comes in the set, although I thought it was a little big for the placement on my card. I used the Pretty Label Punch, but I trimmed off the top and bottom portion on the Whisper White.  Then I punched it again in Garden Green and layered the full punched piece under the greeting.  I also added two little Clear Epoxy Droplets.

Check out the Winter Woods Stamp Set and In the Woods Framelits Dies in a Bundle and save 10%!

Shop Stampin’ Up! Online HERE!

Graceful Glass Stained Glass Birthday Card

Graceful Glass Stained Glass Birthday Card

With all the excitement over Halloween and Christmas products and projects, let’s not forget about one of our greatest needs as cardmakers, and that is birthday cards like this Graceful Glass Stained Glass Birthday Card. It’s always great to sit down and make a birthday card for a loved one or friend.

One of the most beautiful groups of products has been the Painted Glass Stamp Set and the  Graceful Glass Designer Vellum Paper.  The vellum comes in a 6″ x 6″ stack with two each of 12 designs. This vellum provides a wonderful opportunity for some “adult coloring”!  Coloring is therapeutic and relaxing!  I especially like to use the Stampin’ Blends alcohol markers but you can use the regular Stampin’ Write Markers or Watercolor Pencils if you like. Sometimes it is interesting to put different colors of cardstock behind the colored piece.  Usually you might just want Whisper White Cardstock behind the colored piece which brightens the colors.

You might enjoy the Painted Glass Bundle which consists of the Painted Glass Stamp Set and the Stained Glass Thinlits to use with the Big Shot.  This elegant, medieval look will be beautiful on any of the projects that you make.

Enjoy this video about the Graceful Glass Suite!

I hope you get some new ideas from this video. I can’t emphasize enough the fun and relaxation of doing the coloring on this paper!

For my card, I also used the Tufted Dynamic Textured Impressions Embossing Folder for the background layer. I think this embossing folder really gives a nice look for lots of cards.

Take a day and think about upcoming birthdays so you don’t get behind in the midst of all the holiday projects. There are other good sentiments in the Painted Glass Stamp Set, too for other types of cards.  The Graceful Glass Suite is a slightly different style to have on hand but will produce cards and projects of beauty. Check out this blog post with another example of a card using the Graceful Glass Vellum!

SHOP STAMPIN’ UP! 

Coming November 1st: Snowflake Showcase!

Snowflake Showcase Flyer

Coming soon!  The Snowflake Showcase is coming November 1, 2018 through November 30, while supplies last!  The Snowflake Showcase is a  suite of products with which you can make beautiful winter and holiday cards and projects – just in case you didn’t see enough beautiful products in the Holiday Catalog to tempt you!

The Snowflake Showcase has two stamp sets, white velvet paper, dies and Snowflake Trinkets. Think of the beautiful snowy wonderland projects you can make with these products!

Snowflake Showcase Stamps Etc

If you want these products right now in October, you can buy the Stampin’ Up! Starter Kit and put them on your list and become a Demonstrator! Otherwise, just wait until November 1st and order your products right away to beat the rush!  You will actually be able to use some of these products to make designs other than snowflakes.  Use your creativity!

SHOP The Snowflake Showcase Beginning November 1st!

Broadway Birthday Shaker Card

Broadway Birthday Shaker Card

If you want to send a fun birthday card to someone special, you might want to try this Broadway Birthday Shaker Card.  You can find it as a sample in the Stampin’ Up! Catalog on page 69 with the Broadway Bound Suite of products.  I made this card for my brother, my little brother, as I will always think of him no matter how old we get, even though he is only two years younger than me! On my birthday I told him I wished I was as young as he was! I thought this card was perfect for him because I wanted to make something special for him and because if anyone does deserve a wonderful birthday wish, it is him. In THIS POST I mentioned that he and his wife adopted eight (yes, eight!) children in international adoptions over a few short years. Amazingly, time is passing by quickly and those children are growing up and some have left the nest for college! We never could have imagined that would happen (as most of us parents can’t imagine!)!  His family threw him a surprise birthday party earlier this month since he is often busy at work around the time of his birthday.

While shaker cards take a little extra effort, they are fun and impressive!  Anyone can make them!  This one is sized at 4 1/4″ x 4 1/4″ with a Basic Black card base. There is a piece of Broadway Bound Specialty Designer Series Paper layered on the card base. This paper is fun because one side has a bright party design and the other a design with gold foil accents.

I cut two pieces of Whisper White Cardstock, one very slightly smaller than the other so that it could go behind the front piece and not show. This piece provides the background that you can see through the window. I stamped a few of the small images on this background piece.  I also stamped some of the diamonds on the front piece after die-cutting the square opening with the Layering Squares Framelits Dies.  A piece of  Window Sheet was adhered to the back of this front window piece. Then I used Foam Strips to make a tight border around the edges of this window on the Window Sheet.  I poured in some retired gold glitter and some colored sequins I had leftover from a Paper Pumpkin Kit. After the contents are in the shaker window it is time to adhere the smaller Whisper White piece over it. Then this whole window shaker piece was adhered to the front of the card.

Next comes decorating the front of the card on the shaker window. I die cut the word “Wish” with the Broadway Lights Framelits Dies out of Gold Foil. I stamped the greeting with words in the Broadway Birthday Stamp Set and just hand cut the little banners.  There is also a little candle and flame that I stamped and die cut.

There are many ways this card could be decorated using the basic sample in the catalog!  Get the basic shaker part made and then decorate the card however you like for whatever occasion. The Broadway Bound Suite is a great group of products to have on hand for birthday and other congratulatory occasions!

SHOP STAMPIN’ UP! ONLINE!

Be sure to use your Bonus Coupon Codes by September 30, 2018!

All Is Bright Happy Holidays Card

All Is Bright Happy Holidays Card

This All Is Bright Happy Holidays Card is fun and easy to make with just a bit of designer paper and the greeting die cut with the Big Shot. This card could be made a little plainer if you wanted even quicker and easier or you could jazz it up even a little bit more. Most cards are like this, that they can be made very simple and easy or they can have lots of embellishments and bling.

I started with just a card base of Real Red (which I have a hard time remembering that it is not in the “Brights” color family anymore!) and a strip of the Christmas stockings cut from a piece of paper in the All Is Bright Designer Series Paper.  I layered the strip of designer paper on a piece of Garden Green cardstock. The greeting is die cut from Gold Foil Paper with the word dies in the Merry Christmas Thinlits Dies.  Had I been able to find my Multipurpose Adhesive Sheets I would have used these on the back of the Gold Foil Paper before die-cutting. That way no glue is required on the very narrow letters. But since I didn’t have the Adhesive Sheets at hand, I did just use very tiny dots of the Multipurpose Liquid Glue.

I finally decided that the Real Red card base was a little plain, so I embossed it with the Tufted Dynamic Textured Impressions Embossing Folder. I thought this folder gave an elegant look to the card and kind of went with the stockings since sometimes Christmas stockings have that quilted, tufted look. This is one of the “dynamic” folders that is thicker and heavier so it is best to just spritz the cardstock with a bit of water before embossing.  That softens the paper fibers so you get the best embossing.

After embossing the card front and adhering all the pieces, I thought why not add a little bit of Garden Green & White Baker’s Twine to the stocking on the designer paper for a little embellishment.  And that’s all there is to the card!  Like I said in the beginning, the card could have been made with just the plain card front, the greeting and the designer paper and layer adhered to the card front and it would be done and look fine. Certainly if you were making a lot of the same card it would be easier to keep the card simple.

Remember that if you earned any Bonus Coupon Codes in August, you can use them on any purchase in August. And be sure to check out the Clearance Rack since more items were added the other day.  Some are already gone, but get what you can while supplies last!  There are plenty of products on there that you could be using right now for the holidays, maybe with adding new designer paper or new cardstock colors to freshen things up!

Check out this other Christmas card I made using the All Is Bright Designer Series Paper.  This paper has those photographic images as the design which makes it so pretty.  I plan to make more of this card!  I like to make lots of different designs since we have so many great stamp sets and papers to use for Christmas cards, so I make a few cards of each design.  And yes, then it is hard to decide who to send which card to at mailing time!

Be sure to order your supplies early so you won’t have backorders to deal with if you want to make a card like this All Is Bright Happy Holidays Card.

SHOP STAMPIN’ UP! ONLINE!


Trick or Tweet Scary Halloween Animals Card

Trick or Tweet Scary Halloween Animals Card

Halloween is so much fun and this Trick or Tweet Scary Halloween Animals Card is great to send to someone and spread the Halloween spirit!  I love these little costumed animals, ready to stamp and color in how you like!  It’s the Trick or Tweet Stamp Set!  Cute name, too!

Just stamp each animal on some Whisper White Cardstock and color in with Stampin’ Blends markers or your choice of coloring.  I love the alcohol markers! You can use whatever coloring method you like.  Then you can punch out or die cut the animals in circles and layer on a scalloped circle.  I used Berry Burst Cardstock for the layers.

The background layer on the card is embossed with the Oh My Stars Embossing Folder.  I used Lemon Lime Twist Cardstock. This piece is layered on Berry Burst Cardstock and layered on the Basic Black card base.

There wasn’t a good space for a greeting, so I stamped the greeting and cut apart the words!  It’s a technique I see now and then but rarely think to use it myself!  The greeting comes in the Trick or Tweet Stamp Set.  The greeting is stamped in Berry Burst Ink and layered on Basic Black.  I just used my Paper Snips scissors to cut these apart by hand.  Just glue onto the black and then trim that out.  Doesn’t have to be perfect because, after all, it is a spooky Halloween card!

That’s all!  A fun Halloween card!  Be sure to mail it to arrive before Halloween!  Or use these individual little characters as a topper on a Halloween treat bag or box.  Lots of possibilities!  Here is a treat box I made with the little Halloween bird as the decoration!

Wouldn’t someone you know be pleasantly surprised not just to find a card, but a Halloween card, in their mailbox from you?!  Have some fun making cards and treats for Halloween like this Trick or Tweet Scary Halloween Animals Card!