Category Archives: Big Shot

First Frost Flower Bouquet Card

First Frost Flower Bouquet Card

This First Frost Flower Bouquet Card will be a good one to send to someone for almost any occasion, just change the greeting.  You can stamp the flowers in any color, make the whole color scheme of the card in any appropriate colors. First Frost is just a pretty stamp set with nice greetings you can use.

As you can probably see, I stamped the flowers randomly and then die cut with the Frosted Bouquet Framelits Dies.  You could also stamp the flowers on the card and then stamp an extra one or two to die cut and add to the bouquet.  I did stamp the stems and leaves and some of the little wispy flowers or berries, whatever they are. (And they can be either!)  Notice the stamps themselves give that kind of “not full-on ink” impression, a softer look, like watercolor.  It’s a very soft, not bold, stamp set.  So pretty I think!

To save 10%, just purchase the First Frost Bundle that contains the stamp set and the coordinating dies.

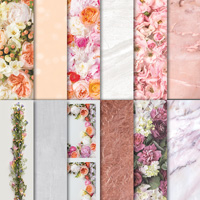
To finish off the card front, I adhered a little strip of the Frosted Floral 12″ x 12″ Designer Series PaperIf you don’t buy anything else in the Suite, I would buy this Frosted Floral Paper because it is shimmery and GORGEOUS!

On the inside of the card, you can add another die cut flower down in the corner!

You’ll find this whole grouping of products in the Stampin’ Up! Holiday Catalog!  Be sure to check out this gorgeous new catalog online!  And if you would like a copy of your own, please send me your contact information.  I would be happy to help you and send you a complimentary copy of the catalog.

You can actually use this Frosted Floral Suite to make holiday cards!  Or you can make birthday cards or sympathy cards or “thinking of you” cards or wedding cards!  How many stamp sets can you say something like that about?!

I hope you can be inspired by this First Frost Flower Bouquet Card and copy it or make something a little bit different for your special occasion to send or give to someone!

SHOP STAMPIN’ UP! ONLINE!


Today Is the Day! The Holiday Catalog Is Here!

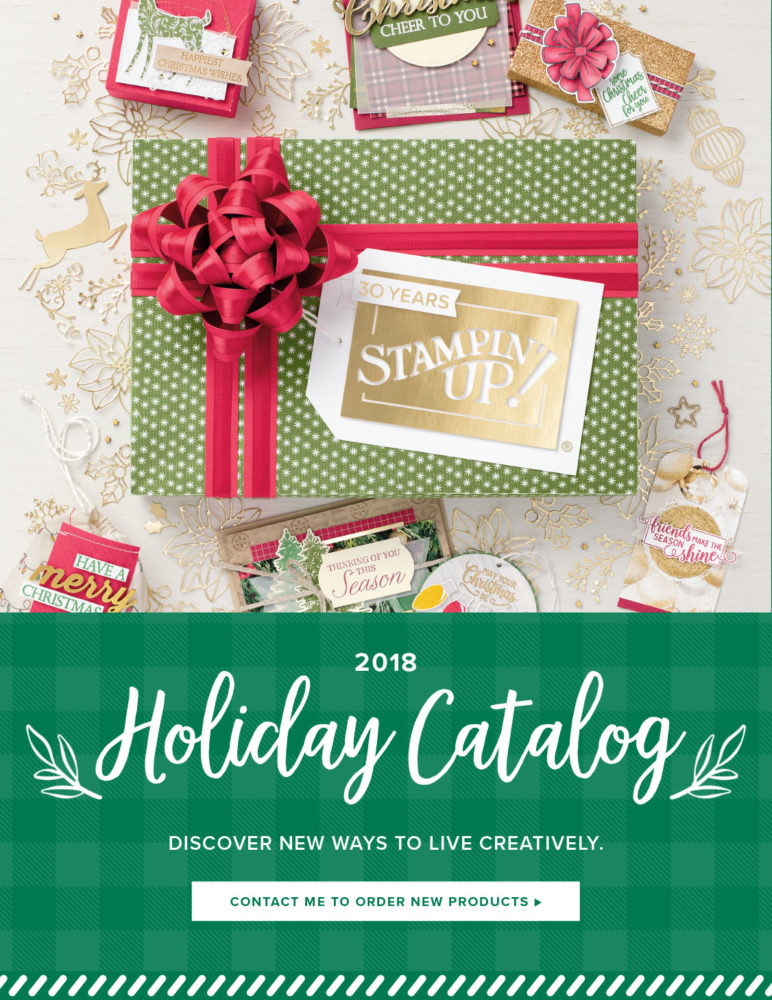
Today marks the official start of the holiday season (for crafters!) with the release of the Stampin’ Up! Holiday Catalog 2018!

You can view the Holiday Catalog Online HERE!

Enjoy a few Stampin’ Up! videos that will really get you “in the mood” if you aren’t already!

SHOP THE HOLIDAY CATALOG ONLINE TODAY! USE YOUR BONUS COUPON CODES!

Stampin' Up! Holiday Catalog 2018 Cover

Easy Fancy Petal Promenade Z-Fold Birthday Card

Easy Fancy Petal Promenade Z-Fold Birthday Card Open

I wanted to make a card for a long-time friend who has a birthday the day after mine, so I came up with this Easy Fancy Petal Promenade Z-Fold Birthday Card.  What can make a more beautiful birthday card than the Petal Promenade Designer Series Paper!  I just love it, and as you may have seen on a video previously, this paper was photographed in the Stampin’ Up! studio from fresh flowers and then made into a paper design by the graphic designers – I think they mentioned digitally removing a spider or ladybug hiding in the flowers!

One of the coordinating colors for this paper is Petal Pink, so that is what I used for the card base. I decided to jazz it up a bit by making a z-fold card.  So simple, yet it makes you look like a specialty card designer!  Just make the card as usual, then fold the front of the card in half back on itself!  It’s best to score first so half of the card front (4 1/4″) is 2 1/8″.  Just score and fold back, hence the name “Z-Fold”.

The designer paper is layered on to the card using the photographic flowers on the front panel, and the opposite side of the paper that looks like a granite pattern on the inside of the card. Since I was using a light color of ink, I used my Stamparatus to stamp the greeting inside the card on the designer paper (stamp first, glue second!). As I thought, the first stamping looked too light, but I could stamp it a second time and then it was inked up well enough to look good. I even glued another “back” of another pattern of paper on the inside of that front fold.  It’s the one that looks like bokeh dots.

The greeting on the front of the card is stamped in Petal Pink Ink on Whisper White and die cut with the Stitched Shapes Framelits Dies. I was hoping I could layer this on top of the Petal Pink die cut piece from the Stitched Labels Framelits Dies and I think it works. The thing is with a Z-Fold card is you want the stamped greeting on the inside of the card to be hidden behind the greeting on the front of the card. You need to think this through a little bit while you are making the card.

For a little bling, I added the Share What You Love Artisan Pearls on the greeting on the front of the card.  I first looked at sequins and some of my other embellishments, but decided, as I often do, on the Artisan Pearls.  They are so teeny tiny they add a nice accent without being too bold.

Remember, Stampin’ Up! Bonus Days are here during August! Spend $50 and get a $5 coupon by email to spend in September!

Pick up some of this gorgeous Petal Promenade Designer Series Paper on your next order and start making some easy cards and projects that will be beautiful like this simple Z-Fold card.

Easy Fancy Petal Promenade Z-Fold Birthday Card

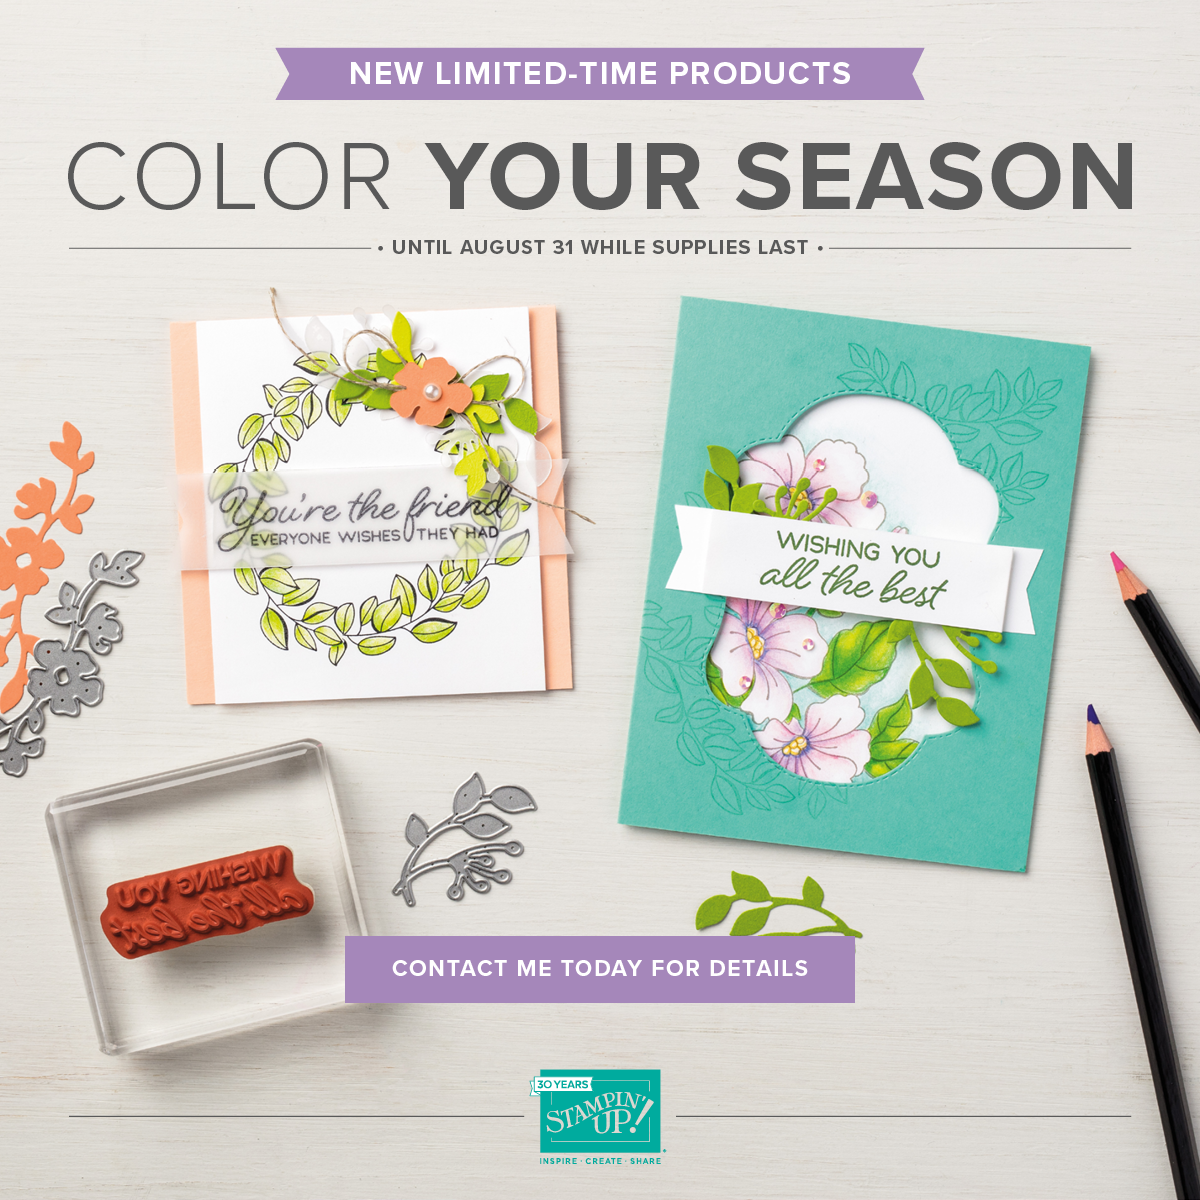
Make Pretty Floral Cards With the Color Your Season Products During August

Color Your Season Floral Samples

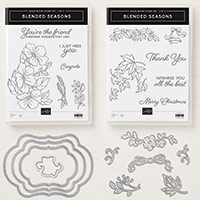
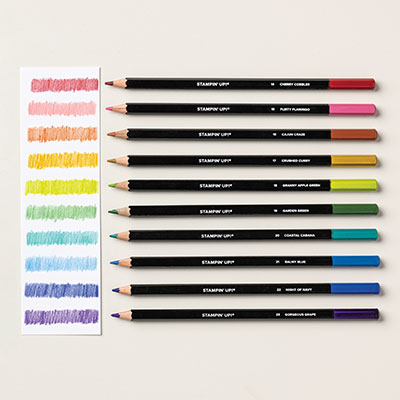
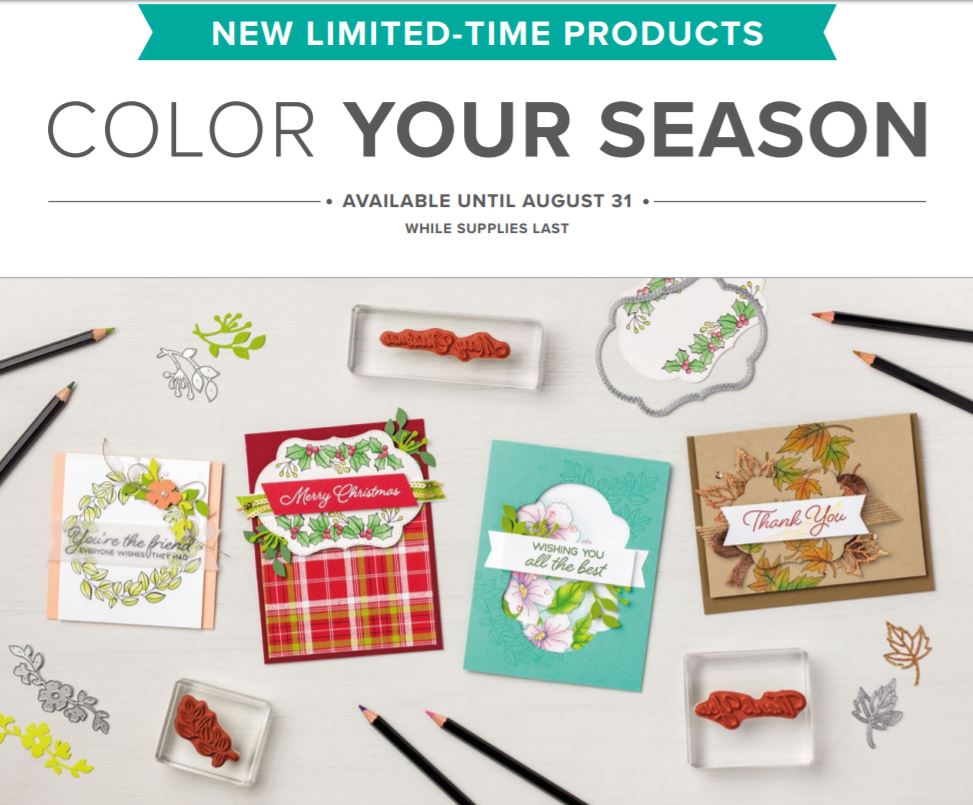
Make beautiful floral cards with the products in the Color Your Season limited time suite! It’s called Color Your Season because with this set of stamps and dies, you can make cards or other projects for any of the four seasons!  Do a little watercoloring with the new colors of Watercolor Pencils with real Stampin’ Up! colors! There is already a set of Watercolor Pencils in the Annual Stampin’ Up! Catalog, but this new set is called Watercolor Pencils Assortment 2.

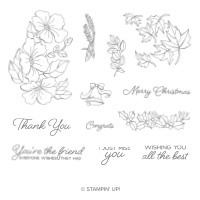
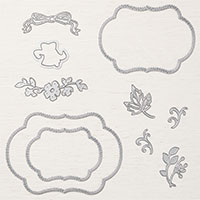
You can purchase just the stamp set, Blended Seasons, which is pretty enough just in itself. You can also purchase just the framelits dies, Stitched Seasons, if you wanted to use them with other stamp sets you have.  They have dies that will create nice frames, plus embellishments. OR if you want it all, you can get the Bundle, Blended Seasons, at a 10% savings.

With this special limited-time set of products, you can make cards with spring or summer flowers, or Christmas cards and cards for fall!  You are all set!

Remember, this Color Your Season group is available only during August, while supplies last.  Don’t wait too long just in case!  And I would highly recommend the Watercolor Pencils for sure especially with Blender Pens of you don’t already have them.  Go ahead and enjoy this set before we get into the serious holiday crafting season!


SHOP STAMPIN’ UP! ONLINE HERE!

Animal Expedition Baby Card Eclipse Technique

Animal Expedition Baby Card Eclipse Technique

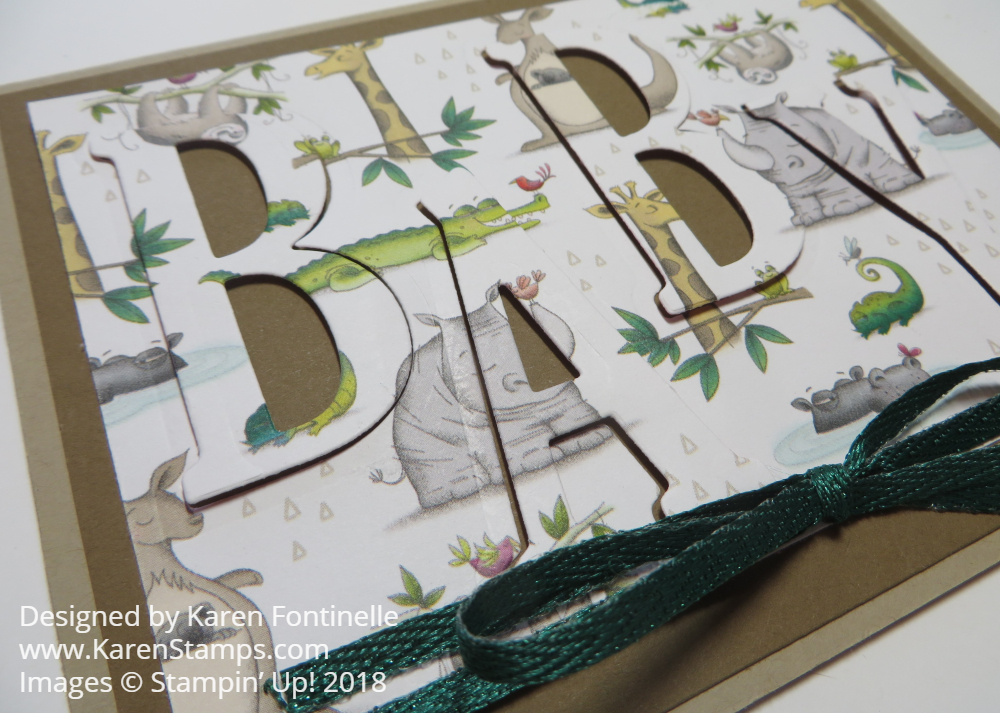
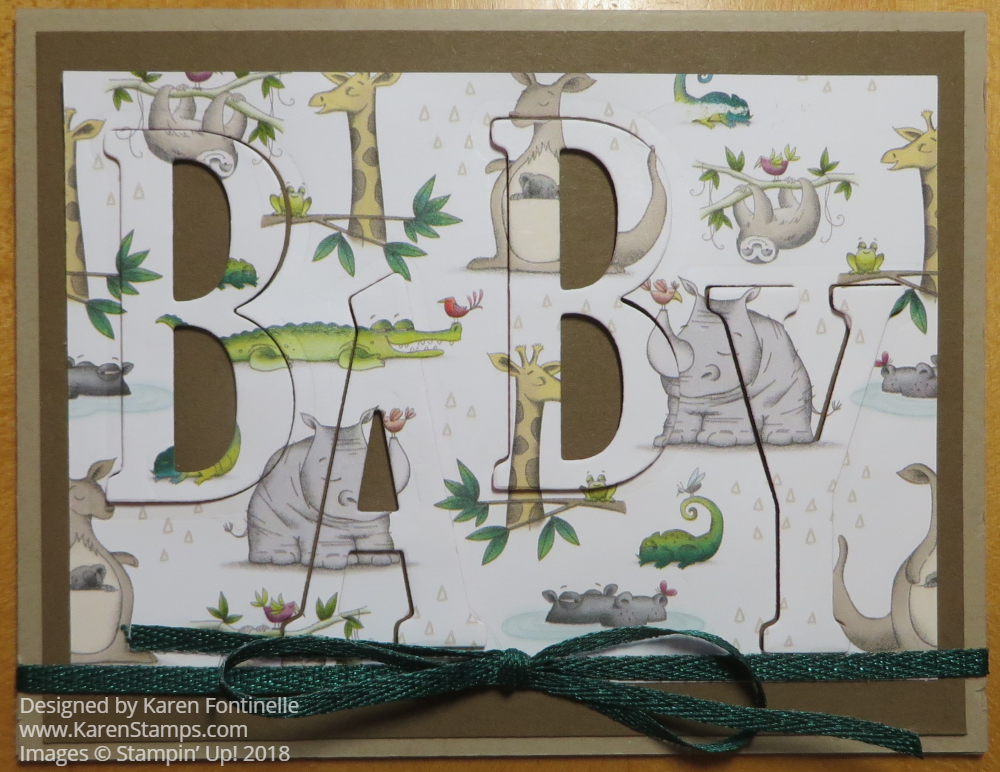
The Animal Expedition Designer Series Paper is some of the cutest paper this year in the Stampin’ Up! Annual Catalog, and here it is used in this Animal Expedition Baby Card with the Eclipse Technique.

I was actually just playing around with this paper and the Eclipse Technique seeing if the letters for “BABY” would fit on a paper layer. When I changed to another design for something I was making, I thought I might as well make a baby card out of what I had already die cut!

There are MANY coordinating colors with this Animal Expedition Designer Series Paper! I always like to write the names of the coordinating colors on the back cardboard of the designer paper so I don’t have to grab my glasses to read the small print!  I wrote and wrote and wrote the names of colors for this DSP! One of the colors is Crumb Cake, which I used for the card base. For the next layer, I used Soft Suede, which surprisingly isn’t on the list of colors!  But I liked it.

The Eclipse Technique is when you die cut or punch out something and then replace that image where it was cut out but popped up on dimensionals so you can just barely see the color underneath.  Oh how I love the Mini Stampin’ Dimensionals!  It saves time cutting down the regular Stampin’ Dimensionals when you need a very small piece. In this case, I used the Large Letters Framelits Dies to spell out Baby.

Animal Expedition Baby Card Eclipse Technique Closeup

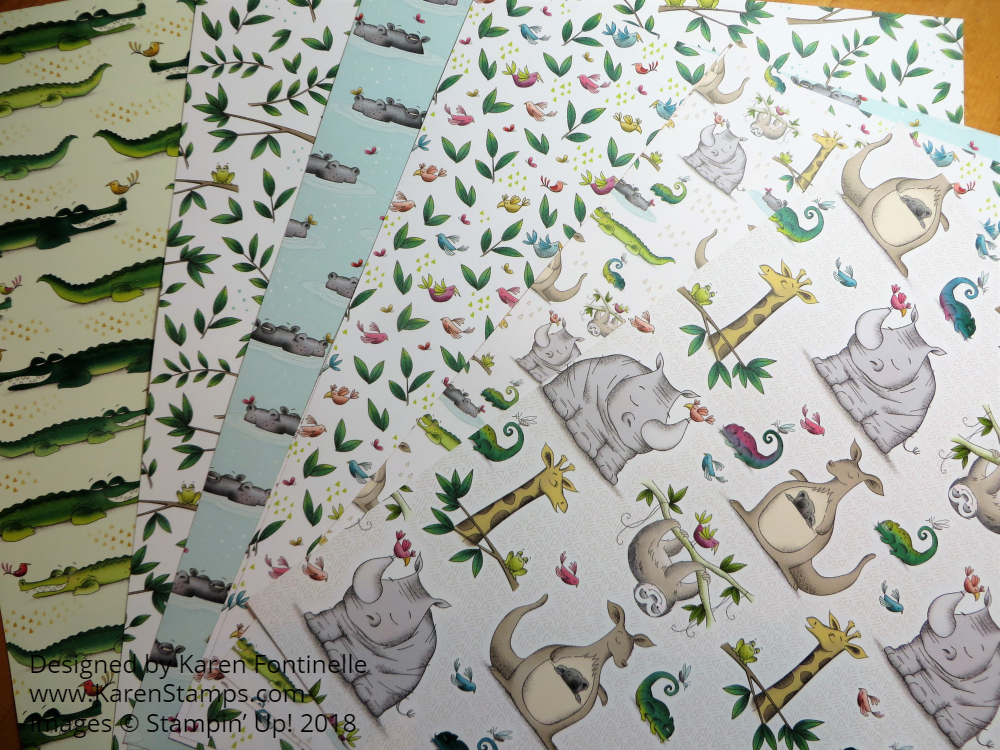
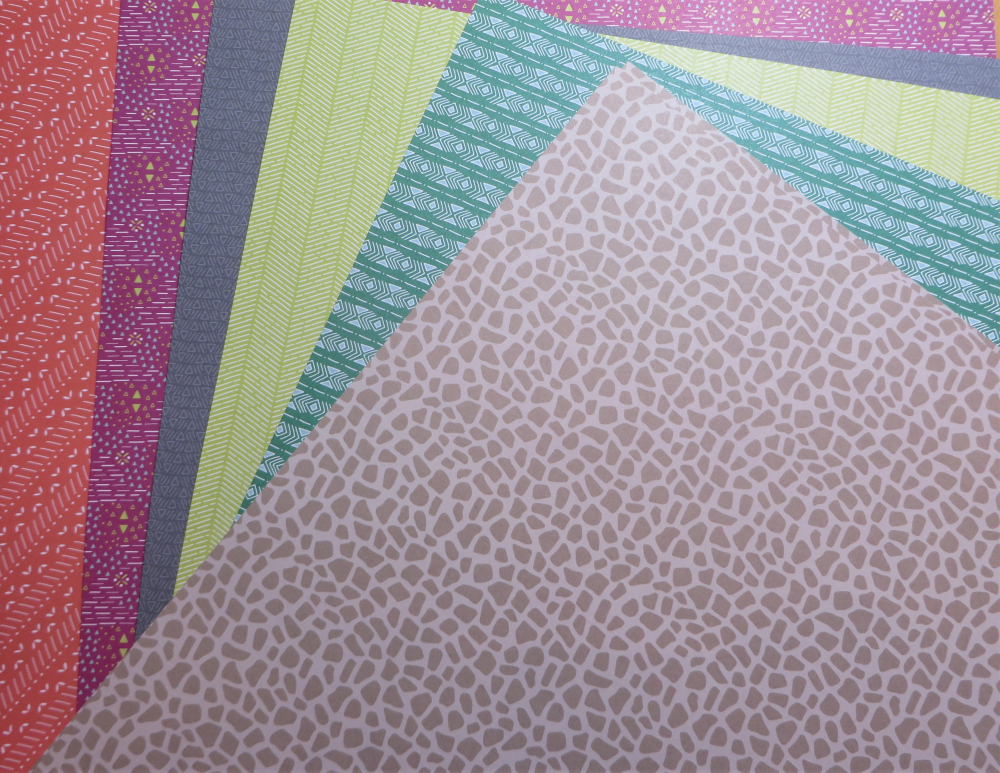
Here are photos of both sides of the whimsical Animal Expedition Designer Paper.

Animal Expedition Designer Paper Animals

Animal Expedition Designer Paper Patterns

Images © Stampin’ Up! 2018   www.KarenStamps.com

For a little finishing touch, I tied a piece of the Shady Spruce Ribbon in the Metallic Ribbon Combo Pack around the card.  You also get Petal Pink Ribbon in this combo pack.

This could be a baby card for a girl or boy, and the paper can be used for adults and older children as well – anyone!  There is also a coordinating Bundle with stamp set and dies, the Animal Outing Bundle, that adds even more to your cardmaking and scrapbooking.

Remember the Stampin’ Up! Bonus Days that are going on during August!  With every $50 you spend this month on an order (before shipping and tax) you will receive a coupon code via email (be sure to save that email and write down your codes!) to spend on an order in September! It’s kind of like Sale-A-Bration…. if your order is close to $50, go ahead and add a little something so you can earn a Bonus Days Coupon! (I printed out my email when I got it from my order so in case something happens to may email or computer, I will have a copy.  Stampin’ Up! cannot replace any lost coupon codes!

Use a punch or other dies to try the Eclipse Technique and make a fun card like this Animal Expedition Baby Card Eclipse Technique.

Stampin’ Up! Bonus Days Are Here!

Bonus Days Flyer 2018 Info

Stampin’ Up! Bonus Days are back!

When you place an order of $50 or more in August, beginning today, you will receive via email from Stampin’ Up! a Bonus Days coupon to use on a purchase in September!  Be sure to save, print out, or write down your coupon code so you have it handy in Sept. lest your email disappears or something!

If you spend multiples of $50 in one order, like $150, you will get one email with all three codes.  If you have separate orders throughout the month, each $50 or more, you will get an email after each order.

If you have an order close to $50, just add another little something to reach $50! Surely you can always use another adhesive, embellishment, or something!

Here’s one way you might want to spend that $50!

Color Your Season Banner

It’s the Color Your Season Limited Time Offer that has the Blended Seasons Bundle if you would like the stamp set and framelits dies. It’s a beautiful set and covers all the seasons you might be making cards for!  In addition, you can order a NEW set of Watercolor Pencils in new Stampin’ Up! colors to add to your previous Watercolor Pencil collection.  Be sure you have a Blender Pen or Aqua Painter to make blending the Watercolor Pencils so easy!  These pencils are not included in the Bundle.  The Bundle is just the stamp set and dies. Just order the WC pencils separately.

Have fun shopping during Stampin’ Up! Bonus Days in August!


An Easy Card For a Special Day

A Card For a Special Day

If you need an easy card for a special day for someone, this might be it!  It’s a monochromatic card, all in Petal Pink. I think it looks pretty elegant for a special occasion, like a birthday, graduation, wedding, or anniversary, yet with the Big Shot, it is very easy to make!

The greeting is stamped and then die cut with one of the Stitched Labels Framelits Dies.  The greeting is stamped from the Stitched All Around Stamp SetYou can even buy the dies and stamps together in a Stitched All Around Bundle.  I love the phrase and the pretty font.  The die cut piece is beautiful too!

But let’s talk about that embossed background!!  Is it beautiful or is it beautiful??!  It’s the Tufted Dynamic Textured Impressions Embossing FolderThis is a new embossing folder in the new Stampin’ Up! Catalog. It’s one of the heavy duty ones that really creates a deep impression in the cardstock.  It’s recommended that you just lightly spritz the paper with water before embossing to loosen up the paper fibers.  This will make a wonderful background for many cards!

To finish off this card, I added some Petal Pink ribbon from the Metallic Ribbon Combo Pack underneath the greeting.  And for just a little bit more fanciness, I added a few matching pearls from the Share What You Love Artisan Pearls.

So stamp a greeting, die cut with the Big Shot, emboss the card front layer and add some ribbon and pearls for embellishments.  That’s as easy as it gets making a very easy card for a special day, for a special someone, with Stampin’ Up! products!

Petal Promenade Beautiful Day Card

Petal Promenade Beautiful Day CardHere’s another easy card, the Petal Promenade Beautiful Day Card, made with beautiful designer series paper and a greeting. A couple embellishments add a nice finishing touch!

The card base is one of the new In Colors, Grapefruit Grove.  The designer paper is the Petal Promenade Designer Series Paper.  This paper is so pretty and is made up of photographic images of flowers on one side.  Stampin’ Up! actually brought in bouquets of fresh flowers, photographed them, then made them into designer series paper!  You can appreciate the paper even more after watching the video of how they designed it!

For this card, I used the backside of the flower design for the main area. It’s just a very soft, subtle design that goes beautifully with a strip of the flower side of the paper which I placed on the left side of the card.  I added a bit of Whisper White 1/8″ Sheer Ribbon around that piece and just tied a little knot.

The greeting is from the Love What You Do Photopolymer Stamp SetThis is a great set with pretty flower images and great sentiments to use! It is die cut with the Stitched Shapes Framelits Dies and layered on a scalloped circle die cut from the Layering Circles Framelits Dies.  It’s difficult to see in the photo, but the three little dots on the greeting are the Faceted Dots.  These come in several colors and sizes and the faceted surface gives them a little sparkle. Very pretty in person!

This Petal Promenade Designer Series Paper is one of the select papers in the Buy 3 Get 1 Free  DSP Sale at Stampin’ Up!  Choose 3 papers on your order and when you add the 4th package, it will be FREE!  Great time to get that designer paper you hadn’t ordered yet or stock up on your favorites.

You can’t go wrong with this Petal Promenade Designer Series Paper if you like to make beautiful cards that are simple and elegant.  Here is another card I made showcasing the floral side of the paper and one of my favorite greetings.  This paper is beautiful for summer and can be used for so many occasions from just a “Thinking of You” card to an engagement or wedding card.  Who do you know who wouldn’t be thrilled to receive this Petal Promenade Beautiful Day Card?

Shop Stampin’ Up! Online Today!


4th of July Patriotic Wreath Card with Swirly Scribbles

4th of July Patriotic Wreath Card with Swirly Scribbles

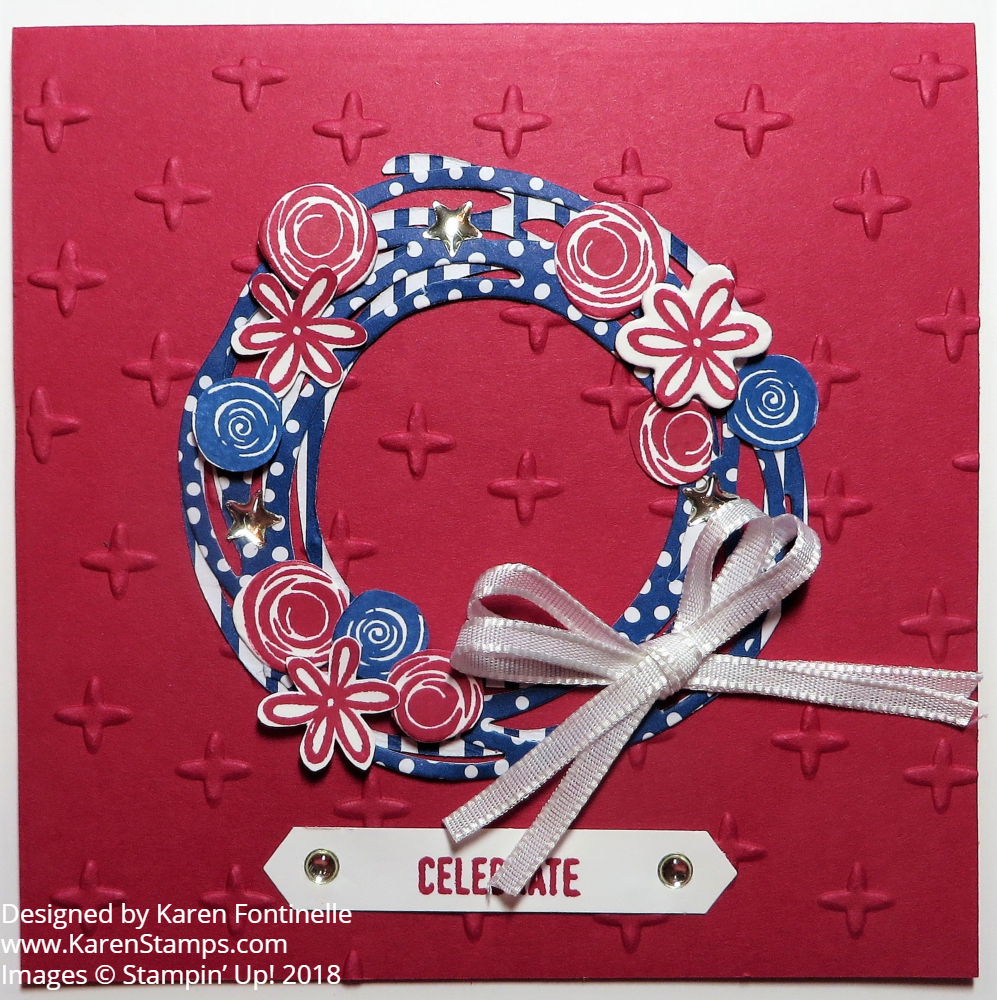
It’s hard to believe the 4th of July is coming up next week, but it is, so here is a card, 4th of July Wreath Card with Swirly Scribbles, to celebrate the holiday!  I said the other day that you didn’t need a “4th of July” stamp set to make 4th of July cards and projects and this is an example!  I’ve always seen cards with wreaths made with the circular die cuts from the Swirly Scribbles Thinlits Dies, so I got the idea to make a patriotic wreath out of that piece.

The card base is made with Lovely Lipstick Cardstock and embossed with the Sparkle Textured Impressions Embossing Folder for a little texture and interest. The Oh My Stars folder would also be a good one to use.

I actually die cut two wreaths and used the In Color 2018-2020 6″ x 6″ Designer Series Paper. I chose one of the Blueberry Bushel patterns. I cut two wreaths but the bottom layer uses the striped blue and white side and the top wreath shows the polka dot wreath.  I thought using two circles (wreaths) added a little more dimension to the wreath.

Then I stamped small flowers from the Swirly Bird Photopolymer Stamp Set, die cut a few and cut out a few by hand with Paper Snips!  Some flowers are popped up on Min Dimesionals.  The ribbon is used to make a double bow on the wreath. It’s the Whisper White 1/8″ Sheer Ribbon.  For a little pizzazz, I added a few silver stars from the Metallic Enamel Shapes (retired).

The greeting is stamped from the Itty Bitty Greetings Stamp Set and cut out with the Classic Label Punch, accented with two small Rhinestone Jewels.  This stamp set takes the place of Teeny Tiny Wishes, one set that I loved and used A LOT!  I can see using the Itty Bitty Greetings set A LOT also!  I think everyone should have it in their collection.

Check HERE for another patriotic card for the 4th of July I made with the Swirly Scribbles dies!

Have fun making some patriotic cards or cute projects for the 4th of July!  Remember, this is the last week in June and next Wednesday is the 4th of July!! Use this 4th of July Patriotic Wreath Card with Swirly Scribbles for your inspiration!

SHOP STAMPIN’ UP! ONLINE!
 

Broadway Bound Birthday Card With a Surprise Inside!

Broadway Bound Birthday Card

This is a fun card to make, a Broadway Bound Birthday Card with a surprise inside! From the outside, it looks like an ordinary card like we make all the time. I started seeing these cards around the internet and wrongly assumed how they were made.

Take a look at the inside of the card first:Broadway Bound Birthday Card Surprise Inside

Now you might, and I did, assume that there is a card base of Basic Black, with a panel of designer paper on the front and another panel of designer paper on the inside of the card, adhered to the full inside of the back of the front card base.  Well, it’s not!

I did start with a card base of Basic Black as usual. But the different step is to cut off 3 1/4″ of the front of the card base, leaving a 1″ strip for the card front instead! This way when you adhere the piece of designer series paper to the remaining portion of the card front, you will be showcasing both sides of the designer paper because when the recipient opens the card, they will see the opposite side of the designer paper!  Now if you did it the other way, adhering a piece of designer paper to the front of the card and adhering another piece of designer paper showing the other side to the inside of the card, this saves weight!  And it’s just something a little different!

Check out the pieces shown in the photo below.  I added a 1/2″ x 5 1/2″ strip of Gold Foil to put a little divider and accent on the front of the card.  When you adhere the designer paper to the card front, be sure to line up the designer paper with the corner and edges of the back side of the card base rather than the fold on the front of the card. (The gold strip in the photo is just laying on the black cardstock, it is not the proper placement.)

Broadway Bound Birthday Card Assembly

For this card, I used the Broadway Bound Designer Series Paper in the new catalog. It’s a little difficult to photograph because of the gold foil accents, but the paper is very pretty and fancy!  It will make lots of great birthday and other cards.

To complete my card, I stamped a greeting from the Picture Perfect Birthday Photopolymer Stamp Set. It is then die cut with the Stitched Shapes Framelits Dies and then layered on a Gold Foil  Scalloped Circle die.

Try this different way to make a card to use and appreciate our beautiful designer series paper. Something fun and different!

SHOP STAMPIN’ UP! ONLINE HERE!

The Perfect Card To Celebrate Summer!

First Day of Summer on the Beach CardToday is the first day of summer, the Summer Solstice in the Northern Hemisphere. I think it has already been “summer” here in Houston, Texas for awhile now, but technically, today is the day! Depending on what you enjoy, this card might be the perfect card to celebrate summer!

Sometimes people say they are either “mountain” people or “beach” people. I don’t know that I am either-or, but I do love seeing the scenic mountains on trips (no mountains in Houston!!).  However, I also enjoy seeing the ocean any chance I get! Not necessarily going out in the water, unless I am just wading, but I love being on a beach and watching the waves! The air is fresh and feels so good. If I thought about a good summer day, maybe it would be sitting on a beach watching the waves breaking on the shore.

This card is just built on a piece of Whisper White cardstock.  I tore off the top portion of a piece of Crumb Cake cardstock for the sand and stamped a piece of driftwood from the stamp set Colorful Seasons.  The waves in the ocean are die cut with the Seasonal Layers Thinlits Dies.  The paper is Coastal Cabana, but any shade of blue will do.  I sponged a bit of white craft ink for the whitecaps. Now we have an Uninked Stampin’ Craft Pad and Whisper White Refill.  For the sky, I sponged on some Balmy Blue ink.  The sun is inked in with a sponge through a stencil. The stencil is made by punching a circle in a sticky note and using that for a stencil to sponge the sun with Daffodil Delight ink.  Such a fun little trick!

The greeting from the same stamp set is stamped in Crumb Cake ink. What a great saying, because the best way to relax is to “Just Breathe.” And there’s no better place to take in fresh air than at the ocean.  The chair is die cut with the Seasonal Layers dies in Real Red.  I LOVE this die cut chair, especially in red!

Here is another card I stamped two years ago which is also another good idea for spending the summer! This Sitting Here Stamp Set is still available in the new Stampin’ Up! Catalog on page 65.

If you are in the Northern Hemisphere,  hope you are enjoying your first day of summer! Probably the kids are out of school and you are planning a vacation. Take some time to stamp some cards for summer, or better yet, some summer scrapbook pages so they are ready to go when you get the photos printed.  Even though I made a card above, you could just expand the idea and make a scrapbook page out of it!  I hope you can make a perfect card for summer according to what your summer will look like!

All About the Petal Promenade Designer Series Paper From Stampin’ Up!

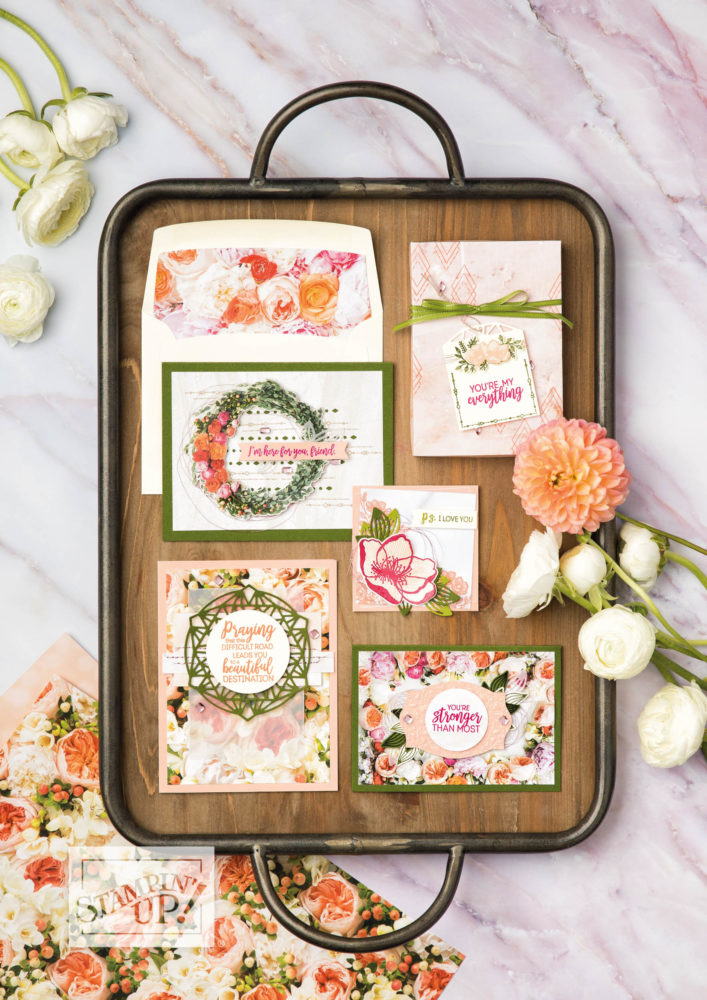
Petal Promenade Suite

The Petal Promenade Suite is one of the most beautiful in the new Stampin’ Up! Catalog.  The designer paper, the Petal Promenade Designer Series Paper, is the real star of the suite!  Like some designer paper in the previous catalog, this paper is designed by photographing real flowers and making it into a paper pattern.

Watch this video below from Stampin’ Up! that describes how they designed the paper.  I love learning the “behind-the-scenes” secrets!

Even seeing this photo from the Online Store, you KNOW and I KNOW from experience that any designer paper made by Stampin’ Up! is ten times more beautiful in person that even the best photograph.

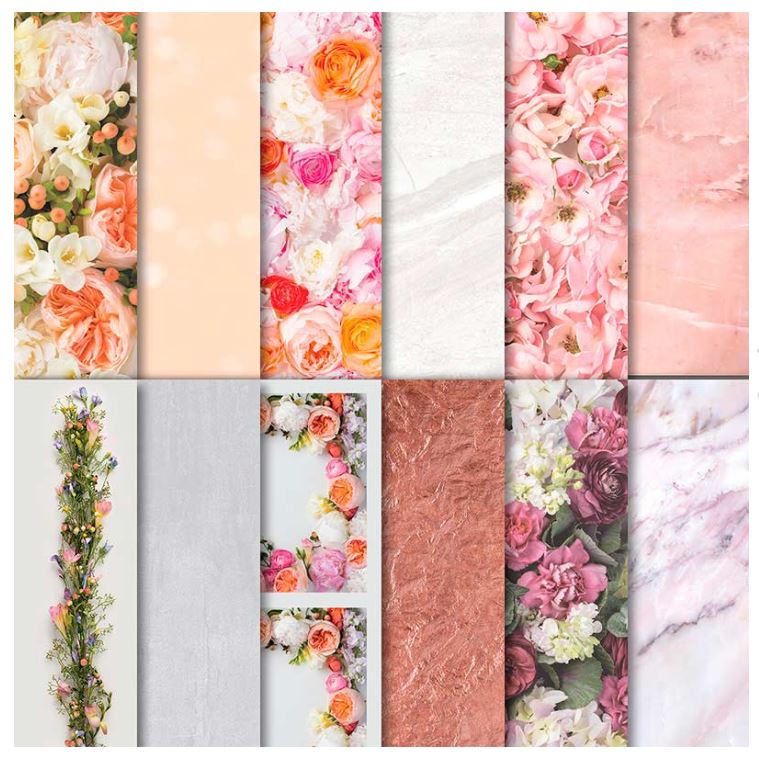
Petal Promenade DSP Sheets

I think this paper is going on my next order! There are some sheets that have elements that you cut apart.  All this paper is 12″ x 12″, so you will have plenty of paper to work with!

The video is very short, but if you don’t have time to watch it, just know that they photographed real flowers that they purchased and then designed the paper from those photographs.  I think there was some mention of photoshopping out a small spider!!  A ladybug on the flowers might have been cute!

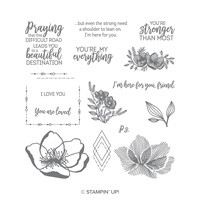
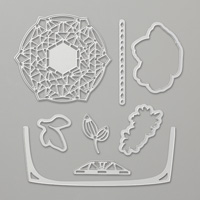
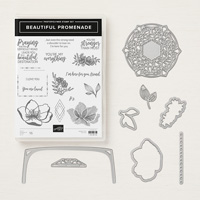
To go along with this designer paper, there is the Beautiful Promenade Photopolymer Bundle containing the stamp set and the Beautiful Layers Thinlits Dies.  There are also some embellishments.  Check out all the products in this suite below:

If you like flowers, I think you will get a lot of use out of these photographic floral images on this beautiful Petal Promenade Designer Series Paper. And now that you know how it was created, you will appreciate it even more!  I know I will!

SHOP STAMPIN’ UP! ONLINE TODAY!

Make an Easy Card With the Garden Impressions Paper

Easy Card With Garden Impressions

Do you ever start out with an idea for a card and end up with something entirely different, like I did making this Easy Card with the Garden Impressions Paper?  I planned to STAMP a card front much like this designer paper, but as I started looking at and pulling out the designer paper, various ideas came to mind.  Since I was short on time at the moment, I chose the easy route!  And there’s nothing wrong with that because with Stampin’ Up!’s pretty designer paper and coordinating paper and accessories, you can make a quick and easy card that looks beautiful!  Especially to the recipient who will love it because it’s from you, and because they will wonder how you could make such a beautiful card that they think they couldn’t possibly make (except WE know they could!).

I’m not sure I’m in love with the brand new color Petal Pink.  Maybe I just haven’t found the right coordinating colors with it. So for this card and this designer paper pattern, I chose to use Powder Pink, one of the In Colors from last year. This designer paper, Garden Impressions 6″ x 6″ Designer Series Paper, has so many pretty patterns in it! I wasn’t sure I would like it at first, but I think I do!  It has bigger, bolder patterns of flowers and also smaller patterns of colors. Also, there are lots of coordinating colors that go with it.

For this card (or actually the card I planned to make) I chose Powder Pink Cardstock for the card base.  Then it was just a matter of cutting the designer paper with the big flowers to 4″ x 5 1/4″ to fit the card front. I chose the Shaded Spruce ribbon from the Metallic Ribbon Combo Pack. Although it’s a bold color, it coordinates and it is narrow so not overwhelming.

The greeting is from the Abstract Impressions Stamp Set.  There are a lot of nice greetings in that stamp set.  I stamped it in Melon Mambo, another coordinating color, die cut with the Layering Circles Framelits Dies and layered that on a scalloped circle. The card was done!

Just looking at the designer paper gave me all sorts of card design ideas, not to mention the Stampin’ Up! catalog itself.  Be sure to use the resources you have right in front of you for ideas and inspiration if you need it!  Some days you will need inspiration and other days you will not!

I could have even added a bit more embellishment to this card, maybe with some pearls or dots or other bling or a little Wink of Stella on the flowers.  But most of the time, simple is plenty good enough!

Try your hand at making an easy card like this one using designer paper, maybe some ribbon, and a greeting.  You will have a beautiful card in minutes!  Here are some similar card design ideas I made with using designer paper (this particular paper just retired, but it’s the idea).

Just be sure you are using Stampin’ Up! supplies because the color coordination is one of the best features of the products.

Shop Stampin’ Up! Online For the Best in Papercrafting Products!

Graduation Card Ideas For 2018

Graduation Cards 2018

Now that my nieces have received their graduation cards, I think it is safe to post these, just in case you are still looking for graduation card ideas for 2018. The three sisters all graduated together – two twins and one graduating a year early!  What a wonderful time in their lives!

You may notice that some of these products I used are now retired, but maybe you already have them or they will just give you some ideas to come up with your own card ideas.  I wanted to kind of keep the cards similar since they were going to three sisters, but I also wanted each to be different.

Obviously I have used the Large Number Dies (retired) but another idea if you have the Large Letters Framelits would be to spell out “GRAD”.  If you don’t have dies or alphabet stamps, you can always use your computer and print what you want on cardstock and use that!

Use what you have!  The balloons come from the Happy Birthday Gorgeous Stamp Set.  The little black graduation cap is simply a black cardstock square with just a hand cut shape of a tassle.  There are fancier styles you can make if you are interested.  The card with the Gold Glimmer Paper is punched with the Star Confetti Punch (retired).  Use whatever appropriate stamp you have for the greeting, whether “Congratulations” or “Best Wishes” or “Good Luck”, etc.

Click HERE to see another graduation card I made last year.

I always say stars and hearts are good for most any occasion so don’t feel you must have a “graduation” stamp set.  A lot of other things will do!  The most important thing is that you make a card from the heart and send your best wishes for their future! Make a graduation card or two to have on hand in case a graduation announcement is on its way to you!

Shop Stampin’ Up! Online Here!

In Color Springtime Impressions Die Cut Butterfly Cards

In Color Springtime Impressions Die Cut Butterfly Card

I think I could have kept on stamping and playing making more cards like these In Color Springtime Impressions Die Cut Butterfly Cards.  These two were fun to make, not to mention, easy! I wanted to try out the butterfly die in the Springtime Impressions Thinlits Dies.  Yesterday I posted a card using the other die in the set, the very flowery corner piece die cut and the one little flower.  Of course all the dies can be combined, also, on a card or project!

Today I started with the new In Color Grapefruit Grove to make a 4 1/4″ x 4 1/4″ card. I stamped the flowers at the bottom of the Grapefruit Grove card using the same color ink with a stamp from the Love What You Do Photopolymer Stamp Set.  I die cut the butterfly from the In Color 6″ x 6″ 2018-2020 Designer Series Paper.   After I had the butterfly ready to place on the card, I decided I would prefer a Whisper White card base and just a layer of Grapefruit Grove.  I’m sure it would have been fine to continue with just the Grapefruit Grove card, but a stamper can change her mind!  I cut off the stamped piece from the rest of the original card and then cut it down a little bit to fit on my Whisper White 4 1/4″ card base.

I mostly just put Snail Adhesive on the middle of the butterfly and a little bit out from the middle, but I wanted the wings to be “free” to look like they could fly!  Then I added a small greeting from the perfect Itty Bitty Greetings Stamp Set.  I think this is a must-have stamp set with such a large number of greetings!!  I didn’t want to cover up my stamped flowers at the bottom of the card very much so this size was perfect.  Then I punched it out with the Classic Label Punch and cut off the one end to align with the edge of the card.

After I made the Grapefruit Grove card, I wanted to see what the butterfly would look like against a piece of the designer paper in the new green, Call Me Clover. I decided it probably needed a bit of white behind it to help it stand out, so I die cut a large oval for a background. It did the trick!  The greeting is also from the Itty Bitty Greetings Stamp Set. I just stamped it on a scrap strip of Whisper White. Then I used the Classic Label Punch to punch a piece of Call Me Clover.  To make it “fit” better under the greeting, I cut it in half and had each end stick out from the greeting.  Nobody can see underneath that it doesn’t go all the way across underneath! And for a final touch, I couldn’t resist using some Faceted Dots on each card!

Both cards are very simple and easy to make! When you get all your In Colors, try making a card for each In Color. Get our your Big Shot and new dies and colors and make some cards like these In Color Springtime Impressions Die Cut Butterfly Cards.

SHOP STAMPIN’ UP! ONLINE!