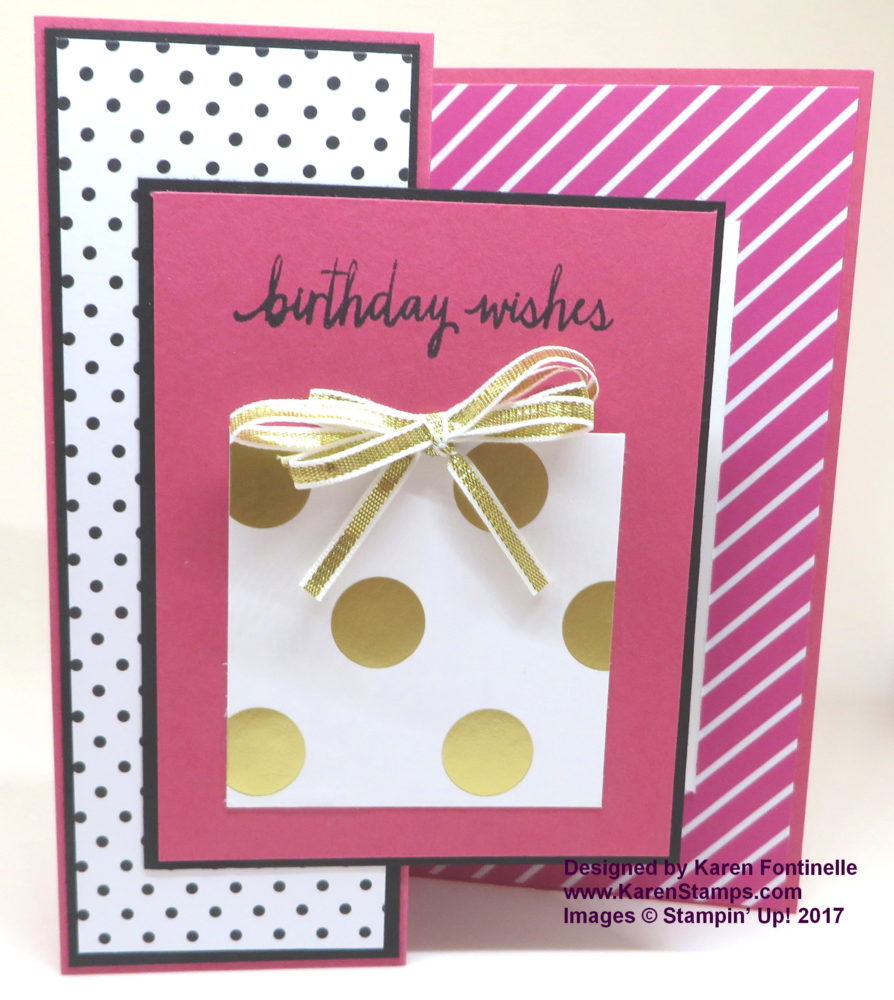
Learn to make a Z-Fold card and everyone will think you are extremely talented, as with this
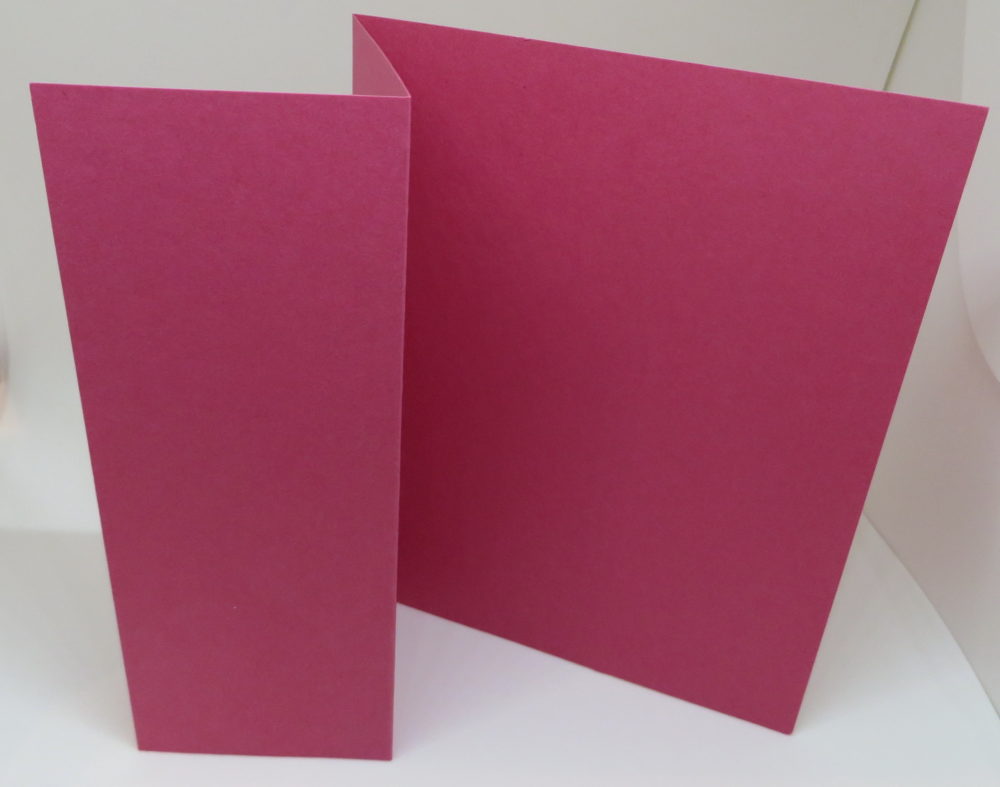
Z- Fold Pop of Pink Birthday Card. The fact that you can make a card with a fancy fold such as this example will really impress, and YOU know that really all you had to do was fold back the front of the card! Look at the photo below!
How to Make a Z-Fold Card
1. Make the usual card base, 8 1/2″ x 5 1/2″, folded in half.
2. Grab the right edge of the front of the card and fold back to the left edge of the card.
3. Embellish!
OR, if you prefer to measure and score, score the front of the card at 2 1/8″ (center of the 4 1/4″ card front) and fold back as in the photo above.
The Pop of Pink Specialty Designer Series Paper and coordinating Washi Tape is on the Retiring List of the outgoing Stampin’ Up! Catalog so grab some while you can! I have always loved the white, pink and black mixed in with some gold, which is why it is called “Specialty” paper. There are two sheets with gold foil, as I used for the birthday present on this card. And the designer paper is ON SALE!
The only “trick” to this card is to make a panel for the front of the card and glue it ONLY to the front z-fold panel. Hold it on the card before you apply adhesive and just make sure you know where to put the glue. Make sure none will extend beyond that front of the card fold or it will also stick to the inside of the card! My panel on this card is 3 1/4″ x 4″ but you can make yours whatever size you like.
Since I decided to put some Pop of Pink Specialty Designer Series Paper on the inside of the card where the greeting would go or note, I had to make a Whisper White panel to go inside. I made it slightly smaller than the front panel and made sure it lined up BEHIND that front panel. When the card is closed completely flat you do not see the white panel on the inside. Now I have space to write or stamp a note or greeting even though I have decorated the card with the designer paper. There also is the back of the card which is plain where you could write more of a note if you wished.
If you want to see another example of a card like this one, check out my Z-Fold Valentine Card HERE. This one is just a slightly different orientation.
Try this z-fold card today and check out the Pop of Pink paper in my Stampin’ Up! Online Store!


Hi Annette, I’m glad my card popped up for you! I’m sure your daughter-in-law will love any card you make for her!
Hi Karen! Was searching for a Z Fold card on Pinterest and up popped this beautiful Pop of Pink DSP card designed by you! Love it and am going to make it for a sweet daughter-in-law!