Category Archives: Birthday

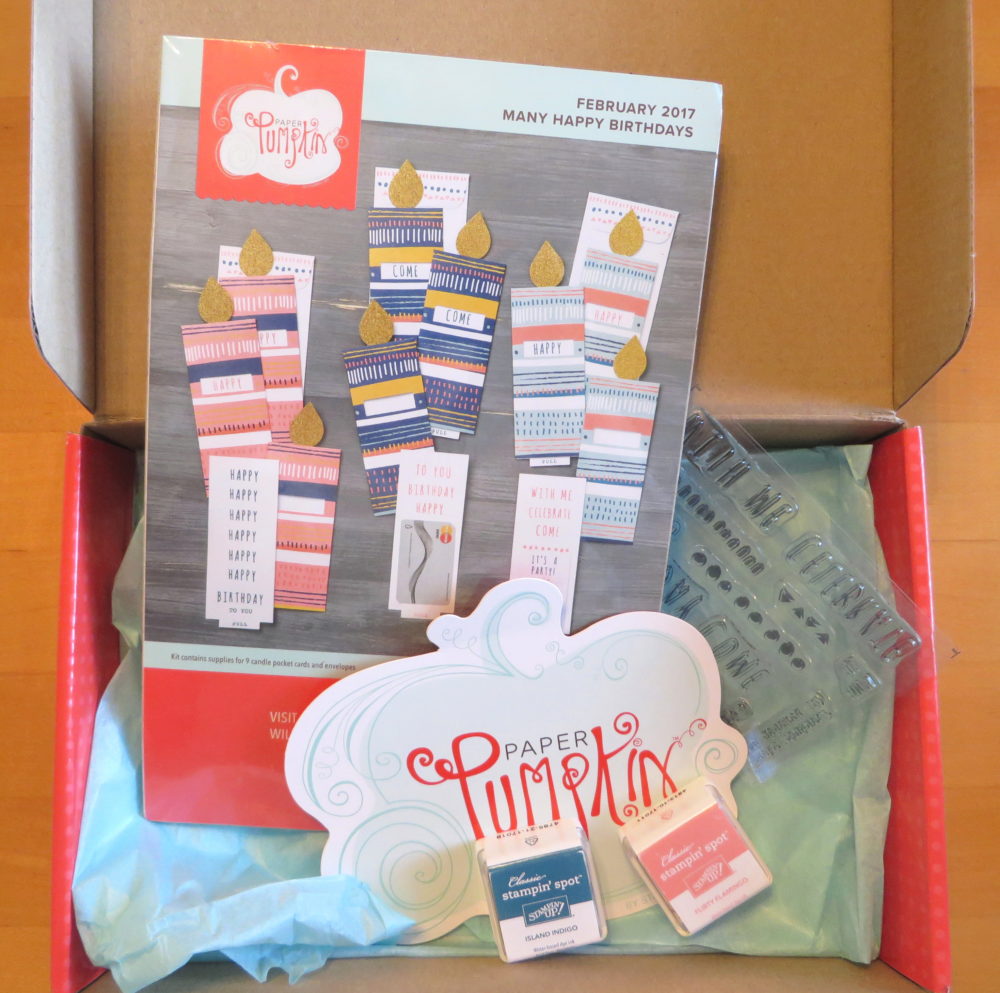
Stampin’ Up! Paper Pumpkin Kit February 2017

Stampin' Up! Paper Pumpkin Kit February 2017

Did you receive this Stampin’ Up! Paper Pumpkin papercrafting kit for February 2017 in your mailbox a few days ago? It has the directions and all the supplies you need to make nine cards, three each of three different designs. It’s a fun design where you pull the bottom tab to read the greetings through the peek-a-boo slot in the front of the card. It’s something different and we can even copy this idea and make more cards like this technique in the future. And if you choose, you can use the same supplies to make some other design of your choosing. There are always lots of alternative ideas for each kit online.

If you did NOT receive this February 2017 Paper Pumpkin Kit in the mail, perhaps you would like to join Paper Pumpkin now so that you WILL receive the March 2017 Paper Pumpkin Kit in your mailbox! And, as soon as you join Paper Pumpkin, you will be eligible to purchase any past kits or refills (just the supplies, not the stamps or ink spots) if there is something you liked in the past.

You have two options with Paper Pumpkin!

During Sale-A-Bration, you can purchase the 3-month Paper Pumpkin option on your Stampin’ Up! order, save $5, and earn a FREE Sale-A-Bration item! (Be forewarned that if you ONLY have this on your order, you will pay $6.95 to have your free product shipped to you….but surely, you want to add some other products to your order to make the shipping worthwhile!)

If adding a Paper Pumpkin subscription to your Stampin’ Up! order puts your order at or above $150, then you will receive Hostess Rewards as well! Even if you have a monthly subscription, you can purchase the Paper Pumpkin subscription on your order and it will use that subscription first before continuing on with your monthly subscription. Let me know if you have questions about this!

Watch this video to see how to assemble the February 2017 Paper Pumpkin Kit. Every month there is a video you can watch if you choose!  And remember, you can use the supplies in the box any way you like, you don’t have to make the exact design!

Go right now to my Paper Pumpkin page to sign up for a monthly subscription to Paper Pumpkin beginning with the March 2017 kit!

Then you won’t forget to do it by March 10th! Or if you prefer, make a note to add it to your next Stampin’ Up! order before March 10th and be sure to set up your account right when you get the email.

Shimmery Heart Die Cut Engagement Card

Shimmery Heart Die Cut Engagement Card

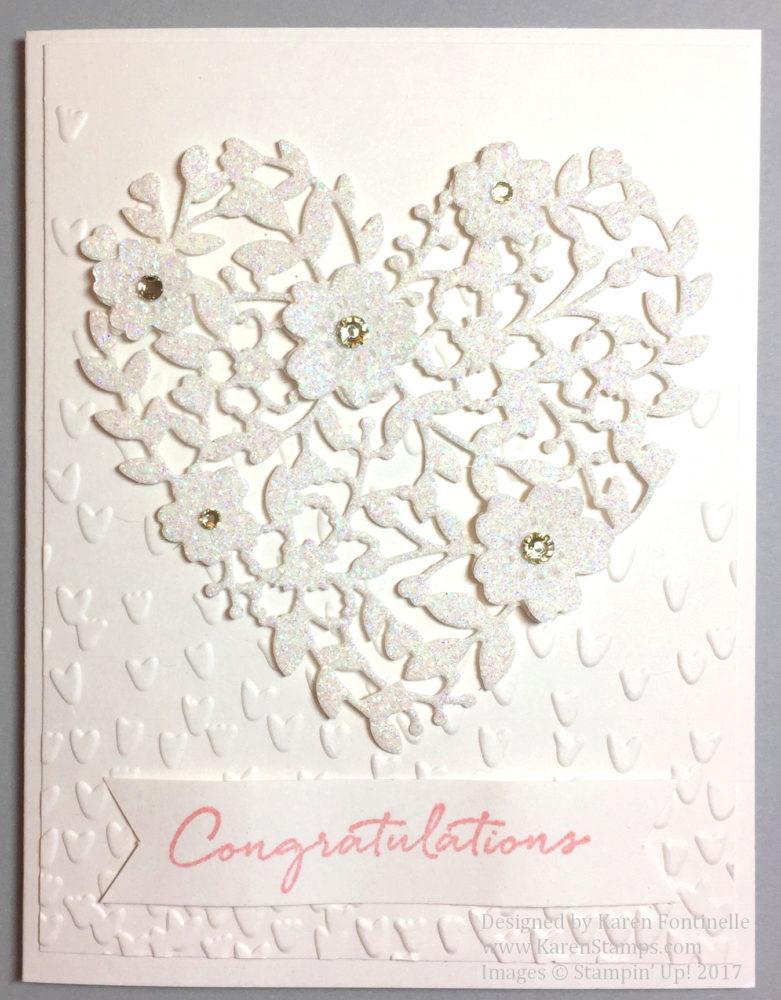
If you need an engagement card for an engagement party, use the Shimmery White Cardstock, which is beautiful in itself, and the gorgeous Bloomin’ Heart Thinlit Dies to make a Shimmery Heart Die Cut Engagement Card. 

Here is how I made the card.  The card base is Shimmery White Cardstock. The next layer is embossed with the Falling Petals Textured Impressions Embossing Folder. To me, this looks like little hearts, but I guess they are meant to be flower petals! It makes it hard to remember the name because I think the folder should be named “heart-something”! But it is a beautiful embossing folder and will be great to use on many, many cards.  The heart and little flowers are die cut with the Bloomin’ Heart Thinlits. It’s best to use the Precision Base Plate with the Big Shot since this is a more intricate die, and be sure to run it through twice, depending on your machine.  And I also highly recommend that you have the Big Shot Die Brush to use to get the little pieces out of the die and the die cut. Then adhere the little flowers on to the heart. I used the Dazzling Diamonds Glimmer Paper for the heart and flowers. And for a little bling, Rhinestone Basic Jewels are always good! The “Congratulations” greeting is from the Floral Phrases Stamp Set.

This card doesn’t photograph well because of the subtle shimmer of the Shimmery White Cardstock and the dazzle from the Dazzling Diamonds Glimmer Paper! In person, it looks very pretty and elegant.  You wouldn’t even have to have the Falling Petals embossed background, the die cut heart is pretty enough by itself on a card. You could even color the glimmer paper with a little reinker and Aqua Painter or brush to add some lightly colored flowers on the heart.  You can see this coloring technique that I did on some punched hearts on this card here on my blog.

They say June is the month for weddings, so maybe you need to start an engagement and wedding stack of cards!  It’s always nice to have some extra cards on hand.  When you make one card and like it, make a couple more of the same while you have the supplies out. You could also make this same card for other occasions, just by changing the greeting or leaving any greeting off. This Shimmery Heart Die Cut Engagement Card is well suited for an engagement card, wedding, birthdays, congratulations and many occasions.

Shop Stampin’ Up! During Sale-A-Bration!

Making a Birthday Card With Easy Adult Coloring

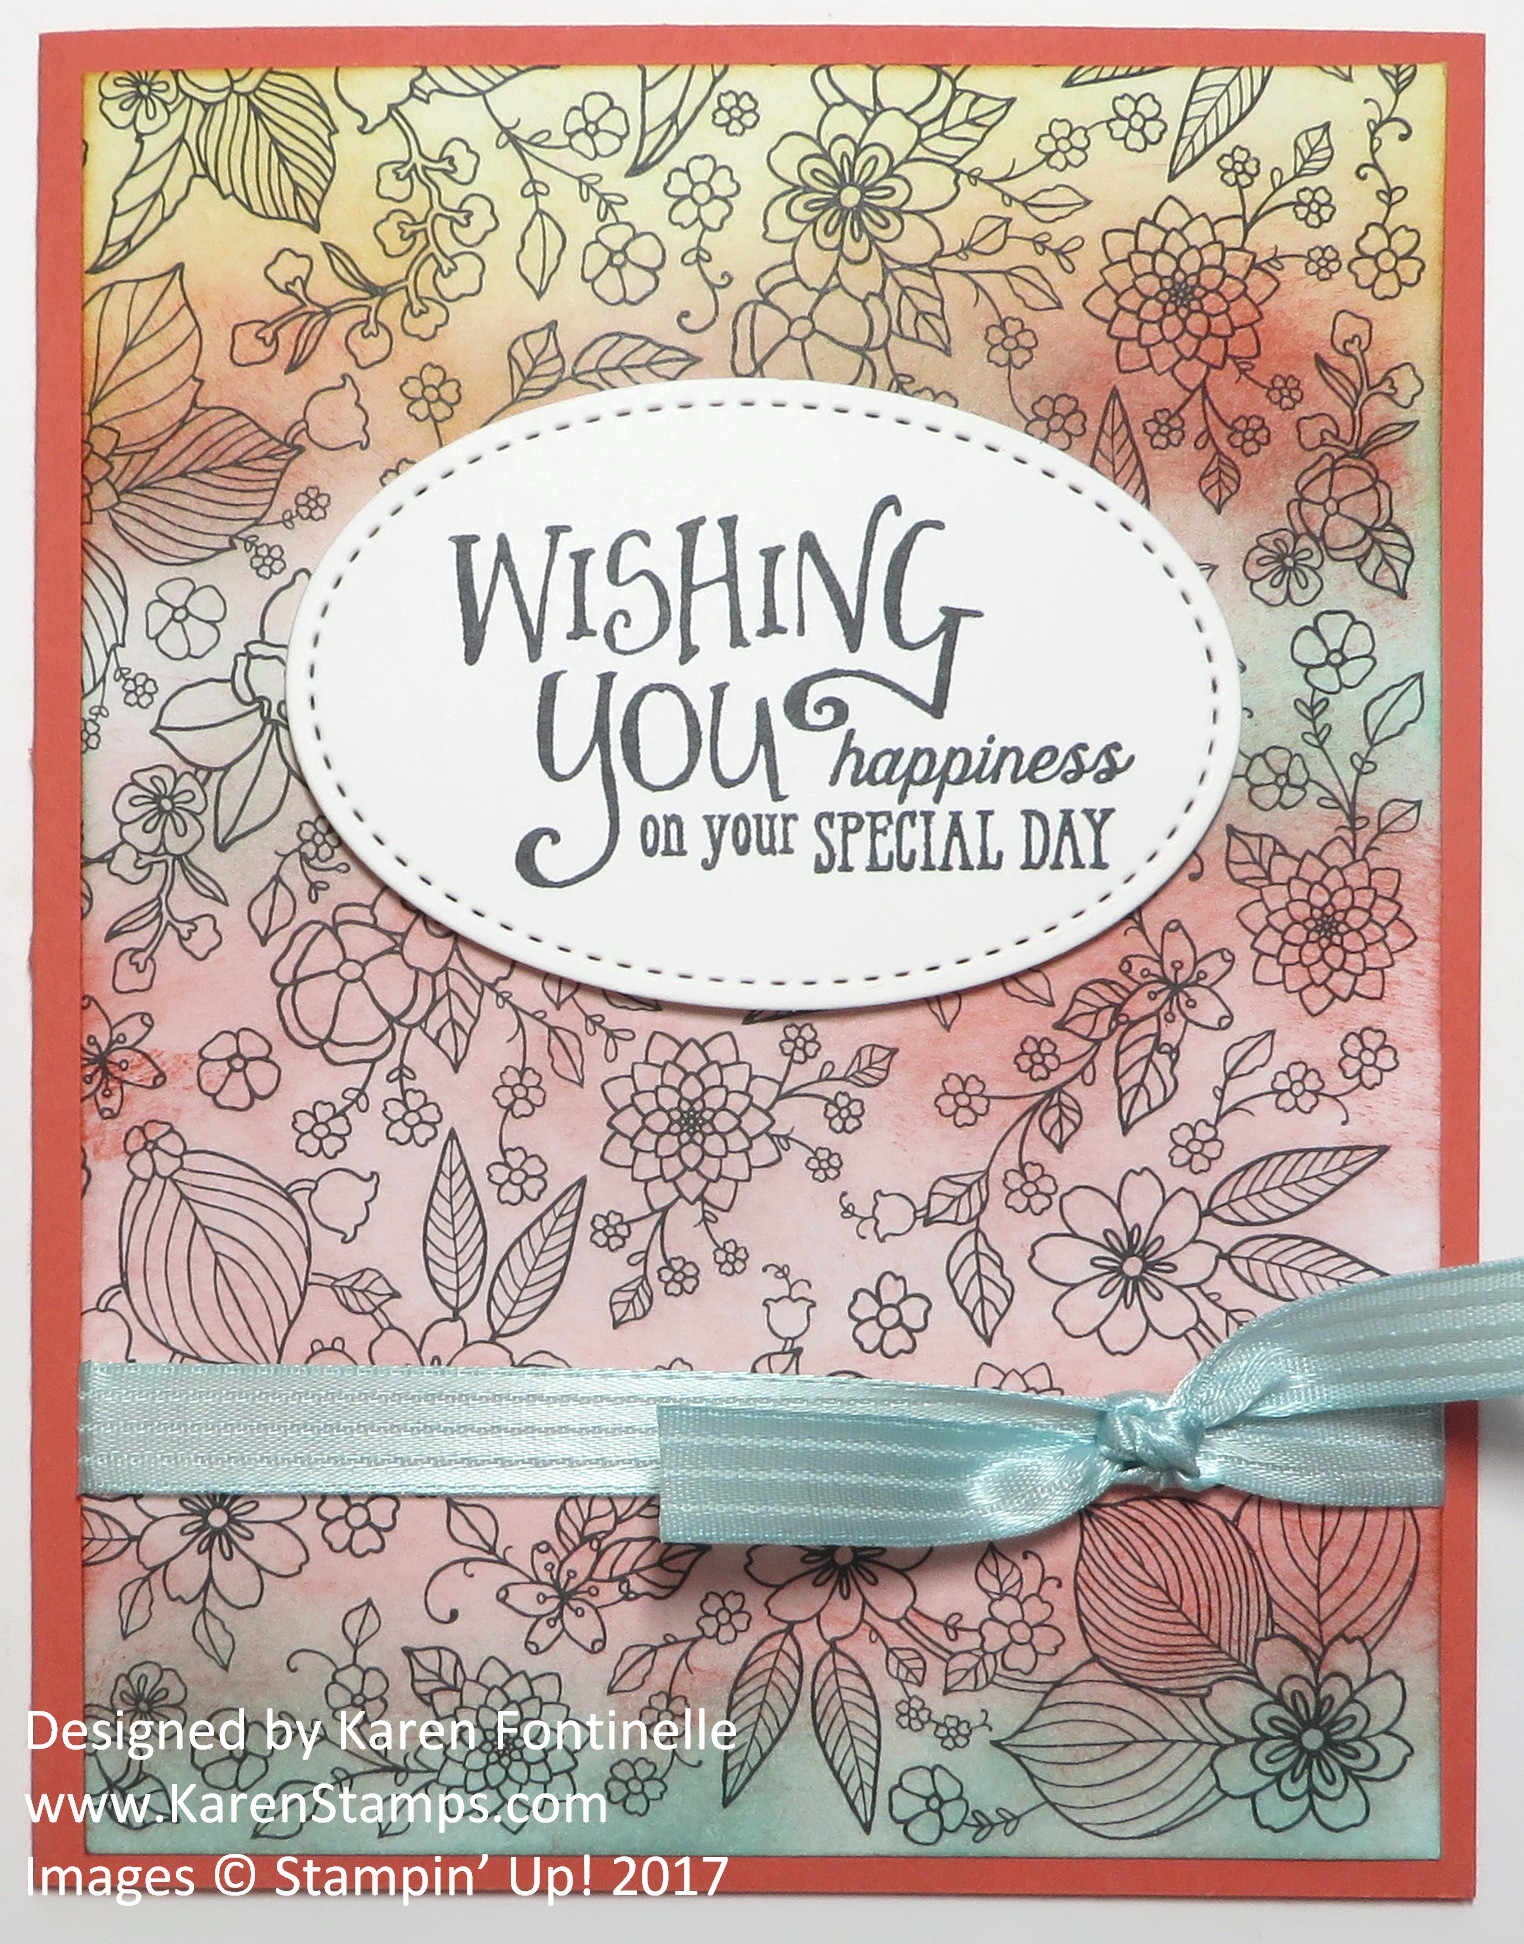
Making a Birthday Card With Easy Adult ColoringMake a birthday card with easy adult coloring using the Inside the Lines Designer Series Paper (143830) during the biggest promotion Stampin’ Up! has, Sale-A-Bration! Sale-A-Bration is in full swing now and we have about another month and a half to go. During Sale-A-Bration with every $50 purchase, you will get to choose a FREE Sale-A-Bration item from the special brochure.  One of the items you can choose is a pack of the Inside the Lines Paper which fits in with the adult coloring trend.  There are different patterns in the package of paper so you can choose what you like. There are many ways to use this paper as well.

At first glance you might think the only way to use this designer paper is to color every single image in the design.  You certainly CAN do that but it might take awhile. However, coloring is supposedly a stress-reliever so it might be good for us to do that on some of the pages!  If you are looking for an easy adult coloring method to make a card, just grab a sponge and color across the card with various colors of ink, or color randomly around on the card.  There is no wrong way.

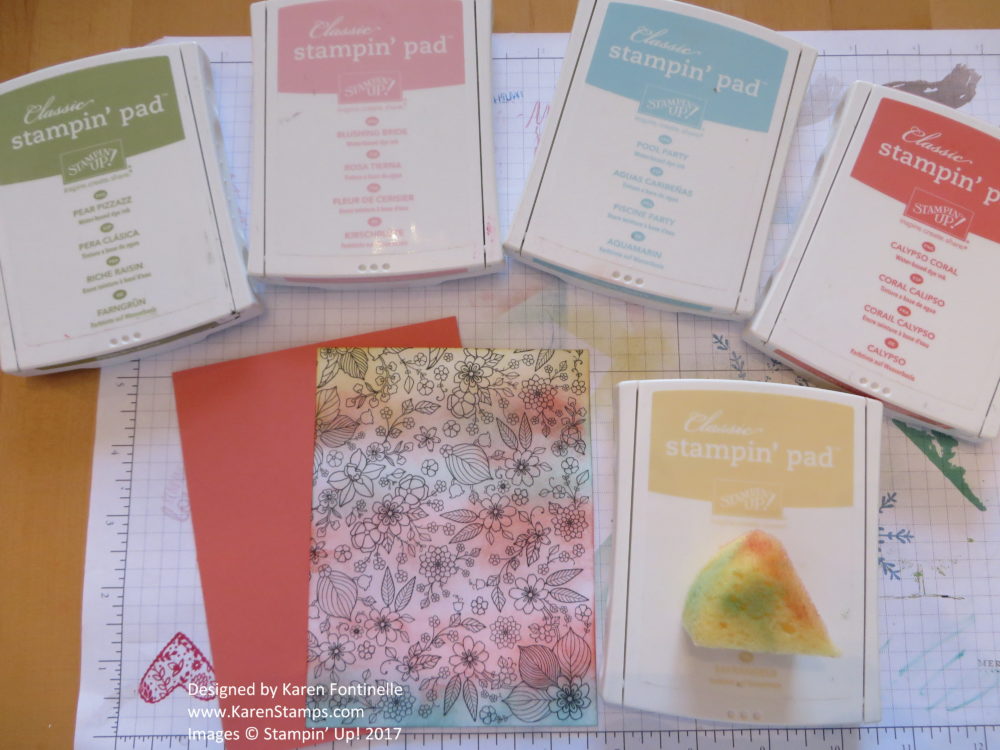
For this card, I started with a Calypso Coral card base. Then I randomly chose five ink colors: Calypso Coral, So Saffron, Blushing Bride, Pool Party and Pear Pizzazz. I started sponging a line of ink going across the card front, the Inside the Lines Designer Series Paper, until I’d used all the inks and filled the card.  I did go back, since the card base was Calypso Coral, and sponged a little of that color in between each of the other colors.  I should have stopped before I did that, but it is okay! No one else is going to look at that card and say, “She never should have sponged that extra Calypso Coral on to the card!”

Inside the Lines Adult Coloring Birthday Card

The greeting is from the Better Together Stamp Setfound in the  Annual Catalog. I die cut that with the oval in the Stitched Shapes Framelits Dies. For an embellishment, I added the Pool Party 3/8″ Stitched Satin Ribbon.

I think my card turned out very pretty and was easy to make, if not a little messy on the fingers! Try the Stamping Sponges and cut them into smaller sized pieces if it suits your purpose. Some stampers have a  quarter or smaller piece of sponge designated for each Stampin’ Up! color. Always start lightly sponging, you can always add more ink.  This way you don’t get the color too dark to begin with.

To see another way to work with this Inside the Lines Designer Paper, check out how I made a card in THIS POST.

With your next $50 Stampin’ Up! order, you might consider choosing the Inside the Lines Designer Series Paper to make projects like this Easy Adult Coloring Birthday Card.

Shop at Stampin’ Up! Online 24/7!

Easy Masculine Birthday Card to Make

Easy Masculine Birthday Card with Serene SceneryFor some reason, we all seem to find it difficult to make a card for the men in our lives, but here is an easy masculine birthday card to make. I think often in the whole crafting world, there is a lot for women but not so much for men. But if we look carefully and think outside the box creatively and often with the help of Stampin’ Up!, we can always find something appropriate for any occasion.

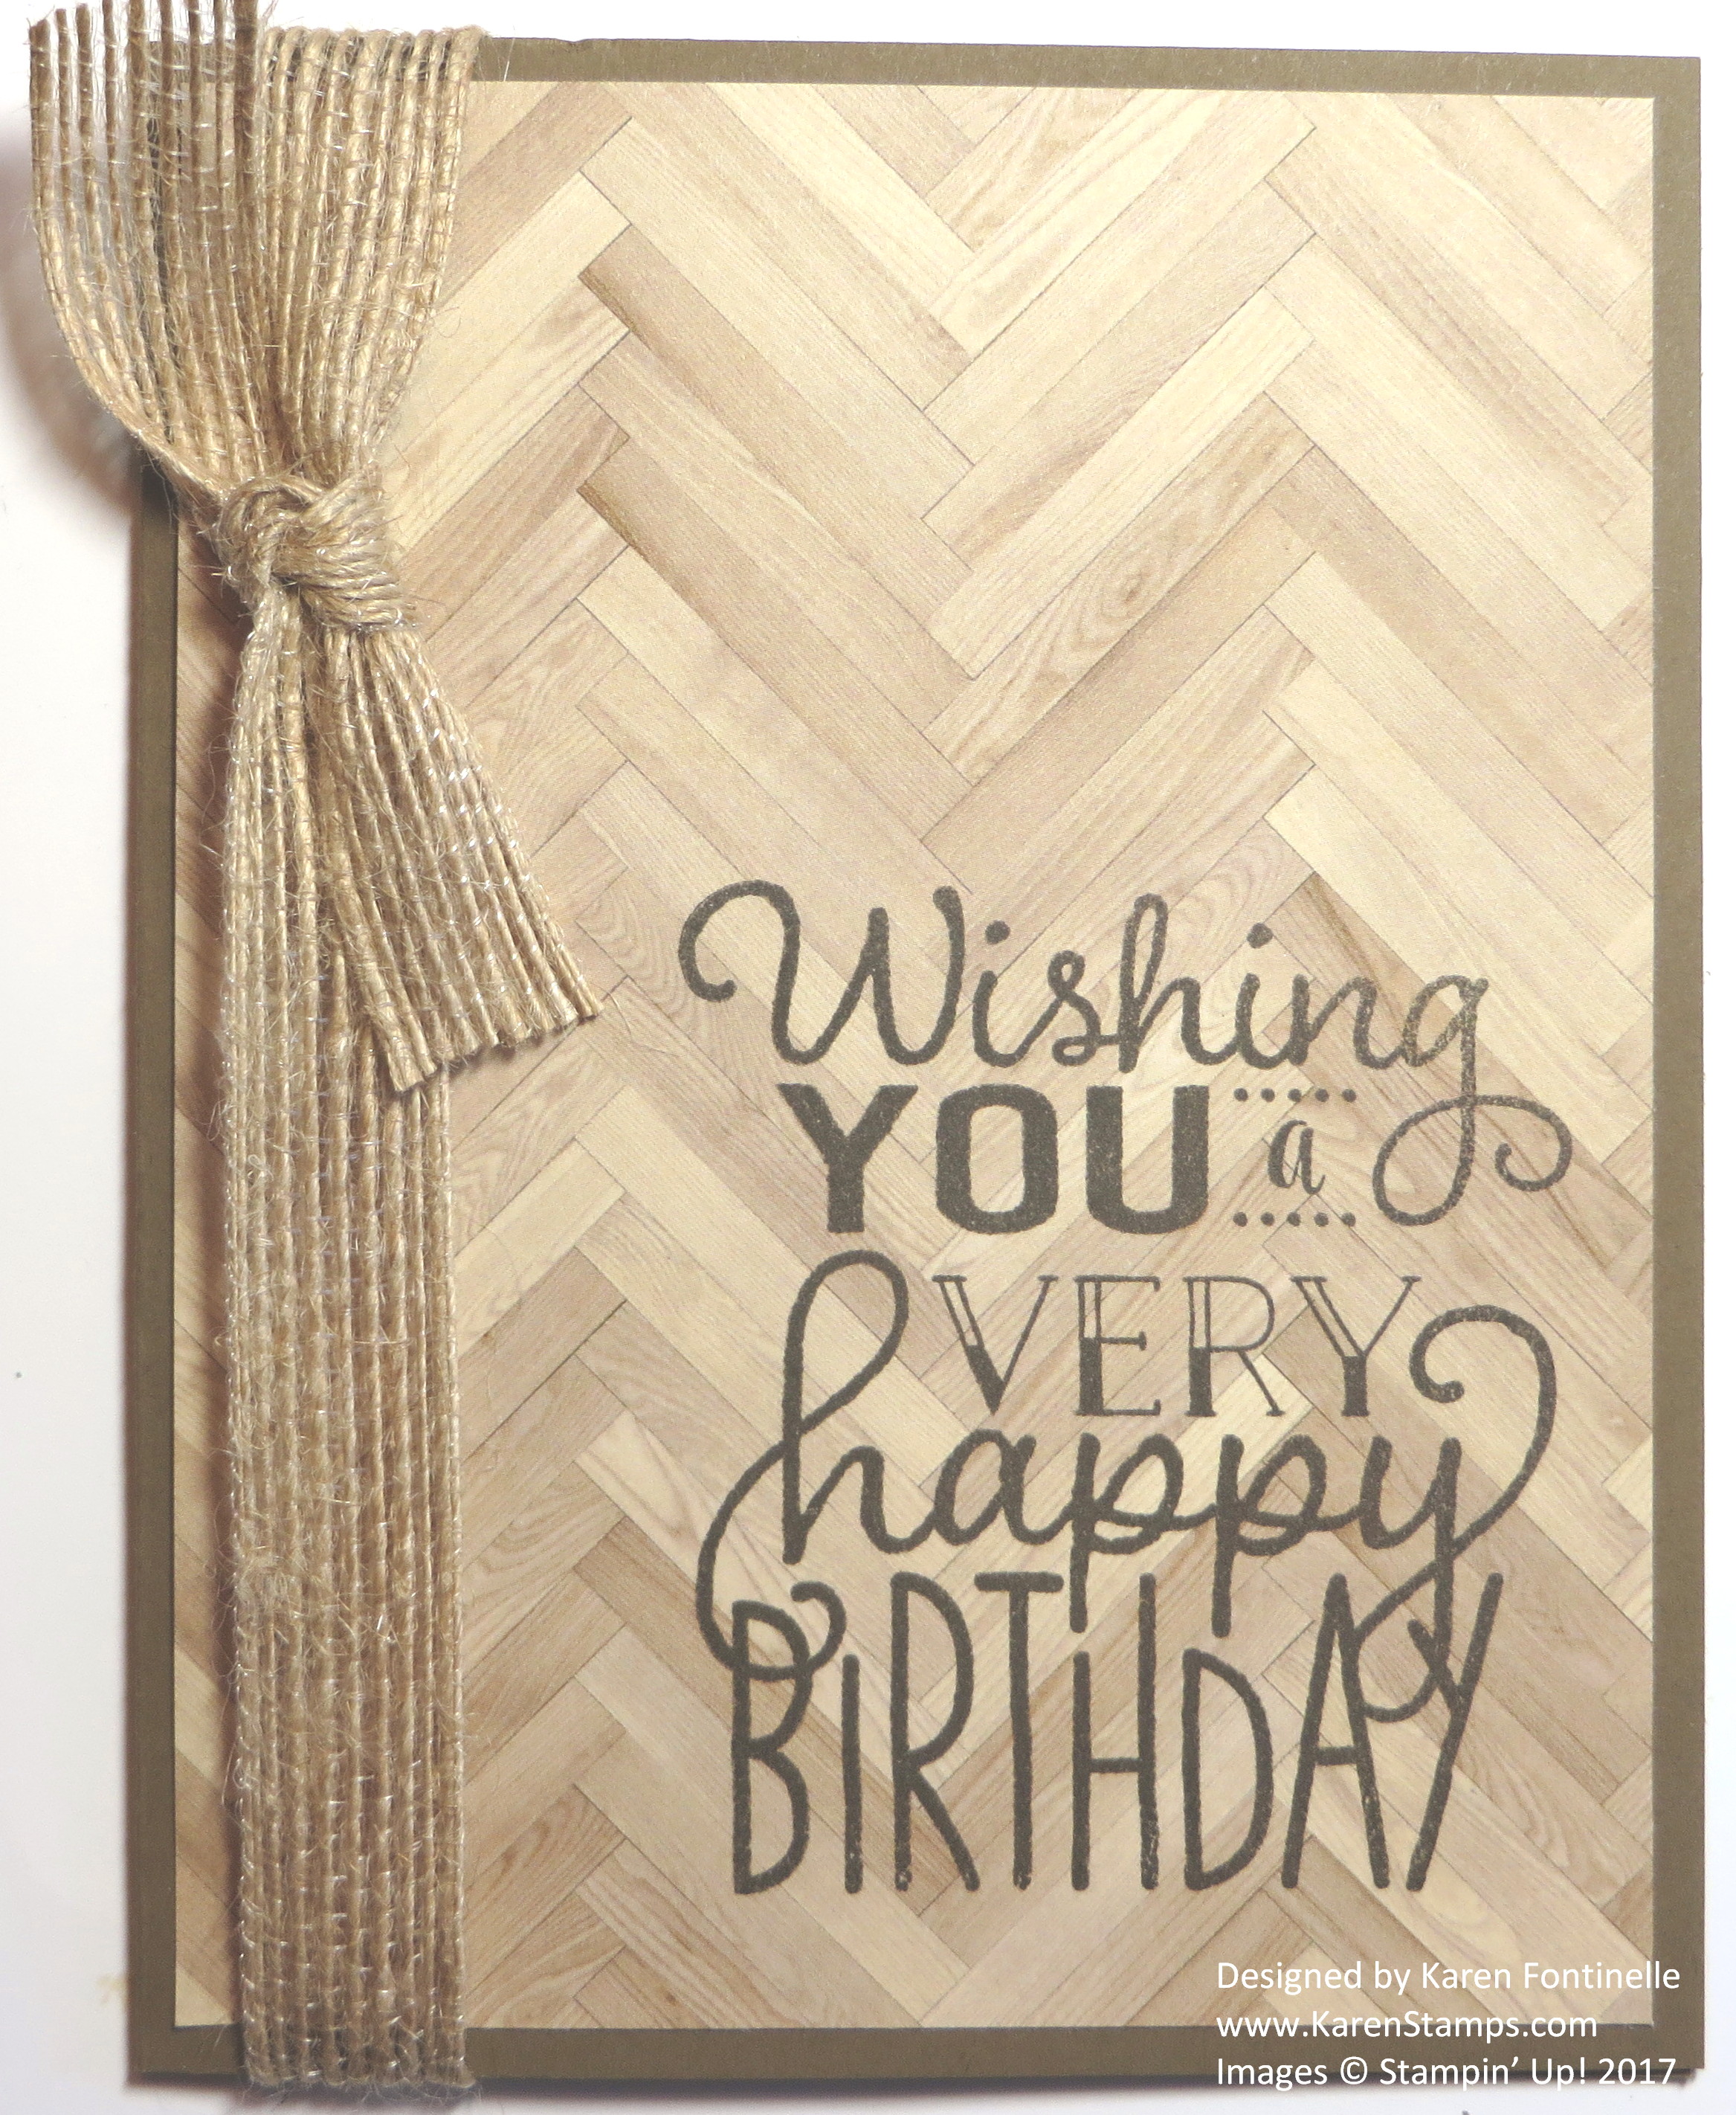
Sometimes an idea just pops into my head, and the other day it was to use the Serene Scenery Designer Series Paper Stack. I find that I often get carried away with the seasonal catalogs, like the recent Holiday Catalog and now the spring/summer Occasions Catalog, and forget all the great products in the Stampin’ Up! Annual Catalog. I paged through the stack of designer paper and choose the pattern that looks like wood strips (it would make a pretty wood floor!) What I wanted to do was make a simple card with designer paper and a bold greeting stamped on the front.

The card base is made with Soft Suede Card Stock, incidentally not one of the coordinating colors with the Serene Scenery paper, but I liked it better with this paper than Crumb Cake. Then I stamped in Early Espresso Ink the birthday greeting from the stamp set Big on Birthdays which is in the Occasions Catalog on page 6. There are so many birthday stamps sets with fabulous greetings to choose from in the Occasions Catalog this year!

To embellish my masculine birthday card, I tied on a piece of 5/8″ Burlap RibbonBurlap is not just for masculine cards and projects at all. It’s a very thin and loose weave ribbon, not big and bulky like you might think of burlap ribbon. It’s very nice and I think something everyone should have in their stash for certain cards and other projects.

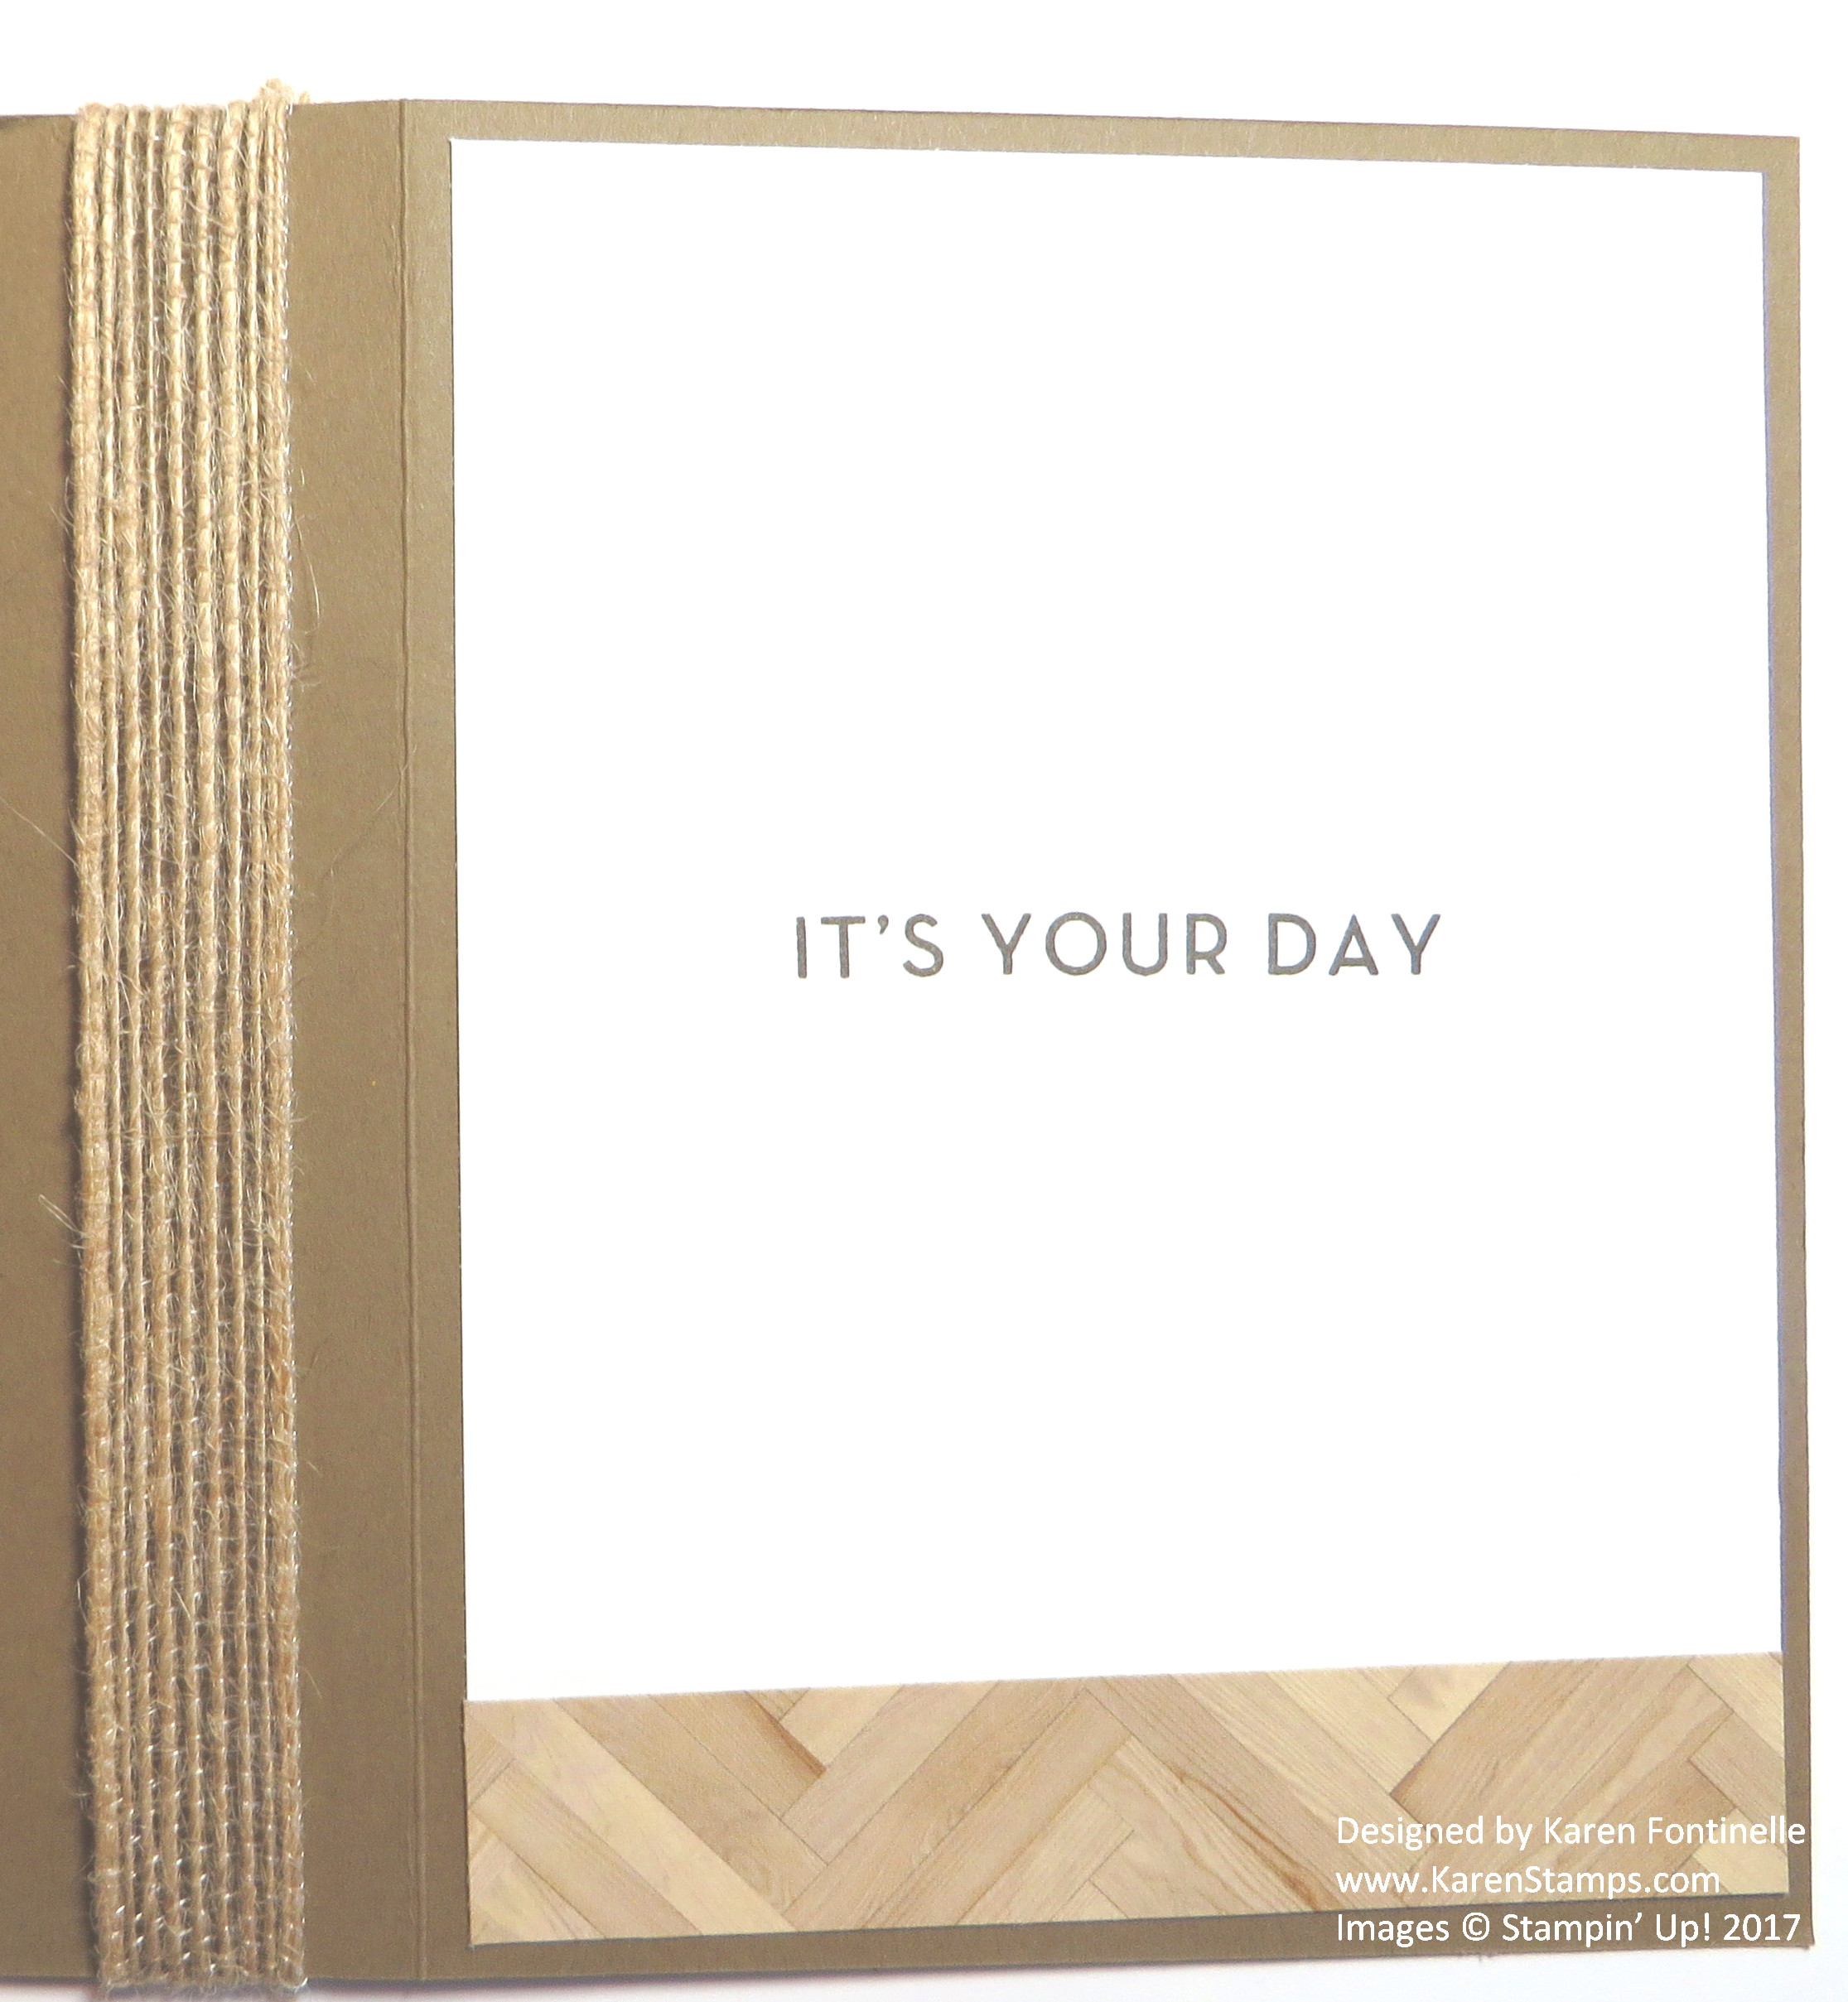
Often we don’t show the inside of cards, usually just stamping a greeting or writing a note inside is all that is required and is personal to your recipient. Since I was using Soft Suede, I added a piece of Whisper White cardstock inside, stamped another greeting from the same Big on Birthdays Stamp Set. Since I had a strip of the patterned paper left over, I just added it to the bottom of the inside piece of cardstock. Often it works to turn the paper over and show the pattern on the other side of the paper!

Easy Masculine Birthday Card with Serene Scenery Inside

Put this Serene Scenery Designer Series Paper Stack on your list to order and choose a stamp set you like in the Occasions Catalog for birthdays or whatever occasion you are looking for. If you don’t have lots of cardstock colors, you hecan make an easy decision by choosing the Serene Scenery pack of cardstock which contains Crumb Cake, Pool Party and the Whisper White Thick Cardstock. That will at least get you started! Maybe choose some ribbon or embellishments you like, extra paper, and probably you will get up to $50. Then choose something for FREE from the Sale-A-Bration Brochure!  We always like “free”! You’ll be all set to make some easy masculine birthday cards or other occasions.

Shop Stampin’ Up! Online HERE!

Stylish Stems Cutout Die Birthday Card

Stylish Stems Cutout Die Birthday Card

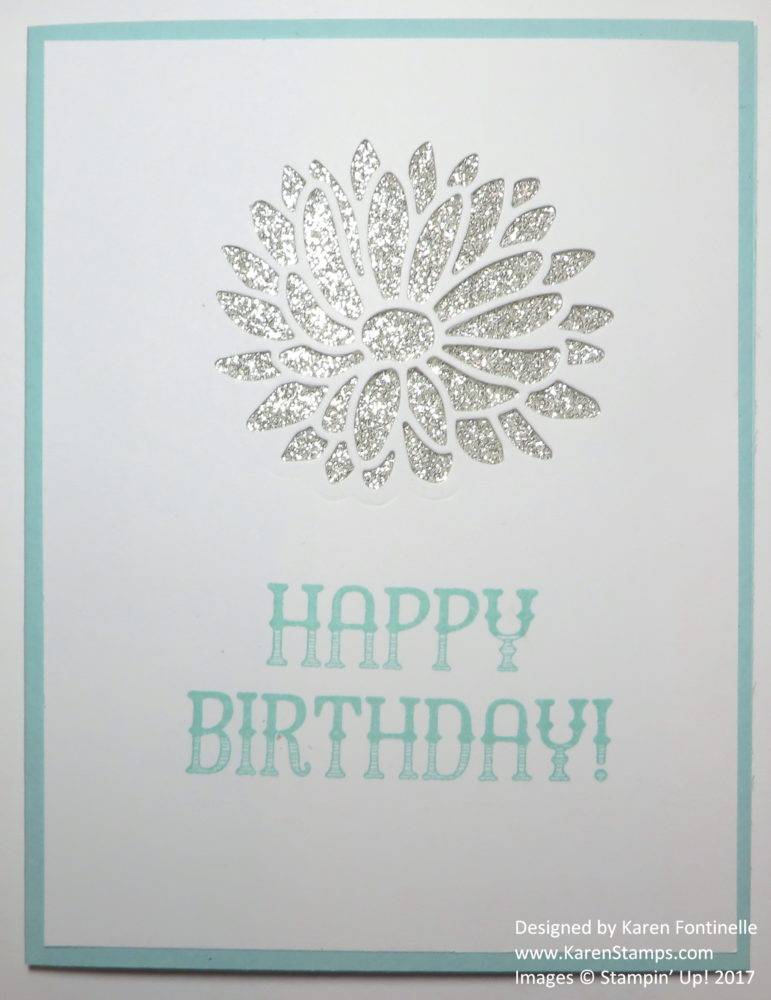
I saw a card like this one and immediately thought I needed to make one like it, a Stylish Stems Cutout Die Birthday Card.  I used a Pool Party card base with a Whisper White layer die cut with a flower die with a glimmer paper behind it. I love the simplicity and elegance of the card, and it has tons of possibilities! I want to make more!

Just think!  Using this basic card idea, you could make a card for almost any occasion! Die cut the flower, put some contrasting paper behind it, and stamp a greeting! So simple and so easy! I was going to make the card white on white like the sample I saw online, but decided to add some color with the Pool Party cardstock. To make the flower I just used my Big Shot and the Stylish Stems Framelits DiesThese dies are special because the large flower die just cuts out the flower pieces as you see on the card above. If you want to die cut the whole flower to use elsewhere, then you can add the shape around it to die cut it. I just adhered a piece of Silver Glimmer Paper behind the die cut flower for some pizzazz!  The greeting is from the Window Shopping Stamp Set.

There is a coordinating stamp set, Special Reason, to use with these dies. If you want to save 10%, the Special Reason Bundle comes with both the stamp set and the framelits dies. I’m sure you will want both sets to make beautiful cards and projects.

Check out the Stampin’ Up! video below to see how to use this stamp set and framelits dies!

And don’t forget……Sale-A-Bration is going on!  For each $50 you spend at Stampin’ Up!, you get to choose a FREE product in the Sale-A-Bration Brochure!

Shop Stampin’ Up! Online HERE!

Quick and Easy Party Animal Birthday Card

Quick and Easy Party Animal Birthday Card

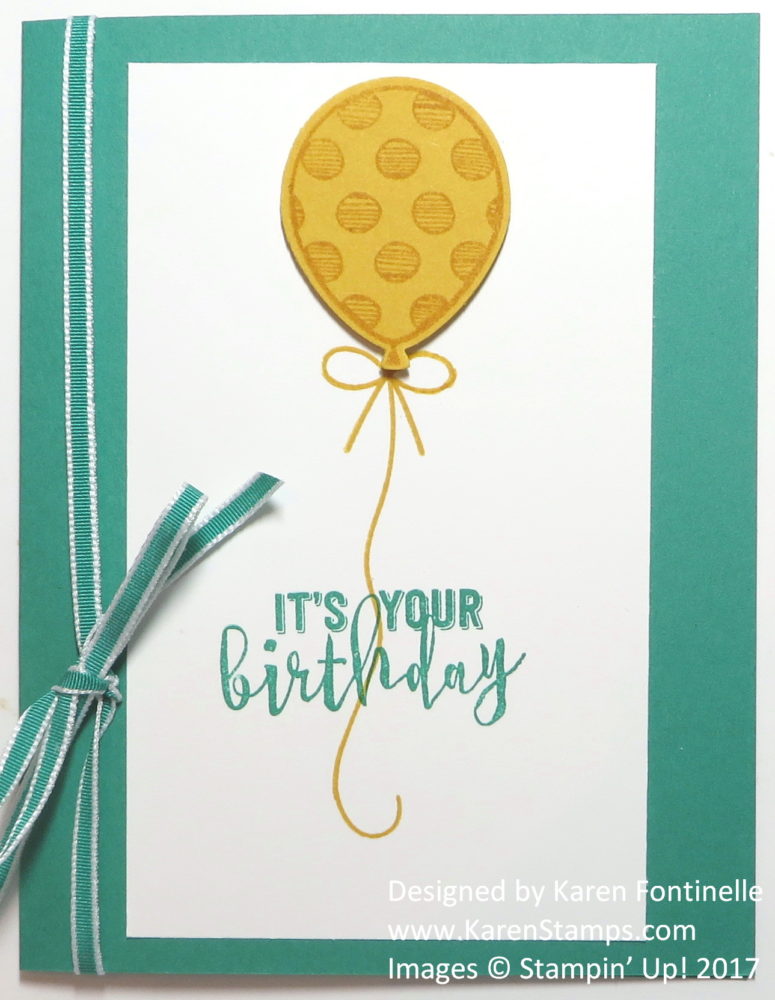
When in doubt, refer to the Stampin’ Up! catalogs for an idea to make a card, like this Quick & Easy Party Animal Birthday Card that I copied directly from the new Occasions Catalog! I got my order of MORE things from the Occasions Catalog the other night but haven’t had time to play yet so I felt overwhelmed at all the possibilities! When you need ideas, one place to head is to look at the samples of the stamp set that you perhaps want to use. Of course in the Party Animal Suite in the Occasions Catalog on pages 4-5, there are tons of samples on page 4.  I chose to start with the Quick & Easy card down in the corner, just to see if it was indeed “quick & easy” …… and it was! If, like in cooking, I had all my materials right at my fingertips instead of spread around the house due to Christmas decorating (which isn’t totally undone yet!), it indeed would have probably only taken me ten minutes or less!  As it was, maybe it took 15-20 minutes.

To make this card, I used a Emerald Envy Cardstock card base. The Whisper White layer for the panel is cut smaller than usual, 3″ x 5″. First I stamped the polka dot balloon from the Balloon Adventures Stamp Set in the Occasions Catalog. I stamped it with Crushed Curry Ink on Crushed Curry cardstock. Then I punched it out with the Balloon Bouquet Punch. Once you have the balloon punched out, you can place it on the Whisper White panel to see where to stamp your balloon string and bow (but pick up the balloon while you do your string and bow stamping!). The balloon can cover up the top part of the string. Then adhere the balloon with a couple of Stampin’ Dimensionals. Stamp the greeting from the same set with Emerald Envy ink.

Now the sample in the catalog also has some stamped squiggles on the green card base on the sides of the white layer that I didn’t see at first, so my card was even quicker and easier!  Wrap some of the new Emerald Envy 1/8″ Taffeta Ribbon around the card front. A quick & easy birthday card made in minutes! Make a bunch maybe in different colors and you will be set for at least a few birthdays that will be coming up!

Check out the new Stampin’ Up! Occasions Catalog HERE!

If you are interested in ordering Stampin’ Up! products and need copies of the catalogs, please email me at Karen@KarenStamps.com with your contact information.

Remember Sale-A-Bration is going on! With every $50 you spend, you choose one FREE item from the special Sale-A-Bration Brochure!

Sale-A-Bration Catalog 2017

Click HERE!  Free items are marked with the pink hot air balloons!

One More Day Until the Occasions Catalog and Sale-A-Bration!

Today is the last day for some things at Stampin’ Up! and tomorrow, January 4, 2017, is the first day for some things, namely the new Stampin’ Up! Occasions Catalog and the first day of the annual promotion called Sale-A-Bration!

In case you need help with choosing new products from the Occasions Catalog, you might enjoy watching some of these Stampin’ Up! videos! I know I want everything when I see the videos of the new products!

See the fun ways to use the Balloon Adventure Stamp Set, Balloon Bouquet Punch, and Balloon Pop-Up Thinlits.

And wait until you see this beautiful So in Love Stamp Set and So Detailed Thinlits Dies! Perfect for making wedding cards or any elegant card or project!

Here’s a new look from the new Happy Celebrations Stamp Set and Celebrations Duo Textured Impressions Embossing Folder.

And something I think everyone should put on their first order, the new Watercolor Pencils in Stampin’ Up! colors!
s

Check out the Year-End Closeouts Sale today before it comes to an end. Otherwise, wait until tomorrow, January 4, 2017 to order and take advantage of the Sale-A-Bration promotion where for every $50 you spend on Stampin’ Up! products, you get to choose one free item from the Sale-A-Bration brochure.

The new Occasions Catalog and Sale-A-Bration Brochure will both be online tomorrow when they go live, if you did not receive a catalog in the mail.  If you are interested in Stampin’ Up! products and don’t already have a Demonstrator you are working with and would like beautiful hard copies of the new catalogs, please email me with your contact information and I will mail them out to you.

Shop Stampin’ Up!

Star Wars Inspiration BB8 Punch Art Handmade Birthday Card

Star Wars Inspiration BB8 Punch Art Handmade Birthday Card

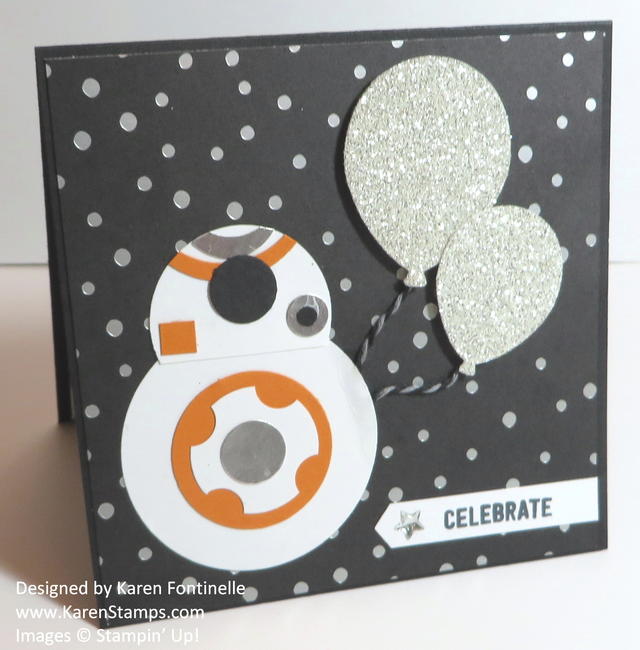
A few weeks ago I came up with this Star Wars Inspiration BB8 Punch Art Handmade Birthday Card  for my son-in-law’s birthday and I liked it so much I made another one for my son’s birthday a few days later. By now they both have received their cards in the mail so it’s safe to show it on my blog!

When you have a Star Wars fan in the family (who even appreciates your handmade cards), you just have to come up with a new idea for each birthday or occasion. After searching the internet of course, I came up with this card of BB8, one of the characters in the Star Wars movie that came out last year. The background paper is the foil embossed paper in the Halloween Night Specialty Designer Series Paper.  I think it is perfect for this card. To make BB8 I used several circle punches. I probably used the 1 3/4″ Circle Punch for the lower body, maybe the 1 3/8″ Circle Punch for the upper body, and then smaller punches for all the details.  I’m sure you can try the punches you have and see what fits on your card the way you want it!  Of course the birthday balloons are punched with the Balloon Bouquet Punch and punched out of Silver Glimmer Paper. The greeting piece is punched with the Classic Label Punch and I added a silver star from the Metallic Enamel Shapes.  

I love these Enamel Shapes and ordered the Bundle of all of them yesterday on the 24-Hour Flash Sale on the Online Extravaganza.  You missed that but you can still add them (not discounted) to your Online Extravaganza order any day this week until November 28! Don’t miss out on anything else!  And be ready for the Flash Sale on the last day, Monday November 28!

Shop Stampin’ Up! and the Online Extravaganza!


Gift Wrap Ideas With Cellophane Bags


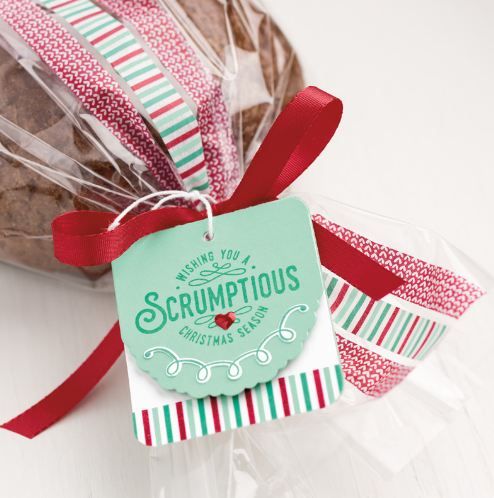
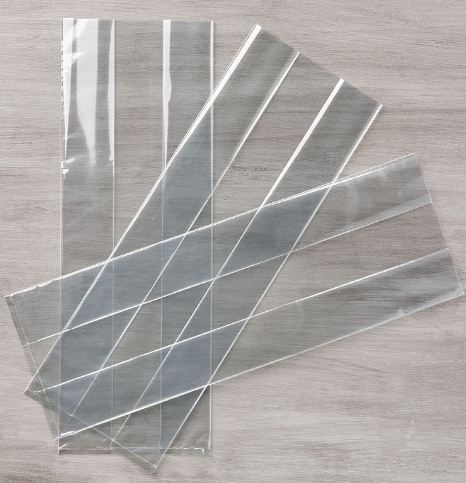
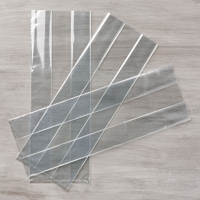
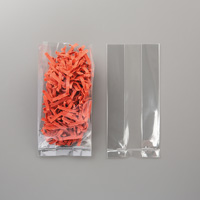
Enjoy this video from Stampin’ Up! and get wonderful gift wrap ideas and maybe just gift ideas themselves using the 6″ x 17″ Gusseted Cellophane Bags.  These are pretty large bags, given the 17″ length, so you can stick a large gift or treat inside! Think about when you are ready to make special treats for the neighbors or a group of friends, wouldn’t these bags be perfect to use for your holiday mix, special bread or cake, bag of cookies or candy, bottle of wine, and more? Just put your gift inside,  tie with a pretty ribbon and add a cute tag! If you don’t want the bag quite so long for a smaller gift, just cut off some of the length.

For another gift presentation when you want the gift to be hidden, just wrap pretty tissue paper all around the gift and insert it in the cello bag! You can also stamp on the outside of the bag if you use Stazon ink.

Remember, presentation is everything!! No matter what the gift, a big part of the thrill will be how you wrap and present the gift, and we stampers have all kinds of materials and ideas to make that the best part!

6x17 Cellophane Bag Gift Wrap

6x17 Cellophane Bags

Stampin’ Up! also carries other sizes of cellophane bags. These are nice bags, completely clear and crisp, not that kind of thick, cloudy, cheaper looking kind of bag you can sometimes buy at other places.

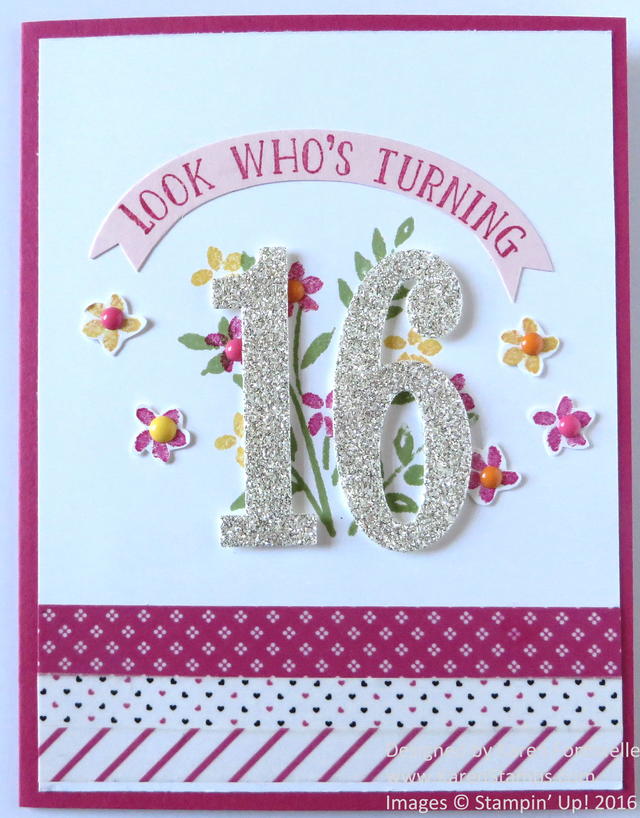
Sweet 16 Birthday Card for a Girl

Sweet 16 Birthday Card

Recently I needed a birthday card for my niece turning 16, not that I can believe that little girl is 16 years old already, but I came up with this Sweet 16 Birthday Card for her. You could modify the background stamping for a boy and maybe not use the Glimmer paper.

The card base is Melon Mambo with a layer of Whisper White. I die cut the numbers with the Big Shot and the Large Numbers Framelits Dies.  The background is stamped with the stems and flowers from the Number of Years Photopolymer Stamp Set. I did cut out a few flowers for a more 3D effect. And I loved adding the little Enamel Dots to the flowers!

The greeting is stamped from the set and then I used two Oval Framelits to cut the curved banner shape.  I accented the bottom of the card with strips of Pop of Pink Designer Washi Tape. It’s so fun to play with washi tape!

Stampin’ Up! Updates!

  • We are happy to announce that we are bringing back the replacement Stampin’ Trimmer Cutting Mats and Scoring Blades. These items will be available for you  to start ordering today.Stampin’ Trimmer Replacement Cutting Mat (item 131375); $4.00 US

       Stampin’ Trimmer Scoring Blades (item 126996); $5.00 US

We came to this decision by taking another look at the overall strategy of the Stampin’ Trimmer and its supporting pieces, and we were able to work out issues with our supplier to be able to offer these items to you. Keep in mind that the cutting blade that comes with the Stampin’ Trimmer does not make contact with the cutting mat so it should not wear it down. Like the cutting mat, the scoring blade is made to last and will not wear out. These replacement items may be helpful for you if you lose a piece or prefer to have extras on hand.

  • Handheld Stapler Being DiscontinuedDue to supplier issues outside of our control, the Handheld Stapler (item 139083) and coordinating Silver Mini Staples (item 135847) will be discontinued after our current inventory runs out. We apologize for any inconvenience.

I LOVE my Stapler!  If you want one, be sure to order one right away.

Shop Stampin’ Up! Online 24/7 HERE!


Flourish Thinlits Fall Leaves Birthday Card

Flourish Thinlits Fall Leaves Birthday Card

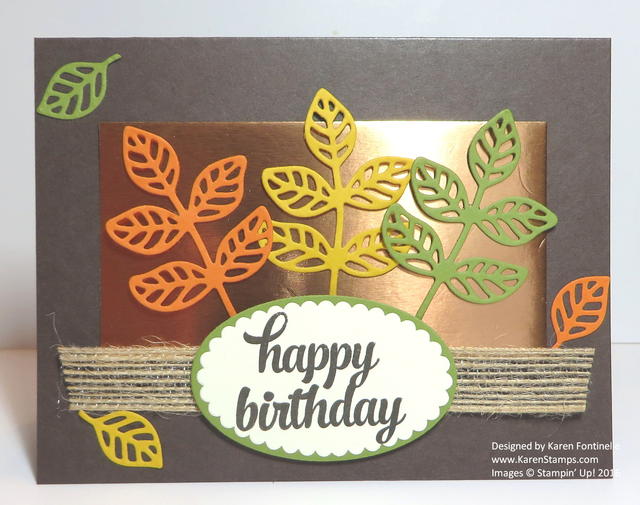
My Flourish Thinlits Fall Leaves Birthday Card was copied with a few changes from a sample in the Stampin’ Up! Annual Catalog. I was looking for a card idea for my husband’s birthday, and this one seemed to fill the bill!  Even though it is still so miserably hot here in Houston, I know my husband loves the colors of fall leaves and perhaps this card would make him believe that cooler temperatures will eventually come!  Probably not for the first day of fall this week, though!  And wow, do these Flourish Thinlits make beautiful diecuts!

The card base is Early Espresso card stock. I’m not sure what Stampin’ Up! used in their sample, but I chose the Copper Foil SheetsI cut a piece of the foil for the background for the leaves. The Copper Foil is beautiful and comes packaged with chipboard covering both sides of the foil so that nothing can scratch it.  You do need to be a little careful working with it. But if you order it, don’t think Stampin’ Up! sent you an empty package!  Look inside!!

For the leaves, I chose Pumpkin Pie, Old Olive and Crushed Curry cardstock. As long as I was die cutting, I decided to make the cute little individual leaves also, in case I wanted to use them on my card.  The greeting is from Tin of Cards Photopolymer Stamp Set and layered with the Layering Ovals Framelits Dies, which are discounted this week on the Special Offers through Wednesday, September 21. For some extra texture and embellishment, I used a piece of 5/8″ Burlap Ribbon.

On the inside of the card, I adhered a layer of Very Vanilla since the Early Espresso is so dark and adhered one of the small single leaves. Sometimes it is fun to put a strip of designer paper or stamp something on the inside of the card.

Don’t miss these Flourish Thinlits Dies in the main catalog!  You get lots of pieces and they all will make beautiful die cuts as you can see here on this Flourish Thinlits Fall Leaves Birthday Card.

Shop Stampin’ Up! Online 24/7!

The Perfect Card For Any Harry Potter Fan!

Harry Potter Card Celebrating New Book

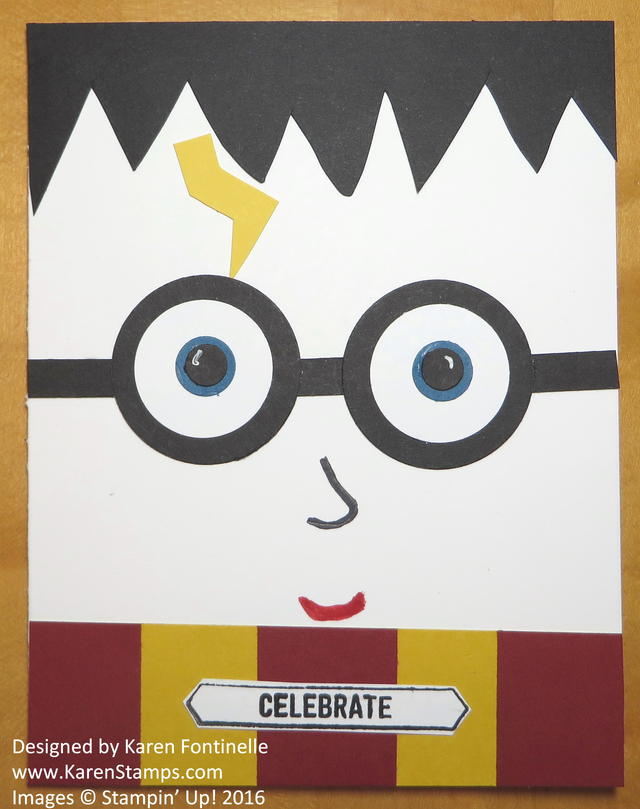
Are you a Harry Potter fan? On July 31, 2016 the new Harry Potter book, “Harry Potter and the Cursed Child,” by J.K. Rowling will be released. To commemorate that and to celebrate Harry Potter’s birthday I made this Harry Potter card.

Not that I came up with the design myself, but I found several samples online and came up with this card for Harry Potter fans.  The card base is made with Whisper White Thick Cardstock and the scarf is made with a strip of Crushed Curry with pieces of Cherry Cobbler adhered to it. The hair is just cut by hand (reminded me of cutting Frankenstein’s hair at Halloween!). The glasses are made with black punched circles with smaller white circles inside and then small circles from the Owl Punch for the eyeballs. Always put a little dab of white on the eyeballs with a white gel pen or the White Stampin’ Chalk Marker for that reflection of light.

The little “Celebrate” greeting is from the Thoughtful Banners Stamp SetThere is a coordinating punch, the Classic Label Punchbut I just cut out the banner by hand.

Easy card to make really and fun for the occasion of a new Harry Potter book and Harry Potter birthday!

If you are a Harry Potter Fan, I hope you enjoy the new book being released, “Harry Potter and the Cursed Child.” 

Need any supplies to make a card like this?  Just check out the Stampin’ Up! Online Store HERE!  Stampin’ Up! has the best stamps, ink, paper and accessories for all your creative needs!

Shop Stampin’ Up!

A Birthday Card with Sweet Cupcake

Birthday Card with Sweet Cupcake Stamp Set

Once you start playing with the Sweet Cupcake Stamp Set you will find so many possibilities with this stamp set and even more with the coordinating Cupcake Cutouts Framelits Dies. Buy these two products together in the Sweet Cupcake Photopolymer Bundle and save 10%, but most importantly, you will have all these tools to make great cards and other projects!

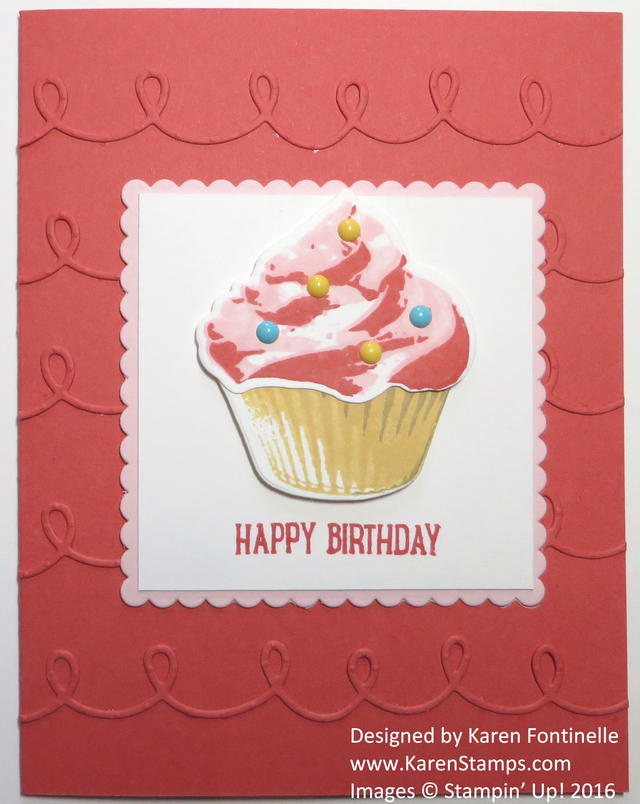
For this card, like yesterday’s card, I used Watermelon Wonder Cardstock for the card base. Then I die cut five squiggles with the Big Shot from the Cupcake Cutouts dies, also out of Watermelon Wonder, just to add a little texture to the background.  I love those squiggles! They are probably the reason I bought the framelits! To adhere them, I just used tiny dots of Multipurpose Liquid Glue. I like to use the Silicone Craft Sheet underneath any narrow pieces like the squiggles so that I don’t get glue on my Grid Paper where I am working on the whole card, and the glue can be wiped off the Silicone Craft Sheet.

I stamped the cupcake the same way I did in yesterday’s post using Pink Pirouette and Watermelon Wonder ink for the frosting and So Saffron and Crumb Cake for the cupcake bottom (or wrapper). I die cut this cupcake and popped it up with Stampin’ Dimensionals.  For some extra pizzazz on the cupcake, I used a few of the Brights Enamel ShapesThis is a product that you might overlook in the catalog, but once you have them you know that they are SO CUTE! Really a fun embellishment!

If you have them, use the Layering Squares Framelits Dies for the background for the cupcake and the little scalloped edge. The Sweet Cupcake Stamp Set comes with lots of great greetings for both the front of the card and the inside so you will get lots of use from this set!

If you are new to my blog or Stampin’ Up! and would like a copy of the new Stampin’ Up! catalog, please contact me at Karen@KarenStamps.com   I would be happy to send you the fantastic new catalog if you are interested in Stampin’ Up! products or would like to get started in the fun hobby (or even BUSINESS!) of stamping, memory-keeping, and papercrafting! Or if you prefer, check out the catalog online HERE.

Shop Stampin’ Up! Online 24/7 HERE!

Sweet Cupcake Birthday Card

Sweet Cupcake Birthday Card

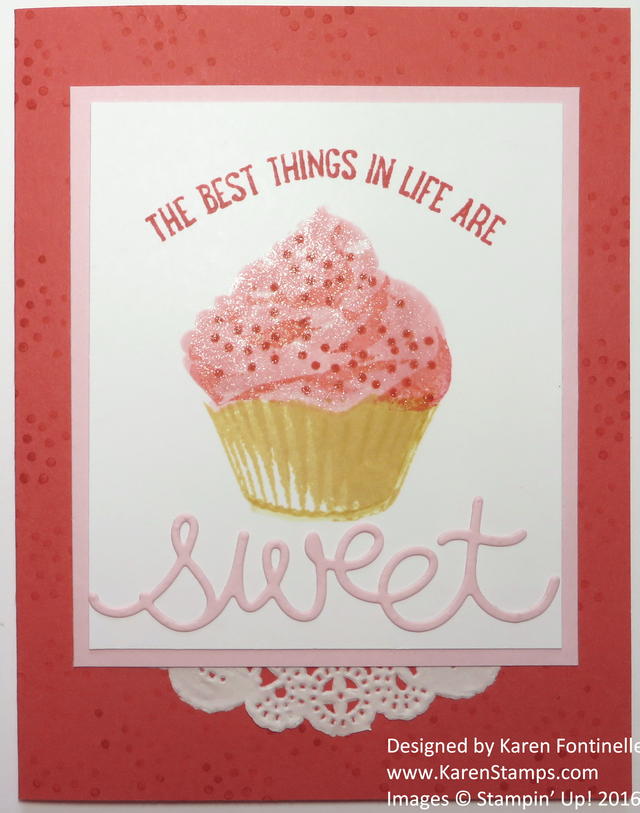
It was finally time to play around with the Sweet Cupcake stamp set and make this Sweet Cupcake Birthday Card!  I think you can even see the glimmer on the frosting from the Clear Wink of Stella Glitter Brush. (Once you start painting on that glitter, you don’t want to stop!)  I didn’t realize that these cupcake stamps are actually 3-step stamping.  You can experiment with them with ink choices and whether to stamp them 1-2-3 or 3-2-1. The stamps are numbered inside on the plastic so you can use that for a guide.  That may sound crazy but the choice will be yours.  You can stamp this cupcake and cut it out with the Cupcake Cutouts Framelits Dies and the Big Shot and pop it up with Stampin’ Dimensionals to give it a 3D look. Get the Sweet Cupcake Photopolymer Bundle with both the stamp set and framelits and save 10% plus be all set to make some cute cards and projects!!

To stamp the cupcake frosting, I used Pink PIrouette Ink and Watermelon Wonder.  I meant to use the new Watermelon Wonder 5/8″ Mini Striped Ribbon on the card but I completely forgot! Maybe the next one!  The cupcake itself (or the cupcake wrapper) is stamped with So Saffron Ink and Crumb Cake. There are lots of combinations or single inks that you can experiment with.

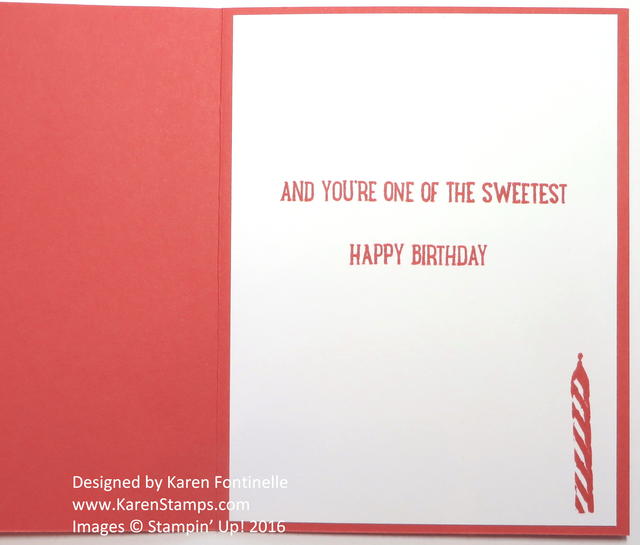
And I love the sayings in this stamp set. I even took a picture of the inside of the card because we seldom show that.  Since the Watermelon Wonder card stock base is rather dark for writing a greeting, I added a Whisper White layer and stamped my greeting. Also, if you noticed on the front, since the stamps are photopolymer, you can actually bend them a little as I did for the greeting above the cupcake.  I also love all the die cuts you can make with the framelits, like the word “Sweet”. At the bottom I added a piece of doily, it’s not one of the new Delicate White Doiliesbut I wanted to use up the ones that I already had. If you don’t own any doilies, they are great to have on hand for just a little bit of texture or embellishment sometimes.

Sweet Cupcake Birthday Card Inside

Don’t forget Stampin’ Up! Bonus Days are going on!  When you spend $50 or more, or any number of increments of $50, you will receive (by email) a $5 coupon to spend in August! Spend $100 in July, get 2 $5 coupons to spend in August, etc. You must have an email address and keep track of your coupons yourself to take advantage of this offer.  Bonus Days end July 31. You can redeem coupons August 2-31.

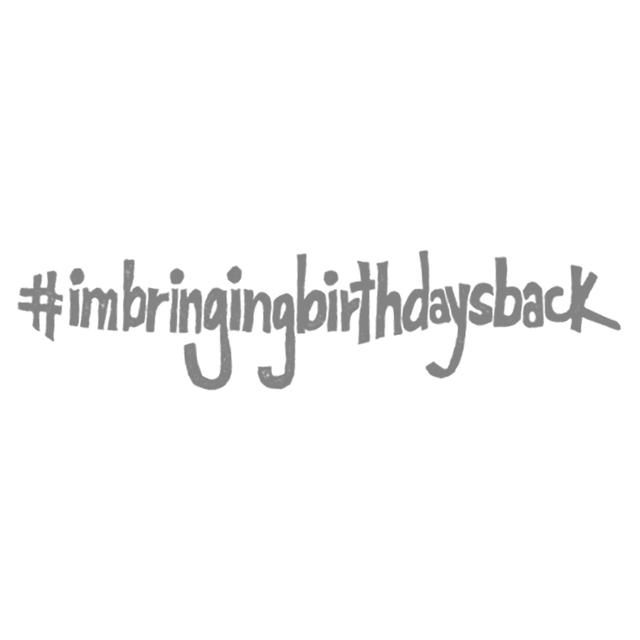
Can’t you just imagine all the birthday cards you can make with this cute stamp set?! Remember how important it is to send real birthday cards in the mail to our friends, not just take one second to write a greeting on social media! If you want to join the movement started by Shannon West of the Stampin’ Up! Home Office, you might like to invest in this #IMBRINGINGBIRTHDAYSBACK stamp to use maybe on the back of envelopes!

#imbringingbirthdaysback stamp

Shop Stampin’ Up! for all your birthday needs!!


Easy Definitely Dahlia All Occasion Card

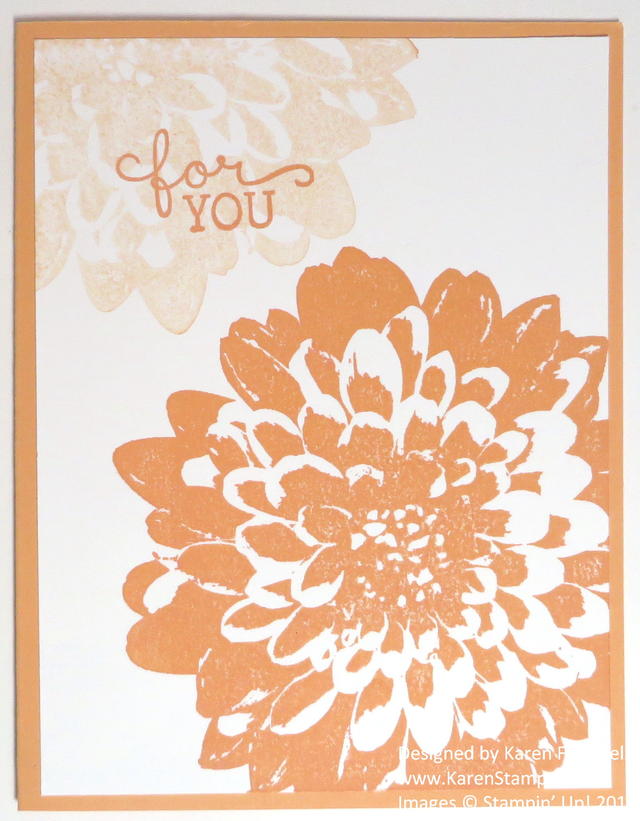
Easy Definitely Dahlia All Occasion Card

Here’s how to make this Easy Definitely Dahlia All Occasion Card. The Definitely Dahlia Stamp is one large stamp! Personally, I recommend the wood-mount version for such a large stamp. I just think it is easier than trying to mount the clear-mount on a block each time. The wood-mount is only $5 more than the clear-mount.

To make this card, I just used Peekaboo Peach Card Stock for the card base.  You could use most any color. Then a layer of Whisper White Card Stock.  My intention was to just stamp the large dahlia, but when I did, I wondered if the color was too bright and bold. So I stamped again in the upper portion of the Whisper White without reinking and I loved the look of the light version of the dahlia! You never know what you might come up with in the end when you start stamping!  The greeting is from the Birthday Blooms Stamp Set.  That’s really all you need for this card. It is dramatic as it is, so you don’t have to do any more.

Try your hand at an easy card with big impact like this Easy Definitely Dahlia All Occasion Card, and change the greeting for any occasion you need. Pure stamping at its best on this card!

Shop Stampin’ Up! Online During Bonus Days!