Category Archives: Birthday

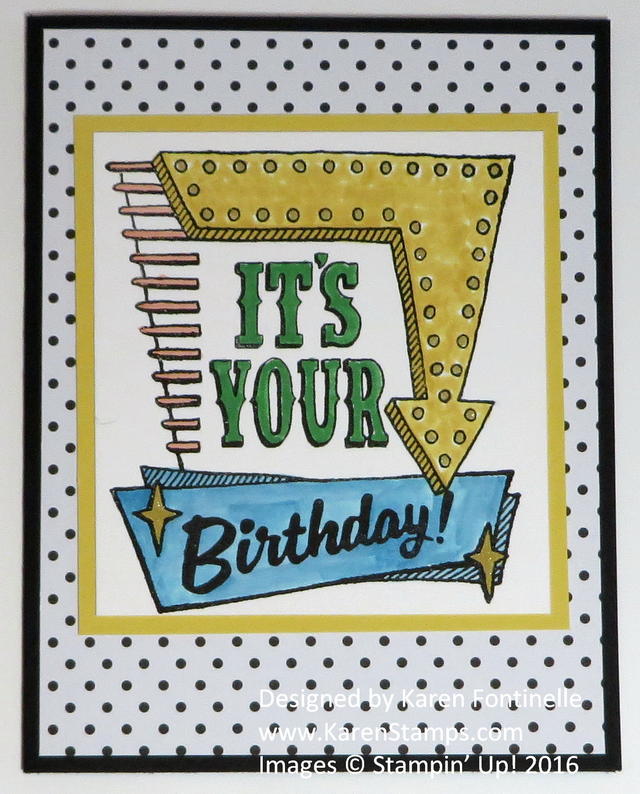
Marquee Messages Birthday Card

Marquee Messages Birthday Card

I played around some more with the Marquee Messages Stamp Set in the new Stampin’ Up! Catalog and made this Marquee Messages Birthday Card!  This is a fun stamp set to play with. It comes with smaller messages that you can add to the front of the card or use for the inside greeting, plus extra little stars and sparkles you can stamp inside or outside to jazz up the card. Use your markers or whatever coloring method you prefer to color in the marquee.  I also used the Gold Wink of Stella Glitter Brush to a little sparkle on the marquee lights and the stars.

On this card I used Basic Black for the card base and added a layer of Pop of Pink Specialty Designer Series PaperAfter stamping the marquee and message, I cut that out and fit on top of a Daffodil Delight card stock layer for the front of the card. If the card base is black, then you need to add a layer of Whisper White to the inside so you can write your message or note and sign your name.  This is the perfect opportunity to stamp a little something in the corners or edges of the white layer. And it is always a good idea to do a little stamping on the envelope if you think of it!

If you don’t like coloring, you could stamp the marquee on a piece of colored card stock or several different colors and cut out various parts.  This is called paper piecing. Lots of opportunities for creativity with this stamp set!

Shop Stampin’ Up! and get your Bonus Days coupons with every $50 you spend in July to use in August!

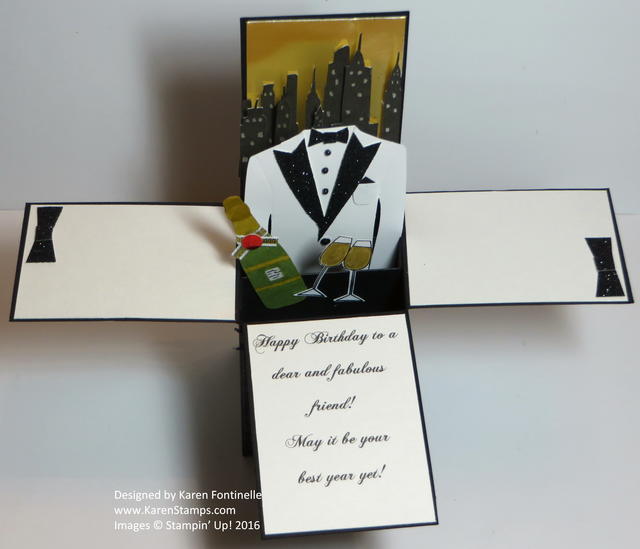
Tuxedo Pop Up Card

Tuxedo Pop Up Card

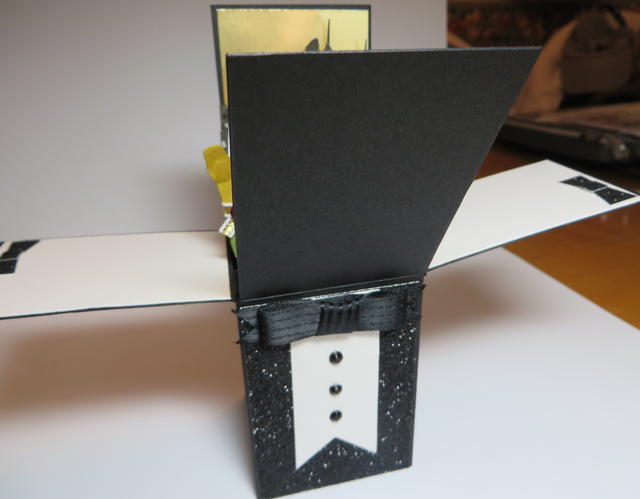
These pop up cards that fold flat and fit in an envelope for mailing are relatively easy to create and can then be customized for any occasion, such as this tuxedo card for a special gentleman’s birthday. This was a custom order for someone who knew exactly what she wanted and really designed the card, I just had to make it come to life.

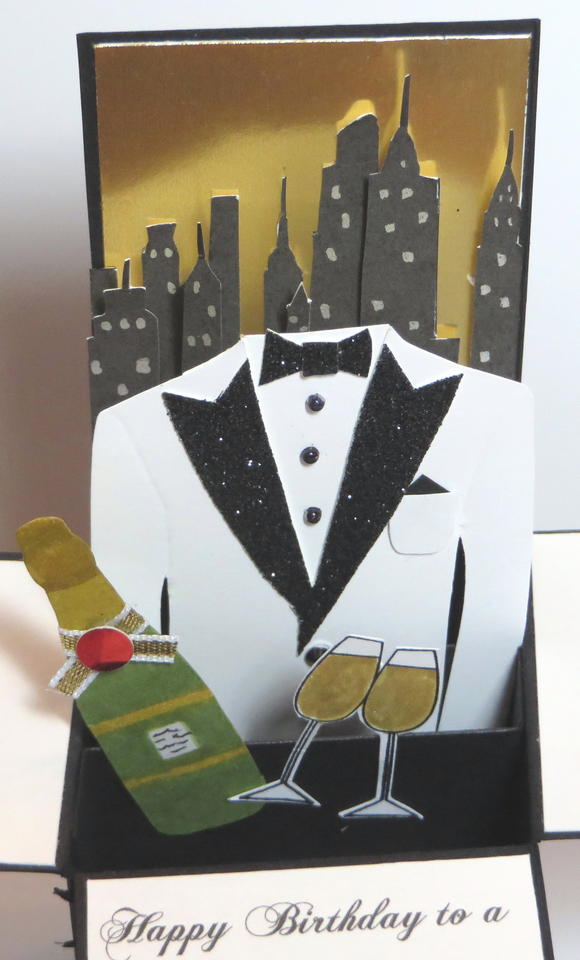
I found a template for a tuxedo jacket online, probably resized it a little bit with Whisper White Cardstock and Black Glimmer Paper (retired) for the lapels and bowtie. The buttons are tiny Pearl Jewels colored with a black Sharpie marker. Just color them on the sheet before attaching to your project.  The champagne glasses are actually from a Stampin’ Up set Cheers To You (retired). The champagne bottle is clip art that I printed on cardstock and colored in myself with Stampin’ Write Markers.

The background is a piece of Gold Foil with the New York City skyline printed on cardstock and cut out. The greeting is printed out on the computer and the little bowties in the corners are Black Glimmer Paper.

tuxedo closeup

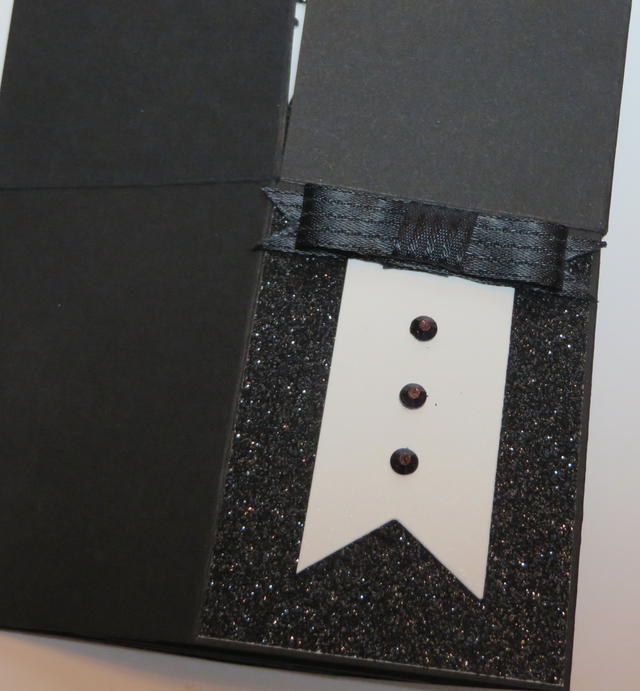
Tuxedo Card Front

Tuxedo Card Front

Just google directions for making a pop up card and you will probably find directions.  They are pretty easy and you can add any stamped images or whatever you like to pop up from the divider(s) inside the box.  Just keep checking as you make it that they all stay within the boundaries of the box so that it will fit in the envelope, unless you are not mailing it!

Shop Stampin’ Up! Online 24/7

Remember, Bonus Days in July gets you coupons to shop with in August!


Botanical Pop Up Corner Birthday Card Inside

Botanical Pop Up Corner Birthday Card

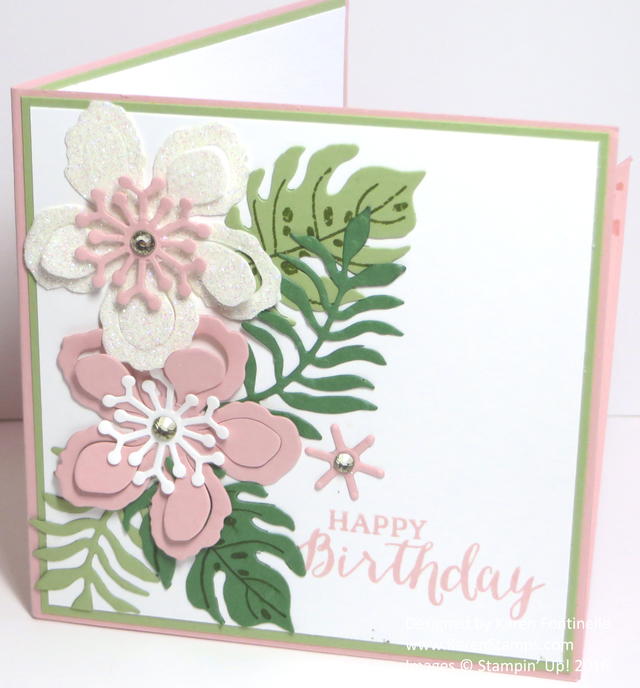
When I discovered these Pop Up Corner Cards, I loved them and made several including this Botanical Pop Up Corner Birthday Card for my daughter. They are so easy and the recipient will think you are so clever!

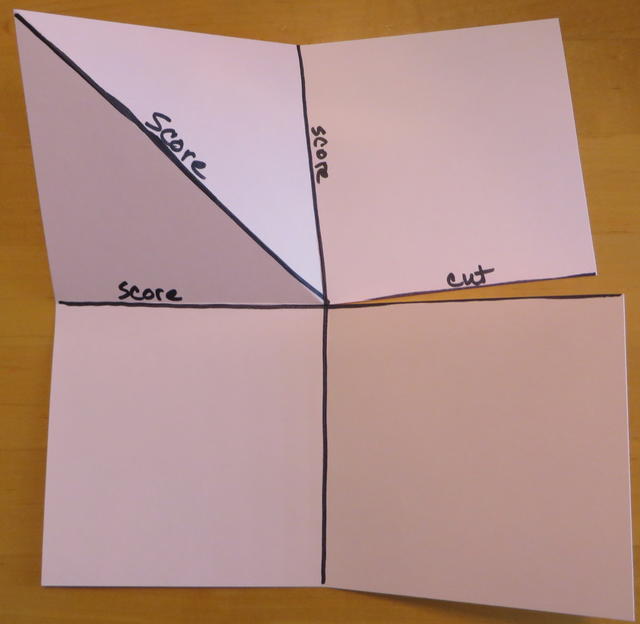
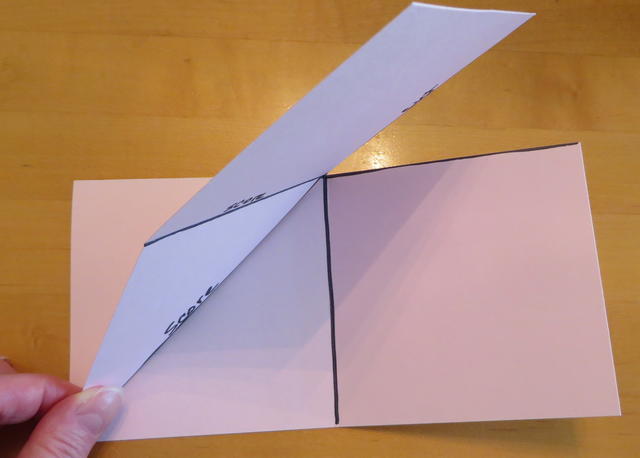
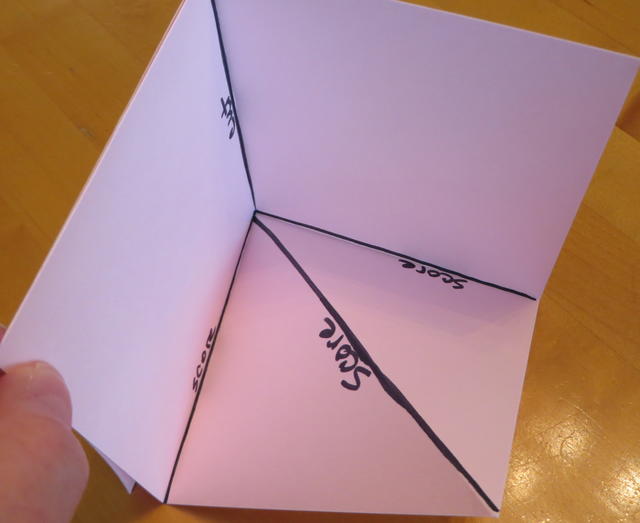
Start with an 8 1/2″ x 8 1/2″ piece of cardstock for the card base.  Score in the middle vertically and horizontally so the paper is divided into fourths.  In the upper left quadrant, score than on a diagonal.  Fold on all the score lines back and forth, then cut the right horizontal line just to the center.

Pop Up Corner Card Diagram

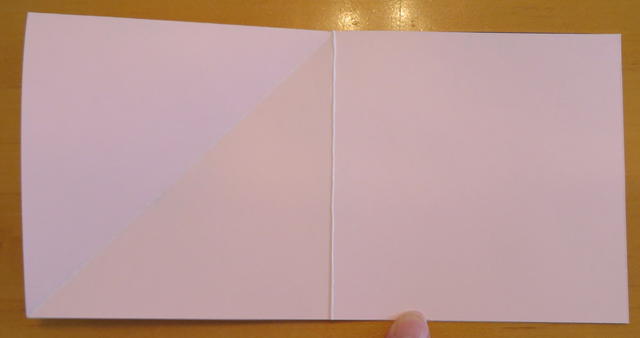
Fold the top half down.

Pop Up Corner Card Fold

Fold the top piece back on the diagonal score line.

Pop Up Corner Card Fold

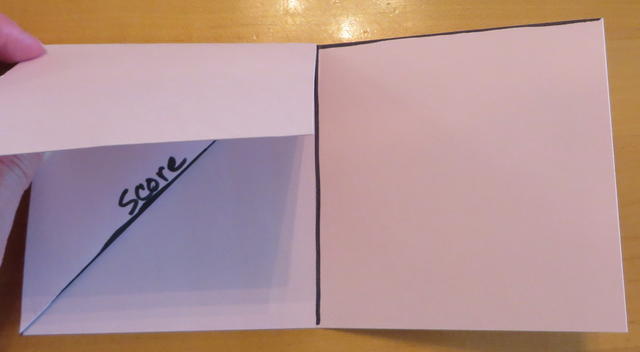
Fold the top quarter down.

Pop Up Corner Card Fold

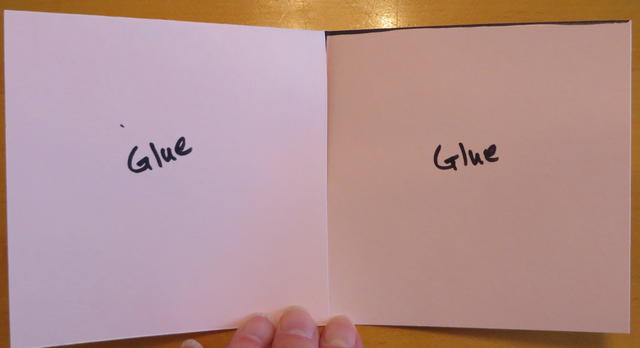
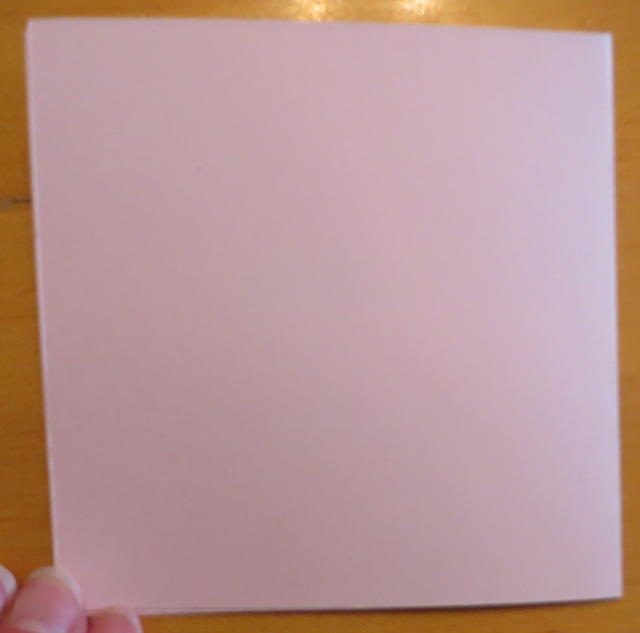
That piece you just folded down and the piece to the right are the areas where you will put adhesive and glue those two pieces together when you fold over the right area.

Pop Up Corner Card Fold

Pop Up Corner Card Fold

Open the card, make sure you have it all going in the right direction and decorate!  As you get experienced, it’s probably easier to adhere paper and embellishments on the sections before those two areas are glued together to actually make it the folded card,

Pop Up Corner Card Open

I hope you will try one of these cards like my Botanical Pop Up Corner Birthday Card.

Shop Stampin’ Up! Online!

Affectionately Yours Mini Treat Bag Birthday Card

Affectionately Yours Mini Treat Bag Birthday Card

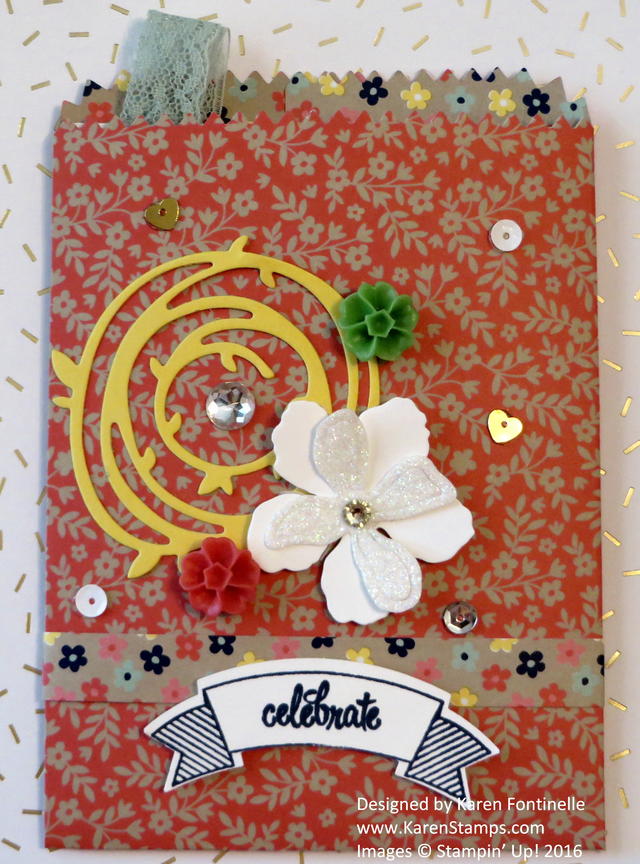
On Friday I needed a quick birthday card before I left town for the weekend, and I came up wtih this Affectionately Yours Mini Treat Bag Birthday Card.  I decided to combine the new Affectionately Yours Specialty Designer Series Paper with one of my favorite things, the Mini Treatbag Thinlits Dies.

I used the Mini Treat Bag Thinlits and the Big Shot to die cut the mini treat bag out of this cute paper.  I love how the inside pattern is as cute as the outside and provides a good contrast. Out of a thin scrap, I made a belly band around the bag so I could showcase that pattern from the inside of the bag a little bit more. Then I die cut a Daffodil Delight piece of cardstock with a thinlit from the Swirly Scribbles Thinlits Dies to kind of look like  a flower and put a large rhinestone (retired) in the center. I already had the white flower pieces die cut from the Botanical Builder Framelits Dies in my pile of scraps so I used those and added sequins from the Metallics Sequins Assortment plus a couple of the retired In Color Blossom Accents since I was hand-delivering the card. They make mailing the card a little difficult!

I used the Thoughtful Banners Photopolymer Bundle (the stamp set and punch) to make the little greeting on the front. And on the top of the card inserted inside the treat bag I stapled on a piece of the retired lace to pull out the card. I used my favorite Handheld Stapler by Stampin’ Up!

I hope you are enjoying the new Stampin’ Up! Catalog.  If you need one and do not have a Demonstrator, please contact me.

Shop Stampin’ Up! Online 24/7.


Pop of Pink Mini Treat Bag

Pop of Pink Mini Treat Bag

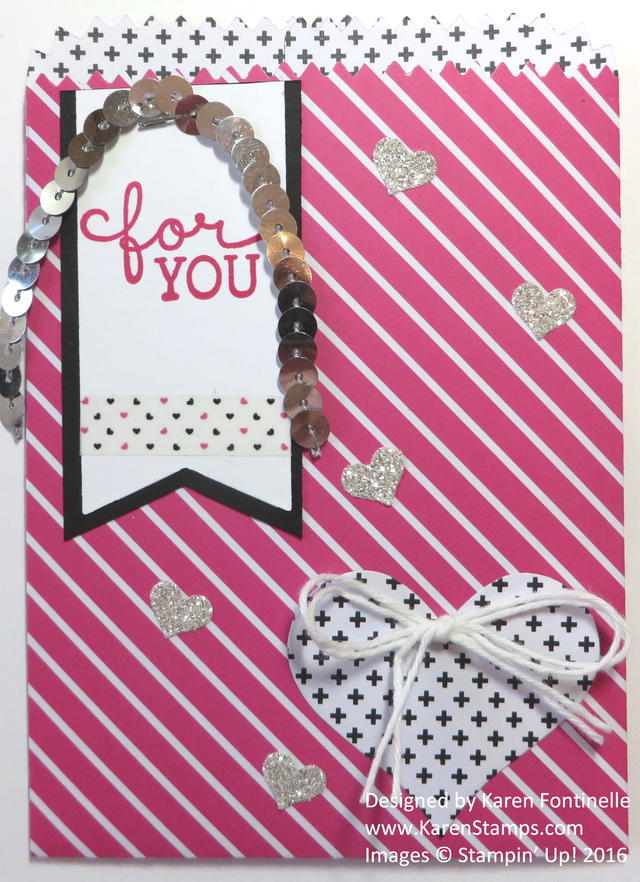
Today I thought I would make a Pop of Pink Mini Treat Bag with the pretty new Pop of Pink Specialty Designer Series Paper and the Mini Treat Bag Thinlits Dies. I have always loved this die set, so many opportunities for creativity! The die set contains not just the ones to make the treat bag, but also many dies for the extra embellishments, like hearts, a banner, star, bow, a couple of greetings and more. This can be a treat bag but it can also hold a card or gift card or monetary gift! There are even ways to modify this bag to make it more 3D.

I made the bag with the diagonal stripe pattern from the Pop of Pink paper and die cut a heart out of the same paper but turned it over on the other side. I die cut a banner, but cut off the one end so it would be straight and cut a slightly larger piece of Basic Black as a layer underneath the Whisper White banner. The greeting on the banner is from the Birthday Blooms Stamp Set. For a little interest I added a strip of Pop of Pink Designer Washi TapeI attached a piece of the Silver Sequin Trim with the Handheld Stapler. (Love this stapler by the way!) I die cut the strip of hearts from the Dazzling Diamonds Glimmer Paper and used the individual hearts for some embellishments and pizzazz. And for a  little something on the Pop of Pink heart, I took two strands of Whisper White Solid Baker’s Twine to make a bow and adhered with a rolled up Glue Dot.

The Pop of Pink Designer Paper  has been so popular it is backordered, but you can still order it now and when Stampin’ Up! gets more they will send it to you. A big supply is due in about a week so it won’t be long!

You can purchase the Mini Treat Bag Thinlits along with the You’re So Sweet Stamp Set in a Bundle and save 10% if you wish.

Check out the Mini Treat Bag Thinlits Dies and and Pop of Pink Specialty Designer Series Paper and consider ordering the dies to go with your Big Shot and have fun making the Pop of Pink Mini Treat Bag

Watercolored Butterfly Birthday Card

Watercolored Butterfly Birthday Card

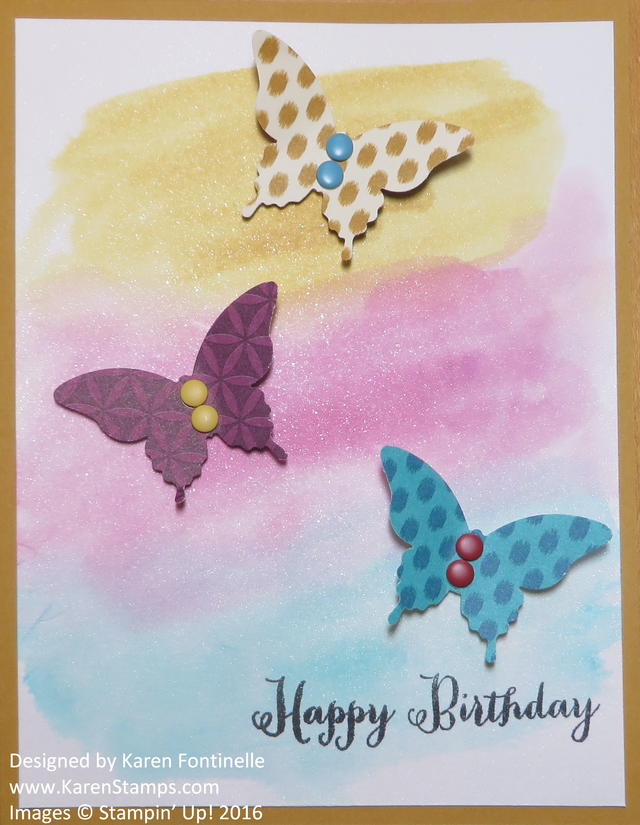
I got the idea for this Watercolored Butterfly Birthday Card from the new Stampin’ Up! Catalog that will be out June 1st!  It was so easy to make and I love how it turned out!

I watercolored the Shimmery White Cardstock background using some reinkers and my Aqua Painter. This is such an easy technique!  The Aqua Painter is one of my favorite tools! The barrel is filled with water so it is like a paint brush without having to dip it in a separate container of water. You can pick up some ink from the lid of an ink pad or you can put just a tiny drop of reinker on the outside of a plastic stamp case or any piece of plastic and water it down with the Aqua Painter first or just pick up as is, depending on what shade you want. Just to help the reinkers along, I spritzed the Shimmery White Cardstock a little bit with water in a spritzer bottle. Shimmery White isn’t as good for watercoloring as Watercolor Paper but it is better than Whisper White.  And you will love the shimmer!  You can probably see it a bit in my photo. I used Delightful Dijon, Bermuda Bay, and Rich Razzleberry reinkers. I just scribbled on some color onto the slightly wet Shimmery White and kind of blended the edges together. If you are in a hurry (of course you are!) use your Heat Tool to gently dry the paper.

The reason I chose those colors was because I was going to use the Elegant Butterfly Punch  to punch out butterflies from the Bohemian Designer Series Paper. Honestly this was never my favorite paper, yet there have been many cute projects made with it. Just look on the back of any pack of designer paper and you will see the coordinating colors listed, in tiny print! I always write them on the back cardboard with a Sharpie so I can read it easily!!  I added some Candy Dots to the butterflies and popped them up on Stampin’ Dimensionals. The greeting is from the Remembering Your Birthday Stamp Set.

You can make this card with just Shimmery White, but mine is actually on a card base of Delightful Dijon Cardstock, which doesn’t show up well in my photo. You can jazz up this card even more if you like with more embellishments but I liked it just the way it turned out. Try something like the Watercolored Butterfly Birthday Card for any occasion or changing the colors or embellishments, etc.

Shop Stampin’ Up! Online for Current and Retiring Stamping Products!

Botanical Gardens Big News Birthday Card

Botanical Gardens Big News Birthday Card

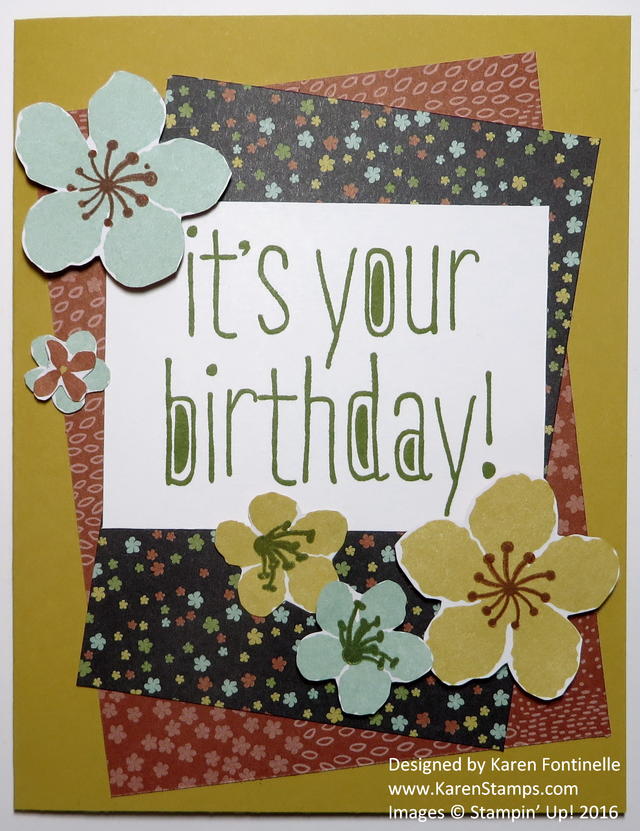
Yesterday I showed you a baby card made with the retiring Big News Stamp Set and today I have used one of the birthday stamps in the set to make this Botanical Gardens Big News Birthday Card. Today is May Day, the 1st day of May, so I thought a few flowers would be appropriate!

Normally I don’t care for the off-kelter, look of cards that seems to be popular recently, like I have done with the designer paper on the background of this card. However, I was looking at a sample that I was copying except for changing the designer paper, so I decided to give it a try. The card base is Hello Honey Card Stock and I used the Botanical Gardens Designer Series Paper for the background layers. This paper is retiring, so get it while you can!  I angled them slightly, which normally I don’t like.  The greeting from Big News is stamped on Whisper White Card Stock with Old Olive Ink.

The flowers are cut out from another pattern of the Botanical Gardens Designer Series Paper. The flowers are pretty as is, but if you like, you can use the stamps in the Botanical Bloom Photopolymer Stamp Set to stamp the flower centers, as I did. I simply cut out the flowers myself, but you can use the Botanical Builder Framelit Dies to die cut them. If you want it all, get the Botanical Blooms Photopolymer Bundle while you can and get the stamp set, the framelits, and the designer series paper.  You will save 15% with the Bundle and get everything you need!  You could also add some other embellishments if you wanted – ribbon, rhinestones, Candy Dots.

Now that it is May, this is the last month for the Stampin’ Up! Retiring Products! See all that is still available in my Stampin’ Up! Online Store HERE. Accessories are only available while supplies last and some are sold out already. Stamps, since Stampin’ Up! manufactures them, will be available through May 22 even if they sell out.  Stampin’ Up! will make more until that date.

See if you like the angled look of my Botanical Gardens Big News Birthday Card today, and if so, try it yourself for something different!

Cherry on Top Easy Amazing Birthday Card

Cherry on Top Easy Amazing Birthday Card

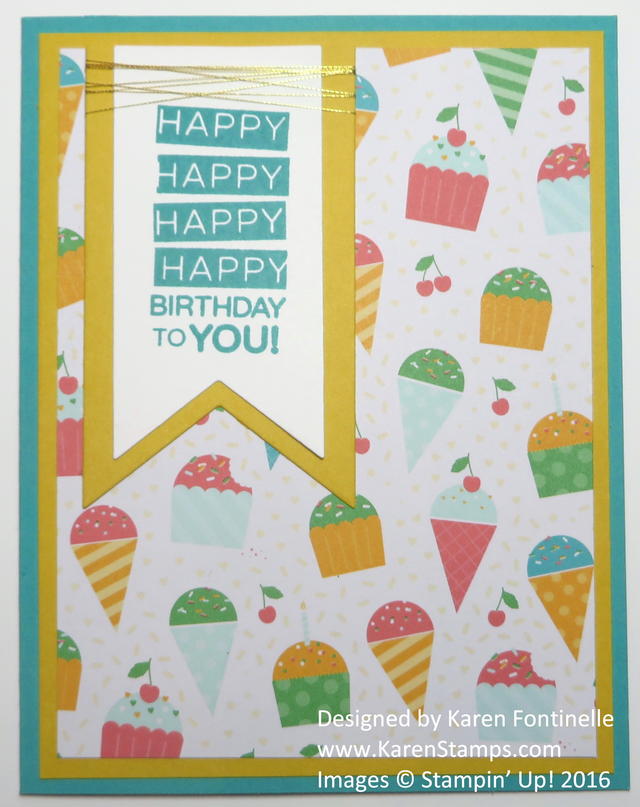
Here is a Cherry on Top easy Amazing Birthday card!  If you are looking for a simple birthday (or most any occasion) card to make, this is one you should try. All it takes is a change of paper and/or greeting to fit any reason to send a card!

One of the retiring stamp sets I am going to miss is the Amazing Birthday Stamp Set! It is even discounted on the Retiring Stamps List. It has birthday-specific stamps but some of the other stamps you can use for other occasions, too!

The card base is Bermuda Bay, with a layer of Crushed Curry, both of which coordinate with the Cherry on Top Designer Series Paper Stack. My Cherry on Top Paper Stack had gotten lost in the shuffle somehow so I was glad to think about it again, find it, and use it because it has some fun, colorful papers in it. It’s “Happy” paper to use!

I used my Banner Framelits Dies to die cut the layered banner on the front of the card. If you like, you can save 15% by purchasing the Amazing Birthday Stamp Set and the Banner Framelit Dies together in the Amazing Birthday Bundle.  I had forgotten these two products came together in a Bundle!

All Bundles are being retired right now, but that doesn’t mean all the products individually are being retiring.  They are just taking apart the Bundles to make room for NEW Bundles in the new catalog and perhaps one of the items in the Bundle is retiring, such as the stamp set or the designer paper.

For a final embellishment, I wrapped some Gold Metallic Thread around the top of the banner. This is not retiring but you may as well put it on your order to have on hand because it is an inexpensive, fun bit of pizzazz to add to any of your cards or projects.

Try making this Cherry on Top Easy Amazing Birthday Card or change it up with your own design!

Stampin’ Up! Retiring Products:  Stamps and Everything Else!

Cherry on Top Washi Tape Card

Cherry on Top Washi Tape Card

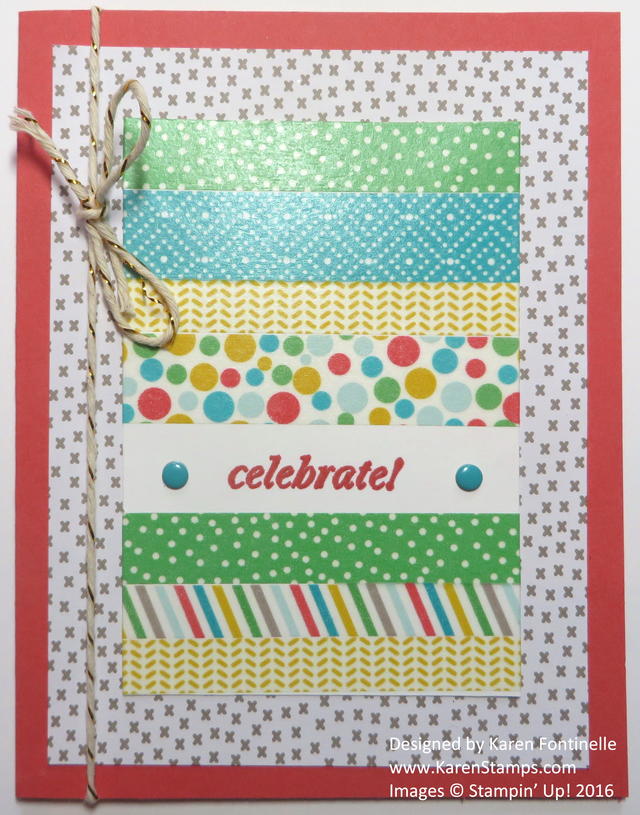
The sun is finally shining today in Houston! No rain is forecast so I think it’s time for a bright and cheerful card like this one made with some of the Cherry on Top products! It’s all going away by the end of May (or while supplies last!). I got the idea for this card in our Demonstrator magazine we all receive quarterly. They used different paper and washi tape, but I was in the mood for the Cherry on Top designs!

The card base is made with Watermelon Wonder. The paper layered in the background is from the Cherry on Top Designer Series Paper Stack.  Then I took a smaller piece of Whisper White cardstock as a base and wrapped Cherry on Top Designer Washi Tape around it, leaving space for a greeting.

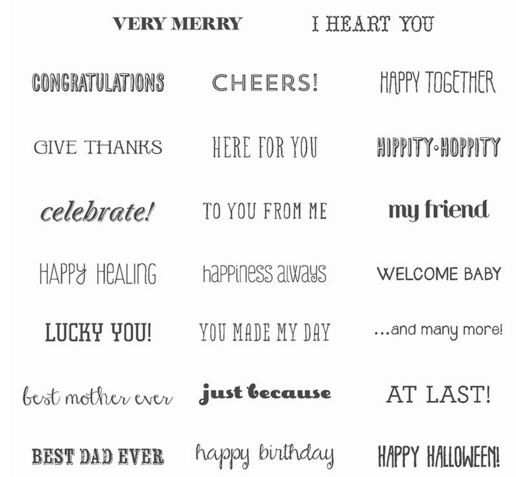
The word “Celebrate” is from the stamp set And Many Morewhich is retiring. It’s one of the stamp sets I hate to see go because I like the ones with lots of words and greetings in it. This stamp set is even discounted so if you need more words for your cards and projects (and who doesn’t?!) I would grab it for your collection.  I have the wood-mount.  Certain sets I like to have the wood-mount so the stamps are ready to go or if they are small I think they work better with wood-mount.

And Many More Stamp Set

For a little pizzazz, I added to Brights Candy Dots in Bermuda Bay to each side of the word. And then I tied a piece of Metallic Gold Baker’s Twine around the front of the card. Easy to do and fun to use my Cherry on Top Washi Tape!

Check out the Stampin’ Up! Retiring Products in my Online Store! This is the easiest way to see everything that is still available! When you are on the page of Retiring Products, choose either “Stamps” or “Everything Else”.  Then on the right side of the page, choose “View:  ALL” in the drop down box so you can just scroll through everything!

Shop Stampin’ Up! Online

Stampin’ Up! Retiring List PDF

Simple Birthday Card with Birthday Bouquet Paper

Simple Birthday Card with Birthday Bouquet Paper

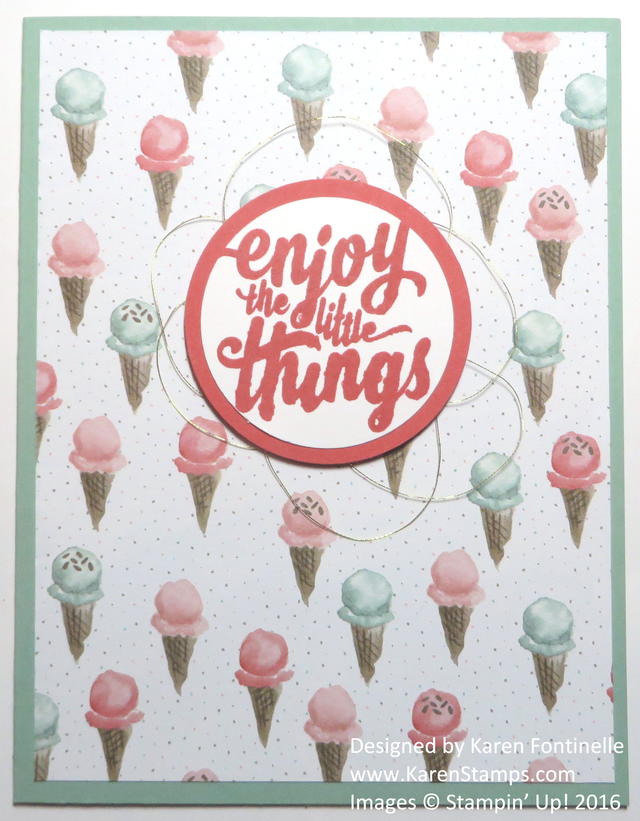
Here is a simple birthday card to make using the retiring Birthday Bouquet Designer Series Paper.  I love this Birthday Bouquet paper, and if you do too be sure to order it while it is available! The ice cream cone patterned paper is layered on a card base of Mint Macaron cardstock.

The greeting is from the retiring stamp set Enjoy the Little Things Stamp Set. This stamp set coordinates with the Enjoy the Little Things Project Kit, which is really cute!  But even if you don’t have the kit, this stamp set has many useful greetings and cute little stamps. For a little embellishment, I just gathered some of the Gold Metallic Thread at the back of the punched circles and popped it up with Stampin’ Dimensionals.

You could use any greeting and any designer paper for a card, so keep this card layout in mind when you want something quick! Start with something simple and you can always embellish to your heart’s content!

Shop the Stampin’ Up! Retiring Products!

Retiring List 2016 PDF

Shop Everything Stampin’ Up!

Mini Treat Bag Thinlits Balloon Birthday Card with Envelope

Mini Treat Bag Thinlits Balloon Birthday Card with Envelope

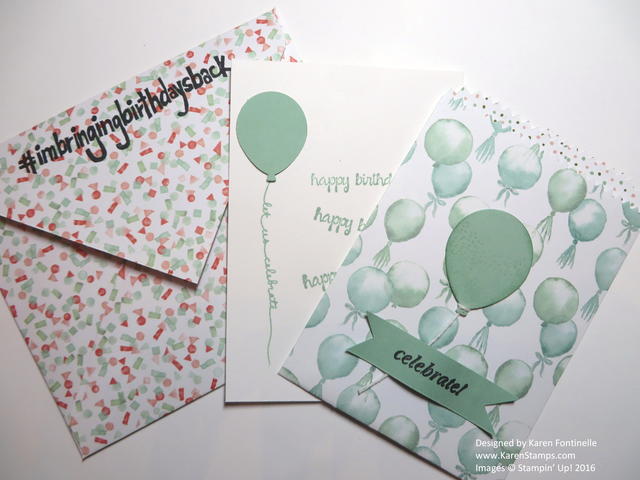
One of the items on the final week of Stampin’ Up! Weekly Deals is the Mini Treat Bag Thinlits! That is what I used to make this Mini Treat Bag Balloon Birthday Card!  I used the Birthday Bouquet Designer Series Paper to make the treat bag. Then I punched a matching “real” balloon with the Balloon Bouquet Punch. To turn this into a birthday card, I added a card of Whisper White to slip inside and stamped with the smaller balloon from the punch adhered to the card. The larger balloon is on the bag.  And to finish it off, I used the Envelope Punch Board to make a matching envelope with another pattern in the pack of designer paper.

The Mini Treat Bag Thinlits DIes have been one of my favorite dies!  Be sure to check it out and perhaps add it to your next order!

Order Stampin’ Up! Products HERE!

Balloon Celebration Regals Colors Birthday Card

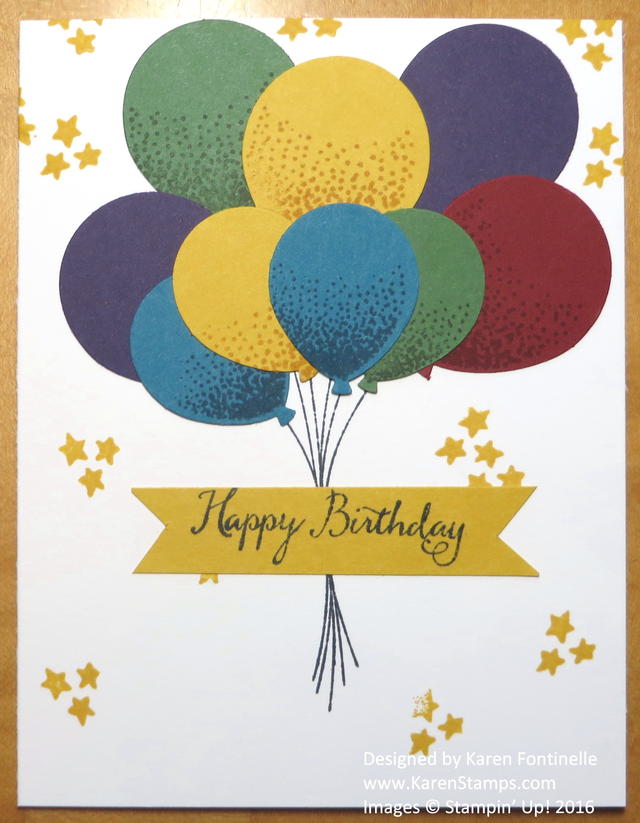
Balloon Celebration Regals Colors Birthday CardOne quick and easy way to make a birthday card is to use the Balloon Celebration Photopolymer Stamp Set and the Balloon Bouquet PunchFor this card, I simply chose to use colors from the Regals Family just because I don’t use those colors as much. But I’m happy with the colors when I look at this card!

To keep it easy, I just used the Whisper White Thick Cardstock for the card base. If you don’t have this paper already, you should add it to your next order.  It just is a little heavier than the regular Whisper White and you don’t feel that you need to add a layer for a little more heft in your card.

Then I had fun punching lots of balloons with the Balloon Bouquet Punch!  If you want to, you can stamp the shading on the paper first and then punch, or punch first and then stamp. Once you start punching balloons, punch extras because it is fun and because you might want to use them on another card or project!

The stars stamp and the greeting all come in the Balloon Celebration Stamp Setas well as the balloon strings, so you are all set!  You will be able to many kinds of cards with this stamp set to cover almost all occasions!  Have fun making this Balloon Celebrations Birthday Card!

Shop Stampin’ Up! Online 24/7!

In Color Birthday Blooms Monochromatic Cards

In Color Birthday Blooms Monochromatic Cards

This is the last week (only today plus three days!) for Stampin’ Up! Sale-A-Bration, and I was also thinking about how soon the current Stampin’ Up! Annual Catalog will also be coming to an end. It’s almost April, for heavens sake! One thing to think about, ahead of time, are the In Colors. These are the trendy, up-to-date colors that Stampin’ Up! chooses to be available for only two years in the catalog and introduces a new set every year as the old set goes out. The colors you see on the cards above are going to be the retiring 2014-16 In Colors:  Blackberry Bliss, Hello Honey, Mossy Meadow, Lost Lagoon, and Tangelo Twist. Based upon previous years, I would guess that as soon as the Retirement List comes out, the In Colors may be the first to go, especially the ink refills. Once they are gone, it is difficult to find ones that are available, unless, perhaps, you pay a premium price from someone selling theirs.

So if you want another FREE item from the Sale-A-Bration Brochure or the extra new SAB products and maybe you don’t really have anything in mind right now you are dying to order, you might consider stocking up on any of the In Color 2014-16 products that you want. If you already have the ink pads, I would strongly suggest getting the reinkers. If you have one of the colors of cardstock that is just about out and you like to use it, then order an extra pack or two.

It’s also a good idea to stock up on adhesives during Sale-A-Bration or basics like Whisper White card stock. Sometimes we are so excited about the new stamp sets and accessories that we forget to check our core supplies.

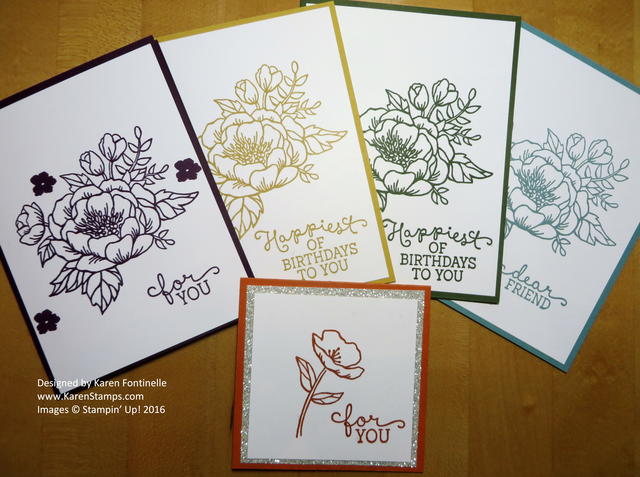
But back to the In Color cards I made in the photo—I probably made those all in about fifteen minutes! I made a card base for each of the In Colors, cut layers of Whisper White card stock, and stamped with the same color inks. The Birthday Blooms Stamp Set is perfect for this because the flower is large and beautiful. There’s really no need to do any coloring or extra embellishing unless you want to! You’ll see on the Tangelo Twist card I decided to make a smaller one (3 3/4″ x 3 3/4″) and stamp with the single flower in the stamp set. I also added a layer of Silver Glimmer Paper for a little pizzazz!  The stamp set comes with those three perfect greetings plus two little accent stamps, a little flower and some dots.

If any of the 2014-16 In Colors are favorites of yours, be sure to check your supply and consider ordering extras before the retirement rush. I don’t know if Stampin’ Up! will do anything different this year, but I’m going by what has happened in the past. And don’t forget, Sale-A-Bration will be ending on Thursday, March 31.  Don’t miss it!!

For quick and easy cards to make, try the In Color Birthday Blooms Monochromatic Cards, even if you use different colors!

SHOP STAMPIN’ UP! ONLINE HERE!

Get the New #imbringingbirthdaysback Single Wood-Mount Stamp

#imbringingbirthdaysback Stamp

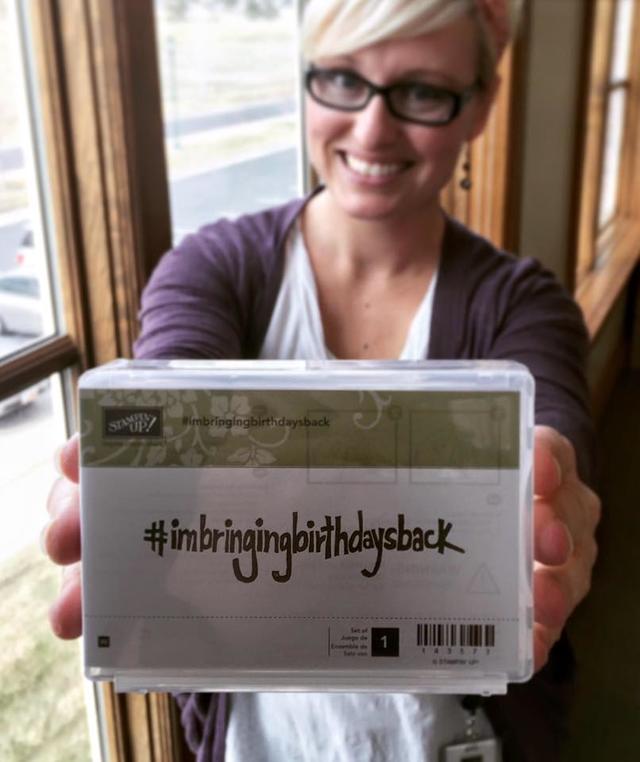
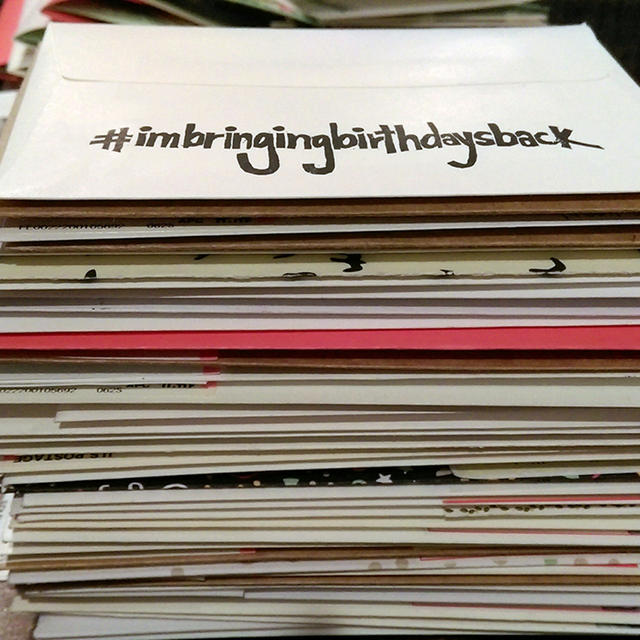
While it is nice, if you are on Facebook, to see a whole list of birthday greetings from all your Facebook friends, wouldn’t it be even nicer to go to your mailbox on your birthday and find it filled with a stack of birthday cards (and not bills and credit card applications!)?! Put this #imbringingbirthdaysback Stamp #143573 on your Stampin’ Up! order and be part of the movement to Bring Birthdays Back! Let’s send real cards to our friends and family! Let them have the treat of finding a real birthday card in their mailbox on their birthday! Use this stamp to stamp the back of the card or the envelope to encourage others to participate!

This is how I remember birthdays growing up, when the mailman “knew” it was someone’s birthday because they got a whole bunch of mail! As a child I would often get a dollar or two or three enclosed in each card from family friends and relatives far and wide. Now why do I even remember that? It’s because I remember going out to the mailbox and finding that birthday mail, maybe even talking to the mailman (his name was Ed!), opening all those cards, setting them up on the piano, writing thank you notes when I got a gift, etc. And I might add, seeing the handwritten note in the card and the signature of the person, the real handwritten signature! People these days do not even sign their Christmas cards, they are all printed! Quicker for sure, but I think we are losing the personal touch! Your handwriting is so important! (But that’s a soapbox for another day!) Do you remember all the birthday greetings you got last year on Facebook?  Probably not!

Shannon West, from the Stampin’ Up! Home Office and one of our favorite presenters at Stampin’ Up! events, awhile back decided to do something about this and started sending birthday cards to friends and family and received hundreds of requests on her Facebook page for a birthday card in the mail. She actually made a stamp with the hashtag #imbringingbirthdaysback. Sara Douglass, Interim CEO of Stampin’ Up!, asked how Stampin’ Up! could support her effort and ended up making the stamp Shannon had designed. Last week the stamp was released, but it sold out in only four hours!  Today it is back in the Online Store and you can put it on your regular Stampin’ Up! order!

#imbringingbirthdaysback Single Wood-Mount Stamp  #143573  $12.00

imbringingbirthdaysback card stack

Shop Stampin’ Up! Online Here!  And YES, this stamp counts toward your $50 Sale-A-Bration order!!


Is Today Your Leap Year Birthday?

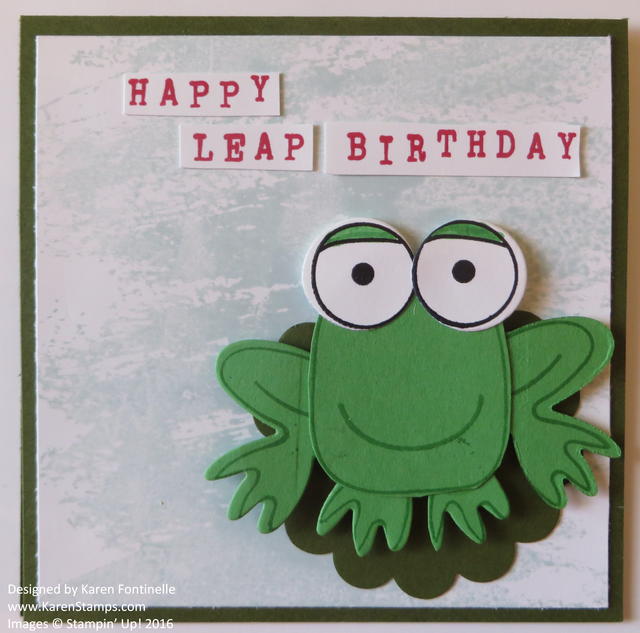
Playful Pals Frog Leap Year Birthday Card

Is today your Leap Year birthday? If it is, then here is a Playful Pal Frog Leap Year Birthday Card for you! The rest of us can just celebrate having an extra day to do all those things we always want more time to do! It’s hard for me to believe it is the end of February already, even with the extra day.

I made this Playful Pal frog sitting on a lily pad using the Playful Pals Photopolymer Stamp SetYou can purchase the stamp set and the matching Pyramid Pals Thinlits Dies in a Bundle and save 15%. If you like either one, you will want both!

The card base is the same card stock as the lily pad, Mossy Meadow. The lily pad is punched with the 2 3/8″ Scallop Circle Punch. The frog is made by stamping pieces with the stamp set and then die-cutting some of the pieces with the Big Shot using the bright Cucumber Crush card stock. The background layer of the card is stamped with Soft Sky Ink on Whisper White with the Watercolor Wash Background Stamp.

Now to make the greeting, I happened to think of my Alphabet Rotary Stamp! Admittedly, I haven’t used it much, but it’s one of those things that comes in handy in the right circumstances. I just stamped each word on scrap paper and cut out each word. I think it’s a fun way to add a greeting to something, to just paste the single words.

I hope you will consider the Playful Pals Bundle which can be used for cards and projects such as my Playful Pal Frog Leap Year Birthday Card and of course the actual 3D pyramids for favors, gifts and treats.

Shop Stampin’ Up! Online! Earn FREE products during Sale-A-Bration!