Category Archives: Birthday

Birthday Bouquet Ice Cream Cone Card

Birthday Bouquet Ice Cream Cone Card

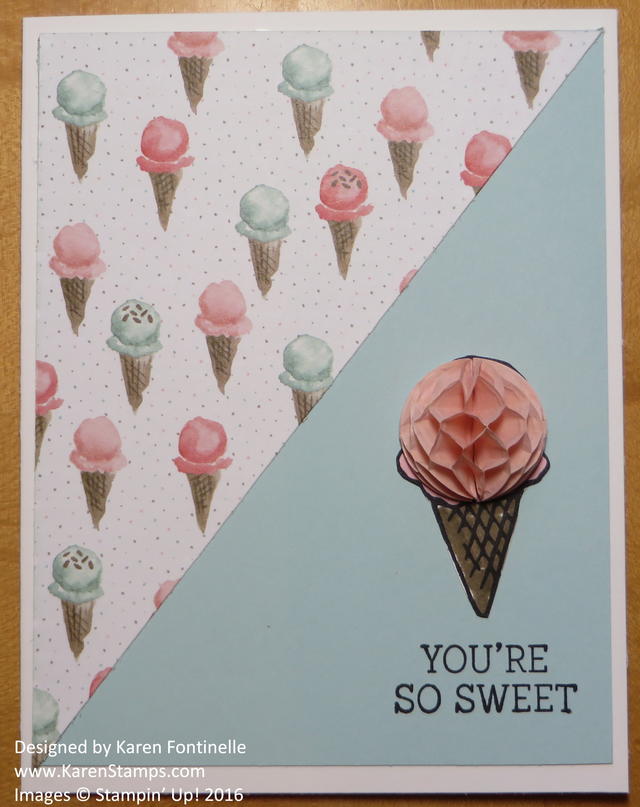
If you want to make a very easy card, this Birthday Bouquet Ice Cream Cone Card might be one you could make! It’s as simple as a card base, a layer of card stock, and a diagonally cut piece of designer paper! Stamp a greeting and you’ve got a card.  I added the ice cream cone but you wouldn’t have to if you want to keep it super simple!

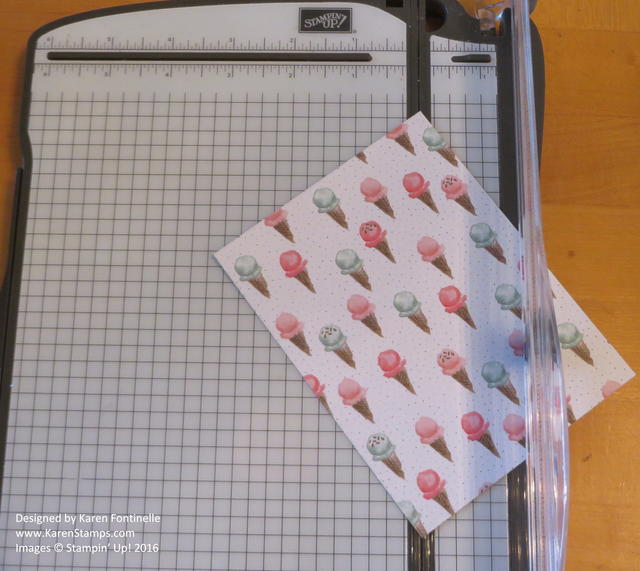
The card base is the new Thick Whisper White Card Stock. It is just a little thicker than regular Whisper White so it makes a sturdier card base like other colored card stock.  Regular Whisper White is fine, but the thick is just a little bit nicer. The layer is Pool Party, one of the coordinating colors with the Birthday Bouquet Designer Series Paper. I diagonally cut the designer paper.  Not a difficult job when you have the Stampin’ Up! Paper Trimmer! Just line up the opposite corners in the channel where the cutting blade will slide and you have your diagonal!  See the photo below.

Diagonal Paper Cutting

I stamped the ice cream cone from the Sale-A-Bration Stamp Set Honeycomb Happiness, in the Sale-A-Bration Brochure on page 15 on Whisper White, colored it in with markers and cut out with Paper Snips.  Then I added a Honeycomb Embellishment in the Occasions Catalog. These are self-adhesive, just peel off the backing. Not that I realized that at first, but you can also add Glue Dots instead if you want or for extra stickiness.

Shop Stampin’ Up! During Sale-A-Bration and Earn Free Product with Every $50 Purchase!

Easy Masculine Birthday All-Occasion Card For a Man

Easy Masculine Birthday All-Occasion Card For a Man

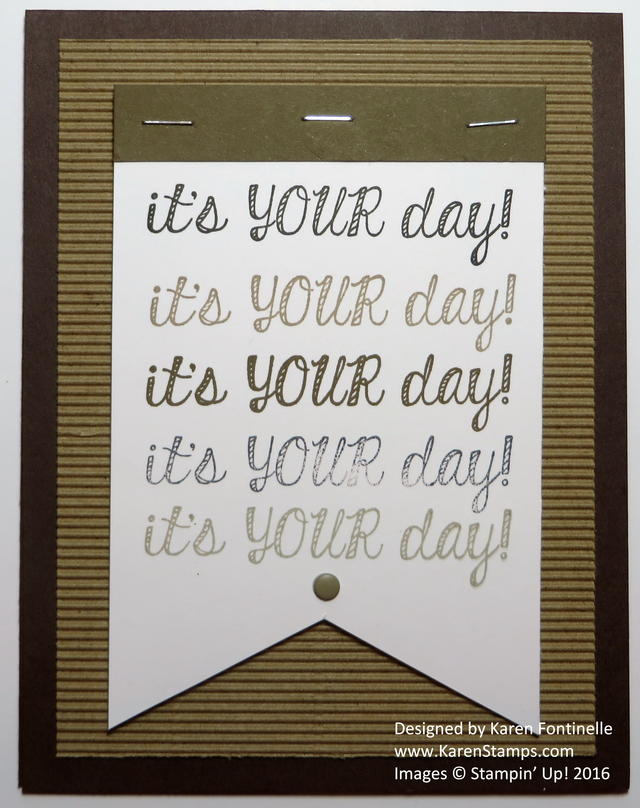
Yesterday I made a card very similar to this one HERE in this post, and then I thought about changing it up in color and texture to make an easy masculine birthday all-occasion card for a man.  I just used Chocolate Chip cardstock for the card base, making it open at the top instead of the side.  Just cut the full piece of card stock lengthwise at 4 1/4″ and then score in the middle at 5 1/2″ for the fold. I used a piece of the Kraft Corrugated Paper (you also get white sheets as well in the pack!) for the layer. The Whisper White banner is stamped with several different inks in the Neutrals family. I adhered a piece of cardstock at the top of the banner and stapled it (for that “masculine” texture!) with the Stampin’ Up! Handheld Stapler. Be sure to order a box of the Silver Mini Staples so you will have some on hand. And it all counts toward your $50 order for Sale-A-Bration!

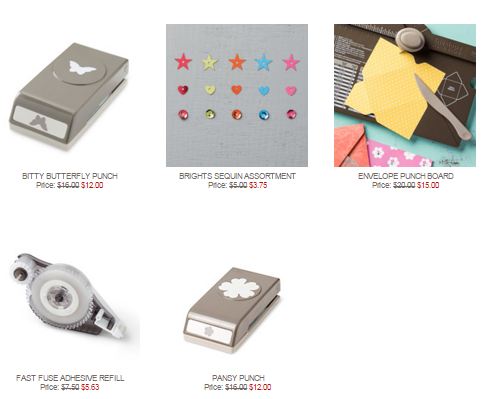
Don’t forget to check out the Weekly Deals this weekend if you are ordering!

Weekly Deal Feb 16 2016

If you are new and need catalogs (and a Demonstrator!), please email me at Karen@KarenStamps.com.  I have a few left on hand I can mail to you.

If you are reading this and are NOT on my mailing list, be sure to sign up in the box in the upper right of my blog or in the pop-up. I hope to have my mid-month newsletter going out today, but the gremlins may have run off with it overnight!  Yikes!  I may have to start over! Gotta love computers!!

Red Mailbox for Mailing List Sign Up

Order online at my Stampin’ Up! Store for all the supplies to make cards like the ones I have on my blog!

Fabulous Four It’s Your Day Card Idea

Fabulous Four It's Your Day Card Idea

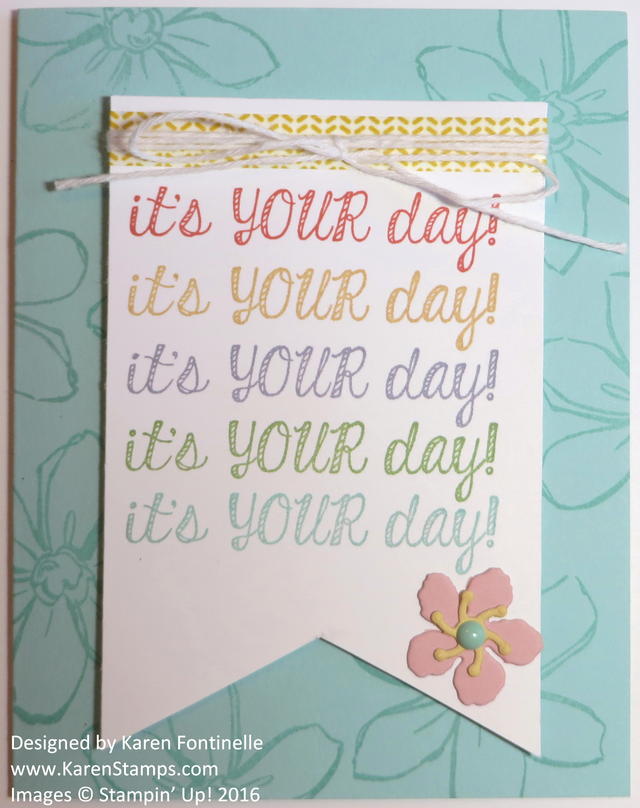
One of the many things I love about stamping is that it is okay to copy an idea, as I did with this Fabulous Four It’s Your Day Card. While a birthday card might come to mind, I think this card with this greeting could be for lots of occasions. I saw this idea in the magazine we receive as Stampin’ Up! Demonstrators and I changed it just a little bit.

The card base is Pool Party card stock stamped with an outline flower from the Garden In Bloom Photopolymer Stamp Set in Pool Party ink for a watermark effect.  The center banner is stamped with the same greeting from Fabulous Four multiple times in multiple colors. I chose Calypso Coral, So Saffron, Wisteria Wonder, Wild Wasabi, and Pool Party. At the top of the banner, instead of card stock, I put a strip of Cherry on Top Designer Washi Tape around the top and tied on a piece of Whisper White Baker’s Twine. For some extra pizzazz, I used my Botanical Builder Framelits Dies to cut out a little flower and its center to put on the banner. I also added one of the It’s My Party Enamel Dots to the center.

This is an easy card to make and can be copied and changed up a bit in colors or texture to make a card for anyone and any occasion. The Fabulous Four stamp set is one I have used a lot, especially the It’s Your Day greeting.

Shop Stampin’ Up! Online HERE for the best in cardmaking supplies!

Making a Valentine Birthday Card With Paper Pumpkin

Making a Valentine Birthday Card

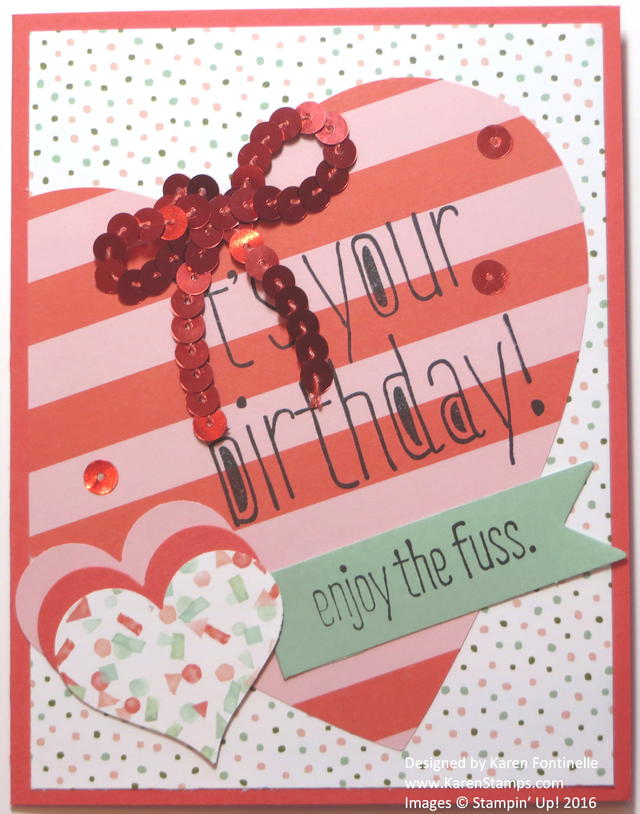
Although the January 2016 Paper Pumpkin Kit had an obvious Valentine theme to it, you can also use hearts for a birthday, especially a birthday for Valentine’s Day. When you receive your Paper Pumpkin papercrafting kit in the mail, you can follow the enclosed directions and/or you can make your own alternative Paper Pumpkin ideas. There often are enough materials to do some of both! And some people subscribe to two kits so they can make the project as designed and then play around with the second kit to make other creative ideas!

There are always alternative ideas out there and I saw other ideas of making cards with the hearts. Since I didn’t really need another Valentine, I decided to make a birthday card with the big Paper Pumpkin heart.  If you aren’t getting the Paper Pumpkin Kit, just cut out your own heart out of cardstock or designer paper.  Perhaps you have the retired Hearts Framelits. (How could they retire those?!!) It’s okay for the heart to be too big for the card, just cut off the overhanging part and it still looks fine. I stamped this heart with a greeting from the Big News Stamp Set.  The background paper is from the Birthday Bouquet Designer Series Paper If you are using two patterns on your card, have one be big and bolder and one smaller to make them work. My little banner also comes from the Paper Pumpkin Kit. The smaller hearts are punched with the Sweetheart Punch.  I just punched three so I could get sort of a layered look even though they don’t really “layer”. The beautiful sequin trim also comes in the kit and I made it look like a bow, adhered with Glue Dots. I pulled off a few sequins to adhere randomly on the heart. Easy with the tiniest drop of glue on the paper and then place the sequin on the paper, don’t try to put glue on the sequin.

I hope this gives you an idea for a Valentine card, alternative ideas for your Paper Pumpkin Kit or an idea for using hearts for other occasions like a birthday, rather than just Valentine’s Day.

Shop Stampin’ Up! Online!

Stampin’ Up! Weekly Deals

Stampin’ Up! Sale-A-Bration

(Last weekend to get the three limited edition products pages 16-19!)

Birthday Builder Card #ImBringingBirthdaysBack

Birthday Builder imbringingbirthdaysback

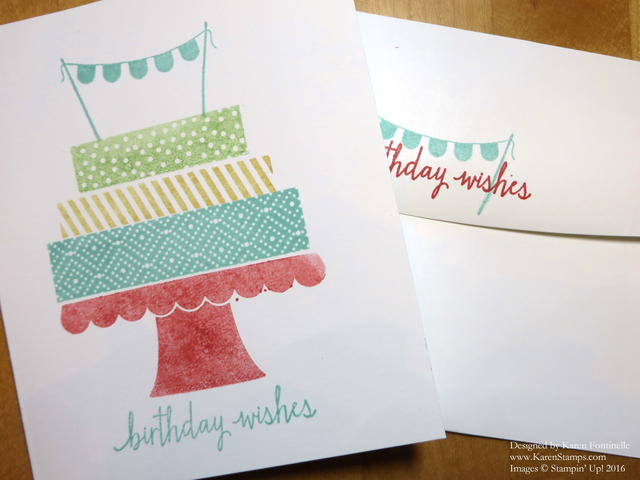
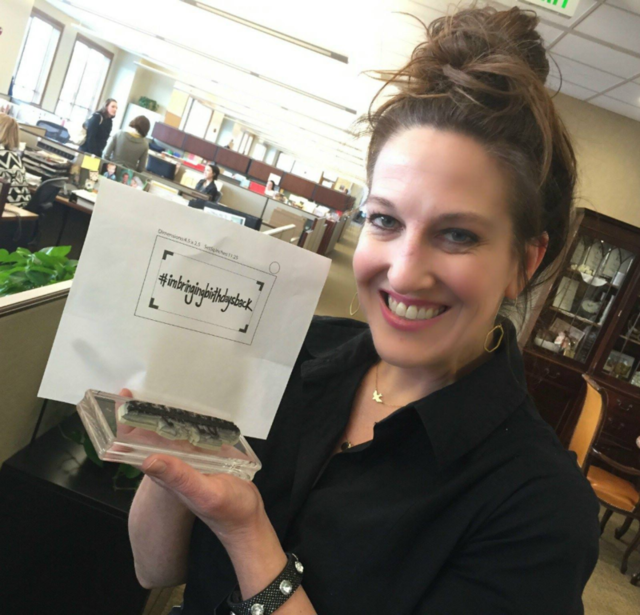
Yesterday Shannon West, from the Stampin’ Up! Corporate Office, was on a local Utah morning show with some stamped birthday cards with the Build a Birthday Stamp Set talking about her idea called #ImBringingBirthdaysBack. Shannon West is one of our favorite presenters at Stampin’ Up! events and on videos, etc.

Shannon was feeling that social media, with its quick and easy way to just type a birthday greeting online to friends, was ruining birthday cards, so she decided she wanted to send a birthday card to anyone who wanted one!  She even made her own hashtag stamp #imbringingbirthdaysback. If you aren’t familiar with hashtags, they really are kind of like search terms that group those certain terms together. Sometimes they are specific and sometimes they are just funny or silly. Of course Shannon was deluged with requests.

Stampin’ Up! got behind her movement since making and sending cards is what we do!  At least we intend to!!  So maybe this will spur more of us on to not just type a birthday greeting on social media but to send a card, especially a handmade card! Let’s make the post office busy again! Stampin’ Up! is going to manufacture Shannon’s hashtag stamp! I can’t wait!

You can see Shannon on the local show, Good4Utah, yesterday HERE.

I made a card similar to the ones she showed, as you can see in the photo above.  I also loved the idea of how she stamped the back flap of the envelope!  Remember, we should not be sending out “naked envelopes”!  Stamp something on them!

Let’s all get those birthday date books out and start making cards, or pull out the ones you have made but not mailed, and start sending real birthday cards, IN THE MAIL, to your friends and loved ones! Bring back the good old days when postmen delivered cards and letters in the mail!

Shannon West BD stamp

Birthday Card with Stars

Birthday Card with Stars

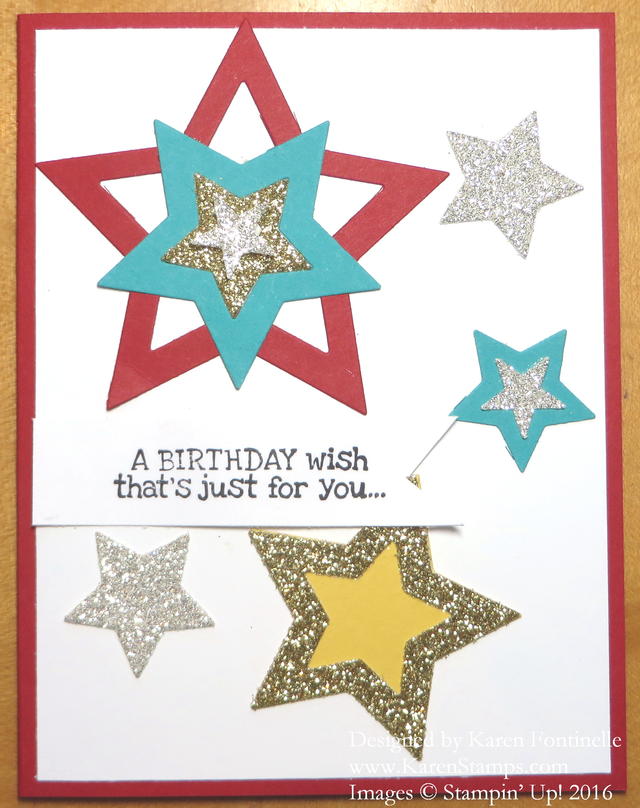
You never know what card design you might come up with from scraps on your desk, such as this Birthday Card with Stars. In order to make space for our Christmas tree, we have to move a desk to another room. This desk is where I heap lots of stamping stuff, not where I actually stamp. The Christmas tree has been down for a little while but we haven’t moved the furniture back where it belongs. Yesterday I was putting designer papers back in their packages which were in a holder (or not!) on this desk, when something tipped over, which knocked my ribbon storage things off the back of the desk with ribbon rolls going everywhere underneath the desk. Even when I tried to catch things and straighten everything back up, there was another domino effect with more stuff going crashing everywhere. It was almost funny except for the mess it was making! So I guess I need to do some major tidying up on that desk when we move it back!

But in the process of the little bit of tidying up I found all these stars I had already cut out with the Stars Framelits Dies so I decided to just go ahead and make a card with some of them! I placed the stars around on the card, adhered them, and then added a greeting from Remembering Your Birthday. I even decorated the inside a little bit with a couple small stars.

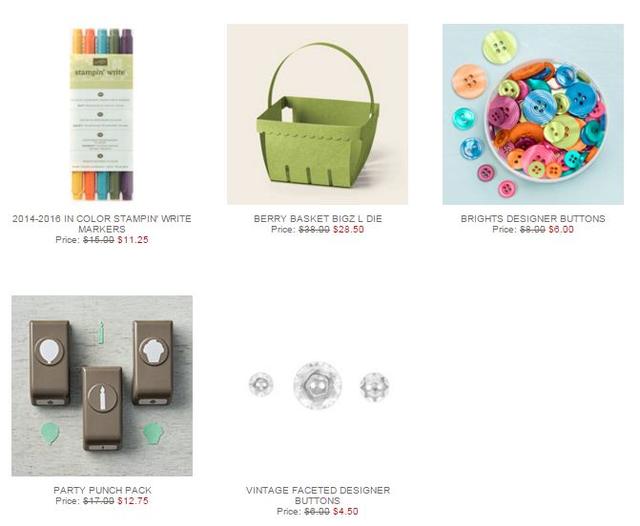
And here are the current Stampin’ Up! Weekly Deals, out today until Monday, January 25.

Stampin' UP! Weekly Deals Jan 19 2016

One exciting product on the Weekly Deals is the Party Punch Pack, which is in the new Occasions Catalog on page 4. If my math is correct, if you want the Party Punch Pack along with the coordinating stamp set Party Wishes, then it is a better deal to purchase the Bundle.  If you just want the punches, then the Weekly Deals discounted price is better.

And of course the other products on the Weekly Deals are all great. I think markers are very useful to have, especially if you don’t own the ink pads.  The Berry Basket Die is fun for lots of projects, and who doesn’t need plenty of buttons on hand for embellishing?!

Even the Weekly Deals count toward Sale-A-Bration, where you get to choose a free Sale-A-Bration item in the brochure with every $50 Stampin’ Up! purchase. Let me know if you have any questions about Sale-A-Bration and the product choices.

Shop Stampin’ Up! Online!

Mini Treat Bag Thinlits Birthday Card

Mini Treat Bag Thinlits Birthday Card

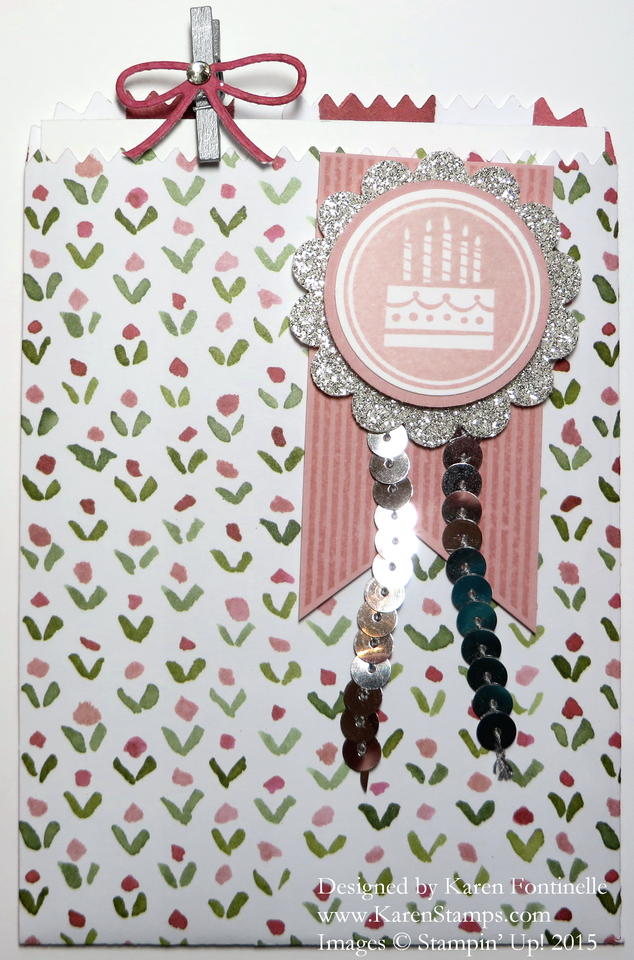
You know how I love the Mini Treat Bag Thinlits Dies and here I have made a Mini Treat Bag birthday card using one of the patterns in the English Garden Designer Series Paper collection.  I’m not sure I had noticed this particular pattern before, but it jumped out at me the other day.  I knew it was perfect for this project.  The other side is also nice, wide dark pink stripes, which you can barely see on the inside of the treat bag at the top. For the card part, I just slipped a piece of Whisper White that fit inside and stamped with a greeting from the Amazing Birthday Stamp Set.  I have used the “Happy Happy Happy Happy Birthday to you” greeting over and over again in birthday cards I have made. I attached one of the Mini Metallic Clothespins to the top of the card so it is clear that the recipient needs to pull out that inside card, and to make it stand out I die cut the little bow that comes with the dies and adhered that to the clothespin, along with a small Rhinestone Jewel. Why not?!

The front of the mini treat bag card is pretty simple.  I stamped the banner in the Amazing Birthday Stamp Set and just cut it out by hand. Then I stamped the birthday cake, punched it out, layered it on a larger circle punch, and then mounted it on the Silver Glimmer Paper scallop punch. For a little more pizzazz, I added a piece of the Silver Sequin Trim to dangle.

The Mini Treat Bag Thinlit Die card is perfect for slipping a gift card inside, too, if you like, or folding the top over and adding a belly band.  So many possibilities! And you get lots of pieces in the die package.  I love making cards and other projects with the Mini Treat Bag Thinlits such as this birthday card.

Shop Stampin’ Up! Online During Sale-A-Bration!

(One free Sale-A-Bration product with every $50 Stampin’ Up! purchase!)

Star Wars R2D2 Punch Art Birthday Card

Star Wars R2D2 Punch Art Birthday Card

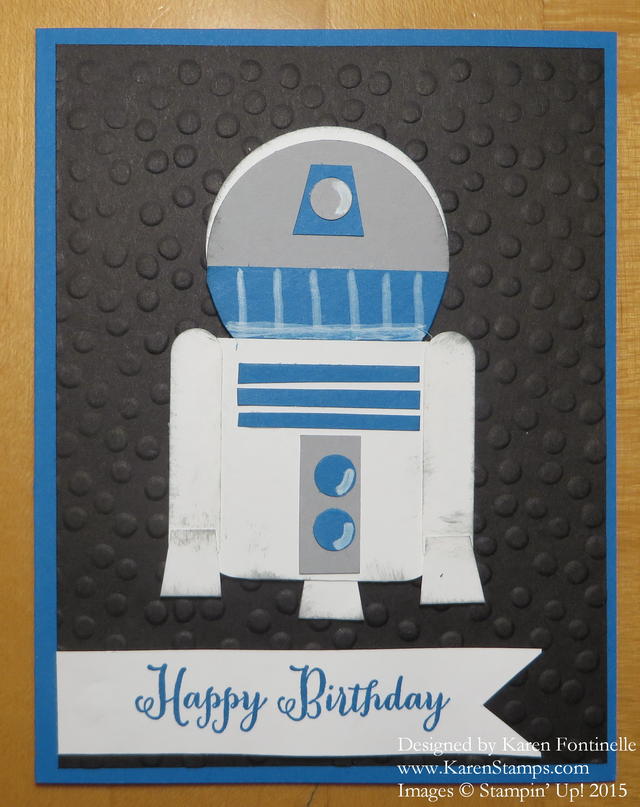
Before we get totally inundated in Christmas, after watching all the Star Wars movie promotions on TV I remembered I had made this Star Wars R2D2 Punch Art Birthday Card for my favorite son-in-law (my ONLY son-in-law, but a favorite nonetheless!). I’m trying to get slightly interested in Star Wars so perhaps I will go see the movie with my family at Christmas so I will know what everyone is talking about. I did see the first Star Wars movie way back when so I slightly know about the characters and such. Sometimes you just have to keep up with this stuff!

I found this idea to make R2D2 character on Pinterest or somewhere. I don’t think there were specific directions and when I made this card I was in a hurry to get it in the mail that day so I was lucky I remembered to take a photo of it, so unfortunately I can’t say for sure what size punches I used, but I am confident you can figure it out from the photo!

The head, of course, are two circle punches, the bottom blue piece another circle but trimmed into the shape shown. The body was probably just a rectangle with rounded corners on the bottom, punched with the Project Life Corner Rounder Punch.  The arms are made with the Word Window Punch (talk about a handy punch!) and the hands are just little scraps cut by hand. The little circles are probably cut with the Owl Punch (another super-useful punch). The background of the card is Basic Black card stock embossed with the Decorative Dots Folder.

If you want to see other Star Wars cards I have made, check THIS POST for a Yoda card and THIS POST for a Yoda and Darth Vader card.

Shop at Stampin’ Up! Online if you need any of the punches or materials to make this Star Wars R2D2 Punch Art Birthday Card or contact me if you have any questions or need help with your order.

Airplane Punch Art Birthday Card

Airplane Punch Art Birthday Card

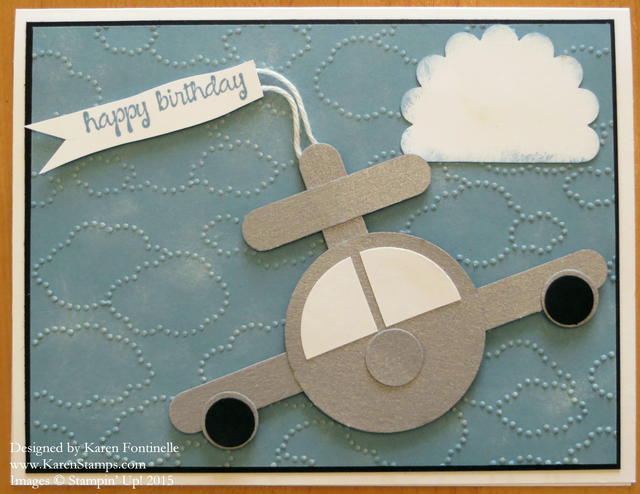
Now that my brother’s birthday has come and gone, I can post the Airplane Punch Art Birthday Card I made for him. The background layer of the card is made with the Cloudy Day Embossing Folder (retired), but an alternative thing you can do is just sponge some White Craft Ink onto a blue background to make some wispy clouds in the sky. I even have one “cloud” in the sky made with one of the Scallop Circle Punches, depending on which size you want to use.

The airplane is made with the Word Window Punch for the wings and the tail. The front of the plane is made with one of the circle punches.  I forget which size! But you can experiment and see which size works for your airplane! For the windshield, use a smaller circle punch and cut it in quarters.  Use two of the quarters for the window. Then, of course, the plane nose and jet engines are made with two small circle punches, I probably used the 1/2″ circle or so. For the body of the plane, I used some retired Silver cardstock but you could use Silver Foil for a shiny plane or one of the gray colors. I “tied” on a banner like an airplane pulls for advertising for the birthday greeting and just cut the banner by freehand.

A fun and easy birthday card to make.  You could use a design like this for a birthday party theme. Try the Airplane Punch Art Birthday Card and customize it!

If you want to make a card like this and need some papercrafting supplies, just shop at my Stampin’ Up! Online Store.

New Stampin’ Up! Weekly Deals Aug 11 2015

Stampin' Up! Weekly Deal Aug 11 2015

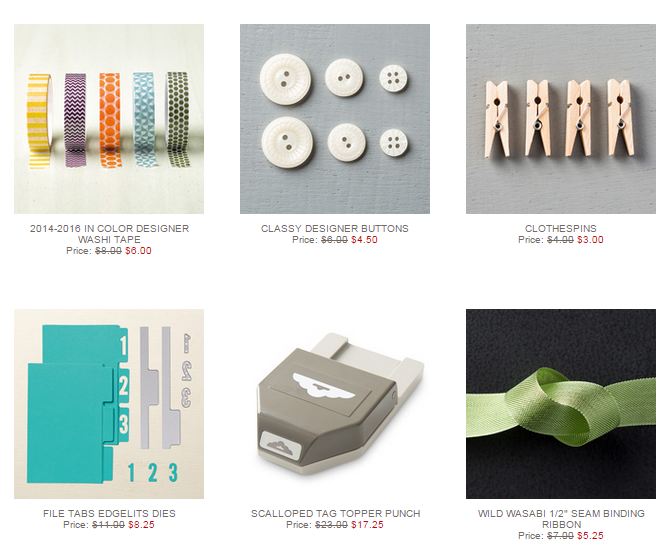
Here are the new Stampin’ Up! Weekly Deals for August 11 – 17, 2015. The main item I would point out is the Scalloped Tag Topper Punch!  If you don’t already have this punch, I would put this on my order for sure! Not only does it make a cute tag with that decorative edge at the top, but you can make longer ones, punch both ends and make a cute favor or belly band or —- ??! Always lots of cute ideas out there!

And then for fun, there are these good embellishments, the Seam Binding, Clothespins, Buttons and Washi Tape!  And who doesn’t need more washi tape?? And if you would like to make your own filing system or organizing system or just some cute cards and projects, then the File Tabs Edgelits Dies are for you!

Be sure to check the Clearance Rack for any additional bargains you might find to add to your order!

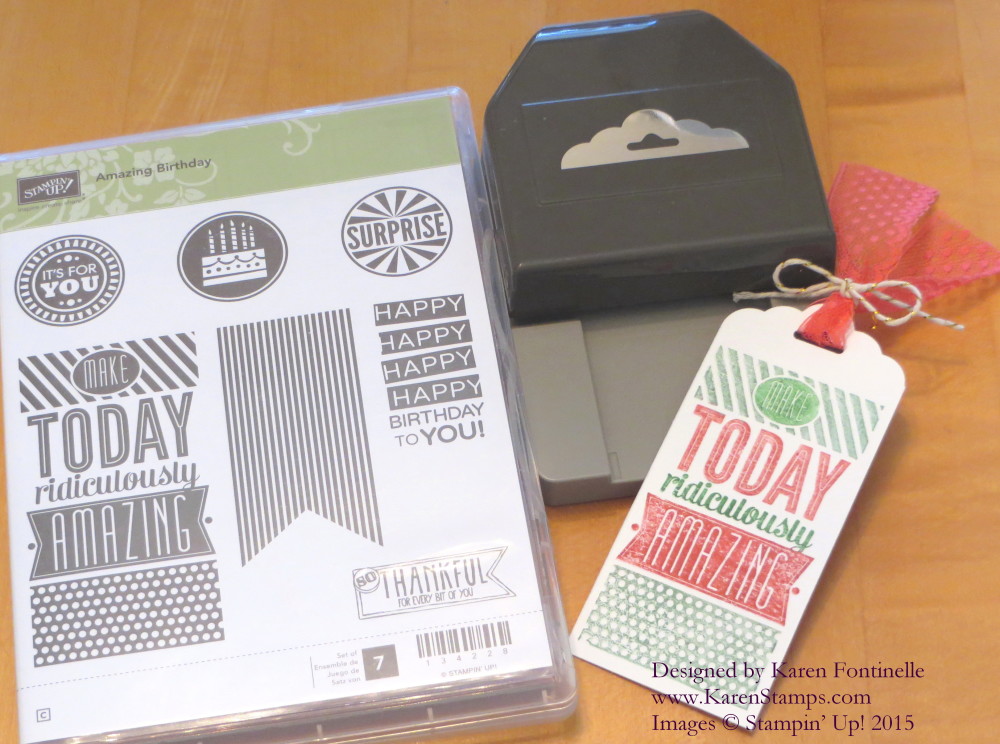
Here is a birthday tag you could make with the Scalloped Tag Topper Punch and just the Whisper White Thick Cardstock with a little Watermelon Wonder Dotted Lace Trim tied with a piece of Metallic Gold Baker’s TwineI used several of the new In Color Markers to color right on the stamp.

Scalloped Tag Topper Punch Birthday Tag
Just in case you know someone whose birthday is today! 🙂

Shop at Stampin’ Up! Online HERE or ask me, I’m happy to put in your order for you!

Make a Tea Light Birthday Cake

Tea Light Birthday Cake

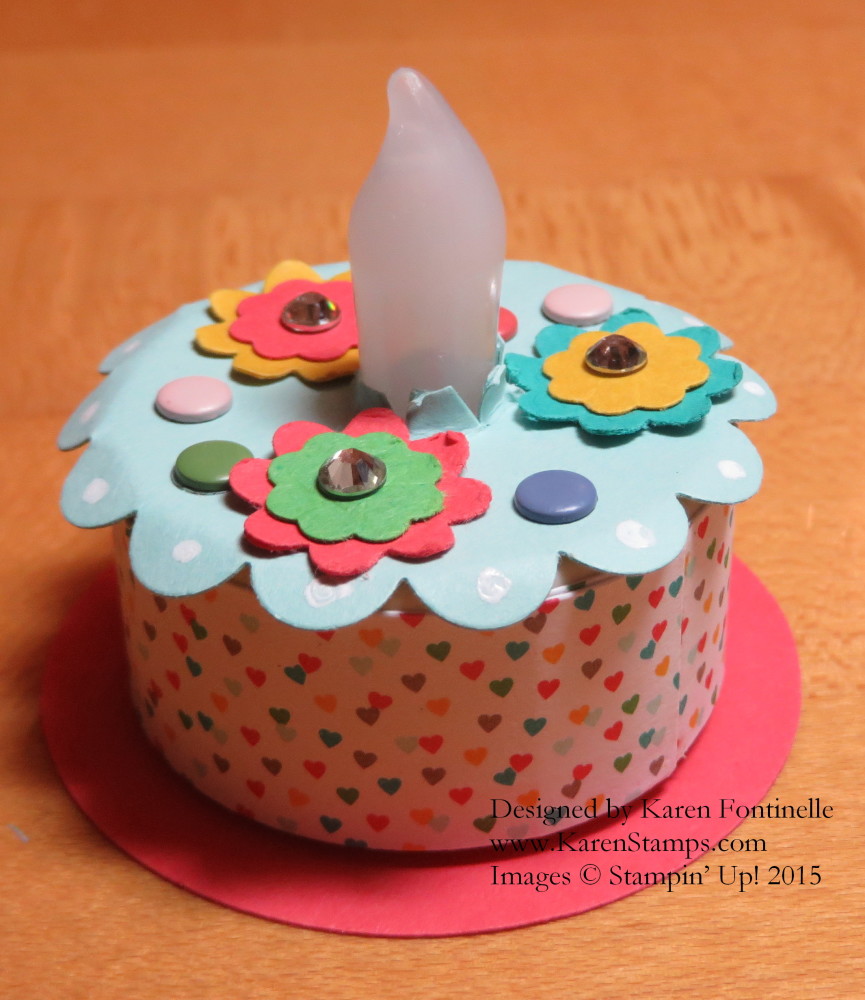
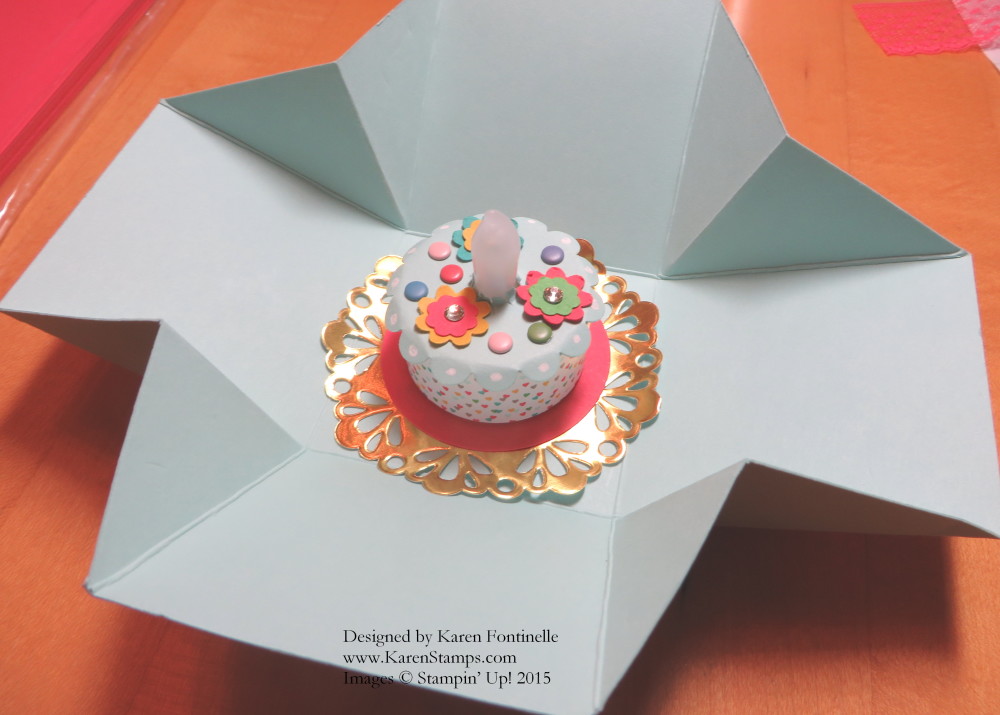
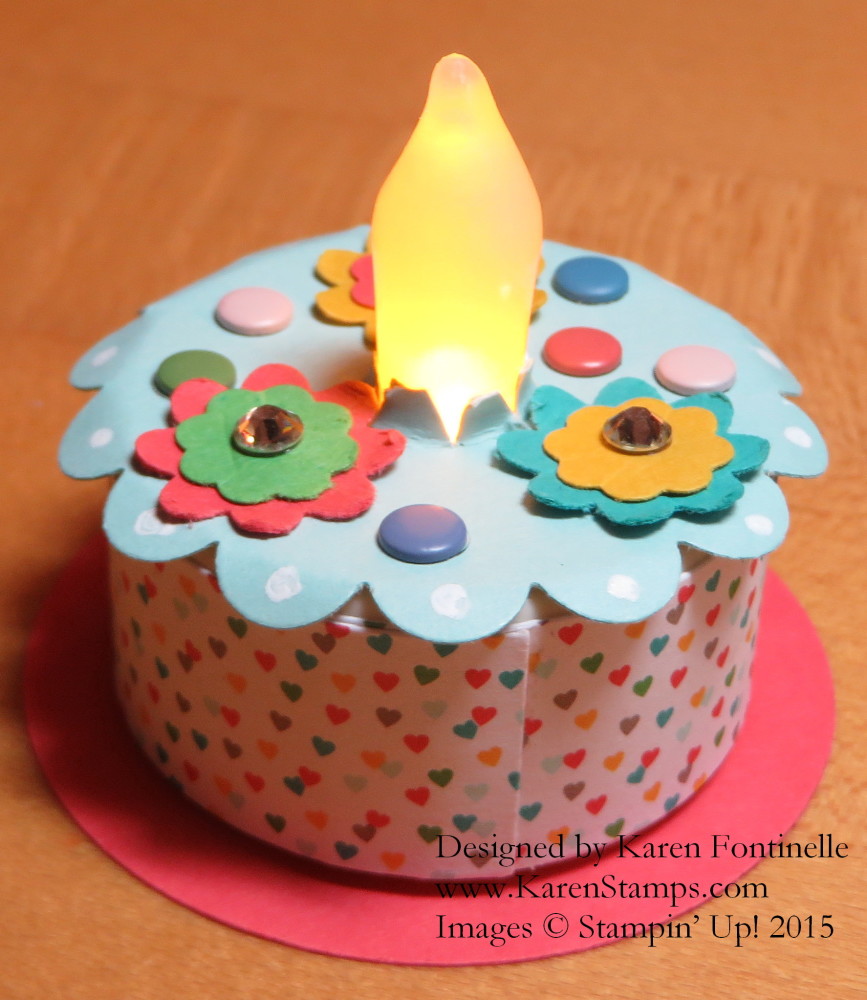
When I needed a fun little gift for a friend, I thought of this cute tea light birthday cake! It’s so easy to just wrap a piece of designer paper or washi tape around the side of the tea light and then decorate the top with a 1 3/4″ Scallop Circle PunchPoke a hole in the center of the scallop piece, cut some little slits so the scallop will slip over the light bulb, then decorate to your heart’s content! I punched the little flowers with some retired punches, but you can use whatever you have in your stash or perhaps stamp a design on the top. I also added some Candy Dots and Rhinestone Jewels, plus a little doodle dot on each scallop edge with my White Signo Uni-Ball Gel Pen. There are lots of fun ways to decorate these little tea light cakes! You just have to purchase some tea lights at the craft store and play with them!

I also made some kind of box to package the cake in, but I failed to take a photo so we’re out of luck on that one!

The only tricky part of this project is the little switch on the bottom of the tea light.  If you want to set the tea light on some kind of base, perhaps resembling a plate, then you have to cut or punch a hole to allow access to that switch (and if yours has it, don’t forget to pull out the little piece of plastic protecting the connection so that it won’t get accidentally turned on before you buy it!).

Tea Light Birthday Cake and Box

I added a Metallic Foil Doily in Gold for the presentation! I think I adhered the Watermelon Wonder card stock to the base of the tea light but then just added a tidbit of adhesive for the doily to hold the cake in place in the box.

Tea Light Birthday Cake Lit

Here you see what it looks like with the tea light lit. I also happened to photograph it from the backside in my rush, but at least you can see how I adhered the piece of paper from the Cherry on Top Designer Series Paper Stack.

This is a really fun project to make, quick and easy really. Just keep a few cheap tea lights on hand and you’ll be ready to go! It’s always good to have things on hand that you can make an easy gift or card with and impress your friends and family!

For the best in papercrafting supplies, please visit my Stampin’ Up! Online Store! Or contact me if you need assistance or would like me to put your order in for you. Try this Tea Light Birthday Cake project soon!

Sprinkles of Life Cherry on Top Birthday Card

Sprinkles of Life Cherry on Top Birthday Card

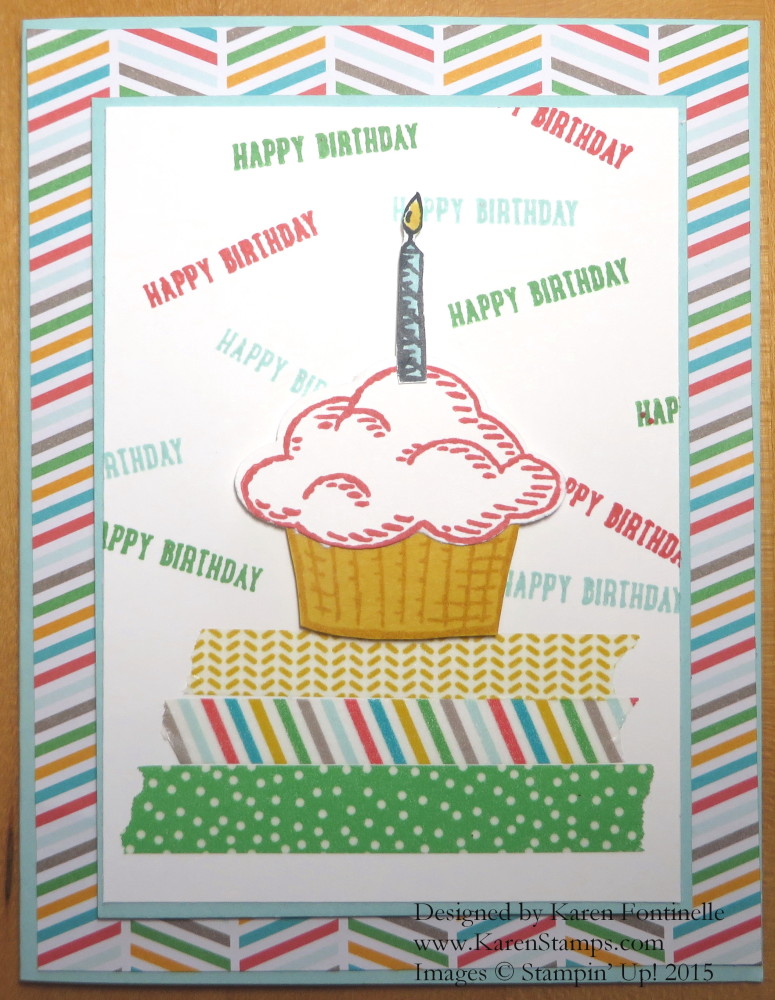
Do you like this birthday card made with the Sprinkles of Life Stamp Set, Cherry on Top Designer Series Paper Stack, and the Cherry on Top Designer Series Washi Tape?  I really wanted to use all three products, and I love all three products, but I think the card turned out a little busy.  I think I could have done something better.  But, on the other hand, maybe somebody out there will like it and it will be just the card design they are looking for!  You never know!  We are all different!

I also used the Tree Builder Punch to punch out the pieces for the cupcake. But if you don’t have the punch, the pieces are not that hard to cut out yourself, at least if you have the Stampin’ Up! Paper Snips.

Washi Tape is always fun to use.  Just tear off a few strips and stick them on your card or project. Washi Tape is repositionable and can be used in oh so many ways.  The Cherry on Top Washi Tape has such cute designs and matches the Cherry on Top Paper Stack. I used a pattern from the Paper Stack for a layer on the Pool Party card base.

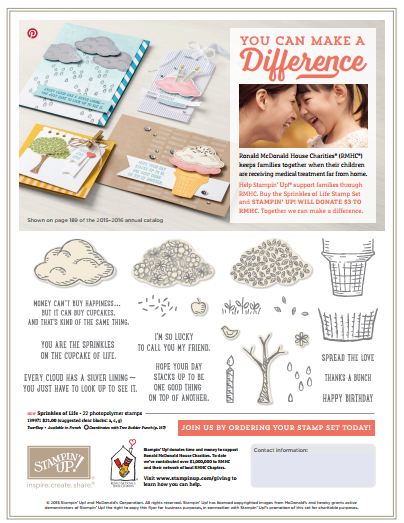
The Sprinkles of Life Stamp Set comes with a special bonus!  While you are stamping beautiful cards and projects with it, you will know that you are contributing to the Ronald McDonald House Charities® by purchasing this stamp set.  With every set sold, Stampin’ Up! donates $3 to this worthy charity, plus makes an annual contribution.

Sprinkles of Life Stamp Set RMHC

You can find this Sprinkles of Life Stamp set and all the products I used to make this card in my Stampin’ Up! Online Store.

How to Make a Piano Birthday Card

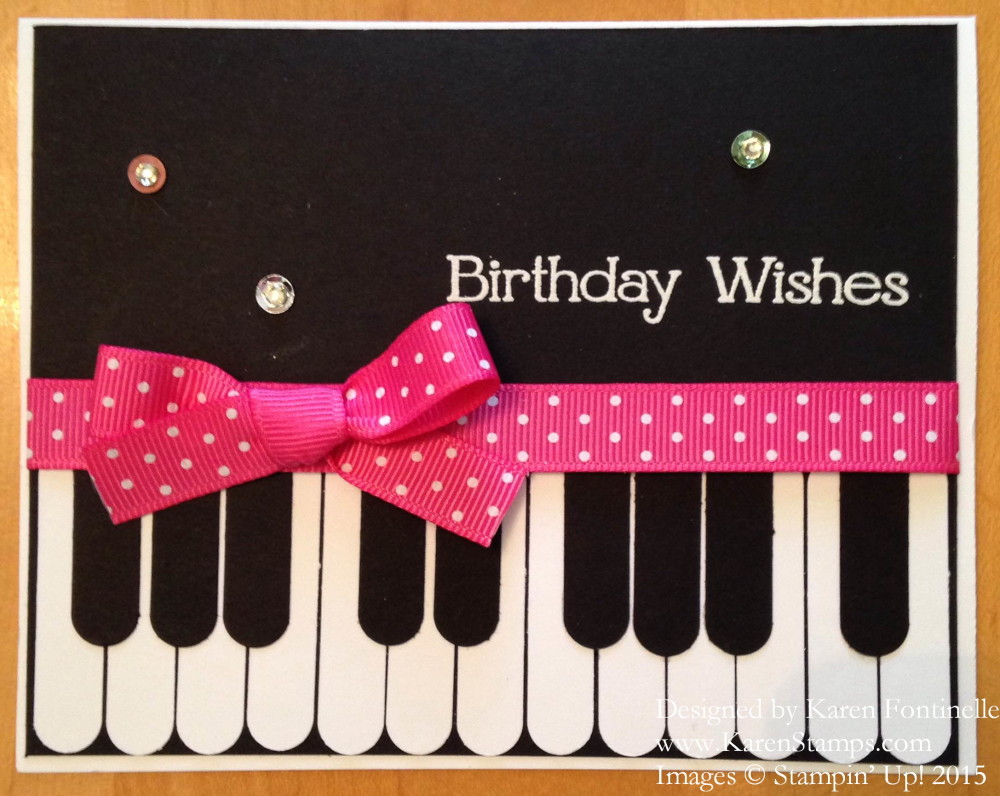
Piano Birthday CardIf you know a piano player, you might like to make a piano card for them! It’s very easy to make a card like this in spite of how different and difficult it looks! You will need the Word Window Punch to make the piano keys. And that’s about it – really!

Make a card base with Whisper White card stock. Make a Basic Black layer on which you will build the piano. I heat embossed the greeting with the White Stampin’ Emboss Powder using the Heat Tool. Rub the Embossing Buddy around on the card first to eliminate static and keep the powder from sticking where you don’t want it.

Punch thirteen white piano keys with the Word Window Punch and line them up along the bottom edge of the black layer. When you know you have them fit correctly, adhere them to the black card stock. The back edge of them will be hidden under the ribbon. Punch nine black keys with the Word Window Punch and adhere them as shown over the white keys. Don’t glue down the very back end of the punched piece.  You will need to trim the back end of the black keys to match the back edge of the white keys so they won’t stick out. Just trim them with the Paper SnipsTie a ribbon of your choice around the layer as shown.   Mine is a retired polka dot ribbon but you can use what you like. Make a bow or just tie a knot.

For a little more pizzazz I added some sequins and rhinestones in the sequin centers. Try the Brights Sequins in the new catalog.

Try a piano card!  Make it suit the occasion with the proper greeting and ribbon!

Shop anytime at my Stampin’ Up! Online Store!

Remember the Stampin’ Up! Weekly Deals, good through Monday, June 15.

Stampin' Up! Weekly Deal June 9 2015

May 2015 Paper Pumpkin Kit

If you didn’t join Paper Pumpkin by May 10th, this is what you missed! And if you did get your Paper Pumpkin kit in the mail already, you might like to watch this video to see how it goes together – OR you might want to wait and be surprised when you open your kit! I don’t know what is coming in the June kit, but you need to sign up by June 10th to get your kit shipped by mid-June!

Take advantage of the 50% off special for the first two months! It’s for new subscribers so join NOW! Good through June 10, 2015. Use Promo Code SAVE50

JOIN PAPER PUMPKIN

Watch the video and see how fun and easy the kits are!

Butterfly Mini Treat Bag Birthday Cards for Twins

Butterfly Mini Treat Bag Birthday Card

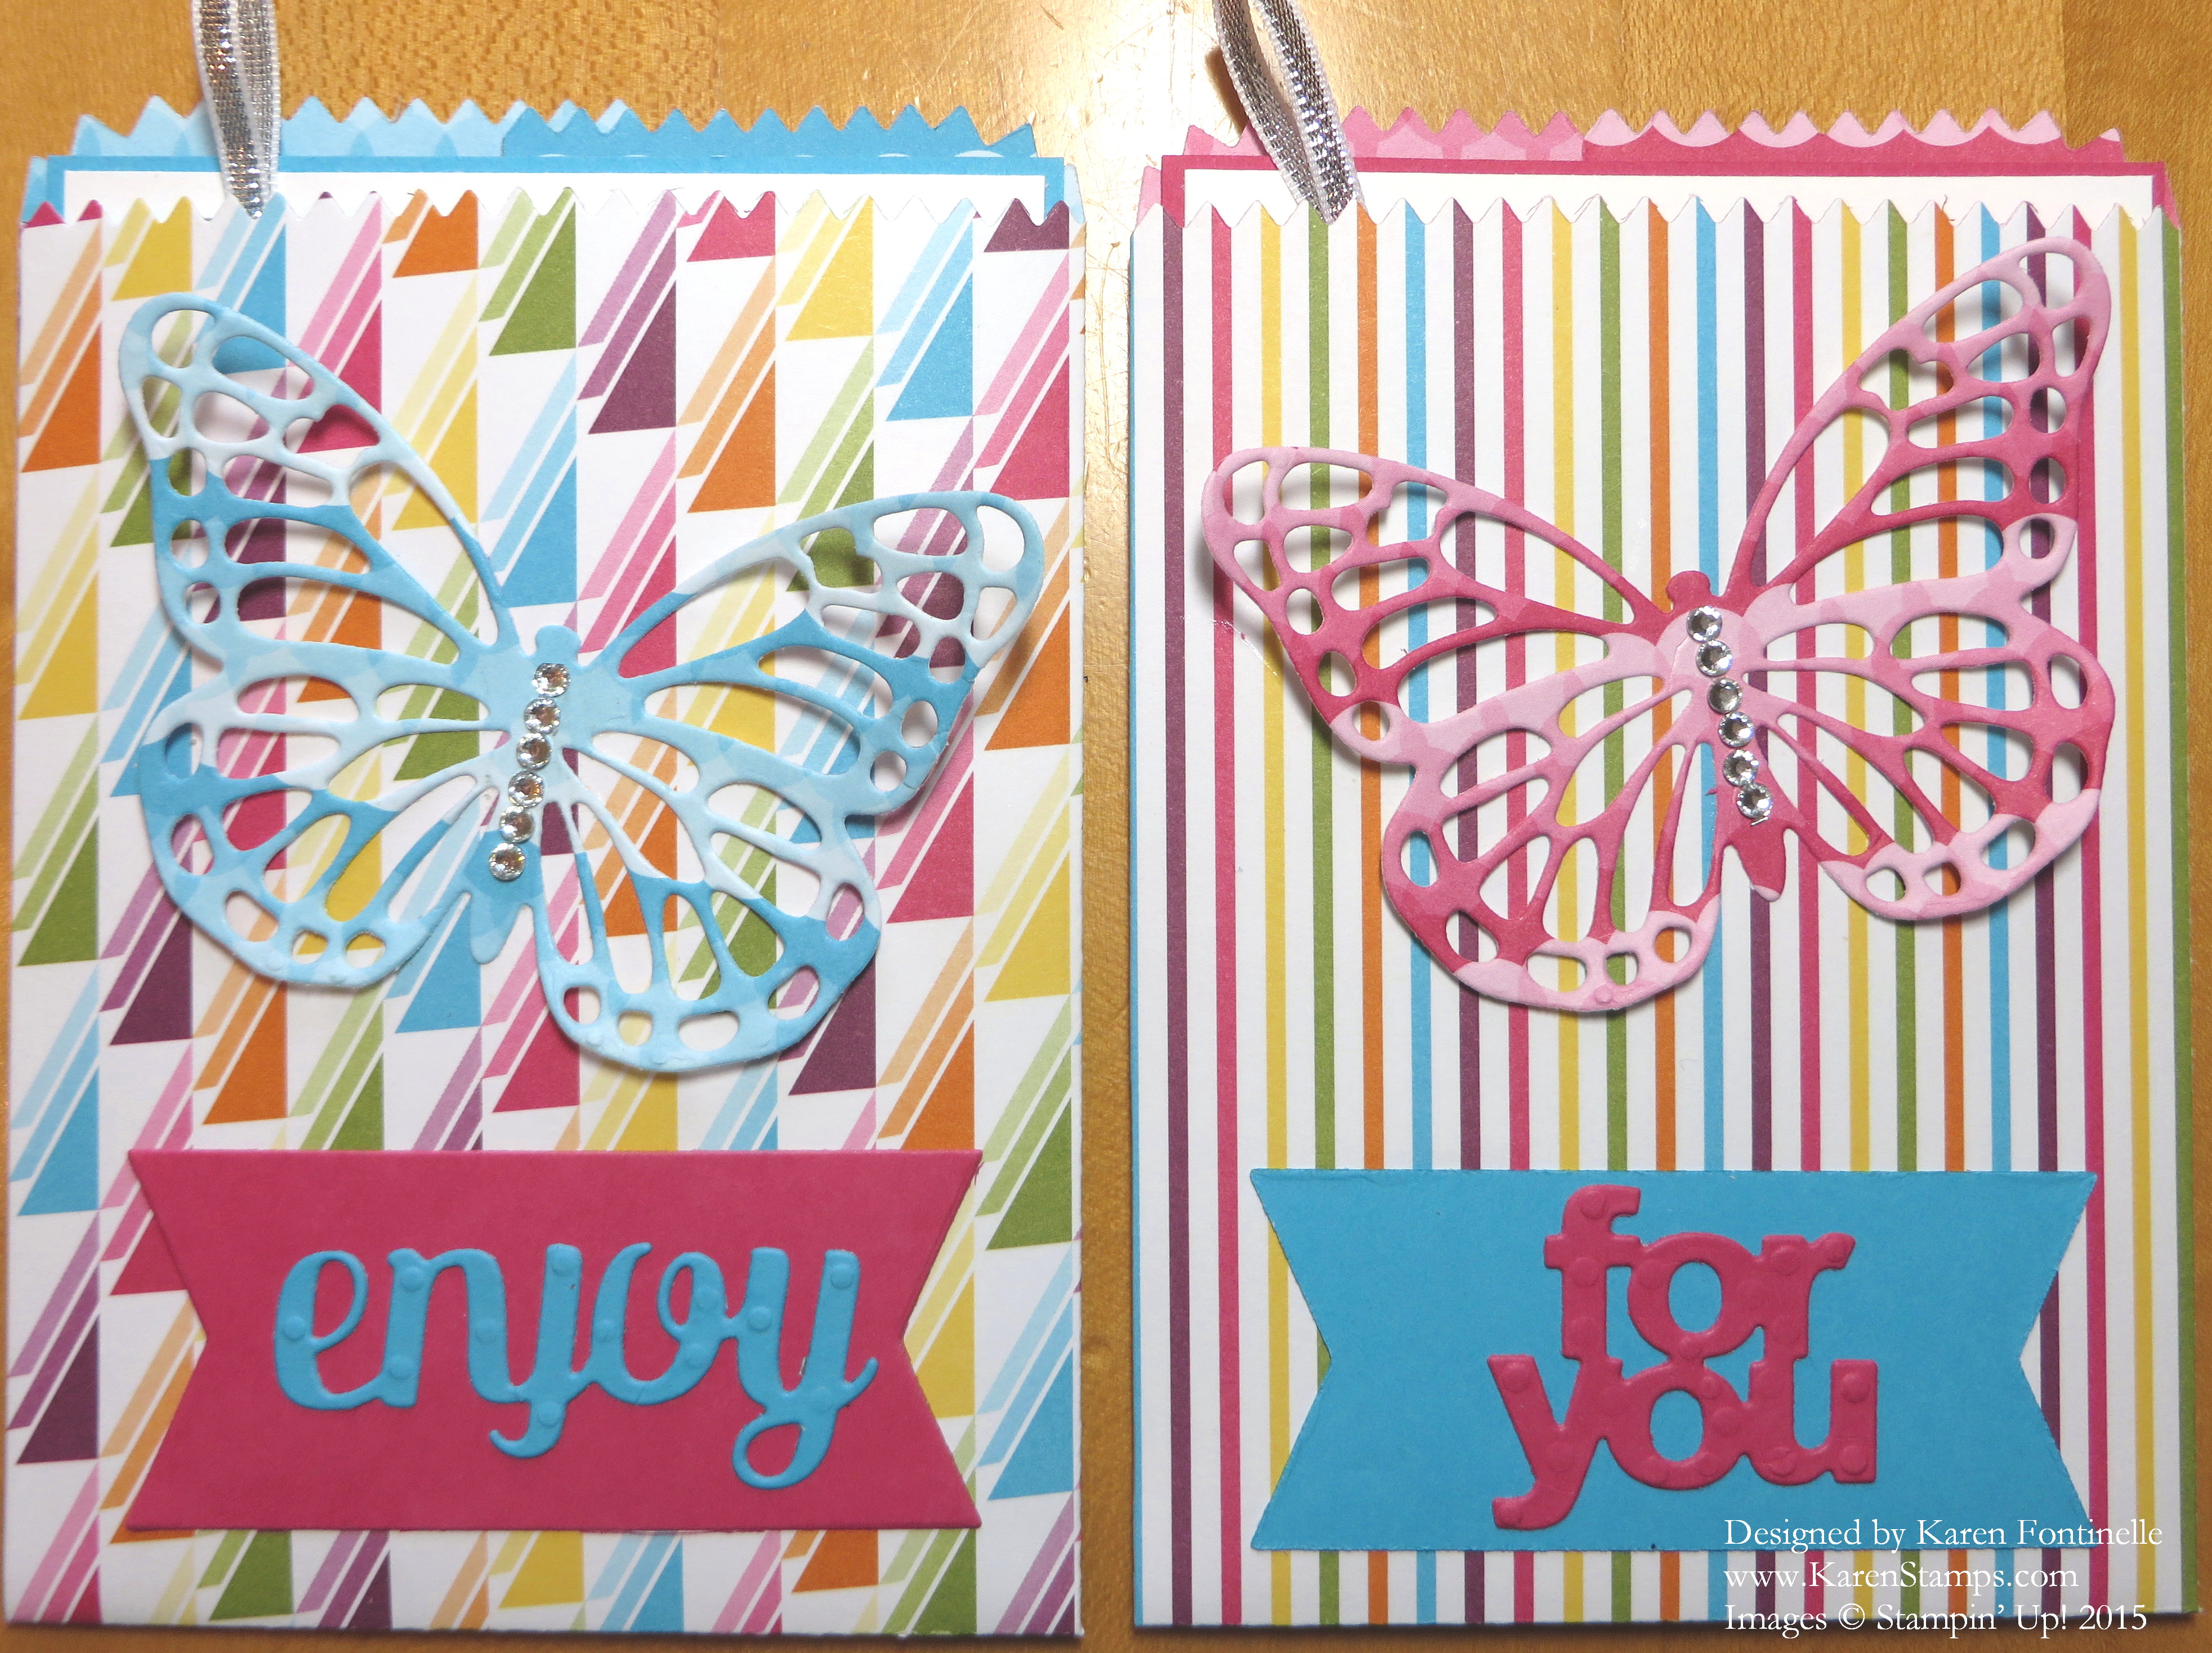
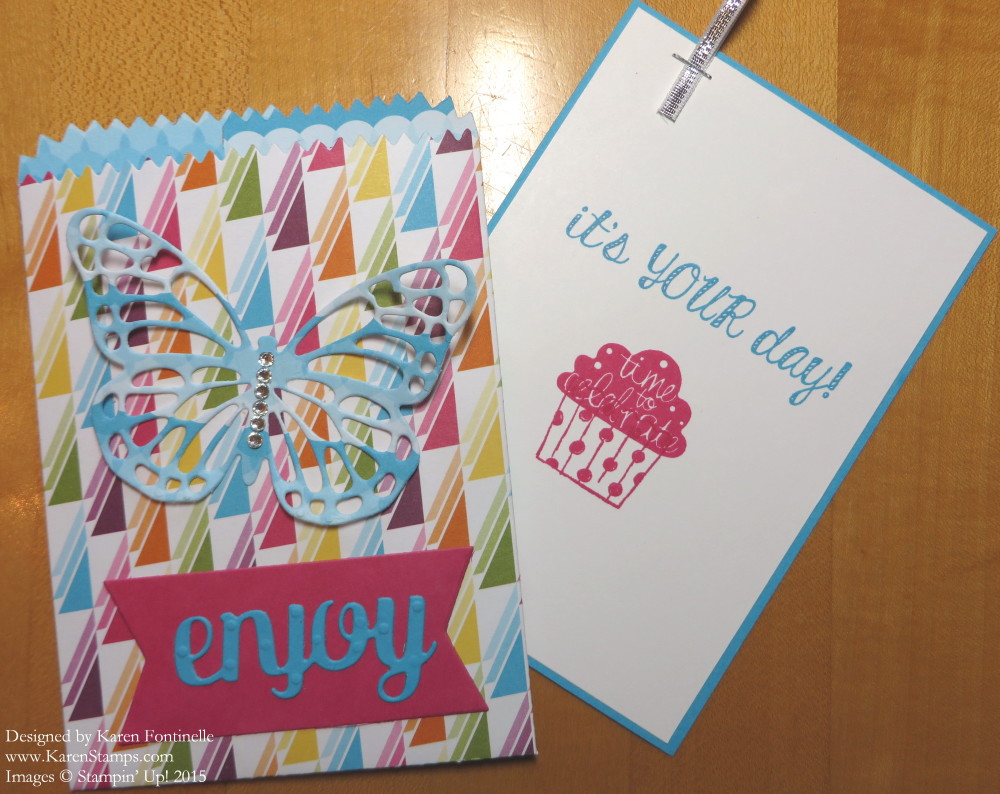
My twin nieces had a birthday this week so I wanted to make them cards that were almost alike but slightly different. I made both of them pocket cards with the Mini Treat Bag Thinlits DiesThis die is a good investment because you get so many pieces with it besides the treat bag. And you can make more than just treat bags with it. Click the link to see all the dies that come in this set – words, shapes, strips!

The bags are made with the Sweet Taffy Designer Series Paper. Such bright and fun patterns on these papers! The banner and the words at the bottom of the bags are from the same Mini Treat Bag Thinlits Dies.  The butterflies, of course, are from the Butterflies Thinlits DiesI cut them out of two of the papers in the Sweet Taffy paper and added some Rhinestone Jewels. There’s a little piece of Silver 1/8″ Ribbon attached to the inside card to indicate there is a card inside to pull out.

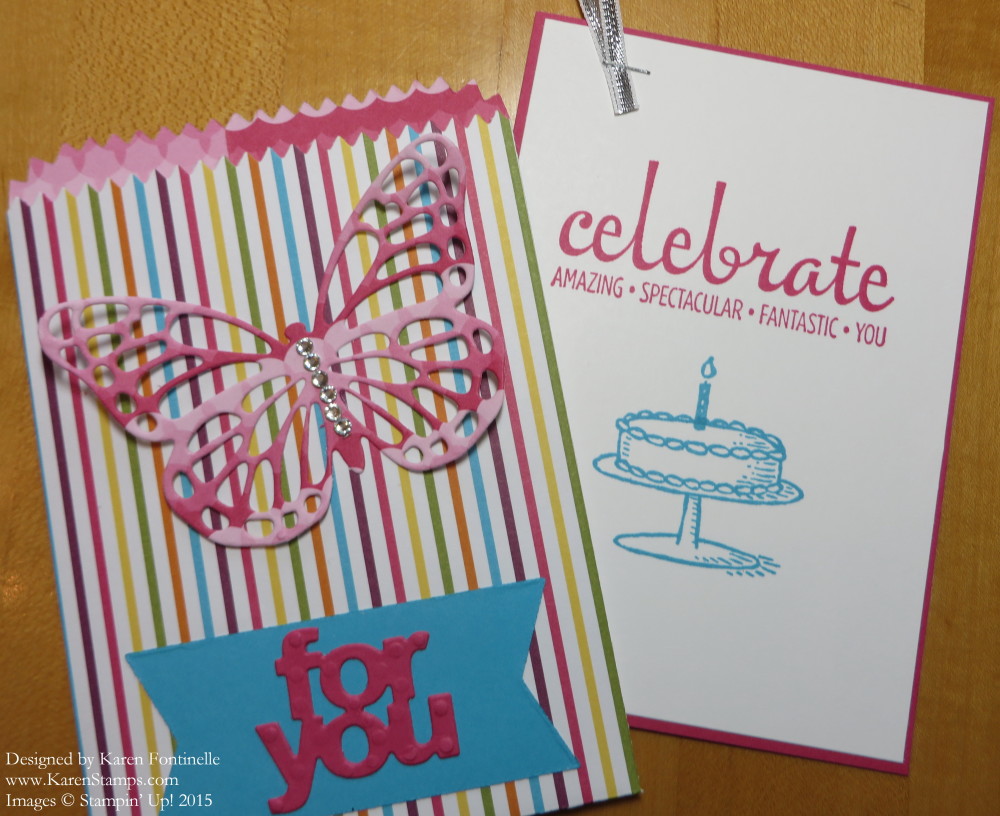
And here are the cards showing the inside card with birthday greetings!

Butterfly Mini Treat Bag Birthday Card For You

This card is stamped with the cake from a Sale-A-Bration stamp set and the greeting from Fabulous Four Stamp Set.

Butterfly Mini Treat Bag Birthday Card Enjoy

This card is stamped with a greeting from the Fabulous Four Stamp Set and the cupcake from Cupcake Party.

Be sure to notice the handy dandy Handheld Stapler from Stampin’ Up!. I love it! Order the box of Silver Mini Staples, too. It’s great for attaching tags or embellishments or pieces of ribbon like on these cards!

Don’t forget the Stampin’ Up! Weekly Deals which will end on Monday night. You might get busy with the holiday weekend and forget.

Have a wonderful Memorial Day weekend!