Category Archives: Birthday

The Amazing Birthday Card – For A Husband

Amazing Birthday Card

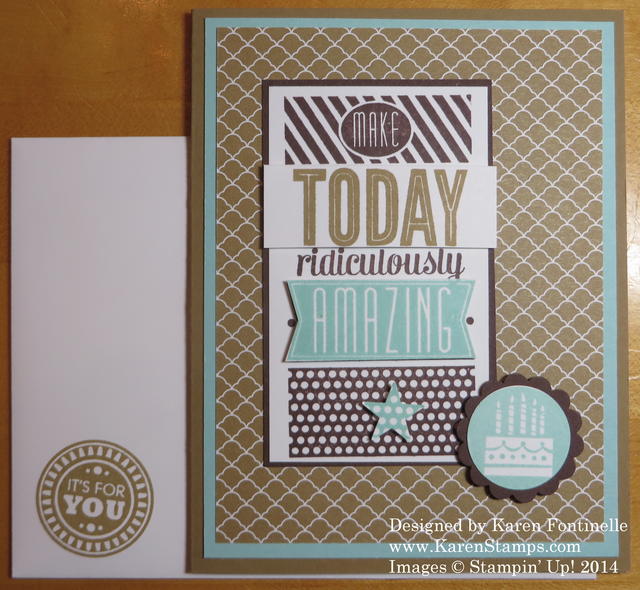
I’m not bragging, this is the Amazing Birthday card!  It’s made with the Amazing Birthday Stamp set by Stampin’ Up! and it is going to my husband. This stamp set is so versatile, you can make it for anyone, you can use the stamps to decorate birthday party favors and make decorations like cupcake toppers.  I happened to choose Soft Suede and Pool Party, along with Whisper White, with a touch of Chocolate Chip thrown in. The background paper is from the In Color stack. Stamp the large greeting stamp a couple of times, cut out some of the words and then mount them with Stampin’ Dimensionals to make them pop on the card over the same greeting. The little star I just punched to put a little something in that space.  Notice I even stamped the corner of the envelope!

For this stamp set and more, check my Stampin’ Up! Online Store!

Another Great Year Happy Birthday Card

Another Great Year Happy Birthday Card

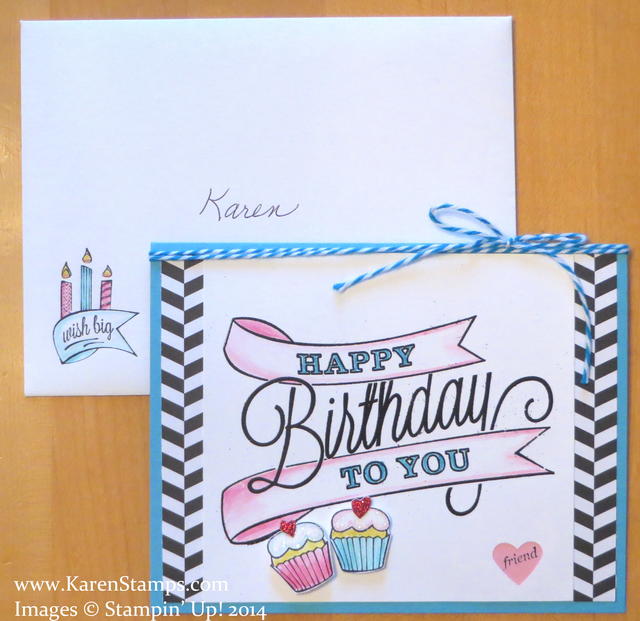
Just had to share a beautiful handmade birthday card I received last week in St. Louis from my friend Jan using the stamp set Another Great Year. I almost always forget this stamp set is retired – I really like it and it seems like it should be current! She used some pieces of Back To Black Designer Series Paper on each side, non-SU baker’s twine around the top and glitter and glimmer for bling on the cupcakes. The main image is embossed with Black Stampin’ Emboss Powder. The little heart at the bottom is punched out with the word “friend” stamped on a paper behind it. Also, I love how she decorated the envelope with some stamping and coloring! We always say you shouldn’t send a naked envelope,although I have to admit sometimes I don’t take that extra second to do it or maybe  I don’t think about it until the card is sealed in the envelope and sometimes that makes it too bulky to stamp on it and have the image come out clearly. Such a happy card, I think! Maybe you already own the stamp set or you can get an idea with some other current set we have.

Don’t forget:  Last day for Stampin’ Up! Weekly Deals for August 12-18

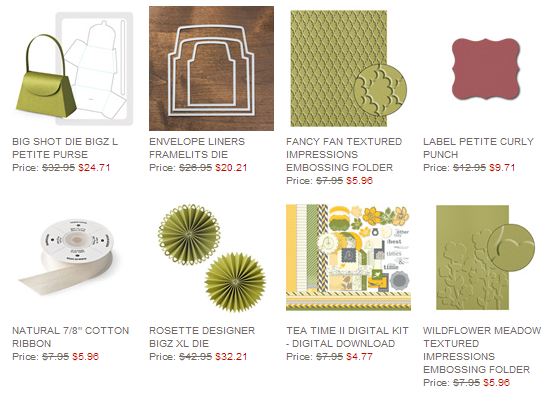
Weekly Deal Aug 12

If you don’t already own a Big Shot Die-Cutting Machine, now is the time to get one with the August Big Shot & Bundles Offer. Buy a Big Shot and choose one of the select bundles free!  And with this week’s Weekly Deals, you can purchase several items at a discount for the Big Shot and you’ll have lots to work with! Be sure to take advantage of it before you run out of time.  Offer ends August 31.

Big Shot Bundle Promo Ad

Click to Shop!

Shop at my Stampin’ Up! Online Store for all your stamping needs!

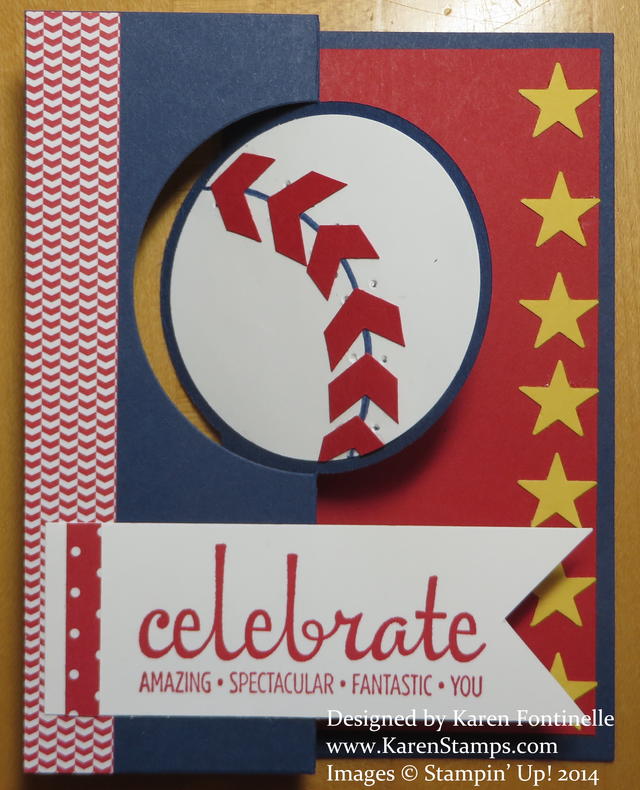
Baseball Circle Thinlits Birthday Card

Baseball Circle Thinlits Birthday Card

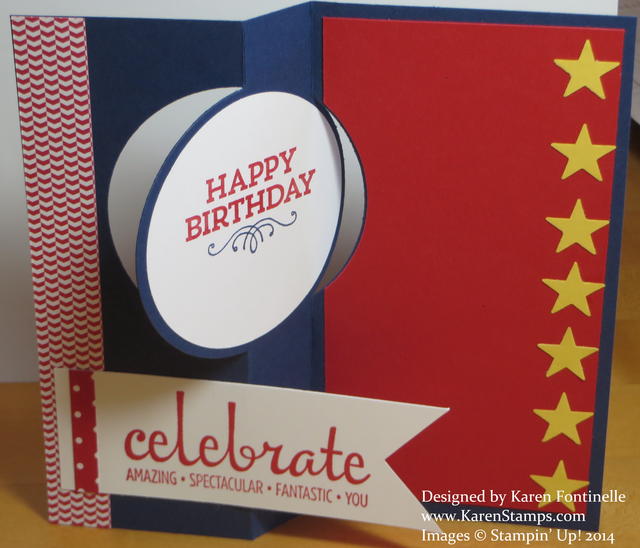
It has been awhile since I used my Circle Card Thinlits Die and this birthday baseball card presented the perfect opportunity. This card copies a couple ideas I saw online in making a baseball card and I thought using the Thinlits Die so that it would open like this made it extra special. The Circle Card Thinlits Die makes it easy to make a card base as it does all the work for you! Then just decorate up a storm to make it into the card you want.

Here is what the card looks like on the inside when it is unfolded.  The hardest part of this card is photographing it, not making it!

Baseball Birthday Card Inside Inside

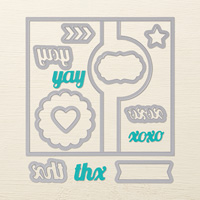
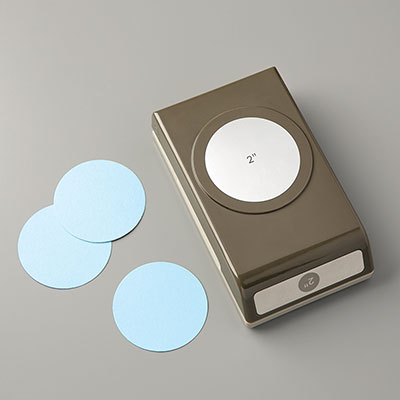
Here are some of the supplies you will need to make this card. You can find any of them in my Stampin’ Up! Online Store!

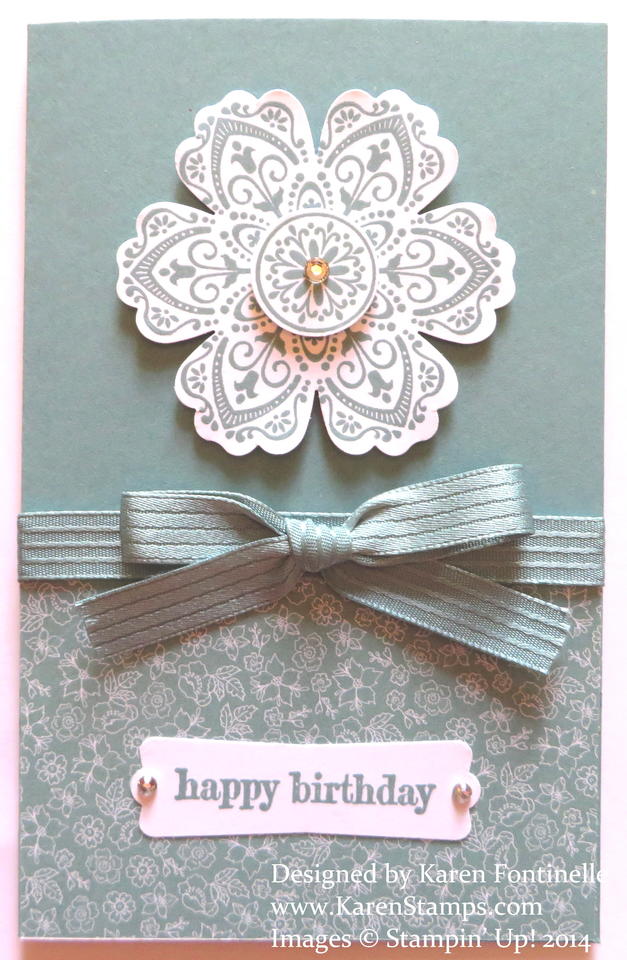
Mixed Bunch Lost Lagoon Monochromatic Birthday Card

Mixed Bunch Lost Lagoon Monochromatic Card

It’s fun to just flip through the All Abloom Designer Series Paper Stack and choose a pattern that speaks to you!  I had already found, in the package of In Color card stock, an already started card with some very bad stamping on it! “Somebody” was trying to stamp a pattern on the bottom of this card and didn’t get it lined up correctly at all! Since there are no mistakes in stamping, I found this pattern that coordinated with the Lost Lagoon card stock and covered the whole messed up area at the bottom of the card! No one will ever know, except you and me! Before adhering the patterned paper, I wrapped a piece of Lost Lagoon 3/8″ Satin Stitched Ribbon around the top of the piece and then tied the bow with a separate piece of ribbon.  So much easier.  It is attached with a couple of Glue Dots. Then what to do with the empty top area?? I decided on a flower from the Mixed Bunch Stamp Set, and thought this patterned flower went the best with the paper on the bottom. I used another stamp for the center, punched with the 3/4″ Circle Punch, popped up on a Stampin’ Dimensional, with a Rhinestone Jewel in the center for a little accent.  The greeting is from the Something To Say Stamp Set. It is punched out with the Modern Label Punch and has two Rhinestones on it. I decided just a simple plain greeting was fine.

To find any of these supplies, just click HERE to go to my Stampin’ Up! Online Store!

Remember, if you are in Texas, today is the last day for the Sales Tax Holiday. Check my previous post about the items that are included in the holiday that you can order from Stampin’ Up!

Also, if you are interested in purchasing a Paper Pumpkin subscription, the kit that comes in the mail to you with a cute project inside, sign up today, August 10th, in order to receive the August kit! Use the promo code HALFOFF2 in order to get a discount of 50% for the first two months!! Regular price is $19.95, which includes shipping! This offer is for new subscribers only.

Click HERE for Paper Pumpkin!

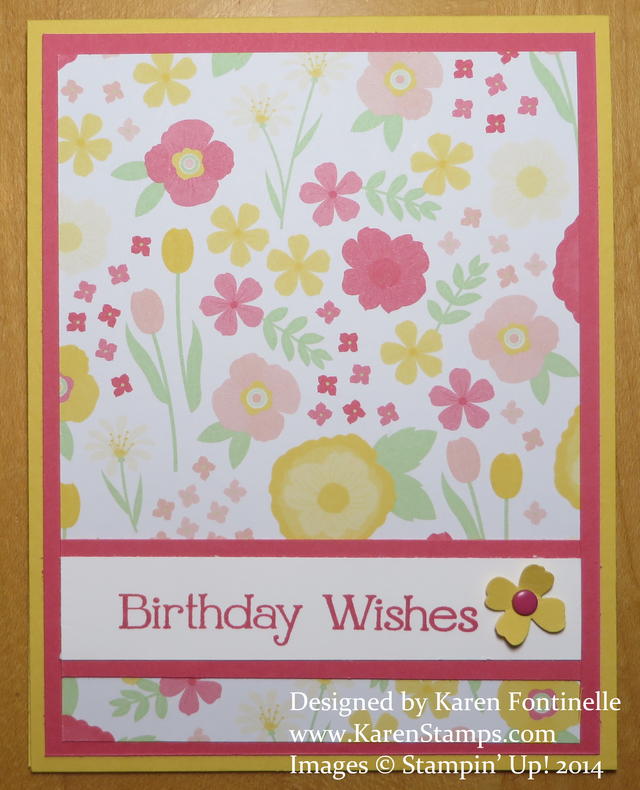
Easy Birthday Card to Make With All Abloom Paper Stack

All Abloom Birthday Card

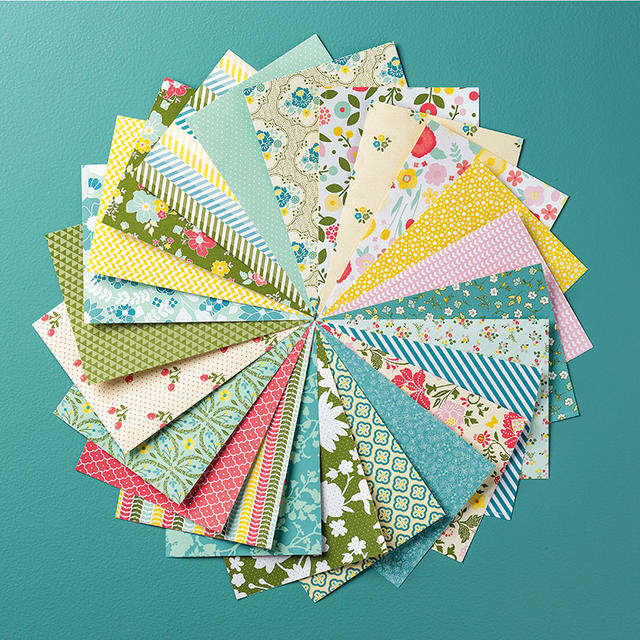
There’s not an easier birthday card to make than this one using the All Abloom Designer Series Paper StackI have to admit, I’ve had this All Abloom Paper Stack since it came out, but hadn’t used it. It actually got lost under all the “stuff” on my desk! To make this card, all I had to do was flip through the stack and see which pattern caught my eye or inspired me. This one just looked so pretty, and I liked the opportunity to use my Strawberry Slush card stock! The greeting is from Four Youa stamp set I find myself using a LOT! I thought the paper was pretty enough itself so the card didn’t need much else.  I added just a little flower punched with the flower punch in the Itty Bitty Accents Punch Pack  with a little Candy Dot in the center! I probably would have added a little flower or something-something somewhere on the card, but honestly, I stamped the greeting just a tad too far to the left so the flower filled in the space perfectly and added just a little accent!  See, there ARE no mistakes in stamping!

The All Abloom Designer Series Paper Stack gives you a ton of paper choices very inexpensively. Not every pattern is a flower so no worries there! You can view them all and purchase in my Stampin’ Up! Online Store. Just think of the tons of cards you could make easily with this small stack of paper!

All Abloom Designer Series Paper Stack

(c) Stampin’ Up! 2014

Make a Cupcake Party Card With Flashback Paper

Cupcake Party Card with Flashback Paper

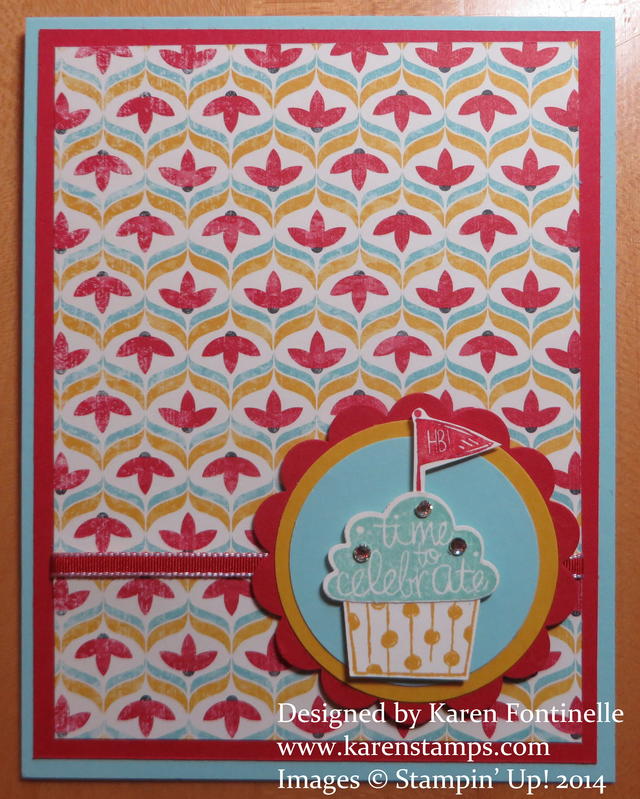
As I looked through the Flashback Designer Series Paper, the Real Red and Pool Party colors on this pattern really caught my eye. I love red! I wondered if I could use it some way with the Cupcake Party stamp set and the Cupcake Builder Punch, on sale this week in the Stampin’ Up! Weekly Deals. The Cupcake Punch is used for the top and bottom of the cupcake, but I handcut the little Happy Birthday flag for the top. With the punch, I could have punched out a little cherry for the top! You wouldn’t believe how many circles and scallop circles I punched in various colors and tried different combinations to see which one worked best behind the cupcake. Finally I just decided on this one! I also put a little strip of Real Red 1/8″ Taffeta Ribbon across the card, even though you don’t see much of it.

This card is cut lengthwise, meaning the Pool Party is cut 11″ x 4 1/4″ and then folded in half. Just a little change!

Don’t judge a pack of designer paper by the first sheet in the package! This one has retro cameras, but there are other pretty patterned papers in the pack. And don’t forget that the Buy 3 DSP Get 1 Free Offer from Stampin’ Up! during July! Much to my surprise, July is almost over! Tomorrow is the last day you can take advantage of this special deal to stock up on designer paper.  Specialty papers are not included. Choose from the patterns on pages 186-7 in the new Stampin’ Up! Annual Catalog.

One more day to order 3 designer series packs and then get the 4th one free!  Add some of the Weekly Deals to your order as well!

Shop any time at my Stampin’ Up! Online Store!

Back to Black with Gold Birthday Card

Back to Black with Gold Birthday Card

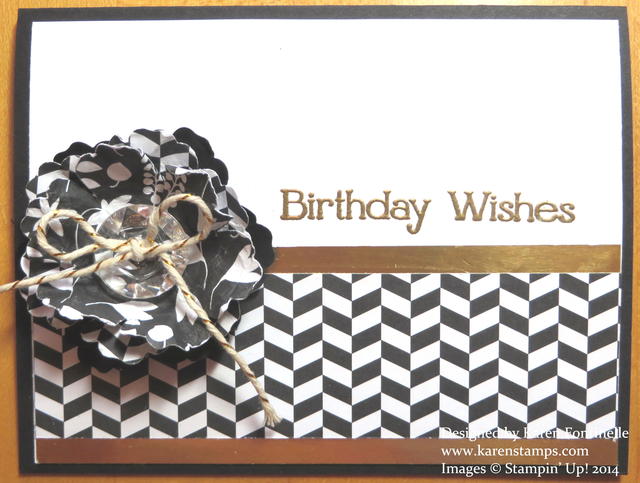
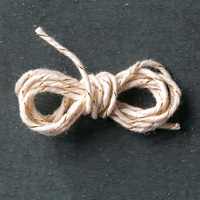
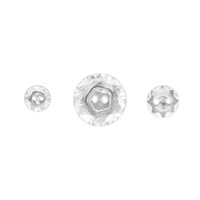
I’m finally taking the time to play with the new Back To Black Designer Series Paper to make a birthday card with a touch of gold. I learned a long time ago in my stamping that black and white could be very stunning – and really all you need sometimes to make a card. That’s all I was going to use on this card, but somehow a little bit of gold snuck in! Once I made the flower using the Blossom PunchI decided the Gold Baker’s Twine would look good with the Vintage Faceted Button. I thought little strips of the Gold Foil Sheets would look great against the black and while. If you could see this card in person, you would see that the extra glimmer really looks nice. Once I had the gold foil accent, I had to emboss the greeting from the Four You stamp set with my Heat Tool and Gold Stampin’ Emboss Powder. Remember, before you emboss, rub the Embossing Buddy on the card stock to try to keep stray flecks of the embossing powder from sticking. Then stamp with Versamark.

I also have another technique I saw recently that I will share with you soon using this paper!  With the July special offer on Designer Series Paper from Stampin’ Up!, now is the time to stock up on paper! Get all the new ones in the catalog while you can get one free!

Be sure the Back To Black Designer Series Paper is on your Wish List!

Pop Up Box 60th Birthday Card

Pop Up Box Card 60th Birthday

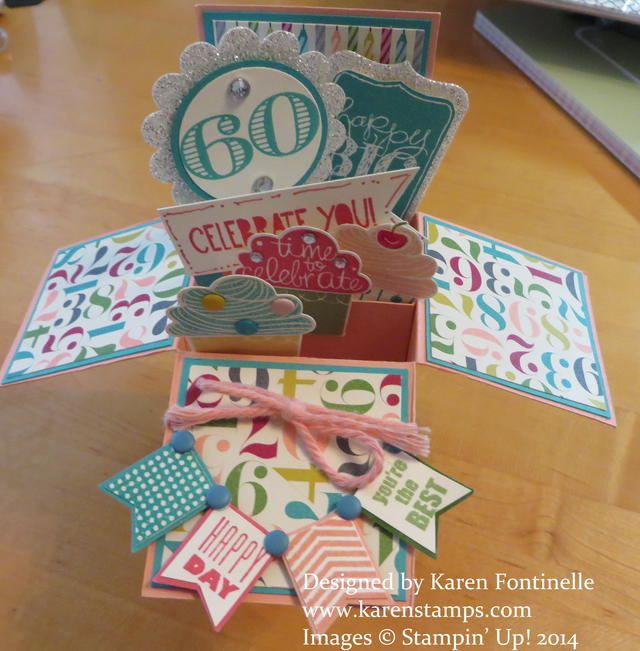
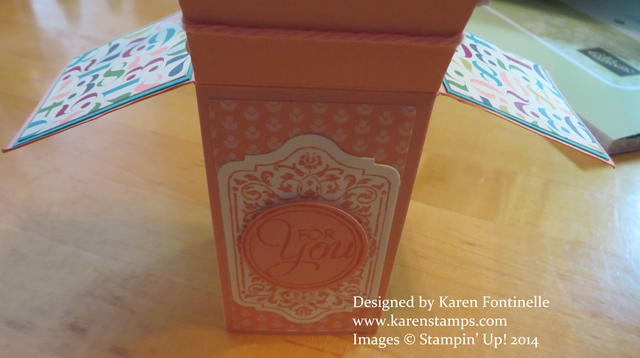
When I needed a birthday card for a special friend for her 60th birthday (a special birthday for sure!), I wanted to make a “pop up box” card. Yes, the designer paper, Birthday Basics, is retired, but I love it so I used it for this personal card. The base (box) is Crisp Cantaloupe. You can see a photo of the front down below.

Even though the designer paper is retired, the stamp sets are new and current! The banner on the front flap is stamped with the Banner Banter stamp set and punched out with the Banner Punch. I added some Candy Dots to make it look like it was strung across the flap.  I LOVE the Candy Dots! They come in the color families and only cost $5.95. Just a cute touch to your cards and projects! Crisp Cantaloupe Thick Baker’s Twine is tied around the front flap.

The cupcakes are from the new stamp set Cupcake Party and punched out with the Cupcake Builder Punch. (See some more Candy Dots on the cupcakes?!) The “60” is from the Memorable Moments Stamp Set. The greeting in the back is from Chalk Talk and cut out with the coordinating framelits. You can buy the Chalk Talk Bundle and save 15%! The “Celebrate You” greeting is also from the Cupcake Party stamp set.

Here is the front of the pop up box birthday card:

Pop Up Box Card 60th Birthday Front

For all your Stampin’ Up! shopping, please visit my

Stampin’ Up! Online Store!

A few new things added to the Clearance Rack!

July Offer:  Buy 3 Designer Series Papers, Get 1 FREE!

Christmas in July: New Christmas stamp sets out early! (Beauty of the Season and Christmas Bliss)

New Photopolymer “Boy” Stamps:  Dear Heart

A Cupcake Party Birthday Card

Cupcake Party Birthday Card

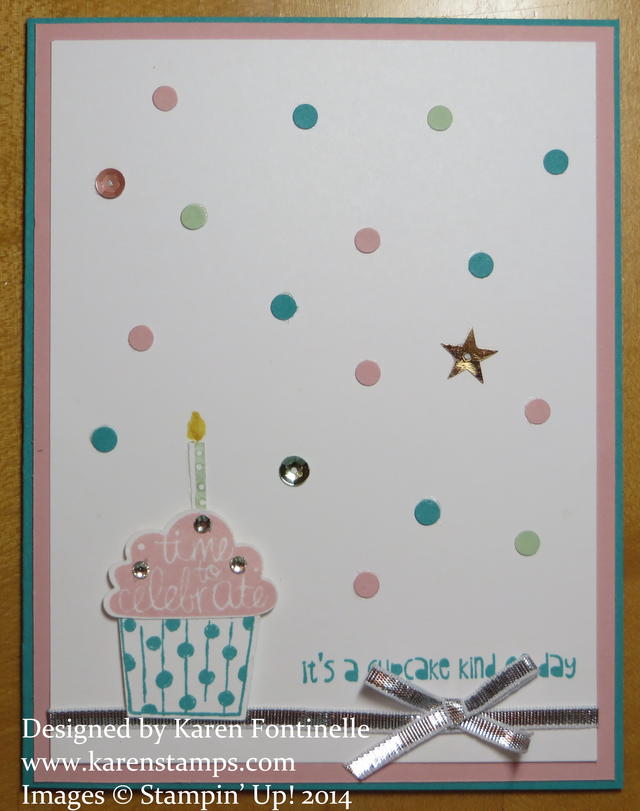
For a fun birthday card, how about making one with the stamp set Cupcake Party?!  Add some punched dots confetti and In Color Sequins for some bling and pizzazz! You can also use the Cupcake Builder Punch to punch out the cupcake! No snipping required! If you already have the Cupcake Punch, you might as well get this stamp set to go with it!  I like the saying on this card, and it was a good opportunity to try out the new sequins! The Silver 1/8″ Ribbon really adds a special touch. It’s so sleek and shiny!

Be sure to sign up for my mailing list in the box in the right sidebar.  My July Stamping With Karen Newsletter will be coming out next week with projects to make and the latest Stampin’ Up! news. And get a free gift when you sign up and confirm!  Watch for that confirmation email and be sure to click on the link inside!

Flower Patch Birthday Card

Flower Patch Birthday Card

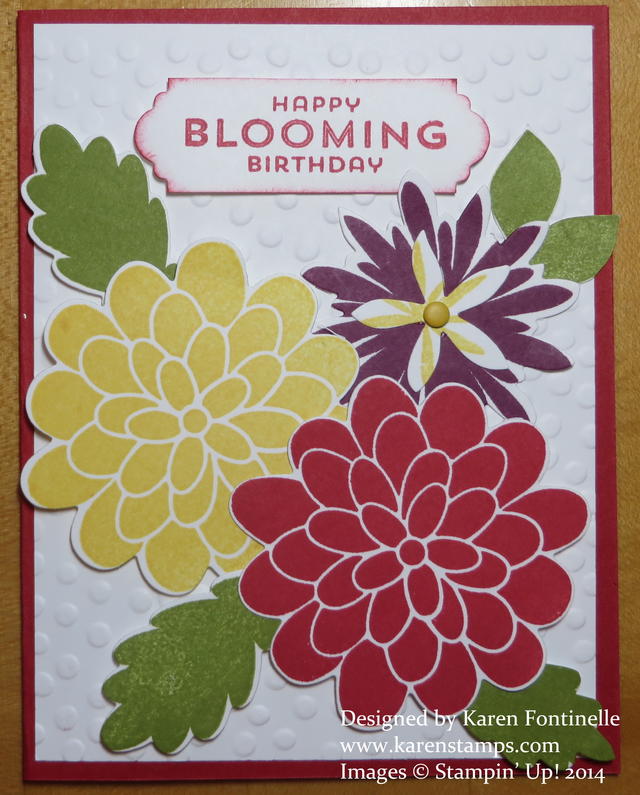
It was time to play with the Flower Patch stamp set and the Flower Fair Framelits Dies to make a birthday card. You can also purchase this stamp set and framelits in a bundle, the Flower Patch Photopolymer Bundleand save 15%! Now that summer is officially here, you are bound to be inspired by lots of beautiful flowers blooming and this set will be perfect to use in your projects. The framelits make it easy to cut out most of the stamped images. The greeting I used comes with the set, but to cut it out I used a framelit from the Apothecary Accents FramelitsI stamped the greeting on a narrow strip of Whisper White and centered the framelit over it so I could have a narrow piece but fancy ends. Rather than try to layer it, I lightly sponged the edges in Real Red just to make it stand out a bit from the Whisper White layer. The large Daffodil Delight and Real Red flowers are popped up with Stampin’ Dimensionals and the Rich Razzleberry flower just adhered right on the paper.

If you wanted, you could “bling up” this card, but for today I kept it simple except for the Candy Dot on the Rich Razzleberry flower!

For any of these stamps and stamping supplies, check out all the new products available in the Stampin’ Up! Online Store. Today is the last day for the current Weekly Deals, too!

Circle Thinlit Makes the Cutest Birthday Card!

Birthday Thinlits Circle Card

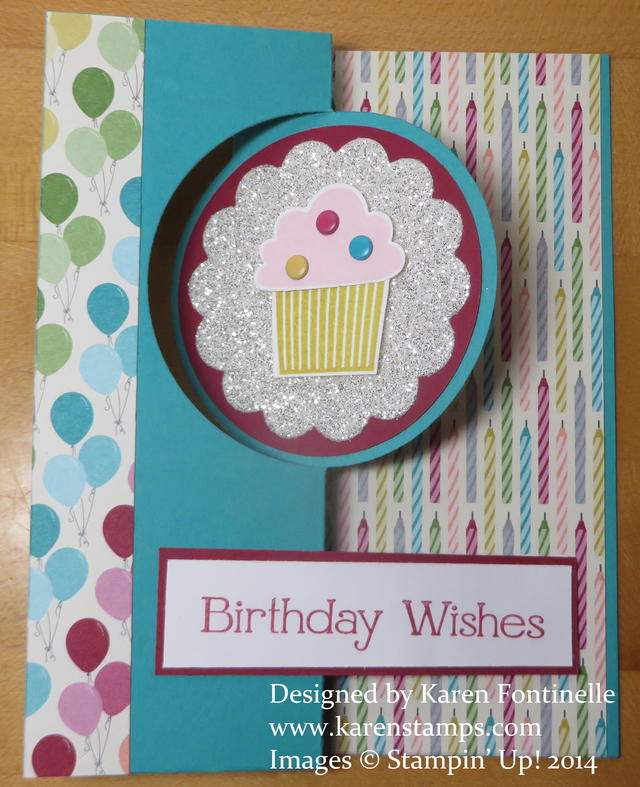
I’ve loved this Circle Card Thinlit Die from the time I got it after the Stampin’ Up! Convention last summer!  That’s where the thinlits dies were introduced! I think it makes the best cards yet is so easy! It just uses a half sheet of card stock for the base and then you can embellish any number of ways!

This is a card I made for our great-niece’s first birthday! She got her first plane ride on her first birthday and spent her first birthday in Texas! We were thrilled we got to meet her and spend her first birthday with her over the weekend all wrapped up in one trip! Of course she had more fun playing with the gift bag and tissue paper than the gift, but that’s fine, that’s how it is supposed to be with little ones!  All they need is the bag or the box the gift came in! She was such a cutie!

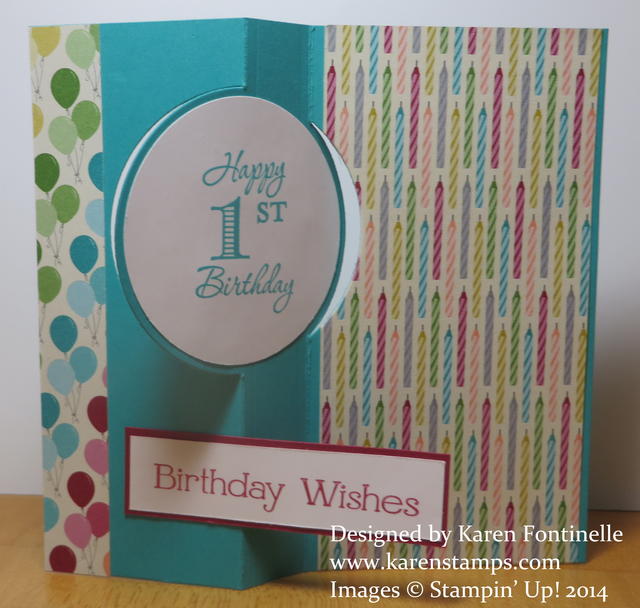
Birthday Thinlits Circle Card Inside

Here is the inside of the card when opened up. I used the Birthday Basics Designer Series Paper which I have always LOVED! I think it is still available as I am writing this, but it is on the Retirement List, so if you want some, you better not procrastinate any longer! The cupcake on the front is stamped with the Create a Cupcake Stamp Setwhich at this moment is available in wood-mount (clear-mount sold out) but is on the Retirement List for Stamps. The stamping is punched out with the Cupcake Punch.  The greeting is stamped on the inside of the circle with the stamp set Memorable Moments. That’s a great set because you can make it say what you want with the choices of stamps!

Don’t forget, if you want any of the Weekly Deals, that ends tonight for this past week!

Check out the Retiring Stamps and Accessories HERE in my Stampin’ Up! Online Store. Some are already sold out and more will be. Even the stamps are only available WHILE SUPPLIES LAST!

Stampin Up! Weekly Deal March 25 2014–Shimmer and Glimmer!

Stampin Up! Weekly Deal March 25 2014

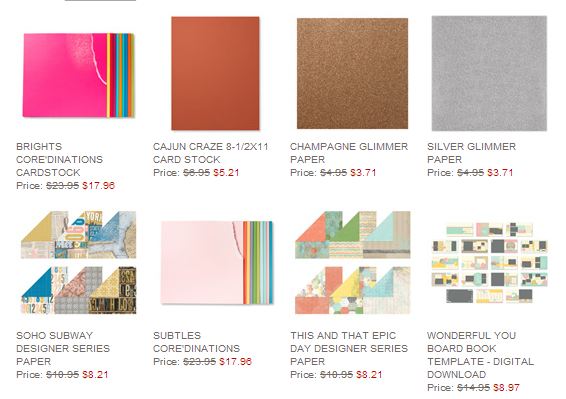
Check out the latest Stampin’ Up! Weekly Deals for this week, March 25 through March 31! If you like shimmer and glimmer, this is the week for you!  Both the Champagne Glimmer Paper and Silver Glimmer Paper are on sale! These are some of my favorite Stampin’ Up! products! The glimmer of the beautiful sparkly paper often adds so much to your project!  We have all loved it ever since Stampin’ Up! started carrying the glimmer paper!  You can even “watercolor” with reinker on the Silver Glimmer Paper to make it a different color if you like that! Be sure to stock up if you like some pizzazz to your cards and projects while you can save a little bit of money! Check out all the other offerings as well!

Remember, they all count toward Sale-A-Bration, which will be over before we know it!  Sale-A-Bration is Stampin’ Up!’s biggest promotion and ends March 31!  That is next Monday, last day! Last day to spend $50 and choose a free product from the Sale-A-Bration Brochure!  Remember, your original purchase doesn’t have to come from the Sale-A-Bration Brochure.  There are suggested Bundles in there if you need suggestions to get to $50 (perhaps for a beginner) but you can purchase any current Stampin’ Up! products and then choose your FREE product from the Sale-A-Bration Brochure. Who doesn’t want free stuff?

Shop at my Stampin’ Up! Online Store any time for the best in papercrafting products, take advantage of these Stampin’ Up! Weekly Deals, and with a $50 purchase earn a free product during Sale-A-Bration this week!

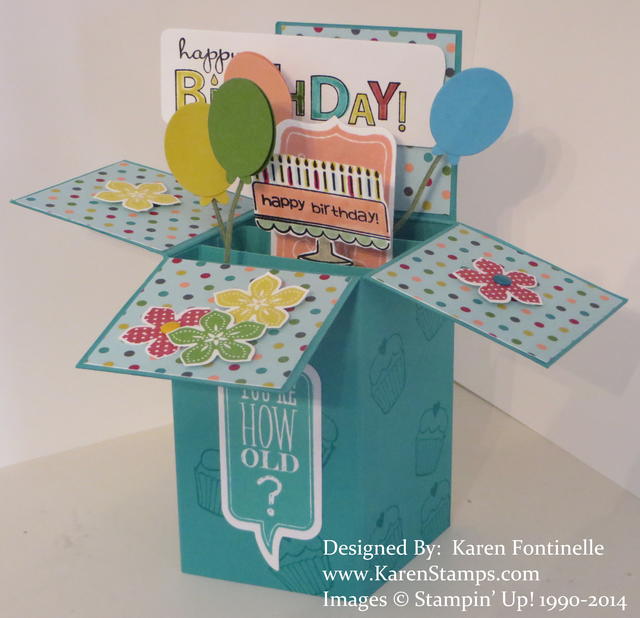
Birthday Pop Up Box Card

Birthday Pop Up Box Card

I’ve been making a lot of these popular pop-up box cards lately! They’re not difficult and are quite cute to make. If you make them the right size, they will fit in a regular size envelope when folded flat. There are two little folded strips inside the box to which you attach whatever stamped images you want to be part of your card. I used several different stamp sets and greetings on this card. You can leave the back piece of the box unfolded and put a long layer on the back if you want to write a greeting.  But you don’t have to. Put more layers of designer paper on the box or not.  It’s all up to. you.
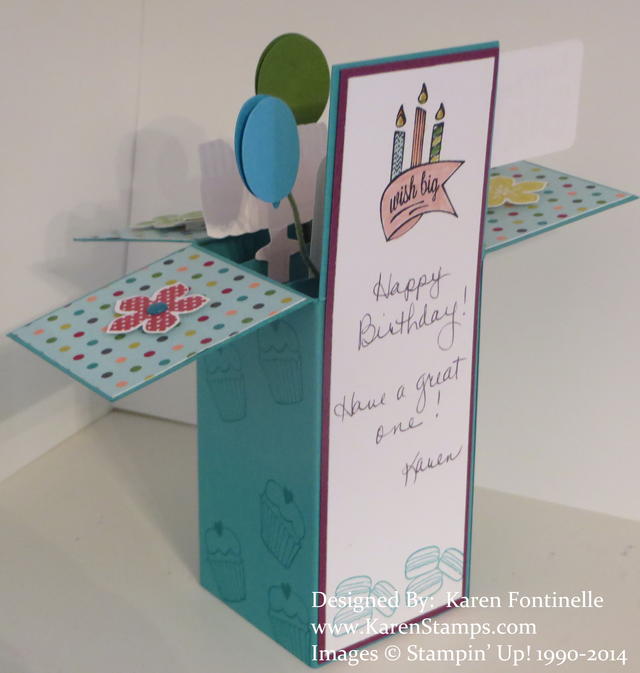
Birthday Pop Up Box Card Back Greeting

These cards are really fun to make! Remember, it folds flat and fits inside an envelope as long as you are careful where you place your popping up images.  Lay the card on your envelope so you see how much space you have.

Start with half a sheet of cardstock like always.  Lay sideways in your Simply Scored Tool.  Score at 2″, 4″, 6″, and 8″. Turn the other way and score at 2″ for box flaps. Then cut those scored sections up to the score line.  The little 1/2″ piece on one end will be the part you attach to the inside of the box. Use Sticky Strip or Tombow Multi Glue.  The little braces that go inside are two 1″ x 3″ pieces, each scored at 1/2″ and 2 1/2″. Those fit inside, the trickiest part! Then attach whatever decorations you want for your card!

Remember, Sale-A-Bration ends March 31.  That’s a week from today!  Just enough time to make your list and get your order in!  Don’t procrastinate until the very last minute!

Shop anytime at my Stampin’ Up! Online Store! If you prefer not to order online, please contact me, email Karen@KarenStamps.com, and I will be happy to make arrangements with you and put the order in for you.

Also the special with subscribing to Paper Pumpkin ends March 31st also! Get a pack of FREE MARKERS with your Welcome Kit!  Your also receive a free clear block for your stamps with the Welcome Kit to use on future kits!  It’s a papercrafting kit in a box, easy to do, quick and simple, unique, exclusive to Paper Pumpkin, and a surprise in your mailbox for only $19.95 which includes shipping!  Just keeps getting better!

Secret Garden Soft Sky Monochromatic Birthday Card

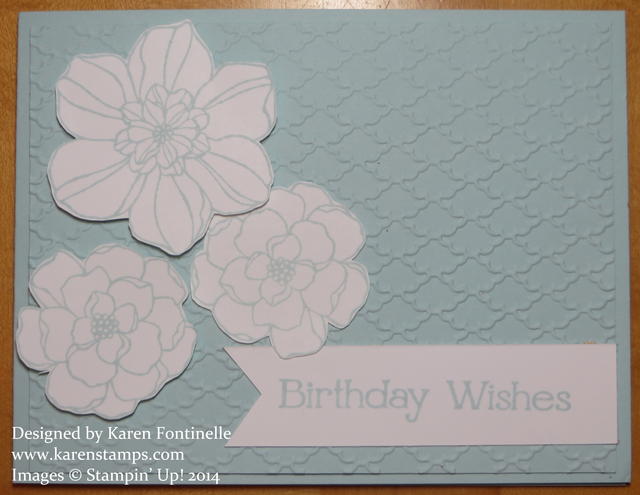
Secret Garden Soft Sky Monochromatic Birthday CardThis monochromatic birthday card uses Soft Sky card stock and flowers from the Secret Garden stamp set. I think a monochromatic card looks calming, not that a birthday card should be calming, it has a simple elegance to it.  I found this Soft Sky piece already embossed with the Fancy Fan Embossing Folder and decided I wanted to just layer it on a card base of Soft Sky as well. I stamped the birthday greeting and made it like a banner and stamped the flowers, also in Soft Sky ink. I just cut the flowers out by hand but there are coordinating Secret Garden Framelits to make that job easier.

Now that spring is here we can start using the Soft Subtles family of colors!

Don’t forget about the Stampin’ Up! Weekly Deals and Sale-A-Bration!

Enjoy your first weekend of spring!

Gift Wrap Idea: Gold Kraft Gift Box with Gold Frizzle

Gold Gift Box with Gold Frizzle

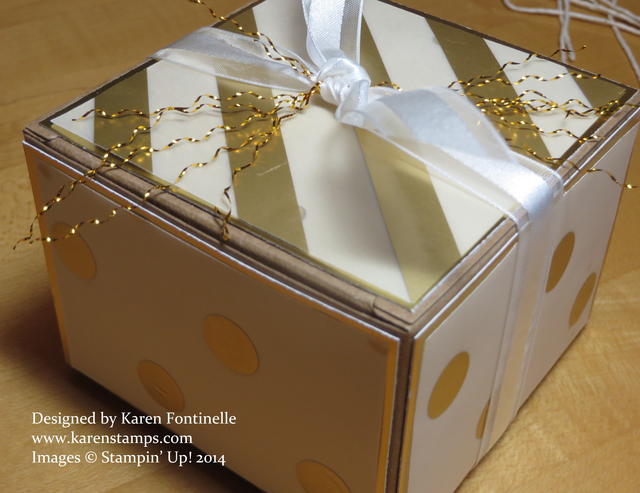
Do you need a fancy gift wrap idea?  Use the Stampin’ Up! Kraft Gift Box and gold, gold, gold! Gold is IN these days so you might as well use it! I love these little Kraft Gift Boxes. They are 3 1/2″ wide on each side so perfect for a small gift or treat. I decorated this one first with a layer of Gold Foil on each side, cut just 1/8″ smaller on each side than the box. Then I layered a piece of Gold Fancy Foil Designer Vellum on each side (choose whichever pattern you like the best). I put a different pattern on the top.

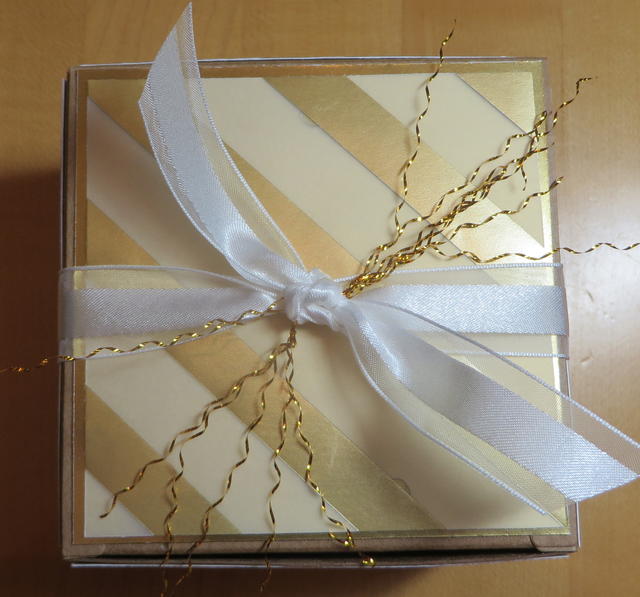
Then to really jazz it up a bit, I put a little “frizzle” on the top! I didn’t know where I came up with that term or description, but it turns out “frizzle” does mean curl or kink or ringlets so I guess I was correct! Do you know where I got it?  From the Gold Baker’s Twine! The Gold Baker’s Twine is really just White Baker’s Twine with the metallic gold thread twisted around in it. Some people have even complained that when using the Gold Baker’s Twine, it came untwisted and frayed at the ends. But you can embrace that idea and untwist the gold thread from the white twine! Cut the Baker’s Twine into pieces several inches long each to make it easier.  Then gather your pile of gold threads and tie onto a bow or knot. Very easy! I could have also added a piece of Gold Sequin Trim for some extra bling!

If you are looking for more gift-wrap ideas and haven’t signed up for my Mailing List yet, do it today and get your FREE GIFT, “A Dozen Creative Gift Wrap Ideas”. You’ll see the sign up box in the upper right corner of my blog!

Gold Gift Box Top with Gold Frizzle