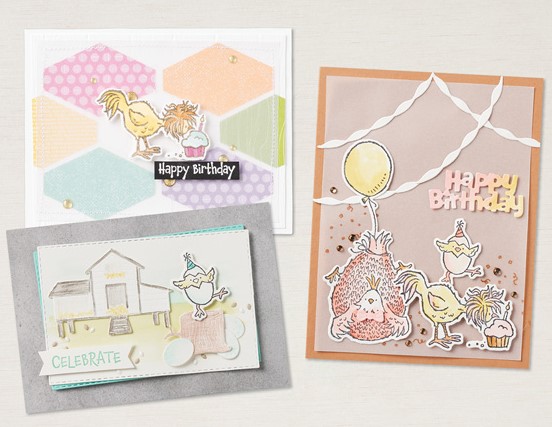
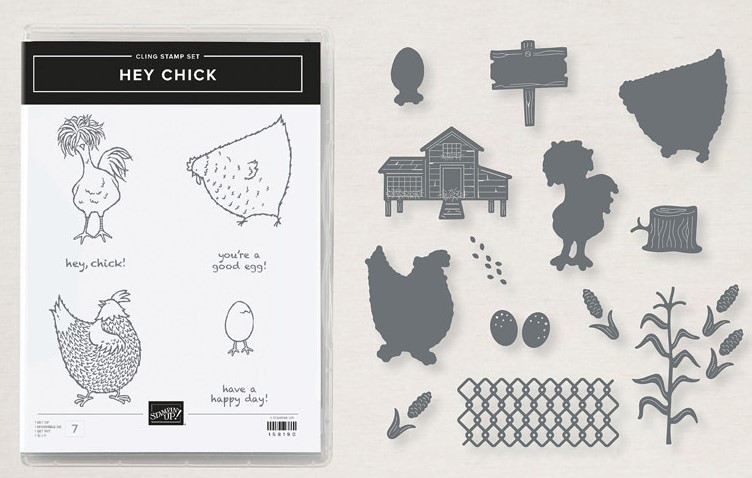
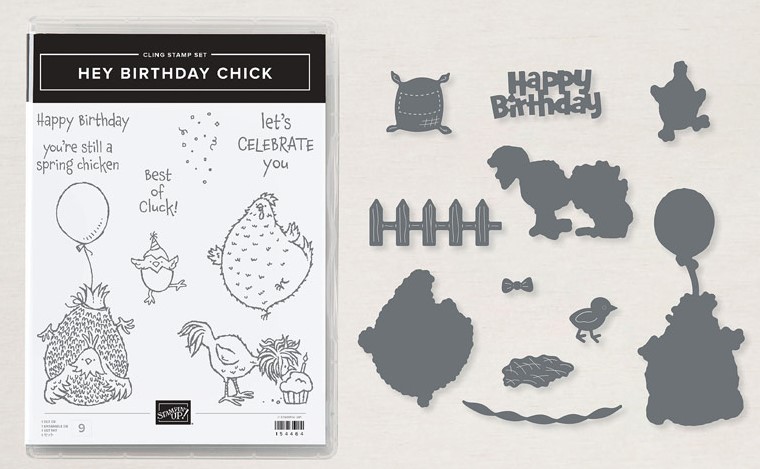
Maybe you noticed the Hey Birthday Chick Stamp Set in the new January-June 2021 Mini Catalog on page 52 and maybe you thought it looked familiar. If you were a Stampin’ Up! customer back in 2017 during Sale-A-Bration, you may have chosen the Hey Chick Stamp Set as one of your free Sale-A-Bration products!
Apparently, it was such a popular stamp set back then that Stampin’ Up! is bringing it back in February! If you already own this stamp set, you are ahead of the game! And if you don’t, you will get a chance to own it beginning February 2. And get the new Chick Dies, too! Just look at those cute images and imagine what you could make with them!
Maybe you have already purchased the Hey Birthday Chick Stamp Set in the Mini Catalog. On February 2, you can also get a set of dies to go with it or purchase both the stamp set and dies in a Bundle.
These Chick stamps and dies will be available February 2 through the end of June! If you like cute chickens, these are the stamps and dies for you!
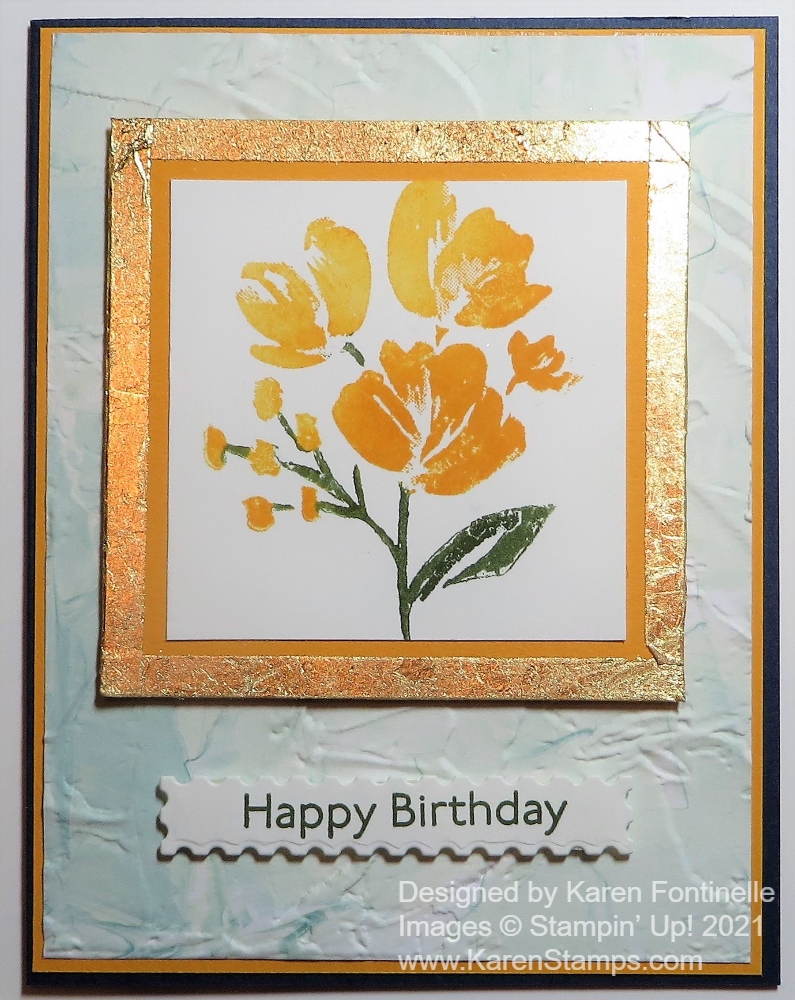
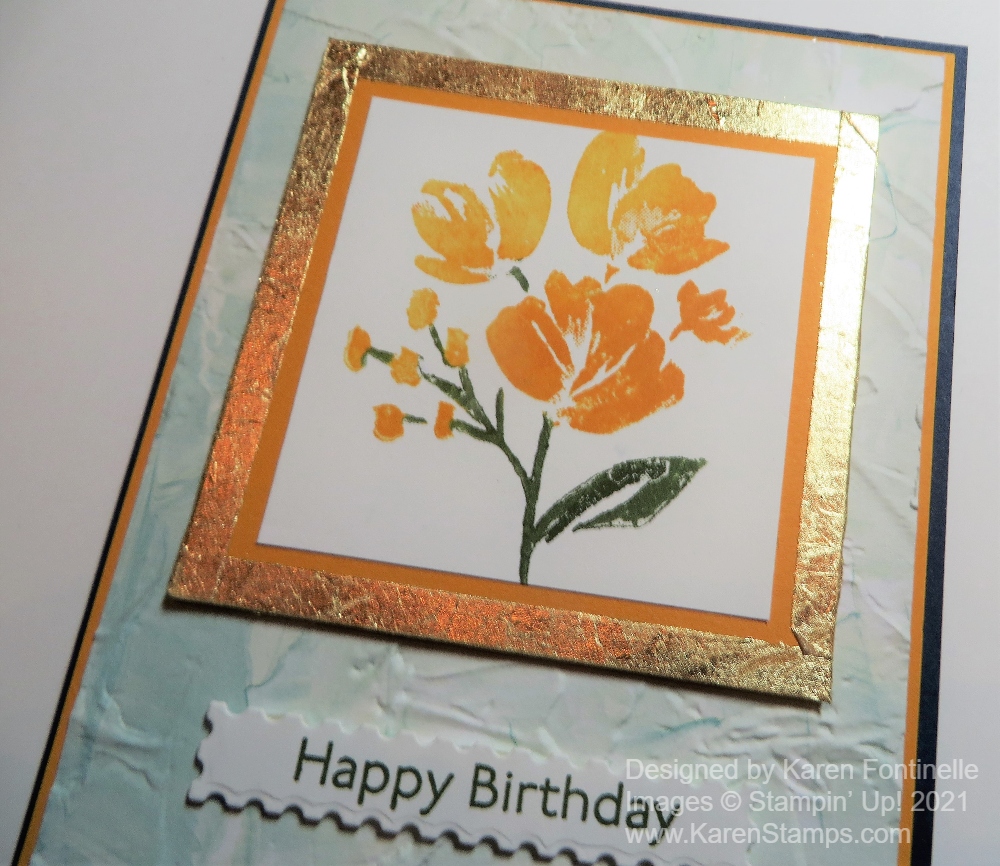
I couldn’t wait to play with the new Gilded Leafing again but I wanted to try something different and I came up with this Art Gallery Floral With Gilded Frame Card.
I’ve loved the little floral stamp in the Art Gallery Stamp Set in the Fine Art Floral Suite. I got the idea to stamp the flower and then make a gilded frame around it. Instead of using Versamark Ink and Heat & Stick Powder before applying the Gilded Leafing, as I did on this card, I simply made the frame with strips of Tear & Tape Adhesive! You can either pick up pieces of the gold leaf and stick it onto the adhesive, which I started doing. But then I just plunged the piece into my container, pulled it out but still held it over the container, and simply rubbed most of the excess off with my fingers. The Gilded Leafing is so soft, you almost want to stick your hands in it! When I had most of it off, I used a soft brush I had from years ago to brush off the last little bits. You can also use one of theStamping Sponges.
The card base is Night of Navy, and I chose that because on another card I made with the Dandy Garden DSP I really liked the yellow flowers and dark blue background of that paper. I started off coloring the stamp with Stampin’ Write Markers but since it was new and I hadn’t prepared the stamp first, the ink from the markers just beaded up. I decided to just skip to a regular ink pad, Mango Melody. I tried to mostly get it on the flowers but I knew that even if I got it on the leaves, that’s okay because they would be covered with green ink. On these I did use the Mossy Meadow Stampin’ Write Marker because it was the darkest green and it would look lighter stamped. What you see on the card is my first attempt, so it worked out great! I layered this on a piece of Mango Melody Cardstock and then added the Gilded Leafing around the sides.
Since I had used the Mango Melody under the flower piece, I decided to use it as a thin layer on top of the Night of Navy card base. The top layer is a piece of the Fine Art Floral Designer Series Paper. Instead of using the floral side, of course, I turned it over and used this light blue with a pattern on it that looks like it was painted with a paint brush! To add to that texture, I embossed the paper with the Painted Texture 3D Embossing Folder.
I adhered the floral piece to the card front with Stampin’ Dimensionals®. For the greeting, I stamped a birthday sentiment from the Art Gallery Stamp Set in Mossy Meadow Ink and then die-cut it with a die in the Floral Gallery dies. I think all of these main products are in the Fine Art Floral Suite! I’m sure it will be one of the most popular Suites in the Spring Mini Catalog! Everything in that Suite is lovely!
If it isn’t on your shopping list yet, be sure to put it on there, at least if you like florals. The paper is gorgeous. The Gilded Leafing is fun and elegant. The Fine Art Ribbon is beautiful and soft. You will want everything!
Remember, with every $50 increment you purchase, you earn a free Sale-A-Bration product! If you spend $100 or more, you can choose one of the special Level 2 products, unless you want two Level 1 products at the $50 level.
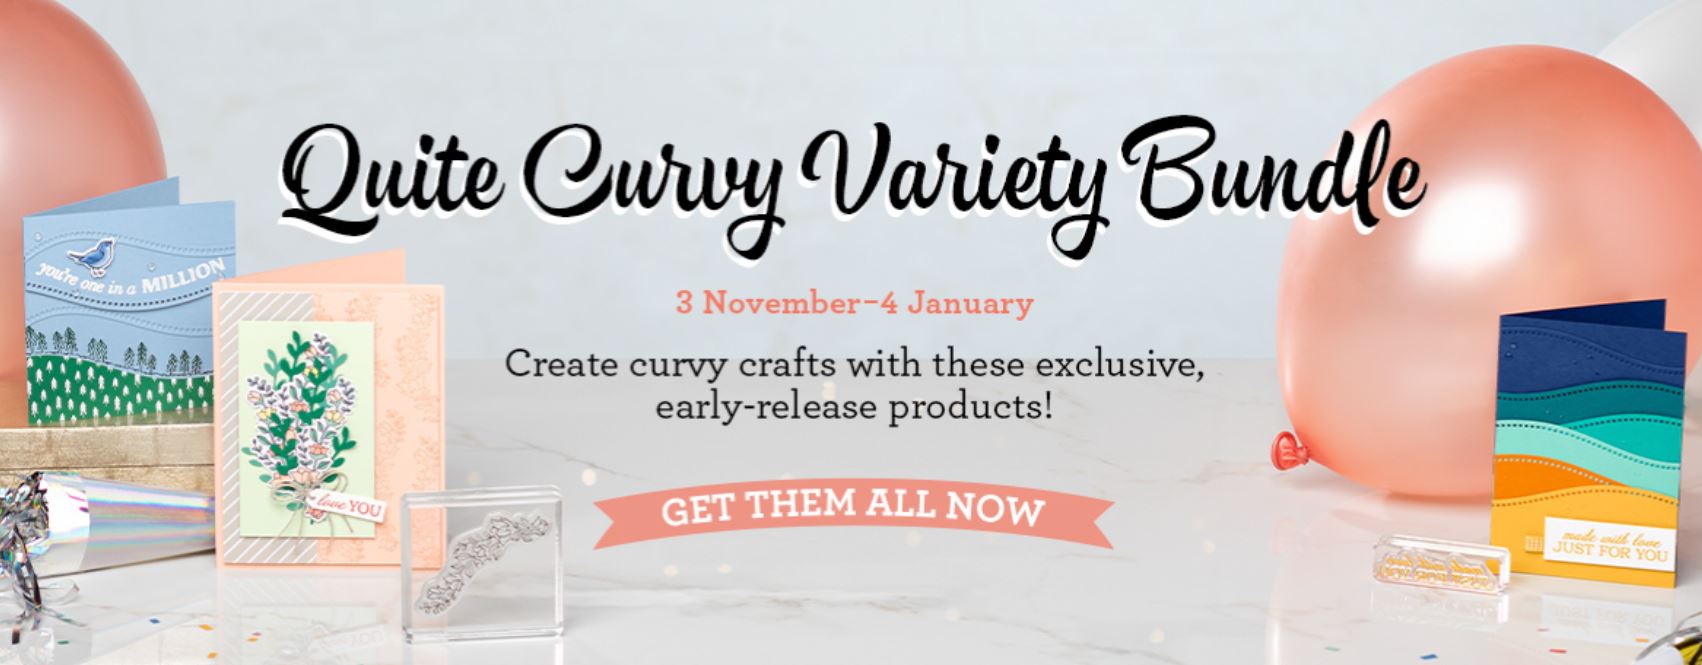
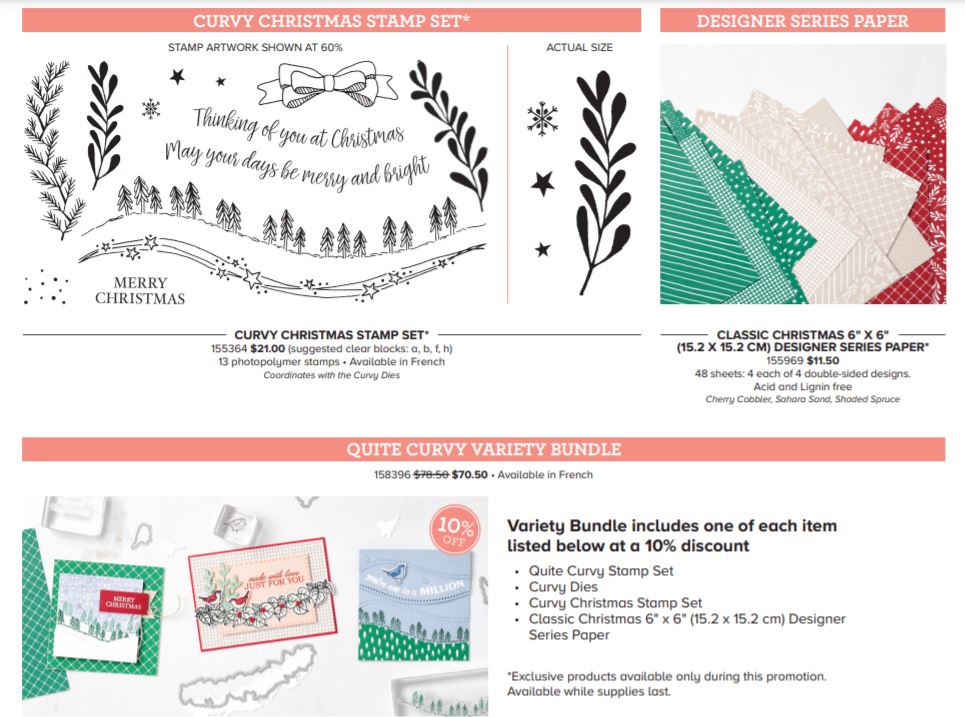
Not only is today Election Day but you can purchase an early-release group of products called Curvy Celebrations! Celebrate with curvy stamps, dies, and more! Designed for a variety of special occasions, so you can get a lot of use out of it.
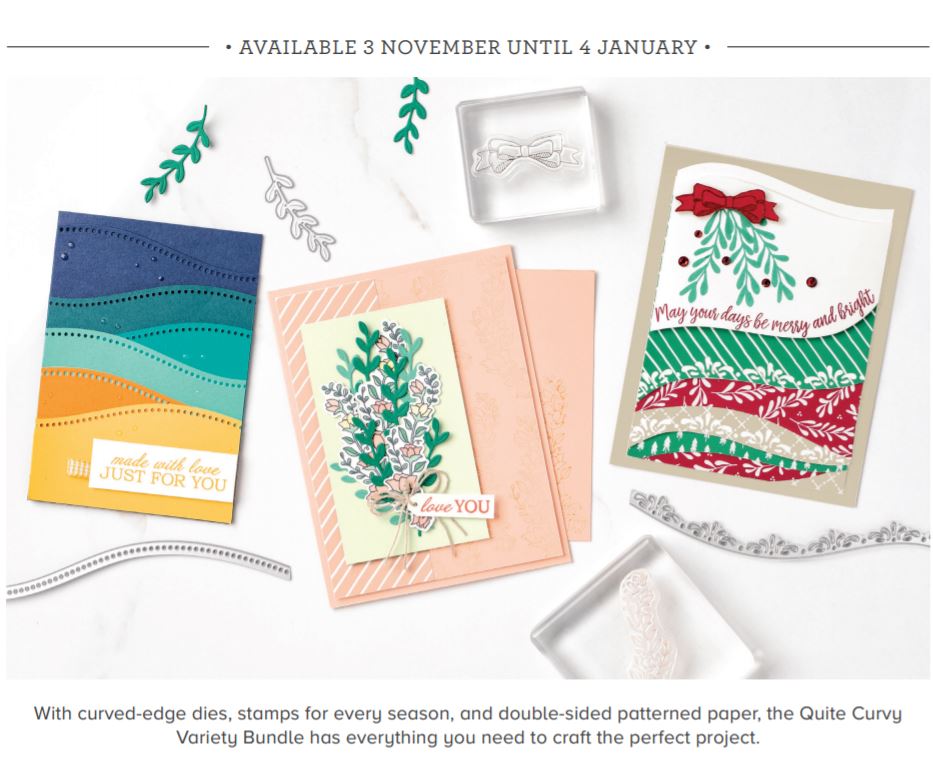
This set will be in the upcoming January-June 2021 Mini Catalog but you can purchase it now! If you purchase the entire group, the Quite Curvy Variety Bundle (158396), you will save 10%! The Christmas items in this Bundle are only available until January 4, 2021. The rest will be in the Mini Catalog in January. The last “safe” day to order before Christmas is December 10th, according to Stampin’ Up! but I’d order as soon as possible. Click on the images below.
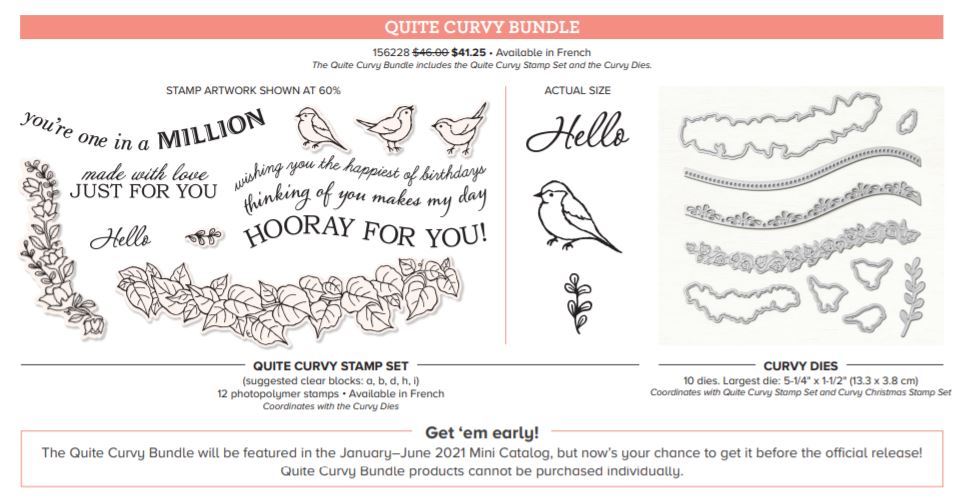
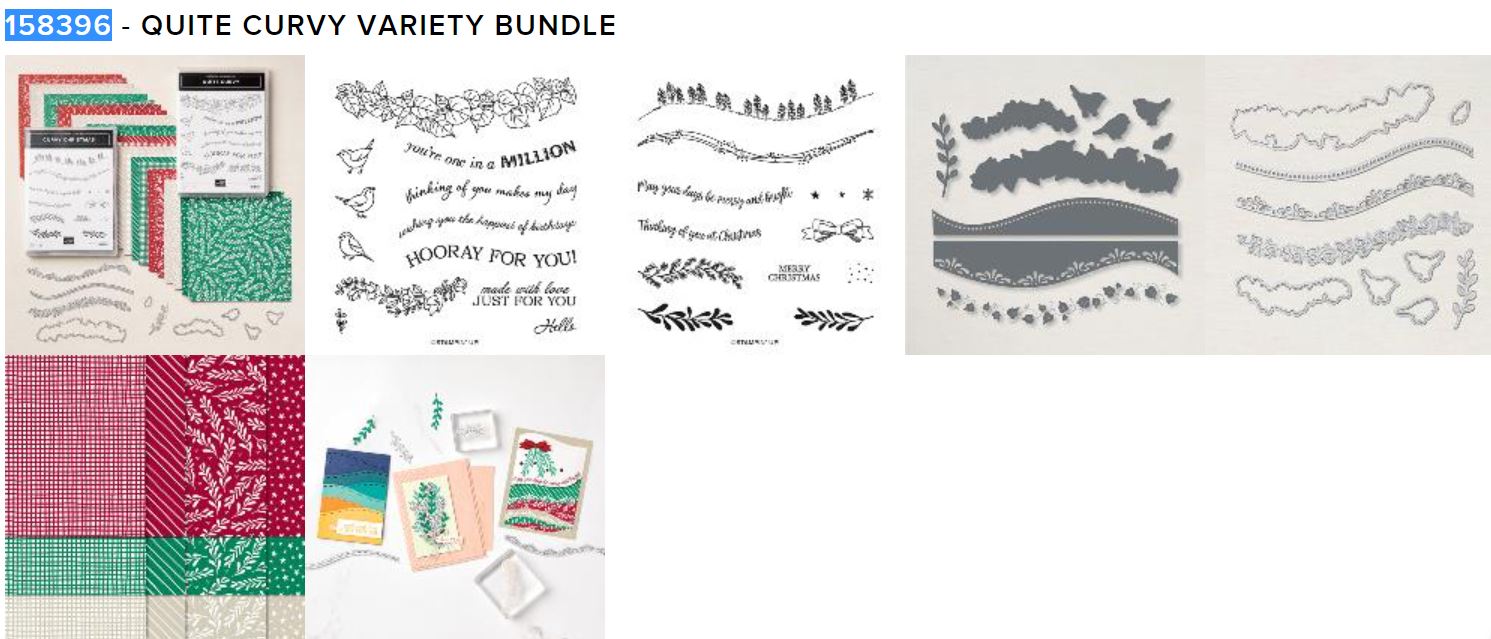
The best value is the Quite Curvy Variety Bundle. You get these items:
If you click on the three horizontal bars on the top left of the Home Page of the Store and click on the “What’s New” category, you will see the Quite Curvy Variety Bundle listed. Or use the link above to directly to my page.
Have fun looking over this new group of products designed to give you additional options for your holiday projects and cards!
This die-cut piece was already laying on my table and I was in a “red” mood so I was pleased how this Many Layered Blossoms Birthday Card came together. Real Red is one of my favorite Stampin’ Up! colors!
You won’t believe how simple this card is to make and yet it will look like you make an elegant, fancy card! That’s what die-cuts can do for you!
The card base is Shimmery White Cardstock, one of my favorite papers! It just barely has a glimmer to it, very subtle, but it is there and makes the paper look rich. It’s a must-have in your stash in my opinion! Then I added a layer of Real Red underneath another piece of Shimmery White.
I had previously used the Many Layered Blossoms Die to cut out this piece or Real Red. I think I was trying out my new Stampin’ Cut & Emboss Machine to see how it would handle a large and intricate die. So I had this stack of die cuts on my table! I just used the teeniest dots of Multipurpose Liquid Glue on the back of the blossoms and adhered it to the front of the card.
I stamped the greeting in Real Red Ink on a strip of Shimmery White and snipped the banner in with the pointy part of the Tailored Tag Punch. Then I layered this on a piece of Real Red.
That’s all there is to this card! If you want a change from Halloween or holiday cards, go back to this popular stamp set and die and make a card like this Many Layered Blossoms Birthday Card.
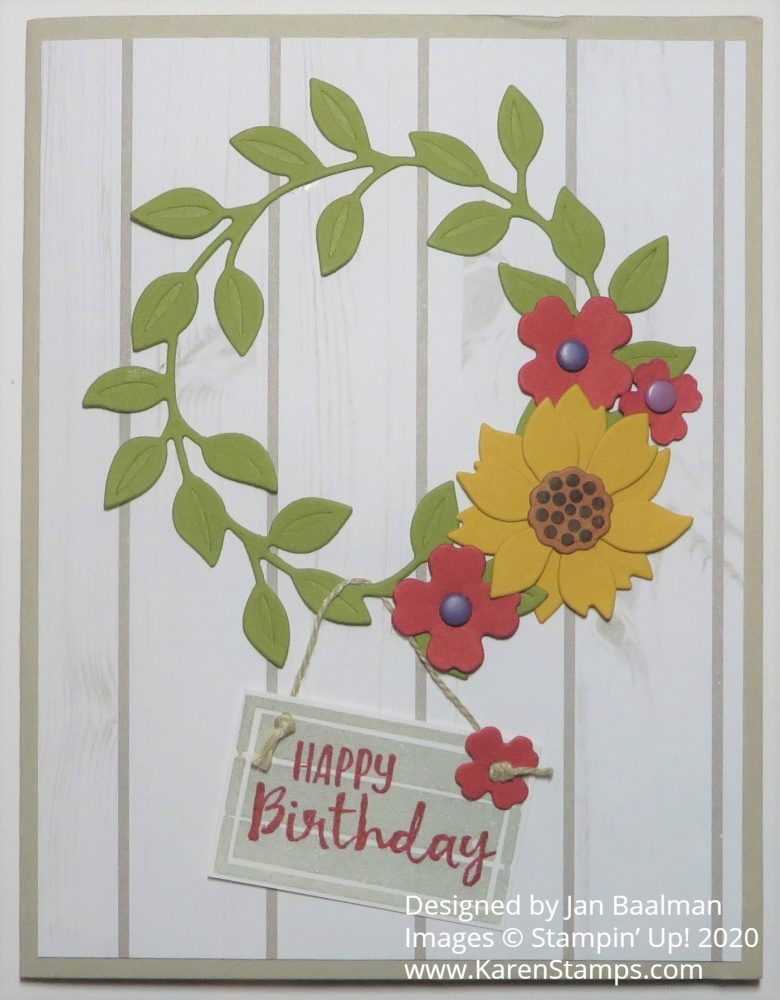
I got several very nice cards for my birthday a couple of weeks ago and this Arrange a Wreath Happy Birthday Card was made by my dear, long-time friend who got me into Stampin’ Up! in the first place!
I still remember stopping by her house when we were in town to go to a wedding shower and her taking just a few minutes to show me some projects she had made at a party by this company called Stampin’ Up! that I had never heard of. I barely knew anything about rubber stamping and had not been successful in my stamping attempts with stamps from the craft store, but her projects were so cute!! She had just received her Starter Kit but hadn’t opened it yet and we didn’t have time that day anyway. When I went back later in the summer for our friend’s wedding, I got to spend time stamping with her and fell in love with it! I didn’t really want to go anywhere else or do anything else, just stay at her house and stamp or look at the cards and things she had made. A few months later, I think, I signed up to be a Demonstrator.
This card was made with the Arrange a Wreath Stamp Set and Wreath Builder Dies. You can purchase both together in a Bundle and save 10%. I have seen some really cute cards made with this Bundle so I just might have to purchase it myself someday!
The card base is Sahara Sand with a layer of designer paper. You could choose something from the In Good Taste Designer Series Paper that might look similar. The wreath is die cut with the Wreath Builder Die out of Old Olive Cardstock. Then you can diecut some flowers from the set in any colors you like to decorate the wreath She used some enamel dots for the flower centers. I think the little Happy Birthday sign hanging from he wreath is so cute!
Obviously you can use this wreath for LOTS of occasions and all the seasons of the year, making this a very versatile stamp set. I love this card!
The latest reports about Hurricane Laura are that Houston is “out of the cone” so we should just have minimal effects, maybe some bands of rain and some gusty winds. The storm will go in around the Texas-Louisiana border which is certainly bad for those people. I just hope our power stays on! We’ve been lucky through many storms but you never know when your power might go out seemingly for no reason! We were making hurricane preparations anyway when it looked like it was coming directly here, so we have batteries and candles and lanterns and a ton of chocolate chip cookies I baked last night!
Take a look at the Arrange a Wreath Bundle for your next Stampin’ Up! order. You’ll find it in the Stampin’ Up! Annual Catalog on page 127 with the dies on page 173. Don’t forget to use your Bonus Coupons from July by August 31 when they expire.
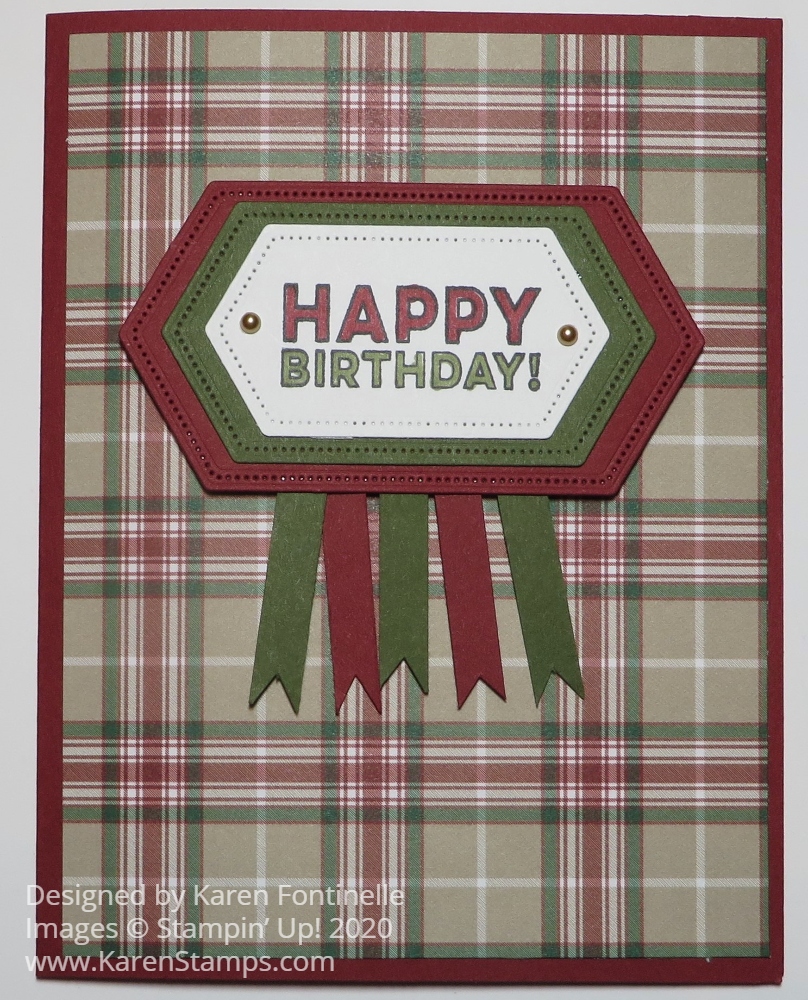
The plaid paper on this Masculine Plaid Tidings Birthday Card is coming soon in the August-December 2020 Mini Catalog on August 4th. Now when I first saw it in the holiday catalog, I wasn’t too thrilled and might have passed it up. I did notice it could be used for Christmas, fall, or Halloween and probably other things but I wasn’t that excited about it. But I did order it and when I opened the package, I just loved the paper!!
The Plaid Tidings 6″ x 6″ Designer Series Paper package has all kinds of plaids in it. There is a long list of coordinating colors! Although we might think of it as holiday paper, whether for Christmas or the oranges for Halloween, Fall, or Thanksgiving, I decided to use a sheet for a birthday card. While it could be for anyone, the plaid gives it a masculine look in this case and we’re always looking for things that work well for masculine cards for the men in our lives. The red on this paper is Cherry Cobbler and the green might be Shaded Spruce or Mossy Meadow. I wasn’t sure!
The card base is Cherry Cobbler and the red and green plaid paper is adhered to that. The greeting is from the Many Mates Stamp Set. It is stamped in black Memento Ink. It’s an outline stamp and you can leave it as is or in this case I colored in the letters. I used my Cherry Cobbler and Mossy Meadow Stampin’ Blends markers.
I stamped the greeting on Whisper White and die cut it with the Stitched Nested Labels Dies. Then I made layers with the same dies out of Cherry Cobbler and Mossy Meadow.
Due to not having the right colors of ribbon, I decided to just use some 1/4″ strips of cardstock scraps for tails hanging from the bottom of the greeting panel. I even cut the little bitty flagged ends with my Paper Snips. You could use more or less strips. I started thinking three would be good and ended up with five! After adhering the strips on the back of the layers with our new Stampin’ Seal Adhesive, I popped the whole thing up on Stampin’ Dimensionals®. Even then I wanted another little something, so I used two gold Metallic Pearls.
This is actually a pretty easy card to make! If you didn’t have the particular dies, you could use rectangles or ovals or circles or even just cut rectangle layers. Just stamp a greeting and choose your favorite plaid paper for the occasion!
You’ll find the Plaid Tidings Designer Paper in the Holiday Catalog, now known as the August-December 2020 Mini Catalog on page 57. I think you will be surprised how much you like this paper and how often you can use it for your projects, like this Masculine Plaid Tidings Birthday Card.
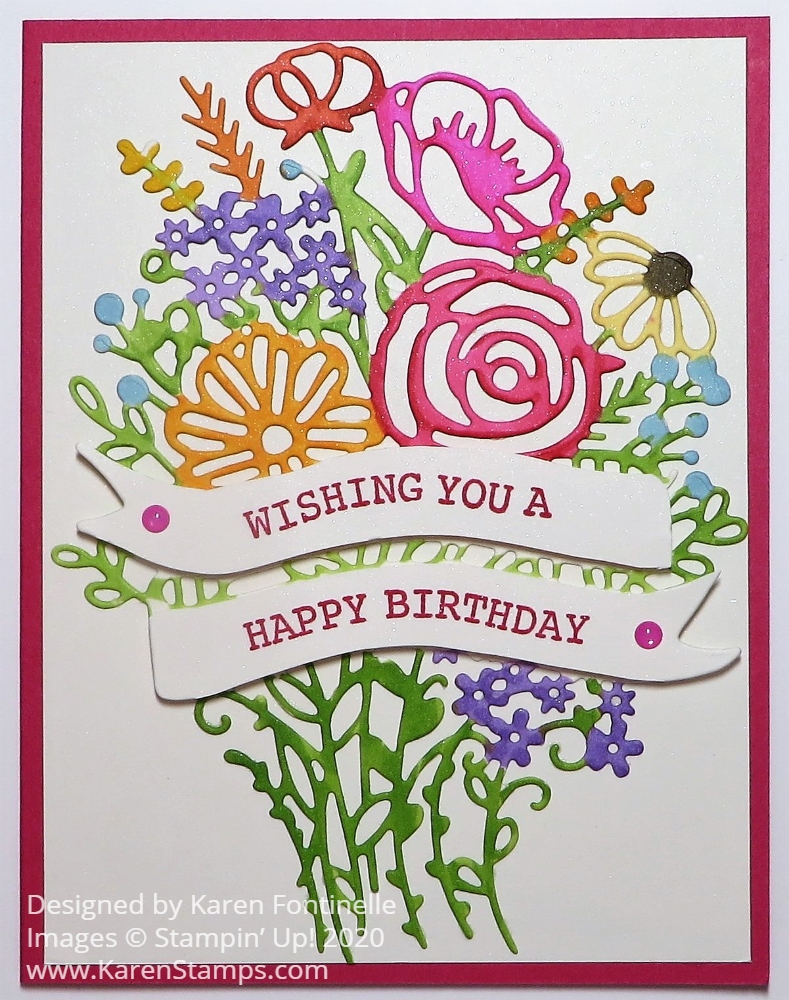
This Banner Blooms Colored Flowers Birthday Card is another example of how I did something different than I planned to! I originally thought I would color this die-cut by sponging on some color, maybe in a very soft look. But when I went to actually color on the die-cut, I grabbed my Stampin’ Blends markers instead and went to town!
When I stamp, I am always, always, always using Grid Paper on my table. It is handy for lining things up and especially for measuring quickly and easily. When I took a decorative painting class years ago, the teacher had us put down a towel on the table and after that, I couldn’t paint unless I had a towel underneath my project! Now you can even choose from several kinds of Grid Paper from Stampin’ Up!, even colorful ones! For coloring these die-cut flowers, I needed a plain white paper underneath (and you always need a paper underneath when coloring with Stampin’ Blends because they do bleed through the paper) so I could see the die-cut well. I simply turned my Grid Paper over to the other side.
This card uses Melon Mambo Cardstock for the card base. I chose it after coloring the flowers. I used Shimmery White Cardstock, my favorite, for the die-cut and also for the card layer, because it is good to color on and it has a very subtle shimmer to it. The paper is very pretty all on its own!
I die cut the flower bouquet with the Banner Blooms Dies. This die is really different from the ones we have had. I found that it works best placing the die cutting side up with the paper on top rather than face down on the paper. I don’t know why, but it does! I also ran it through my machine three times and after that, almost all the pieces popped out on their own and the few that were left I used the Take Your Pick Die Brush Tip to roll over the die cut piece and also over the die to get out just a few pieces of paper that remain in the die.
As I said, I planned to use maybe Sponge Daubers to lightly sponge on ink colors on the flowers and leaves over the die, not really being precise, just adding color. But then I grabbed my Stampin’ Blends Markers and had fun coloring the whole thing! I didn’t try to be absolutely perfect but used mostly the brush tips of the markers to quickly color in the different areas. On the really narrow areas, I used the tip ends of the markers. I usually started with the Light color and also added the Dark for a tiny bit of shading. Since I LOVE coloring with these markers I didn’t find the coloring tedious.
To make the banners going across the bouquet, just stamp the greeting in the Hand-Drawn Blooms Stamp Set on a scrap piece of paper. Then line the die up over the stamped greeting (but you don’t need a full piece of paper or you’ll be wasting it). You will end up with the portion with the stamped banners. Then just trim these off the rest of the bouquet and adhere to the bouquet you have just colored. The greetings in the stamp set are doubled-up to fit perfectly on the banner areas. You could also cut out the banners and use stamps from other sets that would fit.
The whole bouquet is adhered to the card with lots of teeny tiny dots of Multipurpose Liquid Glue. I placed the bouquet on the Silicone Craft Sheet which held it steady and it didn’t matter if a little glue got on the craft sheet.
A good thing to use for delicate die-cuts like this is the Adhesive Sheets which you adhere to the paper before die-cutting and it turns the die-cut into a sticker when you remove the backing paper. I just never think ahead to use it!
Here is another card I made with the Banner Blooms Die using Rainbow Glimmer Paper, another great option if you don’t want to color in!
Remember, we only have about a week left of Bonus Days! When you spend $50 on any order, you will receive via email a $5 Bonus Coupon to use on an order in August. No limit to how many coupons you can earn with every $50 you spend! Bonus Days ends on July 31.
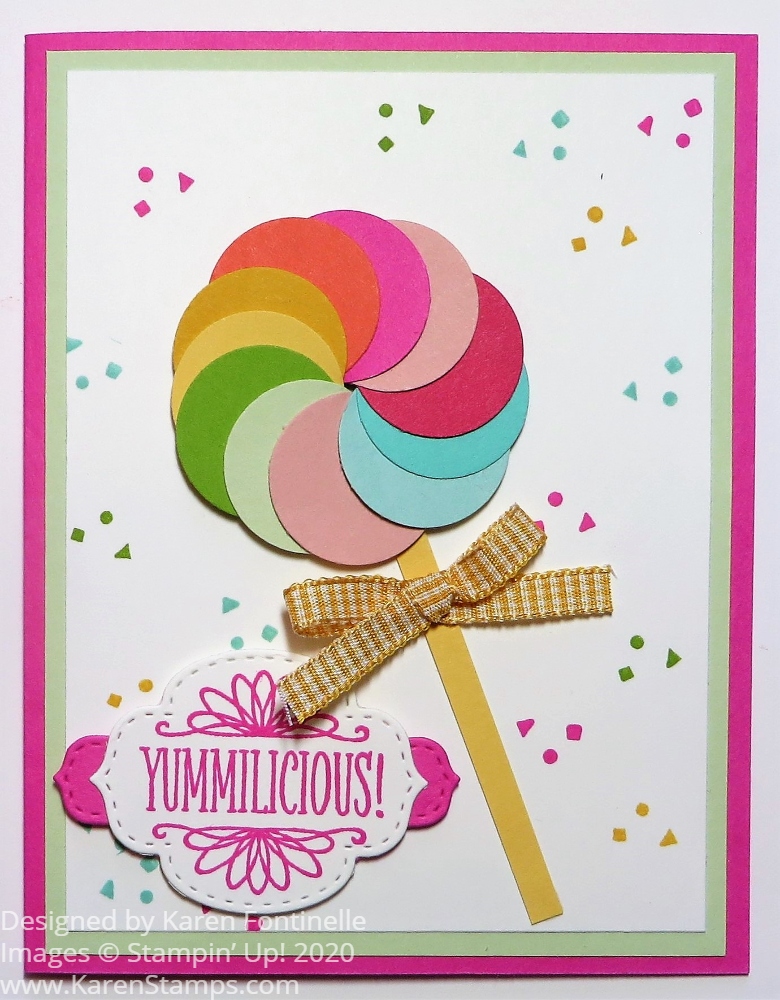
I had saved a magazine photo from YEARS ago with a card like this Colorful Lollipop Greeting Card. It has survived the purging of the file of torn out magazine pages, mostly scrapbook page ideas, several times so I finally decided to leave it out on my coffee table so maybe I would finally make it someday soon. Well, the day came and I made a card with this cute lollipop made out of circles!
There weren’t any super specific instructions on how to make this but I thought it would be easy enough to figure out. It’s a great way to use up some scraps of cardstock or even designer paper or mix the two.
You can use various sizes of circles, whatever suits your fancy and fits on your card. I used a 1″ Circle Punch (retired) but you could use something larger or larger die cuts. I just chose a bunch of colors of cardstock that looked good together.
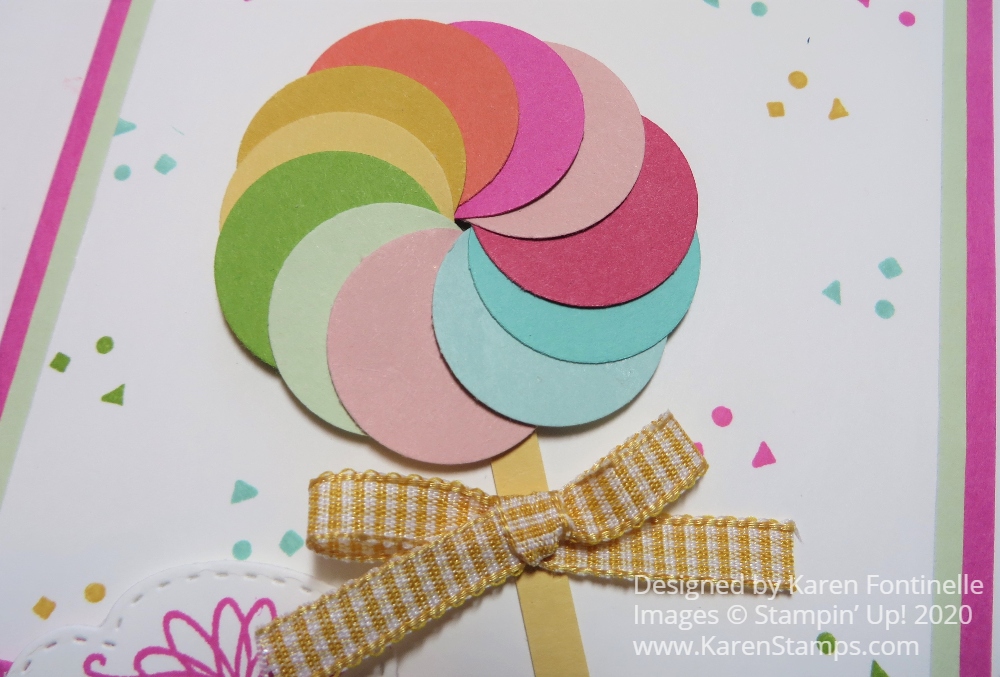
It may seem a little difficult to get the circles placed correctly in a circle to form the lollipop. It might help you to put a pencil dot on your card where you want the center of the lollipop to be and you can kind of arrange the circles around that. When you get to the last circle in the lollipop, tuck it under the beginning circle, otherwise the two pieces on either side of that first circle will overlap it. So you want the last circle to tuck under it.
Use the Multipurpose Liquid Glue to just dab in between the circles to adhere them together into the lollipop shape. That glue gives you a little “wiggle time” to get the circles shaped the way you want them. After you get the lollipop formed, you can either glue it down directly onto the card front or pop it up with Stampin’ Dimensionals® or cut down some Foam Adhesive Strips to fit.
If you have a real lollipop stick, that would be fun to use or just cut a very thin strip of cardstock. I had a white one but of course it didn’t show up against this white cardstock so I just use a strip of Bumblebee Cardstock instead. Then I tied a bow of Bumblebee Gingham Trim and adhered it to the stick with a Mini Glue Dot.
For the greeting, I thought this one in the So Sentimental Stamp Set was perfect! I stamped it in Magenta Madness Ink and die cut with a die in the Stitched So Sweetly Dies. Then I die-cut another piece out of Magenta Madness that was smaller and I just cut it in half so I could use each end under the greeting to help it stand out from the Whisper White card layer.
I also thought it would be fun to stamp the little confetti stamp around the card in different colors to fill in all the white space. I just used some of the lollipop colors. The card base is Magenta Madness with a layer of Soft Sea Foam cardstock.
This is certainly a fun card to make and something different. It would be fun to make a few and make them into birthday cards or just “Hello” cards to send to a friend to brighten their day! Who wouldn’t be happy to receive this special Colorful Lollipop Greeting Card card?!
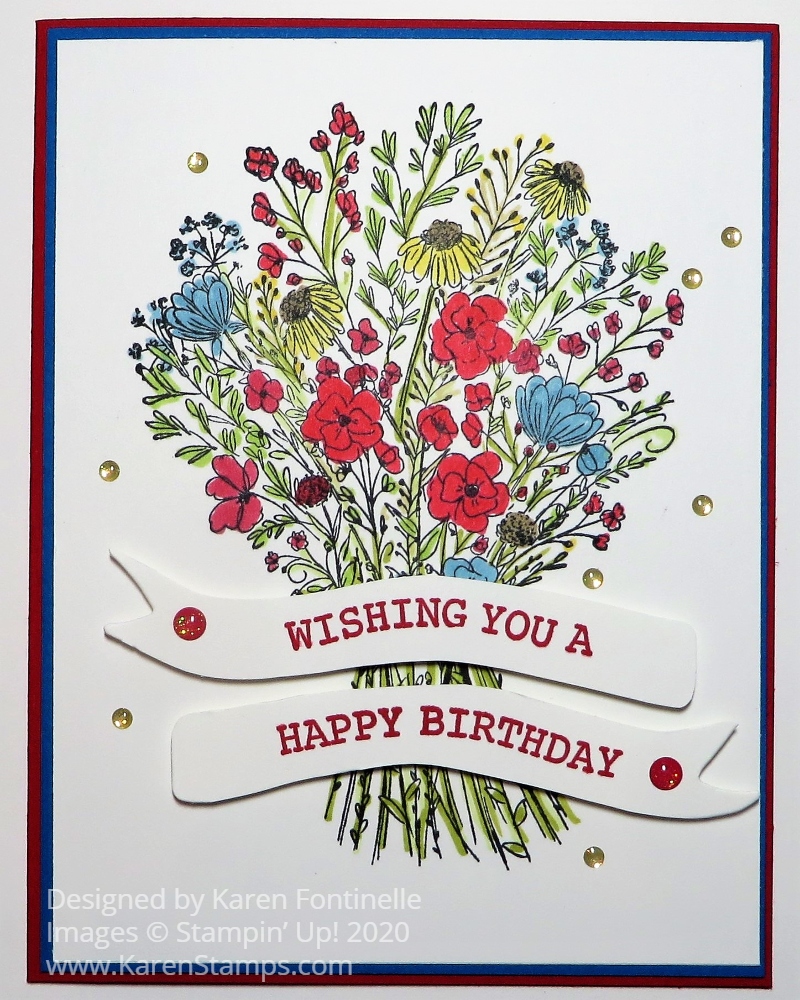
This card, Hand-Drawn Blooms Birthday Card For July 4th, could be a birthday card for someone this month or you could think of it as a birthday card for our country while we celebrate Independence Day on Saturday. Do you know someone with a July 4th birthday?
This new Hand-Drawn Blooms Stamp Set comes with an amazing large die plus a few small flowers and I had played with the die and greetings a little bit, but I hadn’t used this stamp of a lovely flower bouquet. The bouquet is actually two parts, the main bouquet and then the bottom part with a bow and the flower stems.
I stamped the two pieces of the bouquet with Memento Ink and then colored in the flowers and leaves with Stampin’ Blends. Actually I was going to use my Watercolor Pencils but I couldn’t find the set I wanted to use! But I love using the Stampin’ Blends. I primarily tried to use red and blue flowers for the 4th of July with a little yellow. I didn’t try at all to be perfect in my coloring, and you would be surprised how quickly you can actually color in most of those flowers. Since they are so small they look difficult, but since they are small you only need a dot or swipe of color to color them in! I just kind of drew over the stems with a swipe of Granny Apple Green with the small tip of the marker. Again, not perfect, but overall the whole thing looks fine!
The birthday greeting comes in the stamp set. Both lines of words are on one stamp, so just stamp it and then cut it out with the Banner Blooms Dies. Since you really only want to cut out the words, use a smaller piece of paper that fits right where the banner area is, otherwise, the die will cut all of the paper you put under it.
This card has a Real Red card base with a layer of Pacific Point blue. I just made narrow margins on this card so it is more difficult to see in the photo. The greeting is popped up on Stampin’ Dimensionals. I added two red Toile Tidings Glitter Enamel Dots (retired) from the Holiday Catalog last year. I couldn’t stop myself so I added some of the smallest Gold Glitter Enamel Dots around the bouquet. Be careful, once you use one of those Gold Glitter Dots, you can’t stop!
Of course most of the time that you would make this card you probably wouldn’t be thinking about the 4th of July! But you can use these floral bouquet for many occasions and in many color schemes!
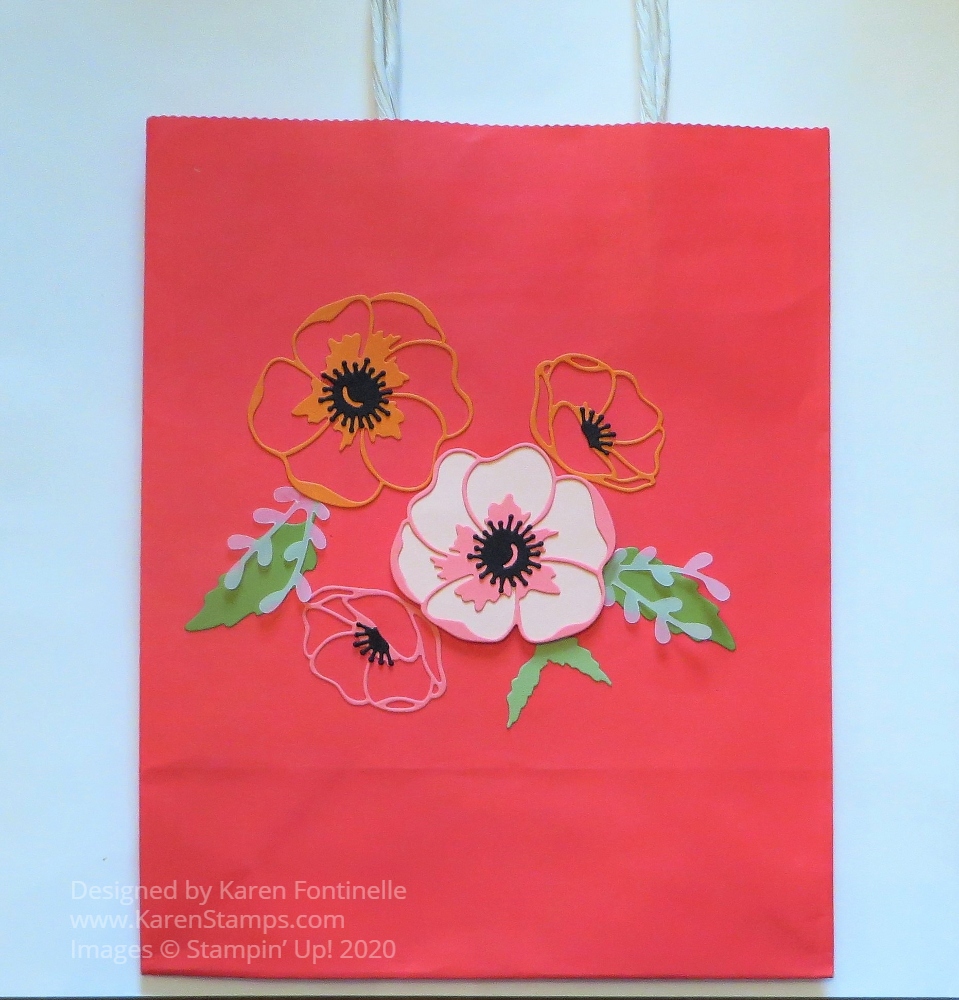
One of my favorite projects to make is to decorate a gift bag like this Poppy Moments Altered Birthday Gift Bag that I made for a friend’s birthday. Sometimes I use a bag I got out shopping and even if it has the store name on the side, I can cover the name with paper and decorate. It’s almost like making a card on the side of a bag! And if you don’t already have a cute shopping bag, you can buy a bunch at the craft store.
To decorate this shopping bag, I used thePoppy Moments Dies and just cut out a few flowers and leaves! I also used the Sprig Punch to punch a few leafy sprigs out of Vellum Cardstock. I made this bag pretty simple because there was no store printing that I had to cover up. After putting a gift inside the bag with tissue paper, you could also tie a ribbon around the bag handles. You could also attach a gift tag that you made. So many possibilities!
Here’s a birthday gift bag I decorated several years ago. The bag itself is pretty with a swirly leaf print on it, but I did need to cover the store name but that’s usually easy to do, sometimes on the front and back of the bag.
This gift bagturned out really pretty I think! I don’t remember if the bag was plain on the front or if it had printing on it, but it was easy to cover almost the whole front of the bag almost like if I had been making a card! You can see how you could make the same design for a card just by making it smaller!
If you are cleaning up closets and cabinets during the pandemic, save those small shopping bags and do something creative with them! Decorate for birthdays or Christmas or something generic and then you will have some personalized gift bags ready to go! Or maybe you can make a bag that matches your gift.
Altering or decorating bags you have around the house is something fun you can easily do and a great way to recycle! And it just might save you a trip to the store for a gift bag!
It certainly is fun to make cards with this designer paper as you can see on this Dinoroar Dinosaur Birthday Card! Perhaps you already ordered this paper from the catalog or maybe you choose it during the last part of Sale-A-Bration. If you don’t own it yet, you can purchase it as a Last-Chance product even at a discount!
TheDinoroar Designer Series Paper is a fun paper to have in your stash for children’s and baby cards…..or even for anyone else! Why not?! Some adults might enjoy getting a dinosaur card for their birthday!
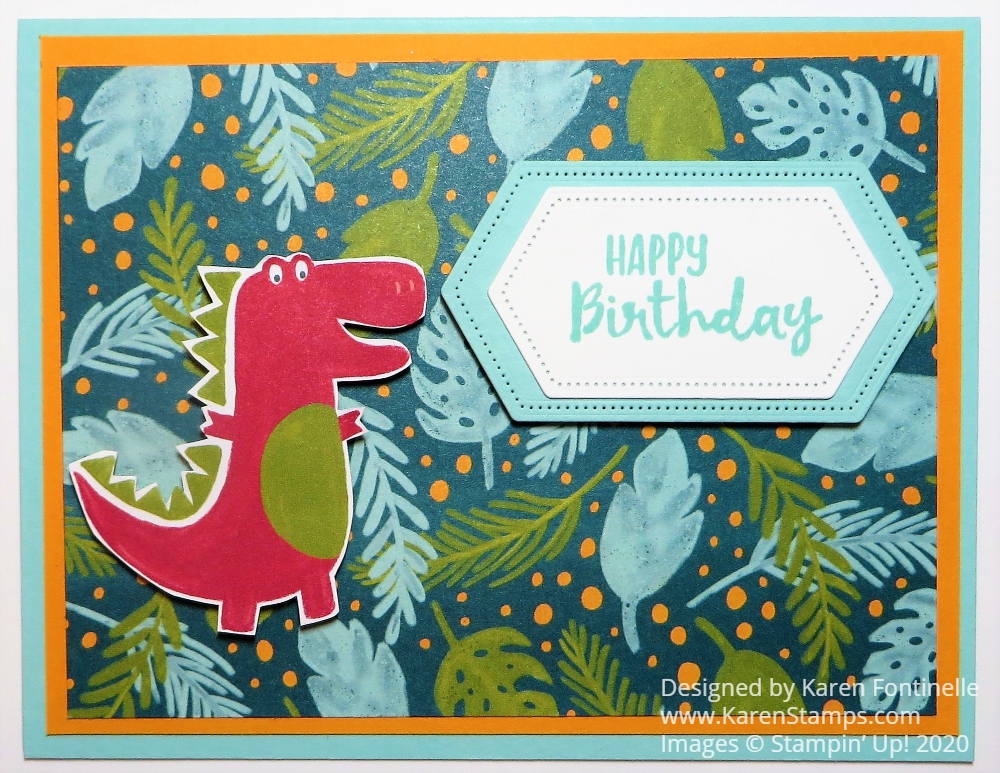
This card has a card base of Pool Party and then a layer of Mango Melody underneath the designer paper. I wanted to use a pattern that had leaves and foliage to look like the dinosaur was roaming the forest! The dinosaur is even cut out from one of the patterns of designer paper!
The greeting is stamped from the Peaceful Moments Stamp Set. The greeting and the layer are cut with the Stitched Nested Label Dies. I wanted to just keep the front of the card simple since the background paper is pretty busy with rather large images and I wanted the dinosaur to stand out.
Here is another dinosaur card I made recently. Now that card you could send to almost anybody just to say “Hello” or put a smile on their face when they open the envelope!
You can still purchase the Dino Days Bundle, consisting of the Dino Days Stamp Set and the Dino Dies for 10% off. The stamp set and dies will be in the new catalog but not bundled for the 10% off price. So if you like it and want to save 10%, get it now. The little Dinoroar Enamel Shapes are on sale also right now in the Last-Chance Products at more than 50% off!
These Last-Chance retiring products are available through June 2, while supplies last, until the new Stampin’ Up! catalog comes out June 3rd! Get some bargains while you can and don’t forget to check the Clearance Rack, too!
This Dinoroar All-Occasion Dinosaur Card is a fun card to make with this dinosaur paper! Just imagine the kids who would love to get this dinosaur card from you! Maybe even some adults because it’s a fun card regardless!
I got this paper free at the end of Sale-A-Bration last month when Stampin’ Up! offered a few catalog items as rewards for spending $50. I hadn’t bought it earlier because I didn’t think I had any use for dinosaur paper, but it’s really cute and I’ll be able to make some fun cards and projects with it. It would even be good for baby cards!
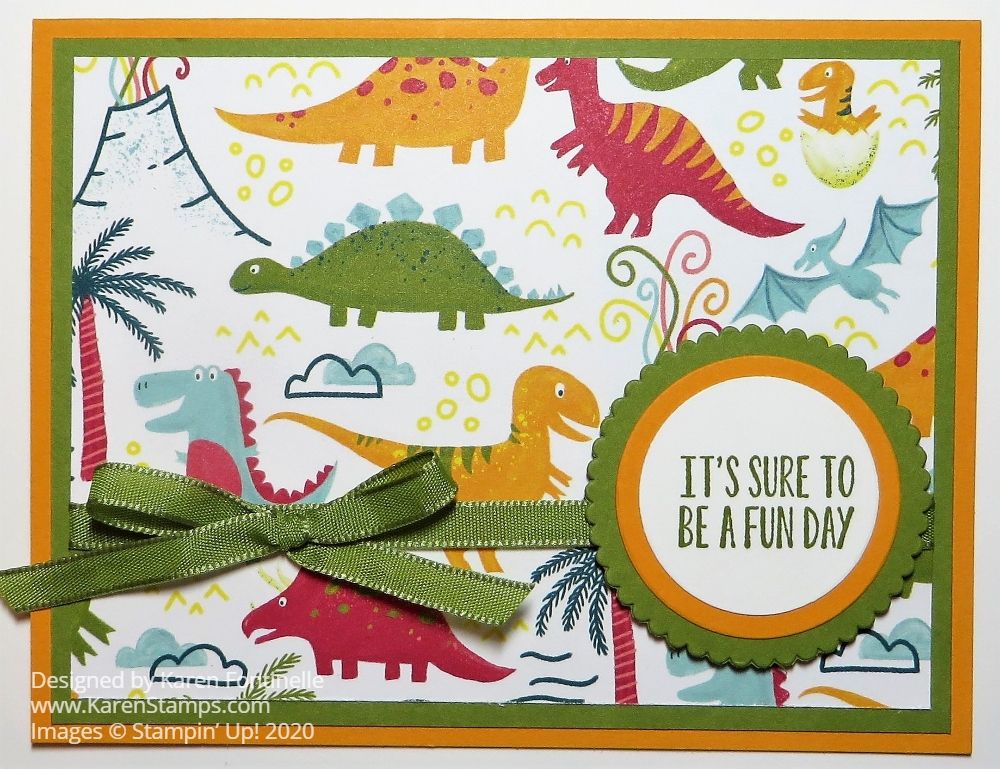
The card base is Mango Melody, one of the coordinating colors for the paper. I also added a layer of Old Olive and then a pattern of the Dinoroar Designer Series Paper.
The greeting is from the Itty Bitty Birthdays Stamp Set, a great stamp set to own. While this particular greeting likely implies “birthday”, I think you could interpret is as an all-occasion type greeting. You could put it on a card just for any day or to encourage someone or for many reasons, maybe a celebration. It doesn’t have to be for a birthday.
The greeting is stamped in Old Olive Ink and die cut with a small Layering Circles die, then layered on another die-cut circle of Mango Melody. These are then layered on a scalloped circle of Old Olive in the same die set. Surprisingly, I used a piece of ribbon from the Ornate Garden Suite. It’s in the Ornate Garden Ribbon Combo Pack.
This was a very easy card to make! Just a card base, some cardstock layers and designer paper on top with a greeting and some ribbon for embellishment. I think this Dinoroar Paper will be fun to use as on this Dinoroar All-Occasion Dinosaur Card.
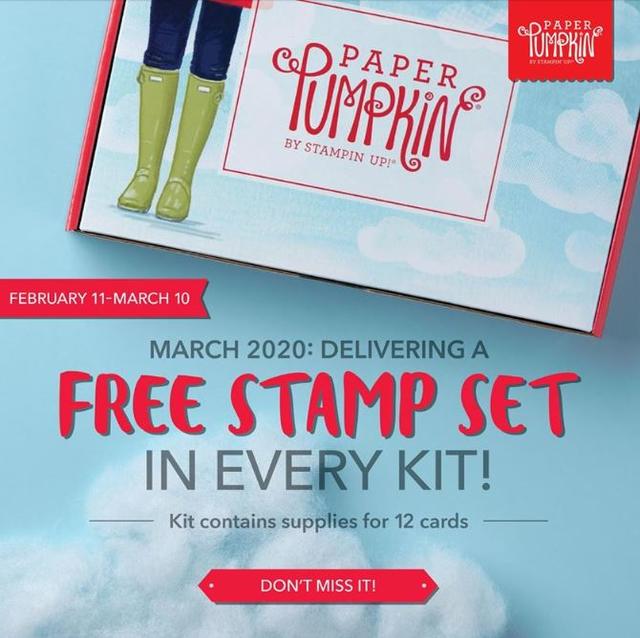
There’s a FREE stamp setin the March Paper Pumpkin 2020 Kit to celebrate Paper Pumpkin’s 7th Birthday! And it’s the last few days to get your March Paper Pumpkin Kit! You must subscribe by Tuesday, March 10 or set up your account with your Prepaid Code with a Prepaid Subscription. Don’t miss it! And look at the cute box!!!!!
Some of the most affordable stamp sets from SU! retail for $15-$20 USD, plus shipping. With March’s Paper Pumpkin kit you get 2 stamp sets (so a $30-$40 value) plus card bases, envelopes, ink spot, embellishments, adhesives, etc. and shipping is included!
This March Kit will be notecards, 5″ x 3 1/2″. They are perfect for short notes to friends and loved ones!
If you get a Prepaid Subscription, you just add it to your regular Stampin’ Up! order, especially if you are close to earning something for Sale-A-Bration or Stampin’ Rewards. Even if you already have a monthly subscription, you can order a prepaid subscription, put in the code they will email you in your account, and Paper Pumpkin will use the Prepaid months first and then revert back to your monthly subscription. Ask if you have any questions!
Paper Pumpkin has only gotten better and better through these 7 years so if you previously subscribed and dropped you might want to give it another try!
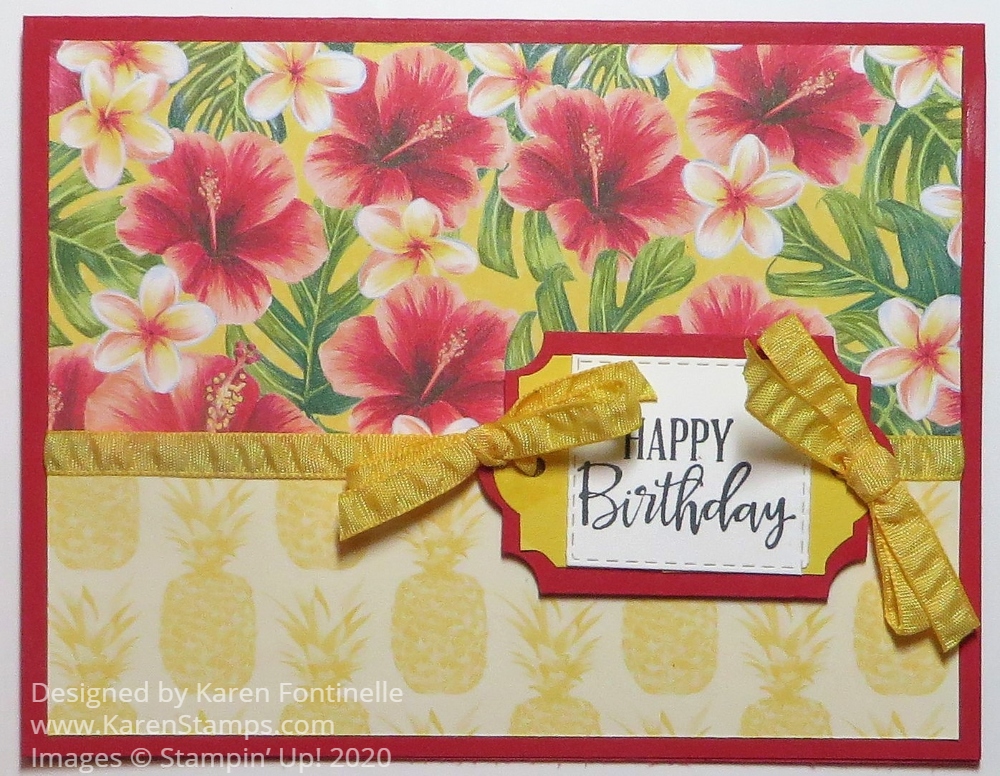
I wanted to make a quick card and the design I used for this card, Easy Tropical Oasis Birthday Card, is almost always a very quick and easy one to use! This Tropical Oasis Designer Series Paper has such gorgeous colors and floral patterns in it. I just flipped this floral pattern over, and the pineapples were on the opposite side! I saw some tiny pineapples at the grocery store one day and thought of this whole Tropical Oasis Suite!
One of the colors that go with this paper is Real Red! My favorite color, so I could not pass it up! So Real Red it was for the card base. Without measuring, I cut out a longer rectangle than I needed because I wanted to have a little overlap of the two papers so that I could glue them together. In the end, the two pieces adhered together measured like any card layer, 5 1/4″ x 4″.
I always like to cover the seam of where two papers meet, so I used the Daffodil Delight 1/4″ Ruched Ribbon. I just took a longer strip than the card and adhered it around on the back of the card layer. After I made the greeting, I use the ribbon to tie a bow on each end of the layered background for the greeting.
The greeting is stamped from the Peaceful Moments Stamp Set. You could choose lots of other greetings or sentiments with this card design and paper. I layered it on Real Red paper punched with the. Everyday Label Punch. Then I trimmed down another punched label of Daffodil Delight and cut it in half so I could make it smaller to fit under the greeting. I didn’t do a perfect job but I was trying!
The greeting itself is tricky to explain. I tried something for the first time. I used a Stitched Rectangle Die to cut it out. As you can see, the rectangle dies are longer than I wanted my greeting to be. I cut only part of the rectangle by not putting my cutting plate over the part of the die I did not want to be cut. Then I switched the die around, still lining it up with the die-cut outline on the sides (it just sticks back on the same lines) and just put the cutting pad on the end that now needed to be cut to make the greeting shorter and only rolled over that end. That all produced the smaller rectangle greeting! I didn’t take pictures because I wasn’t even sure I was doing it right! But I did!
This card design is always great to keep in mind when you want an easy card that still looks great. No fancy folds or directions to follow. Just add some designer paper to all or part of a card base, in either direction, one side of paper or two, add a ribbon or embellishment or not, then add a greeting for whatever occasion. Here’s another card I made that is similar, using a whole layer of designer paper with a strip of a different pattern going across under the greeting. When you have designer paper as bright and pretty as this, almost any card design you use like this Tropical Oasis Birthday Card will turn out beautiful.