Category Archives: Candy

Cello Halloween Jar of Haunts Candy Treat Bags

Cello Halloween Jar of Haunts Candy Treat Bags

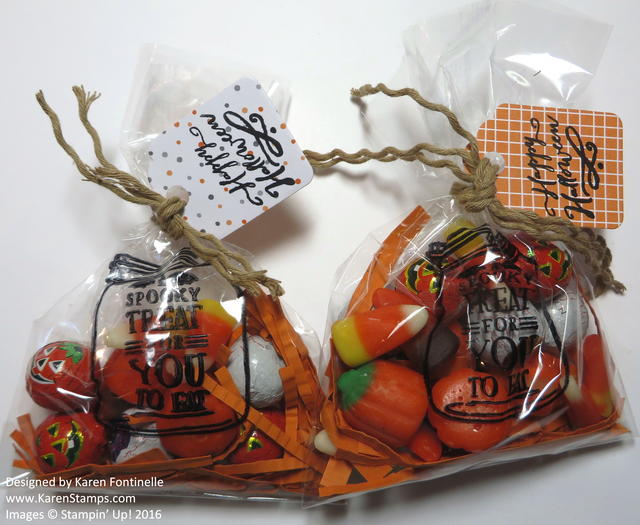
Need more last minute Halloween ideas like these Cello Halloween Jar of Haunts Candy Treat Bags?  This is what I came up with late last night!

Do you ever have late night stamping sessions when you should be calming down and getting ready for bed?  Isn’t that when you feel the most creative?! And then when you do go to bed, you can’t fall asleep because your mind is still swirling with creativity!

Although this size of cello bags is retired, there are other kinds and sizes of cello bags you can use. You do need Stazon Ink to stamp with because it dries on cello bags and plastic items like these treat bags. As with other times, what I thought I was going to stamp and make changed into some other idea as I was working on the project! It happens! As I started putting in my “filler” paper and candy, I got the idea to stamp the empty jar from the Jar of Haunts Stamp Set. Originally I was going to stamp the eyeballs randomly on the bag or an image from the Spooky Fun Stamp Set. But then I saw the jar and thought that would look like the candy in the bag was inside the jar. And then I thought the greeting would be cute stamped inside the jar! That’s how this came about!

The filler paper is just scraps of cardstock, run through the old Crimper we used to have, and then cut into thin strips with the Fringe Scissors. You can cut the strips with whatever scissors or paper cutter you have, it’s just that the Fringe Scissors do several strips at one time. Then, moosh the strips of paper all up with your hands and much as you can, and you have “filler”. I think there’s another name for it but I can’t think of it. Just a little something to take up space and add some color in a gift or treat bag.

The ribbon tying the bag is the Kraft Rope Trim unraveled into three pieces or rope!  I saw that idea online, so always be thinking outside the box with every product! I like the frazzled look of it rather than smooth for this Halloween treat bag!  The tag is made with the Tags & Labels Framelits Dies and Big Shot.  The greeting is in the Jar of Haunts Stamp Set.

Such fun tricks and treats you can make for Halloween!

Shop Stampin’ Up! Online 24/7!

Halloween Night Mini Treat Bag

Halloween Night Mini Treat Bag

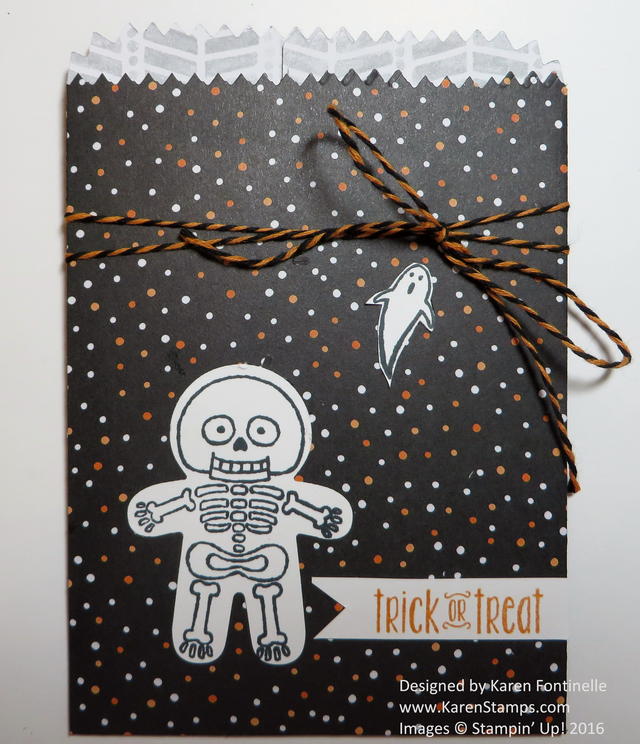
I’ve said it before, and I’ll say it again, one of my favorite Stampin’ Up! products in the catalog are the Mini Treat Bag Thinlits Dies.  I just think the little bags you can make for treats, for money, for gift cards, and used as envelopes are the cutest things and so versatile.

On this Halloween mini treat bag, I used a piece of the Halloween Night Specialty Designer Series Paper for the bag.  You could really use either side of the paper for this project! I also stamped the skeleton in the Cookie Cutter Halloween Stamp Set and punched out with the Cookie Cutter Builder Punch.  So easy!  Then I stuck him on the front of the bag for decoration as well as tying around some Halloween Night Baker’s Twine.  The greeting is stamped from the Spooky Fun Photopolymer Stamp Set and made into a little banner.  The ghost I thought would be cute, from the same stamp set!

Just put a candy treat inside or a Halloween note card or whatever you like!  Just be sure it is spooky when you make this Halloween Night Mini Treat Bag!

Get all of these supplies at the Stampin’ Up! Online Store!

Paper Pumpkin Halloween Test Tube Candy Treats

Paper Pumpkin Halloween Test Tubes Candy Treat

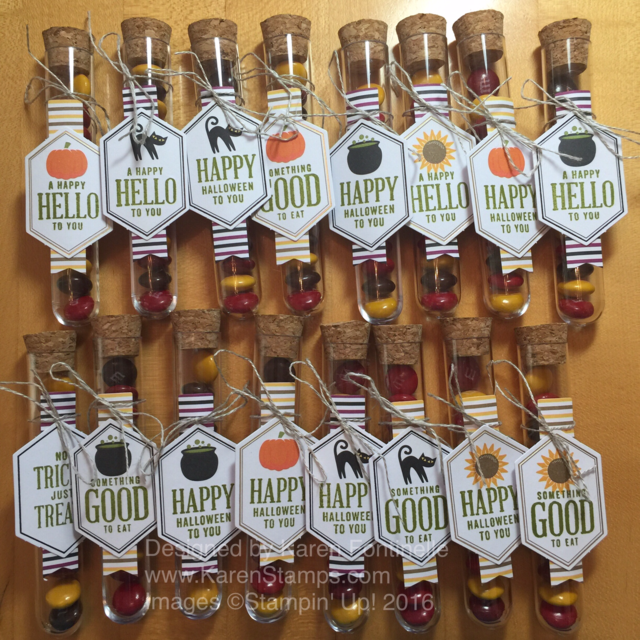
Yesterday I got around to playing with my September 2016 Paper Pumpkin Kit and here is what I made!  I still have some extra tags and banners that I can use to make some other cards. Lucky for me that I had enough CANDY to fill all these test tubes!!! As I worked on these test tube treats, I started thinking of people I could give them to besides my kids, so don’t worry that maybe you don’t have children, grandchildren or trick-or-treaters to pass them out to! Think about taking one or a few along to a doctor appointment, or give to a couple of your neighbors, or take along to a restaurant and give to a good server in addition to a tip, or the drive-thru window at a coffee or fast-food place, there are just all kinds of ways to pass them out to people!

This was such a cute project and so easy to make! I know in the past Demonstrators have loved getting their hands on these fun test tubes to make various treats, so how great to just get them delivered in a Paper Pumpkin Kit!

paper-pumpkin-bogo-ends-october-10

Lucky for new subscribers, Stampin’ Up! has a deal for you!  Subscribe to Paper Pumpkin now (by October 10th) which pays for the October kit and you will receive the November kit FREE! Just use Promo Code:  BOGO

ALSO:  Once you subscribe, you can go to the Stampin’ Up! Online Store, click on Paper Pumpkin and then Past Kits. These are only available to subscribers. A “Kit” means you get the full kit including stamp set. A “Refill” means you get the supplies but not the ink spot or stamp set. But you can still substitute with stamps you have in many cases and still make cute projects with the supplies! The cute Paper Pumpkin Kit from last year with the Halloween treat bags is available as I write this! So subscribe and then grab the past kits or refills that you missed!

Click HERE to Join Paper Pumpkin today!

(You deserve it!)

Halloween Night Candy Bars

Halloween Night Candy Bars

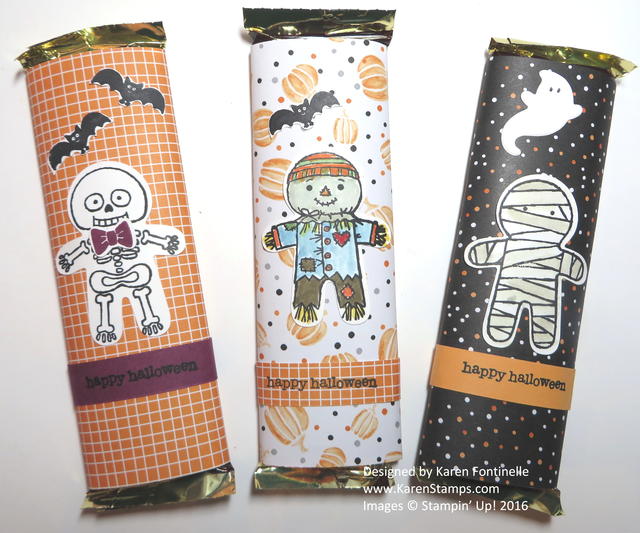
The other day I posted the first candy bar I made, but it was so fun I had to make some more Halloween Night Candy Bars with the Halloween Night Specialty Designer Series Paper and the Cookie Cutter Halloween Stamp Set plus Cookie Cutter Builder Punch.  The greeting is from Teeny Tiny Wishes.

Depending on the kind and size of candy bar you use, just wrap designer paper, or even card stock around the candy bar and secure with strong adhesive like Tear & Tape.  Stamp the Cookie Cutter characters, color in and punch out. Add a few other stamps for embellishments or whatever else you come up with!  So fun and easy!

Are You On My Mailing List?

This week my September newsletter will come out with several stamping projects and all the latest Stampin’ Up! news!  PLUS it won’t be long until I begin my 12 Weeks of Christmas email with a new idea and full directions each week for cards, bags and tags, and gifts. This is a special gift for my newsletter subscribers so be sure you are one of them!  Sign up in the box in the upper right of my blog!

Last Day for Stampin’ Up! Special Offers!

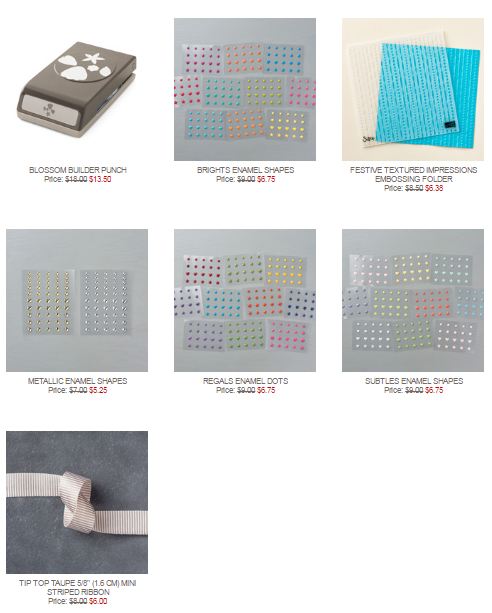
Just like the old Weekly Deals, here are the current Special Offers which have been out since last Tuesday and will end tonight. Tomorrow there will be new ones and one more week of special offers the following week.  Add them to your order!  If you like the Enamel Shapes or haven’t tried them yet, this is your chance to get them at a 25% discount – or a punch, ribbon or embossing folder!

Stampin' Up! Special Offers Week 1

Shop Stampin’ Up! Online even on Labor Day!  The Online Store is OPEN!

Cookie Cutter Halloween Candy Bar

Cookie Cutter Halloween Candy Bar

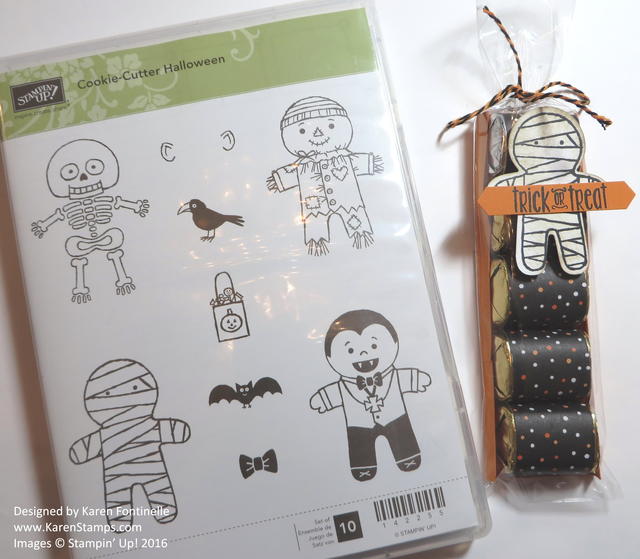
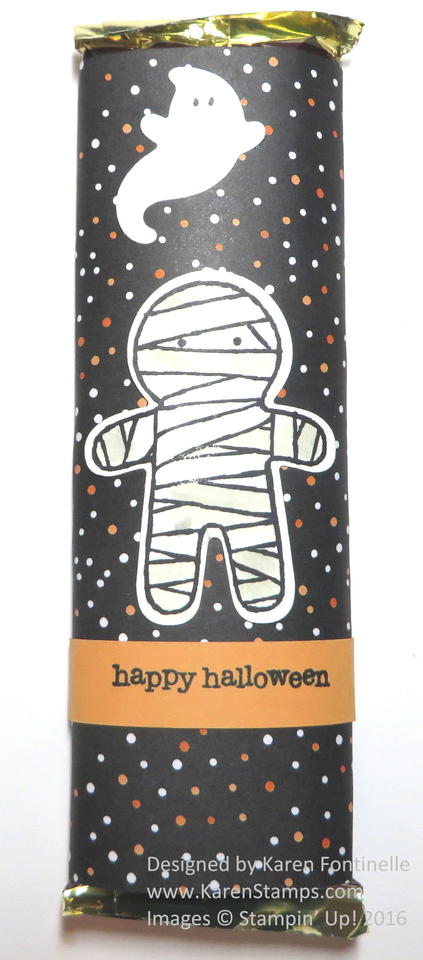
When we think of Halloween we think of candy, so why not decorate a chocolate bar for Halloween like this Cookie Cutter Halloween Candy Bar?! It’s so fun to make stamping projects for Halloween!

First I just wrapped the chocolate bar (with almonds!) in a piece of the Halloween Night Specialty Designer Series Paper. The size depends on your candy bar, just overlap it a bit in the back and make sure it’s a fairly tight fit. I just used a strip of Tear & Tape Adhesive.  The mummy is stamped from Cookie Cutter Halloween and colored lightly with a little Sahara Sand ink and my Aqua Painter.  The little ghost I had already cut out with the Home Sweet Home Thinlits Dies.  The greeting is stamped from Teeny Tiny Wishes.

Such a fun and easy treat or favor to make just for fun or for a party!  Check your pantry or grocery store and see what you come up with!

Shop the Holiday Catalog now at Stampin’ Up! Online!

Candy Cane Christmas Tiny Treat Box

Candy Cane Christmas Tiny Treat Box

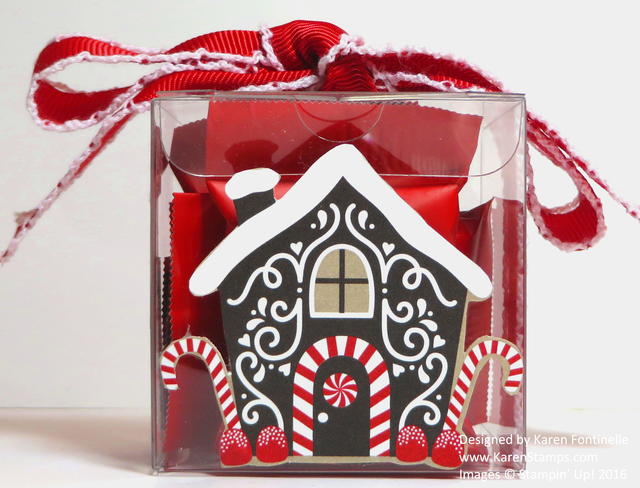
Sometimes the best gifts come in tiny boxes, just like this Candy Cane Christmas Tiny Treat Box. There is nothing simpler than this way of packaging a small gift or treat! The Clear Tiny Treat Boxes are food safe and acid free and only 2″ x 2″ x 2″ in size! You get 16 treat boxes in a package!

There are limitless ways to decorate and use these little boxes! You will have fun seeing what cute ways you can use these boxes. For this one, I assembled the flat-folded box, added the candy treats inside, and tied with the new Real Red 3/4″ Stitched Edge Ribbon (available September 1st in the new Holiday Catalog!). For the little gingerbread house on the front, I found that the smaller ones printed on the Candy Cane Lane Designer Series Paper on one of the sheets fit perfectly after I cut it out with my Paper Snips scissors. That’s all there was to it! Instead of candy, you could put a very small gift inside tucked inside some shredded paper or wrapped in some tissue paper. Instead of being able to see inside so easily, you could wrap designer paper around the outside like a wide belly band. Use these boxes for any occasions! They are great to have on hand!

Remember, the Stampin’ Up! Holiday Catalog goes live September 1st!  You will LOVE it!

Shop for Stampin’ Up! products online HERE!

Cookie Cutter Scarecrow Mini Treat Bag for Halloween

Cookie Cutter Scarecrow Mini Treat Bag for Halloween

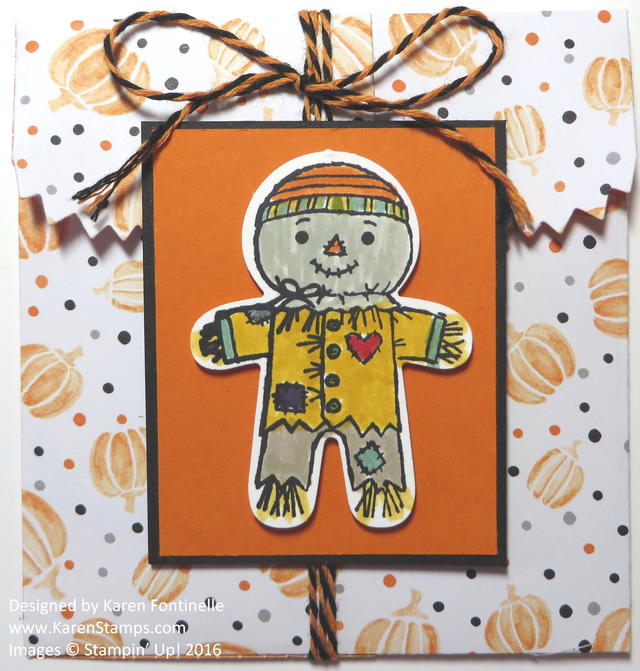
Here’s something fun to make with the Cookie Cutter scarecrow on a Mini Treat Bag all ready for Halloween!  The Cookie Cutter Halloween Stamp Set is coming soon (September 1st!) in the Stampin’ Up! Holiday Catalog and coordinates with the Cookie Cutter Builder Punch (and there is a Cookie Cutter Christmas Stamp Set too that you won’t want to miss!).

I had already stamped and punched out the scarecrow another day and he was right there on my table so I colored him in with Stampin’ Write Markers and mounted him on a layer of Pumpkin Pie cardstock and Basic Black.

You already know how much I love the Mini Treat Bag Thinlits Dies!  When I got the idea to make a treat bag, I grabbed a piece of the new Halloween Night Specialty Designer Series Paper toward the back of the Holiday Catalog.  I think the little pumpkin pattern looks so cute with the scarecrow! I decided to fold over the top of the treat bag and tie closed with the Halloween Night Baker’s Twine.

Don’t forget to put the candy or treat in the bag before you tie it shut!  You could also make it like a little envelope with a greeting or gift card inside. So many uses for the Mini Treat Bag Thinlits Dies!

Holiday Catalogs are starting to arrive in mailboxes so be sure to watch for yours if you have been a regular customer of mine! Sometimes they get lost along the way, so let me know if yours doesn’t arrive by September 1st.  If you are new and would like a catalog, just let me know and I can send one to you.

Shop Stampin’ Up! Online 24/7!

Botanical Pop Up Corner Birthday Card Inside

Botanical Pop Up Corner Birthday Card

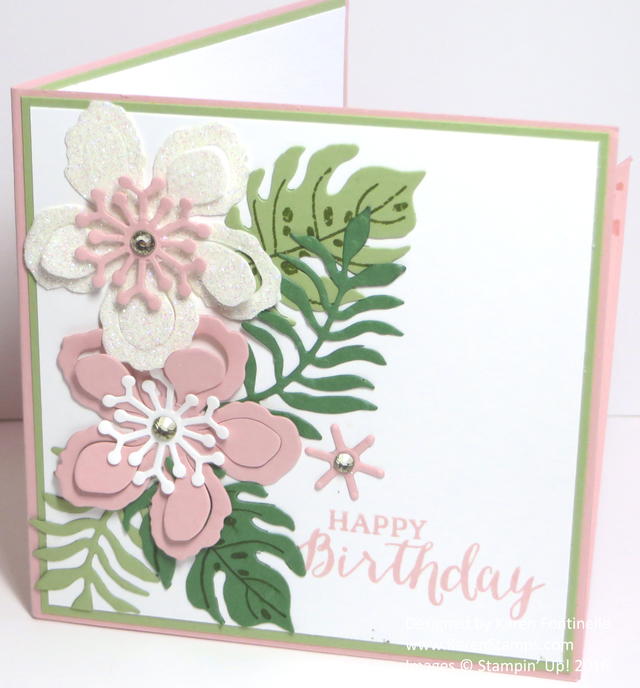
When I discovered these Pop Up Corner Cards, I loved them and made several including this Botanical Pop Up Corner Birthday Card for my daughter. They are so easy and the recipient will think you are so clever!

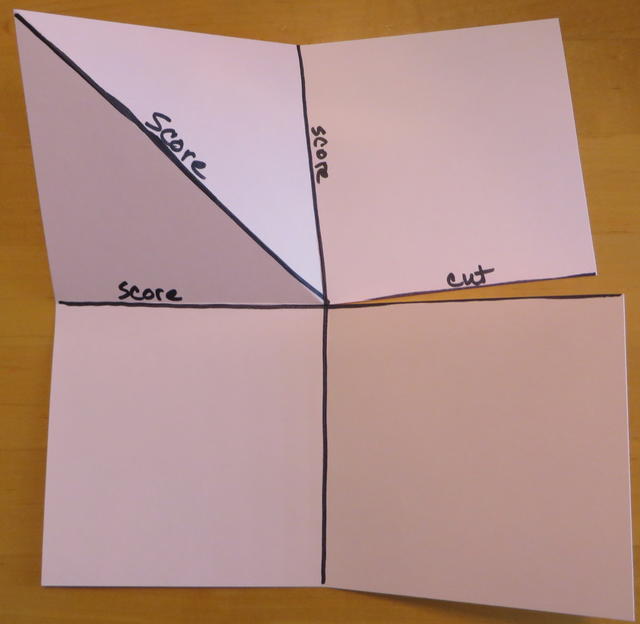
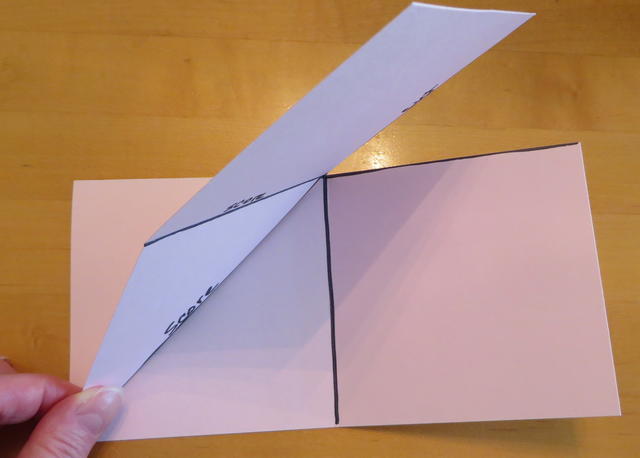
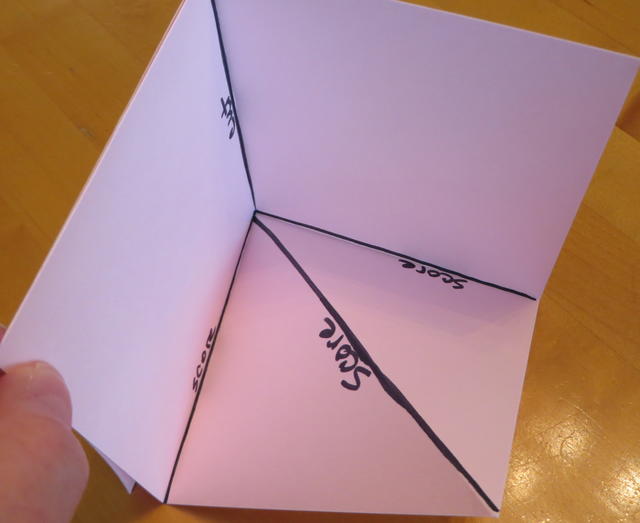
Start with an 8 1/2″ x 8 1/2″ piece of cardstock for the card base.  Score in the middle vertically and horizontally so the paper is divided into fourths.  In the upper left quadrant, score than on a diagonal.  Fold on all the score lines back and forth, then cut the right horizontal line just to the center.

Pop Up Corner Card Diagram

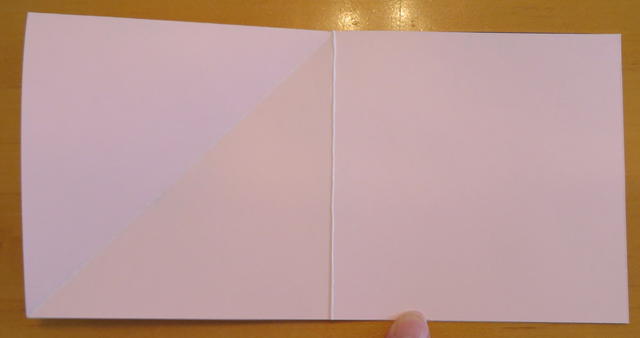
Fold the top half down.

Pop Up Corner Card Fold

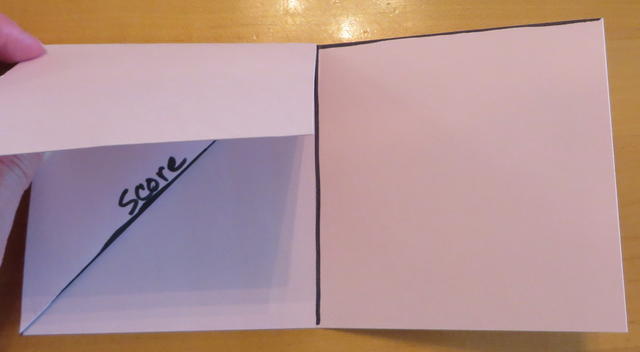
Fold the top piece back on the diagonal score line.

Pop Up Corner Card Fold

Fold the top quarter down.

Pop Up Corner Card Fold

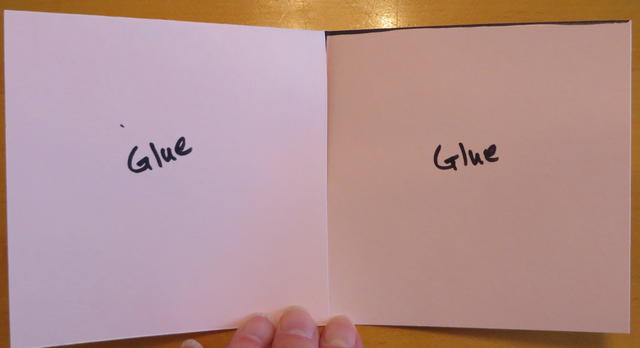
That piece you just folded down and the piece to the right are the areas where you will put adhesive and glue those two pieces together when you fold over the right area.

Pop Up Corner Card Fold

Pop Up Corner Card Fold

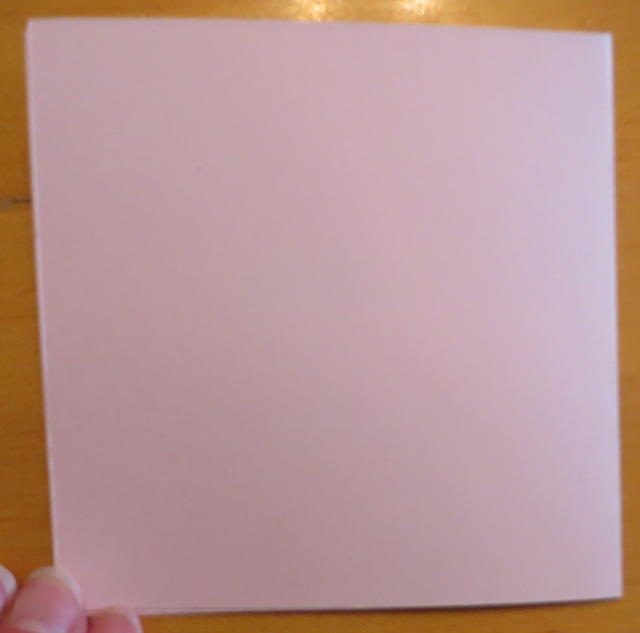
Open the card, make sure you have it all going in the right direction and decorate!  As you get experienced, it’s probably easier to adhere paper and embellishments on the sections before those two areas are glued together to actually make it the folded card,

Pop Up Corner Card Open

I hope you will try one of these cards like my Botanical Pop Up Corner Birthday Card.

Shop Stampin’ Up! Online!

Mini Treat Bag Thinlits Candy Treat Bags

Mini Treat Bag Thinlits Candy Treat Bags

I spent most of the day making a bunch of Mini Treat Bag Thinlits Candy Treat Bags for some people. Yesterday I posted one I made to get myself going and think about how I was going to decorate the treat bag. It’s best to have a simple design when you are making a quantity of anything, of course.  I used quite an assortment of papers for these! I used the Cherry on Top Paper Stack, the Love Blossoms Paper Stack, Birthday Bouquet, English Garden (retired), and the Botanical Gardens Designer PaperMost of these I had big enough scraps for at least one treat bag so I ended up with lots of different papers just to use up some of my current papers.

I scored the bag at 3 1/2″ from the bottom to make the foldover flap. Then I adhered a belly band around the treat bag (be sure to put the treat in first!) and stamped “Thank You” for the Tin of Cards Photopolymer Stamp Set. The word “Celebrate” is from the Any Many More Stamp Set that has all kinds of greetings in it.

It’s fun to make these mini treat bags!  You don’t only have to use them for candy or treats. You can use them for envelopes and slip in a simple card or a monetary gift.

Of course the main thing you need to make these Mini Treat Bag Thinlits Candy Treat Bags is the Mini Treat Bag Thinlits Dies and the Big Shot.

Shop Stampin’ Up! Online 24/7

St. Patrick’s Day Gift Bag and Tag

St. Patrick's Day Gift Bag and Tag

If you have a little treat for someone today on St. Patrick’s Day, you might want to make a little St. Patrick’s Day Gift Bag and Tag like this one!  I pulled out the Stampin’ Up! Gift Bag Punch Board and the Shine On Specialty Designer Series Paper.  This paper has a printed pattern on one side and shiny pattern on the other side, so that presents a dilemma of which side to use because you will like both sides! This is heavier kraft paper so great to use for boxes and bags and such.

The tag is first punched with the Scalloped Tag Topper Punch with Cucumber Crush card stock which matches the Shine On DSP. To make the little pot of gold, I punched a circle of black with the 1 3/8″ Circle Punch and cut it in half. You could use a larger circle punch or even a large oval punch if you wanted a bigger pot.  The rim and two legs on the pot are punched from the Word Window Punch.  What would we do without the Word Window Punch?!! For the gold coins, I pulled sequins off the Gold Sequin Trim.  The greeting is from the Teeny Tiny Wishes Stamp Set and the word “lucky” is from the And Many More Stamp Set. I inked up only the word Lucky on the stamp (it says Lucky You) and punched it out with the Word Window Punch. To make it smaller, I inserted the punched out piece back into one side of the punch coming in from the top so just the one end would get punched. It fits perfectly on the pot of gold!

So there you go! Make someone a St. Patrick’s Day Gift Bag and Tag and surprise them!

Shop Stampin’ Up! Online HERE!

Playful Pals Easter Bunny Pyramid Treat Box

Playful Pals Easter Bunny Pyramid Treat Box

If you get the Playful Pals Photopolymer Bundle, which includes the Playful Pals Stamp Set and the Pyramid Pals Thinlits Dies, and you spend some time playing with it, you will just become more and more creative playing with all the stamps and dies and thinking of all the possibilities, such as my Playful Pals Easter Bunny Pyramid Treat Box.  I didn’t even know if there were proper “ears” in the set, but there were, and then I die cut a bunny ear out of orange card stock for a carrot and a green piece that is probably most like a frog’s foot for the leafy top of the carrot. I just drew in the little lines on the carrot and the leafy top with a black marker.  A lot of times I find that the more I sit and play with my stamps and accessories, the more ideas I can come up with.

Bunnies aren’t just for Easter!  You could make Playful Pals bunnies out of other colors, even designer paper, just for fun.  How cute will they be for babies or baby showers or gifts?! Little kids will like them as a birthday party favor.

With this Playful Pals Photopolymer Bundle, you can just stamp on the pyramid box or you can stamp and use die cuts to make things a little more 3D. So many possibilities! You can copy ideas you find online, but I also challenge you to just play and stamp and stamp and play and see what you come up with all the little pieces and parts!

Don’t forget the Stampin’ Up! Weekly Deals that end tomorrow!  You might for sure want the Ornate Tag Topper Punch and especially the very cute Tin of Cards Project Kit by Stampin’ Up! You might also want to add the Tin of Cards Photopolymer Stamp Set that has great greetings and little doodles that I’ve used on other projects, not just the Tin of Cards.

If you want to make fun little animals and other projects like my Playful Pals Easter Bunny Pyramid Treat Box, be sure to check out my Stampin’ Up! Online Store HERE.

Shop Stampin’ Up! Online 24/7 or email me at Karen@KarenStamps.com if you would like me to put in your order for you.

Easy Valentine Candy Jar

Easy Valentine Candy Jar

I saw this idea for an easy Valentine candy jar in an online feature from Country Living and I had to try it since it looked so easy!  All you need is a doily of some kind, a heart, and some Baker’s Twine or similar! I used just a dab of SNAIL Adhesive to hold the doily in place and the heart while I wrapped the Cherry Cobbler Baker’s Twine around and around the jar. And then the best part – filling the jar with Valentine candy!! Give it fora  Valentine gift or keep it for yourself!

Halloween Mini Treat Bag

Halloween Mini Treat Bag

One more day until Halloween so here is a Halloween Mini Treat Bag for holding some treats! If you have the Mini Treat Bag Thinlits Die, you can make your own treat bag.  If you don’t, maybe this will give you an idea for decorating whatever little bags you have or can buy at the craft store if you are needing some last minute treat bag ideas!  I couldn’t even find my Spider Web Doilies but I did have two halves laying on my table so I used those!  The tag is from the Merry Everything Stamp Set.  I colored in the little vampire with a Pear Pizzazz marker.

For a layer behind the tag I just punched 4 pieces from the Note Tag Punch,  cut off the bottom portions, and adhered them behind the tag, just for a different look!  The spider web paper from Happy Haunting was perfect for this.

I hope you are ready for a fun Halloween! And I hope the weather cooperates for all the little trick-or-treaters, wherever you live!

Witch’s Hat Triangle Treat Box for Halloween

Witch's Hat Triangle Treat Box for Halloween

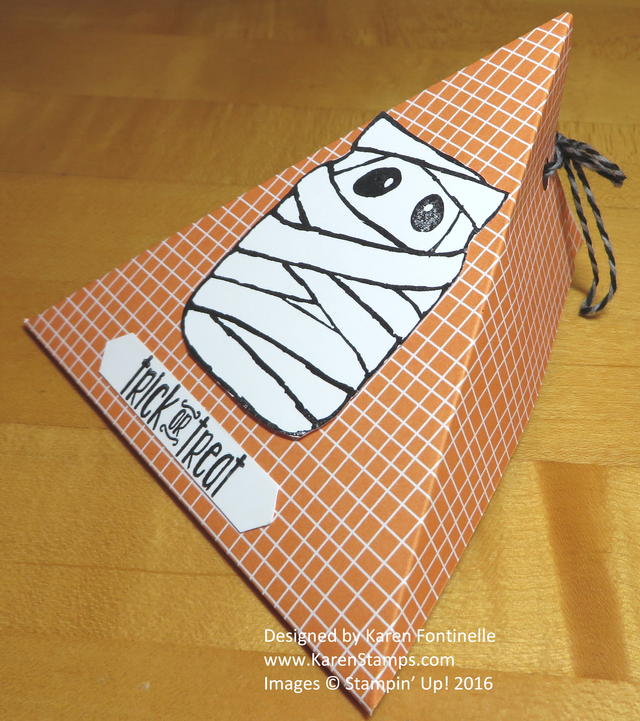
This Witch’s Hat Triangle Treat Box for Halloween is one I learned to make a long time ago and think it is SO easy to make!  You can vary the size and certainly make it for any occasion! And all it takes is half a sheet of card stock!

Witch's Hat Triangle Treat Box Greeting

This is a difficult project to photograph, but here you can see it from the side to see the dimension. Holes are punched in the top and I threaded the Pear Pizzazz Cotton Ribbon through them after putting some candy treats inside.  I also made a Halloween tag tied on with the cotton ribbon by just sponging on some colors of ink on to the tag and stamping “Happy Halloween” with Basic Black Archival Ink.  The stamp is from the And Many More Stamp SetThis is a great stamp set, you can never have too many greetings because we always want just the perfect wording for our cards and projects. I suggest buying the wood-mount in stamp sets like this one with smaller stamps and one that you will use a lot because being mounted .already on the wood, they are quicker and easier to use.

I made the basic triangle box out of Basic Black Card Stock and then traced the top shape onto the back of a piece of Black Glimmer Paper. I glued this on to the top of the box and added a band of Gold Glimmer Paper.  Underneath the gold band, I cut another piece of Black Glimmer Paper to fit into the bottom space except I made it longer by about half an inch or so than the bottom of the hat. Then I trimmed it to make it look like the brim of the witch’s hat. I also punched out some Gold Glimmer stars with the Itty Bitty Accents Punch Pack star punch.

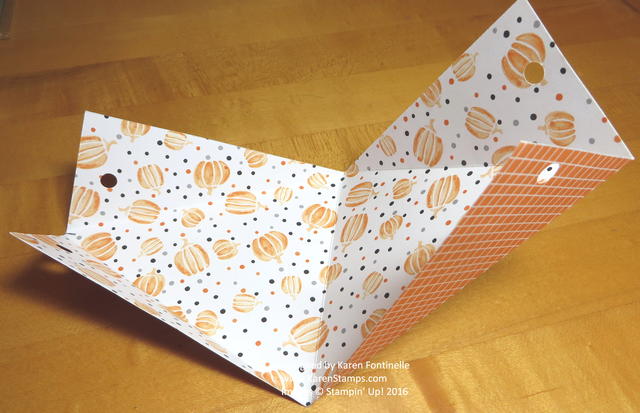
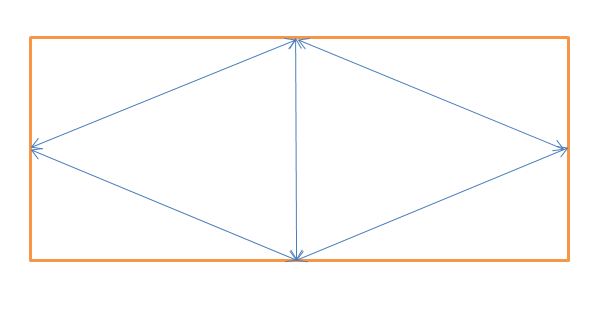
To make the triangle box, cut a piece of card stock in half longways, 4 1/4″ x 11. Score in the middle at 5 1/2″. Then put a small mark at the center of each end, which for this size would be 2 1/8″.  Use the Stampin’ Trimmer to score from this center mark to the center score line at an angle. Do this on both ends on both sides. Fold everything on the score lines, and you will see how it all fits together.  Then punch holes in the top edges for the ribbon.  Be sure to add your treat before tying up the box!

Witch's Hat Triangle Box Drawing

Witch's Hat Triangle Box Layout

Try this project!  These are really fun to make!  And I love projects and ideas that can be used for not just one occasion or theme. This Witch’s Hat Triangle Treat Box for Halloween is just one way to use this triangle box idea!

Halloween Happy Haunting Sour Cream Containers

Halloween Happy Haunting Sour Cream Containers

It’s time to start thinking about Halloween treats so here is an idea with these Halloween Happy Haunting Sour Cream Containers!  Sour cream containers have been around at least since I began stamping, but they are so popular and useful and easy that they are still around!

So easy to make! You can make the sour cream containers small or large.  I’ve seen various sizes such as 4 1/2″ x 6 1/2″, 4″ x 4″. 5″ x 5″, etc.  On my samples, I used Happy Haunting Designer Series Paper cut to 4 1/4″ x 5 1/2″, so the same size as a card front. If you use a rectangular size, you will put adhesive on one long size and at both ends. Use a strong adhesive, such as Fast Fuse or the new Tear & Tape AdhesiveNo matter what size, you will put adhesive on three sides of the paper. You can use designer paper or card stock.

Sour Cream Container PaperI used Tear & Tape Adhesive and since the backing on the tape is white, it wasn’t showing up well in the photo so I colored with some marker ton top of the tape strip so it could be seen in the photo. I would also put a full length of tape on each end rather than the pieces, but the pieces worked.

After applying the tape and removing any liners, fold the paper lengthwise into a roll, like a toilet paper roll. Then squeeze one end of the roll together.  As cute as this project is, don’t forget to add your candy or gift inside before closing the other end!! After you have the contents inside, you want the other end of the container to NOT close in the same direction as the first end. Squeeze the opposite end of the sour cream container together so it will be going at a 90 degree angle to the bottom.

If you happen to have a Paper Crimper, you can crimp the ends of the container as I did, but this is not necessary.  Another option would be to punch holes in one end instead of adding adhesive and tying some ribbon through so that the sour cream container can be opened neatly instead of ripped or cut open.

Next, decorate the sour cream container according to the occasion!  I used the Note Tag Punch to make a small tag. I embellished the tag with some Happy Haunting Designer Washi Tape and stamping with the Howl-O-Ween Treat Stamp Set and the little spider web in the Witches’ Night Photopolymer Stamp Set. And for a finishing touch, I tied a little Gold 1/8″ Ribbon into a bow and stuck it on with a Glue Dot.

There are an infinite number of ways to decorate these Sour Cream Containers for any occasion! Use them for candy or small gifts. You can use plain card stock or stamp card stock, but for a quick and easy way to make sour cream containers, use designer paper which is already decorative. I hope my Halloween Happy Haunting Sour Cream Containers inspire you to try your hand at making these treat holders.

Shop Stampin’ Up! Online HERE or

contact me to put in your order for you!