Category Archives: Candy

Howl-O-Ween Treat Candy Treat Wrapper

Howl-O-Ween Treat Candy Treat Wrapper

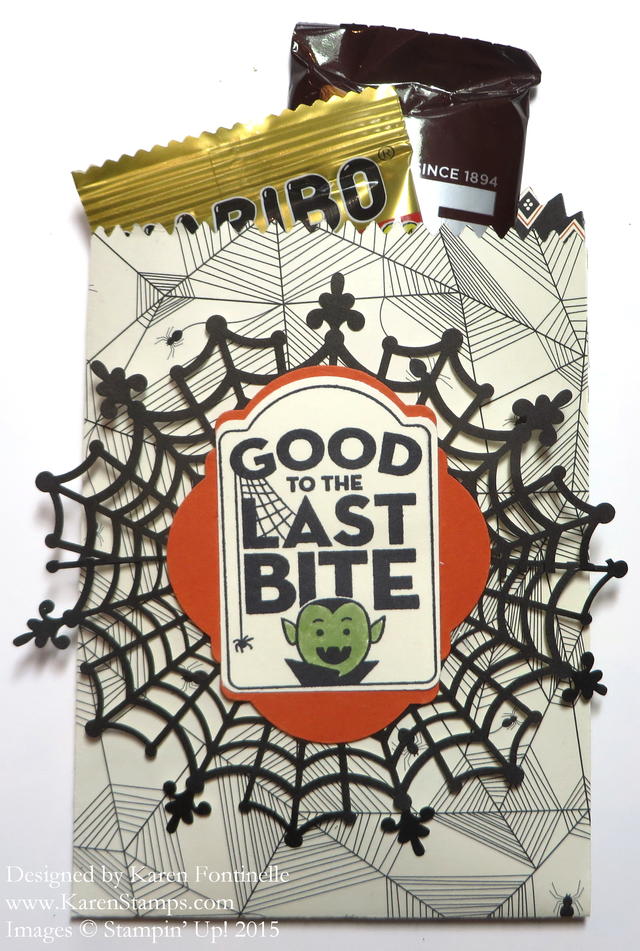
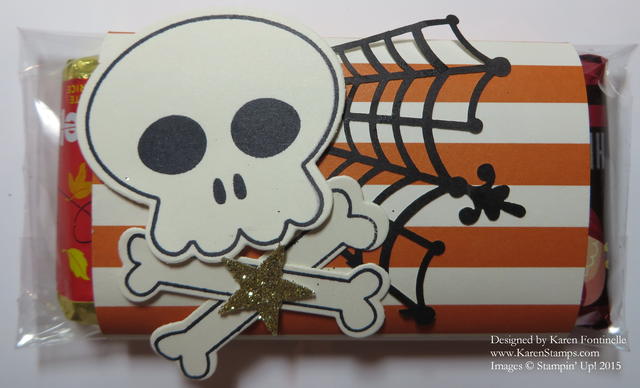
If you need a special Halloween treat, maybe you can get an idea from this Howl-O-Ween Treat Candy Treat Wrapper.  I put a few miniature candy bars in a 4″ x 6″ Cellophane Bag and folded it over. Then I wrapped the cellophane bag with a striped piece of the Happy Haunting Designer Series Paper (DSP). To decorate the wrapper, I stamped the skull and bones images from the Howl-O-Ween Treat Stamp Set.  You can then cut these out or you can die cut them with the Boo To You Framelits Dies and the Big Shot.  Stamp them in black with the new Basic Black Archival Stampin’ Pad. For the background I added just a piece of a Spider Web DoilyThese doilies are quite large so it is perfectly okay to cut them down to a proper size.  They will still look very spooky!  And for a little pizzazz I had to punch a little Gold Glimmer star with the star punch in the Itty Bitty Accents Punch Pack.

You could also use this idea for a single candy bar, just make the wrapper larger. Then decorate with anything you have for Halloween!  I love to make fun things like this for Halloween!  Make something super simple for trick-or-treaters if you like or something more involved or fancier for a little treat for a friend or loved one!

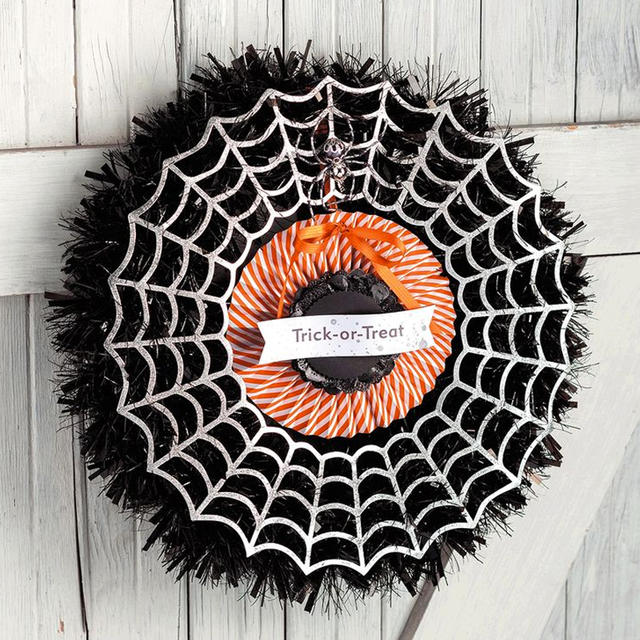
Be sure to check the Stampin’ Up! Clearance Rack for some fall and Halloween things you could use now! As I write this, the Frightful Wreath Simply Created Kit is available. I made one last year when it came out in the Holiday Catalog and was quite cute with the beaded spider!

Frightful Wreath

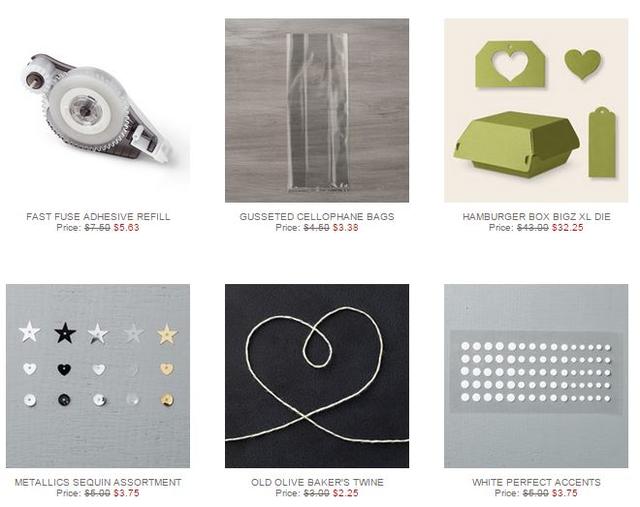
Also check the Stampin’ Up! Weekly Deals!

Stampin' Up! Weekly Deal Oct 6 2015

Shop for all your Halloween craft needs at Stampin’ Up! Online!

Start making some fun Halloween treats to have on hand for the end of the month! Just wrap some paper around a cello bag of candy and decorate for a Howl-O-Ween Treat Candy Treat Wrapper!

Happy Haunting Halloween Gift Bag for a Treat

Happy Haunting Halloween Gift Bag for a Treat

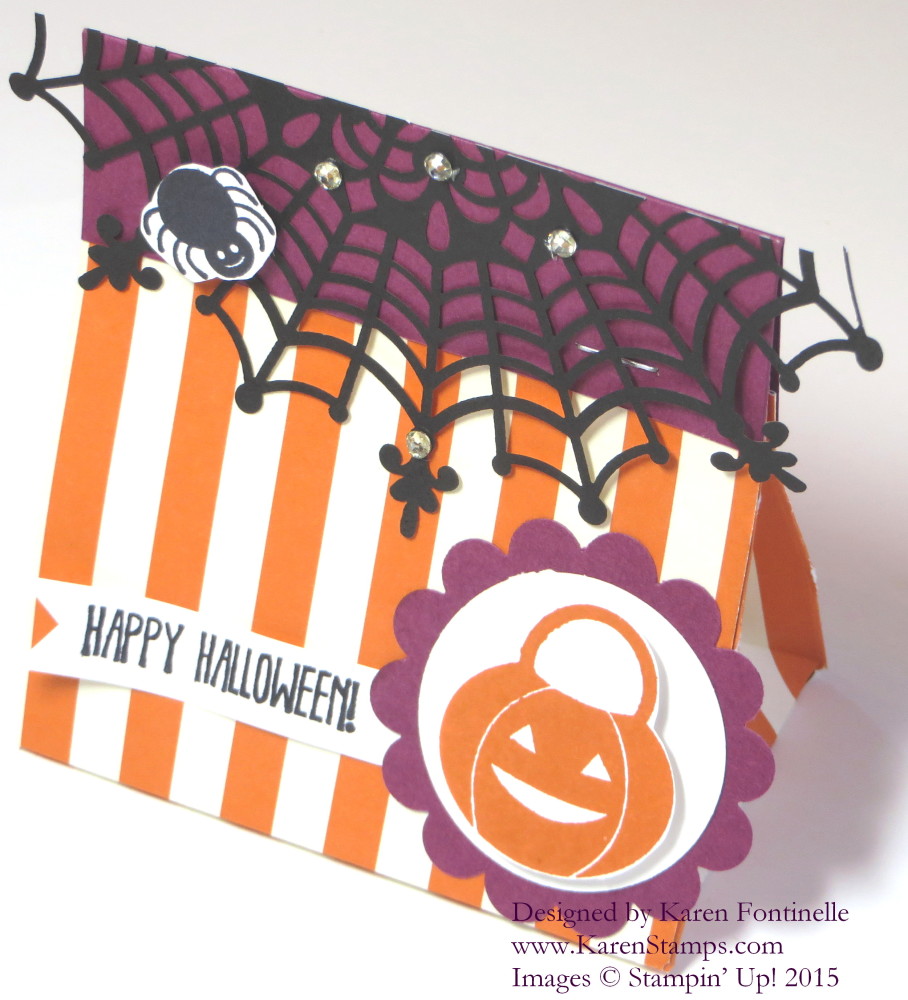
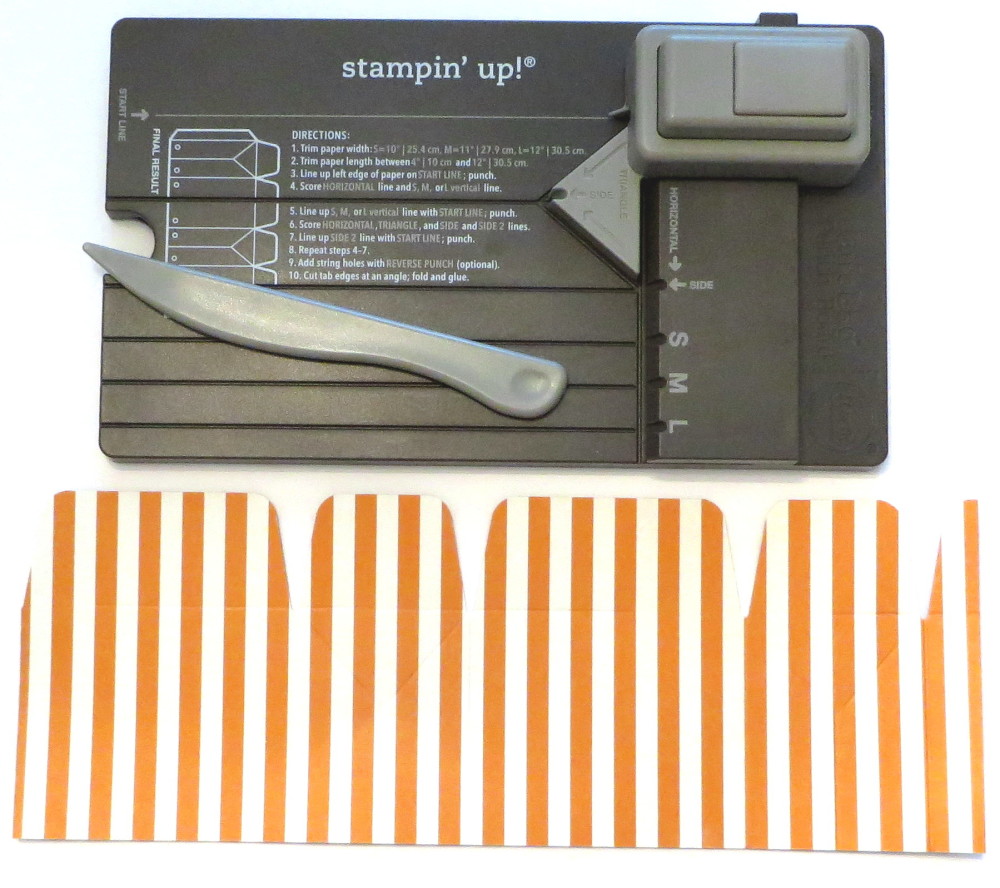
Make a fun Happy Haunting Halloween Gift Bag that you can use for a treat or any little gift. Grab a piece of the Happy Haunting Designer Series Paper and the Stampin’ Up! Gift Bag Punch Board and you will quickly have a little gift bag all scored and cut and ready to be assembled. Directions are right on the Gift Bag Punch Board, but you can also watch a Stampin’ Up! video on how to use the board. Once you do it, you will get the hang of it! I made a Medium size bag with just a 4″ strip of the designer paper. I could have made it taller. I used the new Tear & Tape Adhesive to put the bag together.

After I made the bag, the fun began with decorating it!  You can punch holes with the punch board in the top for ribbon, but I left mine plain and then decided to add a folded strip of Rich Razzleberry to the top and closed the top with the Stampin’ Up! Handheld Stapler. I like a little purple on Halloween things! I definitely wanted to use the new Spider Web Doilies in the new Holiday Catalog. They are pretty large so I was able to cut one smaller to fit my bag, and now I have another piece left for another project! Next I used the Howl-o-ween Treat Stamp Set to stamp a little spider for the web and a little jack-o-lantern. I cut both of them out after stamping with my Paper Snips, forgetting that there are the Boo To You Framelits Dies that I could have used!!  Oh well!  The pumpkin is layered on a white circle punch and the Scallop Circle Punch in Rich Razzleberry. The greeting in the set was too large, so I finally thought of using a small one from the And Many More Stamp Set. And why not add a few Rhinestone Jewels just for fun to the spider web?!

Can you believe it is October already?  I did see my first Halloween decorations in someone’s yard yesterday! It is time to work on Halloween decorations and candy treats and Halloween cards and maybe something like this Happy Haunting Halloween Gift Bag to hold a treat inside! Just have fun with the season and the theme of Halloween!

Shop for all the Holiday Catalog goodies in my

Stampin’ Up! Online Store!

Happy Haunting Gift Bag Punch Board

Join Paper Pumpkin and Help Fight Breast Cancer


Here’s the current September 2015 Paper Pumpkin Kit from Stampin’ Up! Don’t you wish it would have showed up in YOUR mailbox?! Every Paper Pumpkin Kit that comes to you in your mailbox has all the supplies you need for the project (except basic adhesive and scissors, possibly). You get a cute little photopolymer stamp set, a little ink spot, and then the supplies you need, instructions, and a link to a video, like this one above that you can watch for a little extra direction in making your project. You can follow along or make up your own design!  Sometimes there are extra supplies leftover that you can use on other projects you make.

And from now until October 10th, you can help fight breast cancer while you have fun with your Paper Pumpkin Kit!  Stampin’ Up! will donate $1 for every new subscriber to Paper Pumpkin plus $1 for every active subscriber to the Breast Cancer Research Foundation. Be sure not to pause your subscription for October so your subscription will be counted!

Remember, those who get the October kit will not only be donating to a good cause, but they will also get a one-time only, pretty pink Paper Pumpkin box! No one will want to miss it. Promise.

  • New subscribers are those who signed up between September 11 and October 10, 2015 and have not been a Paper Pumpkin subscriber at any time in the past.
    All funds will be donated in US dollars.
  • Mini spoiler alert! The October project inside the pink box is just as awesome as always, but we should probably let you know that it is not a pink project. That’s all we’re saying. 😉
  • Funds will be donated based on number of subscribers instead of boxes shipped. But, if you want more than one pink box, you can always increase your subscription quantity by logging into your account at PaperPumpkin.com before October 10.Stamp Out Breast Cancer with Paper Pumpkin

To join Paper Pumpkin beginning in October, please click HERE to go to my Paper Pumpkin site!

Just click on the “Join” when you get to the page in the upper right!

Paper Pumpkin costs $19.95 per month and that includes shipping! No risk – pause or cancel any time you want to. But please don’t pause your subscription during October so that you can help donate to the BCRF.  Join Paper Pumpkin and help fight breast cancer!

Howl-O-Ween Candy Treat Bag Topper

Howl-O-Ween Candy Treat Bag Topper

Make a Howl-O-Ween Candy Treat Bag Topper for an easy way to package a treat of some kind for Halloween. Maybe you will need some favors for a Halloween party or class parties at school or maybe just some special treat bags for your family.

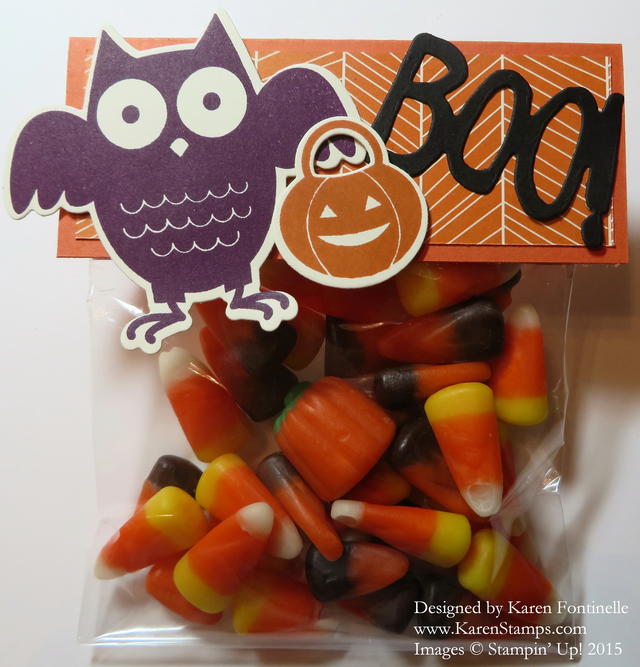
Stampin’ Up! has 4″ x 6″ Cello Bags (102757) that are just the right size for a little treat. Not too small but not too big!  Make a topper of any size you like.  Mine is 4 1/4″ wide  x 3 1/2″ and then folded in half.  The designer paper from Happy Haunting Designer Series Paper  makes a great background on the topper and you will probably have scraps just the right size once you start using it.

I stamped the owl from the Howl-O-Ween Stamp Set in Blackberry Bliss and cut him out with the Boo To You Framelits Dies. The pumpkin is stamped in Tangelo Twist, the coordinating color with the Happy Haunting DSP.  The “Boo” is one of the framelits die. I saw a tip recently saying to use parchment paper in between an intricate die and the card stock and it sure worked well cutting out the Boo word!  Try it if you have some Parchment paper.

Just make a topper for any little treat bag and then decorate it for the occasion!  It’s really fun!

If you want to get an early start on Halloween, shop around in the Stampin’ Up! Holiday Catalog.

When you are ready to order, just go to my Stampin’ Up! Online Store!  If you are new, you will see “Create Your Account”.  Get all that set up and you’re ready to shop! Plan to make a Howl-O-Ween Candy Treat Bag Topper this weekend and be ready to give someone a treat!

Don’t forget the Stampin’ Up! Weekly Deals!  Last day for these is Monday, September 21.

Stampin' Up! Weekly Deal Sept 15 2015


4th of July Uncle Sam Scalloped Tag Topper Treat Holder

4th of July Uncle Sam Scalloped Tag Topper Treat Holder

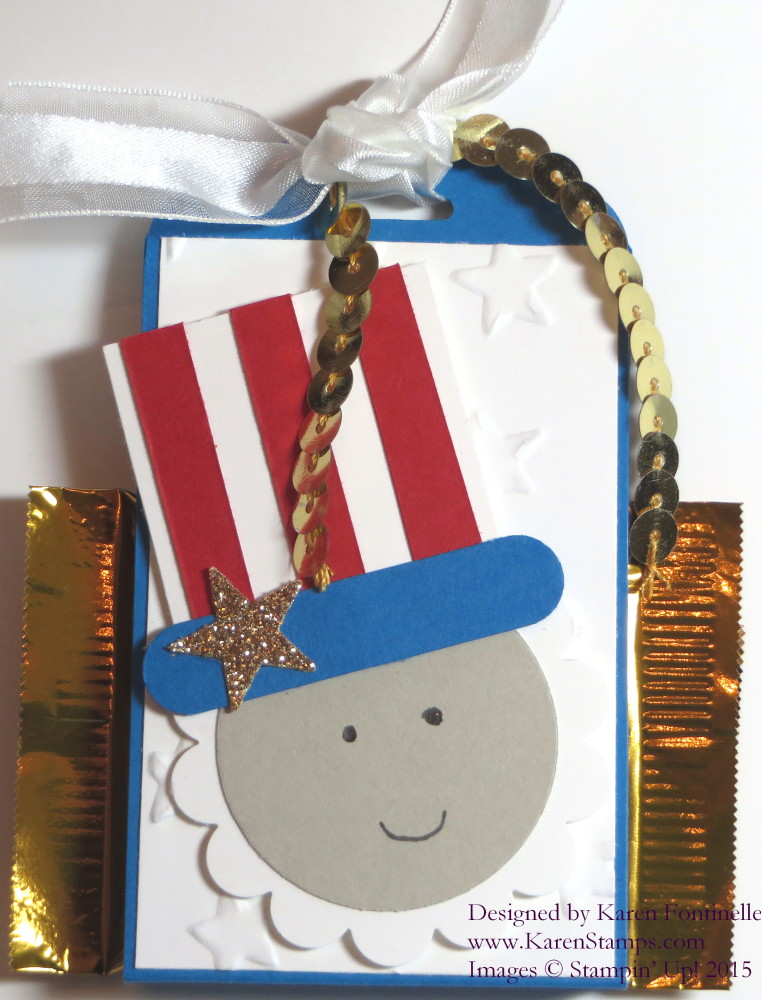
If you are looking for a fun little party favor or table decoration for your 4th of July party, you might have fun making this 4th of July Uncle Sam Scalloped Tag Topper Treat Holder. It’s just a single strip of paper, scored to hold a piece of candy inside, with the top tied together and decorated on the front!  You can use this basic idea for any size or any occasion! But this one will be very cute for a 4th of July Independence Day celebration!

This treat holder is made with a 2″ x 8″ strip of Pacific Point card stock.  I found the center (4″) and then measured equal distance from that to allow room for my single Ghirardelli candy, so I didn’t need it to be very wide. I probably scored it about 1/2″ off the center on each side. Then I used the Scalloped Tag Topper Punch at the top of each end. Next I measured a piece of Whisper White card stock to fit in the space on the front of the treat holder. It looked too plain so I embossed it with the Lucky Stars Embossing Folder.

The Uncle Sam is made with several punches and you could make yours larger. The hat is made with a 1 3/8″ square of Whisper White, and I just cut some narrow strips of Real Red and glued them on the hat. The hat brim is made with the Word Window Punch.  The beard is made with the 1 3/4″  Scallop Circle Punch and the face is Sahara Sand punched with the 1 3/8″ Circle Punch. The Gold Glimmer Paper star is punched with the star in the Itty Bitty Accents Punch Pack.  I tied the package with my favorite ribbon, the Whisper White 5/8″ Organza Ribbon and a piece of Gold Sequin Trim for a little bling!

You have time!  Make a few little 4th of July decorations or treats for your guests or neighbors or kids for your celebration or fireworks viewing!

Don’t forget the Stampin’ Up! Weekly Deals (a couple sold out on the special price already) and the new items (and old) on the Clearance Rack. Also, remember the Watercolor Wishes Card Kit is now available, in the catalog on page 80). Be sure to put THAT on your list!

I hope my 4th of July Uncle Sam Scalloped Tag Topper Treat Holder will inspire you to copy this idea or come up with your own to celebrate the Independence Day holiday!

Quick and Easy Valentine Top Note Purse Candy Treat Bag

Valentine Top Note Purse Candy Treat Bag

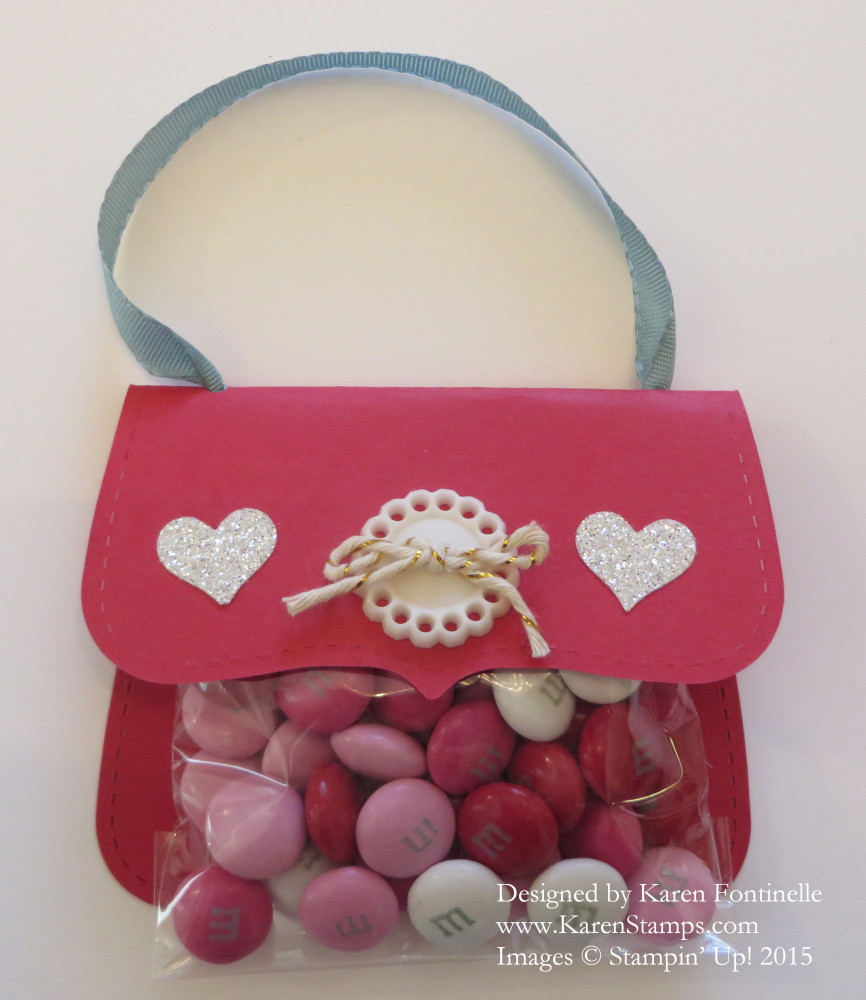
Looking for a last minute, quick and easy valentine treat?  Try the Valentine Top Note Purse Candy Treat Bag!  It’s very easy to die cut the Top Note Die with the Big Shot and the fold the one end over to look like a purse. Punch two holes in the fold to insert ribbon and tie knots in the ends or adhere to inside. I used the retired small cello bags from Stampin’ Up!, but if you had the medium Cello Bags you could turn the Top Note die the other way to fit the larger bag or just fold the bag down to the narrower size you want if it doesn’t quite fit. Fill the bag with candy or whatever treat you have and fold the top over. I adhered the bag to the inside of the purse using Fast Fuse and a little on the flap part of the purse to hold it down on the front.

Decorate the front flap of the purse to your liking! I attached a Very Vintage Designer Button with a few Glue Dots. The bow on it is made with the Gold Baker’s Twine, just attached with a Glue Dot. It was too difficult to try to get the twine through the button so I gave up, made a bow and just stuck it on! For a little more bling, I punched two hearts from the Dazzling Diamonds Glimmer Paper with the heart punch in the Itty Bitty Accents Punch Pack.

If you don’t own the Top Note Die, I would cut a piece of card stock in a rectangle and fold over similarly. Maybe round the corners.  Then I would go order the Top Note Die because it is one of the all-time favorites!

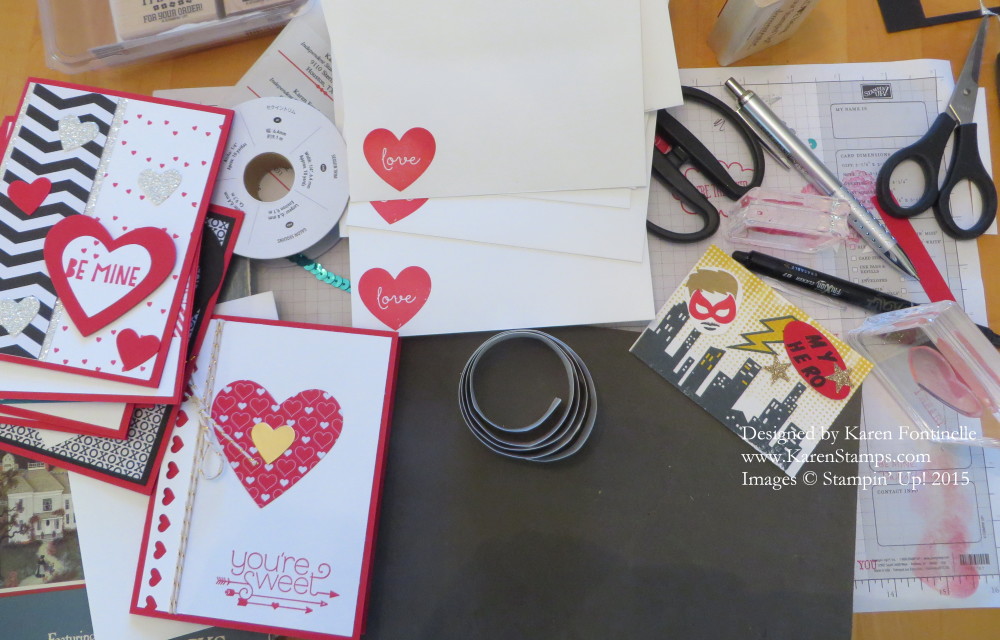
Time is running out to get those class valentine treats done and valentines mailed out! Here’s what your table can look like when you are making valentines!

Valentine Making DayIf you think any of your friends can use a valentine treat idea, please click on one of the social media buttons below this post to share!  Or send them this link!

Valentine Candy Bar Treat

Valentine Candy Bar Treat

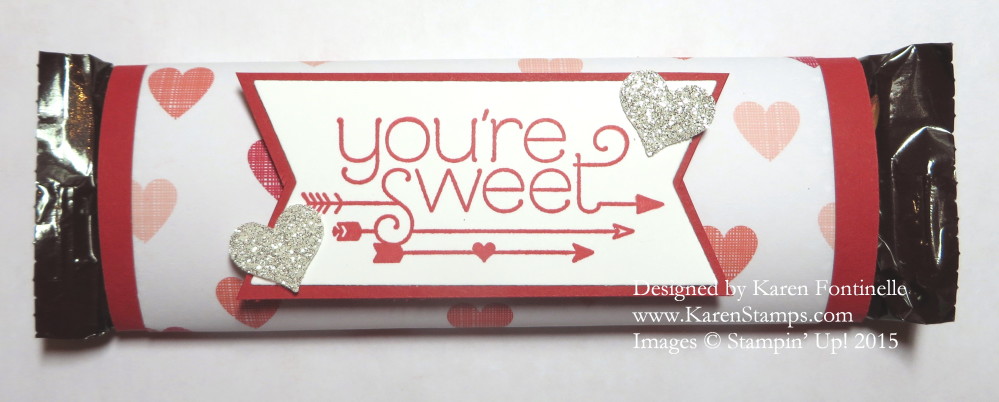
Valentine’s Day is getting close!  Here is an easy idea!  Just wrap a candy bar, whatever size, in card stock and/or designer paper and decorate. You will easily have a Valentine Candy Bar Treat! Make it as simple or as embellished as you like! For class valentines, you need to keep it pretty simple, maybe just designer paper and a punched out heart or two. For your loved one, maybe go crazy!

This sample is wrapped in Real Red card stock and then wrapped with a piece of paper from the Stacked With Love Designer Series Paper Stack.  I stamped a greeting from the You Plus Me Stamp Set. I chose the “you’re sweet” sentiment since I was doing a candy bar! The little hearts are punched with the heart punch from the Itty Bitty Accents Punch Pack.

You can do any size candy bar, from the jumbo ones down to the little snack size.  Better buy extra, though, so you can eat one while you stamp!

Shop Stampin’ Up! Online HERE!

Spend $50 and get a free Sale-A-Bration product!

Stacked With Love Valentine Card

Stacked With Love Valentine Card

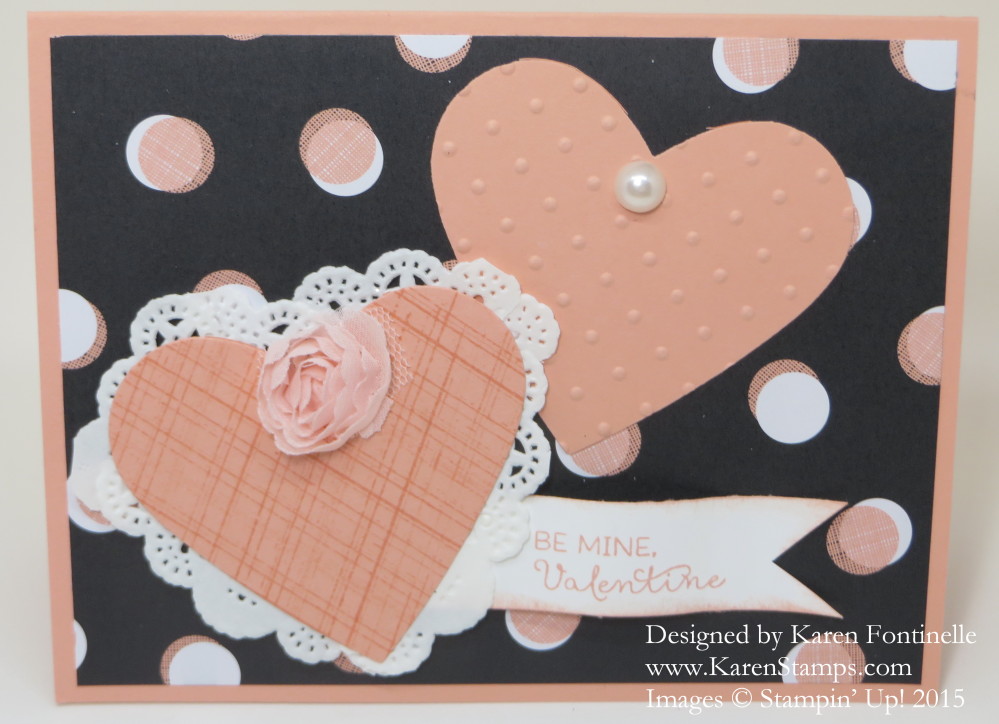
It was announced at the Stampin’ Up! Leadership Conference last week that the best-selling item in the Occasions Catalog is the Stacked With Love Designer Series Paper Stack! Maybe because Valentine’s Day is coming soon or that paper stacks are so cute and handy in their size?! Today I chose this pattern from the paper stack and designed this valentine card around it. (Yes, the circles are offset in the design on purpose!)

Originally I was just going to have the one heart and the little banner greeting on this card, but once I finished this card, it didn’t look right.  Either the heart needed to be larger or it needed to be up higher. I almost let it go, but decided to try adding a heart or more sizes. Once I added the second heart, it felt balanced and much better! The first heart I planned to emboss, probably with the Perfect Polka Dots like the upper heart, but decided to just add some lines with the Gorgeous Grunge stamp set. I tore pieces of the Tea Lace Paper Doily to place underneath the heart. I added a flower from the Rosette Trim in the Artisan Embellishment Kit (love those flowers!). The pearl on the other heart is also from the Artisan Kit. The greeting is one in the January Paper Pumpkin Kit!

It’s fun and easy to make your own valentines, just get out some paper, stamps and ink and go for it! Add some simple embellishments and you’ve got an original, creative card that you made yourself! What more could anyone want?!

If you want the Stacked With Love Designer Series Paper Stack or any other stamping supplies, please visit my Stampin’ Up! Online Store. Don’t forget, with Sale-A-Bration you choose a free product with every $50 purchase!

Christmas Fudge! It’s a Joke!

Christmas-Fudge Poem

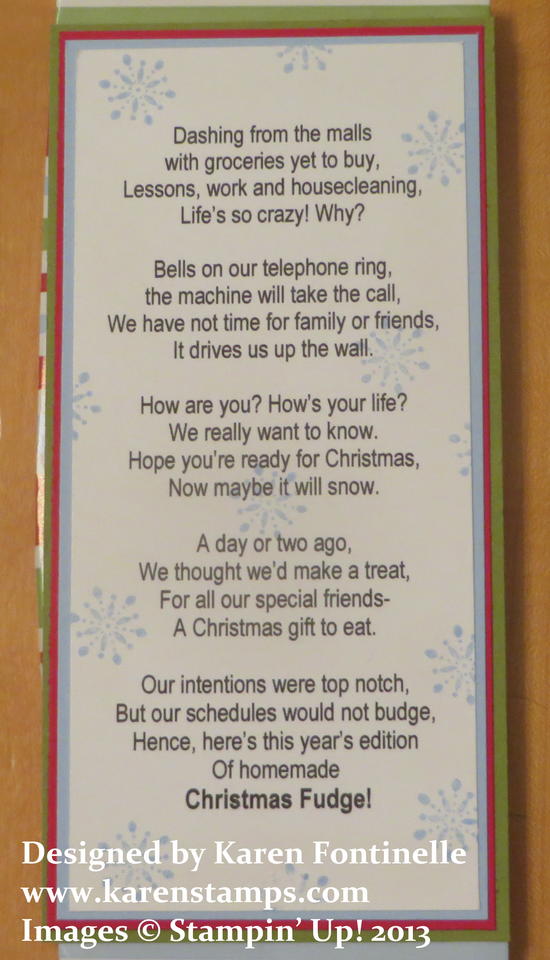
This is actually from a post from last year, but I thought “Christmas Fudge”  was appropriate at this point in time, so close to Christmas!  If you need a little funny something for somebody, this idea has been around for many years but is still good….and handy!  Just print it out and wrap some card stock or designer paper around one of those very large candy bars and you’ve got a gift! Of course once you read the words you will recognize it as a take-off of “Jingle Bells”!

You can read my previous post HERE.

Scalloped Tag Topper Punch Candy Treat Holder

Scalloped Tag Topper Punch Candy Treat Holder

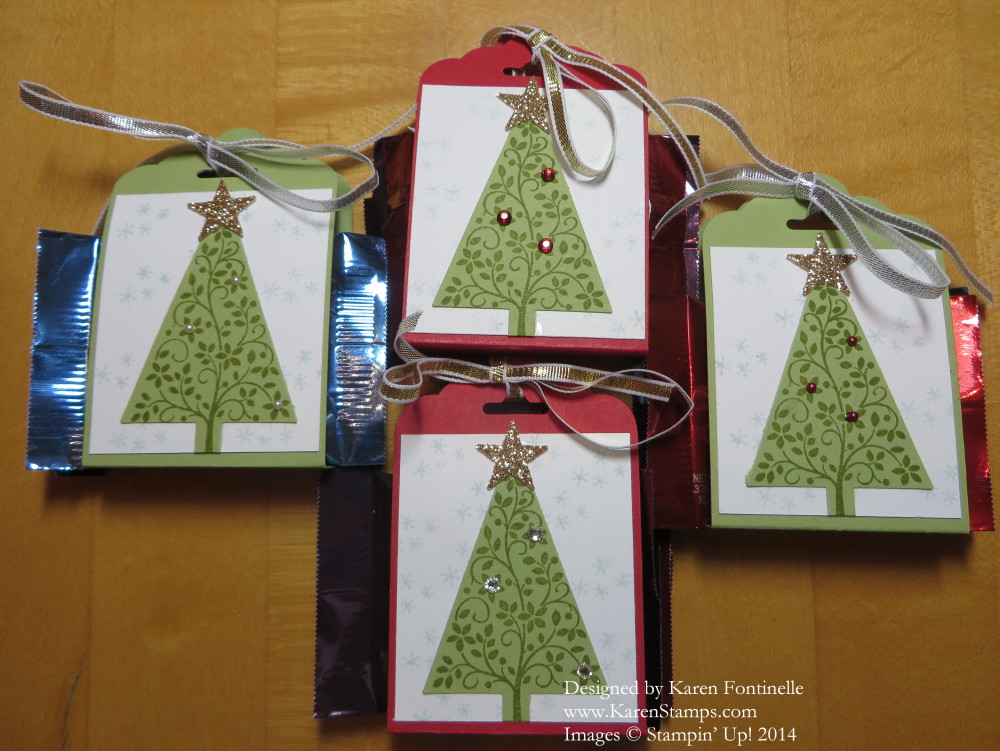
If you need a little candy treat holder for Christmas, try this Scalloped Tag Topper Punch Candy Treat Holder. It’s made with the Scalloped Tag Topper Punchbut if you didn’t have that punch, you could also just make the card stock strip plain and punch holes in the top. The Tag Topper Punches make it easy!

I wanted to be able to enclose two Ghirardelli chocolates inside so I made the spacing for the bottom a little wider and the strip a little longer. I cut my cardstock for the candy holder 7″ x 2″.  It does need to be exactly 2″ or a tad narrower for the strip to fit inside the punch. Score at 3 1/8″ and 3 7/8″. Punch each end with the Tag Topper Punch. Fold on the score lines and decorate the treat holder! I put a little bit of SNAIL Adhesive inside just to help hold the candy. Tie with some ribbon at the top.

To decorate the candy treat holder, I cut a piece of Whisper White for a background layer and stamped with Soft Sky ink the very little snowflakes in Holiday Home. The tree is from Festival of Trees and punched with the Tree Punch. Of course I had to punch out a little star from the Glimmer Paper and I even had to add a little bit of bling with some Pearls and Rhinestones.

This is an easy and fun project to make!  Make it a little smaller if you want to just add one chocolate inside!

Shop Stampin’ Up! HERE.

Christmas Tree Triangle Box

Christmas Tree Triangle Box

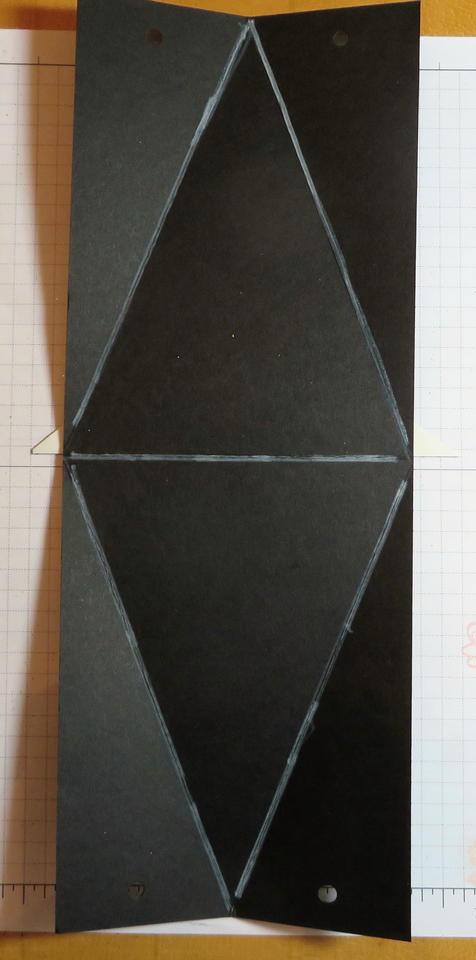
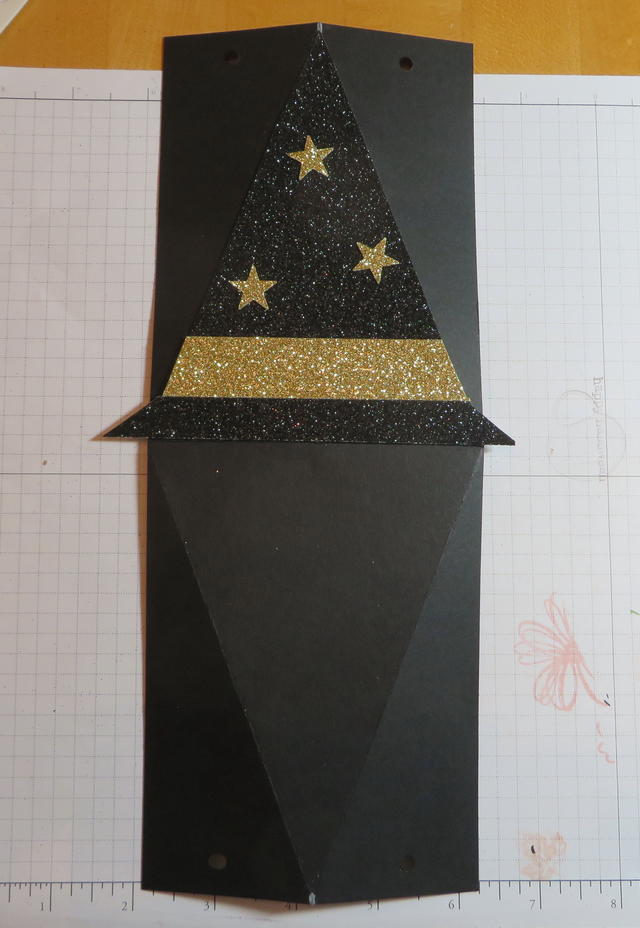
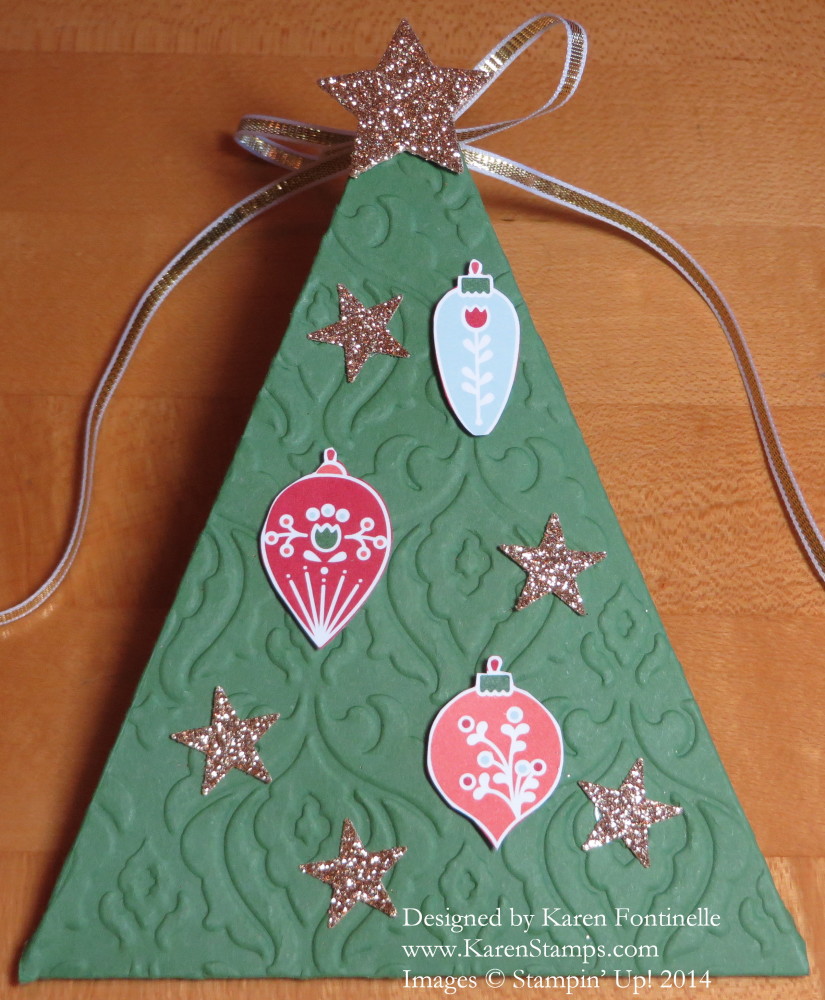
One of the easiest projects to make for any occasion is the triangle box. This Christmas Tree Triangle Box is one I made for Christmas, to look like a Christmas tree. After cutting and scoring the card stock, I embossed the front half with the Beautifully Baroque Embossing Folder to make it look something like a tree. I tied the top of the box together with the 1/8″ Gold RibbonThen I was ready to decorate!  I thought the ornaments on the Nordic Noel Designer Series Paper were cute so I just cut them out by hand with my Paper Snips. They are adhered to the tree with Stampin’ DimensionalsThe Gold Glimmer stars are punched with the star punch in the Itty Bitty Accents Punch Pack and adhered with Glue Dots.

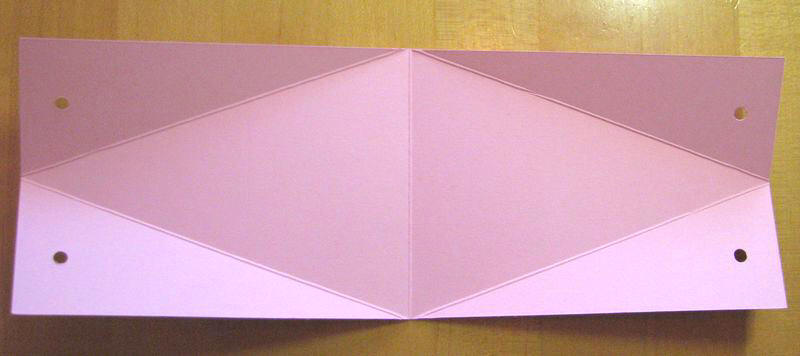
Here’s how the Triangle Box is made:

Triangle Box diagram

  • Cut card stock in half lengthwise:  4 1/4″ x 11″
  • Score at 5 1/2″.
  • Mark the center of the strip on both ends at 2 1/8″ with a pencil mark.
  • Score with Stampin’ Trimmer at an angle, putting that center pencil mark on the track on the Paper Trimmer while also lining up the middle score line on that track.
  • Score both sides of paper and both ends of paper. That will make two triangles, one on each half of the paper.
  • Fold all the score lines and put the box together.
  • At the top point of the box punch holes for ribbon to go through.

You can make these triangle boxes any size you like. Just follow the basic idea. Put a candy treat or small gift inside.

For any stamping and papercrafting supplies, please visit my Stampin’ Up! Online Store!


Christmas Candy Bar Wrapper Ideas

Christmas Candy Bar Wrapper Ideas

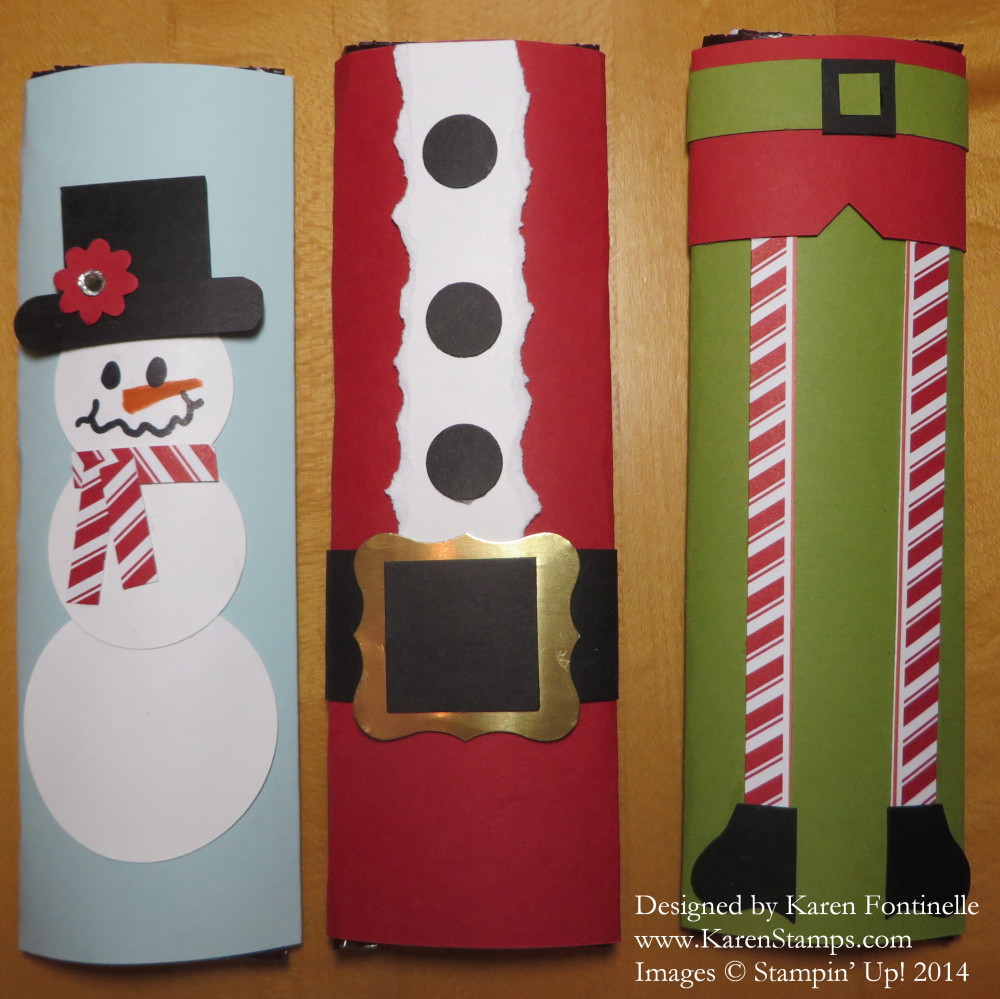
For a fun and delicious Christmas craft project, get some candy bars (regular size) and wrap them in paper and decorate. If you are looking for Candy Bar Wrapper Christmas ideas, here are three for you!  I swear I only bought these Hershey Bars with Almonds for the purpose of crafting and creating! You will have to measure your own candy bars, but for mine, I cut the card stock at 6″ x 4 1/2″ to wrap around the candy bar. You could also use designer paper. Then just decorate! It’s a good way to use up some of your scraps!

For the snowman, I just used three circle punches in different sizes for his body, a scrap of designer paper for his scarf and the 1″ Square Punch and Word Window Punch for his hat!  Plus a little flower punched out with the Boho Blossom Punch with a little Rhinestone for an accent.  I just drew on his face with markers.

For the Santa candy bar, just tear a strip of  Whisper White on both sides after wrapping the candy bar in Real Red card stock. Punch some black buttons with the 1/2″ Circle PunchThe belt buckle is Gold Foil punched with the Curly Label Punch and a square of Basic Black in the center to make it look like a belt! And of course the belt itself is a 1″ strip of Basic Black.

The elf legs are made with strips of designer paper from Nordic Noel Designer Series Paper. The shoes are fashioned out of the Curly Label Punch trimmed down to look like shoes. The wrapper still needed something so I glued on a strip of Real Red around to look like shorts and a belt around the middle.  See, you can just play around and see what you come up with!

Remember the Stampin’ Up! Online Extravaganza is still going on through Tuesday, Dec. 2, 2014. Be sure to double-check the Doorbusters on Monday! Are the Blendabilities calling your name??!

And any orders placed through Tuesday, I will send you a free PDF of some Christmas treat projects you might find easy to do!

Bonus Gift with Purchase

Top Note Thanksgiving Cello Bag Treat

Top Note Thanksgiving Cello Bag Treat

If you haven’t had time yet to make some kind of Thanksgiving treat or table favor, here is something easy. Put your candy or treat into a cello bag and decorate with a topper made with the always popular Top Note Die and Big Shot. Just fold it in half and decorate! I stamped some leaves from the Fall Fest Photopolymer Bundle and cut out with the matching framelits, both of which come in a Bundle so you can save 15% if you buy the stamps and framelits together. The words are from a stamp in the For All Things Stamp Set, only the words I wanted colored in with an Early Espresso Stampin’ Write Marker and punched out with the Extra-Large Oval Punch.

Here are the new Stampin’ Up! Weekly Deals for November 25 – December 1:

Stampin' Up! Weekly Deal Nov 25 2014

Don’t forget, the Stampin’ Up! Online Extravaganza is ongoing! And more Doorbusters coming Monday, December 1st!

Stampin' Up! Online Extravaganza 2014

Make a Halloween Treat With the Tiny Treat Boxes

Halloween Tiny Treat Box

Make an easy Halloween treat or favor using the Tiny Treat Boxes and some stamping and paper! Don’t forget a cello bag of Halloween candy!  You could use this idea for any occasion, actually. The Tiny Treat Boxes are shown in the 2014 Holiday Catalog on page 12 as boxes to make into an Advent or count-down calendar. As you can imagine, you can use them for lots of other things – gift boxes for small gifts, a favor or treat for a birthday or holiday, anything you can imagine.

For this Halloween treat box, I cut a strip of the Confetti Celebration Designer Series Paper almost as wide as the box (about 2″).  I just wrapped it on to each side of the box, scoring with my fingers over each corner and then trimming off the excess paper in the back.  That way it would be sure to fit that box rather than scoring ahead of time. I glued it on with the Multipurpose Liquid Glue in case I needed to wiggle the paper a little to make sure it was fitting on correctly. I’m not even sure how I pulled out that paper!  I must have seen the orange and thought it was Halloween paper! But it worked great! Forgot to mention, I tucked in the side flaps of the box and adhered them to the inside (you wouldn’t have to do that because the bag of candy or gift would keep them inside). Or you could cut them off. The lid of the box I never folded on the score lines and just let it stand up as a background.  I put a piece of the Confetti paper on that background and trimmed off the top around the curved corners.

The ghost and pumpkins were stamped with the Fall Fest Photopolymer Stamp Set and cut out with the Big Shot and the Fun Fall Framelits Dies.  You can buy both the stamp set and framelits together in a Bundle and save 15%! For some reason, all I could think of was that I had to stamp the ghost and didn’t want to take the time to emboss him in white, so I inked him up in Smokey Slate, stamped off once lightly and then stamped him on Whisper White. It worked, and I added Rhinestone Jewels colored with an Old Olive Blendability Marker for the ghost eyes.  I should have just cut him out of Whisper White with the framelit, but then I guess he wouldn’t have the face! So do whatever you like!

The Happy Halloween greeting on the front is from the And Many More Stamp Setpunched out with the Word Window Punch. It seemed fine without a layer behind it! The bag is tied with the Tangelo Twist 3/8″ Satin Stitched Ribbon.

This was a quick and fun project!  Try the Tiny Treat Boxes and see how many ways you can use them!

Halloween Witch’s Boot Candy Treat

Halloween Witch's Boot Candy Treat

Save your next paper towel roll so you can make a Halloween Witch’s Boot Candy Treat like this! I saw this idea online and have no pattern or particular directions, but it is easy to just make according to your own size roll.  (I recommend using a paper towel roll rather than a toilet paper roll. (Just sayin’!) Maybe you could line the inside with some designer paper if you really wanted to get fancy.

I wrapped Rich Razzleberry card stock around the roll, adhered with Tombow Multipurpose Liquid Glue. Before I tried wrapping it, I pulled it over the edge of my kitchen table a few times, which has a rounded edge, just to break up the fibers a little bit and make it easier to roll. You could use a bone folder or just anything rounded to get the paper to “relax”. For the sock stripes, I used 1/2″ strips of Tangelo Twist card stock. For the top of the boot, I just wrapped around a piece of Basic Black and folded back the corners. The buckle is a piece of Dazzling Diamonds Glimmer Paper  (you could use any color Glimmer Paper) with a small square piece of Basic Black right in the center which makes it look like a buckle without having to actually MAKE a buckle! The “shoe” part is easy to make. Measure the roll diameter and then make the black paper slightly wider. Cut it at a diagonal as you see,  Put glue on the bottom of the roll and stick it on the black card stock. When the glue is dry, you can trim off the excess in the back.  Roll up the toe a little bit.  There you have it!  Put a little treat inside the boot.

This could be a little Halloween gift for someone, or a table decoration or party favor. Have fun making your Halloween Witch’s Boot Candy Treat!