Category Archives: Candy

Christmas Fudge! It’s a Joke!

Christmas-Fudge Poem

This is actually from a post from last year, but I thought “Christmas Fudge”  was appropriate at this point in time, so close to Christmas!  If you need a little funny something for somebody, this idea has been around for many years but is still good….and handy!  Just print it out and wrap some card stock or designer paper around one of those very large candy bars and you’ve got a gift! Of course once you read the words you will recognize it as a take-off of “Jingle Bells”!

You can read my previous post HERE.

Scalloped Tag Topper Punch Candy Treat Holder

Scalloped Tag Topper Punch Candy Treat Holder

If you need a little candy treat holder for Christmas, try this Scalloped Tag Topper Punch Candy Treat Holder. It’s made with the Scalloped Tag Topper Punchbut if you didn’t have that punch, you could also just make the card stock strip plain and punch holes in the top. The Tag Topper Punches make it easy!

I wanted to be able to enclose two Ghirardelli chocolates inside so I made the spacing for the bottom a little wider and the strip a little longer. I cut my cardstock for the candy holder 7″ x 2″.  It does need to be exactly 2″ or a tad narrower for the strip to fit inside the punch. Score at 3 1/8″ and 3 7/8″. Punch each end with the Tag Topper Punch. Fold on the score lines and decorate the treat holder! I put a little bit of SNAIL Adhesive inside just to help hold the candy. Tie with some ribbon at the top.

To decorate the candy treat holder, I cut a piece of Whisper White for a background layer and stamped with Soft Sky ink the very little snowflakes in Holiday Home. The tree is from Festival of Trees and punched with the Tree Punch. Of course I had to punch out a little star from the Glimmer Paper and I even had to add a little bit of bling with some Pearls and Rhinestones.

This is an easy and fun project to make!  Make it a little smaller if you want to just add one chocolate inside!

Shop Stampin’ Up! HERE.

Christmas Tree Triangle Box

Christmas Tree Triangle Box

One of the easiest projects to make for any occasion is the triangle box. This Christmas Tree Triangle Box is one I made for Christmas, to look like a Christmas tree. After cutting and scoring the card stock, I embossed the front half with the Beautifully Baroque Embossing Folder to make it look something like a tree. I tied the top of the box together with the 1/8″ Gold RibbonThen I was ready to decorate!  I thought the ornaments on the Nordic Noel Designer Series Paper were cute so I just cut them out by hand with my Paper Snips. They are adhered to the tree with Stampin’ DimensionalsThe Gold Glimmer stars are punched with the star punch in the Itty Bitty Accents Punch Pack and adhered with Glue Dots.

Here’s how the Triangle Box is made:

Triangle Box diagram

  • Cut card stock in half lengthwise:  4 1/4″ x 11″
  • Score at 5 1/2″.
  • Mark the center of the strip on both ends at 2 1/8″ with a pencil mark.
  • Score with Stampin’ Trimmer at an angle, putting that center pencil mark on the track on the Paper Trimmer while also lining up the middle score line on that track.
  • Score both sides of paper and both ends of paper. That will make two triangles, one on each half of the paper.
  • Fold all the score lines and put the box together.
  • At the top point of the box punch holes for ribbon to go through.

You can make these triangle boxes any size you like. Just follow the basic idea. Put a candy treat or small gift inside.

For any stamping and papercrafting supplies, please visit my Stampin’ Up! Online Store!


Christmas Candy Bar Wrapper Ideas

Christmas Candy Bar Wrapper Ideas

For a fun and delicious Christmas craft project, get some candy bars (regular size) and wrap them in paper and decorate. If you are looking for Candy Bar Wrapper Christmas ideas, here are three for you!  I swear I only bought these Hershey Bars with Almonds for the purpose of crafting and creating! You will have to measure your own candy bars, but for mine, I cut the card stock at 6″ x 4 1/2″ to wrap around the candy bar. You could also use designer paper. Then just decorate! It’s a good way to use up some of your scraps!

For the snowman, I just used three circle punches in different sizes for his body, a scrap of designer paper for his scarf and the 1″ Square Punch and Word Window Punch for his hat!  Plus a little flower punched out with the Boho Blossom Punch with a little Rhinestone for an accent.  I just drew on his face with markers.

For the Santa candy bar, just tear a strip of  Whisper White on both sides after wrapping the candy bar in Real Red card stock. Punch some black buttons with the 1/2″ Circle PunchThe belt buckle is Gold Foil punched with the Curly Label Punch and a square of Basic Black in the center to make it look like a belt! And of course the belt itself is a 1″ strip of Basic Black.

The elf legs are made with strips of designer paper from Nordic Noel Designer Series Paper. The shoes are fashioned out of the Curly Label Punch trimmed down to look like shoes. The wrapper still needed something so I glued on a strip of Real Red around to look like shorts and a belt around the middle.  See, you can just play around and see what you come up with!

Remember the Stampin’ Up! Online Extravaganza is still going on through Tuesday, Dec. 2, 2014. Be sure to double-check the Doorbusters on Monday! Are the Blendabilities calling your name??!

And any orders placed through Tuesday, I will send you a free PDF of some Christmas treat projects you might find easy to do!

Bonus Gift with Purchase

Top Note Thanksgiving Cello Bag Treat

Top Note Thanksgiving Cello Bag Treat

If you haven’t had time yet to make some kind of Thanksgiving treat or table favor, here is something easy. Put your candy or treat into a cello bag and decorate with a topper made with the always popular Top Note Die and Big Shot. Just fold it in half and decorate! I stamped some leaves from the Fall Fest Photopolymer Bundle and cut out with the matching framelits, both of which come in a Bundle so you can save 15% if you buy the stamps and framelits together. The words are from a stamp in the For All Things Stamp Set, only the words I wanted colored in with an Early Espresso Stampin’ Write Marker and punched out with the Extra-Large Oval Punch.

Here are the new Stampin’ Up! Weekly Deals for November 25 – December 1:

Stampin' Up! Weekly Deal Nov 25 2014

Don’t forget, the Stampin’ Up! Online Extravaganza is ongoing! And more Doorbusters coming Monday, December 1st!

Stampin' Up! Online Extravaganza 2014

Make a Halloween Treat With the Tiny Treat Boxes

Halloween Tiny Treat Box

Make an easy Halloween treat or favor using the Tiny Treat Boxes and some stamping and paper! Don’t forget a cello bag of Halloween candy!  You could use this idea for any occasion, actually. The Tiny Treat Boxes are shown in the 2014 Holiday Catalog on page 12 as boxes to make into an Advent or count-down calendar. As you can imagine, you can use them for lots of other things – gift boxes for small gifts, a favor or treat for a birthday or holiday, anything you can imagine.

For this Halloween treat box, I cut a strip of the Confetti Celebration Designer Series Paper almost as wide as the box (about 2″).  I just wrapped it on to each side of the box, scoring with my fingers over each corner and then trimming off the excess paper in the back.  That way it would be sure to fit that box rather than scoring ahead of time. I glued it on with the Multipurpose Liquid Glue in case I needed to wiggle the paper a little to make sure it was fitting on correctly. I’m not even sure how I pulled out that paper!  I must have seen the orange and thought it was Halloween paper! But it worked great! Forgot to mention, I tucked in the side flaps of the box and adhered them to the inside (you wouldn’t have to do that because the bag of candy or gift would keep them inside). Or you could cut them off. The lid of the box I never folded on the score lines and just let it stand up as a background.  I put a piece of the Confetti paper on that background and trimmed off the top around the curved corners.

The ghost and pumpkins were stamped with the Fall Fest Photopolymer Stamp Set and cut out with the Big Shot and the Fun Fall Framelits Dies.  You can buy both the stamp set and framelits together in a Bundle and save 15%! For some reason, all I could think of was that I had to stamp the ghost and didn’t want to take the time to emboss him in white, so I inked him up in Smokey Slate, stamped off once lightly and then stamped him on Whisper White. It worked, and I added Rhinestone Jewels colored with an Old Olive Blendability Marker for the ghost eyes.  I should have just cut him out of Whisper White with the framelit, but then I guess he wouldn’t have the face! So do whatever you like!

The Happy Halloween greeting on the front is from the And Many More Stamp Setpunched out with the Word Window Punch. It seemed fine without a layer behind it! The bag is tied with the Tangelo Twist 3/8″ Satin Stitched Ribbon.

This was a quick and fun project!  Try the Tiny Treat Boxes and see how many ways you can use them!

Halloween Witch’s Boot Candy Treat

Halloween Witch's Boot Candy Treat

Save your next paper towel roll so you can make a Halloween Witch’s Boot Candy Treat like this! I saw this idea online and have no pattern or particular directions, but it is easy to just make according to your own size roll.  (I recommend using a paper towel roll rather than a toilet paper roll. (Just sayin’!) Maybe you could line the inside with some designer paper if you really wanted to get fancy.

I wrapped Rich Razzleberry card stock around the roll, adhered with Tombow Multipurpose Liquid Glue. Before I tried wrapping it, I pulled it over the edge of my kitchen table a few times, which has a rounded edge, just to break up the fibers a little bit and make it easier to roll. You could use a bone folder or just anything rounded to get the paper to “relax”. For the sock stripes, I used 1/2″ strips of Tangelo Twist card stock. For the top of the boot, I just wrapped around a piece of Basic Black and folded back the corners. The buckle is a piece of Dazzling Diamonds Glimmer Paper  (you could use any color Glimmer Paper) with a small square piece of Basic Black right in the center which makes it look like a buckle without having to actually MAKE a buckle! The “shoe” part is easy to make. Measure the roll diameter and then make the black paper slightly wider. Cut it at a diagonal as you see,  Put glue on the bottom of the roll and stick it on the black card stock. When the glue is dry, you can trim off the excess in the back.  Roll up the toe a little bit.  There you have it!  Put a little treat inside the boot.

This could be a little Halloween gift for someone, or a table decoration or party favor. Have fun making your Halloween Witch’s Boot Candy Treat!

Freaky Friends Cello Halloween Treat Bag

Freaky Friends Cello Halloween Treat Bag

If you want an easy Halloween treat bag, you can make this Freaky Friends Cello Halloween Treat Bag in about one minute! This uses a  Cellophane 4″ x 6″ Bag filled with candy, the top folded over, and then a stamped Freaky Friend adhered to the front of the bag.

Just stamp one of the Freaky Friends and put a layer or two behind it. I used the Postage Stamp Punch and then the 1″ Square Punch behind the monster stamped in Rich Razzleberry. You could also stamp a Halloween greeting on a little banner and adhere it to the front of the bag as well. Add some googly eyes to your Freaky Friend if you have some.

What trick-or-treater or co-worker or friend wouldn’t love getting a little bag of candy decorated like this for Halloween and it only took you a minute!

For the Freaky Friends Stamp Set and more, please visit my Stampin’ Up! Online Store HERE.

Alternate Ideas for the September 2014 Paper Pumpkin Kit

Alternate September Paper Pumpkin Kit Halloween Card

If you read my post the other day about the September 2014 Paper Pumpkin Kit and all the materials that came in the kit and all the cute burlap treat bags I made with it, you knew that I still had materials left over.  Here are the extra projects I made with the tags from the kit and a few extra materials from my stash.

For the Halloween card, I used a Tangelo Twist card base and added a Basic Black layer that I embossed with the Decorative Dots Textured Embossing Folder. Then I added a piece of the White & Tangerine Tango Two-Tone Trim. After I tied on the knot (separately) I decided to fray the ends and see how that looked! And I used a tag I had already made from the Paper Pumpkin Kit.

Alternate September Paper Pumpkin Kit Halloween Candy Treat

Here’s a little candy treat holder, made with the Tag Topper Scalloped Punch and a 2″ wide piece of Crumb Cake card stock. You can put a couple of Ghirardelli chocolates inside or some other treat. I tied some ribbon at the top with a piece of the sequin trim from the kit and added the tag I had already made with the kit. And I just had to add another one of the little adhesive bats from the sticker sheet!

Alternate September Paper Pumpkin Kit Halloween Lunch Sack Treat Bag

Here’s an easy project, with or without the Paper Pumpkin Kit!  Just find one of those lunch sacks in your pantry, cut a little off the top and fold the top edge over a couple of times. I used a little SNAIL Adhesive to hold it down. Then I took one of the Tea Lace Paper Doilies and sponged a little Rich Razzleberry ink on it for some spookiness. The tag, of course, is from the Paper Pumpkin Kit. The bag needed something so I just used the 1″ punch to punch out some circles to glue to the bag!

Did you know once you are a Paper Pumpkin subscriber, you can usually purchase extra kits or refill kits depending on availability of past kits?

Join Paper Pumpkin now (for sure before October 10th!) and enjoy getting that fun red box in your mailbox!

Scalloped Tag Topper Punch Spring Basket

Scalloped Tag Topper Punch Spring Basket

Did you know you can make a lot more things with the Scalloped Tag Topper Punch than just tags? I’ve seen various creations but got the idea to make a Spring Basket using the Scalloped Tag Topper Punch. It’s available in the Stampin’ Up! Occasions Catalog along with the beautiful Watercolor Wonder Designer Series Paper.

To make the basket, I cut two strips of Daffodil Delight 2″ x 7 1/2″ and punched one end on each strip with the Scalloped Tag Topper Punch.  Score at 3″ from the scalloped top and fold. Those will be the ends of the basket and you can adhere the bottom pieces together.

Scalloped Tag Topper Basket Base

Cut two pieces of Daffodil Delight 2″ x 5 1/2″.  Score 1/2″ at each end. These pieces will be the front and back sides of the basket. If you need to, make a brace to put in the center with a 1″ x 4″ piece scored at 1″ at each end and glue inside the basket.

The handle is a piece 1/2″ x 8 1/2″. I added a piece of Whisper White 1/2″ Stitched Grosgrain Ribbon to the top of the handle using Tombow Multi-Purpose Adhesive. You can see how the handle is inserted and adhered inside in the photo below.

Decorate your basket however you like!  If you want to stamp on it, be sure to do it before assembling!  I added a layer of Island Indigo card stock to the basket and then the Watercolor Wonder paper on top of that. I made the flower with the Pansy Punch. It was just the right size and I punched several flowers out of the sheet of Watercolor Wonder paper that had shades of yellow and blue on it to get a variation in color. A retired Printed Designer In Color Brad held the flowers in place. Then I foofed them up and down and all around to give them some dimension.

You could also make a paper box the right size and just use the tag punched with the Scalloped Tag Topper Punch at the ends. So many different ways to make these great papercrafting projects!

Scalloped Tag Topper Punch Spring Basket Side

The Scalloped Tag Topper Punch is one of my favorite items in the Occasions Catalog because it would sure be difficult to make that pretty scallop at the top by hand! Go shop at my Stampin’ Up! Online Store today and find your favorite products!

Make a Valentine Treat Bag with Scraps

Valentine Treat Bag with Hearts Tag

You might be getting ready to make Valentine Treat Bags of some sort for Valentine’s Day perhaps for your child’s classroom or their teachers or your friends, neighbors, co-workers or maybe your family! Maybe this tag will inspire you. Put the treat in a Cello Bag and make a tag from your scraps! You know you’ve got ’em!  I punched the tag with the new Scalloped Tag Topper Punch and then used scraps to decorate it. Now the tag is pretty narrow, only 2″ wide, as is, but for my small bag I wanted it even smaller.  You can trim your strip of paper narrower than 2″ and just be sure to center it when you put it in the punch so it will be even on both sides.  But since I had already punched it at 2″, I just trimmed off both sides, trying to make the top scalloped edge look symmetrical.  And it doesn’t have to be perfect! Then I rounded off the bottom edges of the tag to match the scallops at the top. It really gives the tag a nicer look.  The layer on top of the Real Red tag is from the Fresh Prints Designer Series Paper Stack. The “XOXO” is from the Oh, Goodie! Stamp Set, a carryover from the Holiday 2013 Catalog. That means you can still order it! And then I grabbed some die-cut hearts from the Hearts Collection Framelits Dies and the Hearts A Flutter Framelits and even the Small Heart Punch. Use whatever you have! Or even just cut some hearts by hand! They can be whimsical odd-shaped hearts! Tie on your tag with a piece of 1/8″ Silver Ribbon.

Here’s a tip for cutting a narrow banner. If the strip is narrow enough, stick the end in the new Banner Punch, free with a $50 purchase during Sale-A-Bration! You only want it to cut the one end, that”s why you don’t slide the strip in the regular way. This will punch just the end and that will make you little “flags” at the ends.

Using the Banner Punch To Make Flag Ends

Have fun making your Valentine Treat Bags and don’t forget to check your pile of scraps!

Stampin’ Up! Monster Hugs Valentine Ideas–But Hurry!

Stampin' Up! Monster Hugs Girl Valentine

Stampin' Up! Monster Hugs Boy Valentine

Valentine’s Day is fast approaching and who doesn’t like handmade Valentines?! I think Valentine’s Day is one of the best holidays, especially for children, because everyone is included. Remember the boxes we used to decorate for Valentine’s Day and how we often made our own valentines to hand out with red construction paper and doilies and maybe some glitter?

Here are some easy and cute Valentines you and/or your children can make!  Just order from me through my Stampin’ Up! Online Store by January 27th, if not sooner! Monsters are so popular right now and these are adorable ones. It’s a kit! Get 18 monsters, 18 googly eyes and 18 adhesive hearts. Make them as you see with a small piece of candy tucked under the monster’s hands or a lollipop or even stick the monster on a card front.

Here is another idea I saw someone from Stampin’ Up! make on stage with the Monster Hugs Valentines.  She made a box and attached it to the front of the monster, wrapped his arms around the sides and filled with candy.

Monster Hugs Valentine Candy Favors

If you would like to purchase cute Monster Hugs Valentines, you can find them in my Stampin’ Up! Online Store along with some other Valentine products! They do have to be ordered by January 27 so don’t hesitate! As we get closer to Valentine’s Day and the deadline for ordering, these Monster Hugs could go quickly.  You will also find other Valentine ideas and stamp sets in the new Occasions Catalog.

Go to my Online Store now and order your Monster Hugs Valentines! Or if you prefer, just contact me at Karen@KarenStamps.com and I can help you with your order.

Mixing Old and New Stampin’ Up! at Christmas

Ghirardelli Chocolate Holders Ornaments

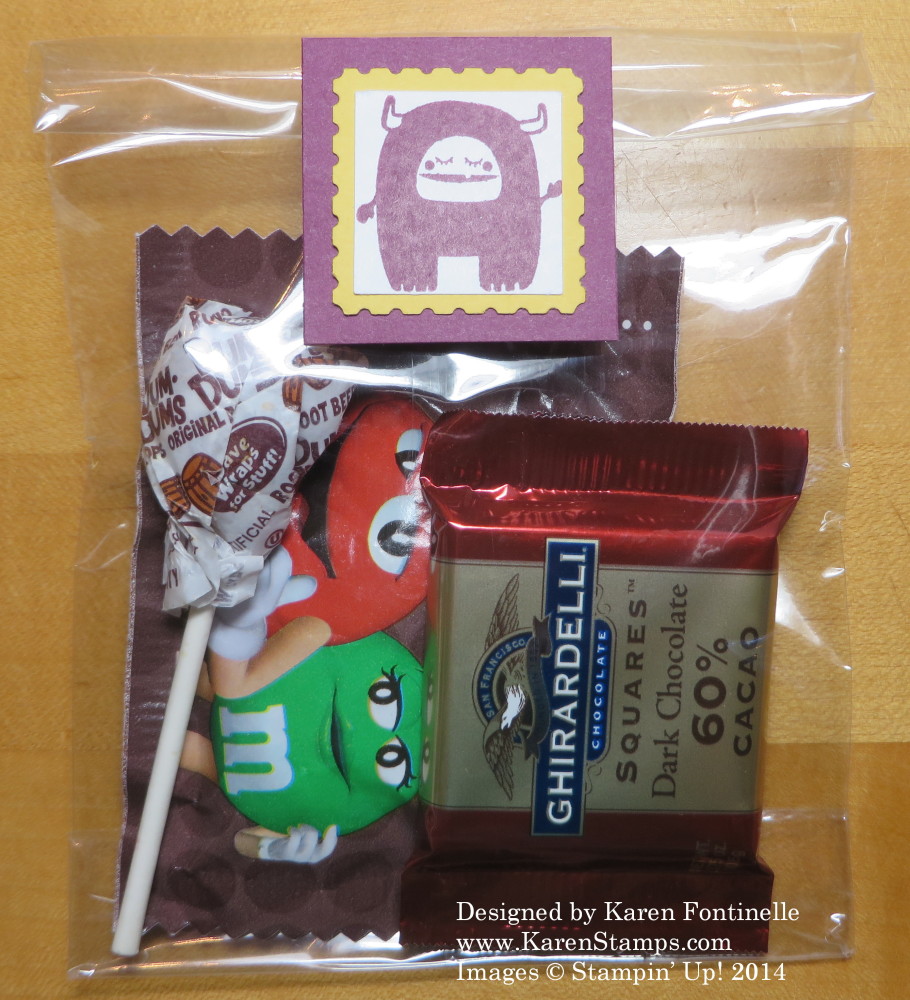
It’s been a busy few days getting ready for Christmas and my work isn’t done yet! But I did take time the other day to make these cute little Ghirardelli chocolate holders mixing old and new Stampin’ Up! products! Can you guess what is what? The holder is made out of the brand new, upcoming Scalloped Tag Topper Punch, which will be in the new Occasions Catalog beginning January 3, 2014. The old is the bit of designer paper I used on the tag.  It is left over from the pretty Christmas box I finally made last Christmas, which, for awhile was on the Clearance Rack. The kit started as some kind of incentive from Stampin’ Up!, then was sold, and then the remaining ones were in the Clearance Rack.  Shelli Gardner and her daughter Sara even made a video as they assembled their own boxes.

Decorated Christmas BoxI got the idea for the chocolate holders from another demonstrator, Mary Fish, although I used a different punch. There is another one with an angled top! Of course I also used the Christmas Ornament Punch in the Holiday Catalog to punch my stamped ornaments from the Christmas Collectibles Stamp Set.

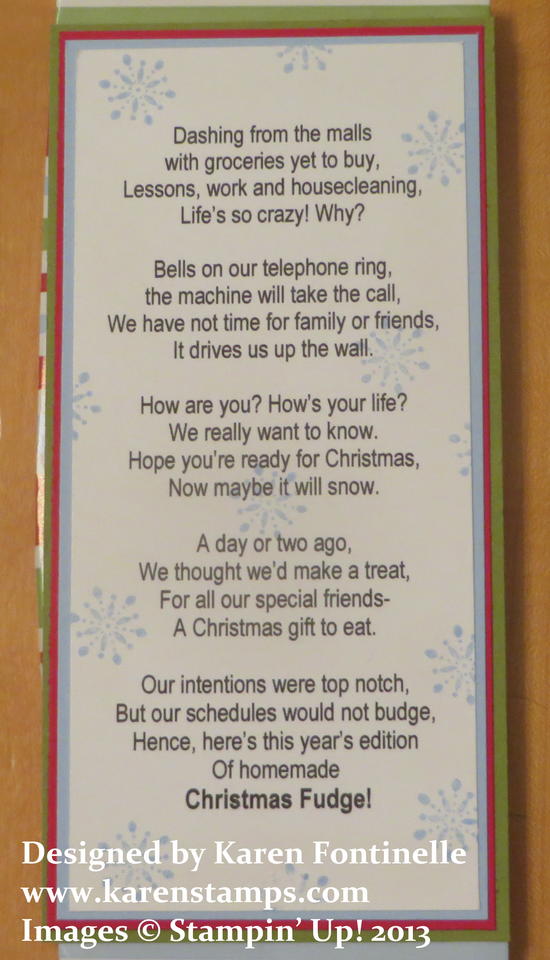
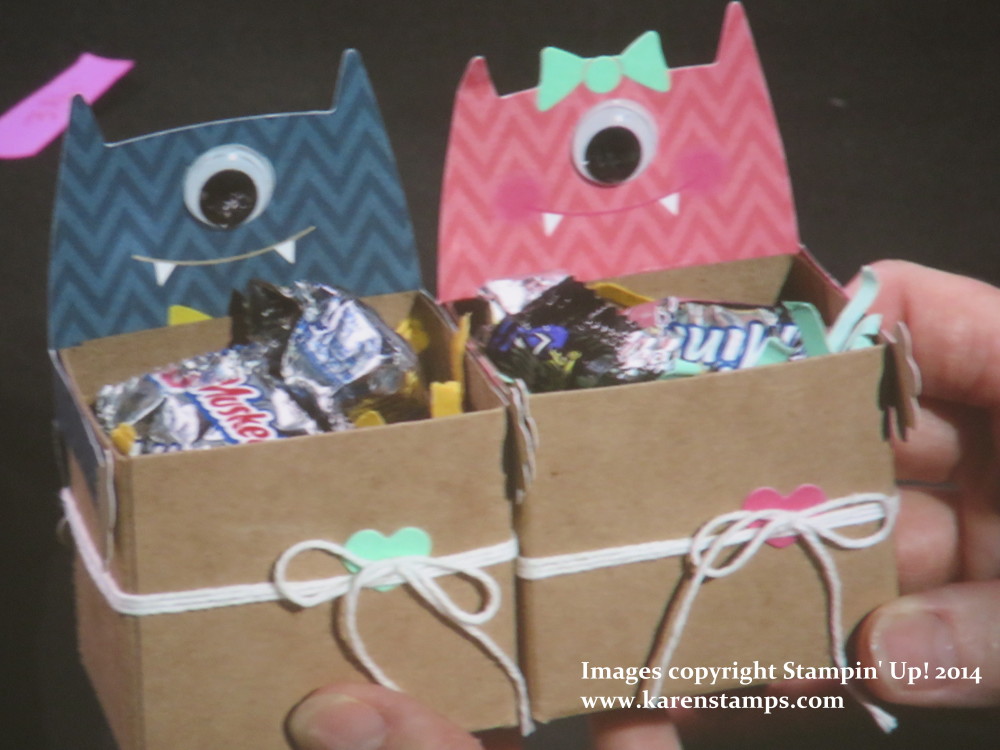
To make the Ghirardelli Chocolate Holders, cut a piece of card stock 5 1/2″ x 2″.  Score at 2 5/8″ and 2 7/8″. I stuck each end of my paper into the new tag punch to get the fancy scallop and then folded on the scored lines.  I folded back the Ghirardelli Chocolate foil and adhered with a Mini Glue Dot on each side to hold it onto the tag. Then I folded up the front part of the tag and tied with Cherry Cobbler Baker’s Twine.  And then I decorated the front with the old designer paper (can’t think of the name right now!). Of course you could use any scrap paper and for any season or occasion.

Ghirardelli Chocolate Holders Ornaments

 And this is what the inside looks like:

Ghirardelli Chocolate Holder

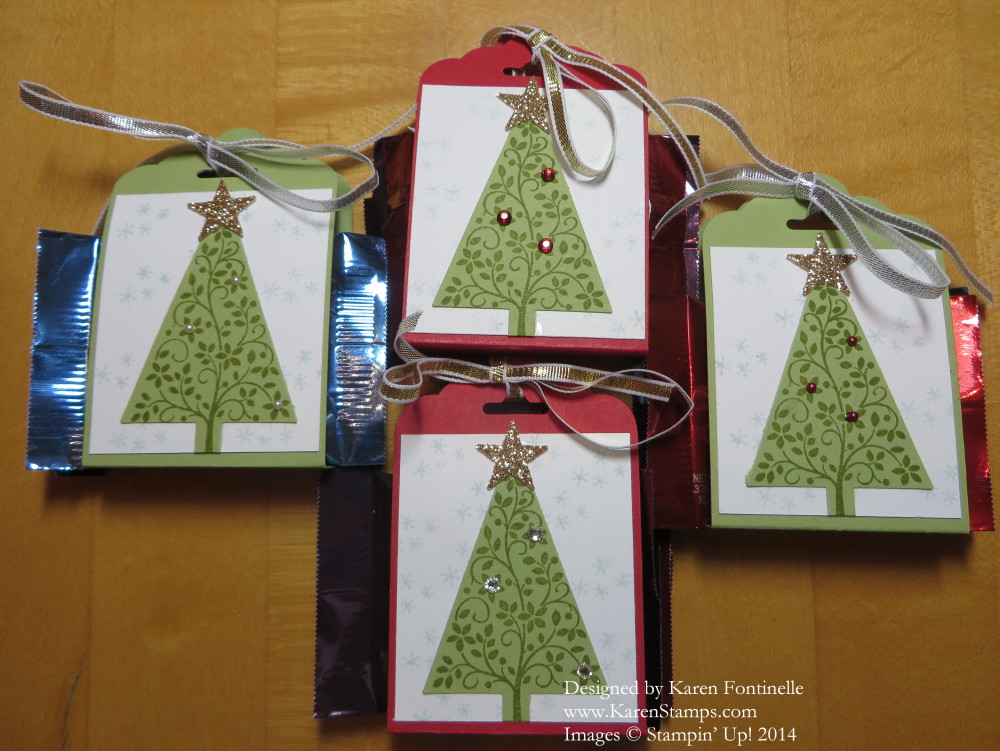
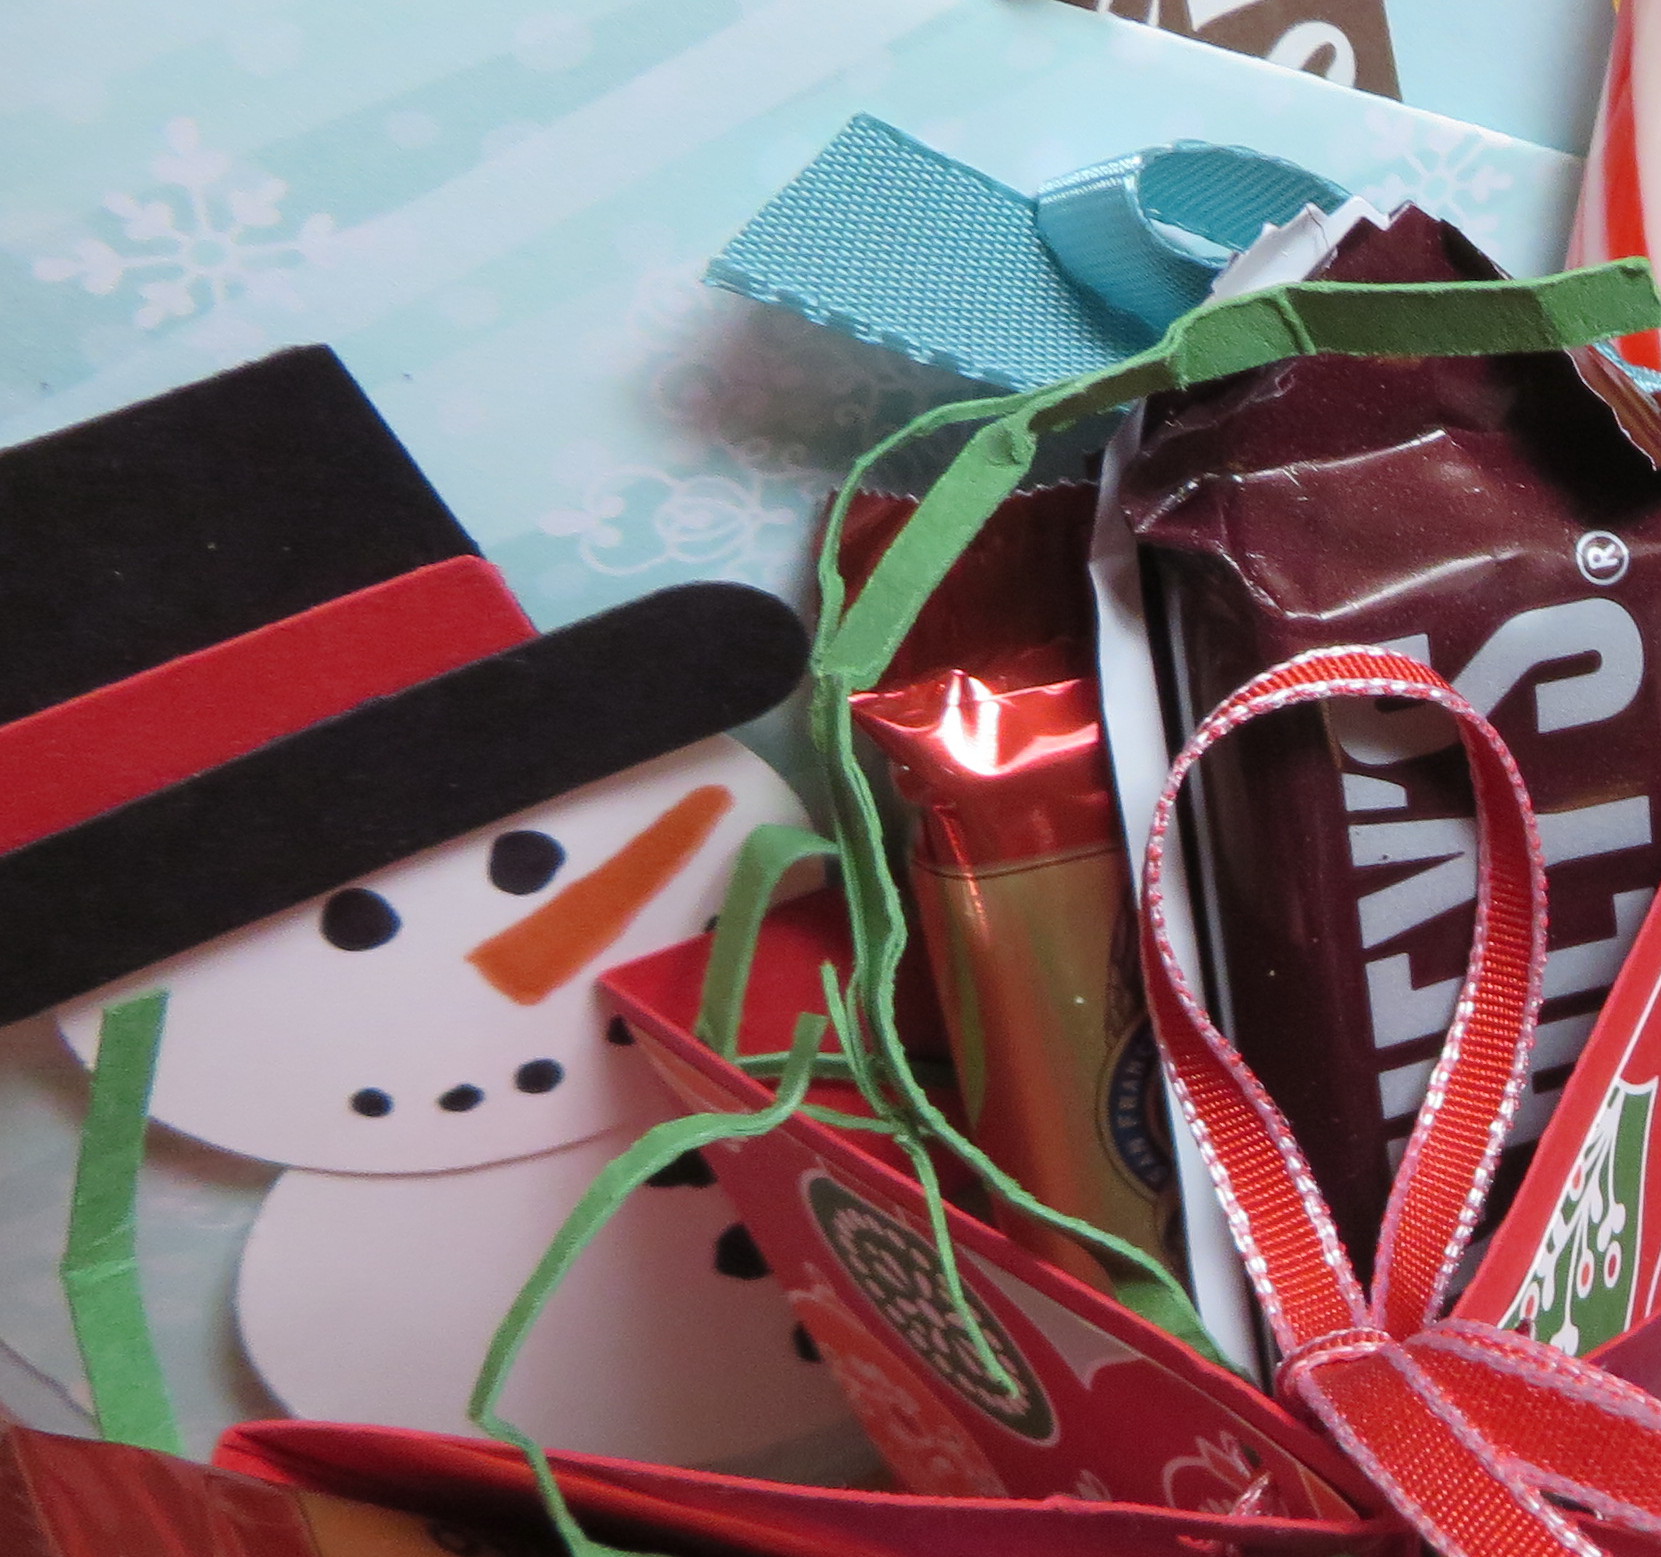
And here are some matching tags I made. All these things plus a store-bought ornament went inside the box I was sending someone.

Scalloped Tag Topper Punch Christmas Tags

You can visit my Stampin’ Up! Online Store HERE. Be on the lookout, my regular customers, for your copy of the new Occasions Catalog and the Sale-A-Bration catalog coming in your mail!  Don’t let them get lost amongst the Christmas mail and hubbub!

Halloween Treat Bag Idea

Halloween Treat BagYes, it is almost Halloween!! Here is a Halloween treat bag idea that you could easily do!  Just grab a 4″ x 6″ Medium Cello Bag, decorate the outside, and fill with delicious Halloween candy! I applied some strips of Witches’ Brew Designer Washi Tape (so fun!) to the front of the bag and added a tag to the front.  The stamp is from the Halloween Bash stamp set. To get the multi-colors on the stamp, I inked up the border with my Pumpkin Pie Stampin’ Write Marker and the words with Basic Black. Breathe on the stamp before you stamp on Very Vanilla card stock to remoisten. I cut out around the edge with my Paper Snips (on sale on the Weekly Deals this week until Monday!).  The black background is easy to cut out with the smallest of the Labels Collection Framelit Dies.  Just adhere with Mini Glue Dots. Tie the bag with some 1/8″ Pumpkin Pie Taffeta Ribbon and you are all set!  Easy to make for class parties, neighbor gifts, treats for your kids, etc.

Check out the Weekly Deals at my Stampin’ Up! Online Store!


Modern Medley Houndstooth Petite Purse

Modern Medley Black Houndstooth Petite Purse

Use the new Stampin’ Up! Modern Medley Designer Series Paper to make a stylish purse with the Big Shot and Petite Purse Die! This is one of the new designer papers in the current Stampin’ Up! Annual Catalog. I added an edging of the new Stampin’ Up! Strawberry Slush Ruffle Stretch Ribbon. This is really pretty ribbon in one of the new Stampin’ Up! In Colors and SO easy to work with because of the stretch.  You will love it! Before I added the ribbon, I snipped off the little tab that would insert into the slit in the front of the purse in order to fit the ribbon. I also added an embellishment from the In Color Boutique Details package. These look like buttons without the holes! This one is a Strawberry Slush color.  I adhered it with a couple of Mini Glue Dots. In order to hold the purse flap closed, I adhered a small piece of velcro on the flap and on the purse so that it can be opened and closed.

This purse is very small but can be used decoratively or to hold a few little favors, perhaps a couple of chocolate nuggets or candies or some other little gift.  The die is easy to use. The paper is scored and easy to fold into the purse shape.  The little handle is a separate piece on the same die that cuts out at the same time.  I have attached it to the purse on the sides with Silver Mini BradsWhen designer paper is used, it may be difficult to see the score lines but using the die as a guide as to where the score lines are, you can easily feel them and then fold them.  It all works quite nicely.

If you are looking for a way to make cute little gift containers or party favors, this Petite Purse Die will make your job easy and fun!

You can find the Big Shot and all the dies, etc. to use with it as well as beautiful designer series paper at my Stampin’ Up! Online Store.  Don’t forget to take advantage of the special offer on Designer Series Paper this month!