Category Archives: Candy

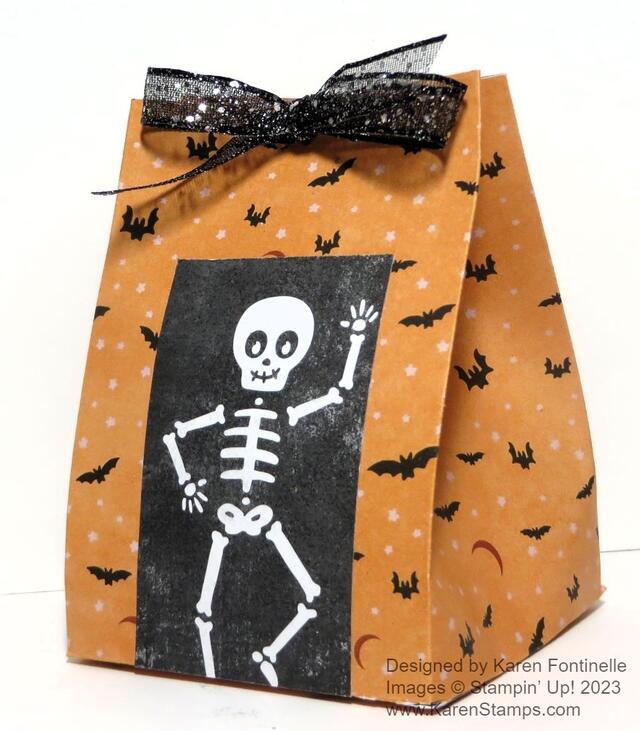
Them Bones Halloween Treat Bag

Them Bones Halloween Treat Bag

Here is a quick and easy candy or treat holder you can make! It’s the Them Bones Halloween Treat Bag and you can copy this exactly or make it and decorate it however you like! It only took a few minutes to make!

Start with a piece of cardstock or designer paper that is 12″ x 6″. Keep in mind that 2″ of that will be the bottom flaps, so if you want your treat bag taller, you need to add more height so maybe you would want to cut the paper 12″ x 8″. I used the batty pattern in the Them Bones Designer Series Paper in the Stampin’ Up! Holiday Catalog.

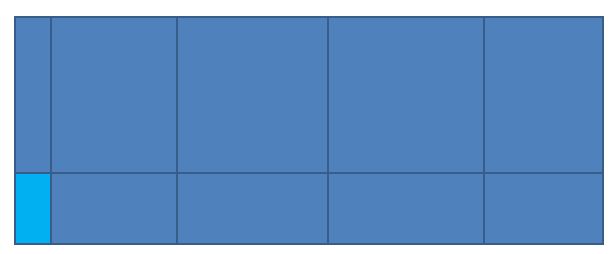
Using the Paper Trimmer or Scoring Tool you will score the paper so it can be folded into the bag shape. Pay attention if your paper has a pattern so you don’t end up with it upside down! Place the paper vertically so you can score the bottom flaps at 2″. Then turn the paper so the 12″ length goes across the top, horizontally. Score at 1″ 3 3/4″, 6 1/2″, and 9 1/4″.

Box Diagram

Crease and fold all the score lines and use a Bone Folder to get a sharp crease. Cut out the small section at the bottom as you see in the diagram above (the light blue area). Cut up on all the bottom score lines for the flaps just up to the 2″ score line.

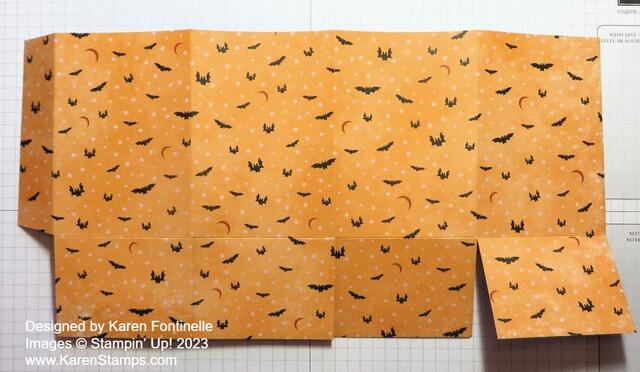
Them Bones Treat Bag Scored

You can pretty well see from my paper above how it is scored, creased, and the bottom flaps cut apart. If you flipped the designer paper over, you would put adhesive on that narrow strip on one side and it adheres to the straight side on the other end of the paper.

Fold everything to form into the treat bag. Make sure you see how it all goes together before you start glueing! Add some strong Seal+ or Tear n Tape on that narrow section above the cut off piece. Then just fold the other end over flat on the table so it all lines up. This is easier than trying to hold it in your hands! Next, glue the bottom flaps together. Push your Bone Folder or something down inside the bag so you can push those bottom flaps together after they have been adhered to get a strong bond.

Before you decorate the bag, look and see where the paper is adhered together to form the bag shape so that you can put that in the back so it’s not so visible. Then decorate the front of the bag however you like. I cut out a rectangle with a skeleton on it that fit perfectly on the front of the bag. You could add a greeting or some jewels. I decided I liked it as is.

With this pattern, you can leave the top of the bag open if you like. Before adhering anything, you could even fold the top edge of the bag down if you wanted to show the inside design of the paper. I didn’t want my bag to be much shorter than it is so I didn’t do that. But if you want to put your treat inside and then close it up, you can add some kind of clip or punch two holes in the top with a punch and put a ribbon through. I used this Black Glittered Organdy Ribbon (retired) but the gingham ribbons we sell now would be cute also. To close the top of this bag, just push in the sides and work with it until you get the top edges even and the sides and bottom how you want them.

As I said before, you could use any paper and decorations to make these little bags for any occasions to hold treats or a small gift! Once you get the hang of making these little bags and boxes with your stamping supplies, you will open up another way to be creative!

SHOP STAMPIN’ UP! ONLINE HERE!

Last-Minute Easter Ideas For You

If you need some last-minute Easter ideas for this weekend, here are some from the past. Maybe you have these older supplies to use! Of course, you can always substitute papers, colors embellishments, etc. Use what you have! Just click on the link below the photo to go to my blog post with information and directions.

Easter Bunny Treat Basket

Someone asked me to make two Easter treats for her nephews, so I copied a bunny treat box I had made earlier! If you don’t have this old die to form the box, just make an ordinary box (or maybe you have a small gift box around the house you could cover or decorate with designer paper).

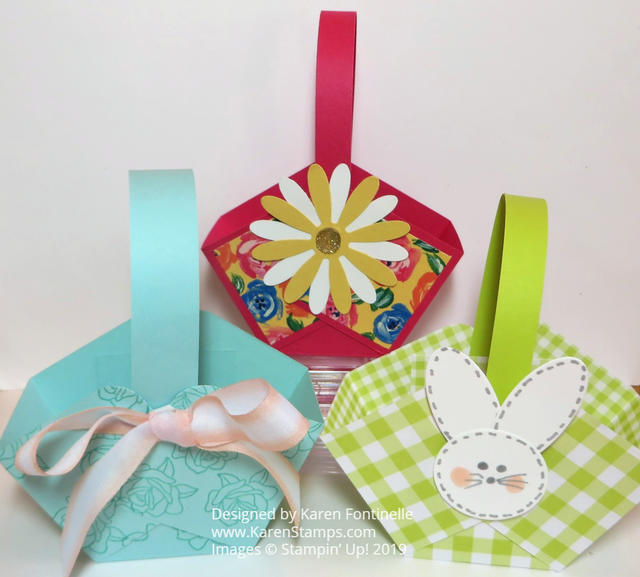
Three Easy Paper Easter Baskets

Make an Easy Paper Easter Basket

You’ve likely made these little baskets before. Use cardstock or designer paper and just decorate!

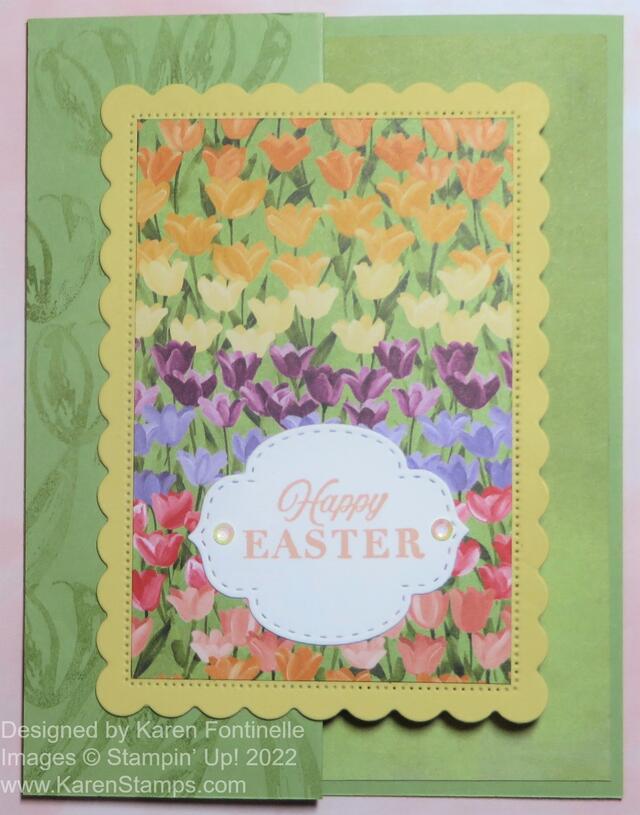
Flowering Fields Z-Fold Tulips Easter Card

Flowering Fields Z-Fold Tulips Easter Card

Use the retired Flowering Fields Designer Paper if you have some in your stash or ANY pretty paper, layered on a rectangle of some sort. Make it a Z-Fold card for extra pizzazz. Add a greeting or write “Happy Easter” by hand if you don’t have a stamp. “Just For You” always works, too!

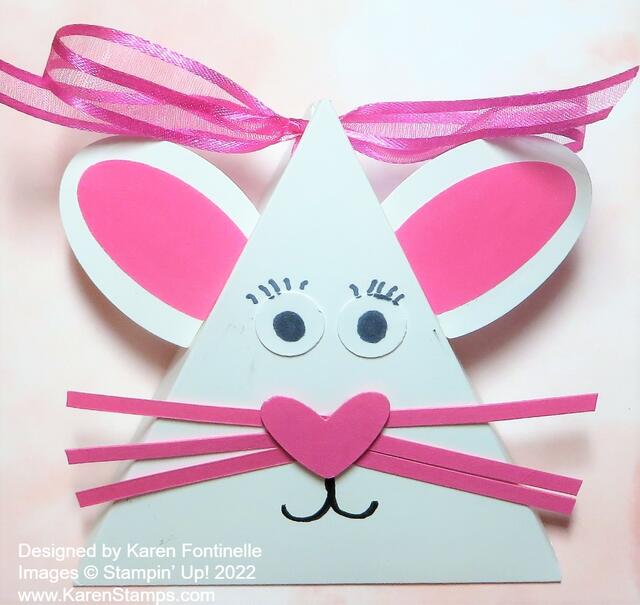
Triangle Box Easter Bunny Treat

Triangle Box Easter Bunny Treat

Here’s one of those easy Triangle Boxes that I like so much. This one is decorated to look like an Easter Bunny, of course! You just need some ovals for ears and maybe a little heart or circle for the nose plus some whiskers! Draw on a face. Fill with treats and tie at the top.

You can find even more ideas if you click on the “Easter” in my Categories drop-down box. It probably goes back MANY years!

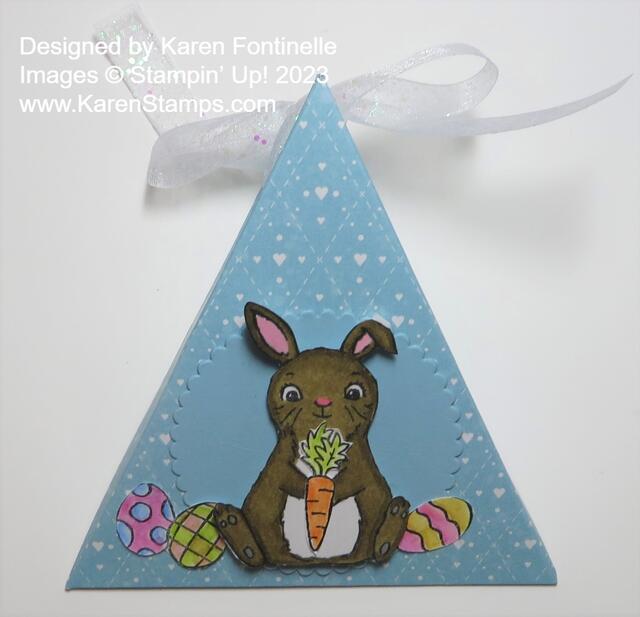
Easter Triangle Treat Box with Bunny

If you have been around for a while, you know I have made MANY of these triangle boxes for various occasions and made them in multiple sizes! They are so easy yet look so cute! If you want an Easter treat box, try this Easter Triangle Treat Box with Bunny.

Here’s how to make one and then just decorate however you like!

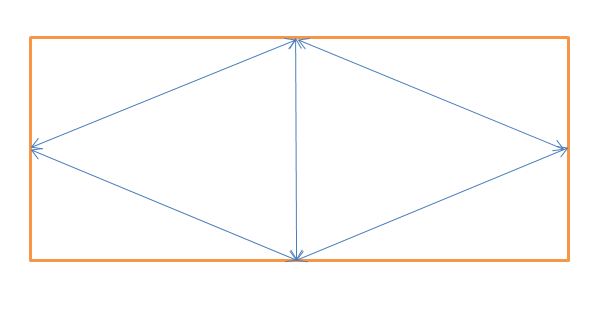
Triangle Box Drawing

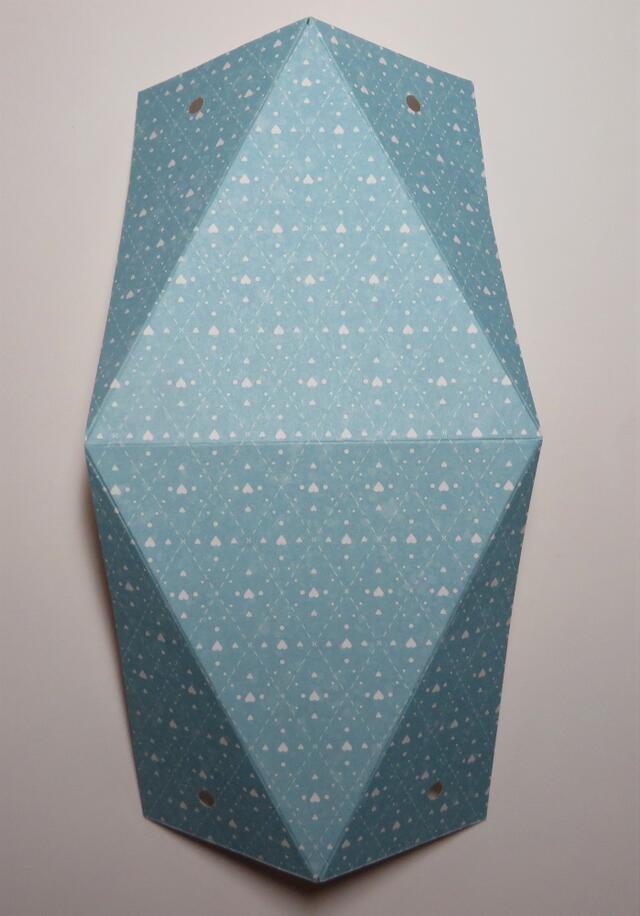
For this Easter triangle box, I used a piece of the Country Floral Lane Designer Series Paper. (It’s not just for Valentines!) It is cut at 4″ x 8″ but you can vary the size. Use the diagram above to see how to score, but it is simple! At each end of the paper, put a light pencil mark at the halfway point which in this case would be 2″. Score the paper in half at 4″. Then in that awkward manner, with your Paper Trimmer, score from that 2″ middle point at one end down to the middle score line which will be on a diagonal. Do that on both sides of one end, then turn the paper and score at the other end in the same way.

Now fold and crease all the score lines. You will see how it will fold together to make the triangle box. Determine which side will be the front or top of your box that you will want to decorate and how the flaps will go so that the top view of the box will have the fold of the flaps showing and not the open side. Pay attention to the pattern direction if it matters. Once you see how it folds together how you like, you can use any hole punch to punch holes in the sides near the top. You want the two holes on each side to align. This is how your paper should look creased and with holes punched.

Easter Triangle Treat Box with Bunny diagram

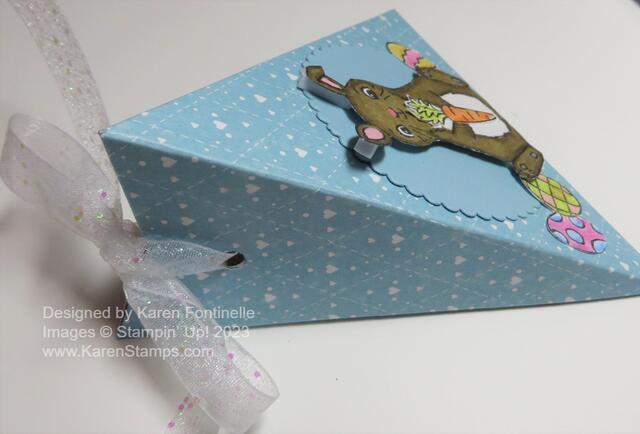
To decorate, I stamped one of the bunnies in the Easter Bunny Stamp Set in Memento Ink and colored with the Soft Suede Combo of Stampin’ Blends markers. I cut out the bunny and popped him up over a Balmy Blue scalloped circle die in the Layering Circles Dies. I already had some extra stamped and colored Easter eggs and a carrot from another project so I just adhered those to the front.

After adding some treats or a small gift inside the triangle box, just close it up and tie a ribbon through the holes you already punched. I used the White 3/8″ Glittered Organdy Ribbon because it’s white and it’s festive and pretty!

You can see what the triangle box will look like from the side.

I’ve made these triangle boxes for Halloween, Christmas, and just for fun! Here’s a Halloween one if you want to see another idea! You really could make an extra-long box, also, just follow the basic scoring directions – score in half and score diagonally from there to the middle point of the end, on each end.

If you want to do something different than an Easter basket, try making something like this Easter Triangle Box with a Bunny on the front!

An Easter Treat Easter Basket

An Easter Treat Easter Basket

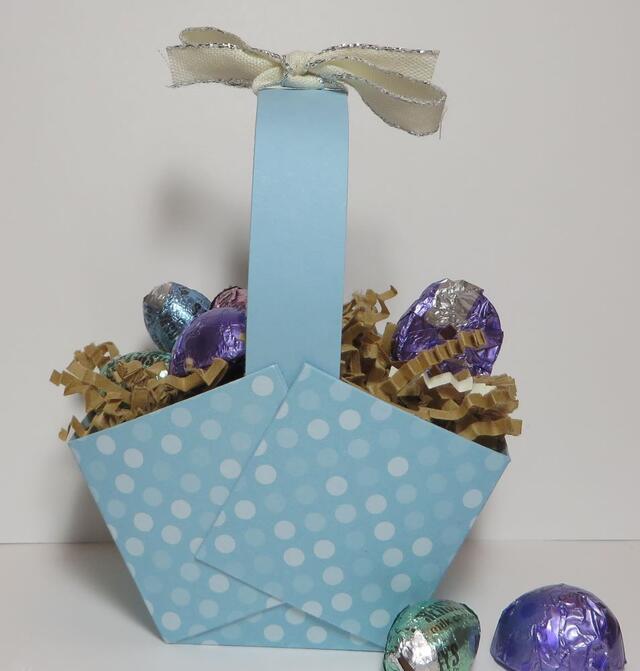
These little Easter baskets are fun and easy to make! Make them for a treat to give someone or for table favors on your Easter table at dinner. Decorate as simply or as fancy as you like.

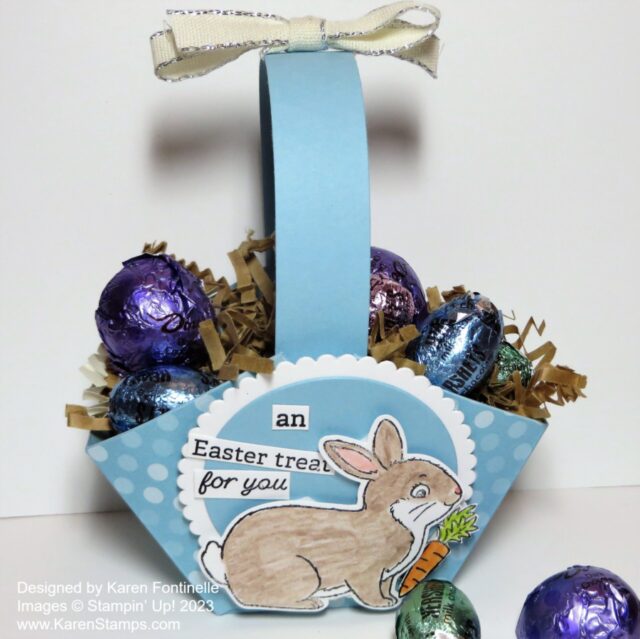
This An Easter Treat Easter Basket is made with both cardstock and designer paper. What I meant to do was make a basket out of cardstock and glue on pieces of designer paper. But I accidentally cut and scored the designer paper first and then realizing my mistake, I just cut a piece of cardstock and glued the designer paper onto it. It worked out fine and made it sturdier than if I had just used designer paper.

This basket is made with Balmy Blue cardstock and a polka dot pattern in Dandy Designs Designer Series Paper. This designer paper was a free product in the Sale-A-Bration Brochure with a $100 purchase and has all this great paper in it. I spotted the polka dot pattern and thought that would be perfect for my basket. Of course, you can use anything you like or even just cardstock.

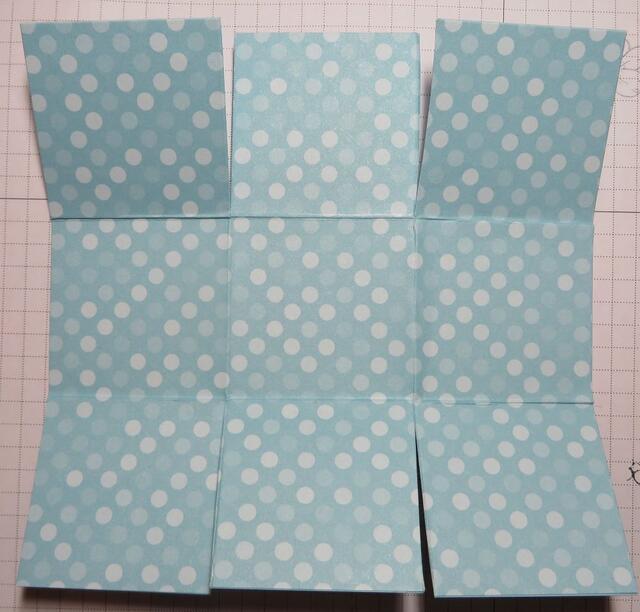
The way you make a basket like this one is to cut a piece of paper (cardstock or designer paper) at 6″ x 6″. Then score at 2″ and 4″. Turn the paper and score at 2″ and 4″ This will look like a tic tac toe pattern so you know if you have it right! Then cut the two vertical score lines top and bottom to the horizontal score line. Crease all the fold lines. You can see the diagram below.

Fold the sides together at angles as you will see in the photo below. Have the basket handle ready to sandwich in between the layers. I cut my handle at 8 1/2″ x 3/4″. Or if you forget, just adhere it to the inside of the basket.

An Easter Treat Easter Basket back

Decorate the basket however you like! I stamped one of the bunnies in the Easter Bunny Stamp Set on Basic White cardstock and colored him in using Watercolor Pencils in both Assortments and smoothed out the coloring with a Blender Pen. I also stamped and colored one of the carrots for the bunny and cut it out by hand. The bunny was punched out with the Easter Bunny Punch. It was so popular it’s been out of stock for a while but more punches are due back in the week of May 15. I diecut a plain circle and a scalloped circle out of the Layering Circles Dies for the side of the basket. There was not enough room for a little Easter greeting, but I used this one in the stamp set and just cut it apart to fit it on the decoration in a way that it would fit! The bunny and the circles were all popped up on Stampin’ Dimensionals.

Since I hadn’t done anything fancy with the basket handle, I just tied on a bow with the Silver 3/8″ Metallic Edge Cotton Ribbon. Then just put some “shred” or tissue paper in the basket and add your Easter treats!

Here is a blog post from a few years ago showing three different Easter baskets I made!

Have fun trying out these Easter basket ideas for a cute Easter treat!

Easter Bunny Treat Sack

Easter Bunny Treat Sack

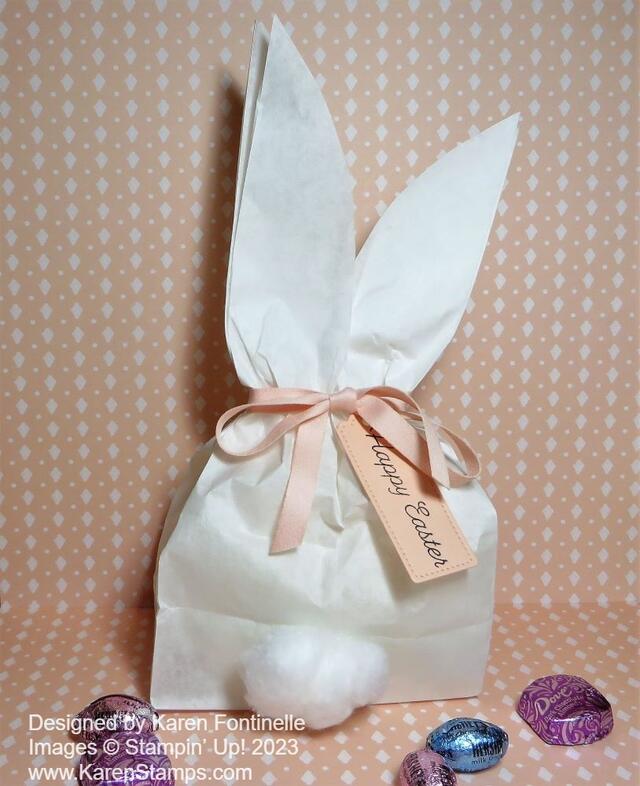
Here’s a cute Easter treat bag or even an Easter decoration for your home….or both! Make this super easy Easter Bunny Treat Sack in minutes!

Use a lunch sack, either kraft or white. I would have used kraft but I couldn’t find any in my house! But I did have white and there are white bunnies, too!

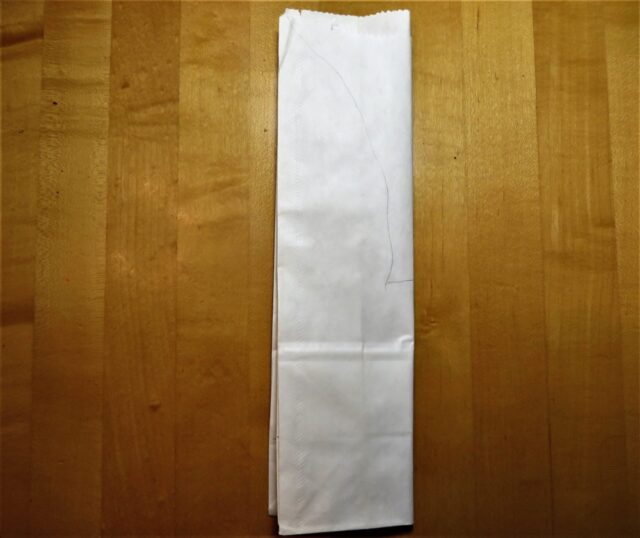
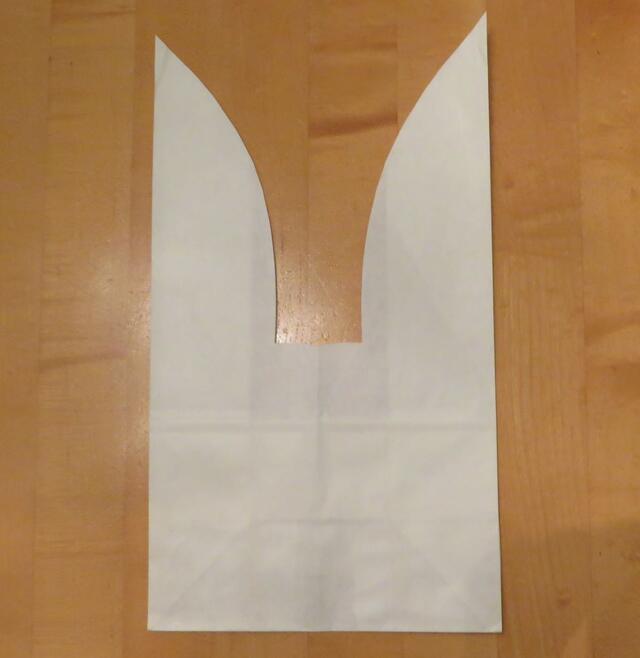
To begin, fold the lunch sack in half lengthwise and simply draw the bunny ear from the top down a little way or as far as you like it. Then cut with scissors, keeping the bag folded and flat so it will cut both sides the same, just like when you cut a heart for a valentine.

Easter Bunny Treat Sack Pattern
Easter Bunny Treat Sack Cut

If you are giving it as an Easter treat, put the candy or gift inside, maybe adding some shred or tissue paper to fill up the space to shape the bag. If you are just using it as an Easter decoration for your house, stuff the bag with tissue paper or newspaper or whatever you have. Then tie a ribbon around the sack below the ears to make it look like a bunny. Add a cotton ball or pompom to the sack for the bunny’s cottontail. Add a Happy Easter tag if you wish or the name of the person you are giving the treat to.

This style shows the back of the bunny with his cute cottontail, but if you prefer you could draw on the bunny face and have it be the front of the bunny. Either way is cute!

Just a fun little Easter thing to make that is so simple you may as well make one!

Last Minute Valentine Ideas!

If you are still looking for Valentine ideas, you will find a lot of ideas here from years past. I’ve picked out some I thought you would like but you can also click on “Valentine” under Categories on the right side of my blog and find a whole lot more!

Just click on the photos below or the title to go to that particular project on my blog!

Sweet Talk 2-4-6-8 Gift Bag

Sweet Talk 2-4-6-8 Valentine Gift Bag

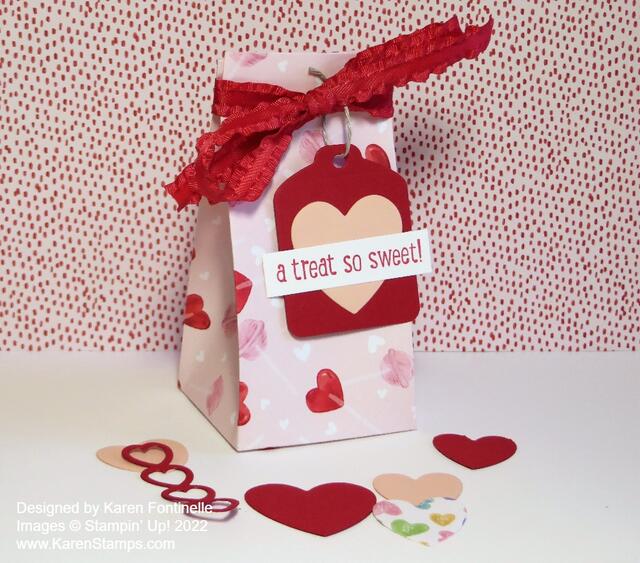
Sweet Little Boxes For Valentine's Day

Sweet Little Boxes For Valentine’s Day

(Get these “Sweet Little Boxes” on the Clearance Rack right now for the future!)

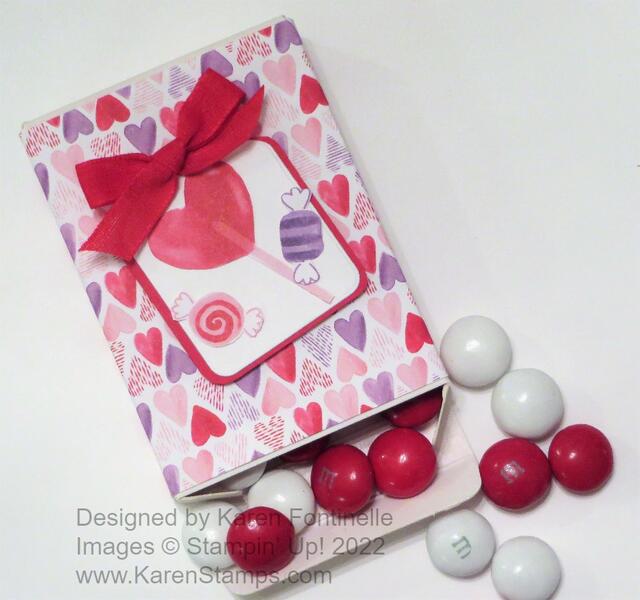
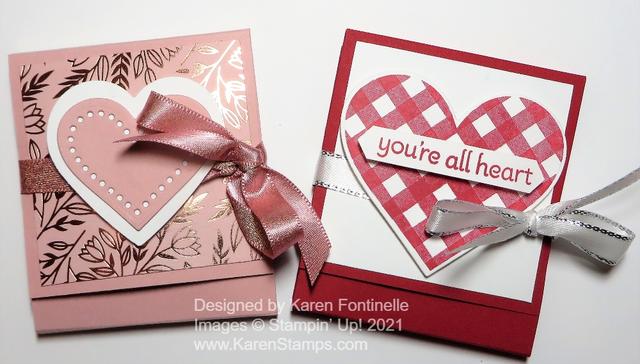
Valentine's Day Chocolate Candy Holders

Valentine’s Day Chocolate Holders

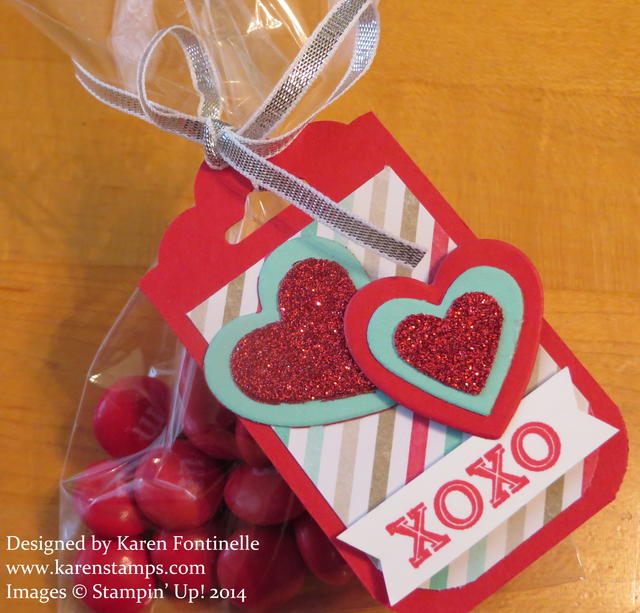
Valentine Treat Bag with Hearts Tag

Valentine Treat Bag with Scraps

Just fill a little cello bag with treats and make a cute little tag!

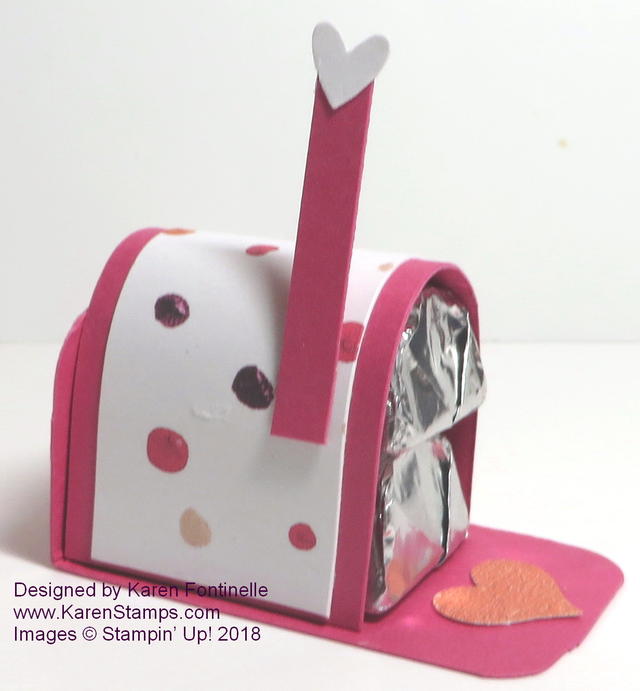
Mini Mailbox For Valentine's Day Candy

Mini Mailbox For Valentine’s Day Candy

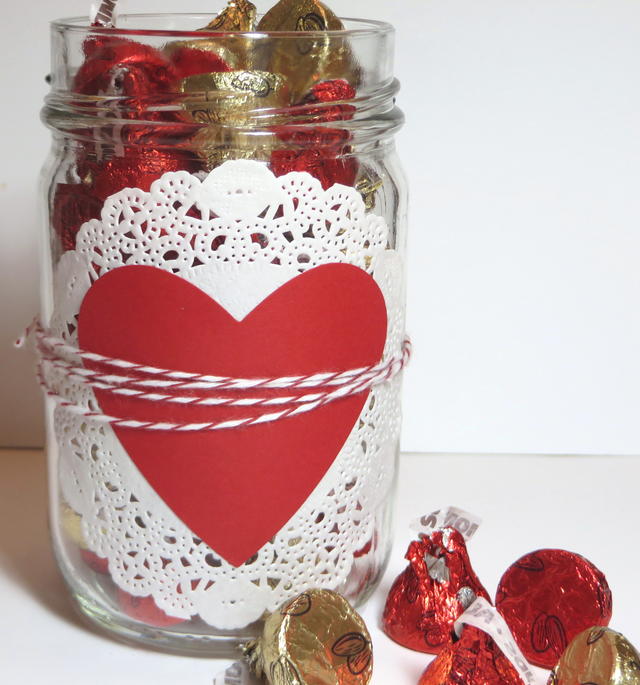
Easy Valentine Candy Jar

Easy Valentine Candy Jar

I hope these ideas help you out! There are PLENTY of Valentine card ideas, too, through the years. Again, just look under Categories and click on Valentine. I think Valentine’s Day is one of the most fun holidays!

Happy Valentine’s Day to you!

Rain Or Shine Valentine Candy Bars

Rain Or Shine Valentine Candy Bars

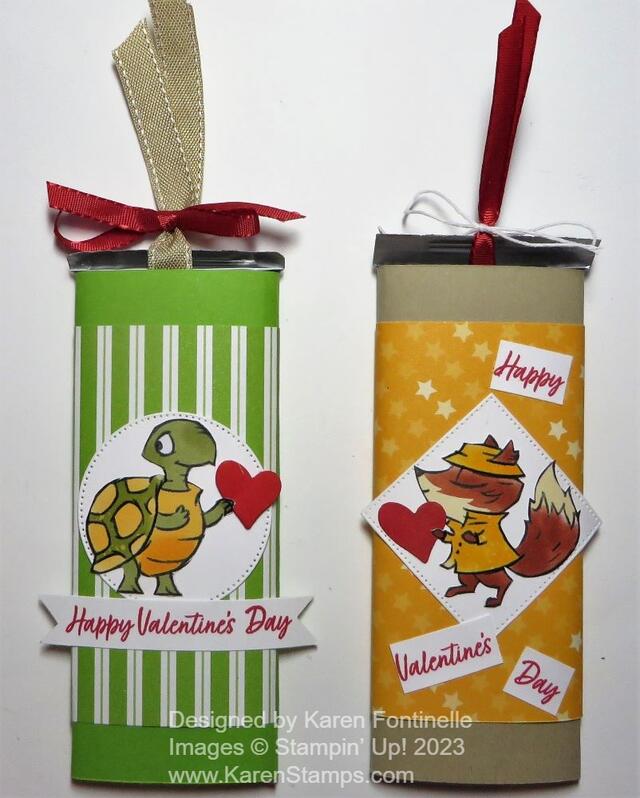
Last week I made a couple of other decorated candy bars for Valentine’s Day and now today I have these Rain Or Shine Valentine Candy Bars to show you! It is so fun and so easy to make these little treats! Of course, they don’t always have to be for Valentine’s Day. Wouldn’t these be cute for birthday party favors if you just changed the greeting?

These Valentine candy bars were decorated with two of the characters in the Rain Or Shine Suite in the Spring Mini Catalog. You can stamp these characters or you can cut them out of the Rain or Shine Specialty Designer Series Paper. Not only is this paper cute with the charming characters and umbrellas and raindrops, but parts of the images have a glossy coating on them making them a little bit shiny and adding some unique texture. You can cut out these images yourself or there are some dies that line up with the paper.

You can use almost any kind and size of a candy bar for this project. You will just have to modify your design accordingly. I used the regular size of chocolate bar and wrapped a piece of cardstock around it. I didn’t prescore the cardstock because the candy bar is not perfectly flat. I found it better just tightly to press the cardstock around the candy bar and when you have it how you want it, press the creases with a Bone Folder or at least your fingers on the edges of the candy bar to give it a good crease. If you want, you can score it on those lines, but it could still be off a little bit. It’s just as easy to do it by hand. Use a strong adhesive like Tear & Tape to hold the cardstock closed around the candy bar. Try not to get adhesive of any kind on the candy bar.

On the turtle candy bar I used Granny Apple Green cardstock to wrap around the candy bar and then a layer of green striped paper in the Dandy Designs Designer Series Paper. You will find this paper in the Sale-A-Bration 2023 brochure on page 14. It’s actually FREE with a $100 purchase. Remember, Sale-A-Bration comes to an end this month! And it’s the only one for the year. In this paper pack, you get 48 sheets, 4 each of 12 designs. It’s a LOT of paper and certainly the kinds of patterns lend themselves to almost any project, as well as being great for scrapbooking. The turtle is cut out of the Rain Or Shine Designer Paper, as I mentioned and layered on a stitched circle die in the Stylish Shapes Dies. This is a great set of dies that you can use all the time! The greeting is in the Country Bouquet Stamp Set and stamped on just a strip of Basic White with the ends flagged. I also punched a red heart with the Country Bouquet Punch for the turtle to hold.

The foxy candy bar uses Crumb Cake cardstock to wrap around the chocolate bar with another pattern from the Dandy Designs Paper, the Mango Melody with stars to cover the Crumb Cake cardstock. I cut off the umbrella the fox was holding on the designer paper because this isn’t a rainy day theme. Instead I gave him a red heart to hold just like the turtle has and layered him on a stitched square, also in the Stylish Shapes Dies. On this candy bar I did the greeting a little differently. After stamping it on a strip of Basic White cardstock, I cut the words apart and separated them. I think that is a fun look to do for the rare times I think of it!

As for the candy bars themselves, I used the Real Red & Burlap Ribbon Combo Pack to tie a ribbon around the length of the candy bar so the recipient can just pull it out of the wrapping around the bar. On the fox candy bar, I used the Real Red ribbon and tied it at the top with a piece of twine. For the turtle, I used the Burlap ribbon and tied it with the Real Red Ribbon to hold the ribbon in place.

If you want to see the other Valentine candy bars I made, just click HERE. Those used the paper, stamps, and punch in the Country Floral Lane Suite. But it doesn’t matter which suite, it only matters if the candy is chocolate!

SHOP HERE BEFORE THE END OF SALE-A-BRATION!

Country Floral Lane Valentine Candy Bars

Country Floral Lane Valentine Candy Bars

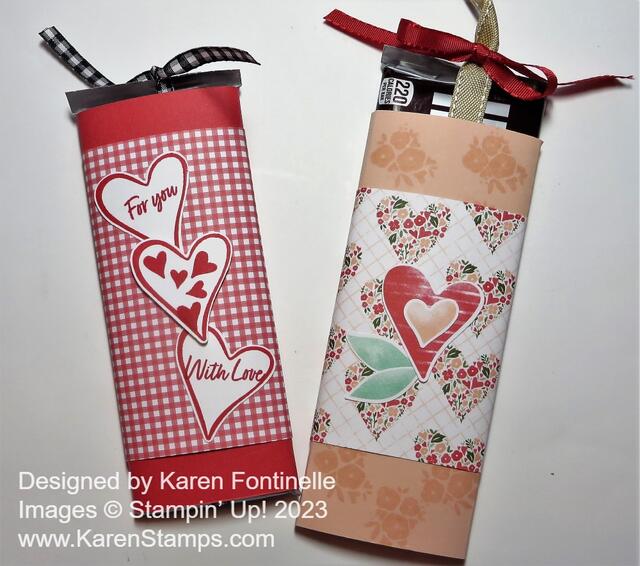
These Country Floral Lane Valentine Candy Bars are a very old project I have been making all of my stamping years! It is so easy and so fun! You can use any size of candy bars and decorate for any occasion, as simple or as fancy as you like!

I got these “regulation size” chocolate bars in a 6-pack at the grocery store. You could use the very small snack-size bars or you could use the giant-size candy bars. The brand, size, and type doesn’t matter either with a project like this. You only need to be able to wrap some paper around the candy bar or even a bag of candy.

My measurements don’t really matter to you because it all depends on the size of YOUR candy bars. But if you want a starting measurement, for my candy bars I wrapped around a 5 1/2″ x 6″ piece of cardstock, then a piece of designer paper, about 4 1/4″ x 6″ on one and 3 1/2″ x 6″ on the other. Six inches provides a fairly wide overlap for the back so you could make that a little shorter if you needed to save paper.

On the pink candy bar, I first stamped some flowers in the Country Bouquet Stamp Set using Versamark ink on the Petal Pink cardstock just for a little interest on the top and bottom. Then I wrapped around a piece of the Country Floral Lane Designer Paper. I suggest just lightly wrapping it around and not scoring it according to any measurements. Each candy bar and wrapper may be different, there is some thickness to it, and you don’t want the wrap to be too tight that you can’t pull out the candy bar or too loose. After I wrapped the cardstock around the candy bar, I held it in place as tightly as I wanted it and actually ran my Bone Folder along the sides which gave a pretty nice crease.

To decorate the pink candy bar, I used the Country Bouquet Punch to punch out the two hearts and leaves directly from the Country Lane Floral Designer Paper. As I write this, this punch is not available and will not be until April. If you want to use that design on the paper, just cut out the hearts and leaves by hand. I used the Real Red & Burlap Ribbon Combo Pack to wrap around the length of the candy bar with the Burlap Ribbon, then tied at the top with the Real Red Ribbon. This gives the recipient a “handle” to pull out the candy bar.

The Sweet Sorbet candy bar is wrapped with Sweet Sorbet cardstock and then a layer of the Country Gingham 6″ x 6″ Designer Series Paper. This paper is cute and so versatile to use on many projects. At this moment it says, “Low Inventory” so if you want it, order it right away!

To decorate this candy bar, I stamped three hearts with the Country Bouquet Stamp Set and punched out with the Country Bouquet Punch, Again, if you don’t have it, just cut out the hearts by hand. I also added two greetings from the same stamp set plus the little hearts stamped inside one of the hearts. That center heart is popped up on Stampin’ Dimensionals. I used the Black & White Gingham Ribbon to wrap around and pull out the candy bar.

As I said, this is a fun project! Even children can do it! If you want to see the small, Snack Size candy bars decorated, here is a Halloween example.

If you need any supplies for any projects, remember Sale-A-Bration is still going on during February and just the other day Stampin’ Up! added more choices of products that you can earn with a $50 or more purchase. Check out all the choices HERE.

SHOP STAMPIN’ UP! ONLINE HERE!

Chocolate Christmas Candy Treat Holders

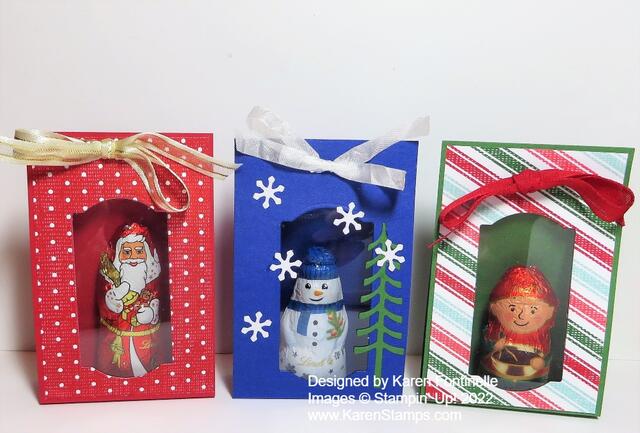
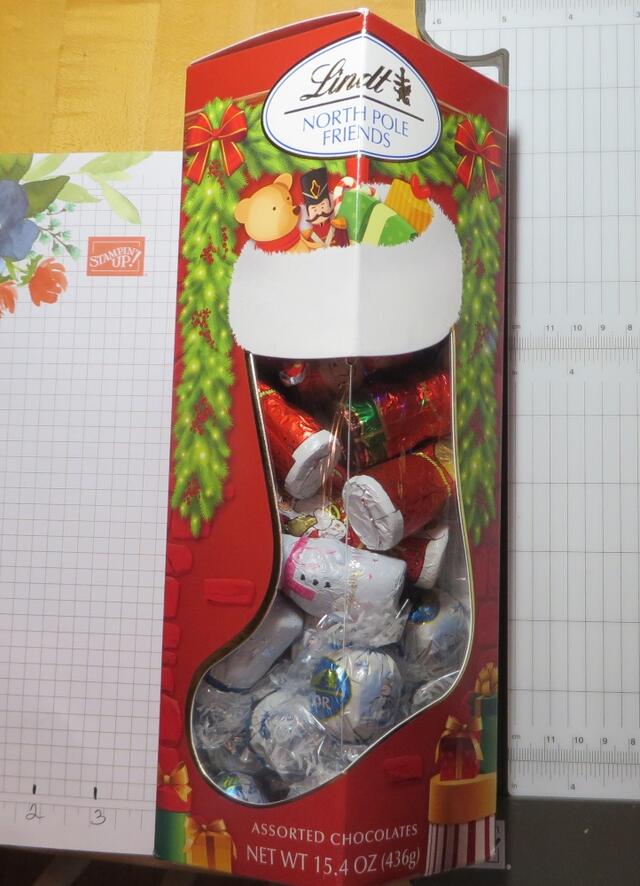
These are the cutest little candy holders that you can make for stocking stuffers or table decorations! And they are easy to make, too! Check out the Christmas candy at the grocery store and see what you can find. I bought this box with these Christmas figures probably at Costco. I knew it might come in handy for “craft supplies”!

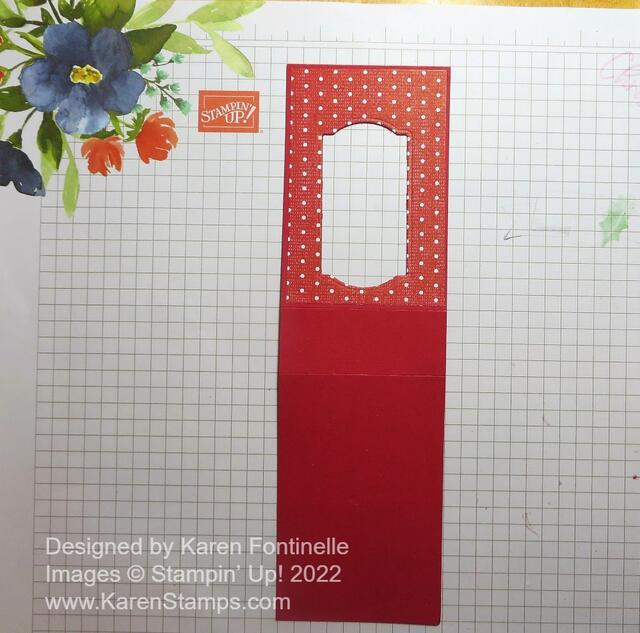
To make these, just cut a strip of cardstock at 2 1/2″ x 8 1/2″. Depending on your candy, you might need to vary that measurement but it worked fine for my little candies! Then score at 3 3/4″ and 4 3/4″, or just score 3 3/4″ from one end, turn the paper, and score at 3 3/4″ from the other end. That leaves space inside the treat holder about one inch wide to hold the candy. Instead of these candy figures, you could use a small cello bag of assorted candies and in that instance, maybe you need to make that inside space a bit wider.

If you want to make a window on the front, (Of course you do!!) just choose a punch or die that will fit your project. For mine, I used one of the Painted Labels Dies. You could also use a punch of some kind. Just make sure that your candy will show through the hole as you like. If you want to decorate with designer paper, as I did with the Sweetest Candy Designer Series Paper, cut that to fit on the treat holder front BEFORE you cut the hole in the cardstock. If you adhere the DSP first, then you don’t have to worry about matching the two openings.

Chocolate Christmas Candy Treat Holder

It might be helpful to adhere a window sheet on the inside to keep the candy safe inside. You may have “official” Window Sheets in your stash or you may find a piece of scrap plastic around the house. I just cut it large enough to cover that window and applied Stampin’ Seal around the edges of the opening. I think the window sheet makes it look quite professional!


Put the candy inside, and to hold it in place, use a few Glue Dots but be very careful not to get any glue in contact with the chocolate. No one wants to eat a Glue dot! I stuck about two or three on the back of the candy figures, but you could also use one on the bottom of the figure.

Once the candy is in place, hold the top together and punch two holes for the ribbon with whatever punch you have. Use your favorite ribbon to tie it closed.

For the snowman treat holder, I added some die-cut snowflakes using the Snowman Dies. Since I had a scrap of White Glimmer Paper I used that for the snowflakes. When I spotted the tree in the die set I cut one out of a scrap of green cardstock I had and adhered that on the side of the snowman. You can decorate these little things however you like! You could add a small greeting or add some jewels or sequins for some bling!

Here are some Easter treats I made almost the same way.

These little Chocolate Christmas Candy Treat Holders are quick and easy to make and will make a fun gift or treat or decoration for everyone!

Last Minute Halloween Treat Ideas!

These Halloween treat ideas may be from years past, but they still work! Use your current paper and things or use your old retired things you are hoarding! 🙂 The trick or treaters won’t care!
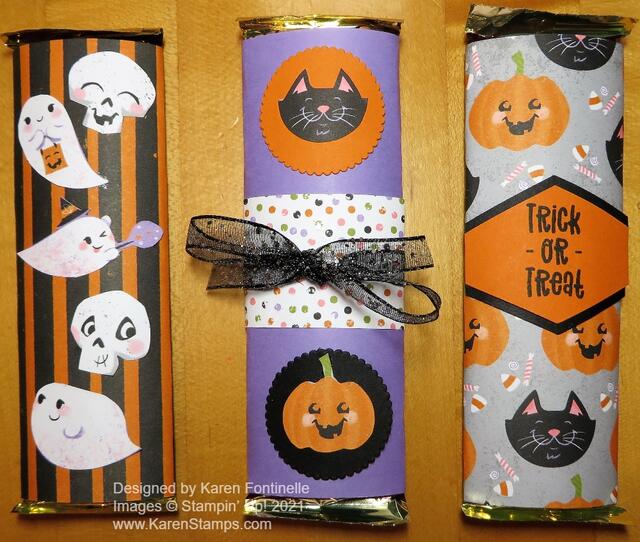
Halloween Candy Bars

This is one of my favorite ideas and simple enough to do. Just wrap a chocolate bar in designer paper! Maybe add some ribbon or a tag if you are making it for someone special. You can use any size of candy bar!

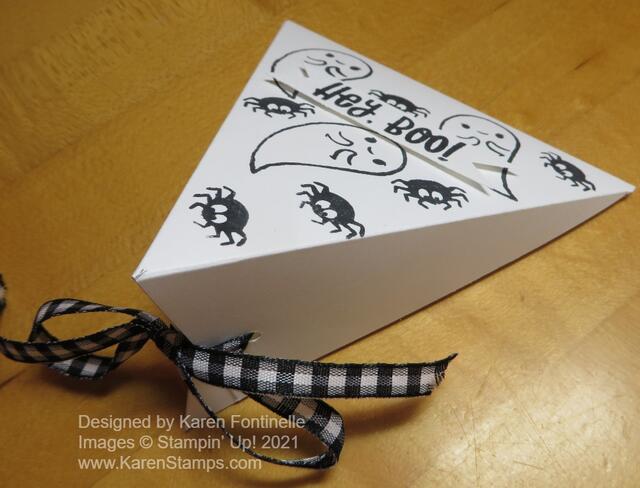
Triangle Halloween Treat Box WIth Ghosts

These triangle boxes are so easy to make and I have made them for lots of occasions! Read my blog post HERE with directions.

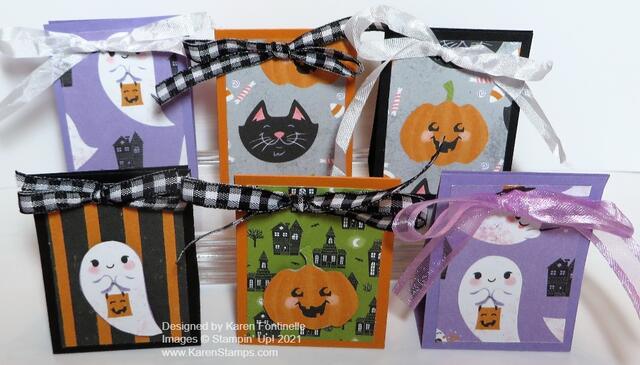
Cute Halloween Treats

I always love making treats with chocolate nuggets! Just cut a strip of cardstock at 1 3/4″ x 5 1/2″. Score the paper at 2 1/4″ and 3 1/4″. This makes a little space so it will sit flat and so it will hold a nugget inside. OR just cover nuggets with strips of designer paper and put in a bag or box! A 1″ x 3″ strip should do it!

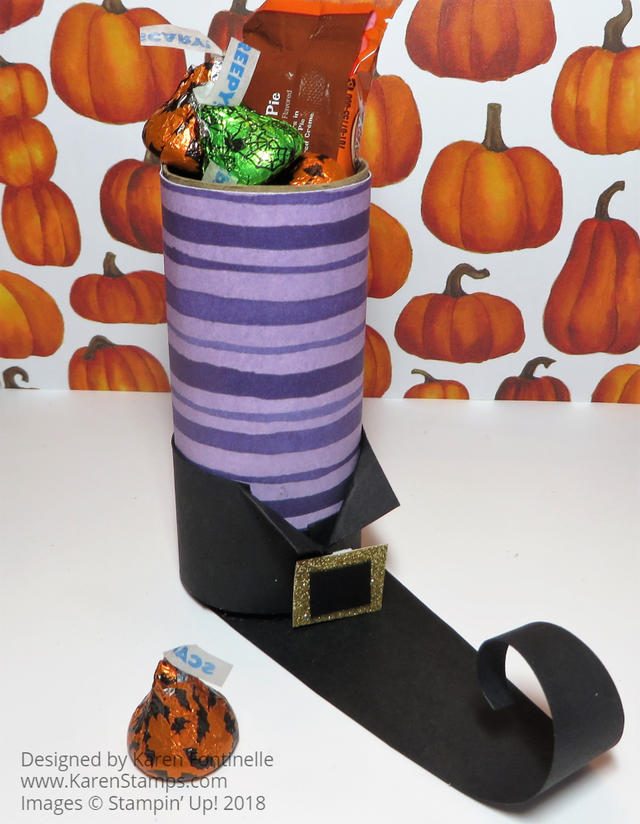
Witch's Boot with Candy

This witch’s book has been quite a favorite! Save a toilet paper roll or a paper towel roll and cut it down, wrap with designer paper, and add the triangular boot bottom! It’s easier than it looks. Directions on this blog post HERE.

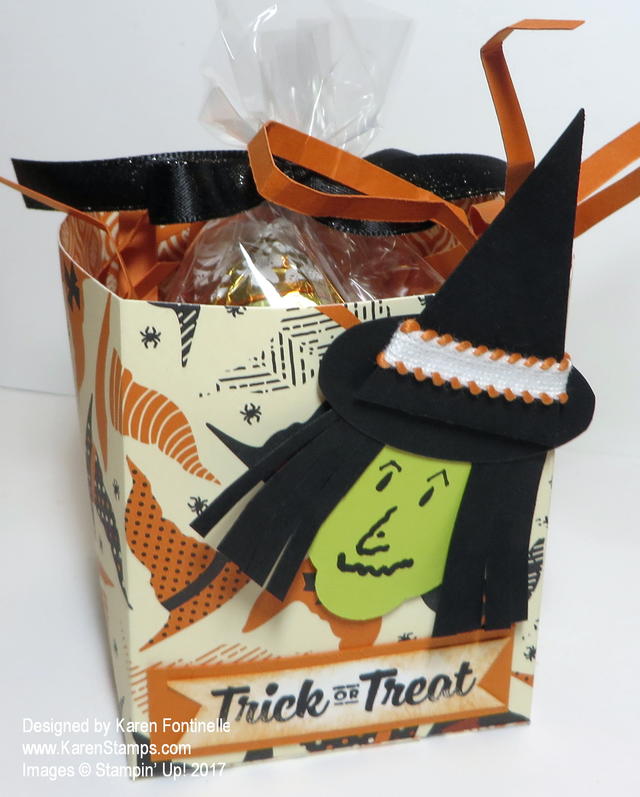
Halloween Witch Trick or Treat Candy Treat Box

Nothing wrong with just making a little box or bag out of designer paper or cardstock and decorating it for Halloween! This one is from five years ago but you can update it easily! Read the blog post HERE.

Those are just a few ideas to spark your creativity for parties or trick or treaters Monday night! Have fun!

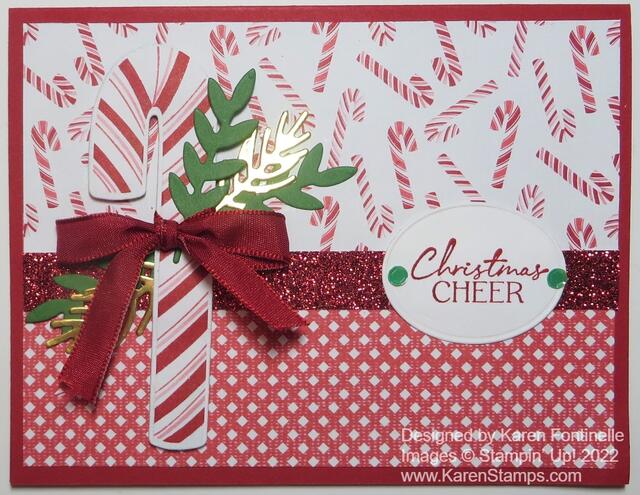
Christmas Candy Cane Card

Christmas Candy Cane Card

As long as I still had the paper, stamps, and dies out from yesterday’s card I decided to make another card design with all those materials. As I looked through the Sweetest Christmas Designer Series Paper, I liked this small candy cane print with this little red and white print on the backside of a candy cane stripe and that’s how this Christmas Candy Cane Card was born!

The card base is Real Red. I cut the two pieces of the designer paper to overlap a little bit. I intended to use Real Red Ribbon across the seam but I glued the paper down to the card base before I put the ribbon across. So the next best thing, maybe even better, was to use a strip of the Real Red Glimmer Paper! It really makes it festive!

To decorate the card, I die-cut one of the candy canes on the Sweetest Christmas Designer Paper from the Candy Cane Dies. You can cut it out with Paper Snips if you don’t have the dies. However, you can purchase the Sweet Candy Canes Bundle with the stamp set & dies and save 10% over buying them separately. I popped up the candy cane with Stampin’ Dimensionals and tied on a bow with the Real Red Ribbon in the Real Red and Garden Green Ribbon Combo Pack. Then I used some diecuts of leaves, Gold Foil and Garden Green, using the Christmas Banner Dies. You can decorate the candy cane as much or as little as you like.

The greeting is in the Sweet Candy Canes Stamp Set. I used the oval die in the All That Dies to cut it out. I think it fits perfectly along the glimmer band. For a finishing touch, I added two of the Adhesive-Backed Seasonal Sequins in green. They come in four different colors.

This would be a relatively easy card to make multiples of because it’s mostly designer paper. The candy cane is easy enough to cut out by hand or die-cut and the extra greenery, whether gold foil or green doesn’t need to be stamped, just diecut. Only the greeting is stamped. Even if you don’t make lots of multiples, you could make 5-10 of this same card, and little by little as you make new Christmas cards you will end up with enough to mail out to lots of friends and family!

You can get by making this card with just the package of the Sweetest Christmas Designer Series Paper, the Real Red & White Glimmer Paper, some ribbon, and a Christmas greeting (which we all have in our stash!) plus some die-cut leaves (and if you have any die cuts, you probably have some leaves or sprigs or a punch!). This Christmas Candy Cane Card is really a basic card design with two different patterns of designer paper top and bottom, a focal point, and a greeting. Here you can see some cards from a few years ago with the two patterns of designer paper and a greeting. Easy peasy!

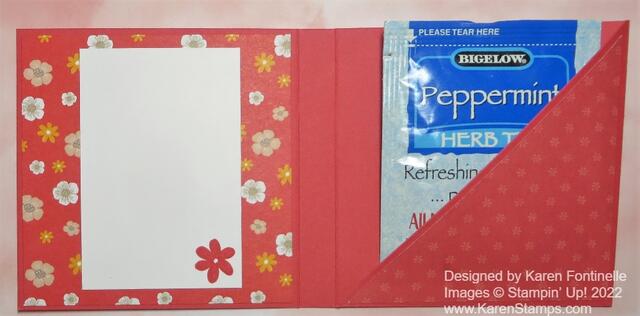
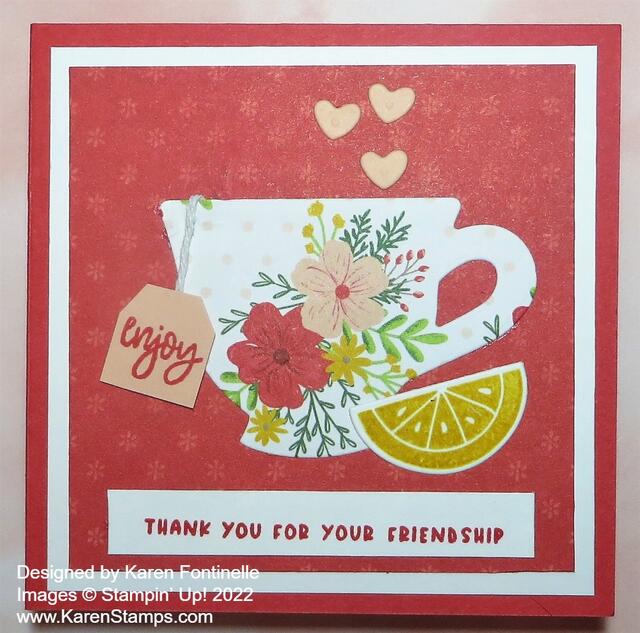
Cup of Tea Teabag Holder

This Cup of Tea Teabag Holder is really an old project I have made many times through the years, but the Tea Boutique Suite Collection is perfect for it! As you will see, this little card opens up to be more than a card! It is a card but holds a teabag inside in a side pocket.

When you open the card, there is a decorated panel on the left on which you can write a message and on the right is space for a teabag or if you wanted, a piece of chocolate or another treat!

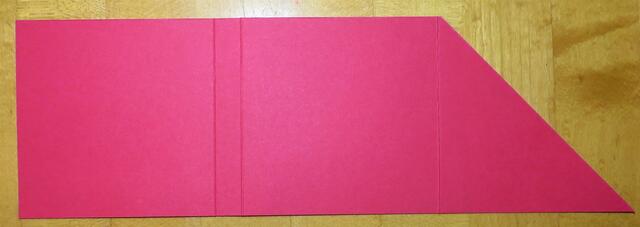
It’s really very easy to make one of these holders. Start with a piece of cardstock 11″ x 3 1/2″. I used one of the new In Colors, Sweet Sorbet. Score this strip of cardstock at 3 1/2″, 7″, and 7 1/2″. Crease all the folds. On the third section on the right, cut that piece on a diagonal as you see in the photo below. When you fold that diagonal over, that will make the pocket to hold the teabag.

Tea Bag Holder scoring

Now all you have to do is decorate the teabag holder however you like for the occasion.

For the cover of the teabag holder, I added a layer of Basic White, cut at 3 1/4″ x 3 1/4″ with a layer of the Tea Boutique 6″ x 6″ Designer Series Paper, cut at 3″ x 3″. The white helps the designer paper and the teacup stand out better.

The teacup is diecut from a floral pattern of the Tea Boutique Paper with the Teacup Dies. It reminds me of many old teacups I have from my grandmother. She used to have a tier table full of teacups and saucers that oddly enough, she said my grandpa brought home from birthday parties as favors! Then there is also a collection of handpainted teacups that my grandpa’s sister painted when my grandparents got married.

But back to making the teabag holder – the greeting is in the Cup of Tea Stamp Set. I wanted to use it because it was small enough to fit in the space. With the stamp set and dies, you can stamp and cut out the lemon slice, the little hearts, and even the tag on the teabag. There are two teabag dies so you could layer them, but the word “enjoy” only fits on the larger tag but I didn’t want that large of a tag on this project, so I just cut it down smaller by hand. I added a small piece of white baker’s twine to look like it is attached to the teabag inside the cup brewing tea.

On the inside panel, I just used another pattern in the Tea Boutique Designer paper, and added a small piece of Basic White on which to write a message or sign your name. I didn’t want to cover up much of that cute paper so I made it smaller than a regular layer.

To make the diagonal pouch on the right side, I used a piece of Tear & Tape just on the bottom of the diagonal. I also cut a piece of the designer paper in a 3 1/4″ square and then diagonally cut it to layer on the pouch.

This is really a fun project to make. The extra scoring in the center leaves space for the thickness of the teabag of candy, whatever you put in there. The only thing I forgot to do was put ribbon around the whole thing to tie it closed. You would likely adhere it underneath the layers so that it would tie on the side to hold it closed. But it’s okay as is, really. If it is presented in an envelope, it’s not going to fall open anyway until the person opens it themselves! There are no mistakes in stamping!

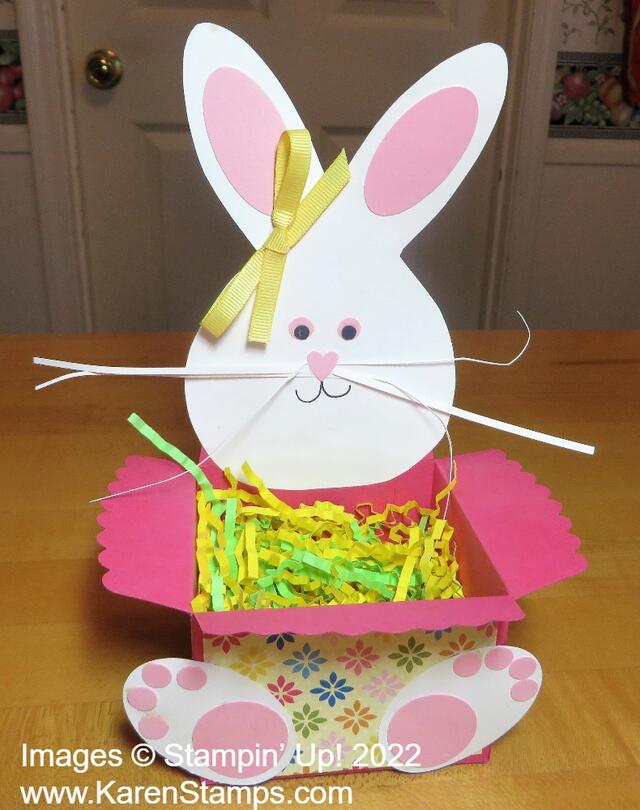
Easter Bunny Treat Basket

Easter Bunny Treat Basket

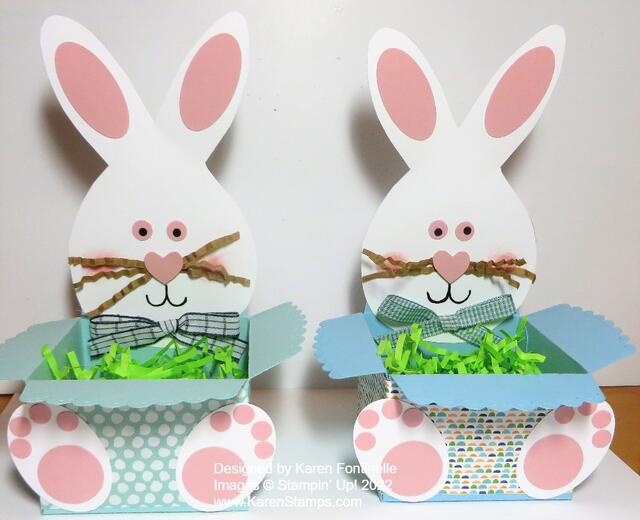
I was asked to make two Easter treat baskets for two little boys. I had kind of a normal little basket idea with a handle (made of cardstock, of course, not a real basket! but when I got home, I saw one of my Easter decorations on my fireplace mantel that I made years ago. I just copied myself and made these two Easter Bunny Treat Baskets! Plenty of room to put some chocolate candy and other treats inside!

To make these baskets, I pulled out a lot of my retired Stampin’ Up! products! The main thing I used was the Sizzix Scallop Envelope Die, I think it is called. It was one of those first dies we had with our Big Shot, the black thick platform kind of die with the cutting blades inside the die. I cut four pieces, cut off one tab on one side of the envelope piece, laid them side by side, adhered them together, and folded in the bottom flaps to form the basket. So if you have been die-cutting for a long time, you may have this die. We could make a lot more things than just an envelope with this die. The bunny on the back of the basket is simply a sketched bunny shape. There may be a template somewhere online. I traced the one I’d already made on my basket. The bunny feet on the front of the basket are made with the retired large oval punch, the 1″ circle punch, and some smaller punched circles. There were several punches I had that could make those, like the Owl Punch and the Gingerbread Man Punch (not sure that’s the correct name). For the ears, I punched oval shapes but you could color them in with a marker. The face can just be drawn in or just small circle punches for the eyes, a small heart, or a circle for the nose. Add a little blush to the cheeks! Draw on some whiskers or use some crinkled strips of paper or this crinkled shred that I happened to have.

If you do not have the Scallop Envelope Die, just make some little kind of square box. Just take a square piece of paper, score it like a tic tac toe board, fold and crease, then cut the flaps at the bottom and the top down to the horizontal scoreline. Fold in all the sides to form a box.

There are so many ways to make bunnies, too! If you are uncomfortable drawing a bunny like mine and cutting it out, just use some circle or heart shapes to put one together! Use dies or cut freehand.

Since these were boy bunnies, I tied bows and attached them to the bunny chins rather than on their ears! You could also make kind of a paper necktie if you wanted! Just have fun with the project! Nothing has to be perfect!

Here is my original bunny I made a few years back I guess!

Easter Bunny Treat Basket Pink

If you need one more Easter idea, this Easter Bunny Treat Basket might be just the thing to inspire you!

HAPPY EASTER!

Some Last-Minute Easter Ideas For You

In case you are looking for some last-minute Easter ideas, here are a few I made in the past! Maybe it’s something different than what we’re all seeing right now or maybe you have these older stamp sets and products. Just pull them out and start creating! Or update with your current products! It’s all fun! Just click on the title to go to the blog post.

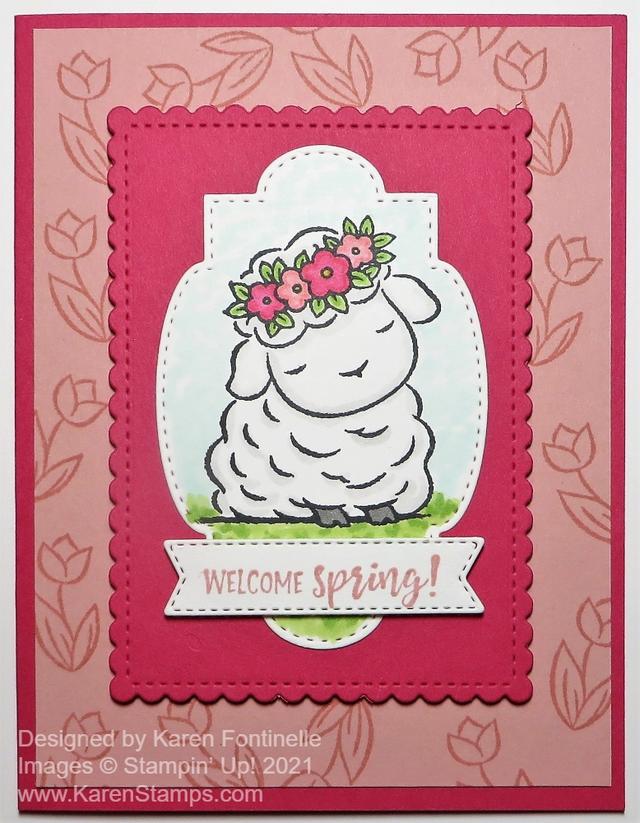
Springtime Joy Lamb Easter Card

Springtime Joy Lamb Easter Card

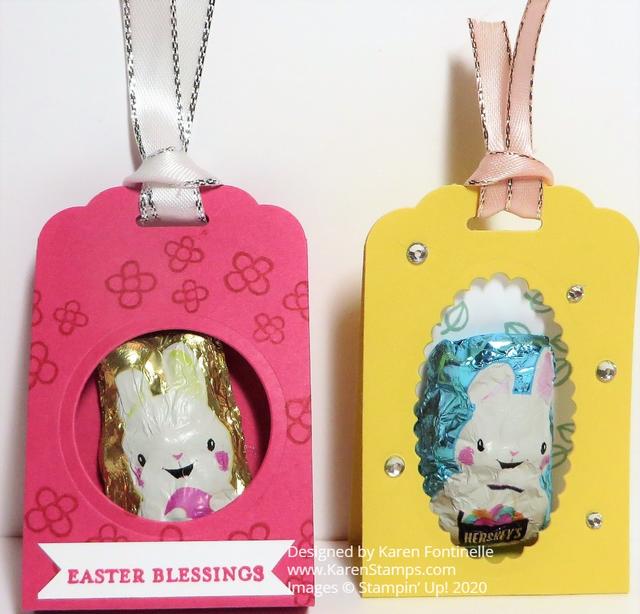
Easy Easter Candy Treats

Easy Easter Candy Treats

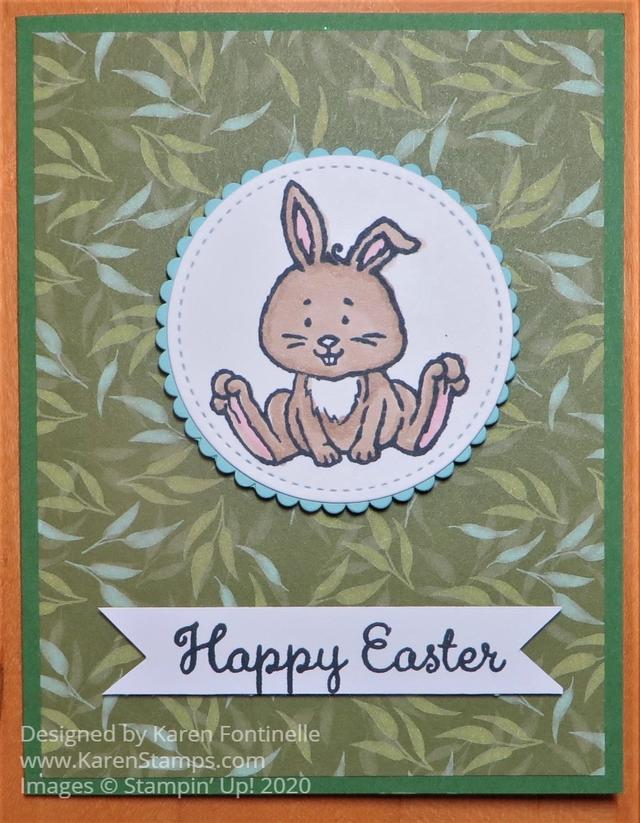
Garden Lane Easter Bunny Card

Garden Lane Easter Bunny Card

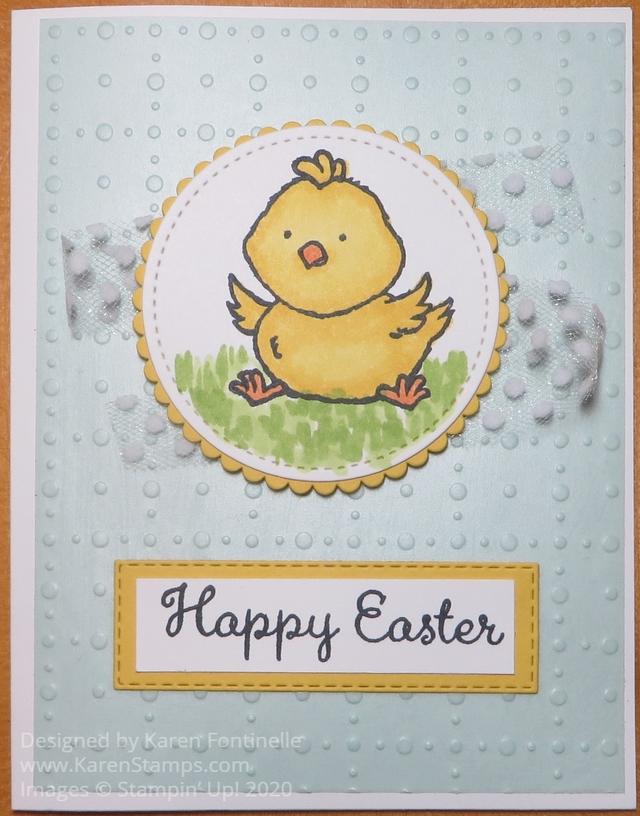
Welcome Easter Yellow Chick Card

Welcome Easter Yellow Chick Card

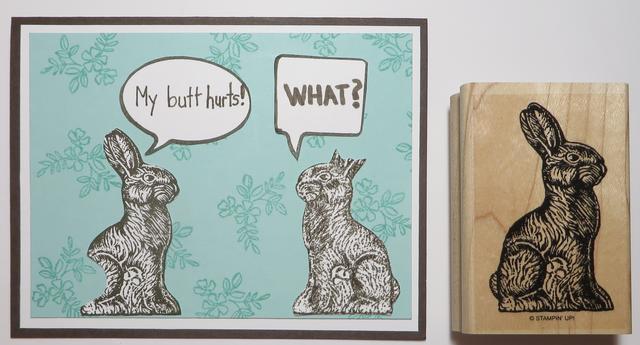
Chocolate Bunny Easter Joke

Chocolate Bunny Easter Joke

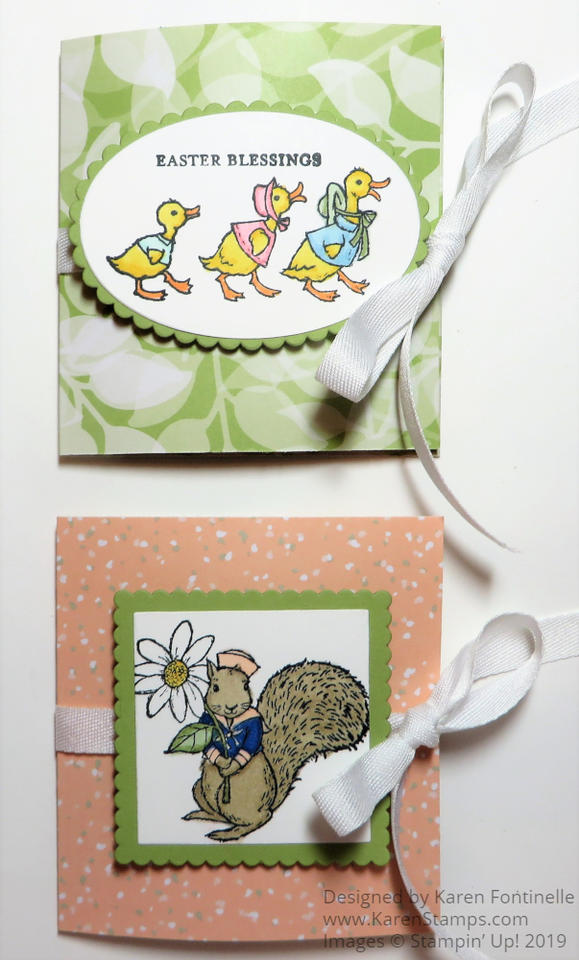
Easy Easter Folded Candy Holders

Easy Easter Folded Candy Holders

Make an Easy Paper Easter Basket

Three Easy Paper Easter Baskets

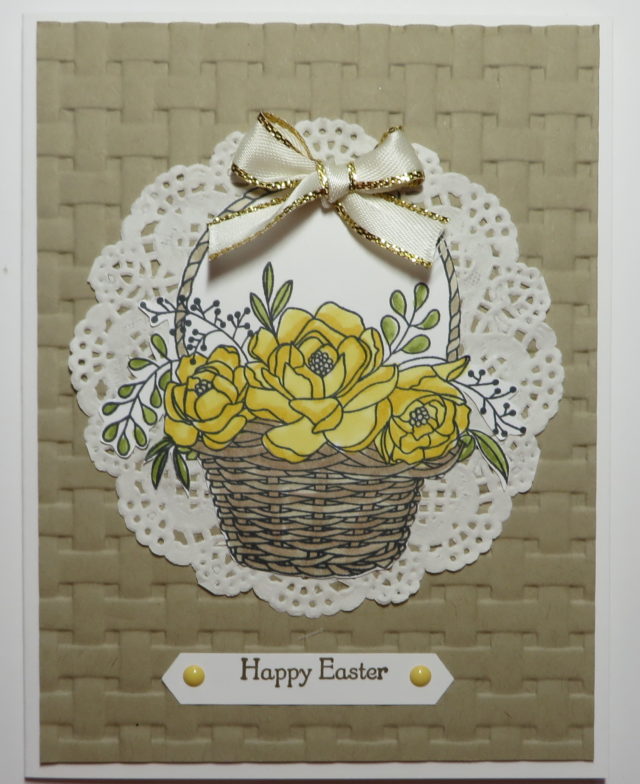
Easter Basket of Flowers Card on a Basket Weave Background

Easter Basket of Flowers Card

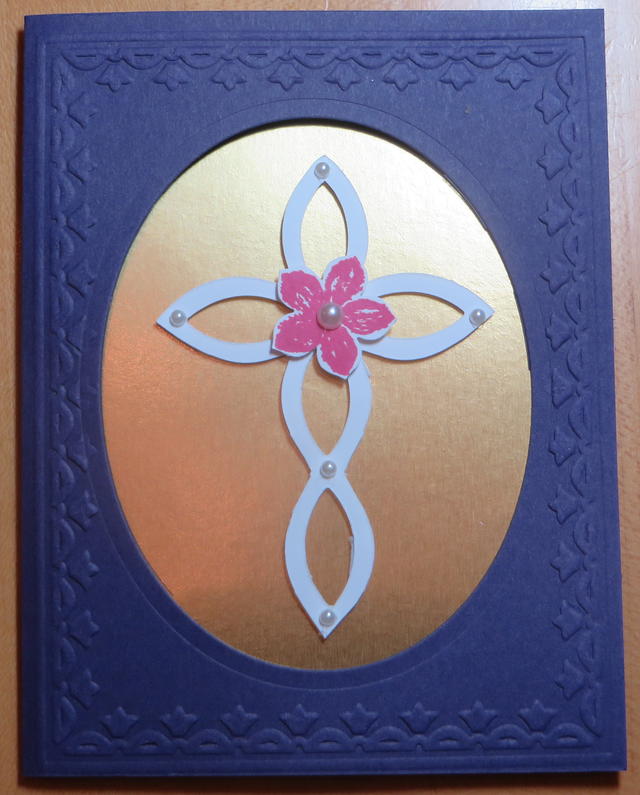
Happy Easter! Lattice Easter Cross Card

Lattice Easter Cross Card

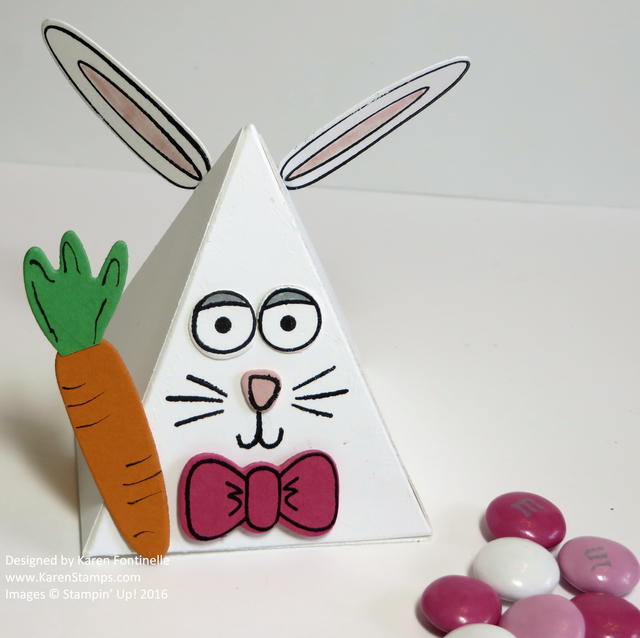
Playful Pals Easter Bunny Pyramid Treat Box

Playful Pals Easter Bunny Pyramid Treat Box

Well, that’s probably more ideas than you need but it was fun for me going down Easter Memory Lane! So many cards and treats over many years and seeing them always brings back wonderful memories because stamping is always so much fun! If you need more or different ideas, just select Easter in the Categories drop-down box under the catalogs.

HAPPY EASTER!