Category Archives: Christmas

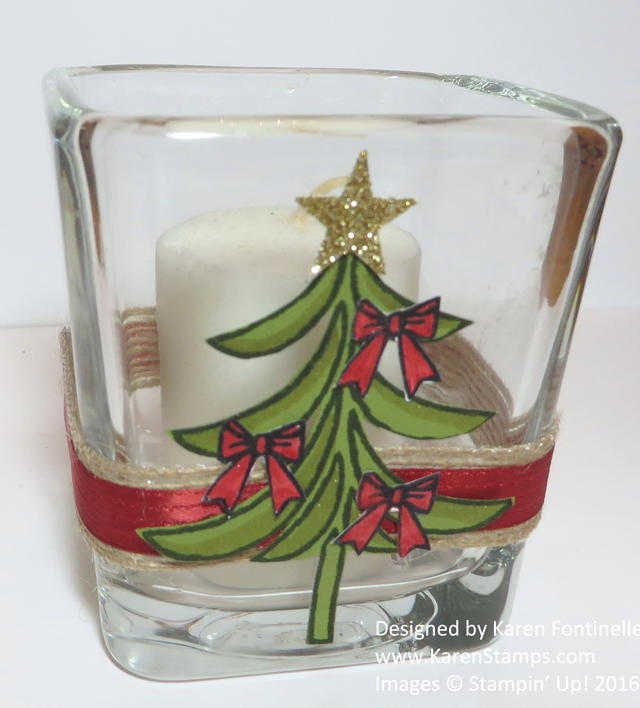
Decorated Christmas Votive Holder

Decorated Christmas Votive Holder

The other day I was at a holiday market and I saw a round votive holder with a piece of burlap wrapped around the middle and some other embellishments attached so that inspired my Decorated Christmas Votive Holder. Stampin’ Up! no longer carries the wide burlap ribbon , but we do have this 5/8″ Burlap Ribbon which is very soft, flexible and easy to use. For a little accent I also wrapped around the Real Red 3/8″ Stitched Ribbon. I love red and I love this ribbon!  Stampin’ Up! really has the best RED, don’t you agree?!

To decorate the votive, I decided on the Christmas tree in the Santa’s Sleigh Stamp Set.  The tree is really too tall for the votive but the design was such that I could cut the top off the tree and it still looked fine. I also stamped the red bows that come in the set and colored with a Real Red Stampin’ Write Marker and adhered to the tree. (Both the Real Red & Crumb Cake Markers can be purchased in the Holiday Catalog). You can’t see it in the photo, but I also felt compelled to play with both Wink of Stella Glitter Brushes!  I applied a little of the Gold Wink of Stella to the tree branches and some Clear Wink of Stella to the bows. Those glitter brushes are dangerous – once you start using them you can barely make yourself stop, they are so much fun! For the star on top of the tree, I used a retired star punch and Gold Glimmer Paper.

I think there are so many possibilities for decorating little votive holders for Christmas like this one. Pick up a few at the store, get out your stamping stuff, and see what you come up with!  They will make nice little gifts.

It’s not too late to get a Stampin’ Up! Annual Catalog and Holiday Catalog if you are interested in Stampin’ Up! products! Just email me at Karen@KarenStamps.com and I can mail the catalogs to you.

One more thing — if you are not on my Mailing List, be sure to sign up in the red sign-up box in the upper right of my blog (or in the pop-up box!) so that you get my monthly emails with projects and Stampin’ Up! news and specials PLUS right now the rest of my 12 Weeks of Christmas emails. You will also get a free gift just for signing up! Do it right now so you don’t forget!

Shop Stampin’ Up! Online HERE!

Christmas Thank You Note Cards

Christmas Thank You Note Cards

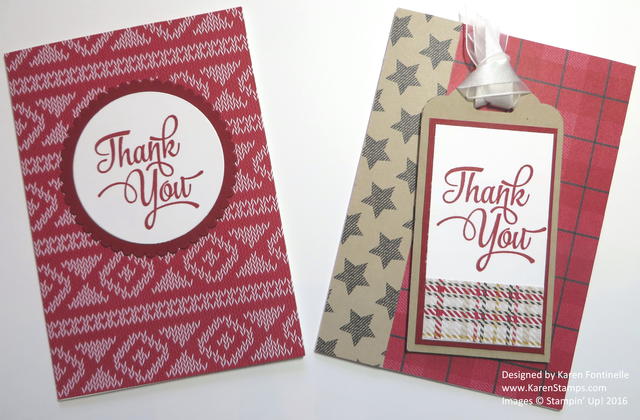
I’m calling these Christmas Thank You Note Cards, but can’t you see that you could use them almost any time? If you send thank you notes (and we all should) you will be sending them after the Christmas holidays, so these made with the Warmth & Cheer Designer Series Paper Stack have a lot of wintery looking papers, perfect to use after Christmas! But there are also other patterns that are other designs that you can use just any time.

To save time, I used the Whisper White Note Cards and EnvelopesThese cards are a little smaller than the cards we normally make, but not too small that they can’t be used for writing notes. I think these Stampin’ Up! Note Cards are one of the most overlooked items in the catalog! They are so handy, you should really keep a pack or two on hand. On these thank you notes, I covered the note cards with the designer paper, but you could also quickly stamp an image on the front of the plain note card and write a note inside.  Quick and easy! There are also Crumb Cake Note Cards and Envelopes if that color suits your purpose better!

Why am I mentioning thank you notes now?? Well, sometimes I think it is better to start from the end and work forward! Sometimes I do my packing for a trip this way! For the holidays you know you have shopping and wrapping and cooking and cleaning to do, but by the time you get to handmade thank you notes, you are not going to take the time. So do those now to keep on hand because you KNOW the shopping, the wrapping, the cooking and cleaning WILL get done! And besides, it’s not just Christmas! Maybe you will get a hostess gift from a guest at Thanksgiving dinner or maybe you will be a guest at someone’s house for Thanksgiving. Wouldn’t it be nice to have thank you notes ready to send after Thanksgiving? Which would be more fun?  Getting an email saying “Thank you for the dinner!” or receiving one of these cards in the mailbox with your handwritten note personally thanking your host?? Email is more convenient (unless the recipient doesn’t check their email as timely as you do!) but a handwritten card means and says so much more. And since that’s what we love to do – stamp and make cards – let’s DO that!

Stampin' Up! Note Card Sample

Make it simple for yourself in this busy time. Get a pack or two of note cards and make up a few thank you notes to send when the occasion calls for it.

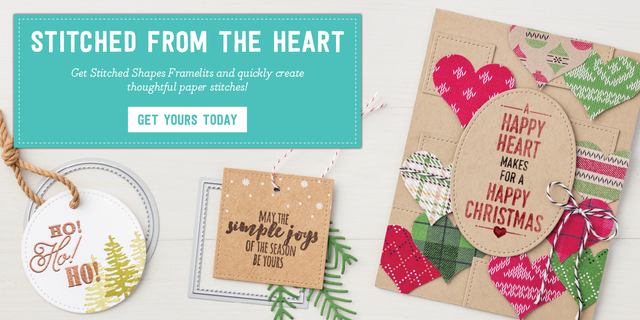
And don’t forget the new Stitched Shapes Framelit Dies available now plus the 25% off sale on select stamp sets!

Stitched From the Heart Cards

Shop Stampin’ Up! Online 24/7 or contact me to help you place your order!


Gift Wrap Ideas With Cellophane Bags


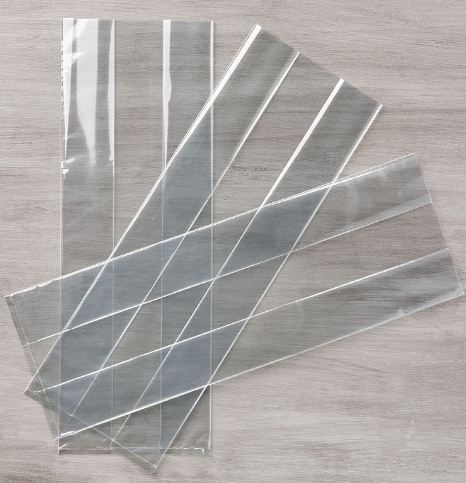
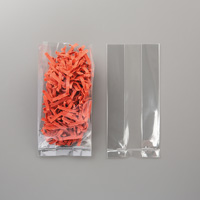
Enjoy this video from Stampin’ Up! and get wonderful gift wrap ideas and maybe just gift ideas themselves using the 6″ x 17″ Gusseted Cellophane Bags.  These are pretty large bags, given the 17″ length, so you can stick a large gift or treat inside! Think about when you are ready to make special treats for the neighbors or a group of friends, wouldn’t these bags be perfect to use for your holiday mix, special bread or cake, bag of cookies or candy, bottle of wine, and more? Just put your gift inside,  tie with a pretty ribbon and add a cute tag! If you don’t want the bag quite so long for a smaller gift, just cut off some of the length.

For another gift presentation when you want the gift to be hidden, just wrap pretty tissue paper all around the gift and insert it in the cello bag! You can also stamp on the outside of the bag if you use Stazon ink.

Remember, presentation is everything!! No matter what the gift, a big part of the thrill will be how you wrap and present the gift, and we stampers have all kinds of materials and ideas to make that the best part!

6x17 Cellophane Bag Gift Wrap

6x17 Cellophane Bags

Stampin’ Up! also carries other sizes of cellophane bags. These are nice bags, completely clear and crisp, not that kind of thick, cloudy, cheaper looking kind of bag you can sometimes buy at other places.

Easy Christmas Card Ideas…and the Stamps Are On Sale!

Tin of Tags Christmas Cards

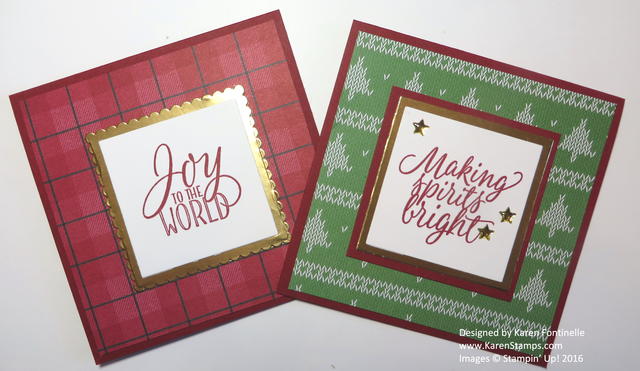
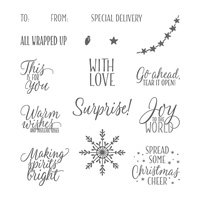
Yesterday Stampin’ Up! announced a 25% off sale of select stamp sets that perhaps coordinate nicely with the newly introduced Stitched Shapes Framelits Dies.  Here I used one of the stamp sets on sale, Tin of Tags Photopolymer Stamp Set, to make two easy Christmas cards! It’s that time of year! I don’t have the framelits yet, but I think they would add a nice touch to my greetings on my cards as a border.

Watch the Stampin’ Up! video below to see how to use the new Stitched Shapes Framelits Dies!

My Christmas cards were very easy to make. I decided to make a 4 1/4″ square card. Instead of cutting the cardstock in half horizontally as we usually do, cut the length to 8 1/2″, then cut in half vertically (well, if you start with a full sheet of cardstock, cut in half vertically and then trim each strip to 8 1/2″.) Score at 4 1/4″ and fold in half. I used a layer of the Warmth and Cheer Designer Series Paper Stack as a background. The greetings on each card are stamped from the Tin of Tags Stamp Set. I die cut the squares with the Layering Squares Framelits Dies, but if you don’t have those, just cut your own squares. I also used the gold Metallic Enamel Shapes to add little accents on the one card.

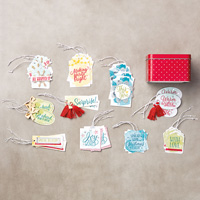
The Tin of Tags Photopolymer Stamp Set of course coordinates with the cute Tin of Tags Project Kit.  Such a fun and easy way to sit down for a little while and make 30 tags to use on your Christmas gifts!  And you still have the cute red tin!  I love red, so in my case, I bought the red tin and the kit just came with it!!  But you can use the stamp set a million ways without the project kit, so don’t let that stop you.

To see all the stamp sets on sale during November and the Stitched Shapes Framelits Dies, just click the link below!

Shop the 25% off Stampin’ Up! Stamp Sale on select stamp sets!

Get On My List for 12 Weeks of Christmas!

12 Weeks of Christmas Holiday Emails

Now that Halloween is over, you know Christmas is just around the corner and the time to be working on cards and gifts is here! Every week I send out a special holiday email to my mailing list subscribers with a new holiday idea! We have already done four weeks of cards!  Next up are gift ideas and then gift wrap ideas. You can still get the rest of my 12 Weeks of Christmas emails if you sign up today! The next issue goes out in less than 24 hours!  You don’t want to miss any!

Join my Mailing List in the red box in the upper right side of my blog, or in the pop-up that may appear on your screen! It’s easy and no obligation! Join us today!

12 Week of Christmas – Week 5 – goes out tomorrow!  

Sign up in the red box on the right!

Need More Christmas Trees For Your Home?

Stampin' Up! Paper Christmas Trees Kit

Images © Stampin’ Up! 2016

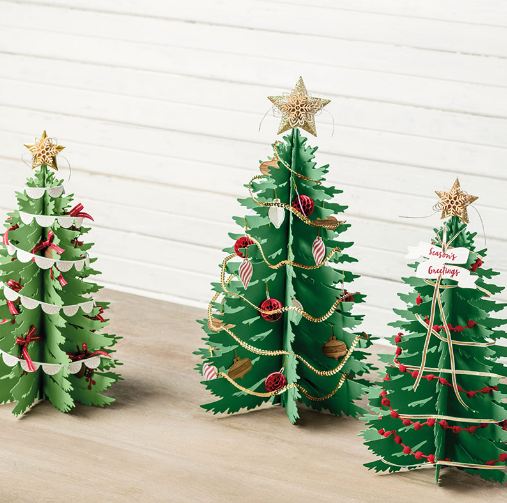
Don’t forget that Stampin’ Up! has extra Christmas trees for your holiday home decor in the Forever Evergreen Project Kit in the Stampin’ Up! Holiday Catalog. There’s always another little nook or cranny where you need a little Christmas, so you could use this kit for your own crafting fun and have something useful at the end.

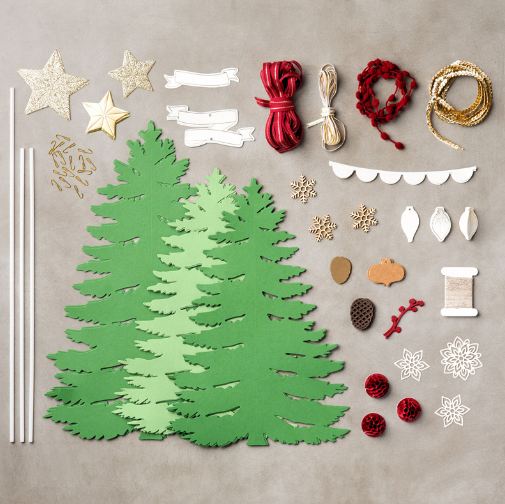
Here are the contents of the kit:

Stampin' Up! Christmas Trees Kit Contents

Images © Stampin’ Up! 2016

Watch the video below with Carrie Cudney of the Stampin’ Up! Home Office show you how this kit goes together!

These Stampin’ Up! kits are great because the project is already designed for you! If you like, add on the Forever Evergreen Photopolymer Stamp Set.

Order this Forever Evergreen Project Kit today and you’ll be ready way before Christmas!

Make a December Project Life by Stampin’ Up! Album Now


December will be here before we know it, so be prepared to document your December days or even the holidays with a Project Life album all ready to go!  Nothing could be easier or cuter! Watch how Donna Griffith from the Stampin’ Up! Home Office goes about making hers with the Project Life Hello December 2016 Card Collection and Accessory Pack. If you want to keep it super simple, just use the cards and your photos.  You can always go back and get fancy with embellishments later, just get the photos and some journaling into an album right away. However, the Accessory Pack is a cute bag of goodies, you just might want it on hand regardless! This is the album that Donna refers to in the video, the Emerald Envy 6″ x 8″ Project Life Album.

Here is a link to the template she shares:  Project LIfe Template

Watch the video below by Holly at the Home Office and find out more about the Project Life Hello December 2016 Card Collection and Accessory Pack.  They are so much fun!

To order any of these Project Life products and others, please visit the Project Life section in my Stampin’ Up! Online Store!

Stampin’ Up! Fancy Frost Textured Designer Paper

Stampin' Up! Fancy Frost Textured Designer Paper

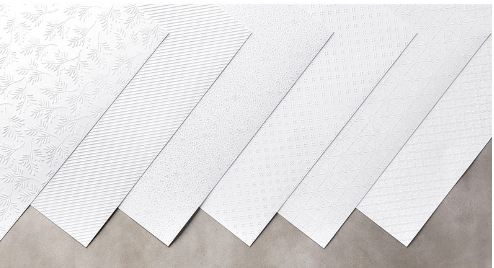
Have you seen this beautiful textured paper in the Stampin’ Up! Holiday Catalog, the Fancy Frost Specialty Designer Series Paper?  It is different than anything Stampin’ Up! has every had that I can remember!  You might think at first glance that it is embossed paper but it is not. The designs are dry embossed on the paper and they are beautiful! The photo above certainly does not do them justice. Watch the video below.  You can leave the paper plain white or you can add color to the raised patterns!

If you want to try this beautiful paper, just add it to your order when you shop at the Stampin’ Up! Online Store!

Santa’s Sleigh Modern Christmas Tree Card

Santa's Sleigh Modern Christmas Tree Card

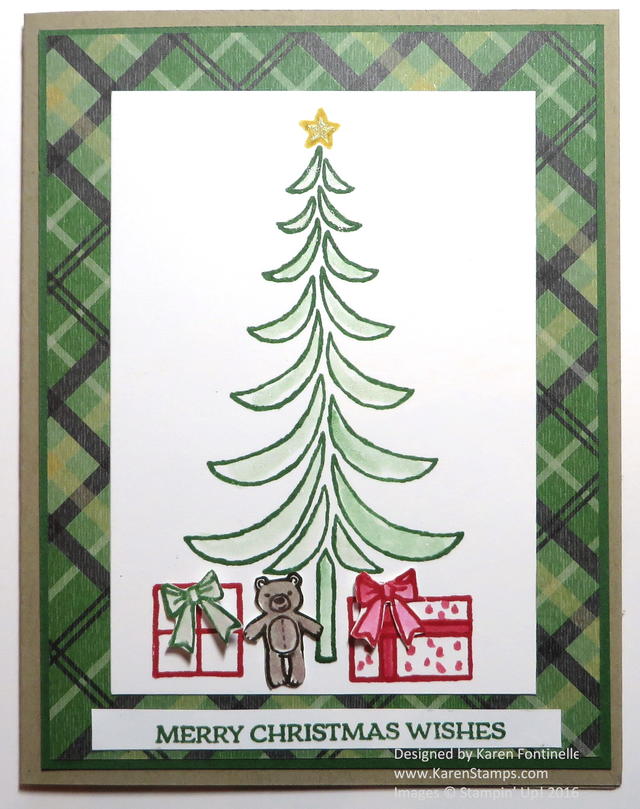
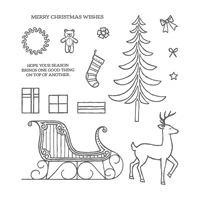
Yesterday I posted this card on my blog to draw attention to my 12 Weeks of Christmas holiday emails beginning, but today I thought I would tell you about the card Santa’s Sleigh Modern Christmas Tree Card itself.  The reason I bought this stamp set, Santa’s Sleigh, was for the sleigh and the reindeer and the beautiful framed art in the Holiday Catalog on page 24. But I haven’t gotten around to playing with those yet!  However, I have seen a lot of pretty cards made with this modern looking Christmas tree. Of course it wouldn’t have to be a Christmas tree, it could be any tree!

The card base is Crumb Cake, but Early Espresso is also a coordinating color with the designer paper, Warmth & Cheer Designer Series Paper Stack.  I love this paper stack and you certainly will be able to use it during the winter past Christmas!  If you have any left by then! The designer paper is layered on a piece of Garden Green. I was trying to keep this card super simple since I was in a rush, but after I stamped the tree and the packages, I thought it would be fun to color in a little bit and cut out the bows for the packages and pop up the little teddy bear. I also used the Clear Wink of Stella Glitter Brush on the tree branches, although it doesn’t show up in the photograph.  I used the Gold Wink of Stella Glitter Brush on the star at the top of the tree.  The greeting is in the stamp set and I just cut a very narrow piece of paper after it was stamped so it would fit on the front of the card!  Just stamping this card gave me ideas for other cards.

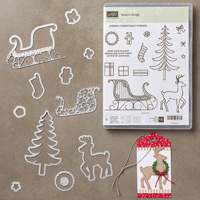
You can get this Santa’s Sleigh Photopolymer Stamp Set and the matching framelit dies in the Santa’s Sleigh Bundle and save 10%!

If you would like to make some cards and many other projects with this Santa’s Sleigh stamp set or Bundle, you can shop at the Stampin’ Up! Online Store HERE!

Less Than 24 Hours Until My 12 Weeks of Christmas Holiday Emails Begin!

!2 Weeks of Christmas Banner


Do you love to get ideas for handmade Christmas cards, holiday gifts, gift wrap ideas and holiday tags?

If so, then you will want to be on my Stamping With Karen mailing list!  In less than 24 hours, I will begin sending out my 12 Weeks of Christmas Holiday Emails, and the only way you can get them is to be on my mailing list!

Sign Up in the red Mailing List sign up in the upper right corner of my blog!

Every week on Wednesday at 1:00 pm Central Time you are going to receive via email a holiday project idea complete with instructions and list of supplies. We will start with Christmas cards, then some gift ideas, and finally wrapping ideas, bags and tags.  You can copy these ideas or use them for inspiration to come up with your own creations!

The 12 Weeks of Christmas emails are a gift from me to my newsletter subscribers! I appreciate your loyalty and interest and hope that you enjoy these extra holiday ideas! These projects will not be seen on my blog, Facebook page or anywhere else, just in this special email. By the end of twelve weeks, you will have twelve wonderful holiday projects that you can complete or be inspired by!

If you would like to receive these 12 Weeks of Christmas Holiday Emails, you must be subscribed to my mailing list by October 5th at 1:00 pm Central time or you will not receive these great projects!

Sign up in the red Mailing List Box in the upper right side column of my blog! You will also get a free gift just for signing up!

*If you already receive my regular newsletters, then you are already on my list and will be getting the 12 Weeks of Christmas emails. You do not need to do anything!

I hope you will join us for 12 terrific holiday ideas! There’s nothing I like better than looking for more and more ideas!

Stamping with Karen 12 Weeks of Christmas

Sign Up for Stamping with Karen “12 Weeks of Christmas” Holiday Card and Project Ideas

Gingerbread man and woman for Christmas holidays

Christmas Is Coming!

Do you need ideas for handmade Christmas cards, gifts, wrapping and tags?

If you do, then join my Stamping With Karen mailing list today to receive my special holiday newsletter every week up until Christmas! Sign up in the red Mailing List box in the upper right!

I’m excited to announce that I will begin sending out my annual 12 Weeks of Christmas holiday emails one week from today on Wednesday, October 5, 2016!  Every week you are going to receive via email a holiday project idea complete with instructions and list of supplies.  We will   start with Christmas cards, then some gift ideas, and finally wrapping ideas, bags and tags.

The 12 Weeks of Christmas emails are a gift from me to my newsletter subscribers! I appreciate your loyalty and interest and hope that you enjoy these extra holiday ideas!  These projects will not be seen on my blog, Facebook page or anywhere else, just in this special email. By the end of twelve weeks, you will have twelve wonderful holiday projects that you can complete or be inspired by!

If you would like to receive these 12 Weeks of Christmas holiday emails, you must be subscribed to my mailing list by October 5th at 1:00 pm Central time or you will not receive these great projects!

Sign up in the red Mailing List Box in the upper right side column of my blog! You will also get a free gift just for signing up!

*If you already receive my regular newsletters, then you are already on my list and will be getting the 12 Weeks of Christmas emails. You do not need to do anything!

The 12 Weeks of Christmas emails always get a positive response, so I hope you will join us at Stamping With Karen for this gift I love to send to my newsletter subscribers!

Fun Gift Wrap with the Stampin’ Up! White Gift Boxes

Christmas Decorated White Gift Box

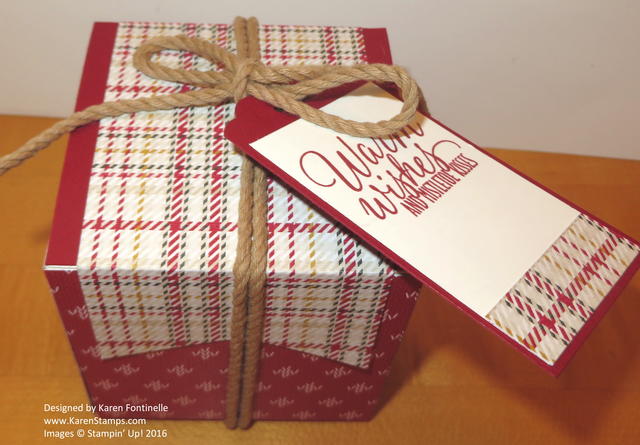
Something you might overlook in the Stampin’ Up! Holiday Catalog are the White Gift Boxes that can be decorated in so many different ways for Christmas and any occasion! These boxes are 3″ on each side, so a decent size for a gift or treats – not too big and not too little. Leave them plain and just tie on a ribbon and a tag or decorate fully however you like. An added bonus is that they come with acetate sleeves that you can slip over the box. It just doubles the decorative possibilities! The boxes themselves have a rather slick surface so it is best not to stamp directly on the box. If you really want that look, I would just stamp on Whisper White cardstock and then adhere that to the sides of the box.

To decorate my White Gift Box, I decided to cut squares from the 6″ x 6″ sheets of the Warmth & Cheer Designer Series Paper StackOn the top of the lid I adhered a piece of Cherry Cobbler cardstock and made sort of a double-ended banner strip to lay across the top. I glued down the top and the back but left the front flap unglued so the person can open the box!  It stays down with the Kraft Rope Trim. This is a fun kind of “ribbon” to use on packaging and projects – not too heavy and easy enough to tie in a bow!

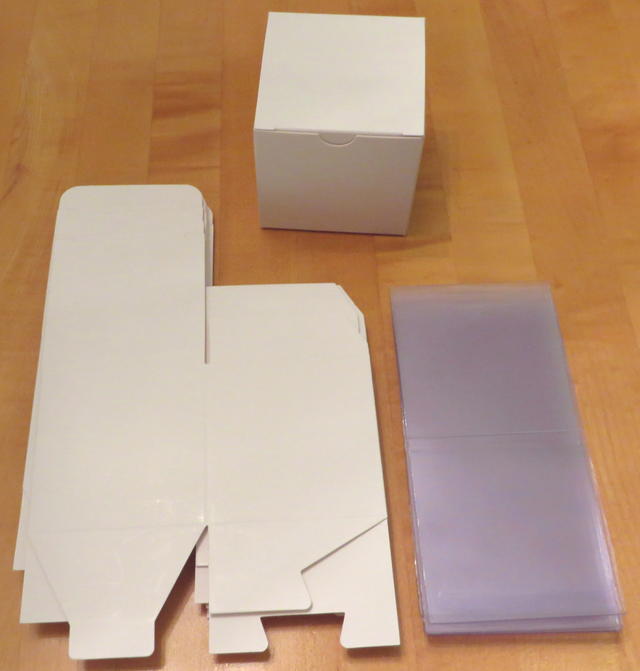
Here is what the White Gift Boxes look like out of the package!

Stampin' Up! White Gift Boxes

You get 8 boxes for $8.00 and they are food safe. You know right well you will be scrambling for just the right size box for a gift during the holidays, so grab a couple packages of these and have them ready to go.  Even if you don’t decorate them except for ribbon and a tag, they will look snazzy and high quality, especially with the acetate sleeve around them!

Since these boxes are food safe, maybe you would put in a stack of homebaked cookies or candy! You could also put the treat in a cello bag and then into the box. And the boxes aren’t just for Christmas, obviously. Special Halloween treats or a Thanksgiving mix or cookie would be great. Not to mention birthdays and any gift-giving occasion!

For the tag on my gift box, I just grabbed a scrap of Cherry Cobbler and put it in the Scalloped Tag Topper Punch.  I trimmed the Whisper White layer with a scrap piece from the Warmth & Cheer paper to match the box.  The greeting is stamped in Cherry Cobbler ink with a stamp from the Tin of Tags Photopolymer Stamp Set.

Find these White Gift Boxes, paper, ribbon, adhesives, tag punch, stamps – everything you need for gifting – in the Stampin’ Up! Online Store HERE! If you need help with your order, just contact me.  I’m happy to put your order in for you if you prefer!

Do you need a copy of the spectacular Stampin’ Up! Holiday Catalog? Email me with your contact information if you are interested in Stampin’ Up! products at Karen@Karenstamps.com. I have some extra catalogs in stock!

Candy Cane Lane Handmade Christmas Gift Box

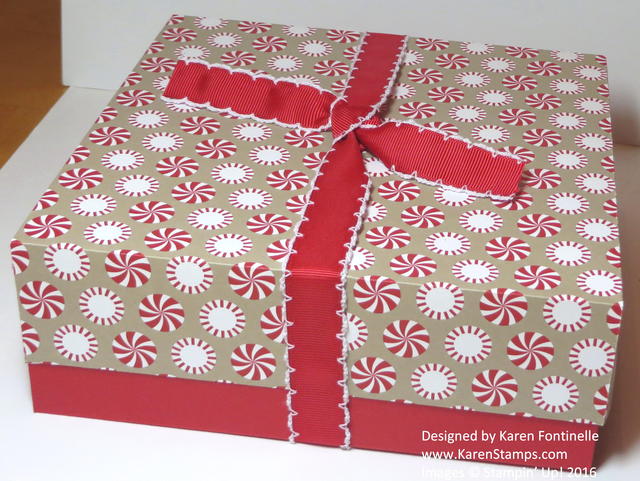
Candy Cane Lane Handmade Christmas Gift BoxIf you think this Christmas gift box is cute that I made with the Candy Cane Lane Designer Series Paper, you will be happy to know you can easily make handmade gift boxes also!

Today I watched a Stampin’ Up! video with Donna Griffith who shows us how to make a square box like this out of a sheet of designer paper for the lid and  cardstock for the box itself. She also demonstrates how to make a rectangular box and explains her formula for making any custom size box. It is really a great video and plenty of extra tips, like how to use Fast Fuse Adhesive!

I’ve made boxes from templates before, but somehow watching this video made it look very easy even without a template! The box I made in the photo above uses a 12″ x 12″ sheet of Real Red cardstock, which you can purchase in the Holiday Catalog if you want a whole package of red!  You probably will want it to use with the darling Candy Cane Lane Designer Paper.

I tied the box with the Real Red 3/4″ Stitched Edge Ribbon. This ribbon will be a beautiful embellishment on any packages or projects!

Watch this video and tell me that you do not want to rush right over to your crafting table and make a box after watching Donna!

If you need the beautiful Fancy Frost Specialty Designer Paper that Donna used or the Candy Cane Lane DSP that I used, or any other Stampin’ Up! supplies, please visit my Stampin’ Up! Online Store HERE! I’m also happy to put in your order, too! And while you’re at it, be sure to check the Special Offers and the Clearance Rack.

Need a Stampin’ Up! Catalog and/or Holiday Catalog?  Just email me with your contact information at Karen@KarenStamps.com.

Shop Stampin’ Up! Online 24/7

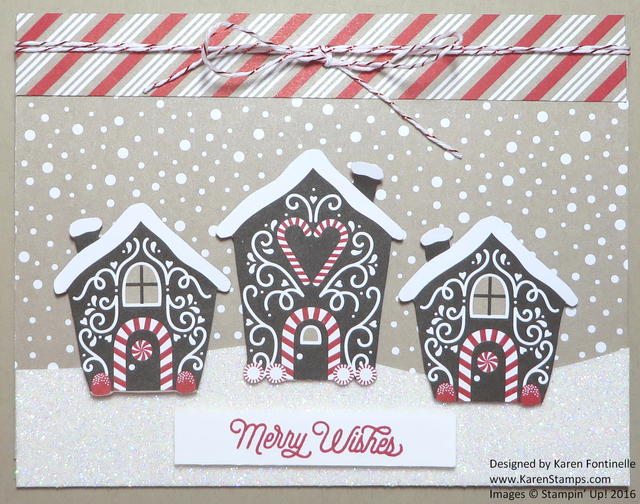
Candy Cane Lane Houses Christmas Card

Candy Cane Lane Houses Christmas CardWhat’s not to love about this Candy Cane Lane Designer Series Paper with all the cute images and pretty patterns?! Once I had the idea, it was very simple to make this Candy Cane Lane Houses Christmas card mostly by just cutting out the cute gingerbread houses on one of the sheets of designer paper.

The card base is just Crumb Cake and covered with a pattern in the Candy Cane Lane DSP that looks like snow. To look almost like real snow, I cut a piece of Dazzling Diamonds Glimmer PaperI measured the width of the card for the strip and then just freehanded the curvy cut. The houses are cut out from the DSP with my Paper Snips and popped up on Stampin’ Dimensionals. Mostly to use another piece of the fun paper, I cut a 3/4″ strip of another pattern to place at the top of the card and tied some Candy Cane Lane Baker’s Twine (the white with red metallic thread!) around the top.  For the greeting, I needed something small and I found this cute greeting in the Oh What Fun Photopolymer Stamp Set.

Here are the Week 2 Special Offers from Stampin’ Up! 

Stampin' Up! Special Offers Week 2

Check out the Stampin’ Up! Special Offers today! Add them to your order!

The Gnomes Sneaking a Peek at Stampin’ Up!

For your weekend viewing pleasure, I hope you will enjoy these Stampin’ Up! videos about the sneaky gnomes trying to get a peek at the new Holiday Catalog products at the Stampin’ Up! Home Office!  You’ll also get to see some sample projects!  We Demonstrators got to see these videos as our sneak peek at the new products right before we got to preorder and now they are available for our customers to watch!  Enjoy!!

And after you are dying to get your hands on some of these new Holiday Catalog products, just click HERE to shop!