Category Archives: Christmas

Home For Christmas Gold Glitter Ribbon Card

Home For Christmas Gold Glitter Ribbon Card

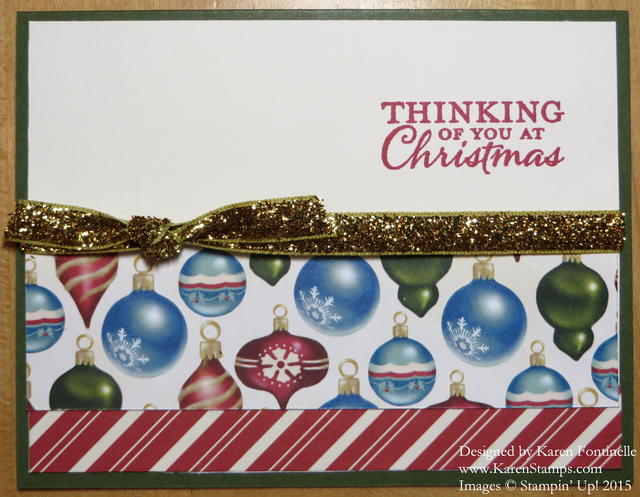
Time is getting short so I thought I would show you a quick and easy card in this Home For Christmas Gold Glitter Ribbon Card. It’s one of the simplest ways to make a card.  Make a card base – in this case – Mossy Meadow Cardstock. Cut a layer of a neutral cardstock – in this case- Very Vanilla. Add a strip of designer paper to the bottom and stamp a greeting in the blank space above. Tie a ribbon or another strip of cardstock across the card at the top of the designer paper.  So easy!

On this card, as I was cutting the strip of designer paper from the Home For Christmas Designer Series Paper in the Holiday Catalog, the other side of the ornament pattern is the red and white stripe!  I had a narrow strip of that left over, so I thought why not put a strip of the stripe at the bottom?! Then I adhered a piece of the Gold Glitter Ribbon (on sale!) across the top of the designer paper (SNAIL on back edges) and tied a little piece of ribbon on for a knot (easier than a bow!). I stamped a greeting from the Embellished Ornaments Stamp Set and it was done!  Since the card base is a dark color, I also cut a layer of Very Vanilla to put inside and stamped the other greeting from the stamp set for the inside of the card.

If you haven’t made some Christmas cards yet, there is still time, especially if you choose an easy design like this Home For Christmas Gold Glitter Ribbon Card.

Order Stampin’ Up! Online HERE!

Embellished Ornament Christmas Card

Embellished Ornament Christmas Card

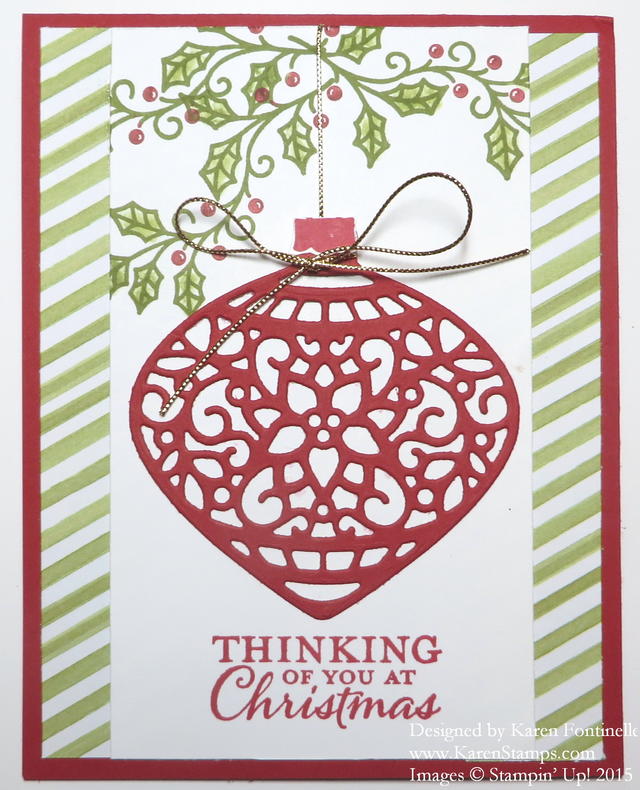
Sometimes it pays to do a little housecleaning because I found an old idea I had saved for a card similar to this layout for this Embellished Ornament Christmas Card. It’s a little stamping, a little Big Shot die-cutting and pretty paper!

Die cut an ornament with the Delicate Ornament Thinlits Dies and the Big Shot. Make. a card base of Real Red cardstock. Cut a piece of Whisper White cardstock for the center panel about 3″ wide x 5 1/4″ high. Stamp holly leaves at the top of the panel from the Embellished Ornaments stamp set. I colored mine in a bit using a Blender Pen and picking up a little bit of ink from the Old Olive ink pad. I should also mention I used the Blender Pen to pick up ink off the holly berries on the stamp and used a Real Red Stampin’ Write Marker to color in the berries. Then the ornament is placed on the panel with a little Gold Cording Trim to “hang” from the holly leaves and to tie a bow around the ornament top. The greeting is stamped at the bottom and is from the same stamp set.  There is also a greeting to use to stamp inside the card.

I adhered two narrow strips (about 1″) of the green stripe pattern from the Season of Cheer Designer Series Paper to the Whisper White panel and then adhered all this to the card base. As you can see, even if you do not have “Christmas” paper, you can use something else on a Christmas card and no one will know it is not “Christmas”.

Be sure to check out the Stampin’ Up! Year End Sale!  Lots of good discounts on there and products you can use right now, like boxes and ribbon for gift-wrapping! Only available while supplies last so order early for best selection, as they say! For all the details, read my post from yesterday.

This is a great weekend to make some simple Christmas cards to send out to your friends and family. Try something like this Embellished Ornament Christmas Card – use a stamp if you don’t have the particular framelit.

Shop Stampin’ Up! Here

Stampin’ Up! Year End Sale 2015

Stampin' Up! Year End Sale 2015

It’s the end of the year, so we’re cleaning our inventory and making room for new products–and we’re offering you some great savings while we do it! We’re adding more products to our clearance rack and discounting select items from the holiday catalog. (Products on the Holiday Retiring List are now discounted up to 40 percent.) During the Year-End Sale, you can find ALL discounted products in one location in the online store: under the Year-End Sale category. So don’t fret if you don’t see the category “Clearance Rack” on the online store right now–it has been integrated into the Year-End Sale.

Details:

  • Promotion Dates: December 10, 2015-January 4, 2016.
  • No minimum purchase required.
  • No refunds or exchanges on Year-End Sale items.
  • Items offered during the Year-End Sale are while supplies last.
  • You can add non-Year-End-Sale items to your order.
  • Year-End Sale orders are eligible for Stampin’ Rewards with qualifying orders
  • Following the Year-End Sale, some remaining items may stay in the Clearance Rack. Other items may be removed from the Clearance Rack to be added at another undetermined time.
  • Orders must be placed online or as demonstrator orders.
  • Deadlines:
    Online orders: January 4, 2016; 11:50 PM (MT)

Don’t forget the Weekly Deals!

Retiring Holiday Catalog products discounted up to 40%!

Go shop right now!  Sale products only available While Supplies Last! (and you know sometimes that is not long!)

Shop the Stampin’ Up! Year-End Sale HERE!

Tree Punch Christmas Tree Tag

Tree Punch Christmas Tree Tag

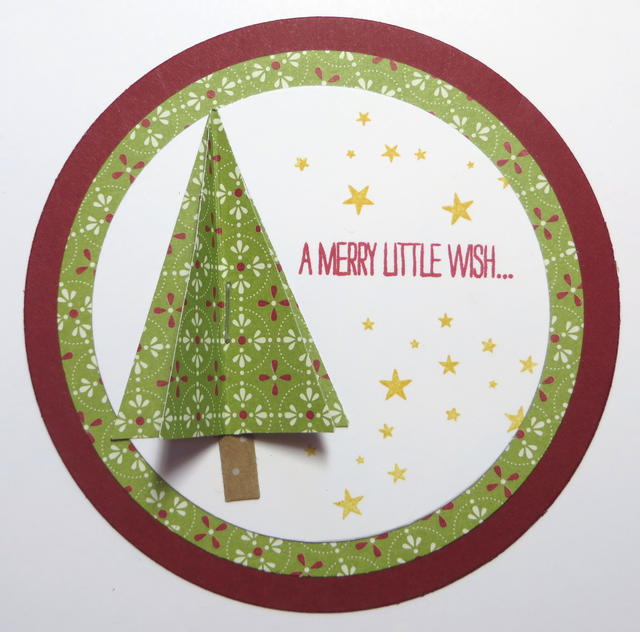
Here is my Tree Punch Christmas Tree Tag, a sample tag I had made for our tag-making day last weekend.  The designer paper I used is retired, from last year I think, a paper stack called Festival of Prints. This was a sample to see if I liked the tree so it didn’t matter what I used. Of course you can use any paper or stamped card stock. I also had cut out circles of Gold Glimmer Paper to use as layers instead of the designer paper and that looked really pretty too – just didn’t take any photos. The tag base is Cherry Cobbler (because I was out of Real Red, if you can believe it!) The stars are stamped in Crushed Curry ink from the To You and Yours Too Stamp Set. This is the stamp set that coordinates with the To You & Yours Shaker Card Kit.

To make the tree, just punch two trees with the Tree Punch and either cut off the tree trunks and add one you cut yourself from a sliver of a scrap or leave the bottom one on.  Fold the trees in half lengthwise, open, then using the Stampin’ Up! cute Handheld Stapler, staple in the center longways on the fold.  This will hold the trees together but allow them to be separated and fluffed up to look 3D.  I guess no reason you couldn’t staple three trees together for more oomph!  Punch a hole in the top and string ribbon through for a tag or use it for an ornament!

Stampin' Up! Paper Pumpkin Monthly Papercrafting Kit

It’s time to remind you about Paper Pumpkin!  The 10th of the month is always the date to be signed up by to receive that month’s kit. Sign up today or tomorrow and get the December kit in the mail around mid-month. Order extras and give as a gift or give it to yourself as a gift for all you are doing for everyone else right now in this busy season! Paper Pumpkin is a monthly subscription from Stampin’ Up! with a surprise inside that comes in the mail.  Each month is a new papercrafting/stamping kit complete with all the supplies for the project except for basic adhesive and scissors (if even needed). You receive a set of photopolymer stamps, a small ink spot, and all the supplies for the project.  It might be cards or gift boxes or a mini album or a decor piece or party favor or candy holder — it’s always a surprise! Paper Pumpkin has gotten tons better since it started so if you tried it way back when, you really need to try again and see how it has improved.  Lots more stuff!!  Make the project the way it is designed or do it your own way. No obligation, stop when you need to or just pause your subscription for a month or two.

Join Paper Pumpkin Today!  Click HERE for information or to sign up!

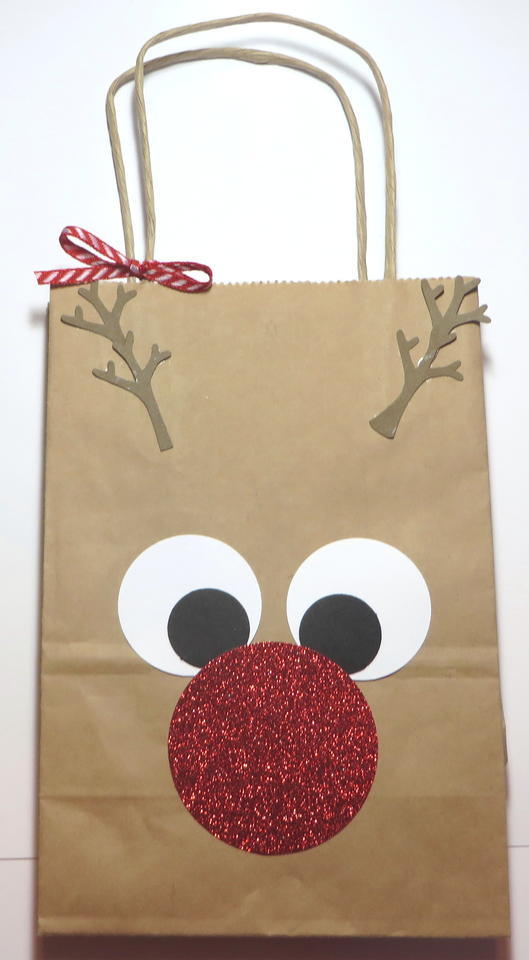
Decorate a Rudolph the Red-Nosed Reindeer Gift Bag

Rudolph the Red-Nosed Reindeer Gift Bag

As I was looking through Instagram, I found cute little reindeer boxes made with the Baker’s Box Framelits by @thepapercaper, a Stampin’ Up! Demonstrator in Australia named Jessica. It reminded me that I had a small plain kraft gift bag laying on my desk waiting to be decorated, so I thought this might be the perfect inspiration!  So easy, so simple! Jessica’s had the box lid open and little ears and candy canes, but of course my bag was different and I didn’t have any candy canes yet.

I made a great big red nose for Rudolph with the Red Glimmer Paper, punched with the 2 1/2″ Circle Punch. The eyes are punched with the 1 3/4″ Circle Punch and the 1″ Circle Punch.  For the antlers, I came up with punching the tree branch with the Tree Builder Punch (the one that coordinates with the Ronald McDonald stamp set, Sprinkles of Life).  I punched four branches or trees and trimmed the ends of two of them so I could glue one behind the other to look like antlers.  Since they are rather delicate being so thin, I didn’t have them pop up from the top of the bag or they would probably get bent up pretty easily, so I just glued them to the top corners of the gift bag. And for a little extra color, and to resemble the candy canes, I tied on a bow with the Real Red 1/8″ Striped Ribbon.

If you are looking for a cute and simple way to decorate a gift bag or a gift box or even the front of a card, try making this cute punch art Rudolph the Red-Nosed Reindeer.

If you enjoyed this project, please join me and sign up for my Mailing List!  You will see the red sign-up box in the upper right of my blog!

Join My Mailing List


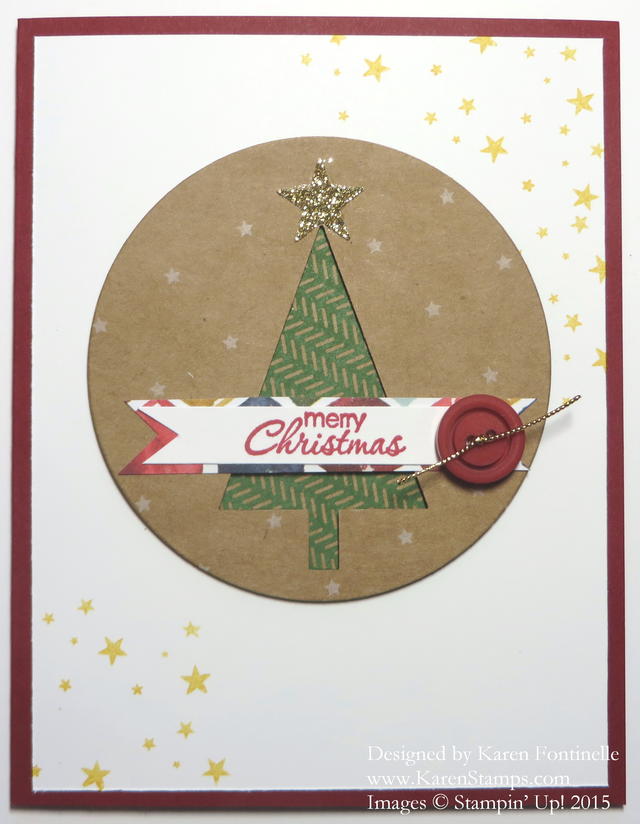
Christmas Tag Card

Christmas Tag CardYesterday my friend and I (and her little daughter) had a wonderful Sunday afternoon making Christmas tags for a certain group of children, teenagers I believe. Not only is it  fun to stamp, but it is especially fun to stamp with someone else! I had made several tag designs for her to choose from and in the end, she let her daughter choose which tag we would make!  Then we all dove in and stamped and punched and Big-Shotted and glued!

I chose some retired paper to use called Under the Tree. It is a heavier weight kraft paper, kraft colored with a white pattern on one side and a colored design on the other. So once we punched 24 tree shapes with the Tree Punchas I was cleaning up, I noticed I now had a bunch of trees with the colored pattern on the other side!  Something cute to use on another project! So today I decided to use that same tag design to make a Christmas card and insert the punched out tree back into the tree shape hole but flip it over so the colored pattern on the back would show. Yesterday to make the tags, we stamped the tree with one from the Festival of Trees Stamp Set in the Annual Stampin’ Up! Catalog.

The card base is Cherry Cobbler card stock with Whisper White stamped with a few Crushed Curry stars from the stamp set To You & Yours Too.  The star is punched from Gold Glimmer Paper with the star punch in the Itty Bitty Accents Punch Pack. For the circle I needed to use the Big Shot and the circle framelit that is a bit over 3″ wide. On this card, and also the tags yesterday, the top layer is popped up with several Stampin’ Dimensionals so there is a little space between the layers,. For the greeting I used a stamp in the Petite Pairs Stamp Set. It is layered, on this card, on a little strip of paper from the Season of Cheer Designer Series Paper. And for a finishing touch, I tied some Gold Cord through a (retired) red button and stuck it on with a Glue Dot.

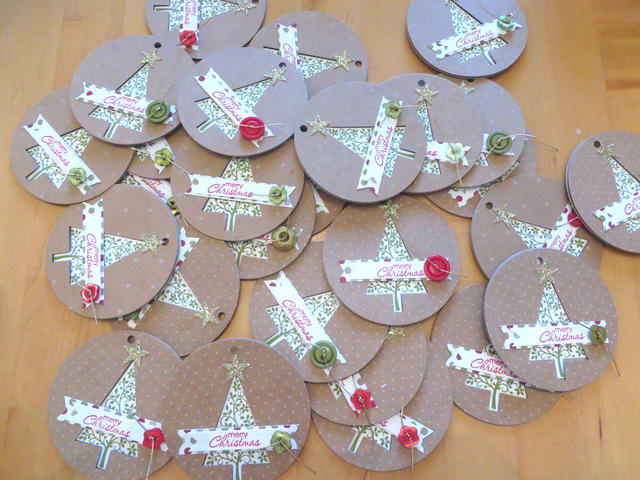
Here is a photo of our pile of finished Christmas tags for the kids.

Christmas Tags for Kids

Whether or not  you have this exact paper, you can use something similar – or look around in your retired stash and remind yourself of what you have!  Make some tags, decorate some bags, or make cards, but just enjoy the process!  And if you can do it with a friend, all the better!

It’s not too late to order some Christmas stamp sets or supplies to make Christmas cards and projects if you haven’t already!

Shop at my Stampin’ Up! Online Store HERE or contact me to put your order in for you. Don’t forget about the current Weekly Deals!  These end tonight at 11:50 pm MT.

Weekly Deal Dec 1 2015

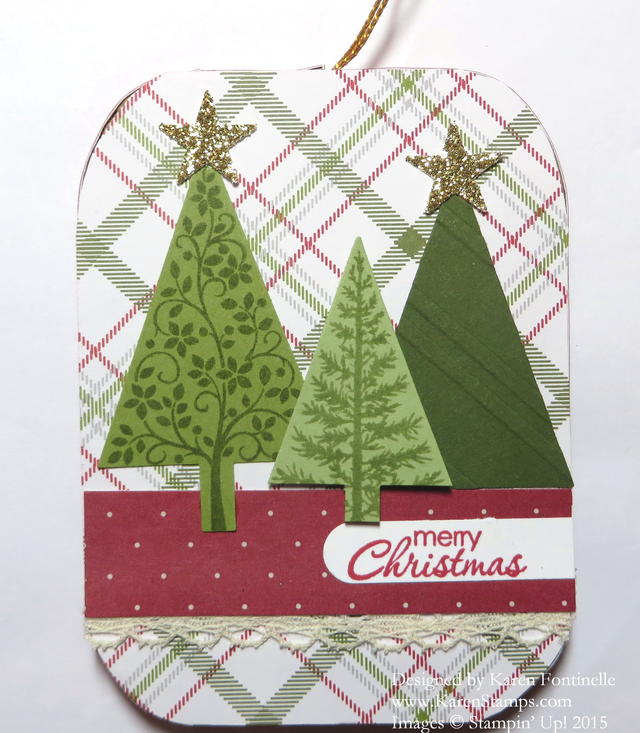
Festival of Trees Paper Mache Ornament

Festival of Trees Paper Mache Ornament

Check your craft stash and see if you have any of these paper mache ornaments. I found one in my closet and decided to decorate it using the Festival of Trees Stamp Set and Tree Punch. If you want to save 15% you can purchase the stamp set and punch in a Bundle!

To cover the paper mache ornament, I used a pattern from the Merry Moments Designer Series Paper StackFirst I traced around the ornament on the back side of the paper and cut it out with Paper Snips.  You could also glue down the paper leaving just a small overhang and then trim it off rather than doing the tracing.  I used Multipurpose Liquid Glue. On the sides of the ornament I cut narrow strips of paper and glued those on.

Once you have the ornament covered, just add whatever you like.  I added a strip of the other side of the paper and a piece of Venetian Crochet Trim.  The greeting is from Petite Pairs.

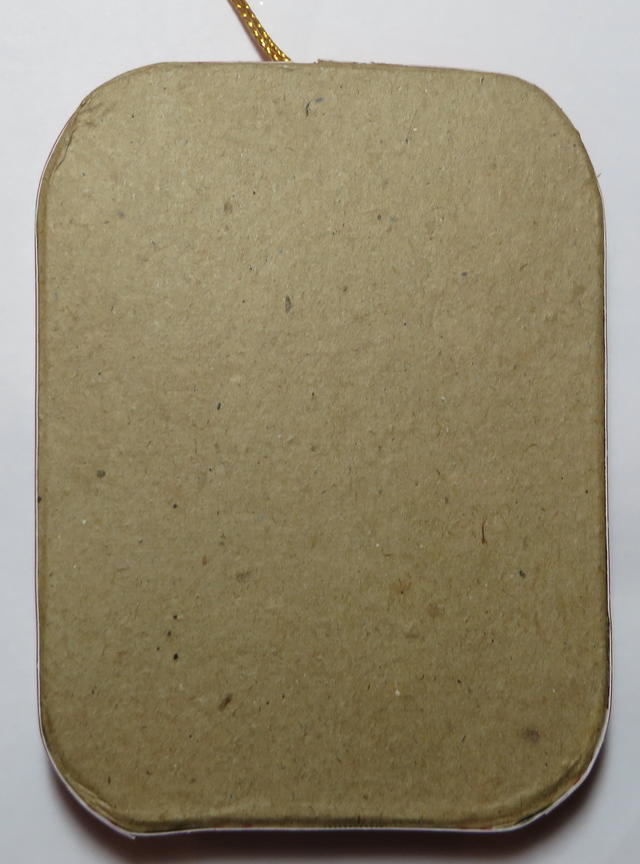
Here is the backside of the ornament so you can see what it looked like to start.

Paper Mache Ornament

Sometimes it is a good idea to dig around in your craft closet or room and see what you can find and then make something! That’s how this Festival of Trees Paper Mache Ornament came to be!

There’s still time to order stamps, ink, and paper to make a few Christmas cards or projects! Just shop at my Stampin’ Up! Online Store HERE.

To You & Yours Shaker Christmas Cards Kit

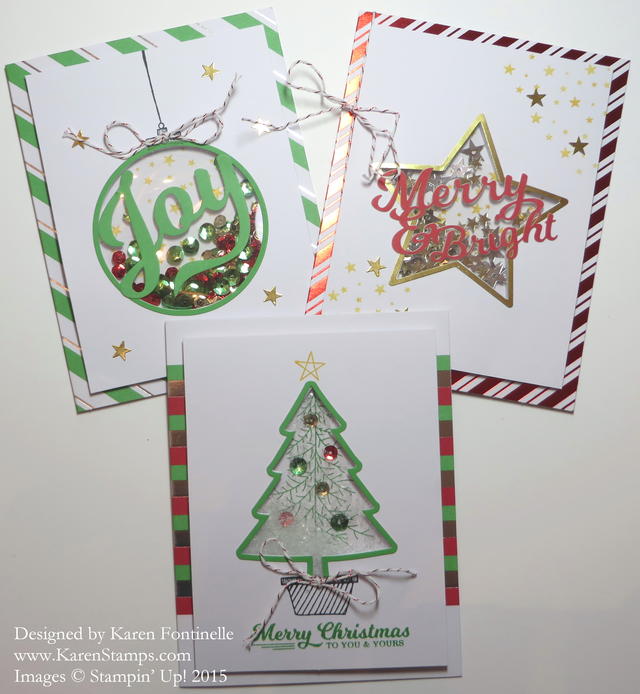
To You & Yours Shaker Cards

I had such a nice time putting together this To You & Yours Shaker Christmas Cards Kit to make these fun shaker cards.  Shaker cards have some kind of “container” that holds glitter or sequins or beads so that when you shake the card, the fillers move around. I think the recipients of these kind of cards will really enjoy them.  You don’t want to overfill any shaker cards because then they won’t “shake” and you won’t see the background image, but you want just enough that the person can see the filling and enjoy shaking the card!

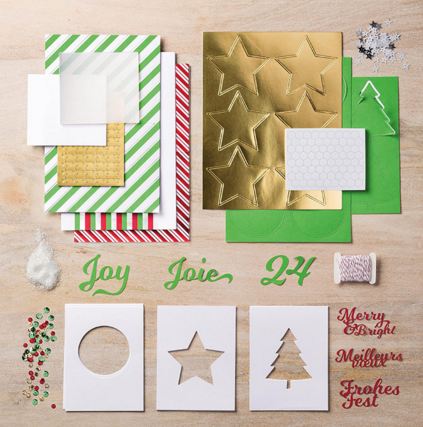
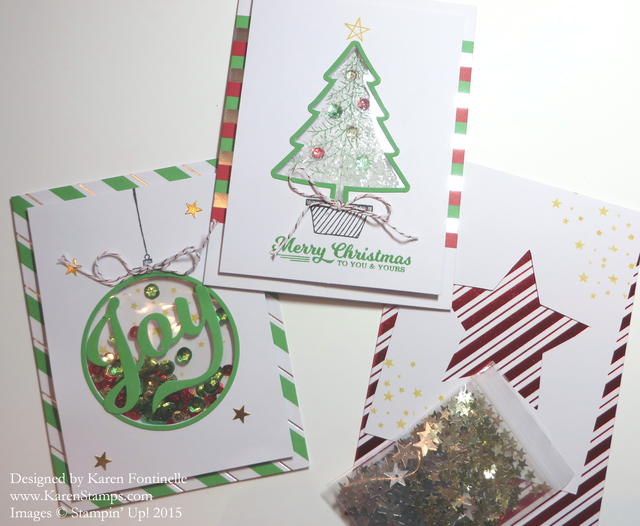
Here are the pretty supplies that come in the To You & Yours Shaker Card Project Kit, including some words in other languages since this is a “global” product. The kit makes 18 cards, 6 each of 3 designs. After you make all the cards, I still had plenty of glitter, sequins and stars leftover, plus some of the “negatives” left behind after pulling off the outline adhesive images that went around each window that I can use on other projects,

To You & Yours Shaker Card Kit Supplies

Here are close-ups of the individual cards, a little difficult to photograph with the window sheet and foil on the card base.

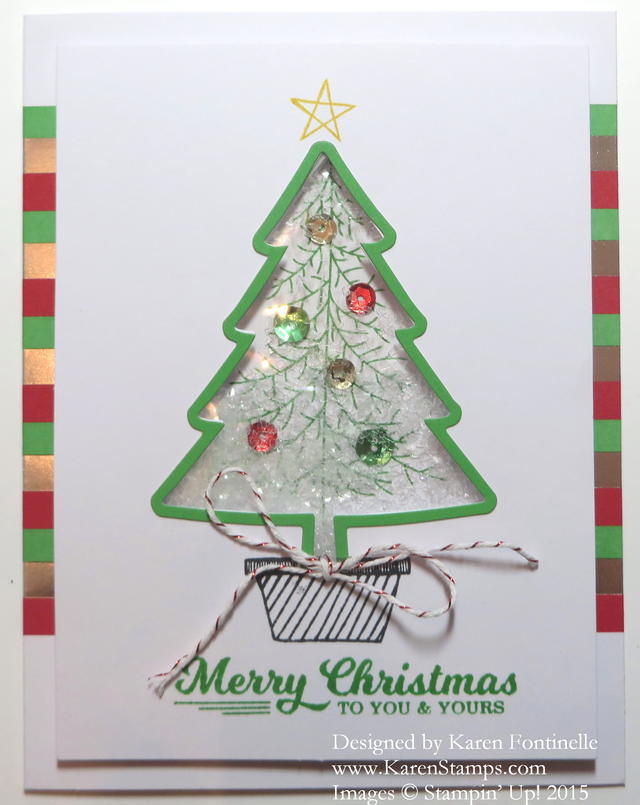
On this Christmas tree card, the tree branches are stamped on the background piece and then the colored sequins are glued on.  You can see the white glitter inside the shaker.To You & Yours Tree Shaker Card

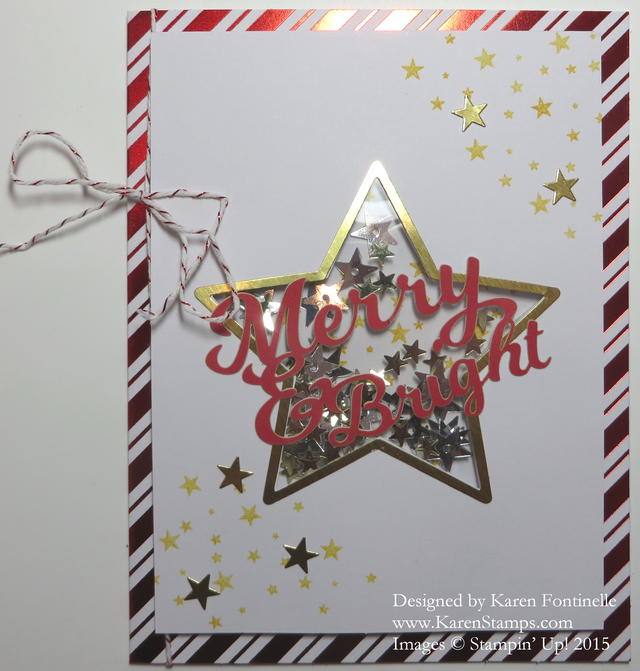
This Christmas star card has some stars stamped on the background in the window and also on the corners of the card.  Then you get star sequins that go inside plus some tiny adhesive stars to stick on the front of the card.To You & Yours Merry Card

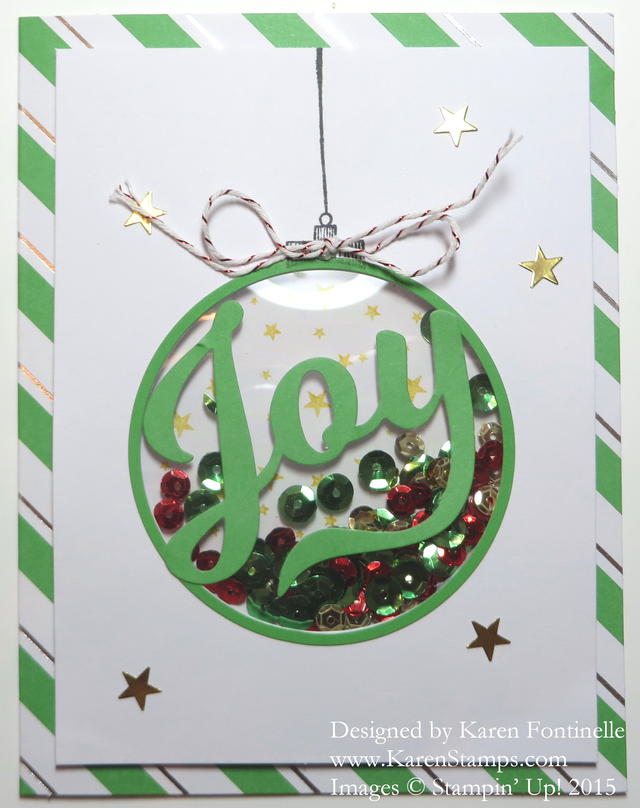
The Christmas Ornament card has colored sequins inside with stars stamped on the background behind the window.To You & Yours Joy Shaker Card

Whether you use this kit or make them yourself, try making a shaker card for fun!  If you are interested in this To You & Yours Shaker Card Kit to make these Christmas cards, you can find it in my Stampin’ Up! Online Store HERE.

Gold Glimmer Sleigh Ride Thinlits Peace Christmas Tag

Gold Glimmer Sleigh Ride Thinlits Peace Christmas Tag

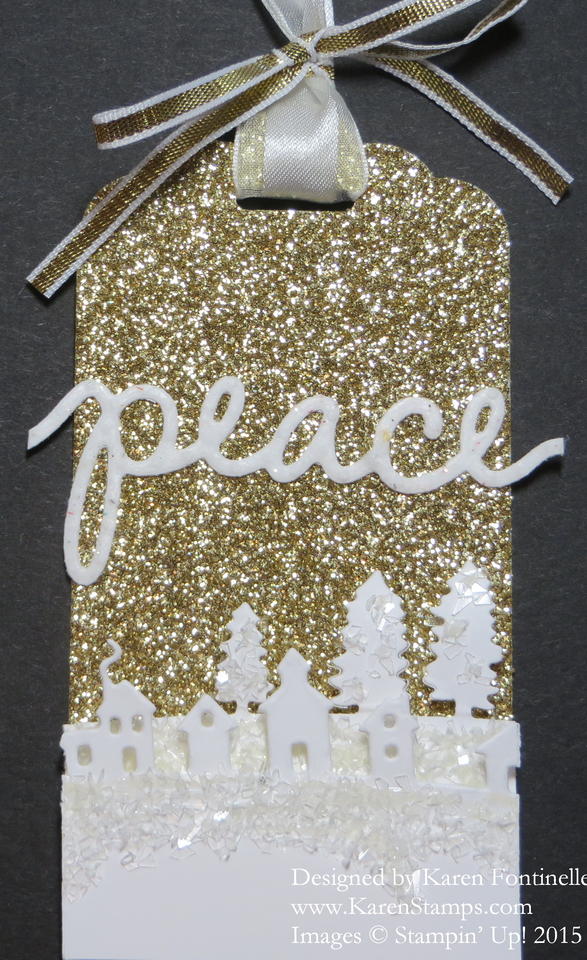
I’m into Christmas tags right now and came across something similar to this Gold Glimmer Sleigh Ride Thinlits Peace Christmas Tag on the internet. I wasn’t even looking for an idea using these Sleigh Ride Edgelits Dies but I found an idea that inspired this tag and I love it!

I cut a 2″ wide strip of Gold Glimmer Paper for the base since that width will fit in the Scalloped Tag Topper Punch.  Then I used the Sleigh Ride Edgelits Dies to cut Whisper White cardstock into the two rows.  I used the Multipurpose Liquid Glue to adhere some extra glitter from the To You & Yours Shaker Cards Project Kit that I just made. Normally I would use the Dazzling Diamonds Glitter. Whichever glitter you choose, apply it like snow just under the images and then pop up those two rows of die cuts with Stampin’ Dimensionals. Then I used the Christmas Greetings Thinlits Dies for the word “Peace”. Gotta love those word thinlits, past and present!

For the tie, I used my favorite ribbon of all time, the Whisper White 5/8″ Organza Ribbon and a piece of Gold 1/8″ Ribbon, another one of my favorites. If you had a little jingle bell, you could tie one on to the ribbon for a cute finished touch.

Hope you have time to make some Christmas papercrafting projects this weekend! There is so much to pick from! I hope this Gold Glimmer Sleigh Ride Thinlits Peace Christmas Tag inspires you to make something!

Shop Stampin’ Up! Online HERE!


To You & Yours Shaker Card Kit Cards

To You & Yours Shaker Card Kit Cards

The card kit in the Stampin’ Up! Holiday Catalog, To You & Yours Shaker Card Kitwas one of the first things I ordered, but as quite often happens, only got around to making the cards yesterday!  The kit comes with lots of fun stuff! The card bases each have some shiny foil stripes on them and of course each shaker element has stars or sequins or glitter to put inside. The kit comes with die cut card fronts, window sheets to cover the opening and then narrow foam strips to apply behind that opening to form the pocket to hold the glitter, sequins, etc. Then there are sticker stars and two word elements to place over the window and pretty baker’s twine with which to tie a bow on each card. There is also some stamping to do on the card fronts and on the background sheet behind the shaker area.  The suggested stamp set to use is the To You & Yours Too Stamp Set. If you didn’t want to purchase this stamp set, you might find something you can use in your stash.

I didn’t get around to making the star card yet but I will do that today! It’s a nice way to spend an afternoon, working on Christmas cards!  Put on some Christmas music on your phone to have playing to get you in the mood!

There is still time to order this kit and make these To You & Yours cards and even get them mailed out before Christmas.  I do not see them as being backordered so get yours while you can!  The kit comes with envelopes also and all the pieces you need except for the stamps, ink, and basic adhesive (I used the Multipurpose Liquid Glue to adhere the window sheet to the back of the card front and also for the few sequins adhered to the Christmas tree). I also used Glue Dots to adhere the bows but you could use a dot of the glue. Dimensionals are included in the kit.

Here is the Stampin’ Up! video with tips for making the cards. I really suggest watching it.

Impress your friends and make your cardmaking easy! Make your own fun To You & Yours Shaker Card Kit cards by shopping at my Stampin’ Up! Online Store HERE.


Holidays Fancy Foil Vellum Embellished Ornaments Christmas Card

Holidays Fancy Foil Vellum Embellished Ornaments Christmas Card

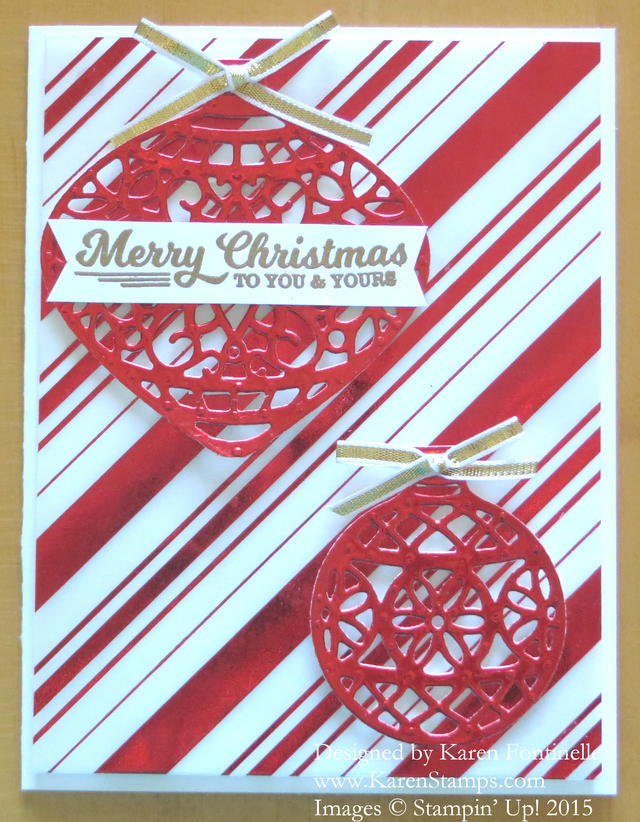
This Holidays Fancy Foil Vellum Embellished Ornaments Christmas Card adds some shine and bling to your Christmas cards.  All the shine makes it difficult to photograph and difficult to see the shine IN the photograph!  This is a pretty easy card, really, and yet looks very elegant.

I started with a card base made with the new Whisper White Thick CardstockIf you haven’t tried this “thick” cardstock, you should get some on your next order.  It’s just a little thicker and stronger than our regular Whisper White so it makes a good card base like all the colored card stock. Not that it matters that much, but it does feel a little better than just using the regular kind. Then I added a layer of the Holidays Fancy Foil Designer Vellum to a Whisper White layer using Glue Dots hidden behind the foil stripes on the vellum as best I could.  That’s the best way to hide your adhesive when using see-through vellum. Once the vellum was adhered to the Whisper White layer, I adhered this to the card base using Stampin’ Dimensionals to pop it up a little.

Next I die cut the ornaments using the Red Foil Sheets paper and the Delicate Ornaments Thinlits Dies with the Big Shot, of course!  I did the whole dryer sheets/waxed paper system and rolled the platform back and forth several times in the machine. Now I have ordered the Precision Base Plate to use with intricate dies such as these ornaments.  You will find the plate in the Holiday Catalog. In the beginning I heard mixed reviews about it, but recently I heard some rave reviews about it.  The only way to find out for sure is to try it for myself! So I will let you know! The purpose of the Precision Base Plate is to make cutting these intricate dies easier.

To finish off the card, I tied little bows with the Gold 1/8″ Ribbon (one of my favorites) and adhered them to the ornament tops with a Glue Dot.  You don’t always have to tie ribbon “around” something, just make it look like it is by adhering to the front with a Glue Dot or other adhesive.

To adhere the ornaments to the card, I cut tiny strips from the edges of the Stampin’ Dimensionals sheet to hide behind the widest areas of the ornaments. Yes, a little tedious but I felt it was the best way to adhere the ornaments to the vellum.  The greeting is stamped in Versamark and embossed with the Heat Tool and Gold Stampin’ Emboss Powder. The greeting is from the To You and Yours Too Stamp Set.

You can use this design idea in many ways, just by stamping ornaments on card stock or stamping and cutting out the ornaments and adhering them to the card front, or adding some different designer paper in the background.  So many easy ways to make a card!

I hope you are going to send at least a few handmade Christmas cards!  It is still plenty early to get them done.  Naturally you want to pick a design that is easy enough to duplicate. I am making several different designs of cards, maybe 5 or 10 or each design just because it is fun for me to make different ones.  So many great ideas out there!  Just stop the world and make cards!

There is still time to shop Stampin’ Up! It is suggested that you place your order by Dec. 17th in order to receive it by Christmas. Look through the catalog with different “eyes” and see what gifts you might be able to purchase for someone, or an assortment of items for a gift.

Check your supply of card stock and see if you need anything for your cards and Christmas projects! I had to order more Real Red card stock yesterday! How could I be low on Real Red?!

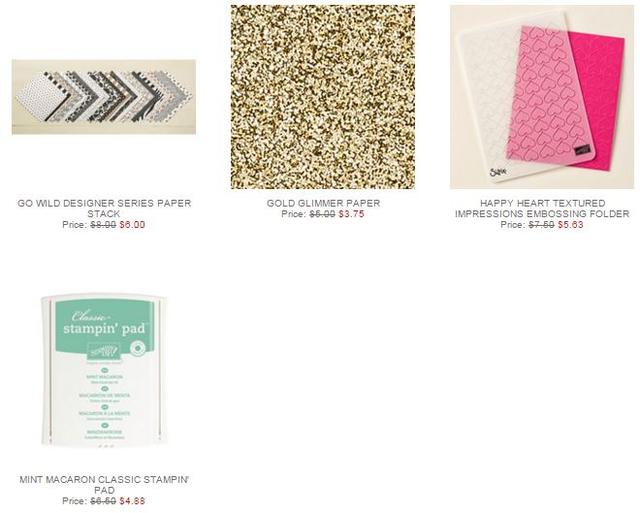
And here are the new Stampin’ Up! Weekly Deals!
Stampin' Up! Weekly Deals Dec 1 2015

If you need any materials to make the  Holidays Fancy Foil Embellished Ornaments Christmas Card just Shop Stampin’ Up! Online or contact me to put in your order for you.

Cyber Monday! Stampin’ Up! Flash Sale & Online Extravaganza Last Day!

Stampin' Up! Flash Sale Nov 30 2015

It’s Cyber Monday and today is the last day for the full Stampin’ Up! Online Extravaganza, plus a Flash Sale all day today (while supplies last!)!

Be sure to use the Bundle numbers to order.

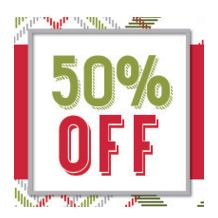
Stampin' Up! Online Extravaganza 50% Off

C’Mon, You Gotta Click HERE!

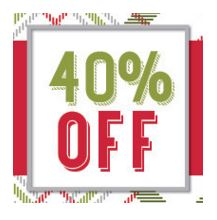
Stampin' Up! Online Extravaganza 40% Off

Click ME!

Stampin' Up! Online Extravaganza 30% Off

No, Click Here!!

Stampin' Up! Online Extravaganza 20% Off

Click Here!

See the whole PDF list of the sale HERE!

My Recommendations (hard to choose!): 

Shop the Stampin’ Up! Online Extravaganza HERE now all day,

while supplies last!

Oh What Fun to Make Christmas Tags!

Sara Douglass On TV

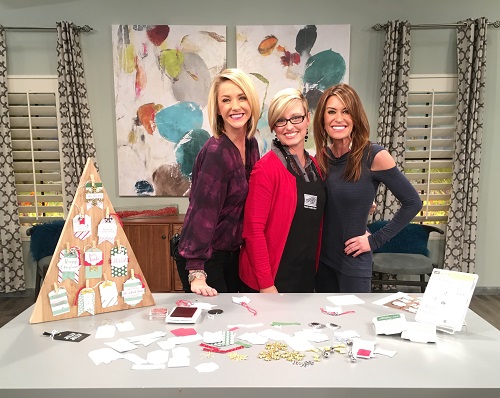
If you have rested and recovered from all the delicious Thanksgiving foods from yesterday and want to take a break from the crazy Black Friday shopping, enjoy this appearance of Sara Douglass, Interim CEO of Stampin’ Up!, (Shelli’s daughter) show the ladies on a local Utah TV show how easy it is to make Christmas tags with the Oh What Fun Tag Project Kit!

Just click this link to watch:  bit.ly/GoodThingsUtahTagKit

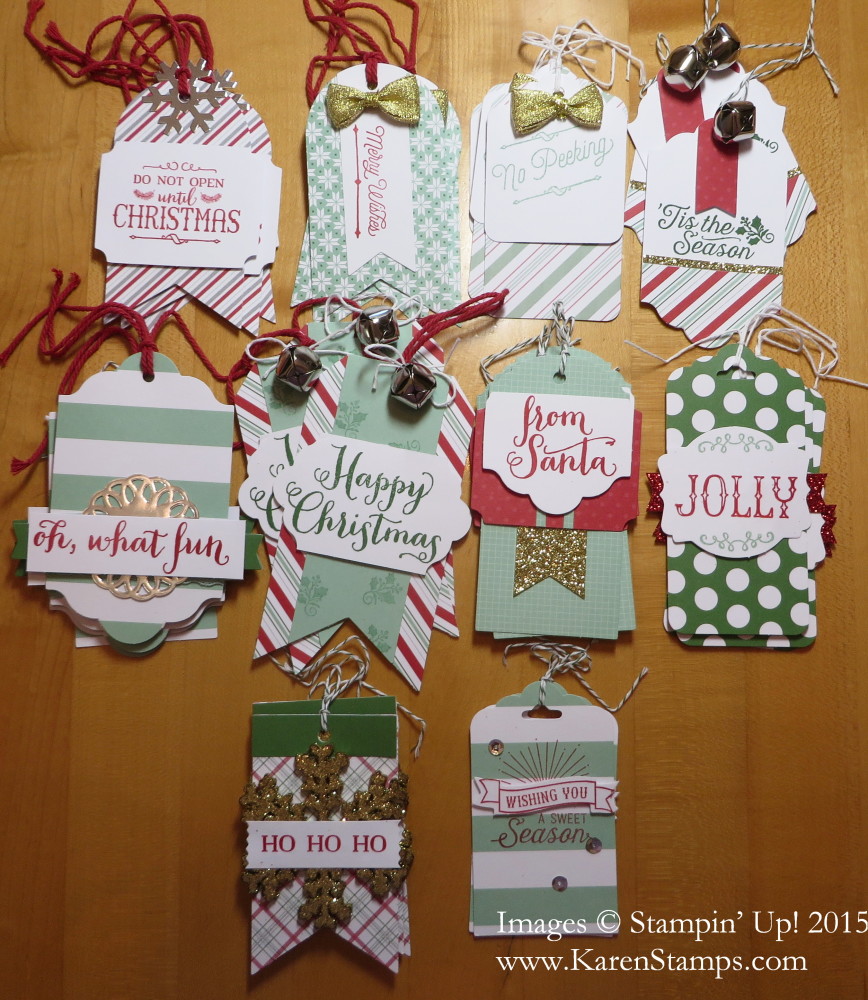
I already made my tag kit!  You get 10 different designs, 3 tags each!  Follow the directions or do your own thing! They are really pretty and easy to make.  Just divide up all the pieces first so you know you have everything for each tag before you begin!

Oh What Fun Tag Project Kit Tags Finished

You do need to purchase the stamp set Oh What Fun for the greetings, unless you have another stamp set you want to use.  But you can also use this stamp set on your Christmas cards and other holiday projects so it’s not just for making these tags and nothing else!

If you don’t need all these Christmas tags, make some of them into birthday tags or other occasions using other greeting stamps!  It doesn’t have to be just Christmas!!

Watch the Stampin’ Up! video for tips on making these fun holiday tags!

Be sure to check out the Stampin’ Up! Online Extravaganza going on right now to get some great Stampin’ Up! stamping and papercrafting products at a discount!!  Save up to 50%!

Online Extravaganza 2015 Banner

When you are finished watching these fun videos, go to my Stampin’ Up! Online Store and order your Oh What Fun Tag Kit right HERE!


Save Money on Stampin’ Up! Deals and Sales!

Stampin' Up! Weekly Deal Nov 24 2015

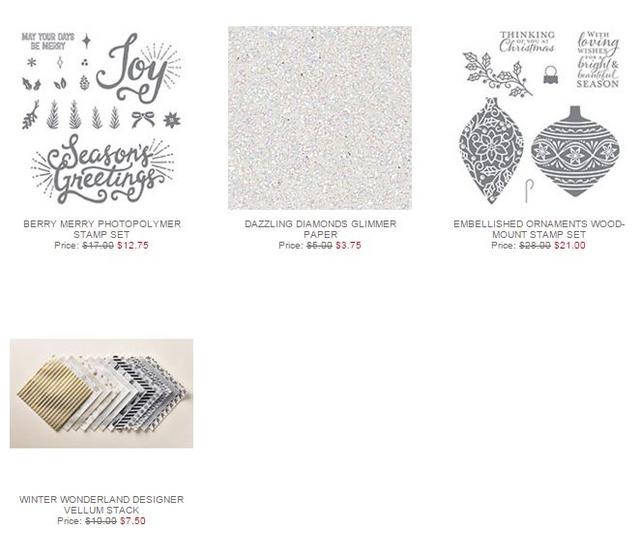
Here are the new Stampin’ Up! Weekly Deals for November 24 – 30. Great ones and very timely this week to use for the holidays! Get the Berry Merry Stamp Set with its bold greetings or the wood-mount Embellished Ornaments Stamp SetThen you certainly MUST order the Dazzling Diamonds Glimmer Paper, so pretty!! It’s not just for the holidays! You will get lots of use out of this fancy paper. And then there is the Winter Wonderland Designer Vellum Stack! Black and gold vellum sheets to make any of your projects beautiful and on trend!  Gold and black are IN!

And the Stampin’ Up! Online Extravaganza is ongoing today!  Be sure to check the list!  I highly recommend the Magnetic Platform for the Big Shot, which is 40% off.  I use mine almost every time I am stamping!  It is well worth the money at $24 instead of the regular price of $40!  It’s even worth the regular price, that’s how much I use mine!

Online Extravaganza 2015

Happy Shopping!  Don’t delay and miss out! While supplies last, of course!

Starts Monday! Stampin’ Up! Online Extravaganza 2015!

Online Extravaganza 2015 Banner

Stampin’ Up! has announced their ONLINE EXTRAVAGANZA that begins Monday, November 23 and runs through Monday, November 30!  Save up to 50 percent on select products!

To make it even better, there will be flash sales that last 24 hours on November 23 and November 30, the first and last days of Online Extravaganza. But remember: Online Extravaganza savings are only available while supplies last, so get them while you can!

TIP:  Do not add these items to your cart ahead of time or they will still come up at regular price on Monday.  Just write down your list and shop on Monday!

Details:

  • Dates: November 23-30, 2015
  • Two 24-hour flash sales for specific products will happen during this promotion: one on November 23 and one on November 30.
  • Past Paper Pumpkin kits and kit refills in Online Extravaganza are available for purchase by subscribers and non-subscribers.
  • You must use bundle item codes provided for Online Extravaganza. Discounts will not be applied if individual component item numbers are entered separately. Bundles featured in Online Extravaganza will exist only during Online Extravaganza.
  • There is no minimum purchase necessary for Online Extravaganza. Discounts will range from 20 to 50 percent.
  • Additional products from current catalogs may be purchased on the same order.
  • All order types qualify for the Online Extravaganza discounted items and bundles.

Deadline:
Orders must be placed by Monday, November 30, 2015 at 11:50 PM (MT)

Don’t Forget!!  You can add items from the Holiday Catalog Retiring List to your order – or any Stampin’ Up! products!

Make out your list and be ready on MONDAY!

Get your Stampin’ Up! Online Extravaganza products HERE on Monday at my Stampin’ Up! Online Store!