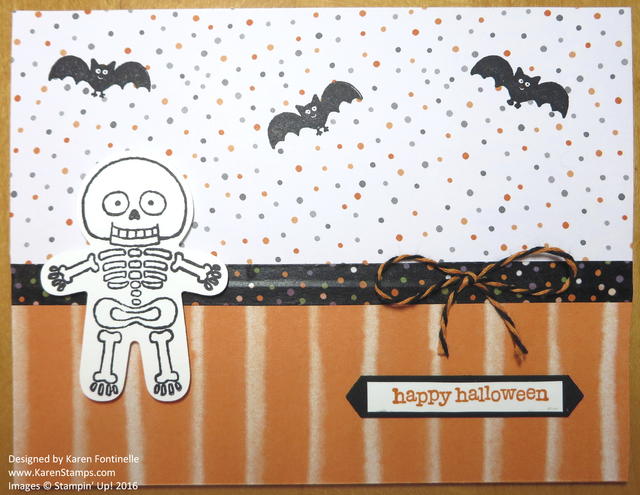
Oh it does my heart good to make a Halloween card! I love Halloween and the feeling and colors of fall! On my first Halloween card with the skeleton from the Cookie Cutter Halloween Stamp Set I used several of the new products in the Holiday Catalog! The card base is Pumpkin Pie cardstock with a layer of the Halloween Night Specialty Designer Series Paper. It’s a trick! The bottom portion of the card is not striped Pumpkin Pie cardstock, it’s the opposite side of the designer paper you see on the top. I just made the designer papers the full width and height of the card so you will only see the Pumpkin Pie cardstock on the inside.
Right where the two pieces of paper met, I covered the seam with the Halloween Night Designer Washi Tape instead of ribbon. For a little accent, I tied a bow with the Halloween NIght Baker’s Twine. (There are two rolls of twine in the package!)
The Halloween skeleton is really easy. Just stamp with black or dark gray ink (I used Stazon) and punch out with the coordinating Cookie Cutter Builder Punch! You’ll find that punch in the Christmas section of the catalog. So great that it can be used for Christmas and Halloween both!! I popped him up with Stampin’ Dimensionals.
I could have used another new stamp set with a Halloween greeting in it, but when in doubt, grab the Teeny Tiny Wishes Stamp Set! There’s bound to be some words you can use on any card in there! And sure enough, there was a “Happy Halloween” stamp! I stamped it on a scrap of Whisper White and punched with the new Classic Label Punch. I trimmed off the pointy ends but realized I also had to make it skinnier to fit on a Basic Black layer also punched with the Classic Label Punch. I think it all fit perfectly and was just the right size for this card!
Hard to believe we are more than halfway through August already so Halloween can’t be far behind! There will be so many cute cards, candy treats, and other projects to make for Halloween! It’s almost time to get started!

