Category Archives: Easter

Circle of Spring Wreath Easter Card

Circle of Spring Wreath Easter Card

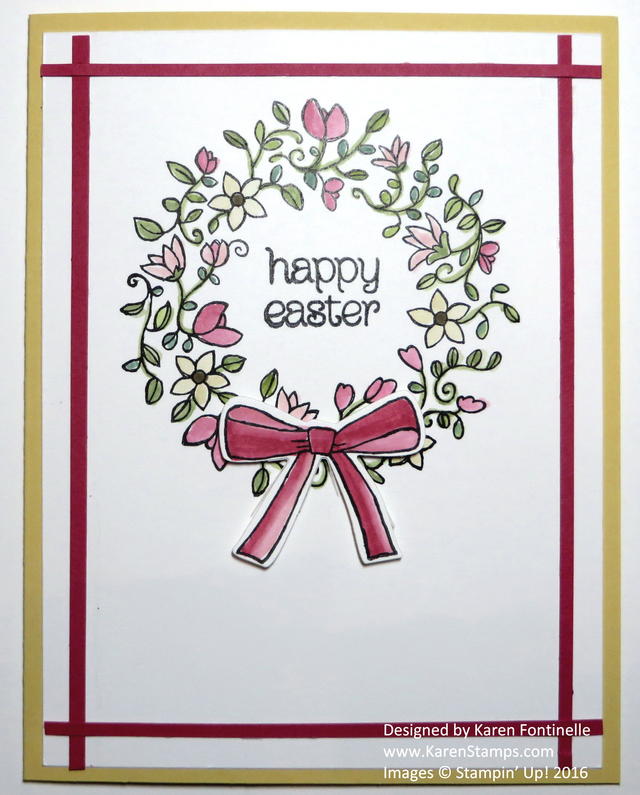
If you are looking for a nice card to make, you might have overlooked the stamp set with which I made this Circle of Spring Wreath Easter card. The stamp set Circle of Spring is in the main Stampin’ Up! catalog on page 77. It’s a beautiful spring-like flowered wreath stamp and plenty of greetings as well as a bow and a flower.  Just stamp the wreath as I did on this card and color in or stamp it and die cut with the Wonderful Wreath Framelits Dies.

On this card, I simply stamped the wreath with Stazon ink on Whisper White cardstock and colored in the leaves and flowers with various Stampin’ Write markers.  Sometimes I used the marker itself to color and sometimes I scribbled marker ink on an acrylic block and picked it up with my Aqua Painter and watercolored. I stamped the bow, die cut it with the framelits die, and used Stampin’ Dimensionals to adhere to the card.

The Whisper White layer was to go on the So Saffron card base, but I felt it needed something. I decided to cut very thin strips of Melon Mambo card stock and very carefully glue the strips down on the card front. My Grid Paper sure came in handy to line it up.

Happiness is having a table full of markers and cardstock on the table and just coloring and relaxing! And at the end, I had this easy Easter card made with the Circle of Spring stamp set.

Shop Stampin’ Up! Online HERE!

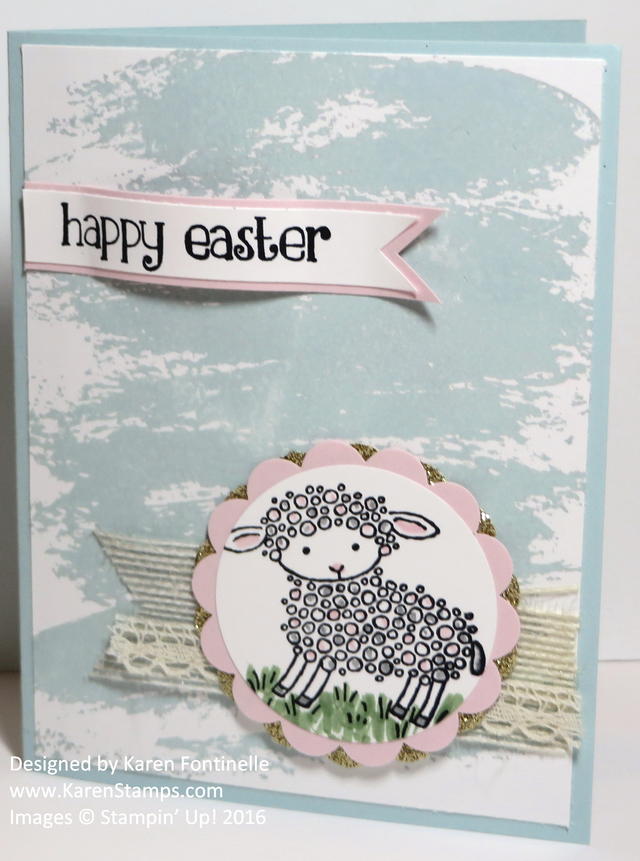
Easter Lamb Easter Card

Easter Lamb Easter Card

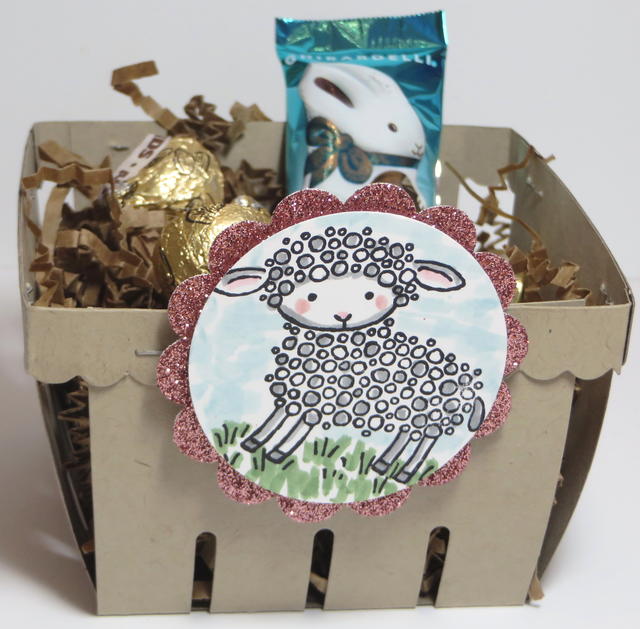
I thought one of the cutest stamps in the Occasions Catalog was the Easter Lamb stamp I used to make this Easter Lamb Easter card. It actually comes with the Happy Easter greeting attached, but I cut it off to place it elsewhere on the card. It is just this one wood-mount stamp, and I think just the stamp itself would be cute set out for an Easter decoration when you aren’t stamping with it!

For a background I used my Watercolor Wash Wood-Mount Background StampI mostly buy the clear-mount stamps because, well they are cheaper and they take up less storage space. But some stamps I do like the wood-mount, like these large background stamps so they are mounted and ready to go and just sturdier to use on the wood-block.  I also like wood-mount for very tiny stamps. I inked this stamp with Soft Sky ink, stamped off a bit and still had plenty of color on my Whisper White paper. It is easiest to lay the paper onto the stamp which is face up on your desk, and then lay scrap paper, like computer paper or your Grid Paper over it so you can rub the paper on the stamp without getting inky fingers.

The lamb is stamped with Stazon Jet Black ink and I colored in a bit with a Pink Pirouette Stampin’ Write Marker and Smoky Slate. I also colored the grass green with a marker.  I punched out the lamb with the 2″ Circle Punch and layered it on the 2 3/8″ Scallop Circle PunchFor a little glitz, I also punched a piece of Gold Glimmer Paper to layer behind.  I love that touch!  Then for a little more interest, I added a strip of Jute Ribbon and Venetian Crochet Trim.

It’s time to start making Easter cards, so use this Easter Lamb Easter Card as an inspiration to get started!

Shop Stampin’ Up! Online HERE!

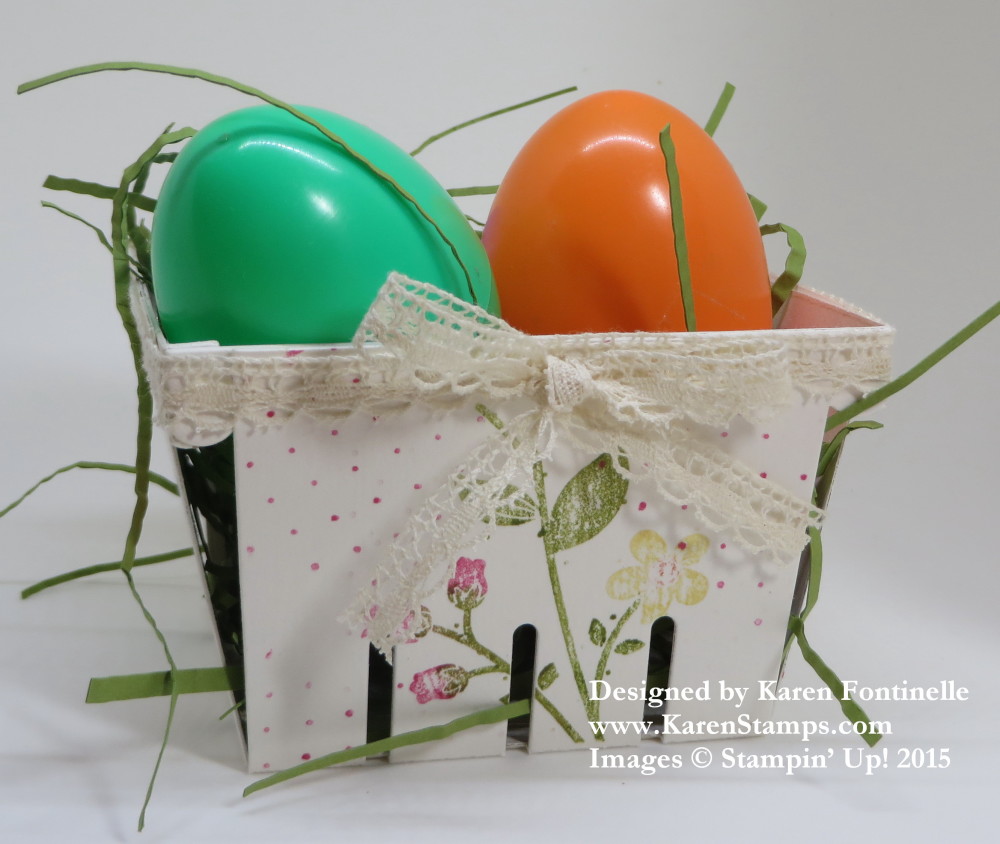
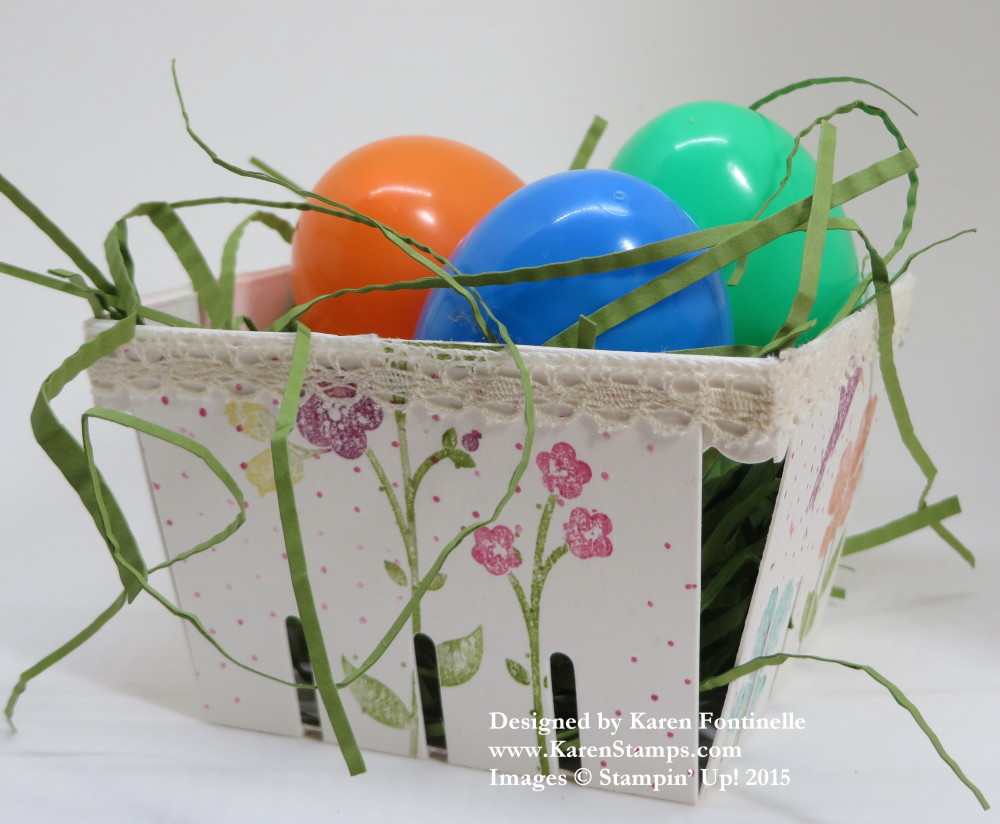
A Handmade Berry Basket for Easter

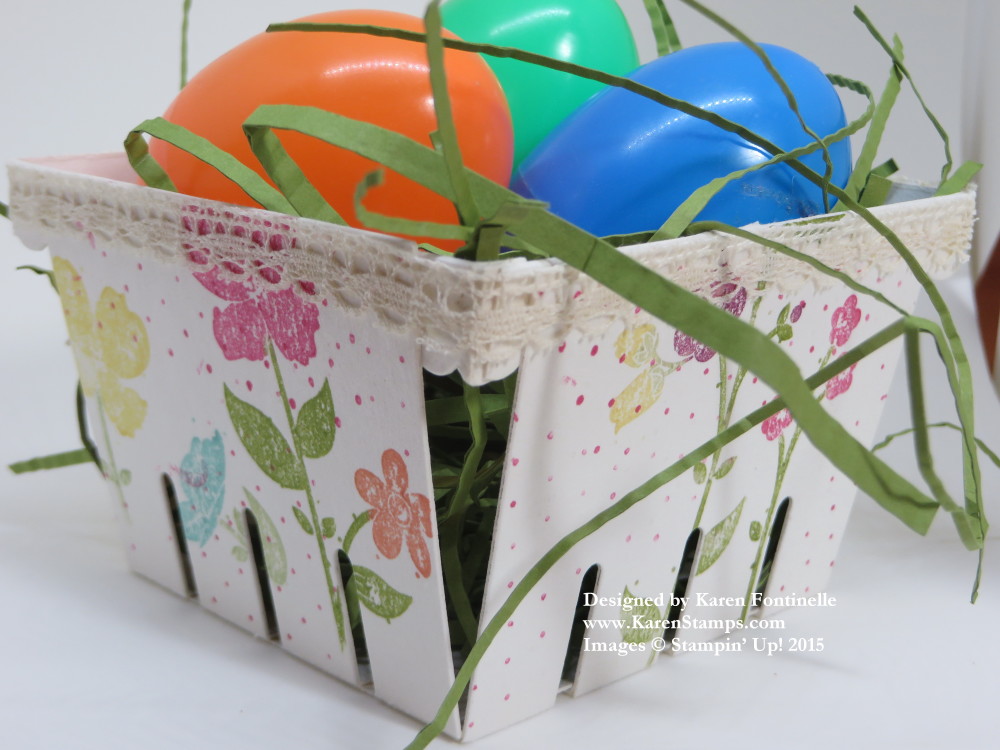
Berry Easter Basket Wildflower Meadow

If you own the Berry Basket Die, you are all set for making cute little Easter baskets! My other berry baskets have been made with card stock or designer paper, but this one is made with Coaster Board and is much sturdier. The Vanilla Coaster Board is described as thinner than chipboard and sturdier than card stock.

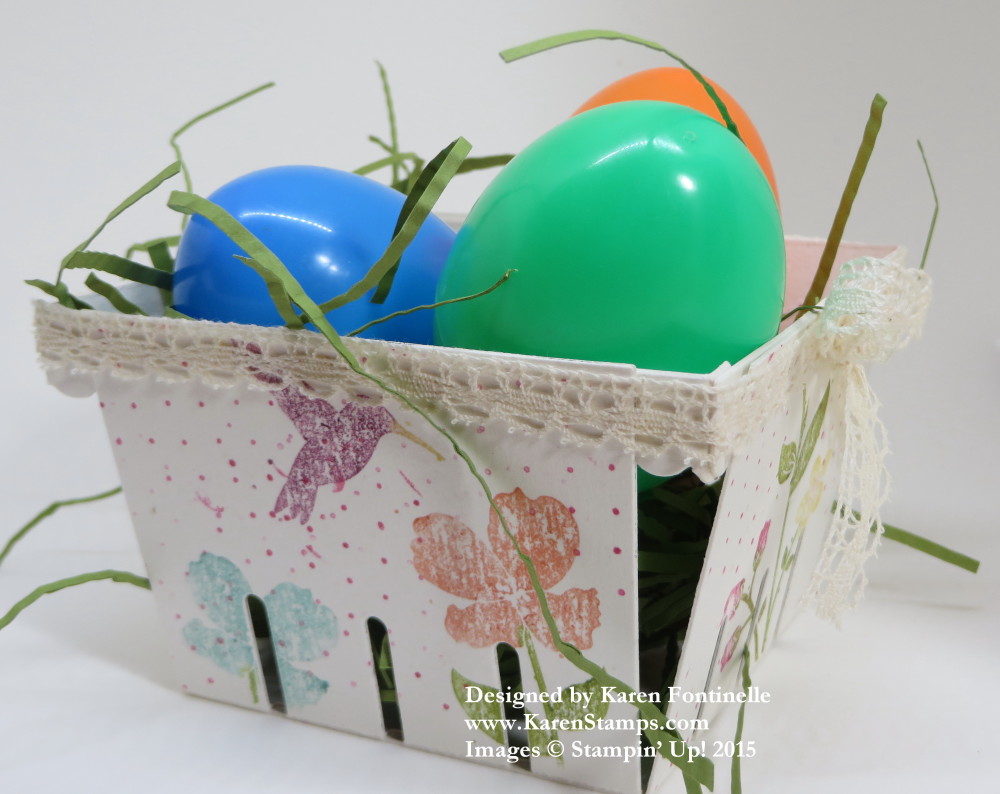
I decided to stamp mine with the Wildflower Meadow Stamp SetThis is one large background stamp, which I would recommend you purchase in the wood-mount. Those large stamps are just easier to manipulate on the wood block than sticking on the very large clear block. I colored the flowers and leaves with various Stampin’ Write Markers and then pressed the Coaster Board pieces, after they were die cut, onto the Wildflower Meadow stamp. I had to cover the portion of the Coaster Board basket that I didn’t want stamped.  And think about which way your pattern is going. I stamped different portions of the large stamp on each side of the basket.

Once it was all stamped, I realized that if I attached the usual basket edges around the top, they would cover up some of my stamping!  So I adhered the basket edges to the INSIDE of the basket to hold it together and adhered the Venetian Crochet Trim around the outside top edge of the basket. I tied a separate bow and adhered it with a Glue Dot to the front. I love the way it turned out, if I do say so myself!

Berry Easter Basket Wildflower Meadow

This berry basket won’t even be just for Easter! It’s pretty for any time, especially spring!

Berry Easter Basket Wildflower Meadow

If you are interested in the Berry Basket Die, you can also purchase the Magnetic Platform for the Big Shot to use with framelits and thinlits on Monday, taking advantage of FREE SHIPPING and the Weekly Deal discount ending on Monday!  Hey, with free shipping all next week (Mon, April 6 – Friday, April 10) you can order the Weekly Deals you want on Monday and then order again if there is something you want that comes out on Tuesday!

Shop HERE at Stampin’ Up!

Berry Easter Basket Wildflower Meadow

Use Your Ribbon to Make an Easter Egg Card

Ribbon Easter Egg Card

Use your ribbon to make a colorful Easter egg! Use the Oval Framelits to cut an Easter egg shape in a card layer. I used adhesive (Fast Fuse) around the back edge of the oval and stretched the ribbon across the opening.  If I did it again, I think I would adhere the ribbon to a separate piece of card stock that fit underneath the oval opening. I used the three colors of ribbon in the Best Year Ever Accessory Pack in the Sale-A-Bration Brochure.  It also comes with buttons.  The bunny is stamped with Stazon and colored in with Stampin’ Write Markers and cut out with Paper Snips (not too hard!). The greeting is from the stamp set And Many More. For a little bling, I added some Rhinestone Jewels to the Easter Egg and a Pearl to cover where I cut through the bunny to reach that inner arm part that needed to be cut out!

Today is the second to last day of Sale-A-Bration!  The biggest promotion of the Stampin’ Up! year ends tomorrow, Tuesday March 31.  Don’t miss it!  With every $50 purchase, choose a free Sale-A-Bration product!

Are you on my Mailing List?  I sent out a last minute reminder for the end of Sale-A-Bration today! Just trying to take care of my customers!  Be sure to check your Inbox!  And if you aren’t signed up, do it today so you won’t miss a thing!

Shop Stampin’ Up! Online HERE!

The Easter Bunny is Hiding Some Easter Eggs!

Easter Card with Bunny and Eggs

This is such a fun and happy card to make! When you are making an Easter Bunny card hiding Easter eggs, it’s bound to be a happy card! I started with a piece of the Irresistibly Yours Specialty Designer Series Paper #138635 that comes in plain white with embossed patterns on it.  When you apply ink over it, the pattern magically appears! I used a Sponge Dauber with Pear Pizzazz ink. Then just take a tissue or paper towel and wipe just to get any excess ink off the embossed patterns.  It’s so fun! Half the work is already done for you with the embossing already printed on the paper.  You could of course leave it plain for an elegant card or to use on a fancy package.

I thought the Easter Bunny hiding eggs in those leaves on the paper would be a fun scene for an Easter card. I just punched out eggs from the Best Year Ever Designer Series Paper #138633 with the Extra-Large Oval Punch and the Small Oval PunchI wasn’t really planning to use both sizes but decided the two sizes looked cute together and why couldn’t the Bunny be leaving eggs of different sizes?!

The punch-art bunny is simply made with the 1 3/8″ Circle Punch, the Large Oval Punchand the Word Window Punch. His little nose is the heart on the Owl Punch. Just draw on some eyes and whiskers with Stampin’ Write Markers.

The greeting comes from two stamps from the Crazy About You Stamp Set.  The card base is Calypso Coral which coordinates with the Best Year Ever Designer Paper.

You can get either or both of these designer paper packs FREE during Sale-A-Bration, each with a $50 purchase, but only until Tuesday, March 31.  Sale-A-Bration ends at 11:50 pm MT (Stampin’ Up! Time) on Tuesday, March 31.  Don’t miss it! That’s THIS Tuesday, believe it or not!!

If you need just a little bit more to reach your $50, or $100, or $150 for Sale-A-Bration, be sure to check out the Weekly Deals or the Clearance Rack for just an inexpensive item to add! And they did add more items to the Clearance Rack the other day!! Or choose a download for My Digital Studio which anyone can use on their computer.

Feel free to contact me if you would prefer that I put in your order for you.  I’m happy to do so.

Sign up for my Mailing List today in the upper right corner to get one more reminder about Sale-A-Bration —and of course all my newsletters about stamping and Stampin’ Up!

To shop online, click the link below!

Shop at my Stampin’ Up! Online Store today and get your order in ahead of the last minute rush!

Easter Eggs Easter Card

Easter Eggs Easter Card

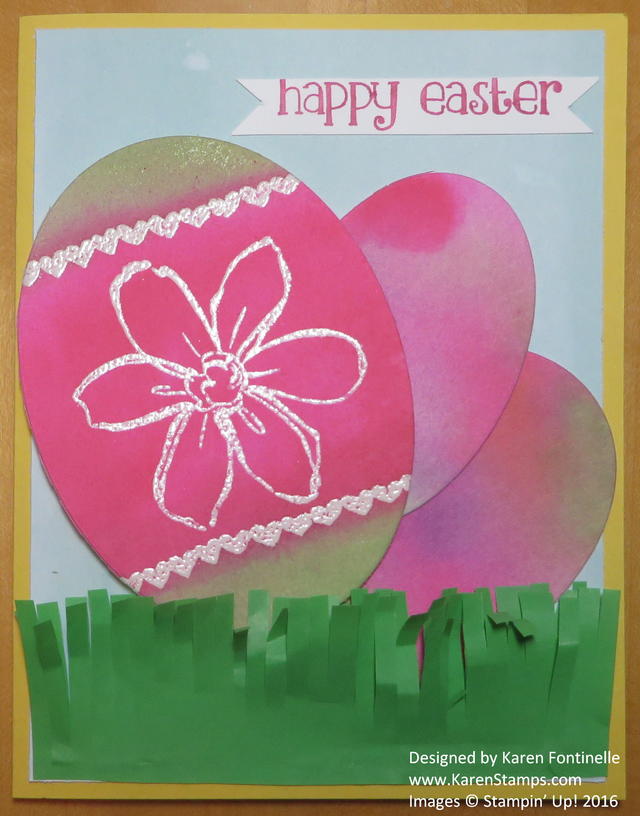
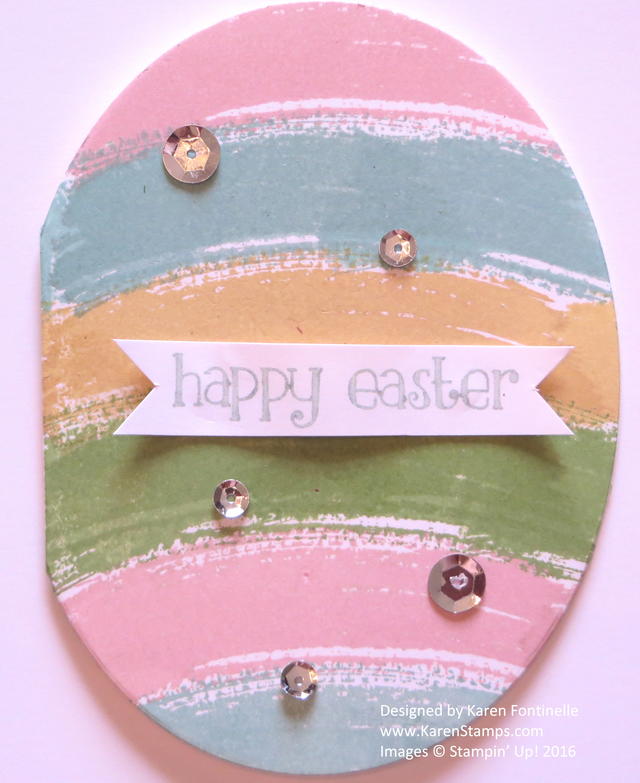
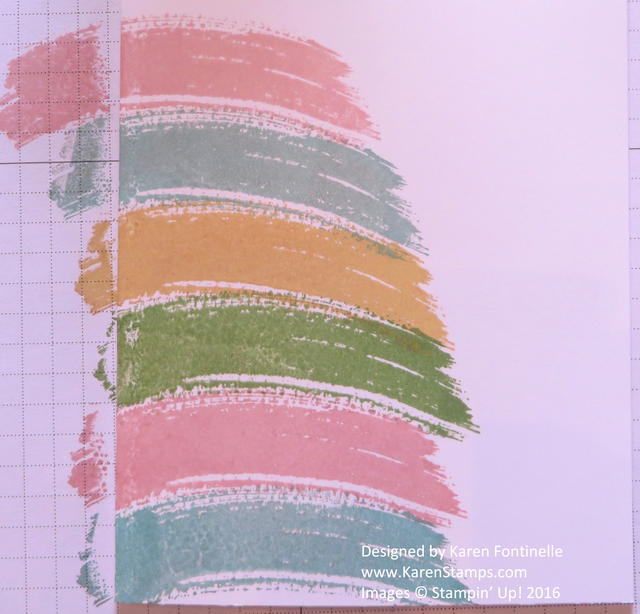
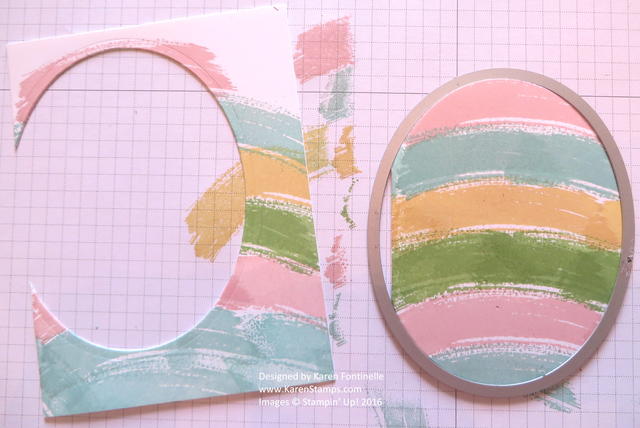
This Easter Eggs Easter Card was a complete surprise to me because I started out planning to make some totally different project! Once I reached into my Whisper White card stock scraps, I discovered these ovals already cut with the Ovals Collection Framelits  #129381 (as of today, these are on backorder). I don’t know what project they came from, but it was handy to find them! I immediately had the idea to stamp these ovals and decorate them as Easter eggs!  I pulled out the Work of Art Stamp Set and used the chevron pattern, the straight line, and the circle stamps in the set to stamp in various colors to give these ovals the look of Easter eggs!  I choose several ink colors from the Subtles family:  Calypso Coral, Wild Wasabi, Soft Sky, Pool Party, Blushing Bride, and So Saffron. You could also use the Brights or In Colors. I kept this card simple, but you could add glitter to the patterns or some other embellishments like pearls or rhinestones!

The card base is Pool Party.  The Whisper White layer is sponged a little at the top with Pool Party ink using a Sponge Dauber to look like sky.  The grass is a scrap strip of Old Olive and cut with the Fringe Scissors.  So easy! The bottom (chevron) egg is glued right to the layer with the Liquid Multipurpose Glue and the other one is popped up with Stampin’ Dimensionals. The greeting is stamped with two words on a clear block from the Crazy About You Photopolymer Stamp Set.  You an order this stamp set in any of the types:  wood, clear, photopolymer, digital. I chose photopolymer because I can see through the stamp to hopefully get the words lined up exactly where I want them. On this card I was able to put both words on the clear block and stamped on scrap paper first to make sure they were lined up and spaced correctly.  Then I just stamped right on the card. It was risky since I already had the rest of the card made!  Better to do the stamping first in case you mess up!  But I also knew that if I messed up stamping directly on the card I could go back and stamp on card stock and then adhere that to the front of the card like a banner or just a strip or a punch.

I might add that this stamp set, in any of the forms, is also available as a Bundle which includes the stamp set and the Hello You Thinlits!  AND you save 15%!

With the exit of My Digital Studio the end of May, as I was looking at these stamp sets and Bundles in my Stampin’ Up! Online Store, I saw the digital version of Crazy About You which includes the stamp brush set (the stamps) plus the Hello You Thinlits words!  All for only $9.95.  It is actually named the So Very You Stamp Brush Digital Download. You can use this whether or not you have MDS, just use it on your computer. But you can still buy My Digital Studio and use it as long as you like even though Stampin’ Up! won’t be supporting it or putting out new downloads. I’m sad to see it go!

Check out the Stampin’ Up! Clearance Rack today!  New items were added, only available while supplies last, of course!

All of this will count toward your order for Sale-A-Bration rewards with a $50 order, or multiples of $50.  Sale-A-Bration ends March 31, next Tuesday!  Don’t miss it!!

Clearance Rack Banner

Happy Easter Bunny Easter Card

Happy Easter Bunny Easter Card

From the minute I saw this Happy Easter Bunny single stamp I loved it! You’ll find it in the Stampin’ Up! Occasions Catalog. It’s just a “happy” stamp!  I kept this Easter card simple, just stamp and color.  And the coloring is easy and fun!

I stamped the image with Stazon Jet Black Ink and colored in the images with my Stampin’ Write Markers. You can purchase these markers in color families, some individually, and best of all, in the complete set with carrying case. If you purchase the Many Marvelous Markers, you will earn two FREE Sale-A-Bration products!  If you add some more products to your order to reach $150, you will earn three SAB products plus Hostess Benefits! That means you get to shop with $25 in Hostess Dollars!

The bunny is colored with Crumb Cake, the leaves are colored with three different “green” markers just for fun, and the eggs and flowers are just colored with random colors.  You choose! To jazz up the greeting “Happy Easter” I used the fine tip of the marker to go over the letters with Melon Mambo. And for a little extra bling, I pulled off some sequins from the Bermuda Bay Sequin TrimTo adhere any sequins, I put a tiny tiny dab of Liquid Multipurpose Glue on the card where I want to place the sequins and then place the sequin on the tiny glue dab.

I find it relaxing to sit and color, and Stampin’ Up! has several ways to do it. I had pulled out my Blender Pens and was going to scribble some ink from the marker on to the stamp case, then pick it up with the Blender Pen, but as it turned out I just colored lightly straight with the marker. But if you need a lighter look, you can try the Blender Pen.

There’s still time order the Happy Easter Bunny stamp and get it before Easter if you hurry.

Shop at my Stampin’ Up! Online Store today!

Easter Bunny Tag

Easter Bunny Tag

Last weekend I had SO much fun making twenty-four of these fun Easter tags with two of my customers/friends and one cute little girl for a group of children. I found the idea for the punch art bunny on Pinterest somewhere and fortunately the bunny fit just right on a tag made with the Stampin’ Up! Tag Topper Scalloped PunchI added some designer paper on the tag for the background and stamped the Easter greeting from a retired Hostess set (sorry!) right on the paper. We played with different combinations, like stamping on cardstock and punching out a shape, but in the end we just liked it stamped on the paper. That’s how you have to play around sometimes with rubber stamping until you just “know” you have the right design!

This is how you make the bunny:  The head is the Extra-Large Oval Punch. The body is the 1 3/4″ Circle Punch, cut in half. The ears are the Large Oval Punch with the pink insides made with the Word Window Punch.  We opted to fold down the top of the ear for cuteness!  The cute little heart nose is punched with the Owl Builder Punch. The eyes are just drawn in with a black marker and Miss Elsie did the whiskers with some wispy strokes with the Crumb Cake Marker! The rabbit paws are just 1/2″ circles.  The carrot is punched with the Modern Label Punch and then just trimmed down with Paper Snips. With the heart punch in the Itty Bitty Accents Punch Pack you can make the carrot topper and even fringe it with the Paper Snips if you want to make it look real.

The ribbon on the tag is the Tangelo Twist 3/8″ Satin Ribbon. It really goes well with the tag.

Hang this tag on an Easter basket or put the tag on a card for Easter. Or just make the punch art bunny on an Easter card.  Have fun with it.

If you need any of these supplies, you might be able to earn a FREE Sale-A-Bration product with a $50 purchase. Due to the Blendabilities not being available any more, other Sale-A-Bration items may sell out so if there is something you really want, don’t delay.

Don’t forget about the Weekly Deals and New Arrivals.

Shop at my Stampin’ Up! Online Store!


Paper Pumpkin Leftovers: Make an Easter Treat!

 February Paper Pumpkin Alternate Idea Easter Treat

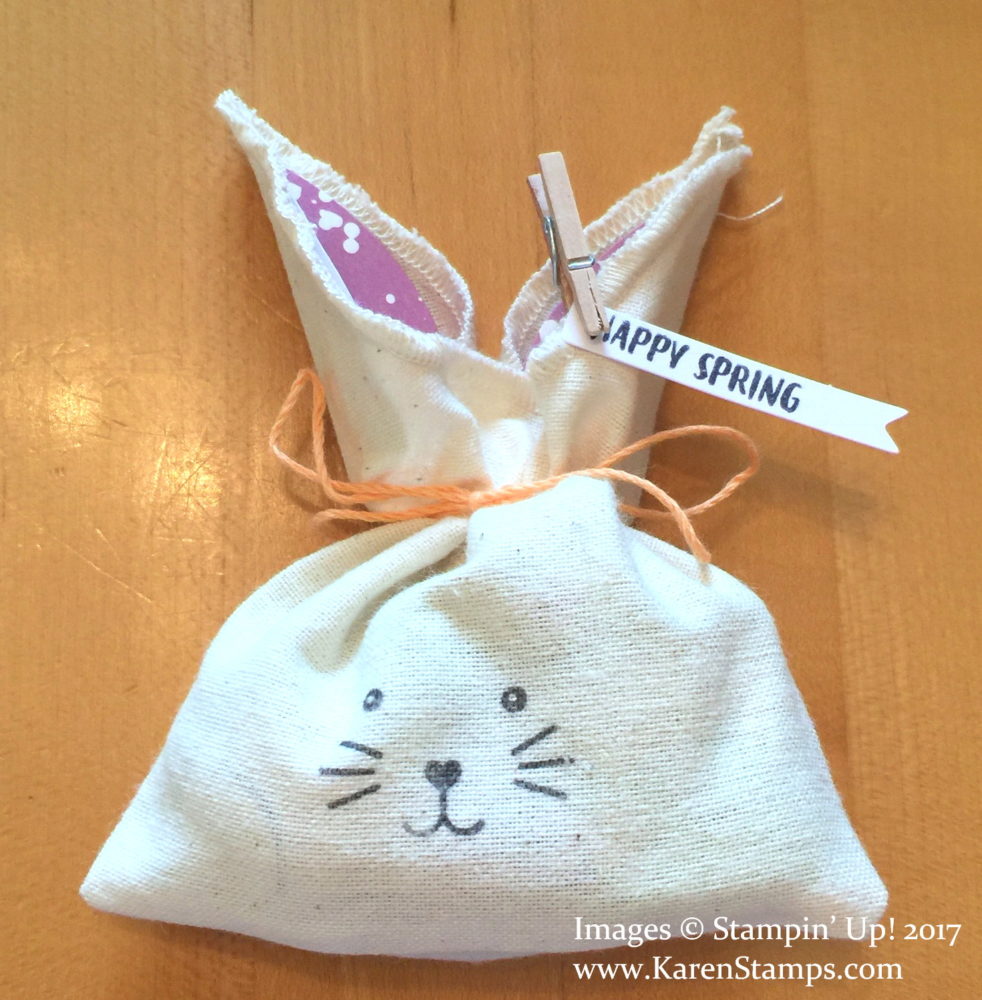
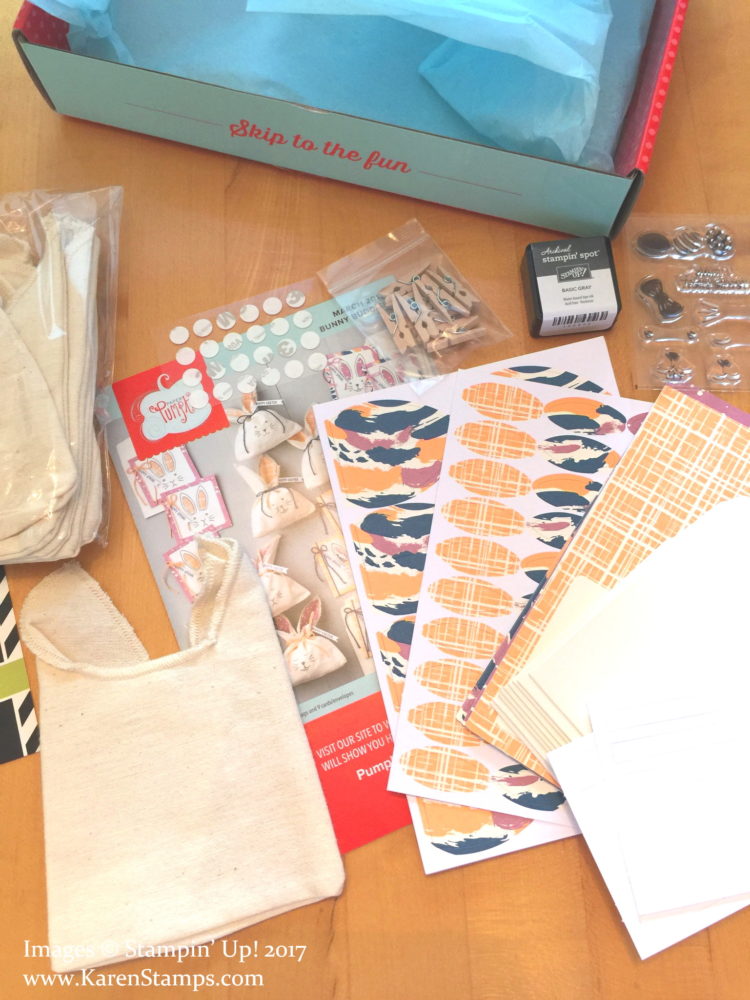
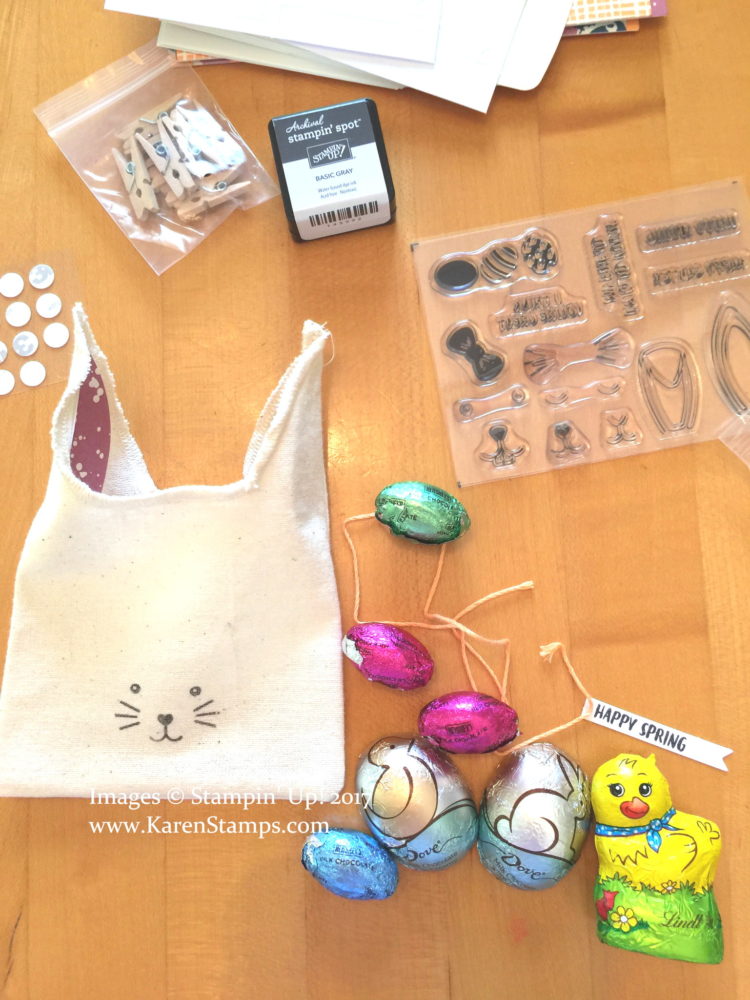
If you don’t use up all the materials in your monthly Paper Pumpkin Kit, just save them and you might come up with alternate ideas in the future. Here I used  extra supplies from my February Paper Pumpkin Kit to make an Easter treat!  The kit contained these cello bags, the foldover tags for the bag topper, the cute clip, the pretty pink and gold baker’s twine, and the little banner tags. I stamped the Easter greeting with a stamp from Teeny Tiny Wishes (a must have word stamp set in my opinion!).

Then just add a cute bunny to the foldover tag! While that tag was used for Valentine treats as designed, it CERTAINLY is pretty for Easter – pink and gold! The punch art bunny is just made from the Small Oval Punchthe 3/4″ Circle Punch, and the Petite Petals Punch. Two of the petals from that punch make cute ears – just cut off the extra petals so you have enough to glue to the bunny head. The little pink bunny tail is made with a retired punch but you can use something similar. And top it off with a Basic Pearl Jewel Embellishment.

To start Paper Pumpkin coming to your house I recommend purchasing a 3-month subscription on a regular Stampin’ Up! order. It is on sale right now during March during Sale-A-Bration!  And since it is a $50 purchase, you will earn a free Sale-A-Bration product. I also suggest adding some other items to your order to take advantage of the shipping. More and More people are getting on the bandwagon, so don’t miss out!! It’s fun that comes in your mailbox!  Give one or more for gifts!

As a storage tip, some people like to keep their Paper Pumpkin stamps in extra Clear-Mount Stamp Cases for each kit and make a label to slip inside the stamp case cover. Or keep several sets in a larger Full Case for Wood-Mount Stamps.

Burlap and Blooms Spring Wreath for Easter

Burlap and Blooms Spring WreathIt was nice to have a kit with everything needed except hot glue to make this Burlap and Blooms Simply Created Wreath Kit. I thought it would make a nice wreath for Easter and spring by my back door where my Be of Good Cheer Curly Paper Wreath was still hanging! My favorite flowers on this wreath are the fringed ones. I didn’t seem to have much of a knack for making the other ones! And I’m not sure I got the flowers placed in the best positions, but, I did get the wreath finished! And didn’t burn my finger on the hot glue until near the end!  Be careful pushing the flowers down onto the wreath! And have a glass of cold water nearby just in case! It still turned out pretty and was an interesting new project. It’s nice to have a kit and not have to think about all the supplies! It’s available in the Occasions Catalog.

Speaking of supplies, the Stampin’ Up! retired list comes out on Monday! And Stampin’ Up! is offering FREE SHIPPING (excluding expedited shipping) on all orders Monday, April 21 through Friday, April 25! When you get a chance this busy Easter weekend, be sure to start making out your list of anything you might want or that you think might retire so you will be ready to take advantage of this free shipping opportunity!

Free Shipping from Stampin' Up! April 21 - 25

Free Shipping from Stampin’ Up! April 21 – 25, 2014

Be a FAN on my Stamping With Karen Facebook Page where I can try to keep you updated and what’s available and what’s not and what’s going on during this busy time at Stampin’ Up!

Chocolate Egg Easter Card with Punch Art Bunny

Chocolate Egg Easter Card with BunnyThis gigantic chocolate Easter egg on this Easter card is really making me hungry! I think the Easter bunny even looks a little surprised at the size of the Easter egg! The egg is the oval I cut out of THIS Easter card the other day! I knew I wanted to use it in another way on another card and here it is. Of course I used the Ovals Collection Framelits Dies. It was already embossed with the Fancy Fan Embossing FolderI just decorated it with a little bit of Daffodil Delight 1/4″ Stitched Grosgrain Ribbon and a few punched out flowers accented with Rhinestone Jewels. The strip of grass is cut with the Fringe Scissors in the Occasions Catalog.  They are just fun!

You can make the punch art Easter bunny with whatever punches you like. Just play with it and make something! Use some circle punches or ovals and see what you come up with.

The greeting on this card is from the Four You stamp set and I stamped the “Thinking of You” on the inside.

Don’t forget about the Stampin’ Up! Weekly Deals available until Monday night!

Happy Easter!

Make a Punch Art Bunny Easter Card

Punch Art Bunny Easter Card

There are so many cute ways to make punch art Easter bunnies. Here is one you can make easily with the Oval Collection Framelits Dies and just trim to fit on your card! I used three sizes of the framelits and for the Easter Bunny face and ears and the Small Oval Punch for his cute little nose! I drew in his eyes and whiskers by hand with a black marker. His rosy cheeks are made with Blushing Bride Ink and a Sponge Dauber. For the inside of his ears I used a Melon Mambo gingham pattern in the Gingham Garden Designer Series Paper. The layer on the card is a piece of the pretty Coastal Cabana pattern in the Retro Fresh Designer Series Paper. The Easter greeting is stamped with the Easter stamp in Teeny Tiny Wishes, one of the handiest stamp sets you can own! It is cut out with the Bitty Banners Framelits Dies.

Try your hand with your punches or framelits and see what kind of cute Easter bunnies you can make for your Easter cards or Easter decorations!

Shop for all your Stampin’ Up! supplies at my Online Store HERE.

Blessed Easter Oval Card

Blessed Easter Oval Card

I admit I was late ordering this Blessed Easter stamp, but it is so beautiful I eventually had to have it. It is just a single stamp so not expensive and can be used without the Easter greeting for many occasions!  Just think of what all you could use these tulips for – birthdays, Mother’s Day, sympathy, wedding, anything!

I used the Oval Collection Framelits Dies to cut the oval shape in the front of the card.  First I did adhere a piece of Retro Fresh Designer Series Paper on the front of the Whisper White card base and THEN cut out the oval. (Make sure you open the card first before running it through the Big Shot so you don’t cut out the back also!). I just loved the color of the paper, especially for Easter.

To get the flowers placed properly on the inside of the card, I could have used a Stamp-a-Ma-Jig but I just took the oval that had been die-cut, put it back in the oval space and lifted up the front o of the card so the oval shape stayed in place on the inside of the card.  I lightly put some pencil marks where the edge of the oval was so I could place my stamp within that oval. It worked great! I could have put an acetate window sheet in that opening in the front or a piece of vellum, but I decided to just keep it simple.

I stamped the flowers with Black Stazon ink so I could watercolor with my Aqua Painter and ink refills. First I colored mostly in the center of the tulips with So Saffron, since that is a coordinating color with the Retro Fresh paper and then added the Tangerine Tango as highlights (also a coordinating color). Don’t be afraid of watercoloring.  The beauty of it is that it doesn’t have to be perfect!  In fact, in lots of cases, you do NOT want to stay right inside the lines when you are watercoloring! So little slips here and there really only enhance your art!! For the leaves, I used Gumball Green with a little bit of So Saffron also added to the leaves  An artist friend years ago always said every green should have a little yellow in it. And for a little pizzazz, I added some Dazzling Diamonds Glitter with the 2-Way Glue Pen. (See my Facebook page today for a good use for the 2-Way Glue Pen – and “Like” me while you are there!)

For the front of the card, I wanted to do “something” else, but finally saw that a little Whisper White Taffeta bow would be just fine, nothing more. Sometimes you have to know when to STOP and today was one of those days!

Blessed Easter Oval Card Inside

Even if it is too close to Easter this year or past Easter, as I said this Blessed Easter single stamp is beautiful and you can still use it.  Just cut off the greeting and use it separately. Go to my Stampin’ Up! Online Store and place your order! It’s also available as a digital download for My Digital Studio!