Save yourself a trip to the store and learn how to make an easy all-occasion DIY gift bag out of designer paper! You can make a gift bag using the Stampin’ Up! Gift Bag Punch Board or you can make one by just scoring paper to determine the size you want. I use my Paper Trimmer as I cut the paper to score with the Scoring Blade, (one comes with the Paper Trimmer) but you could also use the Simply Scored Board.
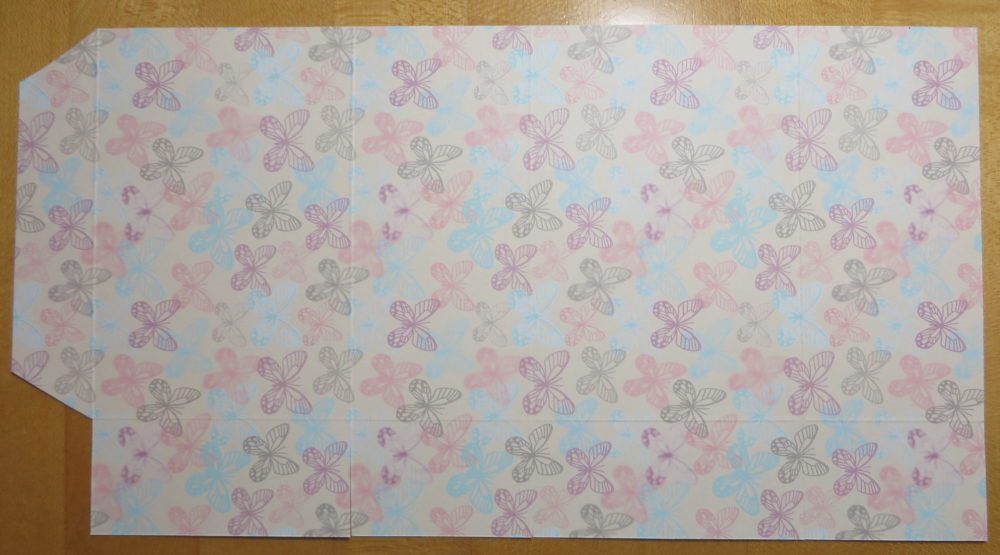
Decide what paper or cardstock you want to use. I used the beautiful Falling In Love Designer Series Paper. While I could have used either side of paper, I had planned to use this soft bokeh-look pattern and that is what I cut. But when I turned the paper over, I saw that the pattern on the other side was a butterfly print. Had I wanted to use that side and didn’t give it any thought, as you can see in the photo below, I would have the pattern going wrong, so be sure you check which way you want your pattern to go and make sure you cut the paper in the correct direction.
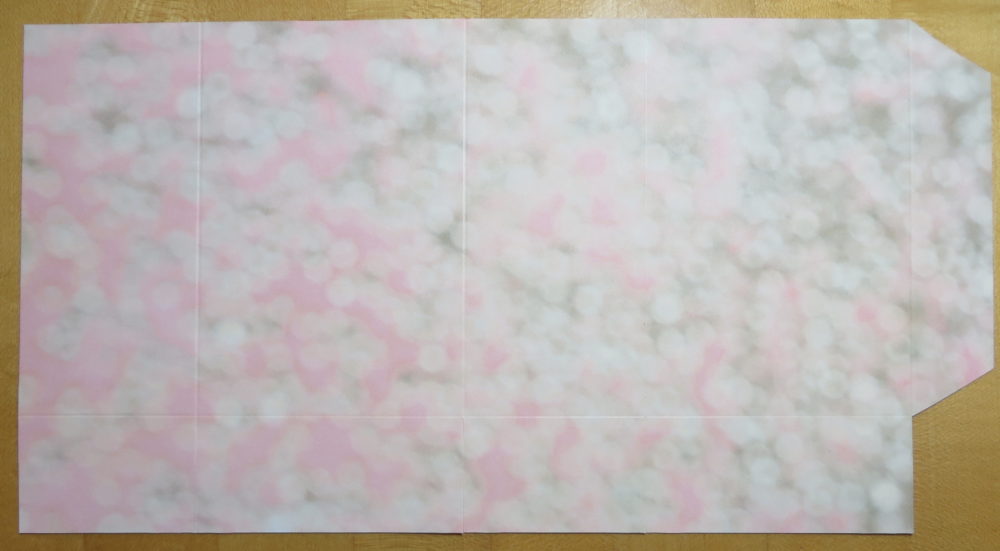
For this particular gift bag, I cut the paper at 6″ x 11 3/8″. I placed the paper “long-ways” (portrait) in my Paper Trimmer and scored at 1 3/8″ for the bottom flaps. Then I turned the paper “sideways” (landscape) and scored at 2 1/8″, 5 1/4″ 7 3/8″, and 10 7/16″. You can’t really see all the score lines in the photo below and the photo is not blurry! That’s the design on the paper!
As you can see, I cut out that tiny little piece on one end that you will see after you score your paper. And just to make the flap easier to fold without the top and bottom edges showing, I trimmed off the edges of the flap. This flap is where you will put adhesive to start assembling your box. As for the bottom of the paper with the 1 3/8″ scored area, just snip each score line up to the 1 3/8″ scored line to form the flaps. Assemble your gift bag and decorate!
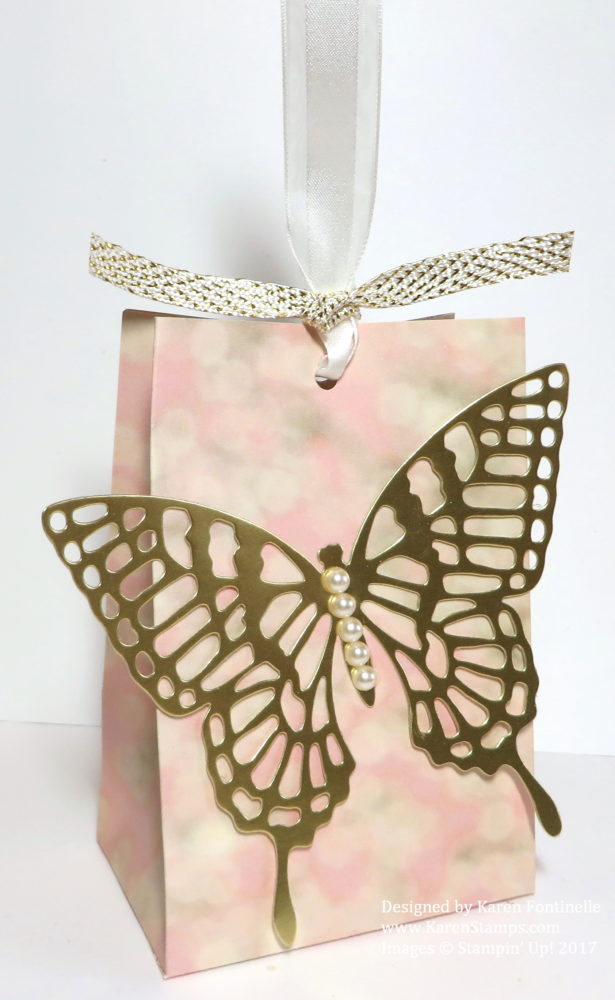
To decorate my gift bag, I die cut a butterfly with the Big Shot and the Butterflies Thinlits Dies, the largest butterfly, out of a Gold Foil Sheet. (My daughter used to call butterflies “foof-flies”.) How beautiful is this large gold foil butterfly? And to make it even more elegant, I added some Pearl Basic Jewels to the body. After I punched a hole in the top of the bag I tied on a Whisper White 5/8″ Organza Ribbon (my all-time favorite ribbon!) using the ribbon with the gold accents in the Sale-A-Bration 3/8″ Metallic Ribbon Combo Pack (143601). You can also add a greeting or tag if you want for whatever occasion you need.
Check out another card I made when the Butterflies Thinlits Dies first came out. These butterflies are made with the smaller medium size butterfly die, cut out of designer paper.
Remember, Sale-A-Bration comes to an end on March 31 so don’t let time fly by and miss it! Remember, there are three new releases since February 21 so you have two brochures to view at that link above. One thing that is no longer available is the gold-striped Card Tin. Everything is available only while supplies last so don’t wait too long!
Make some easy all-occasion DIY gift bags to keep on hand for any last-minute gifts!


