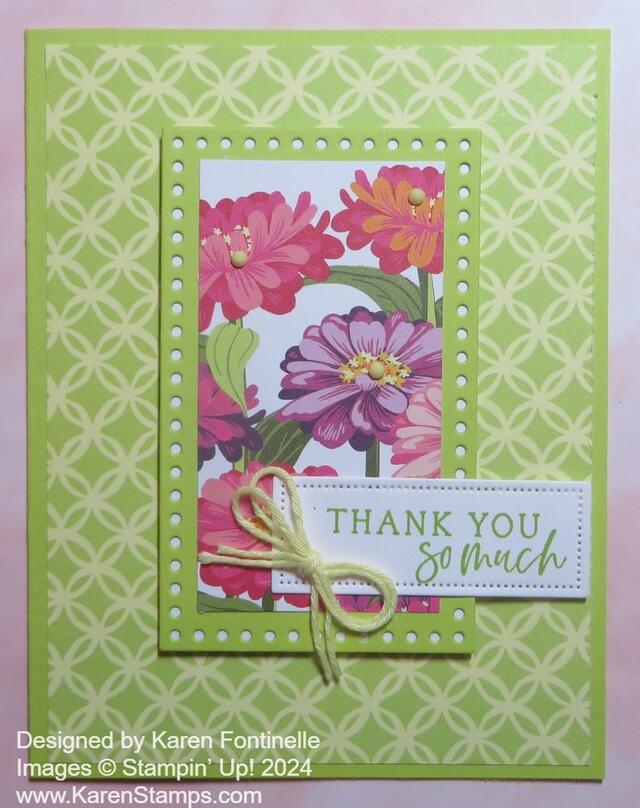
On this card, I used both sides of the Flowering Zinnias Designer Series Paper to show how beautiful these papers are and how you can use just a small floral piece and still have a bright and cheerful card. This Flowering Zinnias Thank You Card could be used for many occasions by just changing the greeting!
The card base is Lemon Lime Twist, a color I don’t think I have used all that often but it sure is pretty on this card. The layered designer paper is cut at 5 1/4″ x 4″ as usual. If you turn this pretty lattice design over, you get the colorful zinnias!
For the focal point of the card, I cut a piece of the zinnias paper at 1 3/4″ x 3 1/4″. This size fit perfectly inside the Everyday Details Diecut. The holes around the border make for a new look than we’ve had. To help those holes show up, I cut a piece of Basic White cardstock that was the same size as the Lemon Lime Twist diecut piece. You can cut it a smidge smaller on all sides so nothing hangs out from under the Lemon Lime Twist piece or make sure you trim it with scissors if it does. This Basic White piece that I cut is 2 1/4″ x 3 1/4″.
The greeting is in the Simply Zinnia Stamp Set in Lemon Lime Twist ink. Then it is diecut with the smallest label in the Everyday Details Dies. That die is the perfect size for many greetings that we use! As I write this, those dies are unavailable but will be back in stock the week of March 25. They must be popular!
The center panel with the zinnias is popped up on Stampin’ Dimensionals or you could adhere it flat to the card. Then the greeting has Dimensionals under the right side but the left side is adhered flat to the zinnias.
For some embellishment, I tied a double bow with the Lemon Lolly twine in the Baker’s Twine Three Color Pack. I also used a few Lemon Lolly gems in the Adhesive-Backed Solid Gems.
I’m sure you won’t be disappointed with this Flowering Zinnias Designer Series Paper, even if you already have lots of flowers! Remember, you will find the whole Flowering Zinnias Suite Collection in the Online Exclusives!


I figured it out!! Thanks!
Figured it out !? . Thanks!!!!!
That’s great!! Easy peasy!
Hi Gloria! Thanks for contacting me. It’s an optical illusion! Ha! I just layered a 1 3/4″ x 3 1/4″ piece of designer paper on top of the Lemon Lime piece in the center. And on the back, I adhered a piece of white cardstock just a tiny bit smaller than the Lemon Lime piece to show through the holes. Also, if you play with all the rectangle dies, you’ll see that the largest one cuts out the center of its piece and leaves a negative frame behind on the cardstock so you could cut around the outer edge of that evenly. And you can put a smaller die inside a larger die and cut out the center. Or just use your Paper Trimmer! Just play with the dies with scrap paper and you’ll see better than reading my explanation. But for the card you are talking about, that’s just designer paper glued to the center of the die and the center is not cut out! Good luck!
Thank you for that detailed prompt response! Now, I’ll go “play”!
I am trying to case your beautiful zinnia card but totally confused how you made the lemon lime everyday detail die a frame??? How did you cut the center out?
Thank you