
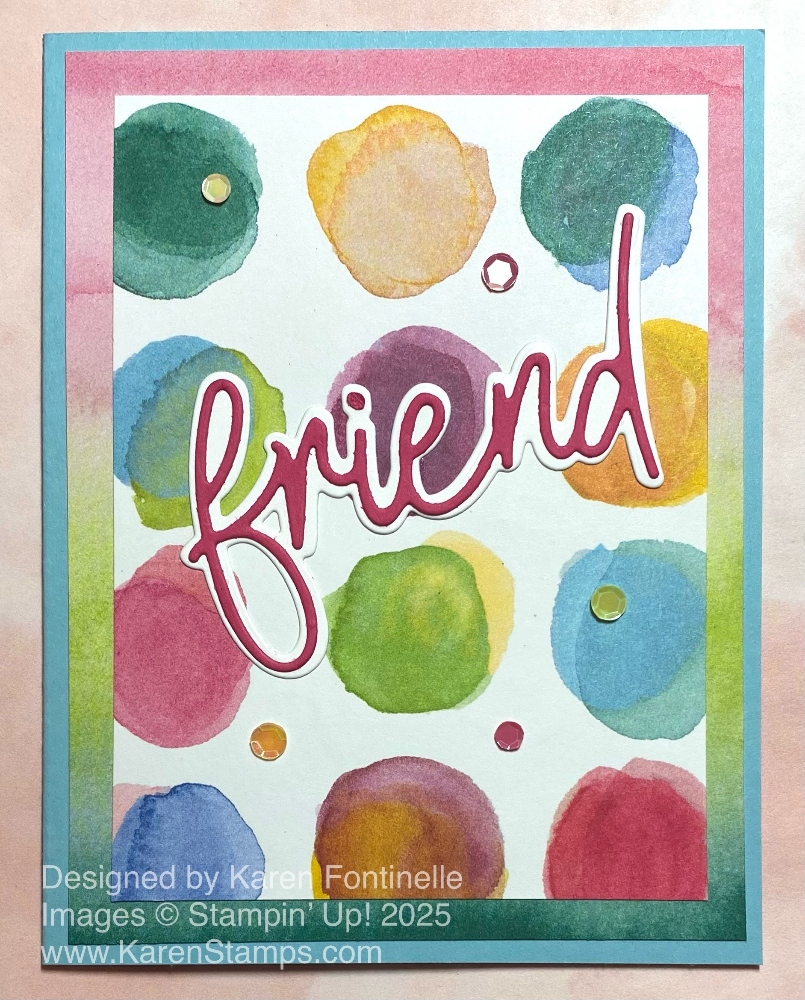
I almost forgot I had this paper so I thought it was time to use it and make this Full of Life Friend Card. It’s just a colorful, easy card with the very cool diecut word “friend” for the greeting on the front. You can do so many creative things with all the paper patterns in this pack. In case you haven’t used yours in awhile either, it’s the Full of Life 6″ x 6″ Designer Series Paper. It is part of the Full of Life Suite Collection and comes with a stamp set, dies, ribbon, and gems. Besides all the colors, the patterns may be squares, circles, color wheels, and brushstrokes. Lots of choices for cardmaking or scrapbooking!
This card starts with a card base of Boho Blue, although there are so many colors you could choose from, just from this patterned paper alone! The designer paper is cut at 3 1/2″ x 4 3/4″ because I wanted to have some margins around the edge. The layer underneath is “the other side” of this circles paper which is also pretty so I wanted that to show a little bit of it. It is cut at the usual size of 4″ x 5 1/4″. If you wanted to add one more layer, you could put another color, even with a very narrow margin, under the circles paper, maybe even black.
With the Friends For Life Dies, I cut out the word “friend”. One die cuts out the narrow image of the word, as you see on top in Melon Mambo, and the other die cuts out the little wider and more solid image that can go underneath as sort of a shadow or just a layer. I tried it with black and with white, and I liked the Basic White background better. Much to my surprise I placed the diecut word at a slight angle, on purpose, and I thought it looked fun! I liked it, even though I intended to adhere it straight across.
For a little sparkle, I couldn’t resist adding some Shiny Sequins in various colors! I guess those are retired now but I still had them in my stash. You can use whatever you have if you want that extra embellishment.
If you think of it, it would be a good idea to use Adhesive Sheets on the back of the cardstock before cutting out at least the narrow diecut “friend” so that you end up with a sticker with adhesive on the back rather than having to put very tiny dots of Multipurpose Liquid Glue on the back! I never think of it until I go to adhere it to the card, of course!
Look through your designer papers! You just might find one you haven’t used in awhile and fall in love with it again!