Category Archives: Halloween

Easy Halloween Eyeball Card

Easy Halloween Eyeball Card

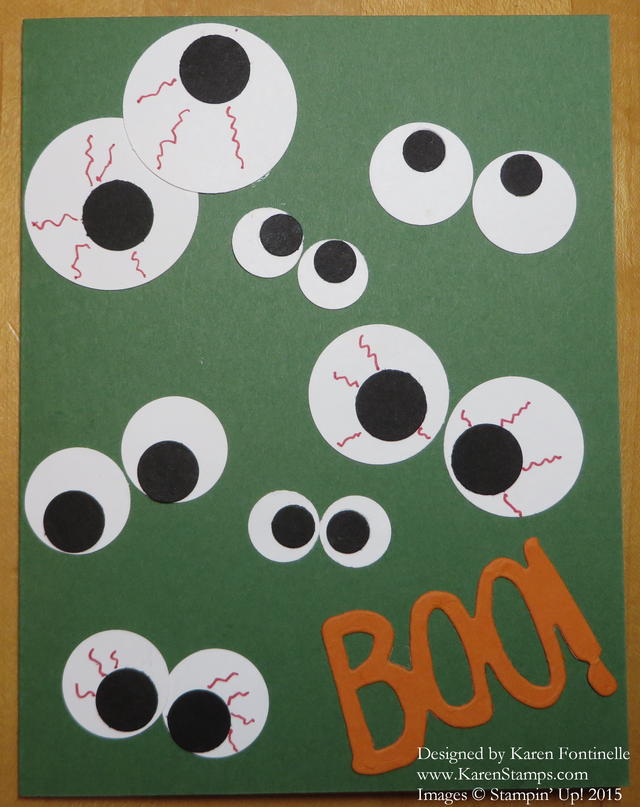
How about this for an easy Halloween card with eyeballs??! This card is super easy to make and a good way to use up some scraps! The card base is Garden Green, but you could use many other colors, like an orange, purple, black, red, whatever you like. Then gather all the circle punches you have for making eyeballs and go to town punching circles, eyeballs and pupils! Glue some black circles in the very center of the white eyeball and some on the edges.  Then you can play around with placement when you adhere them to the card, making some eyes crossed or looking up or down or straight on!  Make some of the eyes bloodshot with the thin tip of the Real Red Stampin’ Write Marker.  Just do whatever you want!  For my greeting, I used the “Boo!” framelit from the Boo To You Framelits Dies.

Here’s a new tip I learned and I think it is working well:  Usea piece of parchment paper in between the die and the card stock! It cuts through the card stock fine and releases it easily from the intricate die.

I got this eyeball idea from looking through a food catalog I received in the mail that had a round box decorated with eyeballs. I thought, “I could make a card like that!” So don’t just trash those many catalogs we will all be receiving in the mail for the upcoming holidays.  Look through them for ideas for your projects, whether it is copying something directly or using the same color combination or using the design for an idea for a card or bag or other project.

Have fun making some Halloween cards for your friends and family, like this easy Halloween eyeball card! Your kids could help with this one!

Shop Stampin’ Up! Online 24/7!

Happy Haunting Halloween Gift Bag for a Treat

Happy Haunting Halloween Gift Bag for a Treat

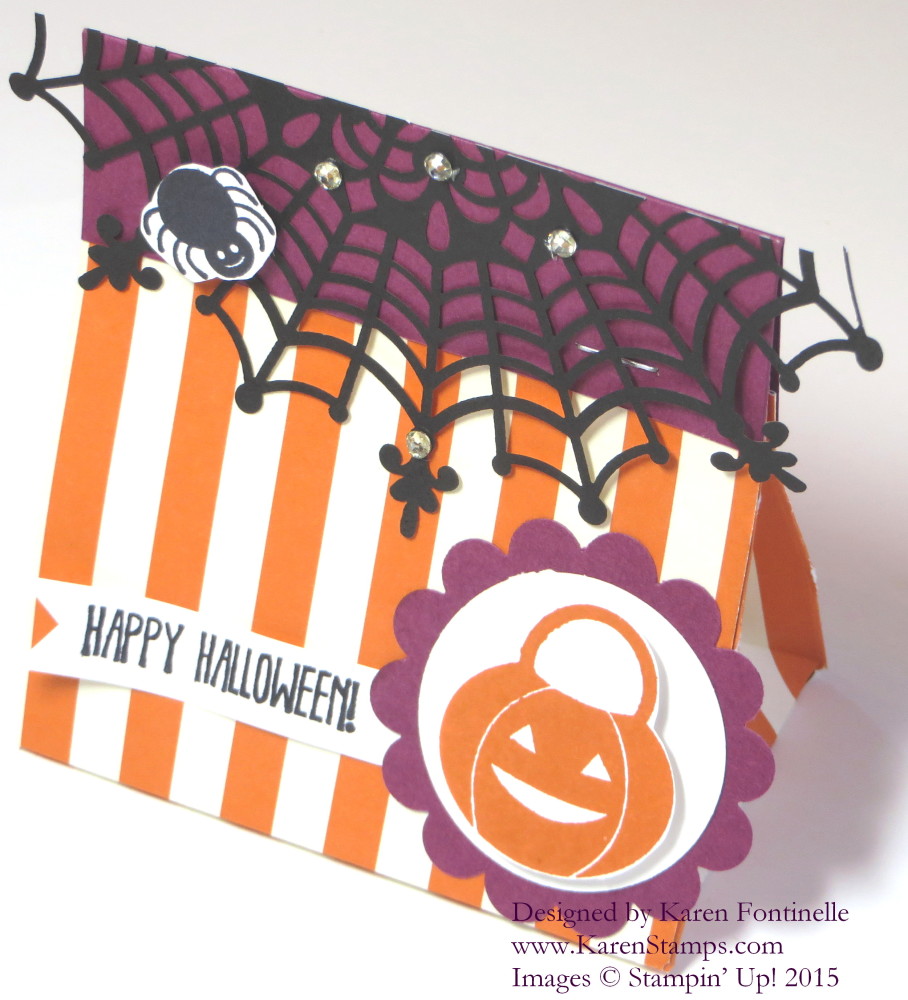
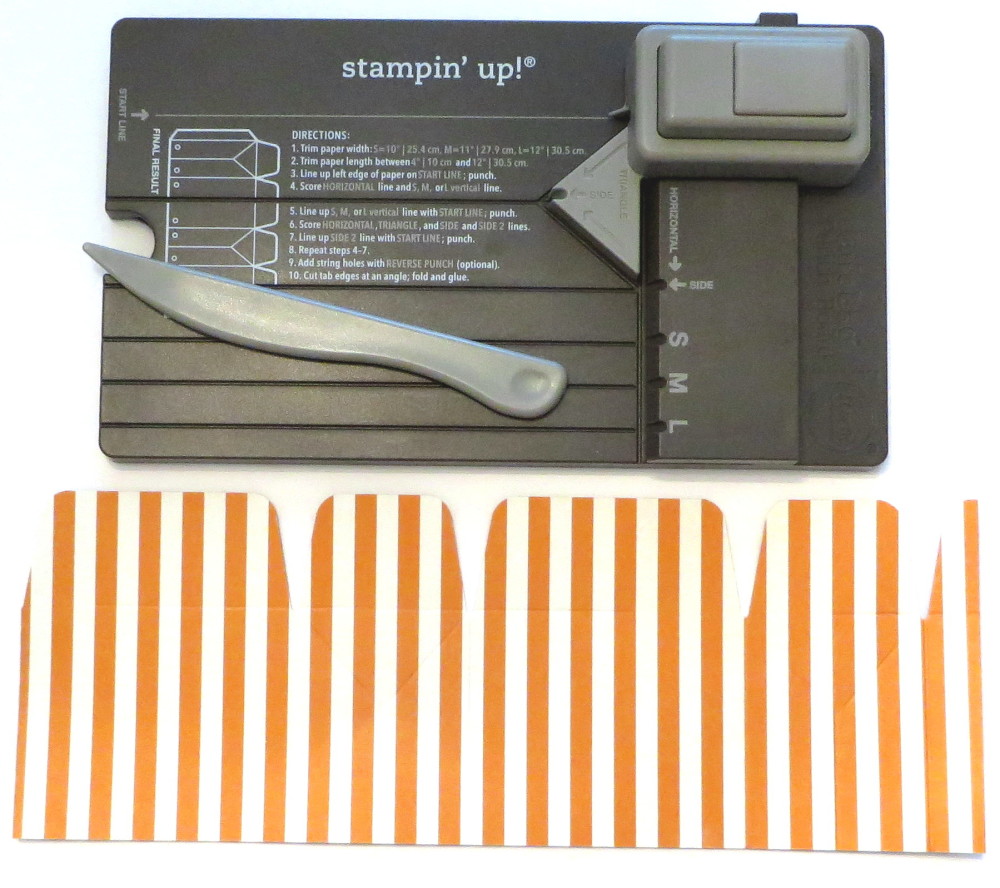
Make a fun Happy Haunting Halloween Gift Bag that you can use for a treat or any little gift. Grab a piece of the Happy Haunting Designer Series Paper and the Stampin’ Up! Gift Bag Punch Board and you will quickly have a little gift bag all scored and cut and ready to be assembled. Directions are right on the Gift Bag Punch Board, but you can also watch a Stampin’ Up! video on how to use the board. Once you do it, you will get the hang of it! I made a Medium size bag with just a 4″ strip of the designer paper. I could have made it taller. I used the new Tear & Tape Adhesive to put the bag together.

After I made the bag, the fun began with decorating it!  You can punch holes with the punch board in the top for ribbon, but I left mine plain and then decided to add a folded strip of Rich Razzleberry to the top and closed the top with the Stampin’ Up! Handheld Stapler. I like a little purple on Halloween things! I definitely wanted to use the new Spider Web Doilies in the new Holiday Catalog. They are pretty large so I was able to cut one smaller to fit my bag, and now I have another piece left for another project! Next I used the Howl-o-ween Treat Stamp Set to stamp a little spider for the web and a little jack-o-lantern. I cut both of them out after stamping with my Paper Snips, forgetting that there are the Boo To You Framelits Dies that I could have used!!  Oh well!  The pumpkin is layered on a white circle punch and the Scallop Circle Punch in Rich Razzleberry. The greeting in the set was too large, so I finally thought of using a small one from the And Many More Stamp Set. And why not add a few Rhinestone Jewels just for fun to the spider web?!

Can you believe it is October already?  I did see my first Halloween decorations in someone’s yard yesterday! It is time to work on Halloween decorations and candy treats and Halloween cards and maybe something like this Happy Haunting Halloween Gift Bag to hold a treat inside! Just have fun with the season and the theme of Halloween!

Shop for all the Holiday Catalog goodies in my

Stampin’ Up! Online Store!

Happy Haunting Gift Bag Punch Board

Layered Letters Alphabet Thanks Halloween Card

Layered Letters Thanks Halloween Card

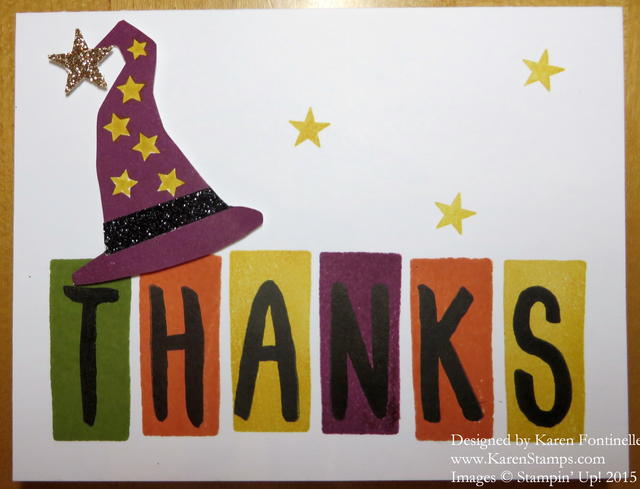
This is a thank you card I made for some of my customers who placed orders recently, made with the fun Layered Letters Alphabet Stamp Set with a little witch’s hat from the Howl-O-Ween Treat Stamp SetI love the colors and wanted to add a little Halloween touch for fun! I love the Black Glimmer Paper and added a small strip to the witch’s hat for some sparkle. I trimmed out the hat with Paper Snips rather than the matching framelits just because I had to make it fit on my card and needed to do a little more snipping! Then I colored in the stars on the hat with a Stampin’ Write Marker. For a little more sparkle I punched out a star from Gold Glimmer Paper with the star punch in the Itty Bitty Accents Punch Pack.

I love the Layered Letters Alphabet Stamp Set!  It is so versatile and modern.  Use the rectangles for a background for each letter or by themselves, or use the letters by themselves! Spell out a word you want or a name on a card or tag.  So many possibilities.

Be sure to try the Whisper White THICK Cardstock on your next order.  If you want to do very simple and no layers, the Whisper White Thick Cardstock can stand up itself in a card better than the regular Whisper White, which is a little thinner.

Don’t forget to double-check the Stampin’ Up! Weekly Deals which end tonight!  If there is anything you want, add them to your order.  We all love bargains!

Stampin' Up! Weekly Deal Sept 22 2015

As you make your thank you and other cards, maybe you might want to add a little Halloween touch to your cards with color or stamp images! Might as well have a little fun in the fall! Use the Layered Letters Alphabet to make a Thank You Card with a Halloween touch!

Shop Stampin’ Up! HERE any time!

Stampin’ Up! Deals

Stampin' Up! Weekly Deal Sept 22 2015

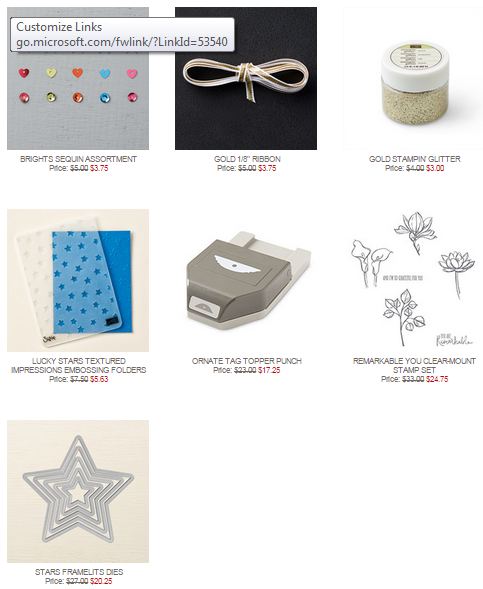
Here are the new Stampin’ Up! Weekly Deals for September 22 – 28, 2015. All great items on the deals this week, whether you want some embellishments or framelits (everybody needs stars in their arsenal!) or a flower stamp set. Sequins are “hot” now.  Be sure to order the new Fine-Tip Glue Pen for adhering the sequins easily.

Stamp Out Breast Cancer with Paper Pumpkin

Stampin’ Up! is supporting the fight against breast cancer by donating $1 for every Paper Pumpkin subscriber and $1 for every NEW Paper Pumpkin subscriber to the Breast Cancer Research Foundation if you subscribe by October 10th! Subscribers will receive their papercrafting kit in a limited-edition pink box!

  • Mini spoiler alert! The October project inside the pink box is just as awesome as always, but we should probably let you know that it is not a pink project. That’s all we’re saying. 😉

Paper Pumpkin is a papercrafting kit from Stampin’ Up! that comes to you  in the mail once a month! All stamps, ink, and supplies are included except possibly adhesive and scissors.  You will be excited for your kit to show up in your mailbox each month and see what project is inside!  No risk, no obligation – you can “pause” or cancel your subscription at any time, just do it before the 10th of any month before the kits ship out.  You will not be billed until your kit ships.  And then you get a cute email from Paper Pumpkin telling you your kit is on its way!

JOIN Paper Pumpkin HERE, especially now, to help people while you have fun stamping!

Sign up before October 10th! The cost of each kit is $19.95 which INCLUDES shipping!  And once you are a subscriber, you can purchase any available full kits or refills from the past.

Paper Pumpkin is FUN!  Just sign up and try it out!  Give yourself a treat!  You deserve it!

Witching Decor Project Kit Witch Hat

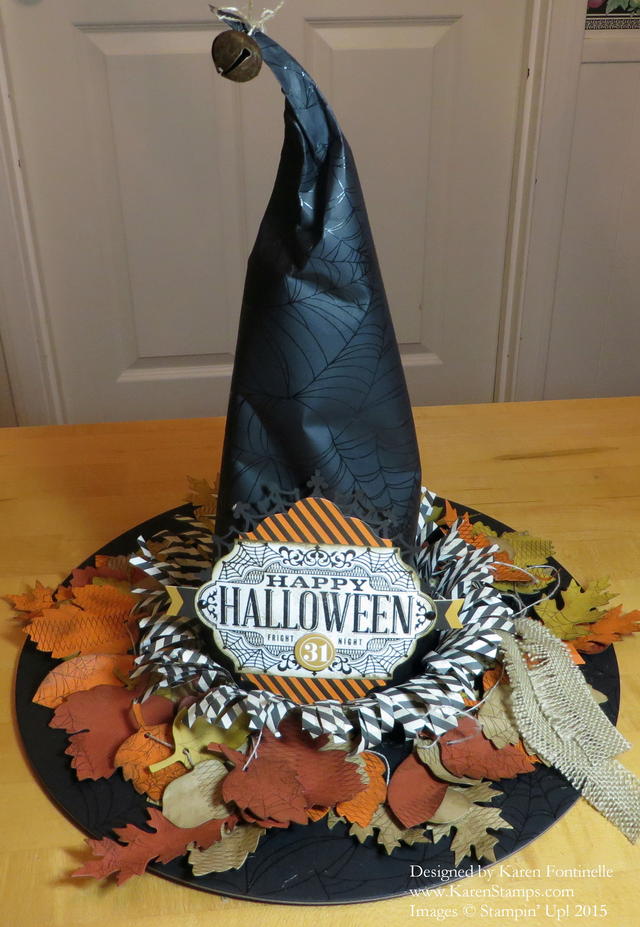
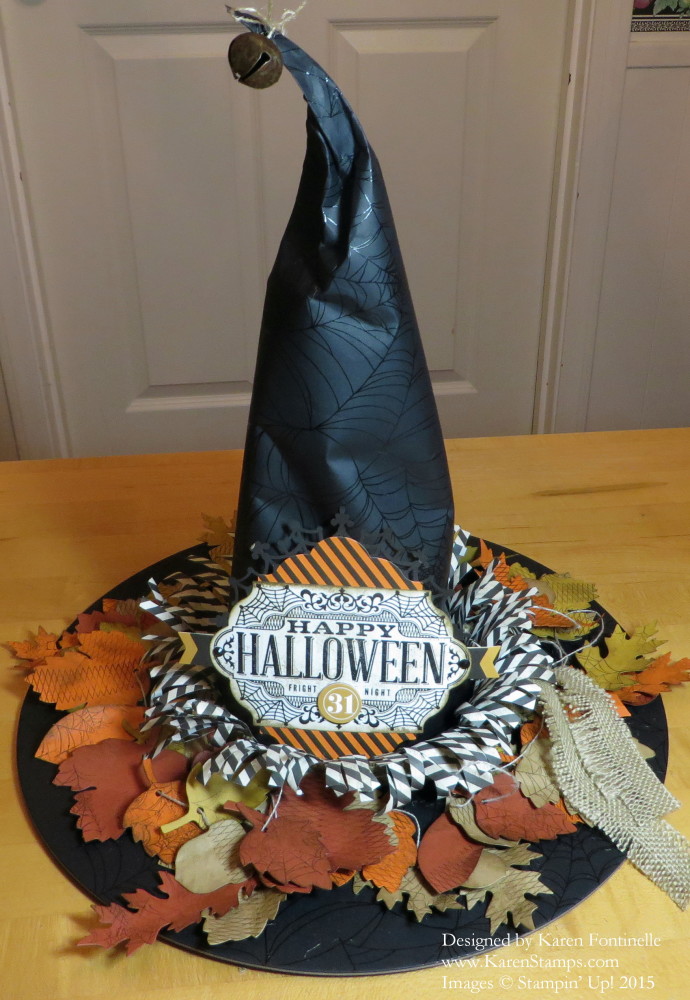
If you are interested in this Witching Decor Project Kit, order it right away! Stampin’ Up! says demand is growing the closer we get to fall and Halloween and once they run out there will not be time to order more.  I LOVE this kit and made my witch’s hat in probably about two hours, if that.  It is not difficult.  The most time-consuming part is punching out the die-cut leaves, stamping a little texture (nothing exact) on them, crumpling and stringing. You will also need the Witches’ Night Stamp Set if you want to stamp the Halloween label on the front. But if you want, you can make up something with whatever stamps you have.  But I do love that label as is!

If you like Halloween like I do, you DO want this kit!  But I strongly suggest you order it as soon as possible so you can get one!  I think it is one of the best kits Stampin’ Up! has done.

Shop Stampin’ UP! Online HERE!

Howl-O-Ween Candy Treat Bag Topper

Howl-O-Ween Candy Treat Bag Topper

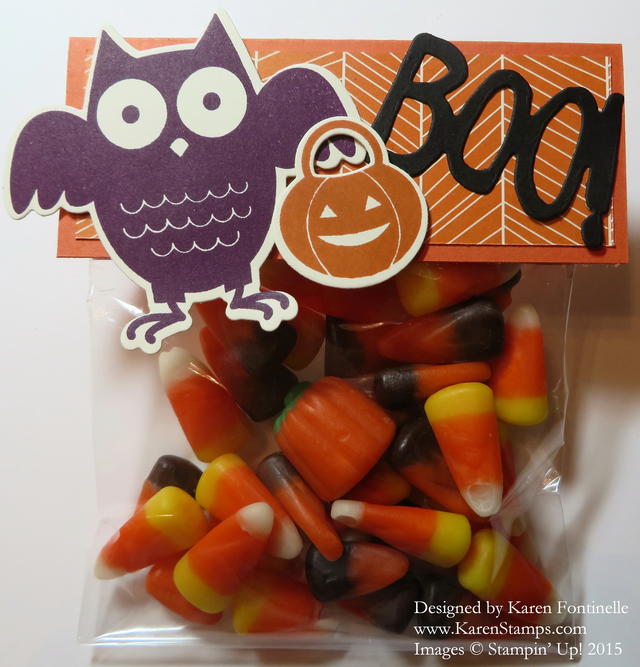
Make a Howl-O-Ween Candy Treat Bag Topper for an easy way to package a treat of some kind for Halloween. Maybe you will need some favors for a Halloween party or class parties at school or maybe just some special treat bags for your family.

Stampin’ Up! has 4″ x 6″ Cello Bags (102757) that are just the right size for a little treat. Not too small but not too big!  Make a topper of any size you like.  Mine is 4 1/4″ wide  x 3 1/2″ and then folded in half.  The designer paper from Happy Haunting Designer Series Paper  makes a great background on the topper and you will probably have scraps just the right size once you start using it.

I stamped the owl from the Howl-O-Ween Stamp Set in Blackberry Bliss and cut him out with the Boo To You Framelits Dies. The pumpkin is stamped in Tangelo Twist, the coordinating color with the Happy Haunting DSP.  The “Boo” is one of the framelits die. I saw a tip recently saying to use parchment paper in between an intricate die and the card stock and it sure worked well cutting out the Boo word!  Try it if you have some Parchment paper.

Just make a topper for any little treat bag and then decorate it for the occasion!  It’s really fun!

If you want to get an early start on Halloween, shop around in the Stampin’ Up! Holiday Catalog.

When you are ready to order, just go to my Stampin’ Up! Online Store!  If you are new, you will see “Create Your Account”.  Get all that set up and you’re ready to shop! Plan to make a Howl-O-Ween Candy Treat Bag Topper this weekend and be ready to give someone a treat!

Don’t forget the Stampin’ Up! Weekly Deals!  Last day for these is Monday, September 21.

Stampin' Up! Weekly Deal Sept 15 2015


Sara Douglass Shows the Season to Season Wreath and Witching Decor Kit


Sara Douglass, daughter of Shelli Gardner, Founder and CEO of Stampin’ Up!, appeared on a local Utah TV show and showed how easy the Season to Season Wreath Project Kit is to assemble and use for multiple occasions. She also shows the completed Witching Decor Project Kit (the witch hat that I love!!).  I always enjoy when Stampin’ Up! makes a TV appearance!

Listen to the cute little reporter! She sounds pretty excited with these projects, but I don’t think she has stamped before! Wouldn’t we all love to get our hands on her at a workshop and show her all about stamping and papercrafting?! It’s always fun to see a new person’s eyes light up when they discover the fun of stamping!

If you would like to watch the Stampin’ Up! videos about assembling these two project kits, here they are!


I hope you enjoyed those! The kits in the Stampin’ Up! Holiday Catalog this year are just fantastic!  I hope you will choose at least one to make!

I’m happy to mail you the current Stampin’ Up! catalogs if you do not have a Demonstrator to help you yet! Just email me your contact information at Karen@KarenStamps.com.

To shop for the Season to Season Wreath Kit and the Witching Decor Project Kit, as well as all the other wonderful Stampin’ Up! products, just visit my Stampin’ Up! Online Store HERE or let me put your order in for you if you prefer!

Witches’ Night Halloween Card Idea

Witches' Night Halloween Card

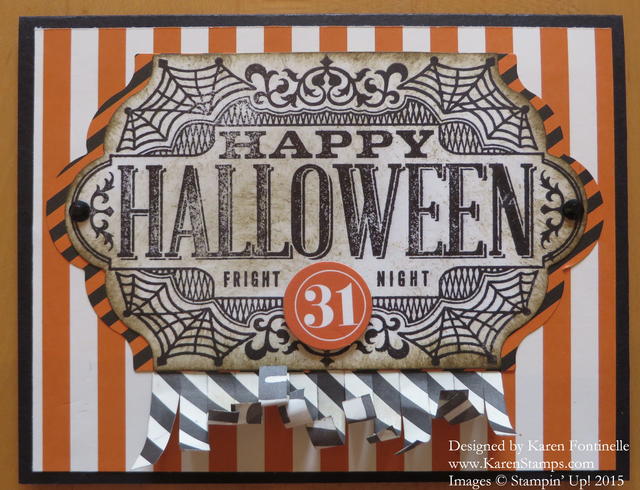
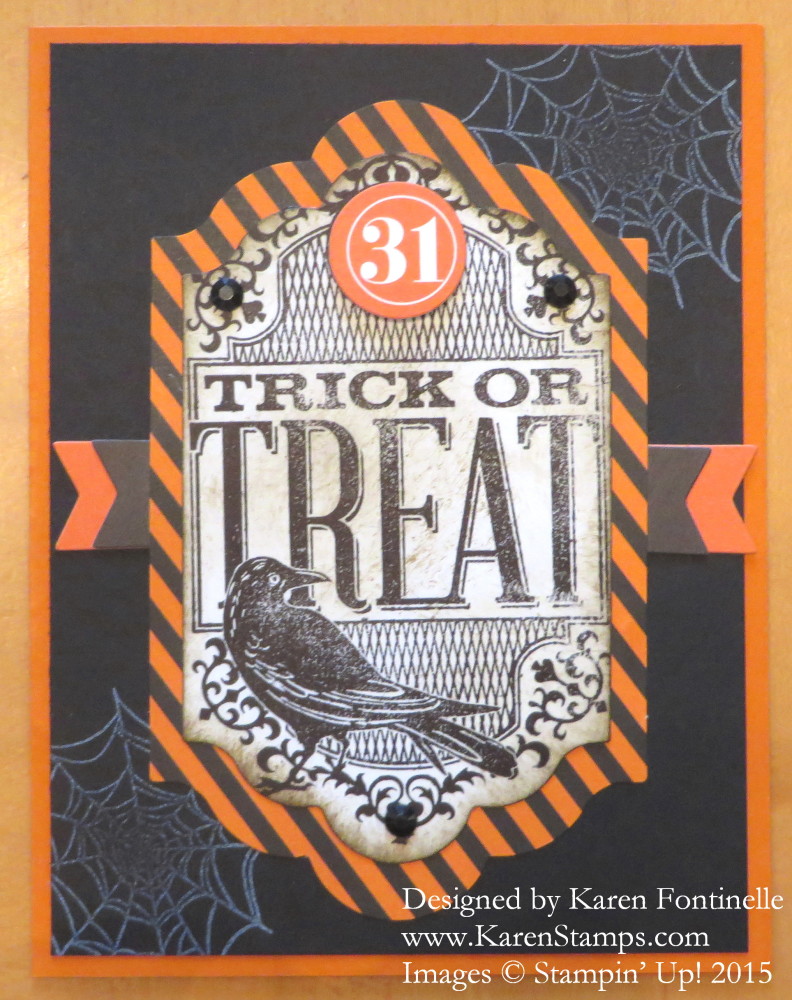
I love the look of this stamp in the Witches’ Night Photopolymer Stamp Set and used it with some leftover pieces from the Witching Decor Project Kit to make this Halloween card. The label that this is stamped on and the orange and black striped piece behind it, the “31” sticker, plus the fringe piece at the bottom are from the Witching Decor Kit. I am SO thrilled with the witch’s hat I made with that kit. You can see it HERE.

After stamping the label, I sponged some Soft Suede ink around the edges.  I wish I would have also sponged some ink on other parts of the card, but I forgot!  The paper is from the Happy Haunting Designer Series Paper. Now you can buy a pack of coordinating card stock for each pack of designer paper from Stampin’ Up! if you do not own all the card stock colors.  Be sure to look for that when you are shopping. It’s nice to know and to have that convenience. Check out the Happy Haunting Card Stock Pack.

******

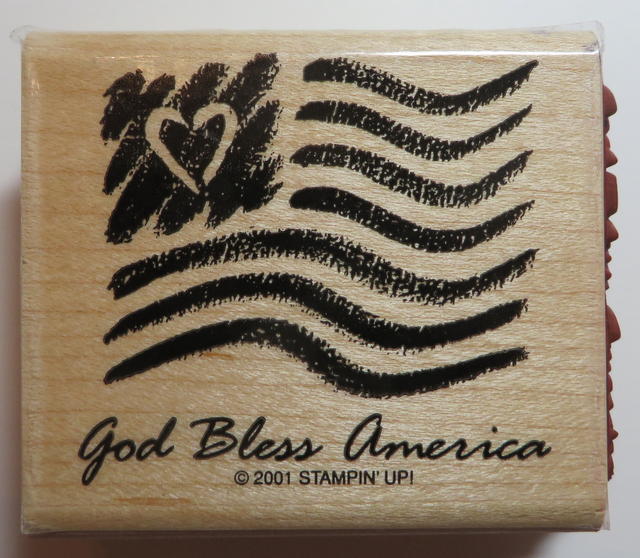
Even as we think about fun things today like Halloween and the upcoming holidays, let’s also honor the day, September 11th. It’s difficult to believe that day is so long ago now for those of us who remember exactly what we were doing when we heard about it. Although most of us were actually a physical distance away from the tragedy, I remember the feeling that we wanted to connect with our loved ones who weren’t at home and friends, just to hear that they were all right, even though we knew they were. So maybe we should all take a moment today and write a quick (or long) note to someone we care about and send a card, just to let them know we are thinking about them. We should do this more often, but we are all busy all the time. Think of the joy you will bring someone when they found an actual personal envelope and card in their mailbox.

Here is the special edition stamp Stampin’ Up! created and sold to benefit the September 11th Fund.  The entire purchase price was donated by Stampin’ Up! in remembrance of the victims.

Special Edition God Bless America Stamp by Stampin' Up!

Howl-O-Ween Treat Mini Treat Bag Halloween Card

Howl-O-Ween Mini Treat Bag

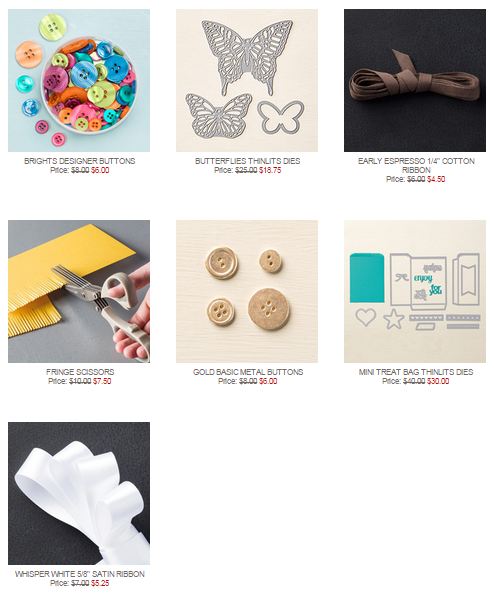
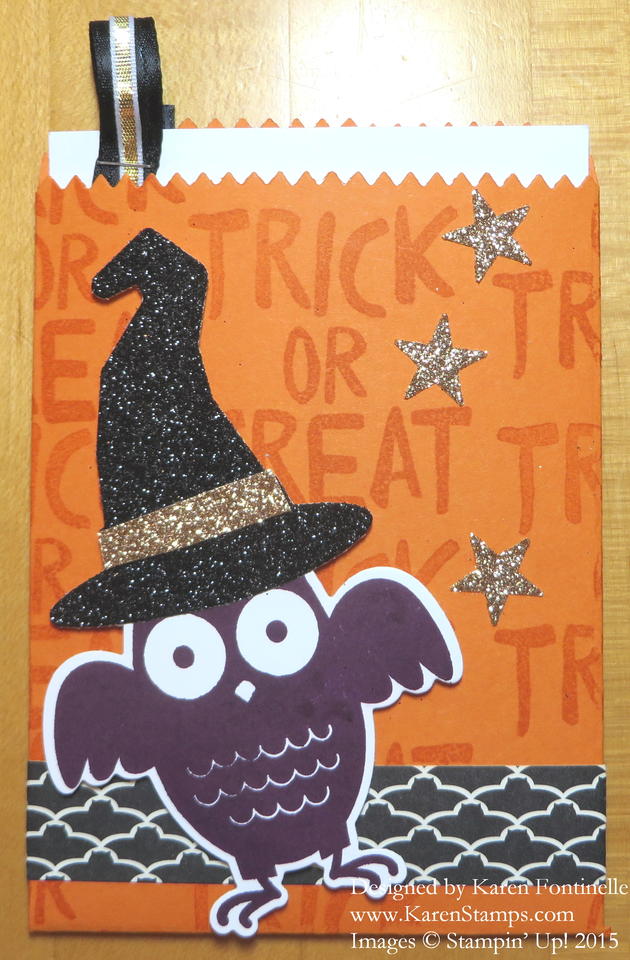
You know I love the Mini Treat Bag Thinlits Diesso for Halloween I made this Howl-O-Ween Treat Mini Treat Bag Halloween card.  I just used Pumpkin Pie card stock to make the treat bag with the die and the Big Shot and then I stamped the words “Trick or Treat” all over with matching Pumpkin Pie ink. That’s how you make your own designer paper! I wrapped a little strip of Happy Haunting Designer Series Paper around the bottom of the bag just for a little something.  The owl from Howl-O-Ween Treat Stamp Set is stamped in Blackberry Bliss and die cut with the Boo to You Framelits Dies.  I also die cut the witch’s hat from the Black Glimmer Paper in the Holiday Catalog and just put a little strip of Gold Glimmer Paper on the hat.  Then I also punched a few Gold Glimmer Stars with the star punch in the Itty Bitty Accents Punch Pack.  Easy to make a deluxe Halloween card!

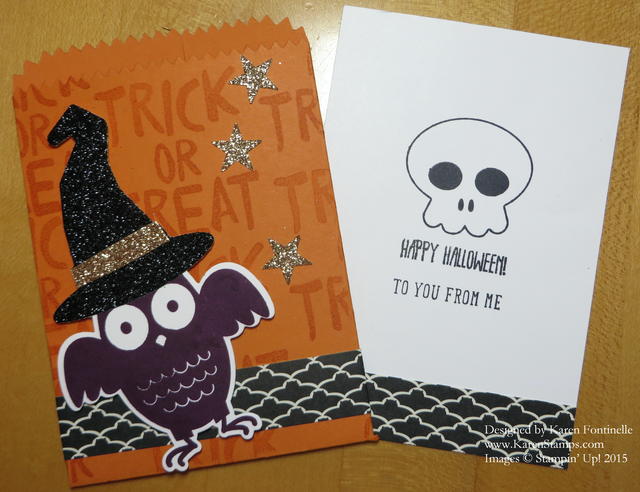
Here is what the inside card looks like.  I added two bits of ribbon, the Basic Black 3/8″ Stitched Satin Ribbon and the Gold 1/8″ Ribbon and stapled on with the Stampin’ Up! Handheld Stapler to help pull the card out.

Howl-O-Ween Mini Treat Bag inside

Notice the strip of Happy Haunting Designer Series Paper!  What do you see?  Just a black and white design?  Or do you see the bats?!  Cute, huh?!

Remember, this year you can buy a pack of card stock that coordinates with the designer series papers rather than buying separate colors, such as this Happy Haunting Cardstock Pack.

So the Mini Treat Bag Thinlits Dies aren’t just for bags or birthdays or treats!  They can be used to make a Howl-O-Ween Treat Mini Treat Bag Halloween Card!

Need anything?!  Shop online at Stampin’ Up! 24/7.

Witches’ Night Witching Decor Halloween Card

Witches' Night Witching Decor Halloween Card

I hope this Witches’ Night Witching Decor Halloween Card gets you in a Halloween mood! After I made the Witching Decor Project Kit witch’s hat HERE I still had some pieces left in the kit, so I made this card with some of them.  I also wanted to get more use out of my Witches’ Night Photopolymer Stamp Set that coordinates with the Witching Decor Kit. I stamped the smaller piece in the kit with the Trick or Treat stamp and sponged some Soft Suede ink around the edges. That layered on top of another piece in the kit and I added the extra little banner pieces from the kit. I also had some black rhinestones left and put three of those on the stamped banner. I changed out the background a couple of times and finally decided on Basic Black with a couple spider webs stamped in the corners with Whisper White Craft Ink.  The card base is Tangelo Twist.

For the inside you could add a layer of Very Vanilla and maybe stamp with a few spider webs or add a strip of matching designer paper.

Whether or not you usually make Halloween cards to send to friends, this Witches’ Night Witching Decor Halloween Card could also be framed for a Halloween decoration in your home!

Shop the Holiday Catalog in my Stampin’ Up! Online Store!

New Stampin’ Up! Weekly Deals, Clearance Rack, & Holiday Catalog

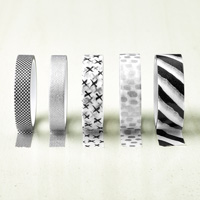
Here are the new Stampin’ Up! Weekly Deals, available while supplies last, until Monday September 7, 2015. Don’t miss out! Great embellishments for your cards and projects in the Candy Dots and Rhinestones, of course! Both are adhesive-backed so all you do is stick them on!  Any Washi Tape is fun to use, and the White Seam Binding Ribbon is always useful!


Clearance Rack Banner 2015

Be sure to check the Clearance Rack before you finalize any orders. You never know what you will find. Stampin’ Up! plans to add new items next week! But if you think ahead to the holidays, right now you can stock up on the pretty Cherry Cobbler Sheer Linen Ribbon (more than half off!), the Real Red Satin Ribbon, the Mossy Meadow Satin Stitched Ribbon for some green,  and the Extra Large Gift Boxes are handy to have on hand for gifts! And there are many more things, but those items jumped out at me as something you can use soon – and all the time, really!

Stampin' Up! Holiday Catalog 2015

And of course, in case you missed it, the Stampin’ Up! Holiday Catalog went live yesterday!!  If you need a catalog (USA) please email your contact information to Karen@KarenStamps.com.

Check out all the fantastic Holiday Catalog products in my Stampin’ Up! Online Store! .

Make a Witch Hat Decoration With the Witching Decor Project Kit by Stampin’ Up!

Witching Decor Project Kit Witch Hat

Today is the day that the Stampin’ Up! Holiday Catalog begins! And the Witching Decor Project Kit Witch’s Hat is the item that caught my eye as soon as I saw it! It was the first thing I wanted to get my hands on because I love Halloween and all the fun decorations! This is a kit with everything you need for the hat except for the stamp set, ink pads and adhesive. It doesn’t take very long to make (really!) and it is a good size for a table decoration or Halloween decor! I love how mine turned out! You’ll find the Witching Decor Project Kit (140969) on page 7 along with the coordinating stamp set, Witches’ Night, to make that Halloween label and to stamp the leaves.

Everyone can begin ordering from the Holiday Catalog today and right through January 4, 2016. (Okay, let’s not get ahead of ourselves!) Everyone can view the catalog and the products online today. I hope my regular customers received their catalog in the mail already. If you would like to be one of my customers, please contact  me and I can send you a catalog (in the USA).

This Holiday Catalog is the best, even if I did say that last year – and the year before!  But this one really is fantastic with lots of new products, lots of Bundles to save you 15%, and lots of Kits that take the worry out of designing something. Get together with some friends and have everyone order a kit, then get together to make the project for a fun girls’ night out, or afternoon.

Stampin' Up! Holiday Catalog 2015
Go right now and check out all the great Holiday Products from Stampin’ Up!  I think you will be dazzled! Order the Witching Decor Project Kit by Stampin’ Up! and make your own witch hat decoration!

One More Halloween Thing!

There’s an app for the iPhone (maybe other stuff) called Flipagram.  You can select your photos and make a video out of them to post on social media, especially Instagram. Except on Instagram I think it has to be cut to only 15 seconds.

You might have to be signed up for Flipagram (it’s free) to see this, I’m not sure, but here is the link of my first Flipagram I made of my Halloween decorations!

http://flipagram.com/f/LBg5c89ioj

Halloween Flipagram

Click to watch.

Motley Monsters Photo Halloween Card

Motley Monsters Photo Halloween Card

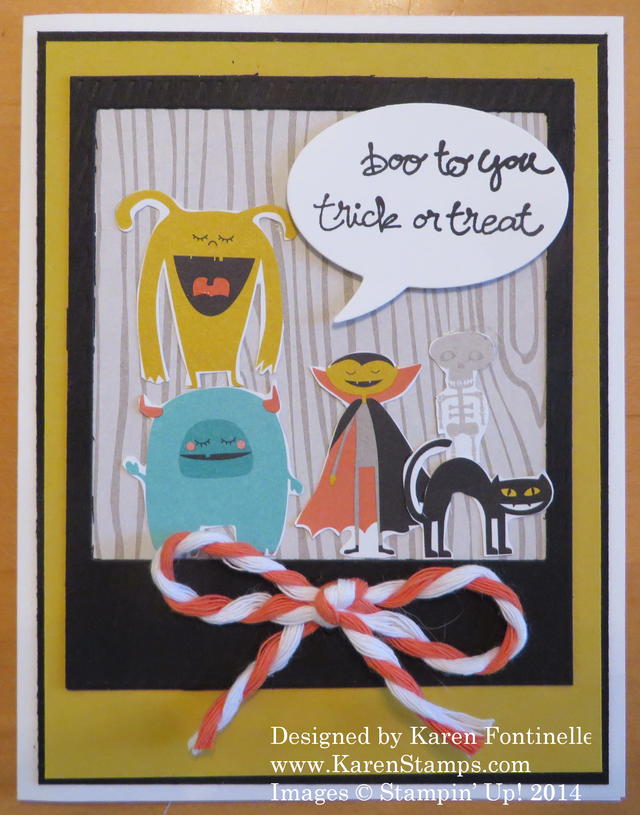
This is an easy Halloween Card to make with the Motley Monsters Designer Series Paper and the On Film Framelits Die, which makes it look like the Motley Monsters are posing in a photo! I cut them out of the designer paper! The job is pretty easy with a pair of Paper Snips. The woodgrain paper behind the monsters is just the opposite side of the monster paper! I had an extra speech bubble cut out with the Word Bubbles Framelits Die so I just used that for the greeting coming from the monster characters!  The words are from the Good Greetings Stamp Set.. The bow is tied with the White-Tangerine Tango Two-Tone Trim A fun Halloween card, I think!

Have a Happy and Safe Halloween Night!  

Don’t let the Motley Monsters get you!!

Triangle Box Witch’s Hat Treat Box

Triangle Box Witch's Hat Treat Box


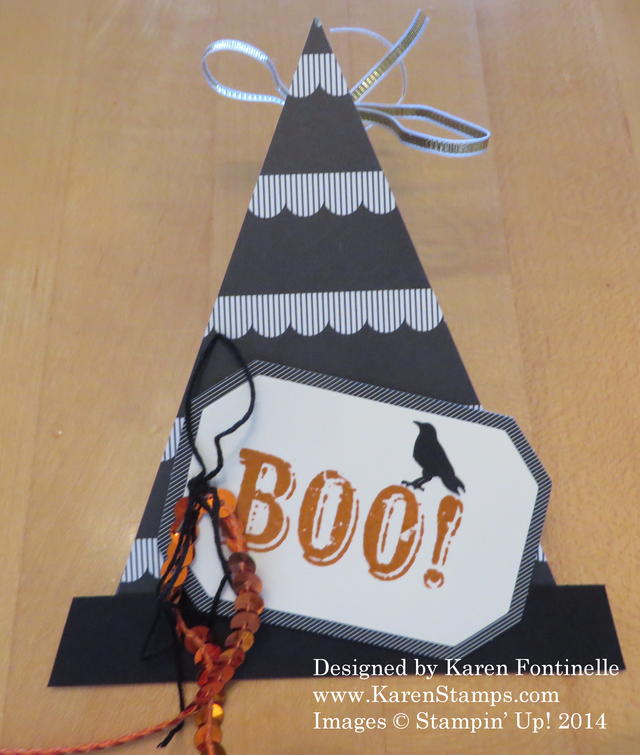
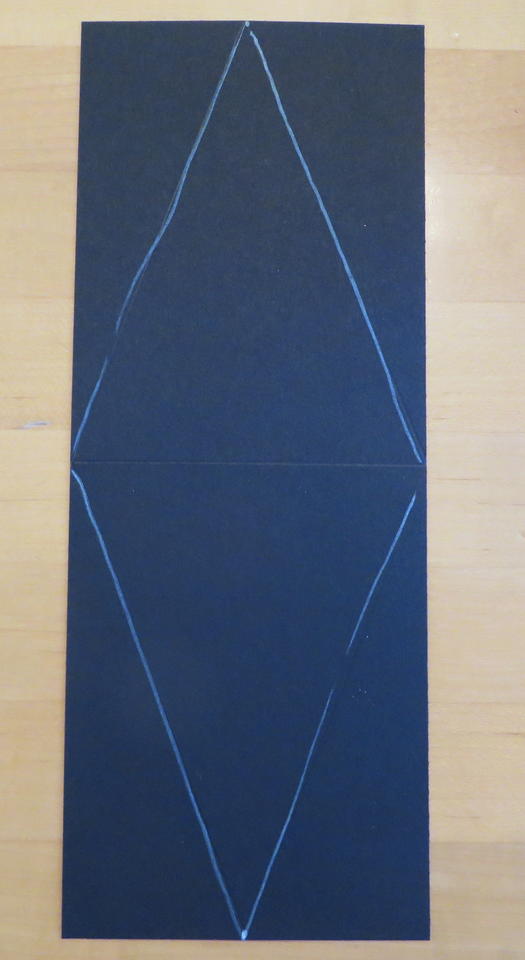
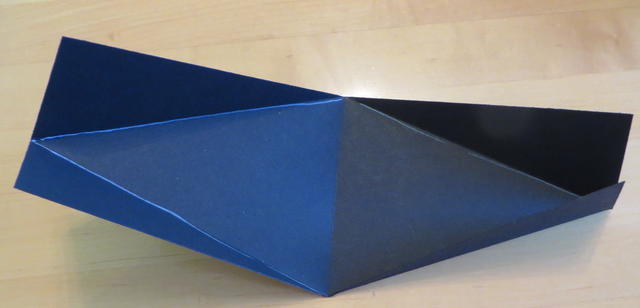
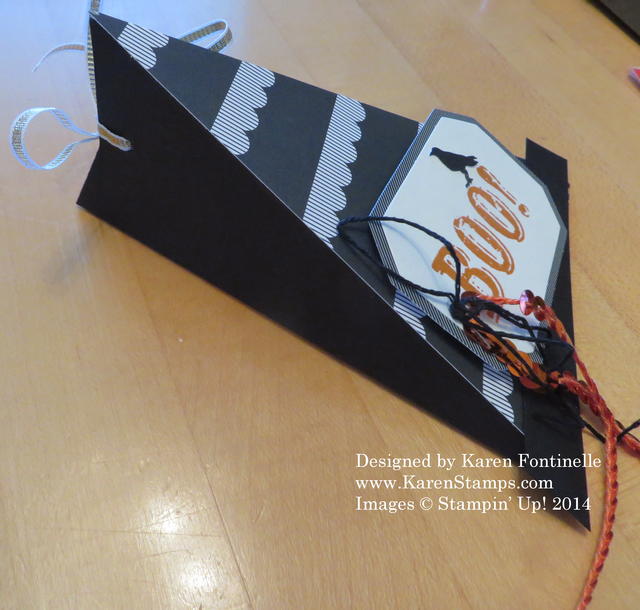
Here’s another Halloween Treat Box for you.  These triangle boxes are SO easy to make.  Just cut some card stock 4 1/4 x 8 1/2″.  Then find the middle of the top and bottom and mark it.  Place in your Paper Trimmer and score in half at 5 1/2″.  Then score from the middle mark top and bottom on both sides to that 5 1/2″ score line.  Check the diagram below.  Then crease the lines and fold up. Punch holes through the top point and after putting treats inside, tie shut with ribbon. I decorated this to look like a hat with some designer paper and a hat brim piece.  The decoration is a leftover piece from my Paper Pumpkin Kit.

Triangle Box Score Lines

Triangle Box

Triangle Box Witch's Hat Treat Box side

One more day until Halloween! And today is my youngest son’s birthday!  If he had been born 45 minutes later, he would have been a Halloween baby!  My husband was always grateful that Steven waited until halftime of the football game to let us know it was time to go to the hospital! It was a lonely night at the hospital for me on Halloween night as everyone was out trick-or-treating and nobody was visiting me and my new baby at the hospital! But his birthday parties were always fun as they had a Halloween theme! Hard to believe that was 26 years ago tonight!  Time flies, all you young mommies! Treasure every moment!!

Motley Monsters Halloween Treat Bags

Motley Monsters Halloween Treat Bags

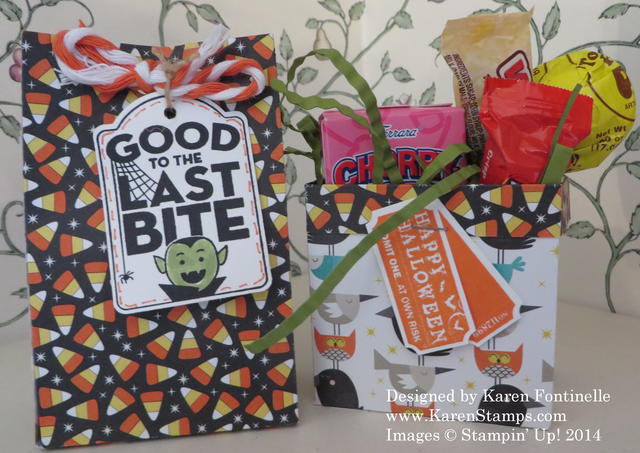
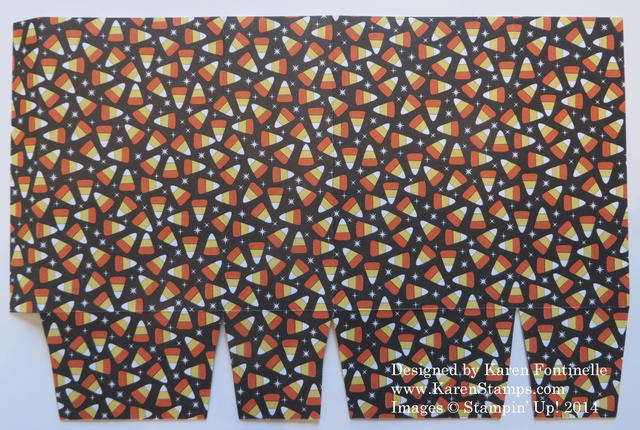
Here’s how to make two easy Halloween Treat Bags using the Motley Monsters Designer Series Paper. You just need paper, a Simply Scored Tool or Stampin’ Trimmerand some strong adhesive, like Fuse Fast.

Start with a piece of card stock or designer paper cut to 8 1/2″ x 5 1/2″. Score the paper lengthwise (portrait) at 1 1/2″ on one side. Turn the paper to landscape position (sideways) and score at 1 1/2″, 4″, 5 1/2″, and 8″. Fold and crease all the score lines, preferably with a Bone Folder. The short little 1/2″ wide section on the very end needs to be cut off. Along that same 1 1/2″ wide section, cut on all the score lines up to the score line going across.  This will make the flaps for the bottom of the bag. If you want, just trim those on an angle a little bit to keep the flaps a little less bulky.  Use adhesive on that narrow little 1/2″ flap that is left and fold the bag over to adhere. Then fold the flaps at the bottom and apply a little adhesive.

Motley Monsters Halloween Treat Bag Paper

The opposite side of this Motley Monsters paper is the little bird pattern. The first bag I made, I actually scored 1 1/2″ on each side, which meant that after I formed the bag and folded up the bottom flaps, I had a score line running across the middle of the bag where it wasn’t supposed to be! Rather than waste the paper or add additional paper to hide it (remember, there are NO mistakes in stamping!), I trimmed off a little bit of the top and just folded that top edge down on that wayward score line. That’s the bag on the right with the birds and a top edge of the candy corn pattern! Turned out cute anyway, if not a little smaller!

The bag on the left I did correctly, using the candy corn side of the paper instead of the birds.Once you have the basic bag made, you can leave it like that or you can push the sides in a little and pinch the top closed, punch a hole for ribbon and tie it shut.

It’s very cute and easy to make and can be used for any occasion. Try one! The candy corn bag uses a Halloween greeting from the Merry Everything Bundle and punched with the included Tag Punch. I used the White and Tangerine Tango Trim to tie it shut.  The other bag has a couple of tickets to adorn it from the That’s The Ticket stamp set.  Sometimes we get so carried away with the “new” stuff in the newest catalog that we forget about what other stamp sets we own that might work, too!

You better get to work on your Halloween treat bags!

Shop at my Stampin’ Up! Online Store when you need some supplies!