Category Archives: Halloween

Halloween Candy Bowl Decoration

Halloween Candy Bowl Decoration

If you want to fancy up your candy bowl a little, try this Halloween Candy Bowl Decoration!  Get yourself some kind of small bowl, dish, or container and make something like a tag or miniature card, essentially, to decorate the bowl for the holiday!

I just took the 5/8″ Burlap Ribbon and wrapped around the candy bowl. Actually, I used some velcro to hold the ribbon together thinking that I could maybe make a Christmas decoration and change it out on the same bowl.  But you could also just use some Mini Glue Dots or something to hold the ribbon on to the bowl if you wanted to.

For the Halloween decoration, I stamped the dog from the Trick or Tweet Stamp Set in the Holiday Catalog on Whisper White Cardstock and colored him in with Stampin’ Blends. I love those Stampin’ Blends Markers!  So relaxing to color with these alcohol markers.  I also stamped and colored the tiny little jack-o-lantern. Then I cut these both out by hand.  I also cut out a pumpkin from the Toil & Trouble Designer Paper as well as the little bat.

The greeting is stamped with the Itty Bitty Greetings Stamp Set and ultimately I decided to just cut all the words apart to fit them onto the decoration easier.  The full moon is cut with the 1″ Circle Punch out of Crushed Curry Cardstock.  I just glued all these pieces onto a piece of Granny Apple Green Cardstock, punched with the 2″ Circle Punch. This is then layered on a piece of Gold Glimmer Paper die cut with one of the Layering Circles Dies.  I adhered this decoration to the burlap ribbon with a couple of Stampin’ Dimensionals.

For a finishing touch, I couldn’t resist tying on a piece of the beautiful, sparkly Black 5/8″ Glittered Organdy Ribbon.  You’ve got to have this lovely ribbon to use on projects!  It’s for more than Halloween, too!

Find a candy bowl in your stash or at the craft store or even the dollar store and decorate it for Halloween! I bet it will make the candy even more enticing (not that we need that!).

SHOP STAMPIN’ UP!

Black Cat with a Hat Halloween Card

Black Cat Halloween Card

It’s fun to make a silly card like this Black Cat With a Hat Halloween Card for Halloween!  This is an easy one because it just uses a punch, paper, scissors, a few sequins and a bit of ribbon!

The card base is Basic Black on this card with a layer of the cute Toil & Trouble Designer Series Paper.  I thought this pattern of the little black cats on the orange background was perfect for this card!

I used the Cat Punch to make the cute black cat.  You could also cut out the cat from designer paper with a small pattern for something different to put on a solid background.  I cut out one of the witch’s hats from the Toil & Trouble Designer Paper to put on the cat.  I stamped the little greeting from the Trick or Tweet Stamp Set and decorated it with a few Iridescent Sequins.  I punched it out and layered it on a piece of Basic Black. You can use whatever punches or dies that you like.

The little bit of ribbon is the beautiful Black 5/8″ Glittered Organdy Ribbon. It has bits of real glitter in the ribbon.  Unfortunately, the ribbon is backordered right now and might not be available until just before Halloween.  But you can use this ribbon for any elegant project and Christmas and New Year’s! I don’t think we have ever had a ribbon like this one and it has been very popular.

Make a few fun cards for your friends for Halloween and be sure to mail them out, like this Black Cat with a Hat Halloween Card.

SHOP STAMPIN’ UP! ONLINE HERE!

Make a Witch’s Boot Candy Holder Halloween Treat

Witch's Boot with Candy

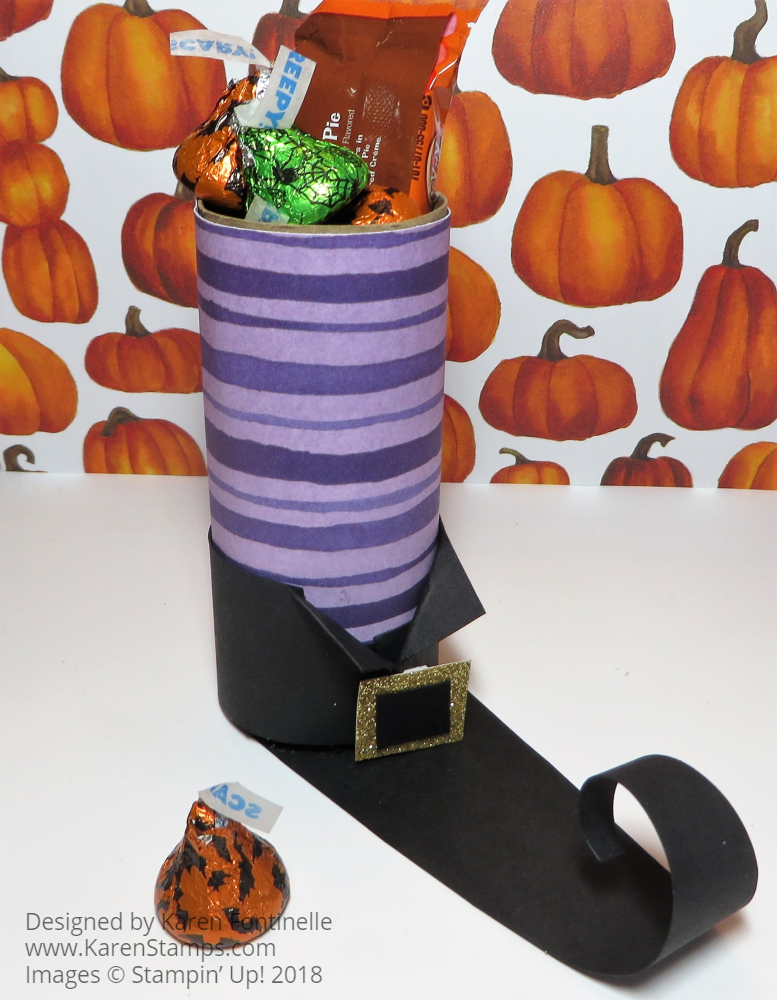
Make a Witch’s Boot Candy Holder Halloween Treat if you want to make something different and fun!  It just takes a toilet paper roll or part of a paper towel roll! (I think I prefer a paper towel roll myself!)

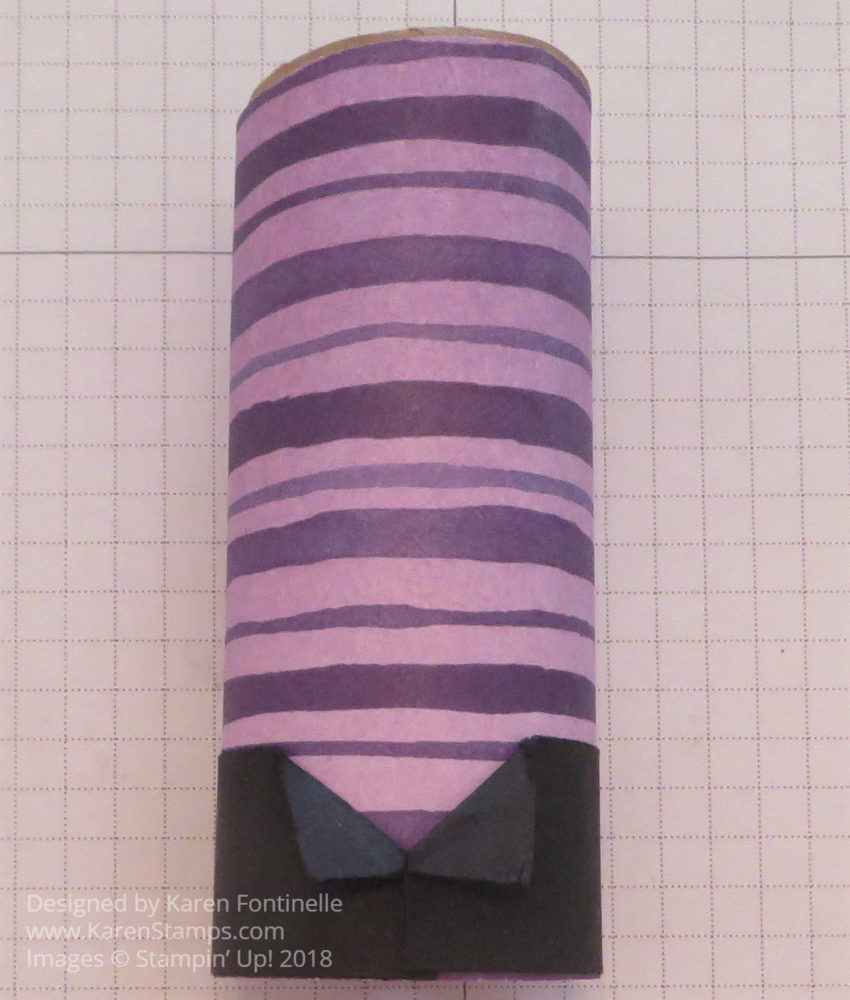
To make it look like a witch’s boot just wrap the roll in a designer paper or cardstock.  I used the Toil & Trouble Designer Paper.  Then take a piece of Basic Black Cardstock however high you would like it to be to wrap around the bottom of the roll to start making the “boot”. Cut it so the ends meet in the center of what will be the front and then you can fold back the top corners.  Make it tall enough so you can add the buckle, especially if you want a big one.

Witch's Boot Tube

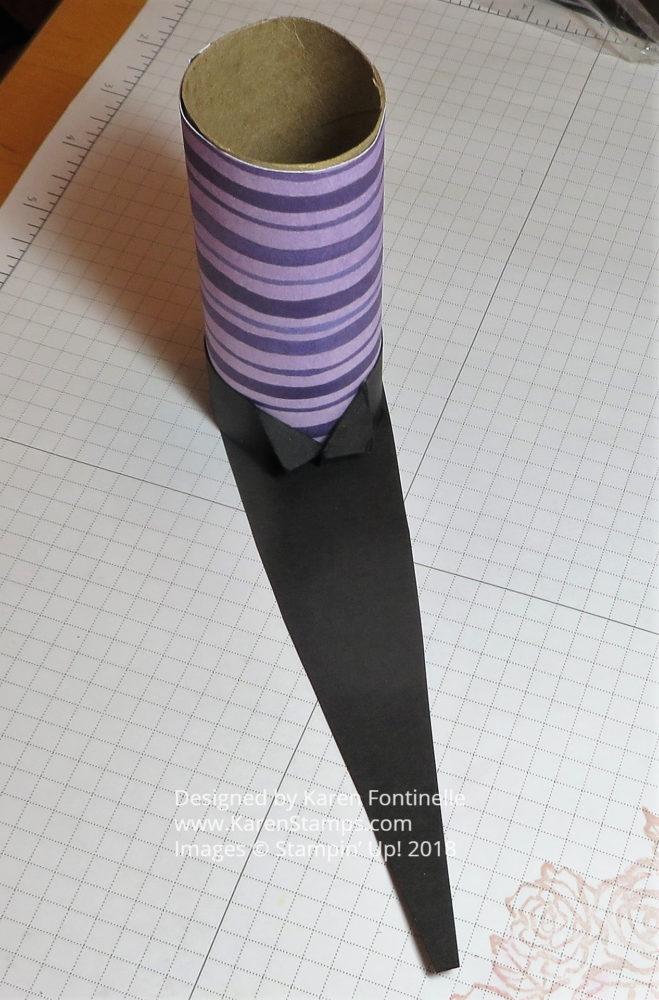
Next just cut a piece of Basic Black in a long triangle to make the bottom of the boot.  You want it to be as wide as the roll but you can trim around it to make it rounded in the back.  You cut it longer than you want and then curl up the toe with just a pencil or something however you like it.

Witch's Boot Triangle

You can make a cheater buckle by just adhering a square of black in the center of a square of Gold Glimmer or Gold Foil.  Then put some candy in a cello bag or add it to the “boot” as is.  Just have fun with this idea and don’t worry about perfect measurements.  It all depends on the size of the roll you use!  Here’s another Witch’s Boot I made a couple years ago!

Don’t forget the Paper Pumpkin Flash Sale if it is still going on today!  New subscribers can get the October Paper Pumpkin Kit for only $5.00!  It certainly is worth a try for that price! Check out yesterday’s post for more info!

Have fun trying the Witch’s Boot Candy Holder Halloween Treat for the fun people in your life!

Making the September 2018 Paper Pumpkin Kit Frights & Delights

Paper Pumpkin Sept 2018 Kit Package

This weekend I had fun making my September 2018 Paper Pumpkin Kit called Frights & Delights! It all started with the spooky black box in my mailbox this month!

Paper Pumpkin Sept 2018 Box InsideAnd when I opened it up, there was the exclusive stamp set and ink spot!

Paper Pumpkin Sept 2018 Box Inside

Inside the black tissue paper were all the pieces I would need for this project!

Paper Pumpkin Sept 2018 Pieces1All I had to do was punch out the pieces and look at the directions.

Paper Pumpkin Sept 2018 Kit Pieces Punched OutThen the fun began of putting the pieces together! The kit makes 24 Halloween treat bags. You get the cute printed cello bags, a little piece of heavy paper to put in the bottom to make it flat, and all the pieces to make the cute toppers for the treat bags! I stamped the tags and adhered the adhesive-backed spooky words!

Paper Pumpkin Sept 2018 Kit Tags Assembling1Next I tied the sparkly twine around the tag.

Paper Pumpkin Sept 2018 Kit Tags

There are cute cutouts to adhere to the tags, the pumpkins and ghosts with a silver backing to show through. I used the new Take Your Pick Tool to help with the little glue dots that came in the kit.

Paper Pumpkin Sept 2018 Kit Package

It’s best to fold the tags on the score line so you can adhere the bats, ghosts, and pumpkins to the top of the tags. And that’s it for the tags!

Paper Pumpkin Sept 2018 Kit Toppers completedAll that is left to do is buy some treats later and fill the bags, then attach the cute bag toppers!!  I think the trick-or-treaters or whoever I end up giving these treat bags to will love them!

As I write this, the full Frights & Delights Kit is still available in the Online Store as well as the Refill Kit if you already have the full kit or if you have your own Halloween stamp set you want to use. The only thing is you have to be a Paper Pumpkin subscriber to purchase any past kits. But that’s no problem!!  You can join Paper Pumpkin right now and go shop!  No risk, no obligation! You can skip a month or cancel your subscription any time by making any changes in your account before the 10th of any month. If you join today, or at least by October 10th, you will receive the October kit.  I have no information or hints about the next few kits, but I bet with the holidays coming up, they will be something fun!  Remember, the Past Paper Pumpkin Kits will be available only while supplies last!  The category will show up under Paper Pumpkin after you become a Paper Pumpkin subscriber.

Enjoy this September video and then go join Paper Pumpkin so you won’t miss the fun!

JOIN PAPER PUMPKIN TODAY!

A Toil & Trouble Halloween Treat Bag Topper

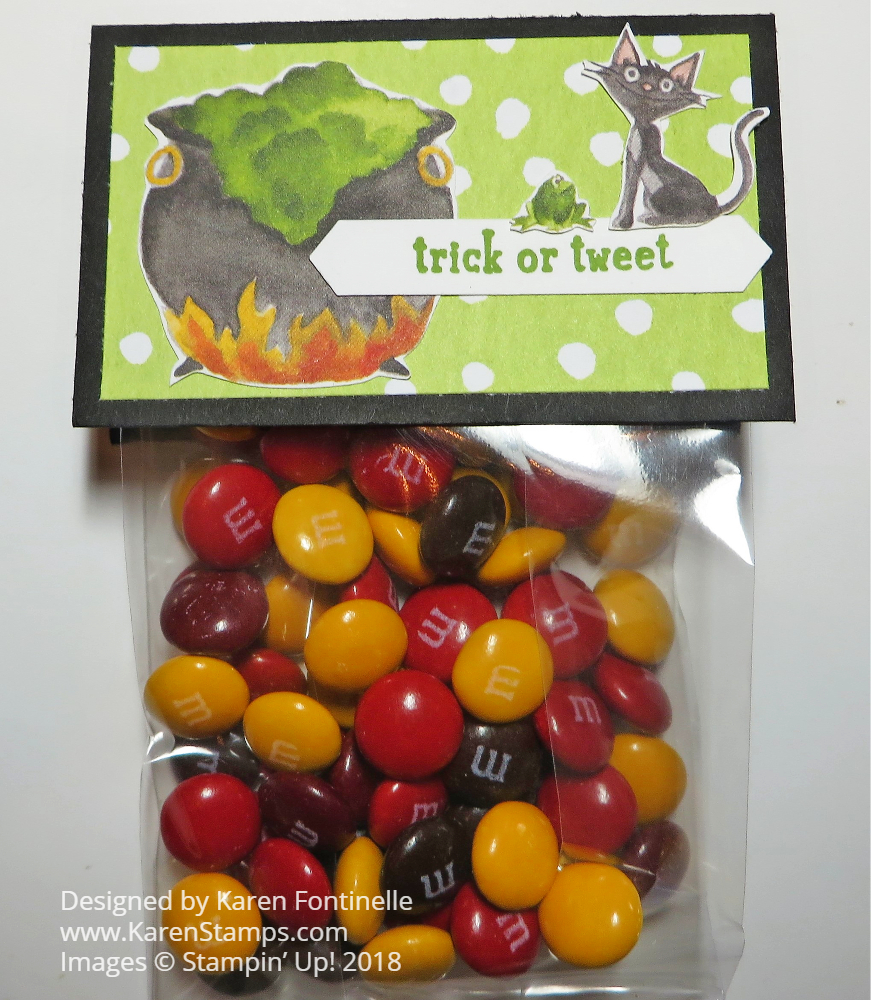
A Toil & Trouble Halloween Treat Bag TopperI just love using the Toil & Trouble Designer Series Paper to make Halloween cards and other projects, like this simple little Toil & Trouble Halloween Treat Bag Topper.  If you have children or neighbors or office workers to whom you want to give a little candy treat, just make a simple little topper with cardstock and some decoration to close a bag of Halloween candy or treats!

Start with the 3″ x 6″ Gusseted Cellophane Bags that will hold some Halloween candies. If you don’t want to be quite so generous with the candy, partially fill the bag with some “shred” like in gift bags or crumple a piece of colored tissue paper….or cut the bag down from the top to make it a little smaller.  Put the treat inside and fold the top over once or twice.  Adhere with some Snail Adhesive or Fast Fuse (some refills still left on the Clearance Rack!).

Make the bag topper just a bit wider than the bag.  Mine is 2″ x 3 1/4″ folded in half, so 4″ x 3 1/4″ to start with.  I cut out some of the images from the Toil & Trouble Designer Paper in the Holiday Catalog and adhered them to the topper.  The greeting is stamped in Granny Apple Green from the Trick or Tweet Stamp Set and punched with the Classic Label Punch.  I thought I needed something besides just the Basic Black Cardstock in the background so I put a piece of the polka-dot pattern on the topper. I think it sets off the cutout images better. Just adhere the topper to the bag.

Be sure to check out the Clearance Rack and don’t forget to spend your Bonus Coupon Codes from August if you earned some!

If you want the September Paper Pumpkin Kit,  the Frights & Delights Kit, you will need to subscribe first so then you can purchase the “past kit” in the Online Store.  If you are already a subscriber and want more of the treats, buy just the refill.  Subscribe to Paper Pumpkin HERE and get the October Kit in mid-October.  You must join by October 10th.

If you would like another Halloween treat idea, click HERE to see my Clear Tiny Treat Boxes decorated with the Cat Punch.

And if you want to make your own Halloween treat bags, try something like my Toil & Trouble Halloween Treat Bag Topper and have fun making up some treats!

Triangle Treat Box For Halloween

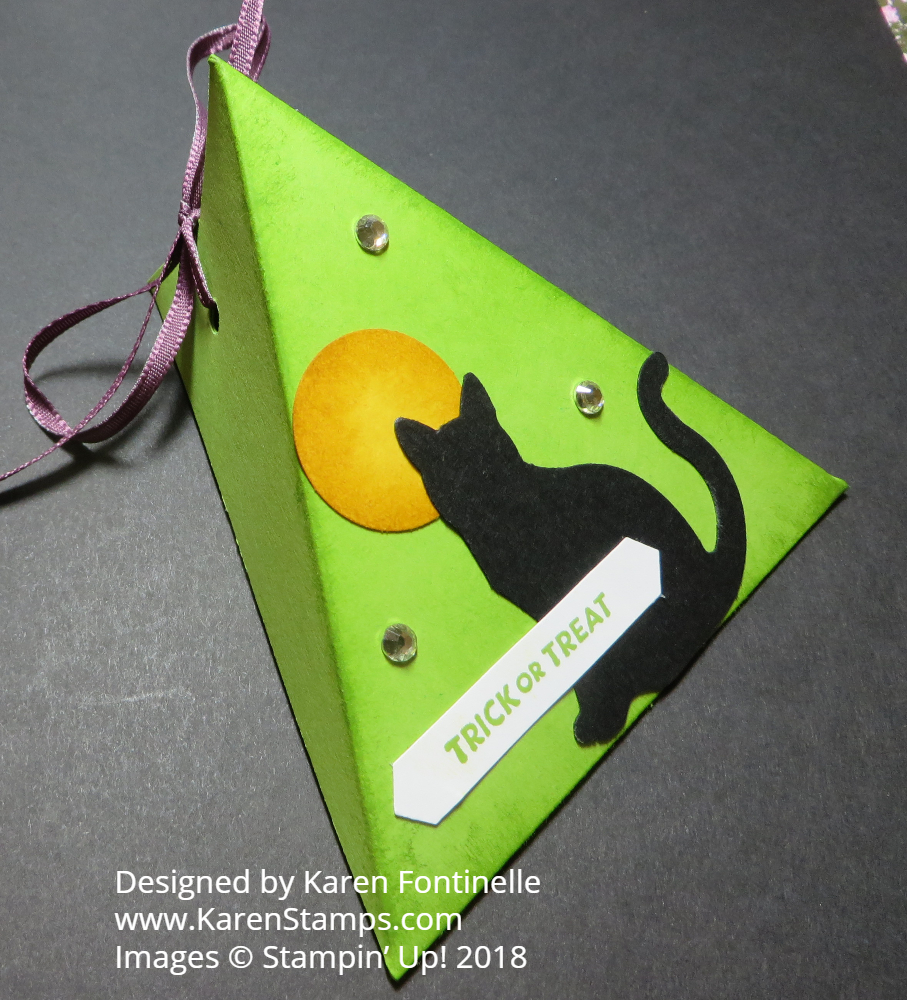
Triangle Treat Box For HalloweenOne of the easiest things to make is this Triangle Treat Box For Halloween.  Triangle Boxes are so easy and the size can be varied. It just involves a strip of cardstock scored a certain way and folded up.  Decorate the outside according to the occasion, put your treat inside, punch some holes in the side and tie shut with ribbon.  Easy peasy!

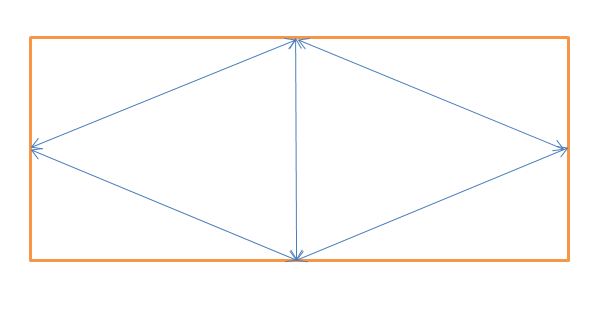
For this triangle box start with a strip of 4″ x 8″ cardstock, in this case, Granny Apple Green.  It is scored in half, like a card, at 4″.  Then on each end, put a pencil mark at the center point. Next, score on a diagonal from that center point on the end of the paper to the center score line on each side.  Essentially you are making a point at each end.  See the diagram below.  Just angle the paper on your Stampin’ Trimmer so that both the center score line and the center point on the end are on the track on the Trimmer and then score.

Triangle Box Drawing

To decorate the box, I sponged a little Granny Apple Green ink around the edges of the front of the box.  I was going to use some cut-out image from the Toil & Trouble DSP, but changed my mind and punched out the black cat with the Cat Punch.  I thought the cat could use a moon so I punched a circle of Crushed Curry Cardstock with the 1″ Circle Punch and even sponged it with some Crushed Curry ink.

The greeting is stamped from the wonderful Itty Bitty Greetings Stamp Set.  I think this stamp set is a must-have.  You can always find some sort of greeting you can use in this stamp set. It replaces Teeny Tiny Wishes, my previous favorite and highly used stamp set.  I stamped it in Granny Apple Green Ink and punched out with the Classic Label Punch.

I thought the box still needed a little something, like some shiny little stars. I added some small Rhinestone Jewels to the front of the box or I could have used some sequins.

If you want another idea, here is a Halloween triangle box I made to look like a Witch’s Hat.  It shows how the paper gets folded into the triangle if you need more information.

These Triangle Boxes can be made for Christmas gifts or birthdays or any other when you want to place a small gift or treat inside! Try it!  So easy! It’s just a little over five weeks until Halloween! Oh my!!  Make a Halloween Treat Box for Halloween and give to someone for a surprise!

SHOP STAMPIN’ UP!

Trick or Tweet Scary Halloween Animals Card

Trick or Tweet Scary Halloween Animals Card

Halloween is so much fun and this Trick or Tweet Scary Halloween Animals Card is great to send to someone and spread the Halloween spirit!  I love these little costumed animals, ready to stamp and color in how you like!  It’s the Trick or Tweet Stamp Set!  Cute name, too!

Just stamp each animal on some Whisper White Cardstock and color in with Stampin’ Blends markers or your choice of coloring.  I love the alcohol markers! You can use whatever coloring method you like.  Then you can punch out or die cut the animals in circles and layer on a scalloped circle.  I used Berry Burst Cardstock for the layers.

The background layer on the card is embossed with the Oh My Stars Embossing Folder.  I used Lemon Lime Twist Cardstock. This piece is layered on Berry Burst Cardstock and layered on the Basic Black card base.

There wasn’t a good space for a greeting, so I stamped the greeting and cut apart the words!  It’s a technique I see now and then but rarely think to use it myself!  The greeting comes in the Trick or Tweet Stamp Set.  The greeting is stamped in Berry Burst Ink and layered on Basic Black.  I just used my Paper Snips scissors to cut these apart by hand.  Just glue onto the black and then trim that out.  Doesn’t have to be perfect because, after all, it is a spooky Halloween card!

That’s all!  A fun Halloween card!  Be sure to mail it to arrive before Halloween!  Or use these individual little characters as a topper on a Halloween treat bag or box.  Lots of possibilities!  Here is a treat box I made with the little Halloween bird as the decoration!

Wouldn’t someone you know be pleasantly surprised not just to find a card, but a Halloween card, in their mailbox from you?!  Have some fun making cards and treats for Halloween like this Trick or Tweet Scary Halloween Animals Card!

Last Day! Join Paper Pumpkin Today to Get This Spooky-Cute Kit!

Paper Pumpkin Sept 2018 Ad New

It’s September and time to sign up for the September Paper Pumpkin Kit and get a Halloween papercrafting kit!  If you love Halloween, don’t miss this kit!  Usually we don’t know what will be in the monthly kit, but this time…..based on the time of year, the ad you see above, and a little hint from Stampin’ Up! about the quantity being 24 treat holders…..I think we have a good idea it’s Halloween!

You must sign up by September 10th which is today!  I can’t wait to get my kit!  They will ship out soon after the 10th of the month so you will receive your kit around the 15th.  You can skip a month or cancel any time, just go into your account by the 10th of any month and update it. But if you like Halloween, go ahead and try Paper Pumpkin right away!

I have used past Halloween Paper Pumpkin kits for trick-or-treaters or to give to friends or maybe the office staff at a doctor’s office. Almost any treat holder you know is going to be fun to make and give away!

Kits are $19.95 + tax, but that includes shipping.  You get an acrylic block with your first kit, an exclusive stamp set you can use again later, a Stampin’ Ink Spot (it’s great to use with your Stamparatus!), and all the materials you need for the project, even adhesives.  Most pieces are die cut so you just punch them out.  There is a video online if you like to watch the whole process and also printed directions, of course, in the kit.  Make any kit exactly like the directions, or do something different on your own.  You will find alternate ideas online a little while after the kits have been received and people have started creating! So you do get a lot for your money and the value of the crafting fun you will have is immeasurable!

Sign up today for the Paper Pumpkin Halloween papercrafting kit that anyone can make!

JOIN PAPER PUMPKIN TODAY!


Don’t Miss Out on the Spooky Paper Pumpkin Kit

Paper Pumpkin Spooky Banner 2018October is on its way, and that means you creatively-minded people will be searching in every spooky nook and cranny for a bit of papercrafting fun. Paper Pumpkin has just what you need—a frightfully delightful kit in a scary-cute, special edition box.

So if you love Halloween, like I do, now’s the time to join Paper Pumpkin or even sign up again if you’ve tried it before.

You’ll get the handmade Halloween look without the fuss. This exclusive Halloween kit and special box will give you a fun crafting opportunity to get you in the mood for fall and have something to show for it and USE when you are finished!  I’m sure this will be a fun kit!  Try it!  You deserve it!  You’ll be glad you did!

Click HERE to join Paper Pumpkin and get the

September Kit mid-month!  

Toil & Trouble Witch’s Broomstick Halloween Card

Toil & Trouble Witch's Broomstick Halloween Card

How fun is it to use this designer paper with the witches’ brooms all over it and then put a Halloween witch holding a broomstick on the front of the card as in this Toil & Trouble Witch’s Broomstick Halloween Card!

This Halloween designer paper from Stampin’ Up! in the new Holiday Catalog is called Toil & Trouble Designer Series Paper.  It has lots of cute images for all kinds of Halloween cards, bags, tags, and other projects!  You will have fun making all kinds of cards and things out of it! I just started with a card base of Pumpkin Pie and a layer of Basic Black.  Next comes the designer paper pattern with the broomsticks.

For the focal point of the card, I cut out the witch by hand from the Toil & Trouble DSP and mounted her on two ovals, one using Crushed Curry.  You know you can find out the coordinating colors of any designer paper by looking on the back of the paper.

To finish off the card I tied on a piece of Crumb Cake twine from the Nature’s Twine package of 4 colors.  After that, I realized I didn’t really have a good place to put a greeting, so I left it off.  I can stamp something on the inside or just a personal note.  It’s not a rule that every single card has to have a greeting on the front!

I hope you will check out this Toil & Trouble Designer Series Paper and see if it gets your Halloween spirit moving!  Here’s another card I made with this designer paper by cutting out the witch and a cauldron!  Don’t forget to join Paper Pumpkin, too and get a spooky cute box this month!

Shop Stampin’ Up! Online HERE!

Sign Up For Paper Pumpkin and Get a Halloween Papercrafting Kit!

Paper Pumpkin September Kit For Halloween

It’s September and time to sign up for the September Paper Pumpkin Kit and get a Halloween papercrafting kit!  If you love Halloween, don’t miss this kit!  Usually we don’t know what will be in the monthly kit, but this time…..based on the time of year, the ad you see above, and a little hint from Stampin’ Up! about the quantity being 24 treat holders…..I think we have a good idea it’s Halloween!

You must sign up by September 10th, 6 days from now!  But do it today because in a couple of days you will be distracted with the new Stampin’ Up! Holiday Catalog!  I can’t wait to get my kit!  They will ship out soon after the 10th of the month so you will receive your kit around the 15th.  You can skip a month or cancel any time, just go into your account by the 10th of any month and update it. But if you like Halloween, go ahead and try Paper Pumpkin right away!

I have used past Halloween Paper Pumpkin kits for trick-or-treaters or to give to friends or maybe the office staff at a doctor’s office. Almost any treat holder you know is going to be fun to make and give away!

Kits are $19.95 + tax, but that includes shipping.  You get an acrylic block with your first kit, an exclusive stamp set you can use again later, a Stampin’ Ink Spot (it’s great to use with your Stamparatus!), and all the materials you need for the project, even adhesives.  Most pieces are die cut so you just punch them out.  There is a video online if you like to watch the whole process and also printed directions, of course, in the kit.  Make any kit exactly like the directions, or do something different on your own.  You will find alternate ideas online a little while after the kits have been received and people have started creating! So you do get a lot for your money and the value of the crafting fun you will have is immeasurable!

Sign up today for the Paper Pumpkin Halloween papercrafting kit that anyone can make!

JOIN PAPER PUMPKIN TODAY!


A Quick and Easy Halloween Card With Ghosts

Halloween Card With Ghosts

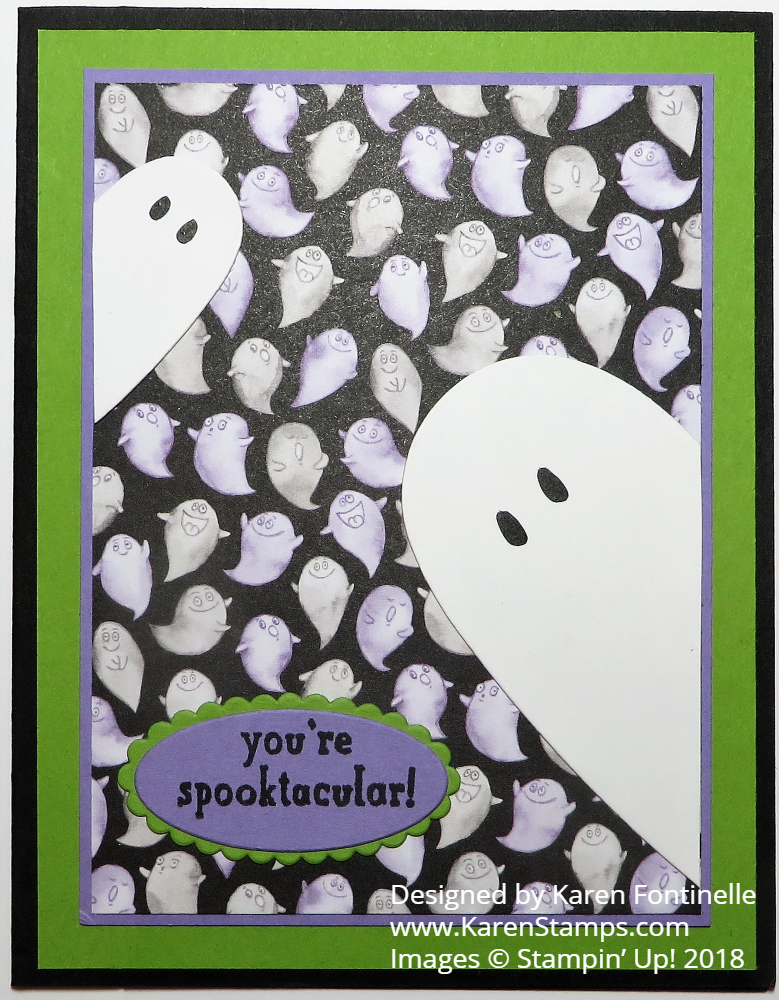
Want to make a quick and easy Halloween card with ghosts?  I can show you how! In fact, a card like this one is partially responsible for me becoming a Stampin’ Up! Demonstrator!  I was visiting my friend who was a Demonstrator and she took me along to a team meeting. There was a card on a display board with a ghost or two.  When I found out the ghost was made by cutting a heart in half I was just thrilled with how creative people could be with this thing called stamping! I was so inspired by all the creativity I saw at the meeting plus everything my friend had at her house!  I think I signed up while I was visiting her that weekend!

When I made another Halloween card in THIS POST with this new paper coming in the Holiday Catalog September 5th, Toil & Trouble, I remembered the idea of making ghosts out of hearts!  Just punch out, die cut, or hand cut out a heart of whatever size you want.  Then cut the heart in half!  That’s all there is to it!  Draw on some eyes with a marker. Adhere it to the side of the card layout!  Sometimes it doesn’t take much to thrill me to pieces!

This card starts with a Basic Black card base with a layer of Granny Apple Green Cardstock.  I let that have a wider margin than usual and cut a smaller piece of Highland Heather Cardstock for another layer.  Then I added the ghost patterned paper in the Toil & Trouble Designer Series Paper for the background layer. The half-hearts/ghosts were adhered to the card on the sides.  The greeting is from the Trick or Tweet Stamp Set in the Holiday Catalog.

This Toil & Trouble paper makes Halloween cardmaking so much fun!  Especially when you can cut a heart in half and make a ghost poking out from a spooky place!  You, too, can make a quick and easy Halloween card with ghosts!

SHOP STAMPIN’ UP! ONLINE HERE!

Quick and Easy Frankenstein Halloween Card

Frankenstein Halloween Card

You’ve got to try this Quick and Easy Frankenstein Halloween Card if you like Halloween!  It will only take you two seconds to make. You can even vary the design to put on tags or treat bag toppers or a Halloween piece of home decor – whatever you like.

The card base is Old Olive Cardstock.  The hair is Basic Black just cut in a jagged way.  Just figure out how long you want his hair to hang down and cut off the top portion.

Otherwise, you just need a 3/4″ Circle Punch and a 1 1/4″ Circle Punch to make his eyes and nose.  Punch two 1 1/4″ circles of Old Olive and cut in half with Paper Snips. Sponge some Old Olive Ink on three of the pieces for the two eyelids and nose.  You could also make a circle nose if you like or an oval.  The Whisper White eyes are punched with the 1 1/4″ Circle Punch and Basic Black with the 3/4″ Circle Punch.  I used the White Stampin’ Chalk Marker to just draw in those little whites of his eyes.  You can put them at crazy angles or whatever you want if you want to have some fun with it!

Draw in a few scars and Frankenstein’s mouth with a Basic Black Stampin’ Write Marker or Journaling Pens .  Once you get your supplies out, making the card goes very quickly!  Halloween is so much fun!

Here is a closeup of Frankenstein’s face.  Have fun making your Frankenstein!

Frankenstein Halloween Card closeup

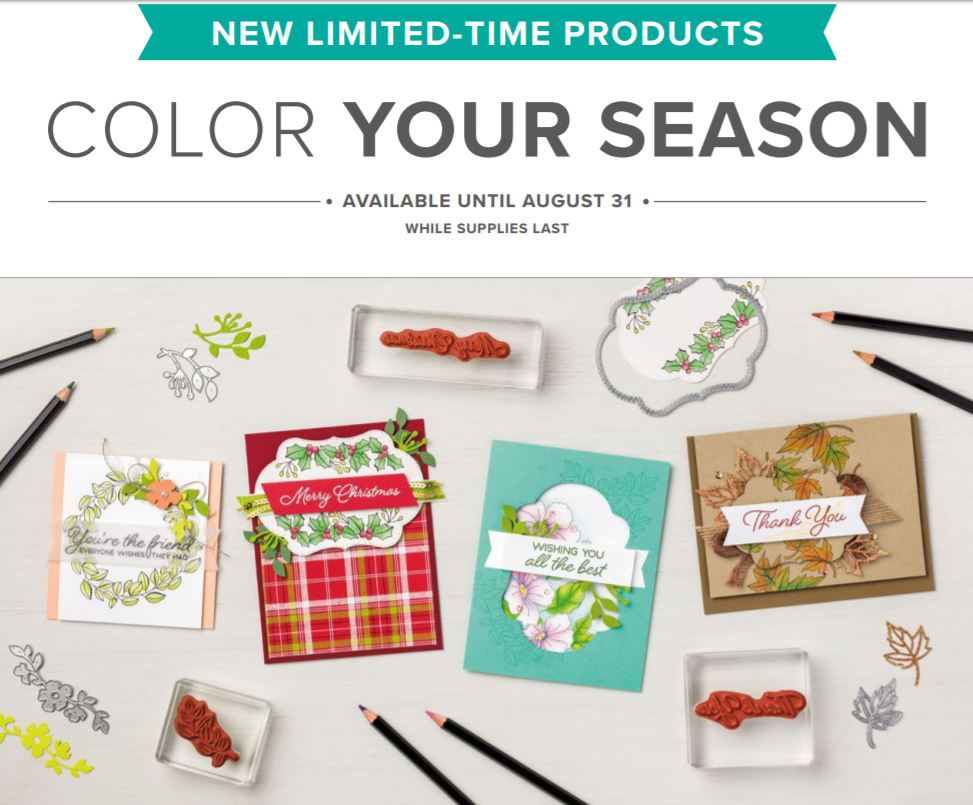
Don’t forget!!  Today is the last day for Stampin’ Up! Bonus Days and also the Color Your Season Suite of special products!  Don’t miss out!

Color Your Season BannerBonus Days Flyer 2018 Info


Halloween Favor Clear Tiny Treat Box

Halloween Favor Clear Tiny Treat Box

This Halloween Favor Clear Tiny Treat Box is so fun and easy to make if you need a little party favor or treat!  It’s a good idea to always keep a package of these Clear Tiny Treat Boxes on hand for little gifts or treats.  You never know when one might come in handy at the last minute!  They are so easy and fun to decorate for whatever occasion, not just Halloween, of course!

These little clear plastic boxes come flat so you just assemble them by opening up and creasing the score lines to form the box.  Be sure to take off the extra plastic that protects them.  Then decorate away, inside or outside!

For this box, I just cut a strip of the Toil & Trouble Designer Series Paper, coming in the Holiday Catalog in September.  I wrapped it around the box, barely creasing it on the corners, just to see how it would fit.  You can start with the 12″ strip, however wide you would like it, and then see how much excess length you can cut off. Decide if you want that overlapping in the back of the box or in the front, hidden by whatever you decorate the front with.  Then you can take it off and crease the folds with a Bone Folder to get a good, crisp crease.

For the front of my little Halloween favor box, I stamped the little bird ghost from the Trick or Tweet Stamp Set in the Holiday Catalog and colored it in with Stampin’ Blends alcohol markers.  There are new colors coming in the Holiday Catalog, too!  Love these!!!  Then I punched him out and layered him on various circle punches and the small 1 1/8″ Scallop Circle Punch.  I could have done even more, maybe tied ribbon around the box or added a greeting, but I just stopped here and put some candy inside!

Another idea to consider for Halloween treats is to join Paper Pumpkin before September 10th to receive the September papercrafting kit that is definitely going to be Halloween but not too spooky!  I cannot wait!

Paper Pumpkin Sept 2018 SPOOKY Kit new

Click to sign up!

If you would like to make a little Halloween favor box like mine, these Clear Tiny Treat Boxes are fun to have available, whether or not you join Paper Pumpkin!  Be sure to put them on your order and be ready for the holidays!

Party Animal Dog Halloween Card

Party Animal Dog Halloween Card

This cute little Party Animal Dog is front and center on a Halloween card and all dressed up in his spooky Halloween costume!  I just love the colors and the fun images for Halloween!

My main purpose for this card was to use the Stampin’ Up! Watercolor Pencils and Blender Pen. I selected this image that needed to be colored in from the Trick or Tweet Stamp Set in the upcoming Holiday Catalog.  As far as the Watercolor Pencils, the Stampin’ Up! Annual Catalog has a set just called Watercolor Pencils.  We’ve had those for a while.  But if you would like some additional colors, during August you can order the Watercolor Pencils Assortment 2.  It’s part of the Color Your Season Suite going on during August only!  The pencils are not included in the Blended Season Bundle that includes the stamp set and framelits dies.  But all of these products go away August 31 so don’t miss out!  Stampin’ Up! “may” bring back the pencils in another publication, but we don’t know so if you want them and don’t want to have to wait until another catalog, go ahead and order them now!

Watercolor pencils are easy to use, especially with a Blender Pen.  Just lay down some color (you don’t even have to color in every space) and the Blender Pen will sort of “melt” the color and you can smooth it out beautifully. You can also pick up the color from the pencil itself with the Blender Pen just by touching the tip of the Blender Pen to the pencil.  That probably gives a little darker shade of color.  You can also use an Aqua Painter or a small paintbrush. I’ve always like Watercolor Pencils for coloring!

The card is made with a base of Gorgeous Grape Cardstock.  The designer paper is from Toil & Trouble.  When I saw the ghost paper,  I thought that would be a cute background.  I wondered if it would be too much, so I checked and the back of the paper was purple-striped so I just used that different pattern at the bottom of the card layer.  To cover the seam of the two papers, I adhered a piece of Basic Black 3/8″ Shimmer Ribbon.

The little dog is stamped on Thick Whisper White Cardstock with Stazon Ink since it is waterproof. That means it will stand up to the moisture of the Blender Pen.  I also used some Sponge Daubers to sponge on some color on the tag so it wouldn’t be so stark white.  The tag is made with the Scalloped Tag Topper Punch and popped up with Stampin’ Dimensionals.  I also tied on a piece of the black ribbon.  You might be able to see the shimmer a bit in the photo.

Check out the Color Your Season Suite and the Watercolor Pencils so you don’t miss the August 31 deadline!