Category Archives: Kit

Paper Pumpkin 3 Year Birthday! Join Now!

Paper Pumpkin 3 Year Birthday

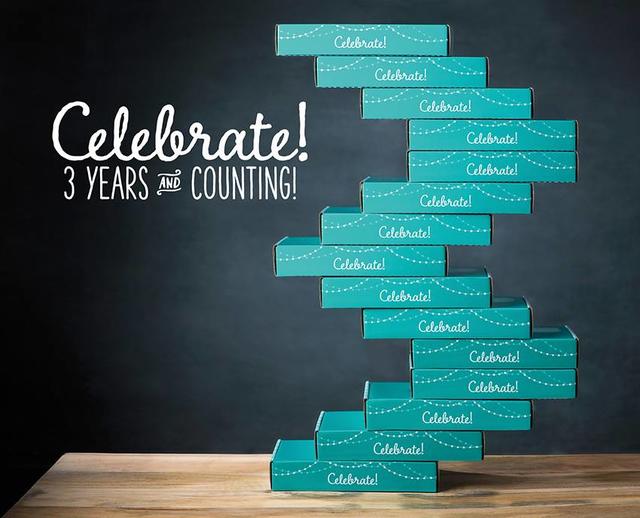
Stampin’ Up! is celebrating the 3rd birthday of Paper Pumpkin, the papercrafting kit that comes to you in the mail, with these pretty blue limited edition boxes for the March kit! If you are not already a Paper Pumpkin subscriber, you need to join before March 10th so that your March kit will be on it’s way when they go out mid-month! (Notice how they stacked the boxes in a “3” shape??!)

You have a couple of choices!

  • Join month by month by signing up HERE.
  • Order prepaid subscriptions on your regular Stampin’ Up! order. With a 3-month prepaid subscription, save $5 and earn a free Sale-A-Bration item!

Either way, just get signed up and activate your account by March 10th in order to receive the March kit. Do it after March 10th and receive the April kit.

Your first kit will include an acrylic block to use with the stamps included in each kit.  Each kit includes everything you need for your project, including an ink spot. Depending on the project, you might need adhesive and scissors, but often the appropriate adhesive is included.  Kits are not always cards, each month is a surprise!

Email me if you have any questions at Karen@KarenStamps.com! Or click on the links above for more information.  You can pause or cancel your subscription any time.

Watch the video below to see the February kit!

Sign up for Paper Pumpkin by March 10th and join in the 3-year birthday celebration!

Paper Pumpkin January 2016 by Stampin’ Up!

Don’t look if you haven’t received or opened your Stampin’ Up! Paper Pumpkin Kit yet!

Mine is still unopened in the box, but it was a busy week and I think this weekend might be a good time for some Paper Pumpkin time! Don’t delay too long with your kit as there is a time factor involved! And I have to remind myself of this, too — you can use the stamp set that comes in the kit for other stamping projects! I often use it for the kit project and then put it away!  I missed out on using the greetings in one kit on other cards for a holiday because I just didn’t think about it!  Some people store their photopolymer Paper Pumpkin stamps in the Project Life by Stampin’ Up! Photo Pocket Pages and then in an album for easy access. I think I need to get organized and do that!

OK, so if you are still reading then you probably want to see what the Stampin’ Up! January 2016 Paper Pumpkin Kit is all about!  Here is the Stampin’ Up! video that shows how to put the kit together. Keep in mind, with each kit you can follow the directions….or not!  Sometimes you can make part of the kit as they describe and then make alternate projects with the remainder of the pieces.  It just depends. Each month’s  kit is different! And I love that Stampin’ Up! provides a video to watch, if you want, for each kit. So besides reading the directions, you can also watch how to make the kit.

If you would like to receive a Paper Pumpkin Kit in your mailbox once a month (or whenever you choose), the best deal right now during Stampin’ Up!’s Sale-A-Bration promotion is to order the 3-Month Prepaid Subscription and save $5. This will qualify you for a free Sale-A-Bration item from the Sale-A-Bration Brochure! I recommend adding some other products to your order because you will be paying the normal $6.95 minimum Stampin’ Up! shipping for your free SAB item. Might as well get some adhesive and Paper Snips or ribbon or cardstock along with it to make the shipping worthwhile! That’s my opinion anyway!

When you order before the 10th of any month, you will receive that month’s kit!  So order before February 10th and get the February kit.  Order later in February and you will receive the March kit.  Whatever you prefer.  Once you have subscribed, if you want to pause (or, heaven forbid, cancel!) your subscription, just do it before the 10th of the month because Paper Pumpkin starts shipping out around the middle of the month.

You can order extras for gifts! On the prepaid kits, you will receive an email from Stampin’ Up! telling you have to set up and activate your account with a special code.

If you prefer, there is still the monthly subscription HERE.

Either way, I think you will really enjoy the thrill of getting that Paper Pumpkin box in your mail every month!  And who doesn’t need some “happy mail” once a month!

Save $5 on a 3-Month Prepaid Paper Pumpkin Subscription

Click for more information!

Don’t forget the Stampin’ Up! Weekly Deals for this week and always check the Clearance Rack! And for every $50 you spend with Stampin’ Up! through March 31, 2016 you will get to choose a FREE Sale-A-Bration product! (Some products are only available until February 15th and then a few new products will be introduced!)

Occasions Catalog “Enjoy the Little Things” Project Kit

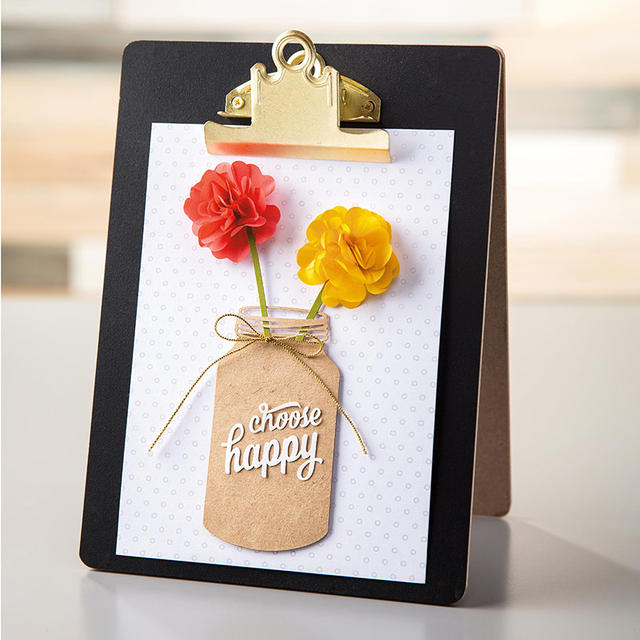
Enjoy the Little Things Project Kit Photo

I guess there are so many wonderful new things in the Occasions Catalog, that I completely missed this Enjoy the Little Things Project Kit on page 33.  It was only when I read online somewhere about the “easel kit” in the catalog that I went back and looked and found out what this project kit is all about!  And it looks like a cute one!

You get a ton of materials to make 13 display pieces for this nice easel. If you watch the video, you will see (and hear!) that it is very sturdy, almost like a chalkboard, with a gold clip on top, of course. You can change the display piece out as you desire, some are certainly seasonal, but others are not. It all comes in a nice box in which to store the extra pieces while they await their turn on the easel! And if you wanted to make an extra one of these (or more!) for a gift, you have the gift box right there for a nice presentation.

You will want to purchase the stamp set that goes with it, Enjoy the Little Thingswhich you can use in plenty of other projects and cards, it won’t just be for this project kit. In the catalog you will see what other inks and adhesives you will need to make this project.

Watch Brandi in the Stampin’ Up! video below tell you all about the kit and give tips on assembling each display page. It’s fun to watch someone make something, I think, even if you aren’t doing it yourself at the moment!

If you want to order the Enjoy the Little Things Project Kit along with the Enjoy the Little Things Stamp Set, just add on a few more dollars to your Stampin’ Up! order and you will qualify for a FREE Sale-A-Bration product at $50 or more. Remember, you get a free SAB product with EVERY $50 you spend, no limit!

If you are new to Stampin’ Up! or don’t have a Demonstrator that you are working with, I would be happy to send you copies of the catalogs. You can view them online, but, in my opinion, there is nothing like a Stampin’ Up! Catalog in your own hands! Just email me at Karen@KarenStamps.com.

Shop Stampin’ Up! Online HERE!

Paper Pumpkin December 2015 Kit Calendar

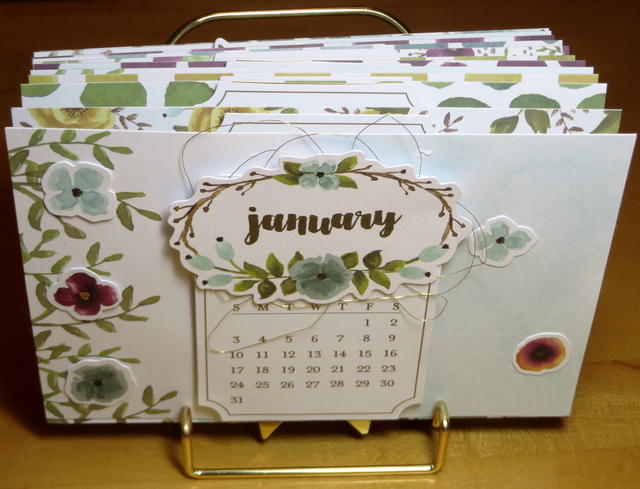
Paper Pumpkin December 2015 Kit Calendar in Stand

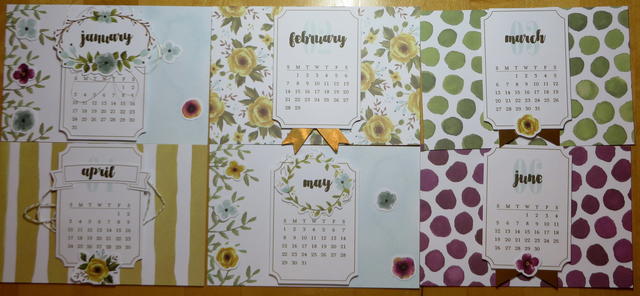
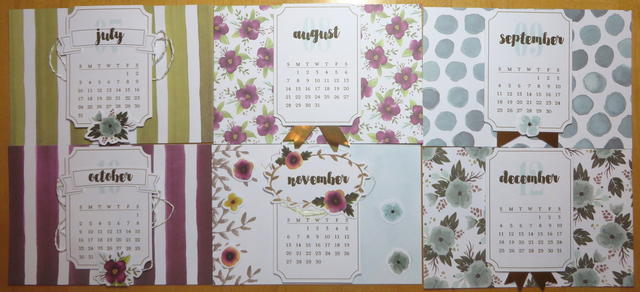
I received my December 2015 Paper Pumpkin Kit in the mail before Christmas and finally got around to making it!  I knew it was a calendar so I knew I better get it made! As cute as it is as a calendar, I don’t really need a calendar like this, so I looked for alternate ideas, which you can do with any of the Paper Pumpkin kits. I actually found a great idea on the Stampin’ Up! Blog HERE, to make the pages into a photo album rather than a calendar.  I can choose a photo for every month as the year goes along. For this project, I turned the calendar pages sideways rather than vertical as designed in the kit. And actually I can still have it sitting out as a decorative calendar for 2016 and make it into an album at the end of the year!

It was fun putting this calendar together and doing some stamping! Stampin’ Up! always provides a video showing how to assemble the project and all materials you need (except maybe glue and scissors) plus the instructions. With your first kit, you receive a clear block for mounting the photopolymer stamps that come in the kit. So each Paper Pumpkin kit has a set of stamps, an ink spot, and all the supplies to make the papercrafting project!

Here are the months for the calendar.

Paper Pumpkin December 2015 Kit Calendar

Paper Pumpkin December 2015 Kit Calendar

The Paper Pumpkin Kits are getting so popular that the refills for this kit sold out very quickly. To avoid seeing something you like but being unable to purchase it, you should become a Paper Pumpkin subscriber yourself! You can subscribe by the month, or you can add a subscription to your Stampin’ Up! order.

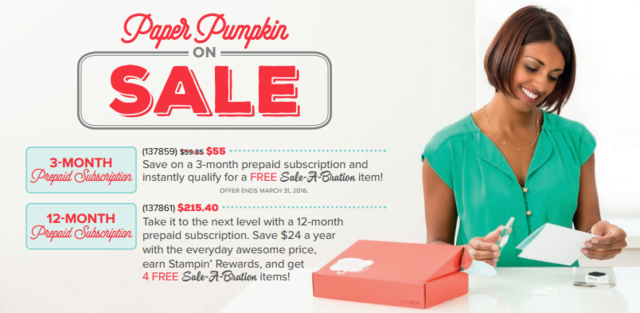
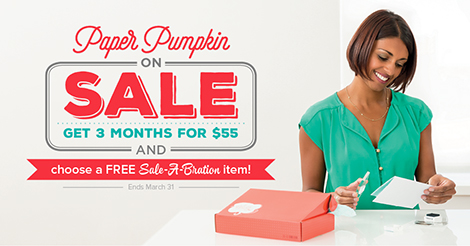
Stampin’ Up! will be offering a special on a 3-Month Prepaid Paper Pumpkin Subscription starting January 5th, when Sale-A-Bration starts! Instead of paying $59.85 for a 3-month subscription, you will only pay $55. And when you spend over $50, you instantly qualify for a FREE Sale-A-Bration item, just by purchasing the prepaid Paper Pumpkin Subscription for 3 months!

Do something special for yourself and get a Paper Pumpkin Kit! You will look forward to that red box showing up in your mailbox each month! Put a prepaid subscription on your Stampin’ Up! order between January 5-10 so that you receive the January kit!

Paper Pumpkin Sale for Sale-A-Bration

Need a Last Minute Christmas Gift?? Paper Pumpkin to the Rescue!

Paper Pumpkin Box

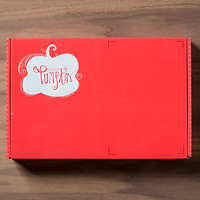
I love getting mail and I especially love getting my Paper Pumpkin Kit by Stampin’ Up! in the mail every month, so if you need a quick Christmas gift for someone, just give them a subscription to Paper Pumpkin! It’s a papercrafting kit that comes in the mail! Every month is a new surprise and comes with all the materials you need except perhaps adhesive and scissors. You receive a set of stamps, an ink spot and all the materials for the project. Sometimes there are even leftovers you can use another time.  Follow the directions or do your own thing! Paper Pumpkin is good for anyone and I would even hazard a guess that someone who never crafts would even enjoy it.  It might surprise you! And maybe YOU deserve a subscription for a little crafting time every month after all the time you have put in making everyone else’s Christmas a happy one!

For more information, read about Paper Pumpkin HERE!

To purchase a Prepaid Subscription, check HERE!


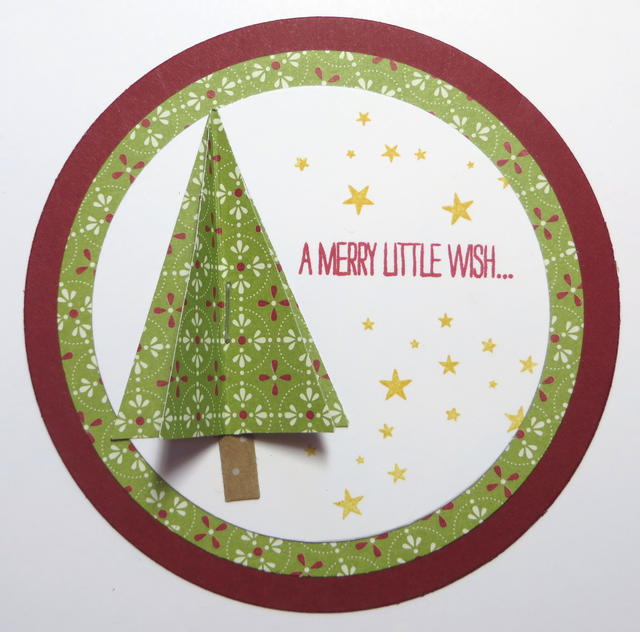
Tree Punch Christmas Tree Tag

Tree Punch Christmas Tree Tag

Here is my Tree Punch Christmas Tree Tag, a sample tag I had made for our tag-making day last weekend.  The designer paper I used is retired, from last year I think, a paper stack called Festival of Prints. This was a sample to see if I liked the tree so it didn’t matter what I used. Of course you can use any paper or stamped card stock. I also had cut out circles of Gold Glimmer Paper to use as layers instead of the designer paper and that looked really pretty too – just didn’t take any photos. The tag base is Cherry Cobbler (because I was out of Real Red, if you can believe it!) The stars are stamped in Crushed Curry ink from the To You and Yours Too Stamp Set. This is the stamp set that coordinates with the To You & Yours Shaker Card Kit.

To make the tree, just punch two trees with the Tree Punch and either cut off the tree trunks and add one you cut yourself from a sliver of a scrap or leave the bottom one on.  Fold the trees in half lengthwise, open, then using the Stampin’ Up! cute Handheld Stapler, staple in the center longways on the fold.  This will hold the trees together but allow them to be separated and fluffed up to look 3D.  I guess no reason you couldn’t staple three trees together for more oomph!  Punch a hole in the top and string ribbon through for a tag or use it for an ornament!

Stampin' Up! Paper Pumpkin Monthly Papercrafting Kit

It’s time to remind you about Paper Pumpkin!  The 10th of the month is always the date to be signed up by to receive that month’s kit. Sign up today or tomorrow and get the December kit in the mail around mid-month. Order extras and give as a gift or give it to yourself as a gift for all you are doing for everyone else right now in this busy season! Paper Pumpkin is a monthly subscription from Stampin’ Up! with a surprise inside that comes in the mail.  Each month is a new papercrafting/stamping kit complete with all the supplies for the project except for basic adhesive and scissors (if even needed). You receive a set of photopolymer stamps, a small ink spot, and all the supplies for the project.  It might be cards or gift boxes or a mini album or a decor piece or party favor or candy holder — it’s always a surprise! Paper Pumpkin has gotten tons better since it started so if you tried it way back when, you really need to try again and see how it has improved.  Lots more stuff!!  Make the project the way it is designed or do it your own way. No obligation, stop when you need to or just pause your subscription for a month or two.

Join Paper Pumpkin Today!  Click HERE for information or to sign up!

To You & Yours Shaker Christmas Cards Kit

To You & Yours Shaker Cards

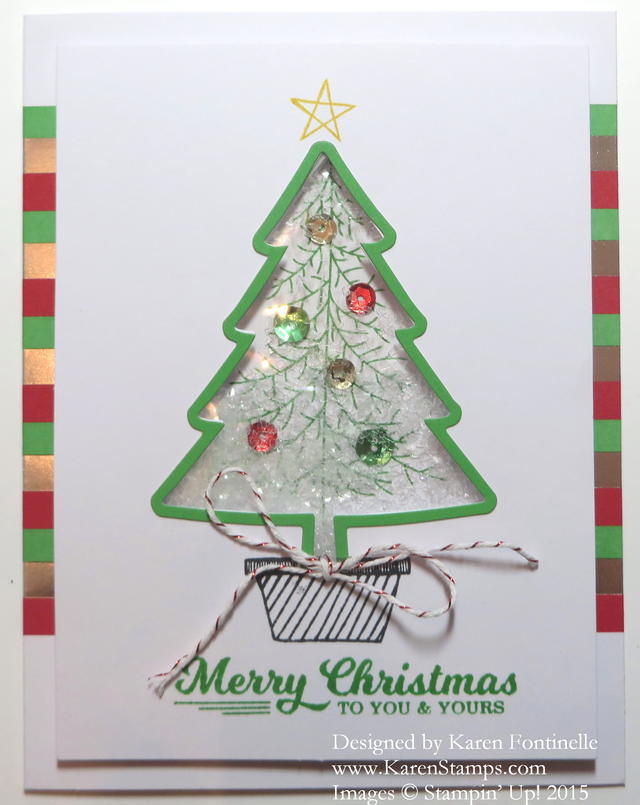
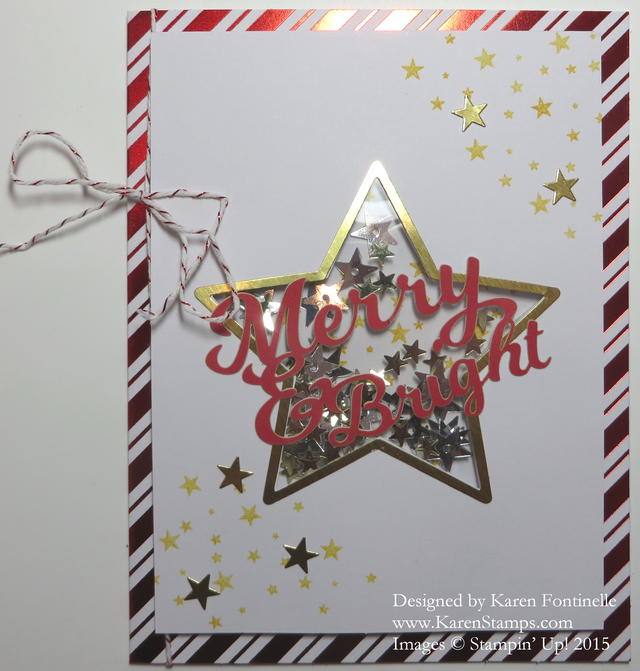
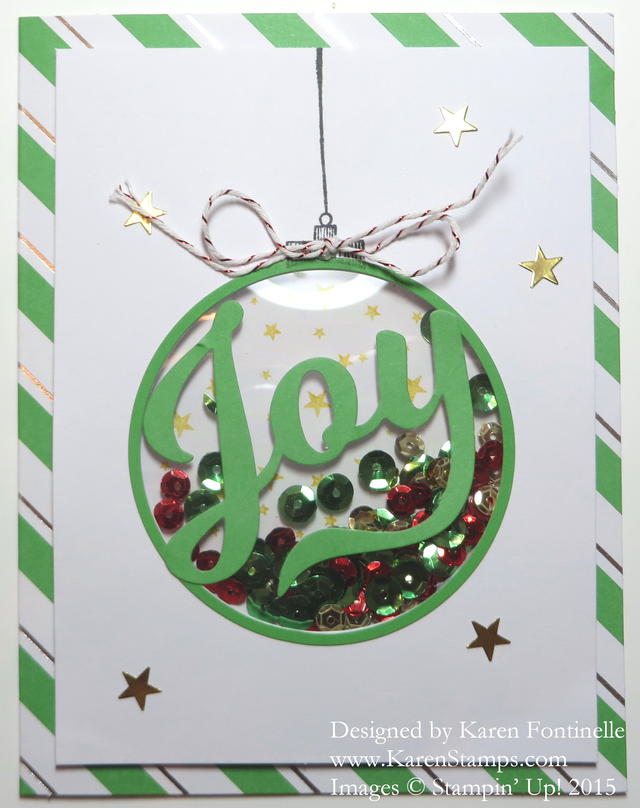
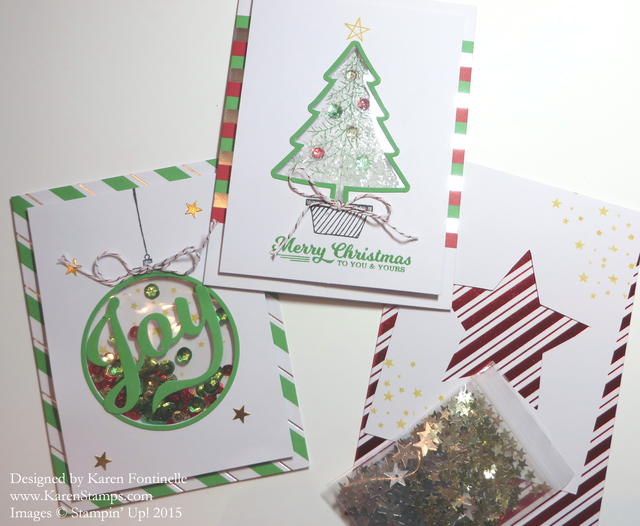
I had such a nice time putting together this To You & Yours Shaker Christmas Cards Kit to make these fun shaker cards.  Shaker cards have some kind of “container” that holds glitter or sequins or beads so that when you shake the card, the fillers move around. I think the recipients of these kind of cards will really enjoy them.  You don’t want to overfill any shaker cards because then they won’t “shake” and you won’t see the background image, but you want just enough that the person can see the filling and enjoy shaking the card!

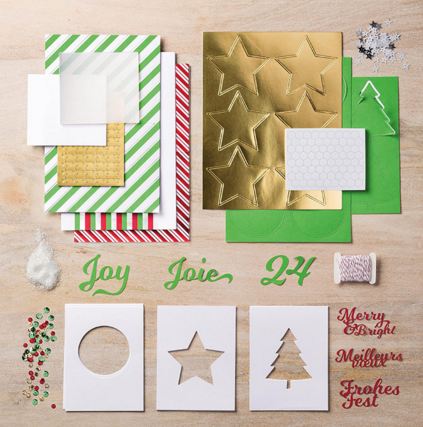
Here are the pretty supplies that come in the To You & Yours Shaker Card Project Kit, including some words in other languages since this is a “global” product. The kit makes 18 cards, 6 each of 3 designs. After you make all the cards, I still had plenty of glitter, sequins and stars leftover, plus some of the “negatives” left behind after pulling off the outline adhesive images that went around each window that I can use on other projects,

To You & Yours Shaker Card Kit Supplies

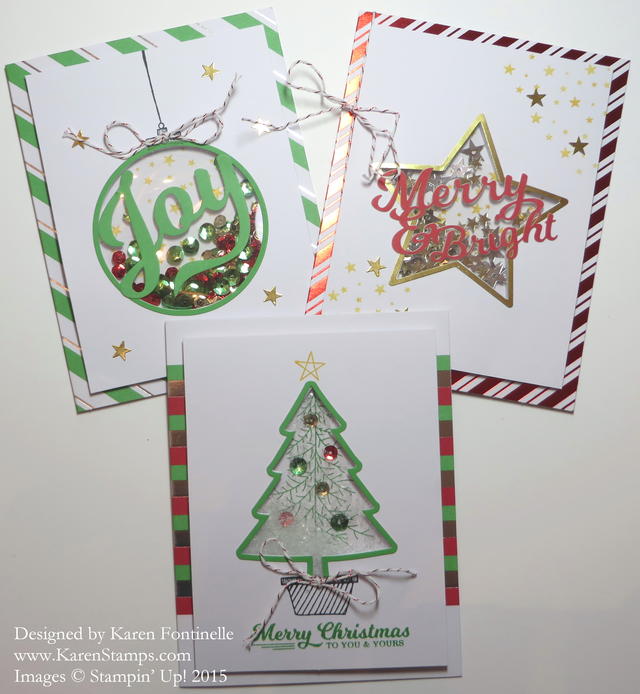
Here are close-ups of the individual cards, a little difficult to photograph with the window sheet and foil on the card base.

On this Christmas tree card, the tree branches are stamped on the background piece and then the colored sequins are glued on.  You can see the white glitter inside the shaker.To You & Yours Tree Shaker Card

This Christmas star card has some stars stamped on the background in the window and also on the corners of the card.  Then you get star sequins that go inside plus some tiny adhesive stars to stick on the front of the card.To You & Yours Merry Card

The Christmas Ornament card has colored sequins inside with stars stamped on the background behind the window.To You & Yours Joy Shaker Card

Whether you use this kit or make them yourself, try making a shaker card for fun!  If you are interested in this To You & Yours Shaker Card Kit to make these Christmas cards, you can find it in my Stampin’ Up! Online Store HERE.

To You & Yours Shaker Card Kit Cards

To You & Yours Shaker Card Kit Cards

The card kit in the Stampin’ Up! Holiday Catalog, To You & Yours Shaker Card Kitwas one of the first things I ordered, but as quite often happens, only got around to making the cards yesterday!  The kit comes with lots of fun stuff! The card bases each have some shiny foil stripes on them and of course each shaker element has stars or sequins or glitter to put inside. The kit comes with die cut card fronts, window sheets to cover the opening and then narrow foam strips to apply behind that opening to form the pocket to hold the glitter, sequins, etc. Then there are sticker stars and two word elements to place over the window and pretty baker’s twine with which to tie a bow on each card. There is also some stamping to do on the card fronts and on the background sheet behind the shaker area.  The suggested stamp set to use is the To You & Yours Too Stamp Set. If you didn’t want to purchase this stamp set, you might find something you can use in your stash.

I didn’t get around to making the star card yet but I will do that today! It’s a nice way to spend an afternoon, working on Christmas cards!  Put on some Christmas music on your phone to have playing to get you in the mood!

There is still time to order this kit and make these To You & Yours cards and even get them mailed out before Christmas.  I do not see them as being backordered so get yours while you can!  The kit comes with envelopes also and all the pieces you need except for the stamps, ink, and basic adhesive (I used the Multipurpose Liquid Glue to adhere the window sheet to the back of the card front and also for the few sequins adhered to the Christmas tree). I also used Glue Dots to adhere the bows but you could use a dot of the glue. Dimensionals are included in the kit.

Here is the Stampin’ Up! video with tips for making the cards. I really suggest watching it.

Impress your friends and make your cardmaking easy! Make your own fun To You & Yours Shaker Card Kit cards by shopping at my Stampin’ Up! Online Store HERE.


Oh What Fun to Make Christmas Tags!

Sara Douglass On TV

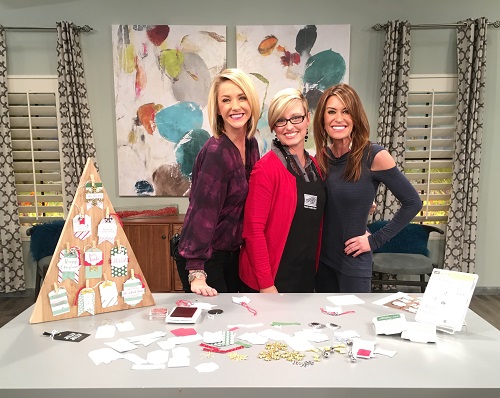
If you have rested and recovered from all the delicious Thanksgiving foods from yesterday and want to take a break from the crazy Black Friday shopping, enjoy this appearance of Sara Douglass, Interim CEO of Stampin’ Up!, (Shelli’s daughter) show the ladies on a local Utah TV show how easy it is to make Christmas tags with the Oh What Fun Tag Project Kit!

Just click this link to watch:  bit.ly/GoodThingsUtahTagKit

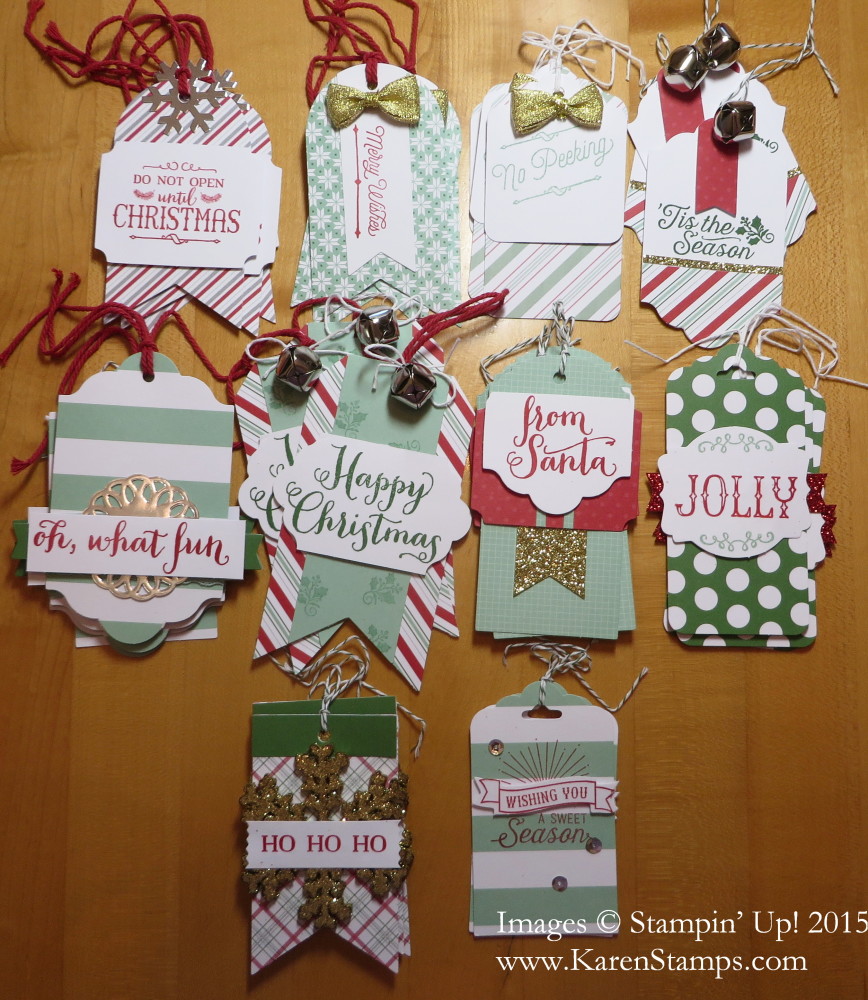
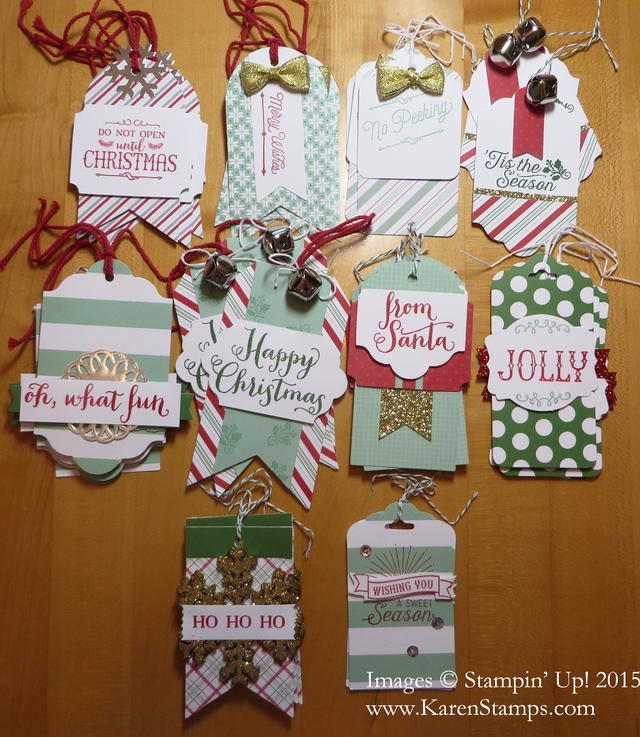
I already made my tag kit!  You get 10 different designs, 3 tags each!  Follow the directions or do your own thing! They are really pretty and easy to make.  Just divide up all the pieces first so you know you have everything for each tag before you begin!

Oh What Fun Tag Project Kit Tags Finished

You do need to purchase the stamp set Oh What Fun for the greetings, unless you have another stamp set you want to use.  But you can also use this stamp set on your Christmas cards and other holiday projects so it’s not just for making these tags and nothing else!

If you don’t need all these Christmas tags, make some of them into birthday tags or other occasions using other greeting stamps!  It doesn’t have to be just Christmas!!

Watch the Stampin’ Up! video for tips on making these fun holiday tags!

Be sure to check out the Stampin’ Up! Online Extravaganza going on right now to get some great Stampin’ Up! stamping and papercrafting products at a discount!!  Save up to 50%!

Online Extravaganza 2015 Banner

When you are finished watching these fun videos, go to my Stampin’ Up! Online Store and order your Oh What Fun Tag Kit right HERE!


New Stampin’ Up! Deals

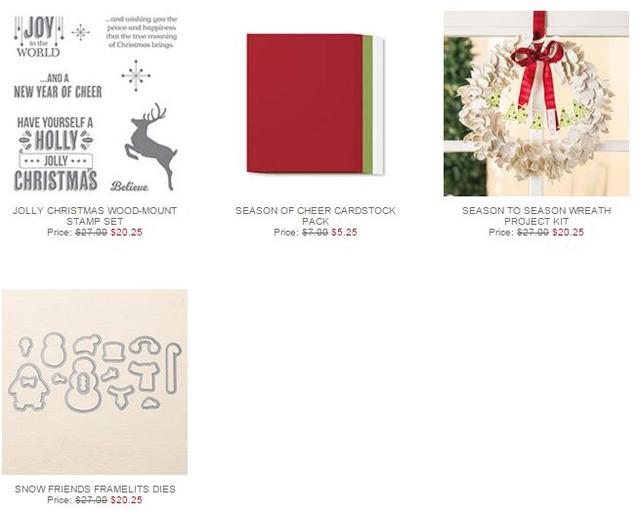
Stampin' Up! Weekly Deal Nov 17 2015Here are the new Stampin’ Up! Weekly Deals for November 17 -23.  Need a Christmas stamp set? Choose the Jolly Christmas stamp set with the reindeer and plenty of greetings.  Get the Season of Cheer Cardstock Pack so you have Christmas colors handy. The Season to Season Wreath Kit can be changed out (the center garland) for different seasons.  I also saw online a cone tree decorated party with the paper leaves from the wreath kit for something different. And then we have the Snow Friends Framelits Dies that coordinate with the cute Snow Place Photopolymer Stamp Set.

If you want any of these items, just add them to your order or place a separate order.  Also, keep in mind the products Stampin’ Up! has listed as “retiring” from the Holiday Catalog. This means that these products will not carry over after the deadline from the Holiday Catalog so if you want any of them and have put off ordering, be sure to get them ordered pretty soon. Unfortunately, the accessories will only be available while supplies last as there is not enough time for reordering by Stampin’ Up! However, stamp sets will continue to be made until December 28 since Stampin’ Up! makes the stamps themselves.

Holiday Catalog Goodbye Adieu

Shop Stampin’ Up! Online HERE or contact me to place your order! 

Oh What Fun Tag Kit Video

Yesterday I posted photos of the Oh What Fun Tag Project Kit.  I made all 30 tags, three each of ten designs. They are easier enough to make and come with directions. If you don’t like the directions (or following them!) just make your own versions!  But it is nice to have pieces all die cut and easy to punch out plus some extra-special pieces like jingle bells and gold bows! Just have fun with it!  If you don’t need 30 tags, invite two friends over and each one of you make a set of 10 tags!  It’s always fun to stamp with friends!! As Holly says in the video, divide up the supplies for each group of tags so you don’t inadvertently use more than you should on other tags and then run out.  Enjoy the video and see how great this Tag Kit is!

Place an order with Stampin’ Up! Online for the Oh What Fun Tag Project Kit!

Oh What Fun Tag Project Kit by Stampin’ Up!

Oh What Fun Tag Project Kit by Stampin' Up!

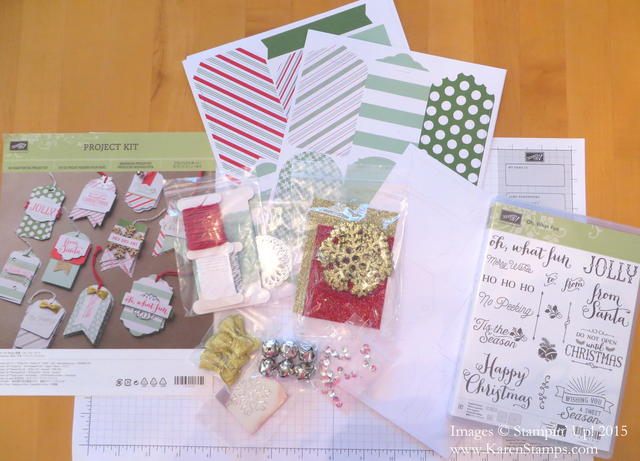
Oh what fun you will have making Christmas tags with the Oh What Fun Tag Project Kit by Stampin’ Up!  This is the coordinating Oh What Fun Photopolymer Stamp Set that you can use to make the tags and also use for any cards or other Christmas projects and the contents of the Oh What Fun Tag Project Kit.

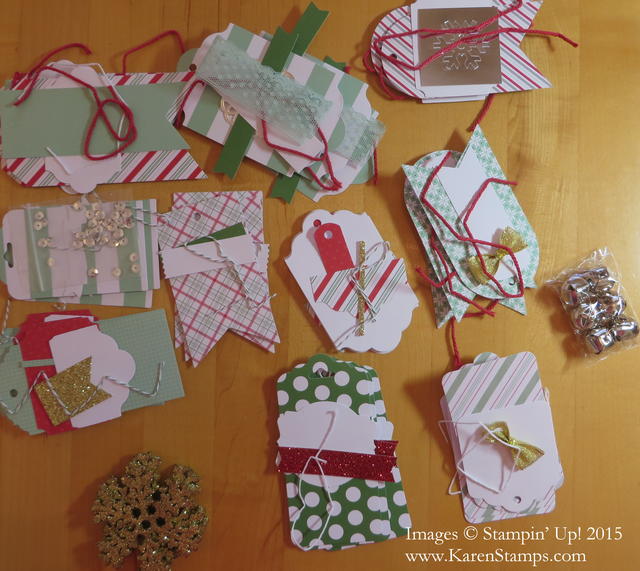
It is suggested that you separate the materials you need for each tag so that you are sure you have the right pieces in the right places for the right tags!

Oh What Fun Tag Project Kit set up

Then you are ready to stamp and go for it! In the kit, you receive enough materials to make 30 tags, 3 each of 10 designs!  Just think how much fun you can have making these easy tags and how lovely your gifts will look with a fancy tag attached!

Oh What Fun Tag Project Kit Tags Finished

This is the time to start stamping things like this so that you are not rushed in December when you will be wishing you had done these projects much farther in advance! I need to listen to my own advice, believe me — but I do have these tags made!  On the back you can stamp the “To & From” so you can write in the names when you actually wrap the packages. A friend of mine said she was going to enclose a tag with her Christmas cards as a gift for the recipient! You could also use the tag as the focal point on the front of your card! You could also use some of the tags on scrapbook pages for the holidays, even on Project Life pages.

So there are lots of ways to use the tags in the Oh What Fun Tag Project Kit, whether you use them all for gift wrapping or whether you use them for decorations, cards, scrapbook pages or other projects!

Shop for holiday project materials and kits in the Stampin’ Up! Online Store!

Last Day! Stamp Out Breast Cancer with Paper Pumpkin

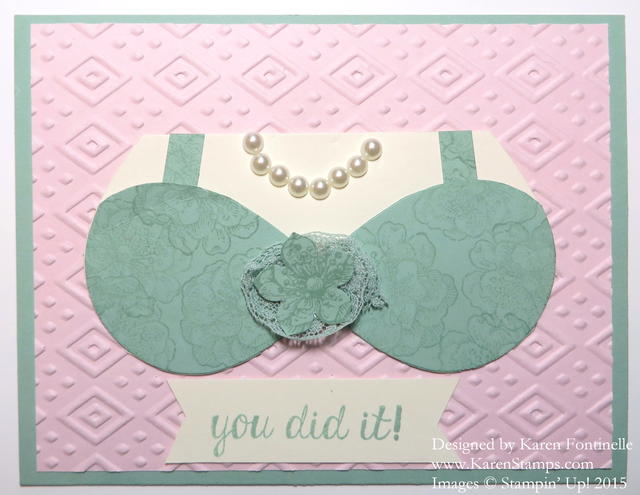
Mint Macaron Bra Card

This is another fun bra card to remind you that today, October 10, is the last day to order the October Paper Pumpkin Kit in order to help stamp out breast cancer with Stampin’ Up!

Paper Pumpkin is the monthly papercrafting kit that comes to you in the mail from Stampin’ Up! There is a surprise project in the box each month for you to make with all supplies included (except for some adhesive and scissors). You get a stamp set, an ink spot, a clear block to mount your stamps in your very first kit, and all the paper and embellishments you need, sometimes with supplies left over to use another time! It’s not always cards, but it’s always a surprise!  And there is always a video you can watch in addition to instructions in the kit.

Stamp Out Breast Cancer with Paper Pumpkin

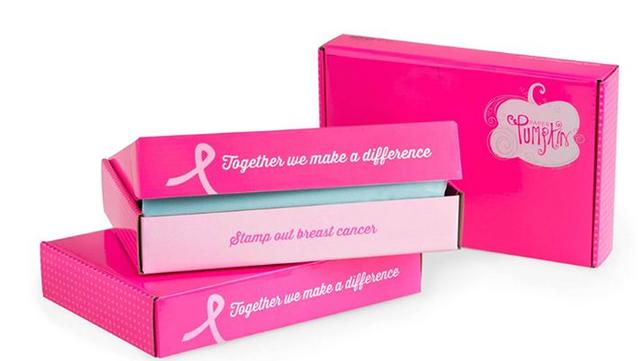
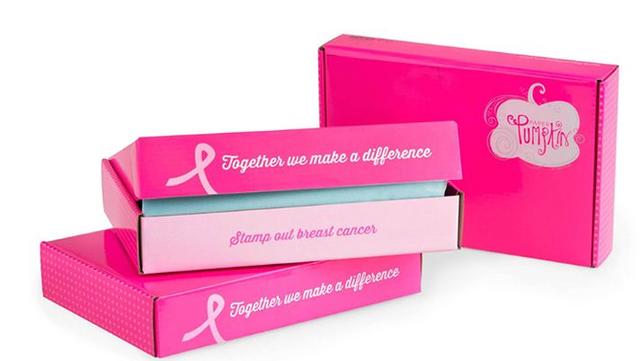
To show our support for Breast Cancer Awareness Month, we’re going PINK . . . or at least our October boxes are! And because we know our subscribers want to share the love too, we will be making a donation on their behalf to the Breast Cancer Research Foundation (BCRF).

Stampin’ Up! will donate:
$1 for every active Paper Pumpkin subscriber.
Plus, an additional $1 for every new subscriber.
Together, we will make a difference!

Here’s how you can help:

Subscribe! If you’re new to Paper Pumpkin, click here to get started. Your first kit will arrive in a limited-edition pink box that you’ll want to hold onto forever-and we’ll donate $2 because you’re new!
Stay active if you’re a subscriber so we can donate $1 for you. Only those who receive the October shipment will be counted for the donation.
Remember, those who get the October kit will not only be donating to a good cause, but they will also get a one-time only, pretty pink Paper Pumpkin box! No one will want to miss it. Promise.

More About BCRF

The Breast Cancer Research Foundation (BCRF) advances the world’s most promising research to eradicate breast cancer. Founded by Evelyn H. Lauder in 1993, BCRF has raised more than $550 million to fuel discoveries in tumor biology, genetics, prevention, treatment, survivorship and metastasis, making it one of the largest non-governmental funders of breast cancer research in the world. This year BCRF has invested $58.6 million in research, to support over 235 researchers at leading medical institutions across six continents, including $11.6 million to the international Evelyn H. Lauder Founder’s Fund focused on metastasis. By spending 91 cents of every dollar on research and public awareness programs, BCRF remains one of the nation’s most fiscally responsible nonprofits. BCRF is the only breast cancer organization with an “A+” from CharityWatch, and has been awarded Charity Navigator’s highest rating of four stars 13 times since 2002. For more information, please visit: www.bcrfcure.org.
Mini spoiler alert! The October project inside the pink box is just as awesome as always, but we should probably let you know that it is not a pink project. That’s all we’re saying. 😉
Paper Pumpkin Pink Boxes

Join Paper Pumpkin today and get the special October Kit in the pink box and help others while you stamp! If you like it, keep getting your subscription each month. If it is not for you, no risk, no obligation, just pause or cancel by the 10th of any month.  You will not be billed until your kit ships each month.

Last chance today to get the pink box and Stampin’ Up! donation!

Help Stamp Out Breast Cancer today with Paper Pumpkin!

How to Make a Bra Card

Stampin' Up! Bra Card

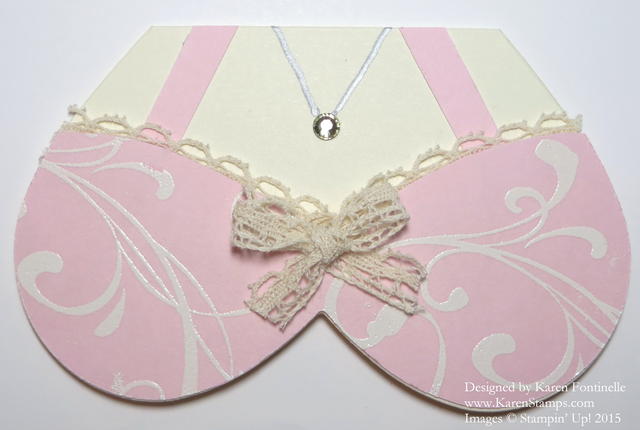
Today I am going to give you some ideas on how to make a Bra Card! This is an idea from a long time ago and I haven’t seen it recently. I thought it might be fun to bring up the idea again with it being October and Breast Cancer Awareness Month.

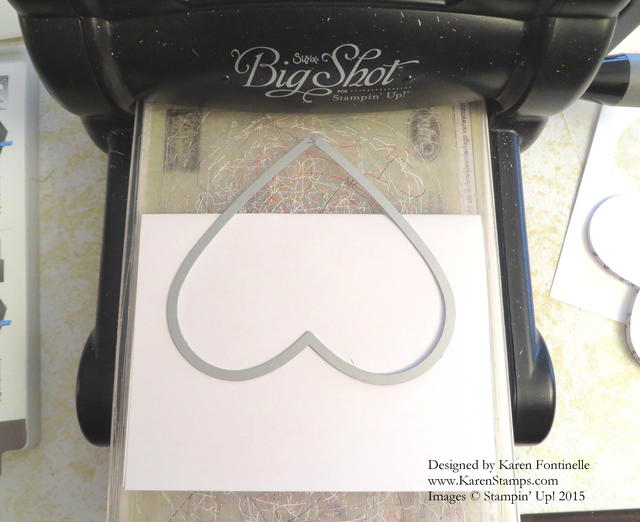
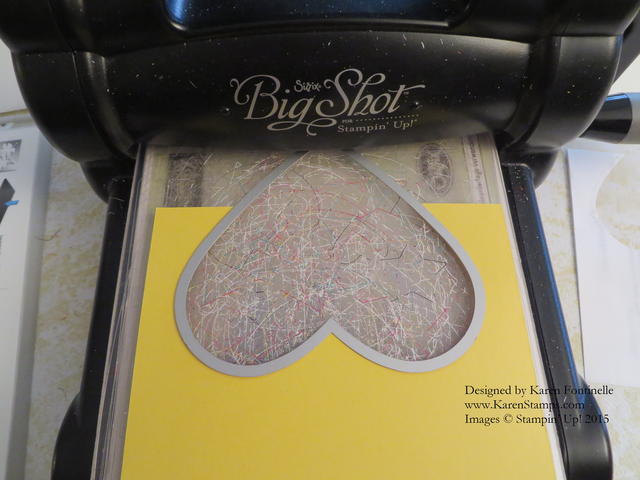
To make the card base, fold paper in half and place Heart Framelit Die (I used the second largest die). The Heart Framelit Die is retired now but if you already own it you can use it or at least it will give you the idea! You can make your own heart shape just out of paper and trace around it. Anyway, leave the fold at the top untouched so that the card will open.

Bra Card Big Shot

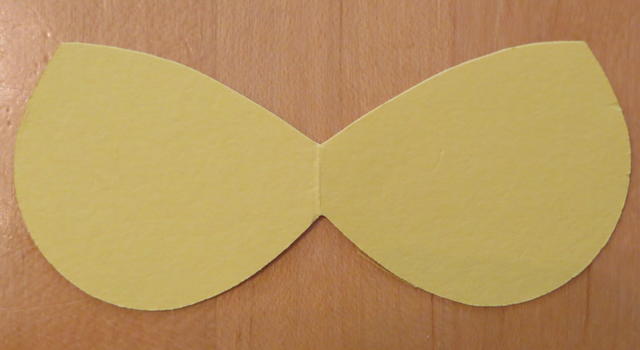
Next, cut a similar piece just out of one layer of card stock which will become the actual bra piece or at least the template if you want to keep it to make more.

Bra Card Template

Bra Card Template Cut out

With this piece, I folded it in half and then contoured it just freehand with my scissors in the bra shape I wanted.  Nothing scientific about this, you know they come in lots of shapes so you can make it wide or narrow or straight or rounded, however you want.  I used this piece for a template to cut out the pink card stock.

On the pink card stock, I stamped with Versamark the flourish from Everything Eleanor and then embossed with Stampin’ White Embossing Powder  and the Heat Tool to look lacy.  And I added a bit of Venetian Crochet Trim for a bit of lace.  For the straps, I just cut two thin scraps.  For the necklace, I drew on a silver chain with a Sharpie and added a Rhinestone Jewel.

You can make these bra cards with designer paper or plain card stock blinged up with rhinestones or pearls or embossing, both heat and with the Big Shot folders or with stamping a design.  So many creative choices!  Glue it on a larger card if you prefer!

Stampin’ Up! is helping in the fight against breast cancer by donating to the Breast Cancer Research Foundation (BCRF.org) for each Paper Pumpkin subscription.

Stampin’ Up! will donate $1 for every active Paper Pumpkin subscriber by October 10th

plus, an additional $1 for every new subscriber.

To find out more about Paper Pumpkin or to join  by October 10th, just click HERE.

Paper Pumpkin Pink Boxes

Stampin’ Up! Helps Fight Breast Cancer with Paper Pumpkin Kits

Paper Pumpkin Pink Boxes

It’s October and you can help Stampin’ Up! fight breast cancer if you subscriber to Paper Pumpkin, a monthly papercrafting kit that comes in the mail. Stampin’ Up! will donate $1 for every Paper Pumpkin subscriber and an extra $1 for each NEW subscriber before October 10th to the Breast Cancer Research Foundation (BCRF). You can help a worthy cause while you have fun stamping! The October Paper Pumpkin Kit will come to you in a pink box rather than red. That is why you need to subscribe by October 10th so you receive this special pink box.

BCRF is a world-class organization dedicated to ending breast cancer, and we are excited to be teaming up with them to make this happen. Their mission is to advance the world’s most promising research to eradicate breast cancer. For more information:  bcrfcure.org

Paper Pumpkin is just $19.95 a month and that includes shipping!  You will receive everything you need to make the project with the possible exception of adhesive and scissors. With your first kit you receive a clear block on which to mount the stamps that come in each kit. No risk, no obligation to continue for any amount of time. Only those “active” subscriptions will be counted in the donations so make sure your subscription is not “paused” for October.

  • Mini spoiler alert! The October project inside the pink box is just as awesome as always, but we should probably let you know that it is not a pink project. That’s all we’re saying. 😉

JOIN PAPER PUMPKIN TODAY! It’s a gift for yourself and others!