Category Archives: Kit

Paper Pumpkin Dec 2014 Kit Birthday Shaker Card

Paper Pumpkin Kit Confetti Birthday Card

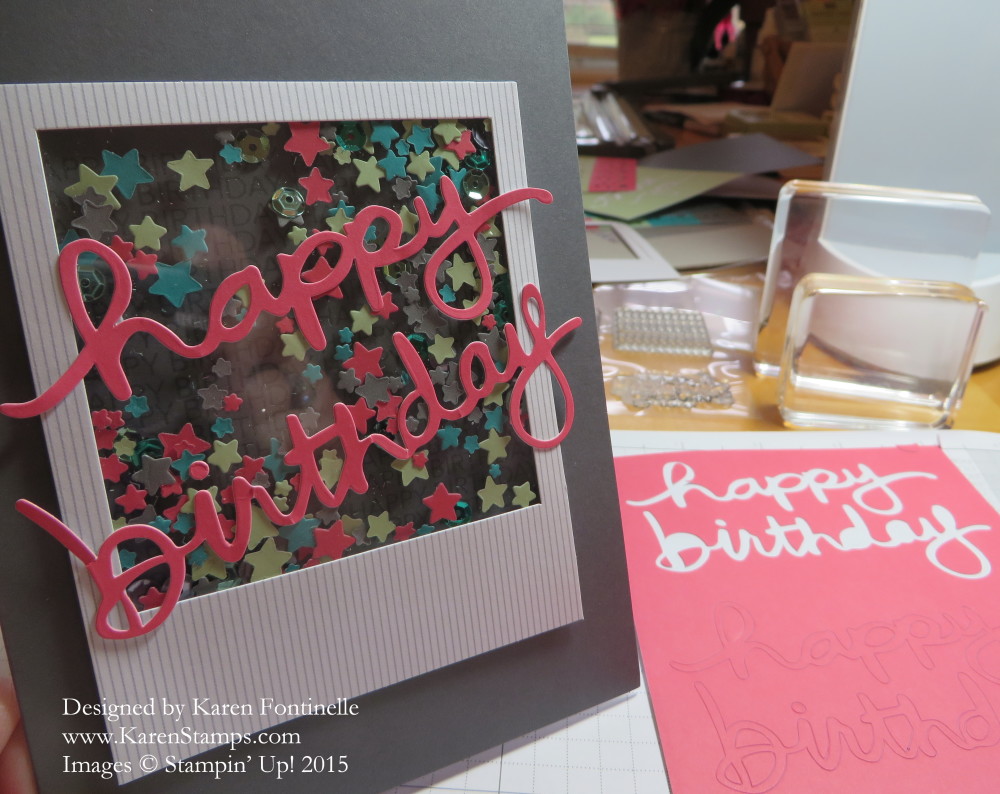
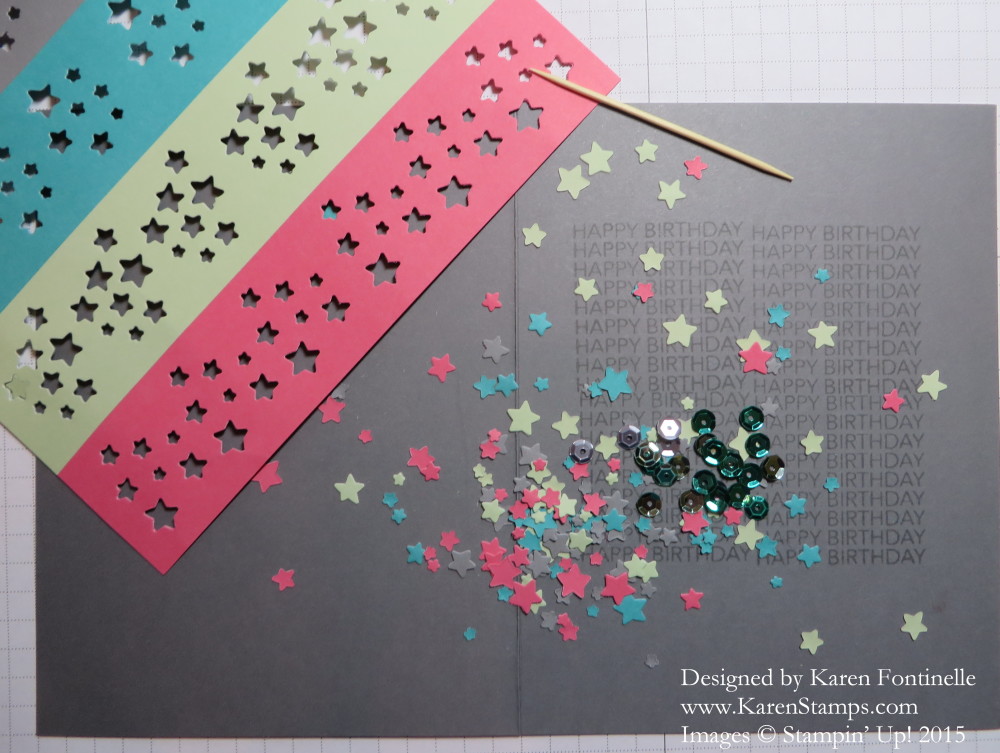
It may be cold, dark and rainy outside today, but inside it’s fun and happy making the cards in the December Paper Pumpkin Kit! The colors are cheery and the cards just brighten up the afternoon! All this star confetti plus turquoise-colored sequins make a shaker card using a window sheet adhered in a frame using long dimensionals provided in the kit so the confetti has room to move around inside. You get to make 3 Thank You cards, 3 Happy Birthday cards , and 3 Hello cards! What a helpful and happy kit to have to start off the New Year!  All supplies are included, even the toothpick!! In other kits you may need to provide your own adhesive.

Paper Pumpkin is the papercrafting kit from Stampin’ Up! that shows up in your mailbox once a month with a surprise project inside. While it is past time to receive this particular kit, there is a new one every month and all you have to do is sign up.  Once you are a Paper Pumpkin subscriber, you do have access to any past kits that you missed based on availability. Sometimes there are extra entire kits and sometimes just the supplies but no stamps.

Here is my finished Happy Birthday card with the confetti and sequins inside the shaker window!Paper Pumpkin Dec 2014 Kit Birthday Shaker Card
Right now during Stampin’ Up! Sale-A-Bration you can purchase a prepaid 3-month Paper Pumpkin subscription and save $5 Not only is that a little bit of a special deal, but since that subscription on your Stampin’ Up! order will cost $54.85, that will qualify you to earn a FREE Sale-A-Bration item from the Sale-A-Bration Brochure!  You can order other Stampin’ Up! products along with it, or give an extra Paper Pumpkin subscription to a deserving recipient for a gift, and for every $50 in merchandise you spend, you will receive a free Sale-A-Bration product!

Browse through the Sale-A-Bration Brochure right now, find the items marked FREE, and choose what you would like to receive as a bonus for every $50 purchase!

Let me know if you have any questions or if you would like copies of the Stampin’ Up! Occasions Catalog, Annual Catalog, or Sale-A-Bration Brochure! Email me at Karen@KarenStamps.com.

Paper Pumpkin at a Discount – And Free Sale-A-Bration Product!

Paper Pumpkin Subscription SAB 2015

Here’s a new twist on Sale-A-Bration from Stampin’ Up! Stampin’ Up! has lowered the price on a 3-month prepaid subscription for Paper Pumpkin, the papercrafting kit that comes to you monthly in the mail in a cute red box. Stampin’ Up! lowered the price $5, and since the cost is $54.85, that 3-month subscription qualifies for a free Sale-A-Bration product!  You can order the 3-month Prepaid Subscription by itself and choose a free Sale-A-Bration product OR add the subscription to your regular order and choose SAB products for your entire order.
Paper Pumpkin has gotten better and better over time, especially during the past year — better projects, more materials, in my opinion. It’s really fun to open that box each month and be surprised by what is inside. In the December kit, there was an extra free gift enclosed, a paper piercing pack with three templates! One of those things that just adds a little extra to a project!

If you order by the 10th of any month, you will receive the kit that goes out around the 15th of the month. You can even pause your subscription if you want to skip a month.

You’ll find Paper Pumpkin in my Stampin’ Up! Online Store under “Kits”. There you can choose whatever length subscription you want.  You can even make it a gift for someone.  Who wouldn’t want a red Paper Pumpkin Kit showing up in their mailbox during these cold, dark days of winter?!

Do it for your sanity! Do it to perk up your post-holiday blahs! Do it for your own “craft therapy” to relax and reenergize!  Creativity is good for you!

Order your 3-Month Paper Pumpkin Subscription today and choose your free Sale-A-Bration item!

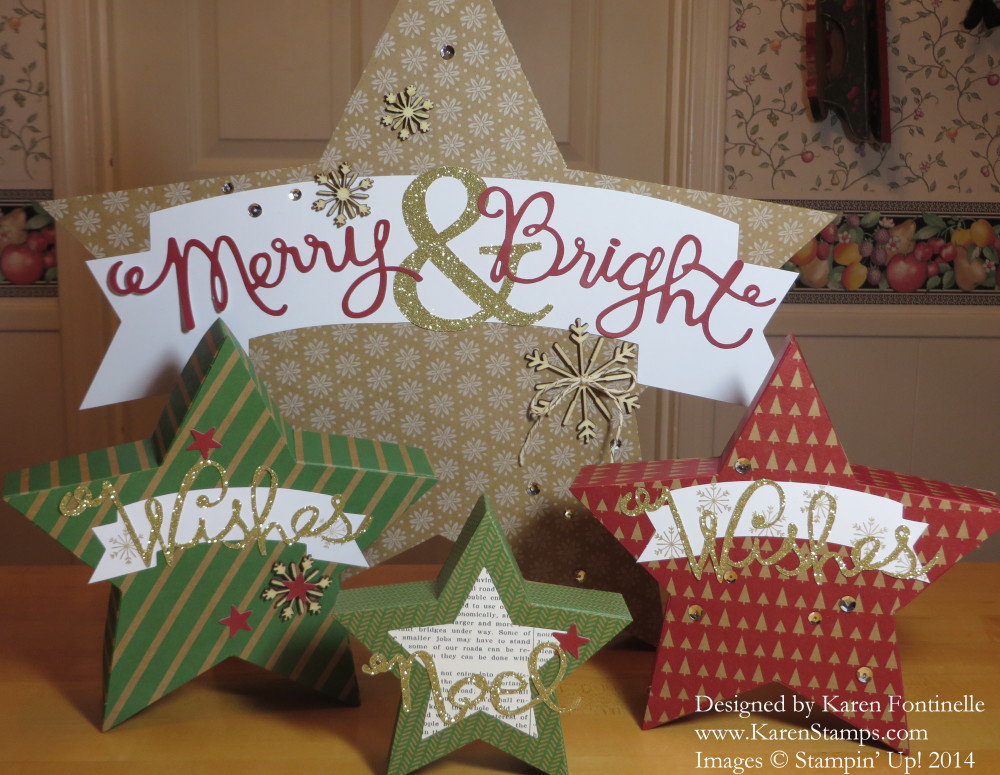
Many Merry Stars Simply Created Kit Boxes

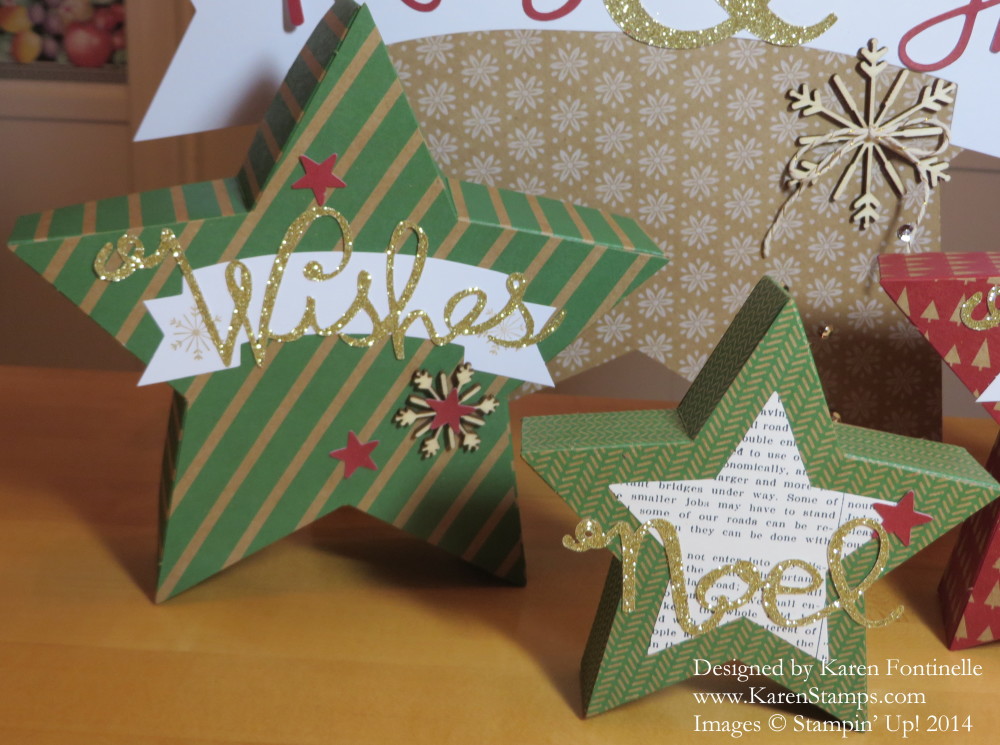
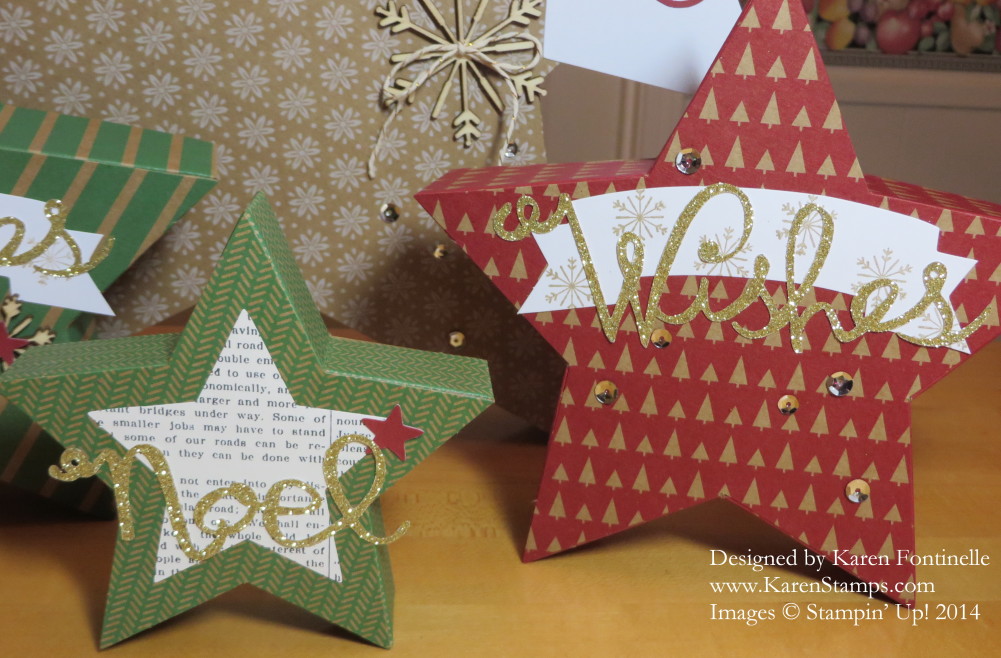
Many Merry Stars Simply Created Kit BoxesYes, I know star boxes from the Many Merry Stars Simply Created Kit were supposed to be made before Christmas, but much as I wanted to, it just didn’t happen!  I frequently do Christmas things AFTER Christmas – like bake cookies, make decorations! I could have saved the whole kit for next year, but for one thing, I’m in the mood now to make these, I’ve been looking forward to making them since I first heard of them, and by next Christmas there will be something new and shiny I am interested in!  So better to just make them now and have them ready next Christmas! What a joy that will be!

There are tons of supplies in the kit and the star boxes really were quite easy to make. They suggest starting with a medium size star box to get the hang of it on an easier size. I also followed someone else’s directions to make two of the boxes into boxes with a lid and bottom so that next year perhaps I can use them to put something inside.  Otherwise you are just adhering the back on to the bottom of the sides of the box and the whole thing is closed up.  Still cute and you can string a ribbon through at the top in the beginning of assembly to make an ornament. I haven’t tried all the variations yet!

Really, you could made some of these stars for just any occasion or for a birthday, not everything is Christmas-themed in the kit!

Just want to let you know it is okay to make Christmas things AFTER Christmas, in case you want to!

And at this moment you can still purchase the Many Merry Stars Simply Created Kit on the Year-End Closeouts Clearance Rack HERE. Only available while supplies last.

Hope you had a happy New Year’s Day yesterday! It seems like the holiday goes on and on with this weekend after! Time for a little more holiday stamping and then on to spring and the new Occasions Catalog and the start of Sale-A-Bration on January 6th! If you do not have a Stampin’ Up! Demonstrator and would like the new catalogs, I have some extras I can mail to you.  They will also be available online January 6th when the catalogs and promotion go live! If you are a customer who regularly receives catalogs from me, I think you should have received them already, so hunt through that Christmas mail you might have put aside and find them!

Many Merry Stars Green Boxes

Many Merry Stars Red and Green Boxes


More Watercolor Winter Simply Created Kit Christmas Cards

Watercolor Winter Merry Tree

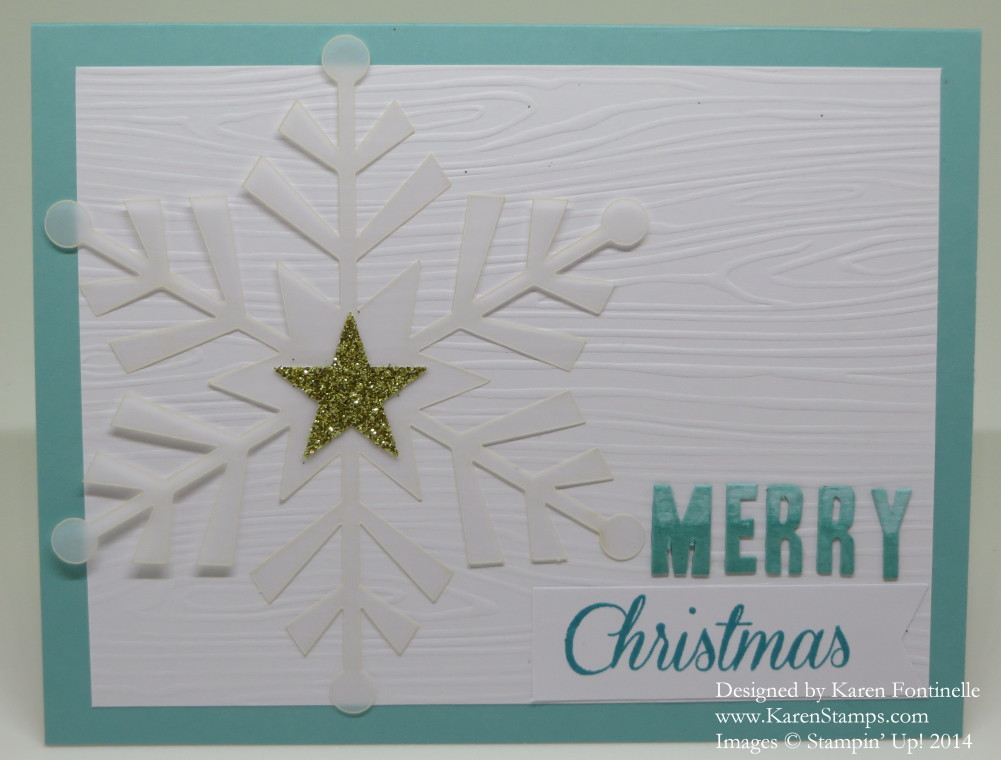
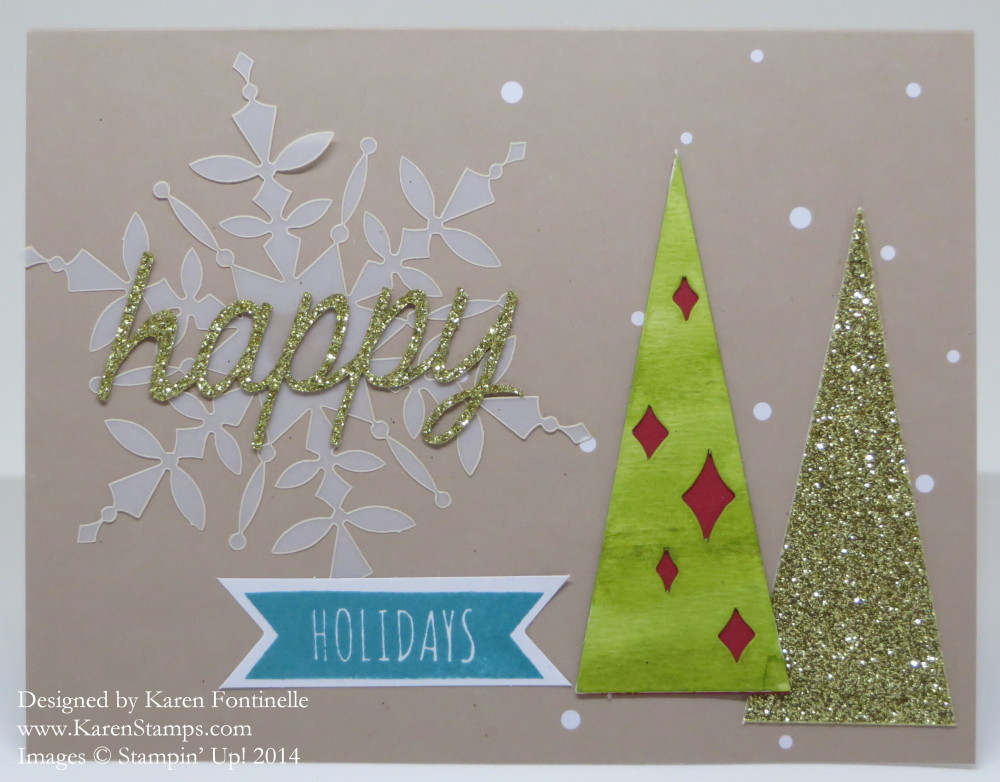
Besides the designed cards in the Watercolor Winter Simply Created Card Kit, I was able to make lots of other designs with the materials in the kit.  Some I copied and some I made up as I went along! That’s the beauty of stamping! The Watercolor Winter Kit is still on the Stampin’ Up! Year-End Closeout Clearance Rack, but is only available while supplies last! There are other holiday products on there that you might like to grab right away so you can use them this year – or save them for next year!

Here are some of the other cards I made from the kit and maybe with a few extra pieces from my stash.

Watercolor Winter Joy Sled Card

Watercolor Winter Card Sled Joy Snowflake

Watercolor Winter Card Bermuda Bay Snowflake

Making Watercolor Winter Cards from a Kit

Watercolor Winter Snowflake Trees CardYesterday I followed my own advice and just sat at the kitchen table and made Christmas cards! I used the Watercolor Winter Simply Created Kit, which made the card-making easier because the pieces were all there!  All I had to do was assemble!  Ok, I did do some watercoloring with ink refills (the trees, the letters, the sleds) but that was super simple with my Aqua Painter (even though a brush is included in the kit). No watercoloring skill required – just wet your brush, dip it into the ink refill puddle which can be in the lid of your ink pad, and brush over whatever piece you are coloring.  It helps to color the pieces before punching out because you can just color right across. Since the “ombre” look is so in style, it doesn’t matter if you get one part darker or lighter than the other.

There is also a coordinating stamp set that goes with this set, available separately. It is the Watercolor Winter Too Stamp Set. You can also use any greeting set you already have.

Since I have already made some of the cards exactly how the directions in the kit showed, I barely looked at the directions this time and just made my own designs or copied ones I liked on the internet. So in some cases, you will see I used a few other materials that did not come in the kit. But if you didn’t have any other paper scraps or materials to use, you would still be able to make the cards in the kit and even have leeway on how you wanted to make the designs.

This Watercolor  Winter Simply Created Kit, as I write this, is still available on the Stampin’ Up! Year-End Closeout Sale (Clearance Rack), but only while supplies last!

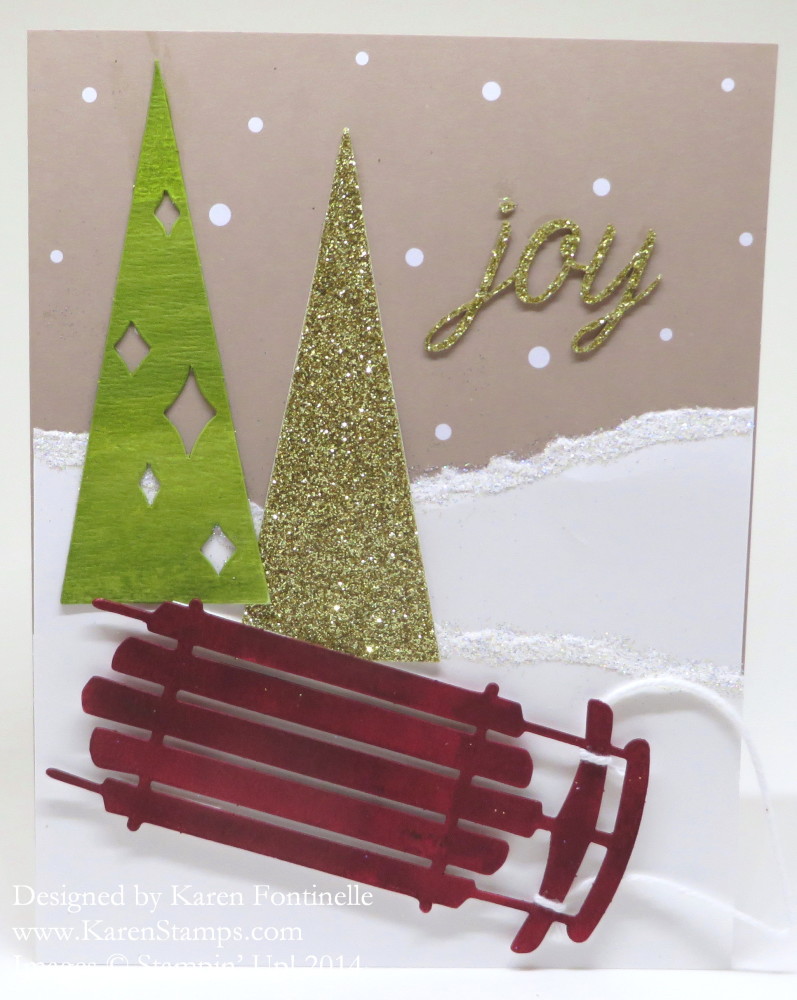
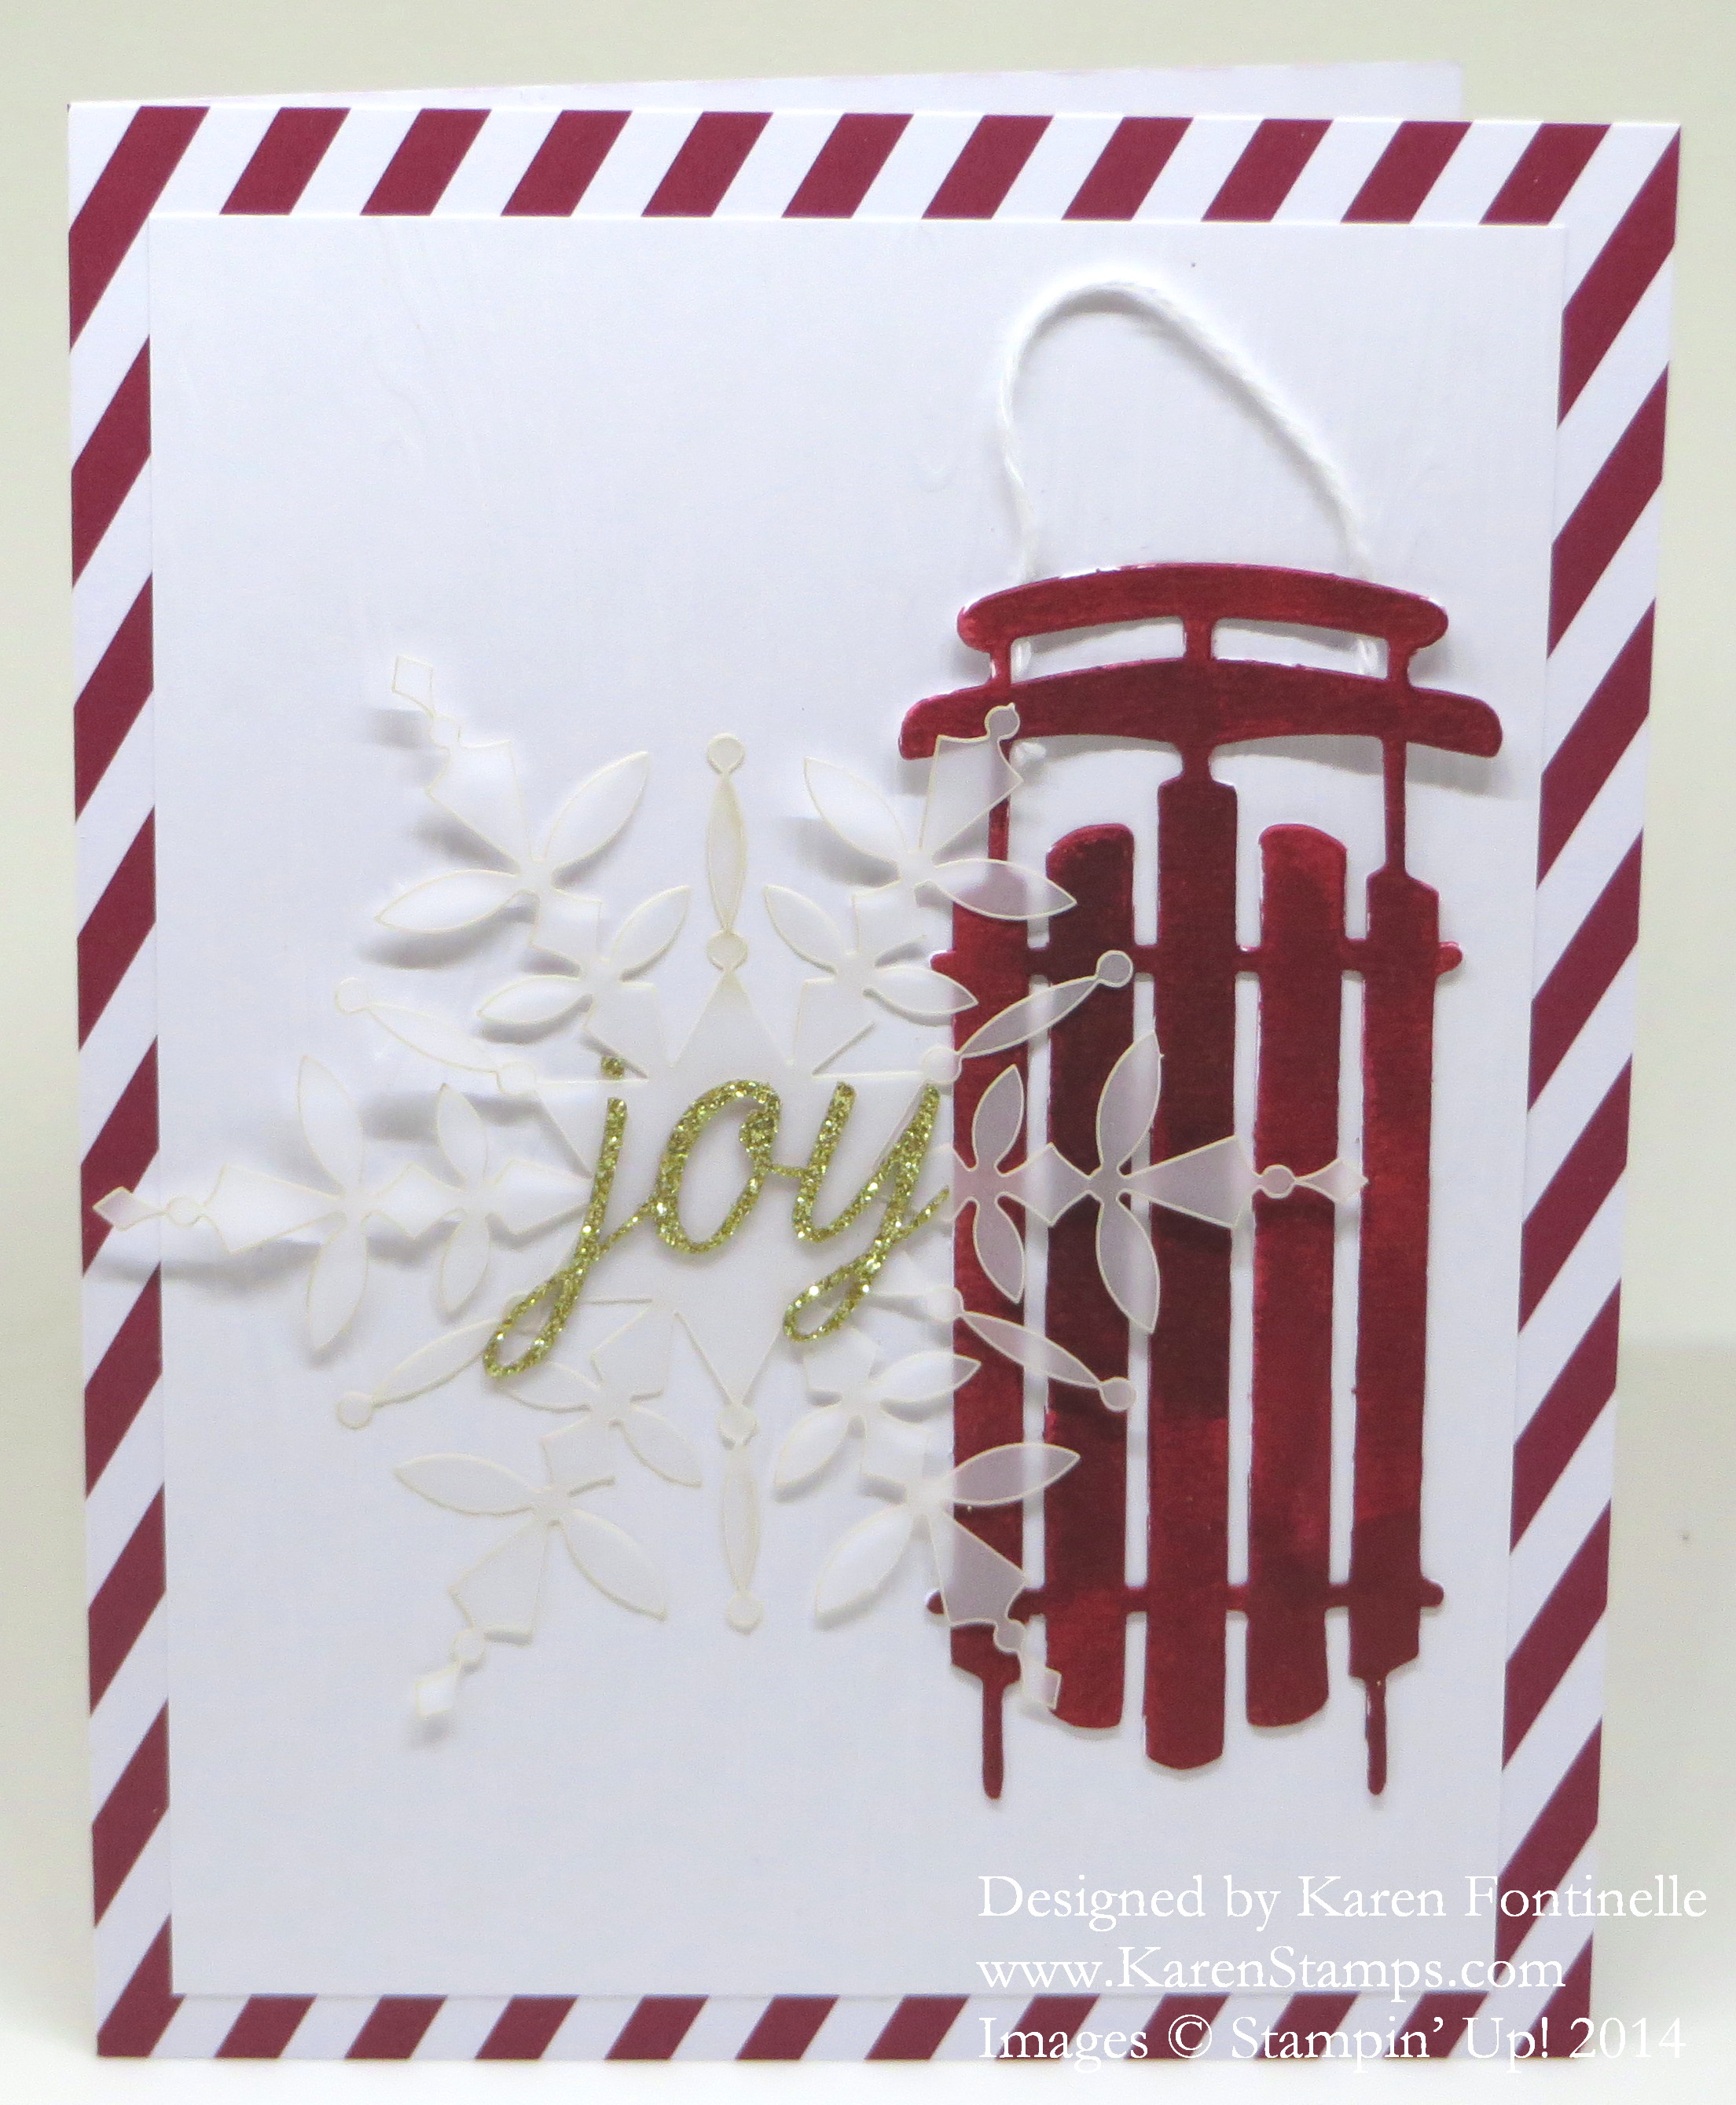
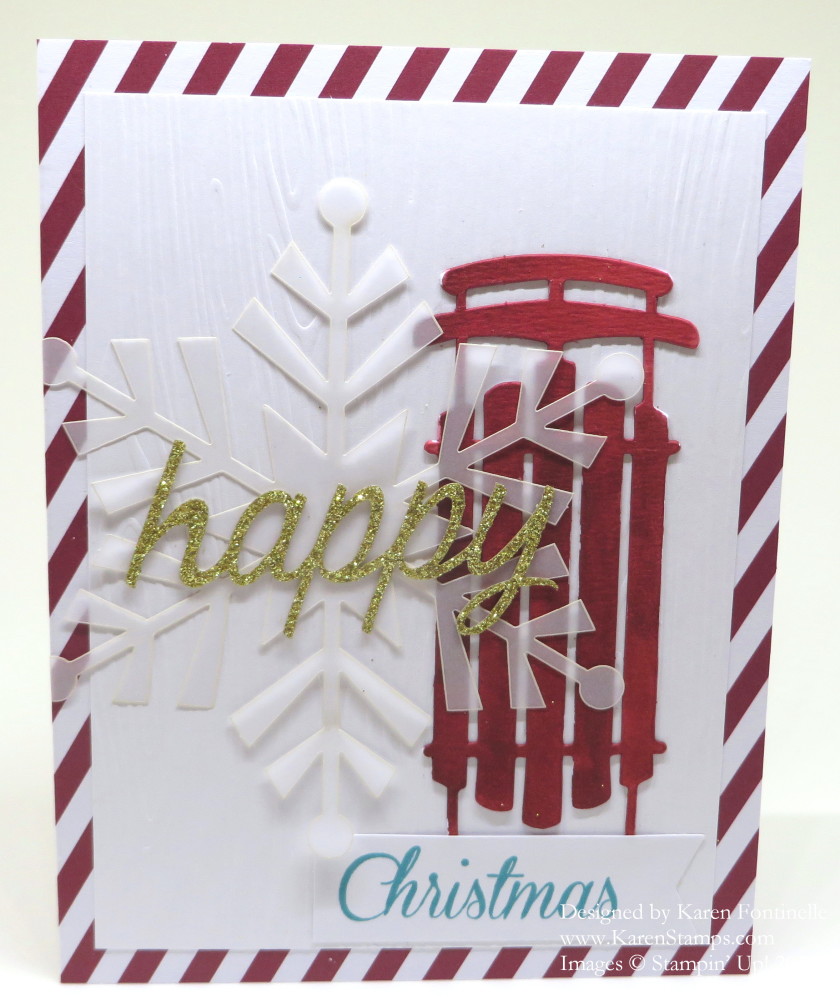
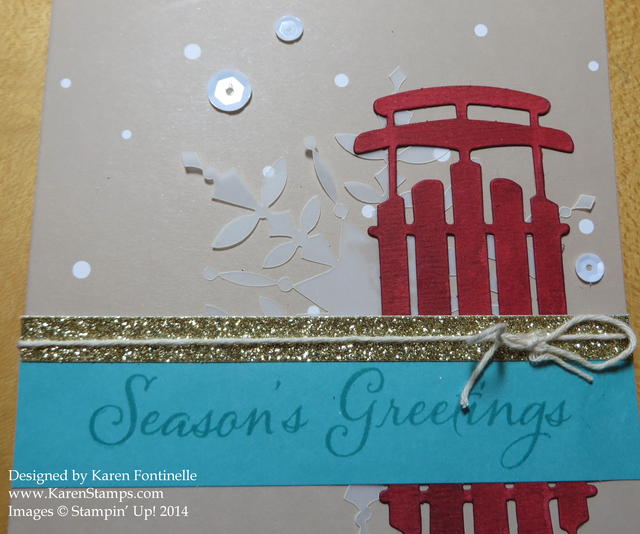
Here’s another card I made.  Love the sleds!!!! The striped card base comes in the kit, the woodgrain white layer, the snowflake, the glittery word, and the banner on which to stamp the greeting.

Watercolor Winter Card Kit


Shop anytime at the Stampin’ Up! Online Store!

More With the Stampin’ Up! November 2014 Paper Pumpkin Kit

Nov Paper Pumpkin Christmas Tags

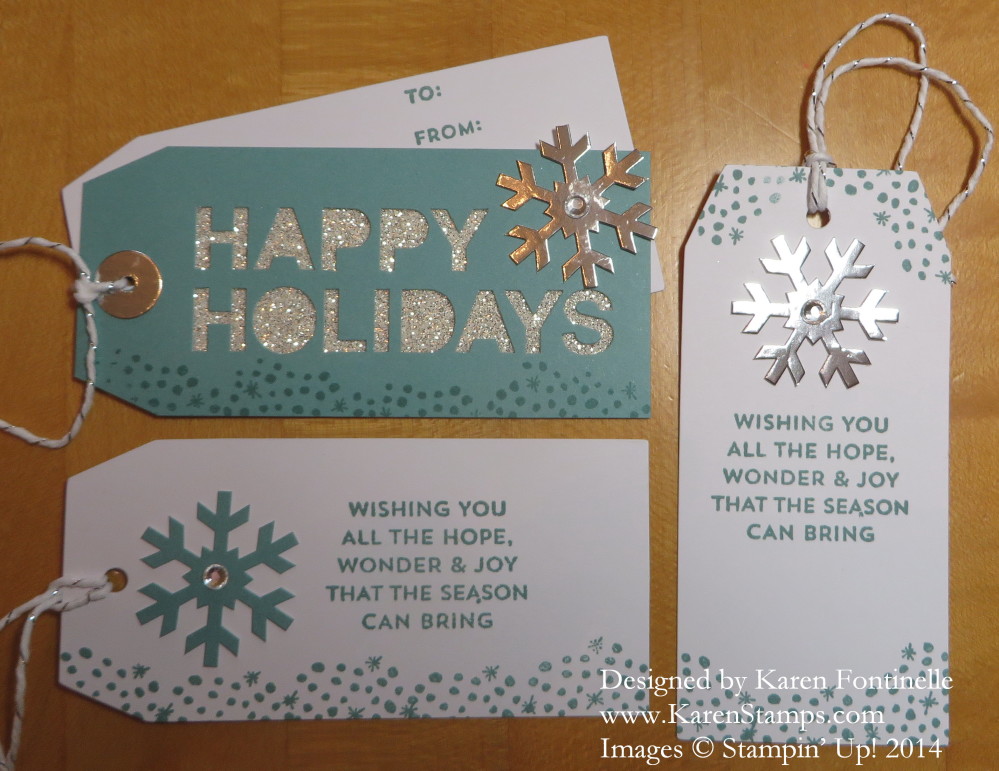
The thing about the Stampin Up! Paper Pumpkin Kits is that you can design alternate projects with the materials or even with the extra materials in the kit! This kit had such cute and clever Christmas cards and Christmas tags to make, that I didn’t think I could do much better on my own! But I did want to play around a little bit, so these are the extra tags I came up with. The top Happy Holidays tag just has a piece of Silver Glimmer Paper adhered behind the letters.  I love the glittery look it gives to the tag! Otherwise, everything else comes from the kit, including the glue dots!

Nov Paper Pumpkin Iridescent Ice Snowflake Christmas Card

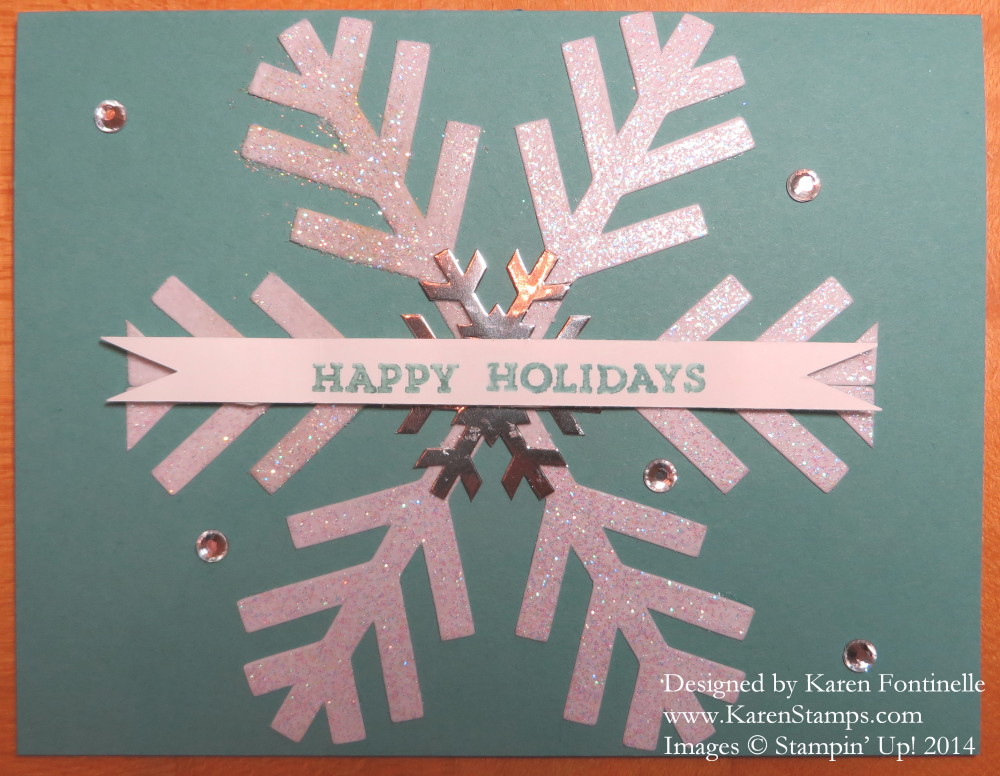
Here is the punched-out snowflake for the designed card, but I put the two halves together and put the greeting across the line where they meet up. You can barely notice at the ends under the greeting where the two halves go together, I could have made the greeting a bit longer, but only a “professional stamper” will notice! I inked the snowflake with Versamark ink and embossed with the Heat Tool and Iridescent Ice Embossing Powder. I did adhere a little Dazzling Diamonds Glitter in a few spots where the Iridescent Ice didn’t stick or emboss well, but it is barely noticeable. The silver foil snowflake in the center comes in the kit, and since I didn’t add it until later, I just cut it in half and adhered both sides slightly underneath the greeting. I also added a few rhinestones from the kit around on the card. Of course the snowflake would have looked just as good just plain!

November Paper Pumpkin Christmas Cards and Tags

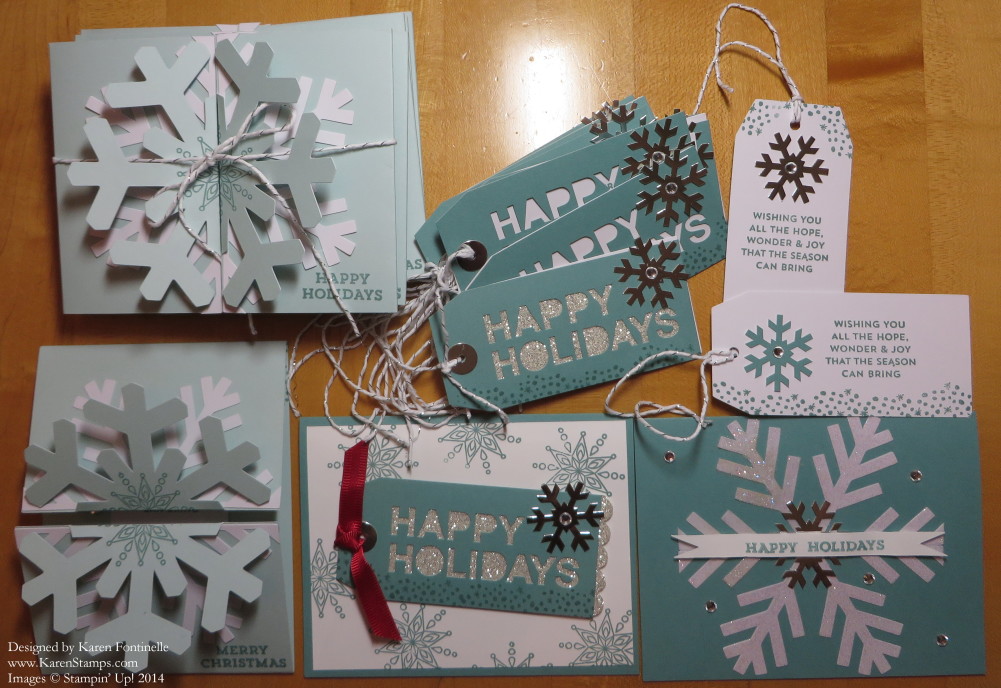
Look at all the Christmas cards and tags I made with the November 2014 Paper Pumpkin Kit from Stampin’ Up! And I still have some materials left over!

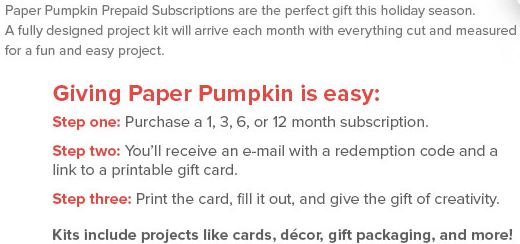
If you want to get in on the fun of the Paper Pumpkin papercrafting kit that comes in your mailbox just for you once a month, purchase one of these subscriptions and try it out!  No risk, no obligation! Add them on to your normal Stampin’ Up! order and it will count toward Hostess Rewards!

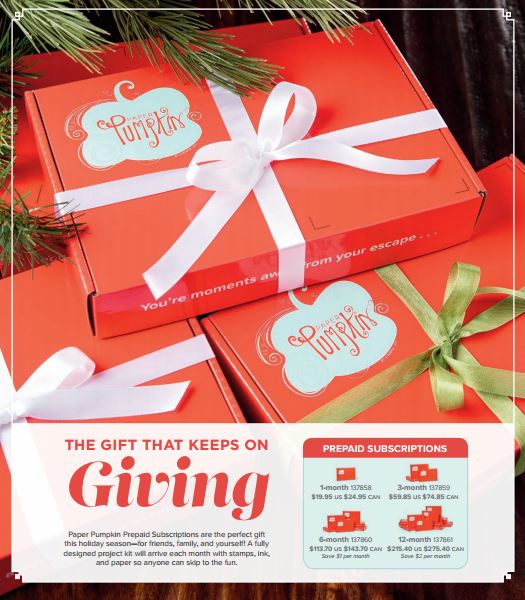
Paper Pumpkin Subscriptions make great Christmas or other gifts for your friends and loved ones! Make your shopping easy and a special treat for them!  Better than a gift from the mall!

Stampin’ Up! Deals and More Deals!

Stampin' Up! Online Extravaganza 2014

LAST DAY for the Stampin’ Up! Online Extravaganza!

Shop HERE at my Stampin’ Up! Onine Store, but please ask if you would prefer me to put the order in for you!

And with ANY Stampin’ Up! order today you will also receive my special bonus, a PDF with four easy and quick Christmas projects to make!

Karen's Christmas Project Bonus PDF

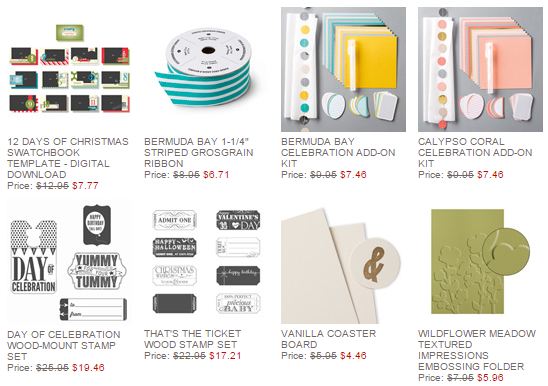
And MORE!  Stampin’ Up! Weekly Deals today through Monday, December 8, 2014.

Stampin' Up! Weekly Deal Dec 2 2014

 Build Your Own Bonus: Join Stampin' Up!

Want to be a Stampin’ Up! Demonstrator?  Last day for this great deal!  Buy the Starter Kit to join for ONLY $74.25 (regularly $99).  Choose $125 worth of product for your Starter Kit (you choose!). THEN you get an EXTRA 5% off on orders you place in December! It’s like a Christmas Bonus for you! For more information, just CLICK HERE. Then click the JOIN NOW Button, check off the Agreements, and then you will see the opportunity to start building your Starter Kit and take advantage of this special deal! I’m happy to answer any questions about being a Demonstrator and I will be your guide in getting your business started in the way you want to go.

Sneak Peek!! Stampin’ Up! Online Extravaganza 2014 – Starts Monday!

Stampin' Up! Online Extravaganza 2014

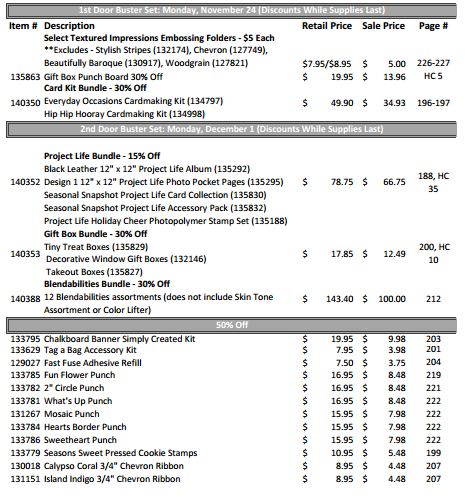
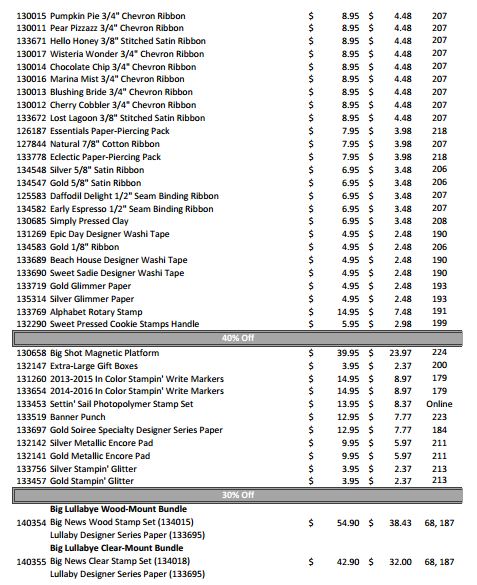
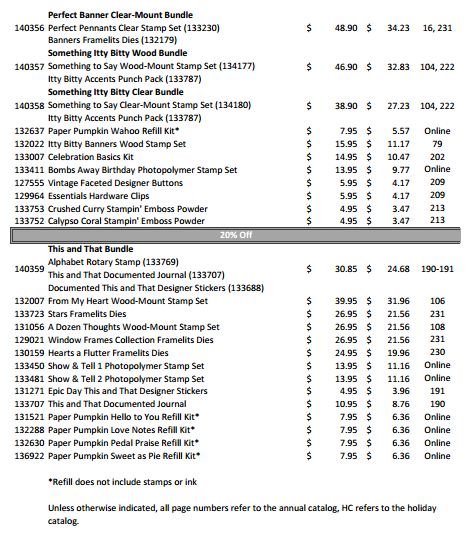
Get your Wish List ready because the Stampin’ Up! Online Extravaganza begins on Monday! Get Hot Deals Monday, November 24 through Tuesday, December 2, 2014. There will be discounts on select products and bundles, Plus DOORBUSTERS on the first day and again on Monday, Dec. 1st! You don’t want to miss them!

Click HERE to print out or view the Online Extravaganza List!

Stampin' Up! Online Extravaganza page 1

Stampin' Up! Online Extravaganza page 2

Stampin' Up! Online Extravaganza page 3

Don’t let the term “Online Extravaganza” scare you off if you don’t like putting your order in online. Just contact me and I can put it in for you!

Print out your list, think about it over the weekend and be ready to get your deals on Monday! Let me know if you have any questions that I can answer for you!

Click Here:  Karen’s Stampin’ Up! Online Store

Simply Created Thankful Banner

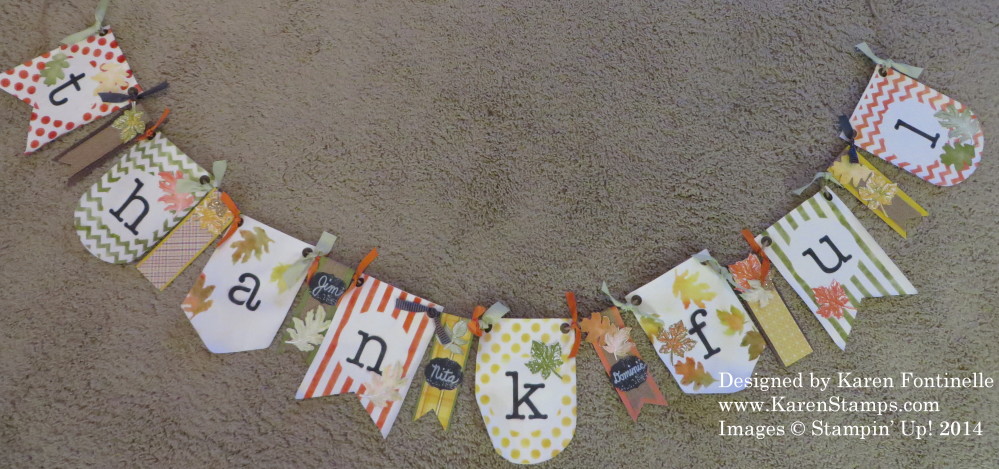
Simply Created Thankful Banner

The Simply Created Banner KIt was a new product in last year’s Holiday Catalog, but it is still available in the current Stampin’ Up! Annual Catalog. This is a “Thankful” Banner I made with the Simply Created Banner Kit for a birthday gift for a friend since she had been over recently and admired my “Spooky” Halloween Banner in THIS POST! The Simply Created Banner Kit comes with the stencils to decorate the banners as you see here,even the alphabet letters.  You can spritz the ink on lightly (lightly is all it takes) but for me I preferred sponging on the ink.  You can use a piece of a Stamping Sponge (I cut mine into 4-6 pieces) or Sponge Daubers.  I think I used Sponge Daubers!

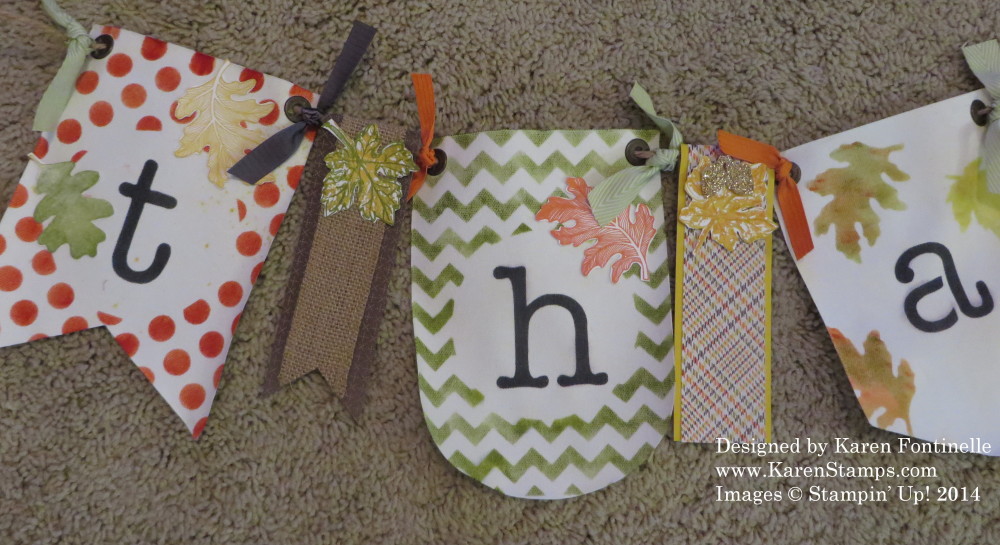
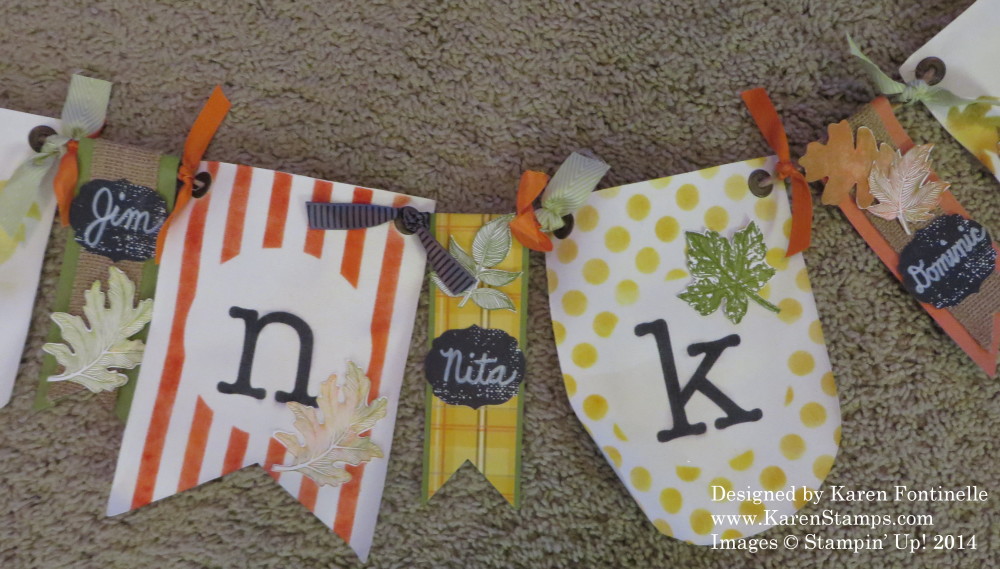
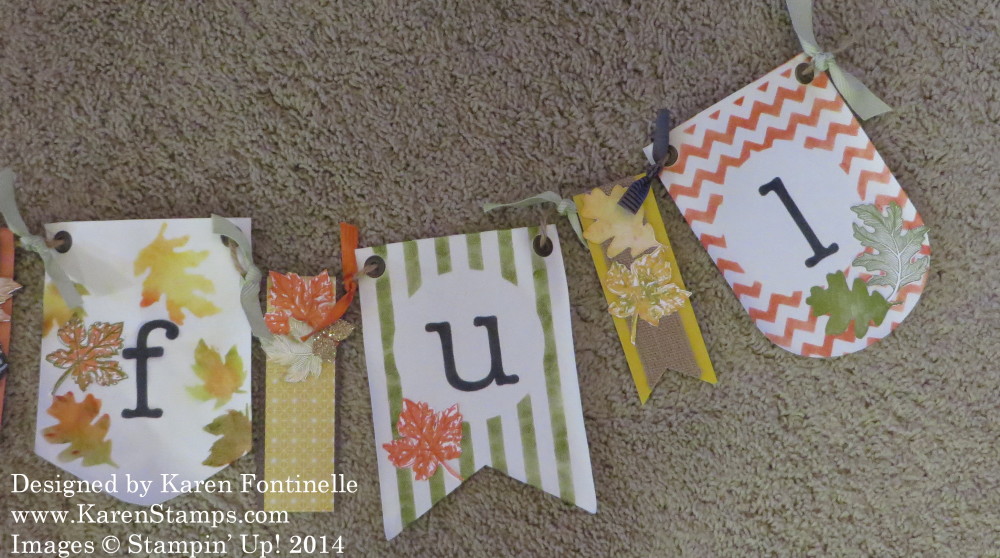
For the leaves (since I do not have the Autumn Accents Die, which would have made this SO much easier!), I simply stamped some leaves to cut out with my Paper Snips and then used some of those “negative spaces” as stencils and sponged in several colors of ink on the banner pieces to make my fall leaves. The Designer Series Paper I used on the in between strips is retired, I believe from last year, but of course you could substitute anything you like. Of course I was using some samples I saw online to make my banner and liked the idea of using chalkboard style pieces to write names with my White Stampin’ Chalk Marker. As a long-time lover of chalk, this marker is the next best thing! You should have one on hand to use when the mood strikes you in a project! My friend can clip on some photos of her family if she likes on the extra strips in between the banners or just leave them plain for decoration.

When this Simply Created Banner Kit first came out, I did not see it as anything I would have a need for.  But after seeing it demonstrated at the previous Convention, it looked like so much fun that I ordered it right away. You can also still order refill banners for the kit, Simply Created Banner and it also comes with the jute twine you can use to hang the banner.  You can use these banners for any holidays, for weddings, for birthdays, just any kind of decoration you like.  And banners are IN!

Check them out at my Stampin’ Up! Online Store!

Thankful Banner close-up


Thankful Banner middle closeup


Thankful Banner end

Join Paper Pumpkin!

Paper Pumpkin Escape

Click to get your Paper Pumpkin Escape!

This is the perfect time to join Paper Pumpkin, the delightful papercrafting kit that comes to you in your mailbox once a month! It is almost November 10th, and if you sign up by November 10th, you will receive the November Kit.  Not long to wait!  (After the 10th of any month and you will receive the following month’s kit.) We all look forward to seeing that red box arrive! It’s all in the presentation, as they say, and when you open the box, you will find all of the supplies you need (except adhesive) perfectly wrapped as a gift for YOU! And if you would like to gift others, you can order kits for them as well! There is no obligation, no risk.  Cancel or pause your subscription as you see fit.  And an additional perk, once you subscribe, you are eligible to order any available past kits or refills, in case you missed something you really liked.

Directions are included to make the project as designed, but with a little googling after the kids arrive, you will find plenty of alternate ideas you might like. The are plenty of creative people out there! Sometimes I make part of the kit as designed and then make some alternate things, just to play! It’s not just cards, it’s a mixture of projects through the months, and I can say, as time has gone on, Stampin’ Up! has only improved the kits with more supplies and better ideas!  With your first kit you will receive a special clear block to use with your included stamps. Usually you need to provide some adhesive, but often there are glue dots or some kind of adhesive included in the kit. So it can hardly get any easier for you to enjoy a little while of crafting time just for you. Yes, each month is a surprise! Some people like surprises, some people would prefer knowing. On occasion there is a sneak peek, but otherwise just step out of the box and take a chance on a surprise. Like I said, if you don’t like the project that comes, use your imagination and creativity (or internet search skills!) and make something to your liking! Or send that kit to your college student or your mother or aunt or nephew or birthday gift to a friend!

Cost is just $19.95 per month, which INCLUDES shipping! Sign up by the 10th of any month to receive your Paper Pumpkin Kit THAT month! So sign up by November 10 or sooner, and mid-month, when Paper Pumpkin Kits ship, your kit will be on its way.  You will not be billed until your kit ships.

To find out more and to sign up, please visit my Paper Pumpkin site HERE!

Here is a video from Stampin’ Up! showcasing the October Paper Pumpkin Kit!


Want New Holiday Stampin’ Up! Holiday Products?

Stampin' Up! 2014 Holiday Supplement

Click to Shop!

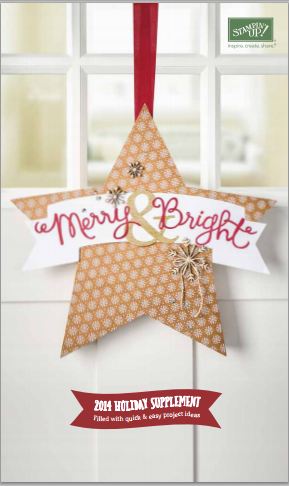
It’s here!  Today is the day!  The new Stampin’ Up! 2014 Holiday Supplement is LIVE, today, Monday October 20, 2014. Click the highlighted link or click the picture above to view the new supplement. As you look through it, you will notice the pages with the ordering information are pages 8-11. Due to the short time period until the holidays, these products are ONLY available WHILE SUPPLIES LAST! Don’t delay!  Order what you like right away to avoid disappointment. Some of the items in the Holiday Supplement are already available in the Annual and Holiday Catalogs.

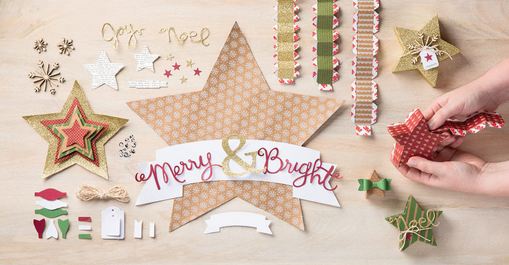
If you like stars, you will like this Holiday Supplement! Lots of Project Life by Stampin’ Up! products for the holidays, including a new album with RED! (okay, Cherry) I love red!  I think the most exciting item is the Many Merry Stars Simply Created Kit! All the materials you need to create 26 3D stars! And a coordinating star stamp set, Many Merry Stars Photopolymer Stamp Set.

Many Merry Stars Simply Created Kit

Click to Shop! Images (c) Stampin’ Up! 2014

Watch the Stampin’ Up! video below to see how these stars go together!

For all these new holiday items and everything else,

shop at my Stampin’ Up! Online Store!

September Paper Pumpkin Kit

September Paper Pumpkin Kit Bags and Tags

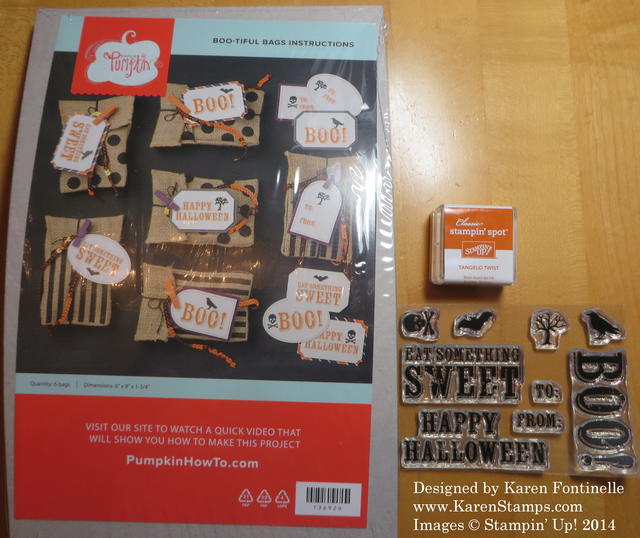
I think this September Paper Pumpkin Kit has to be one of my favorites, maybe because I like Halloween so much! It’s fun to get the Paper Pumpkin red box in the mailbox and then see what is inside! And the kits have just gotten better and better over time!

Here’s what came in the box!

September Paper Pumpkin Kit

I love the Halloween photopolymer stamps that came in the kit!

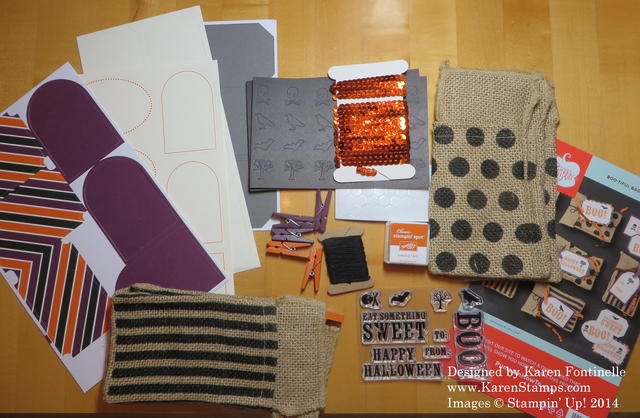
And here is what all was wrapped up with the instructions!

September Paper Pumpkin Kit Contents

Plenty of stuff to make the kit as designed and a few extra tags and materials left over to make something else!

If you would like to get a Paper Pumpkin Kit in the mail every month, please sign up HERE at my Paper Pumpkin website!

And if you would like to add a subscription to your regular Stampin’ Up! order, you can choose from these options HERE.

Order your Paper Pumpkin Kit by October 10th – do it today so you will be on the list already!  No obligation, no risk. Cancel or pause you subscription any time, just make your choice by the 10th of any month!

More Watercolor Winter Kit Christmas Cards

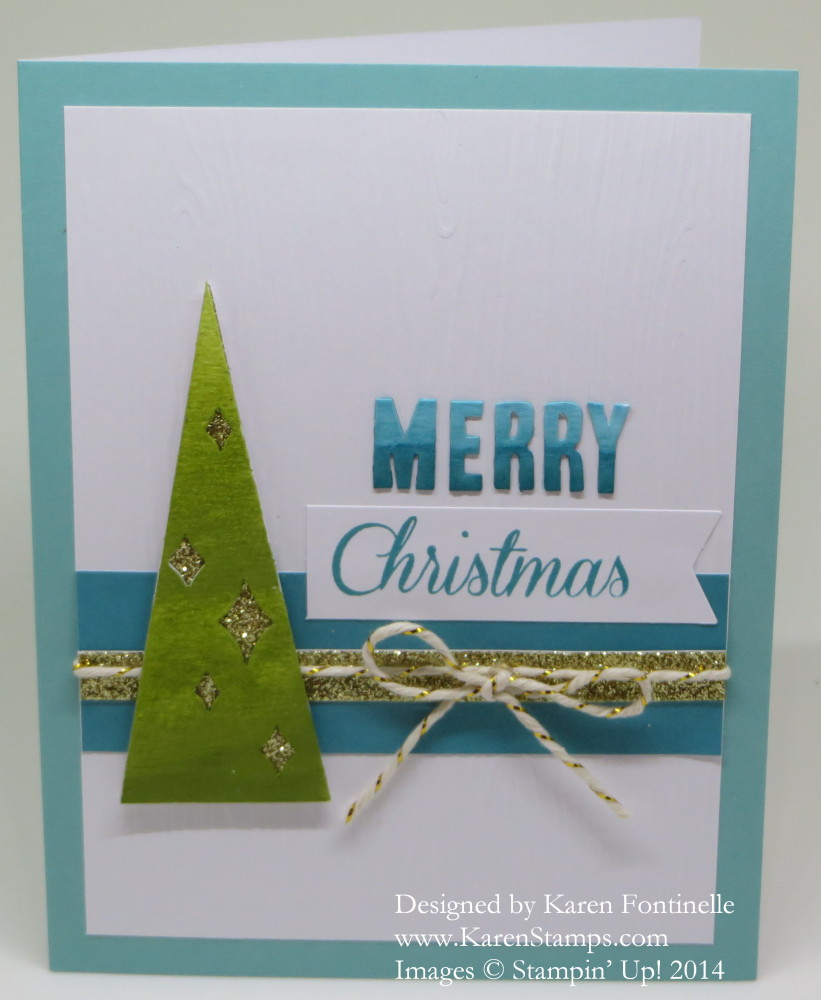
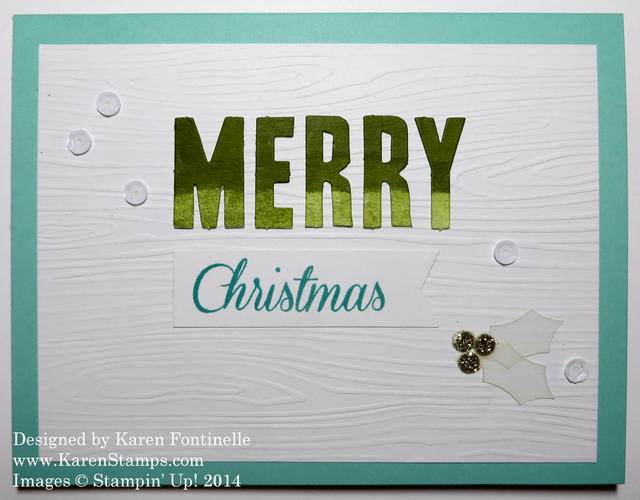
Watercolor Winter Kit Merry Christmas Card

The Watercolor Winter Simply Created Kit in the Stampin’ Up! Holiday Catalog really appealed to me after seeing some photos of the cards Demonstrators made at the Stampin’ Up! Convention. They are cute cards, but I found them a little bit more difficult to make than I expected. I think Stampin’ Up! could have done a little better job with the directions and they could have included color photos of  all the finished cards.  But you can look online or in the Holiday Catalog on page 37 to see the cards. The cards are not difficult to make, really, probably a little more detailed and tedious what with tiny pieces and waiting for the watercoloring to dry. If you are looking for super simple and quick, this kit is probably not for you. If you can handle taking some time and handling some small pieces and looking at another source to see what the cards are supposed to look like, then you might like making these cards just fine. You do get PLENTY of pieces of “stuff” in this kit so you can follow some or none of the directions and do your own thing. Or make some of the cards according to the kit directions and then branch out with your own ideas! Don’t forget the coordinating stamp set, also on page 37 of the Holiday Catalog, called Watercolor Winter Too.

As per the title of the kit, there is watercoloring involved with these cards!  A watercolor is even included. It’s best if you have some reinkers that match the cards so that you can add the reinker to a bit of water or use your Aqua Painter instead of the brush, to color the items in the kit, such as the letters on this card.  For these letters I chose to do the “ombre effect”.  Notice the gradation of shades from light to dark. Well, now that I look at the photo, I’m not sure the medium shade shows up, but however you want to do it, or however it turns out, is fine! It is easiest to color the letters while they are still attached and then you can pop them out when they are dry.

Here is the other card in the kit:

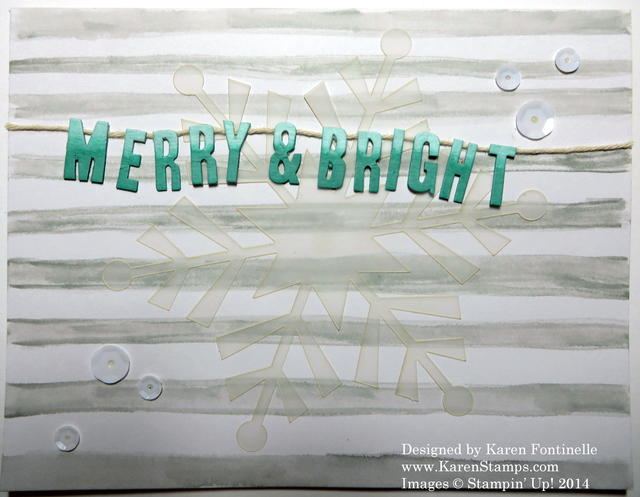
Watercolor Winter Kit Merry and Bright Card

On this card, I actually painted on those gray stripes going across the card front! They don’t have to be perfect (and aren’t!) because you are watercoloring!  Lots of room for imperfection and it still looks good!  Then you just stick on one of the vellum snowflakes that comes in the kit and add a few sequins. The small letters are watercolored on their sheet, but here is a twist!  Turn the piece containing the letters and other card die-cuts over to glue the linen thread to the back of the letters. Directions on that ARE included in the kit. Again, a little tedious, if you are not into that kind of thing, but it does work! I used Tombow Multipurpose Liquid Glue. You could also color the letters, punch them out and then just glue them onto the card. But they are small!

So if you are interested in this Watercolor Winter Simply Created Kit, here is where you get it!

Be sure to watch this video so you can see what other supplies you need and see how they cards go together – and all the supplies you get in the kit! And let me know if you have any questions!

Watercolor Winter Simply Created Kit Cards

Watercolor Winter Pieces

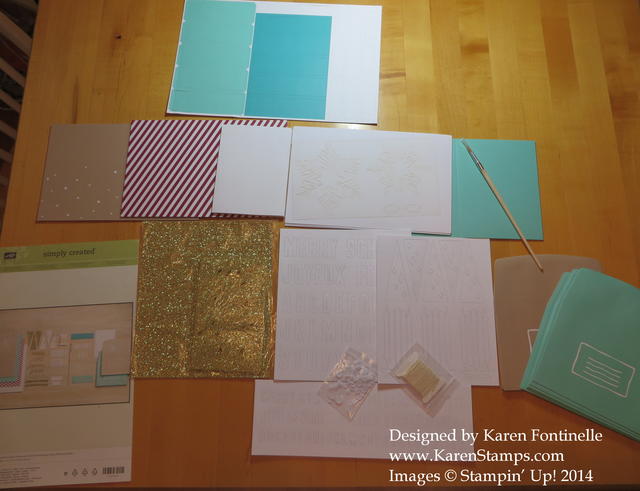
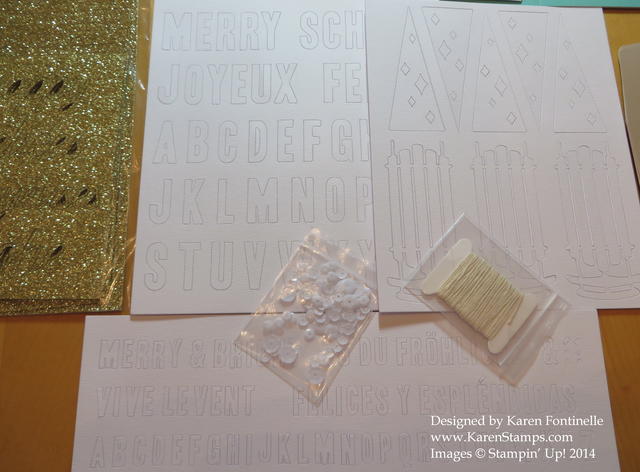
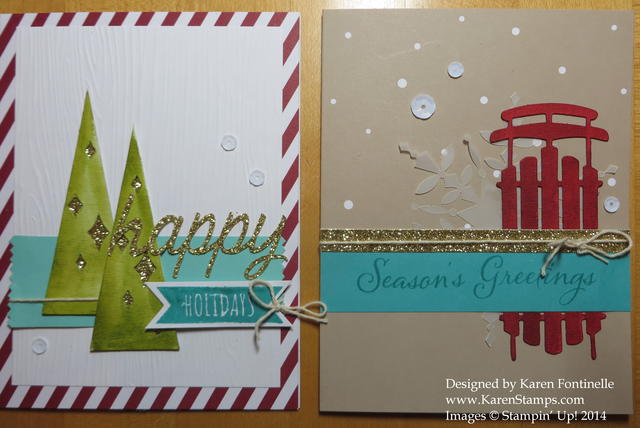
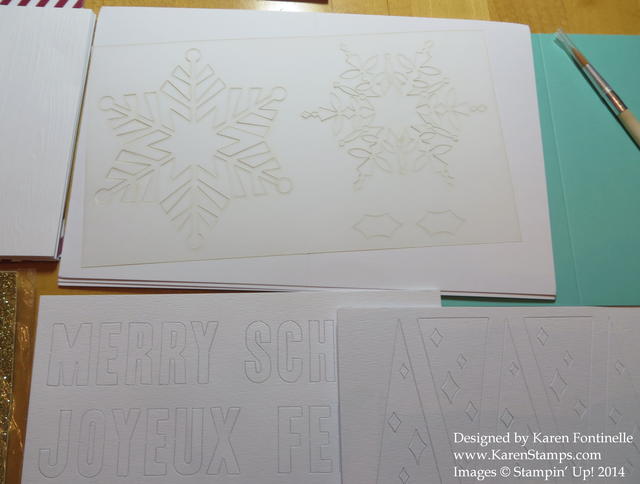
I was surprised when I finally opened up the Watercolor Winter Simply Created Kit package and saw ALL the pieces that come in it!  It took up half my kitchen table to lay everything out to show you! The kit has enough materials to make 20 cards and includes envelopes. You DO have to have some reinkers with which to watercolor the pieces, adhesive, and a couple of clear blocks for the stamps. I have to be honest and say I wasn’t pleased with the directions they put in the kit, and I think they should put color photos of each card so you have a better idea what to do.  I made one of each of two of the cards for today exactly like the directions say, which you will see below. I think when I strike out on my own making similar cards but not following the directions I will enjoy it more. I think it helps to lay everything out on the card before adhering parts to see if it all fits and see if you like it and which kind of adhesive you want to use. At the very end you will see a Stampin’ Up! video that helps in seeing how to make the cards.

Watercolor Winter Pieces2

Watercolor Winter Pieces3

Watercolor Winter Trees and Sled Cards

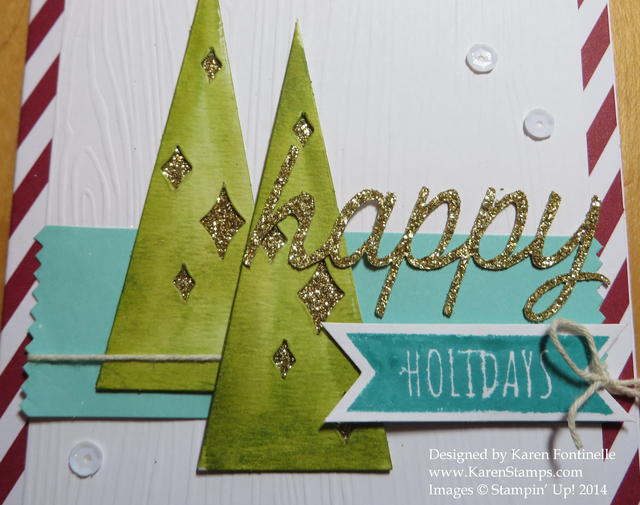
Watercolor Winter Tree Card closeup

Watercolor Winter Sled Card Closeup

I love the look of these cards, but you do need more things than come in the kit. You also need a Bermuda Bay ink pad and a greeting, like the Watercolor Winter Too stamp set that coordinates. But with a little patience and the right supplies, you can make a set of beautiful Christmas cards out of this Watercolor Winter Kit,whether following the directions or going out on your own!