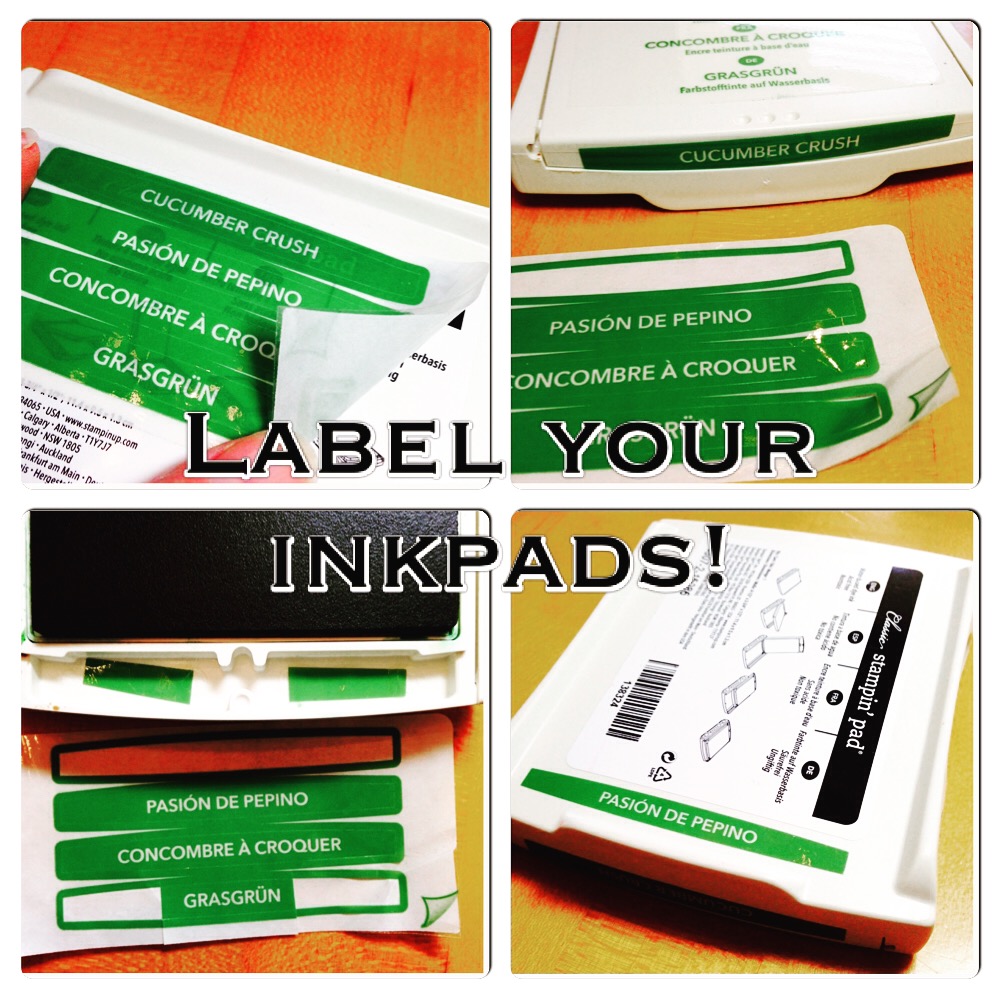
If you are new to stamping, this is how to label Stampin’ Up! ink pads! You might not have noticed (or forgot, like me!) that there are ink color labels on the bottom of each ink pad. They come in different languages, as do most things these days, but you can use more than your country’s name! It’s very handy and useful!
Peel off the whole color label piece. Underneath you will find the directions for opening and closing your ink pad so you want that uncovered anyway, especially if you are new to stamping. Choose the label with the ink color in your language and stick that on the front of the ink pad as shown. It fits perfectly along that top edge. (One time I thought I had to fit the label on the shorter space underneath, I don’t know why!)
Then use the extra labels in the other languages to trim off the color ends and adhere those inside the ink pad in the little well in the front. Sometimes you can’t tell one ink pad color from another when you have several open, so this way, you can look inside and see the color from the labels. Very handy at times!
Then since you still have some labels left, use another one, to adhere to the bottom of the ink pad. Maybe not likely you will be looking under there, but just in case your ink pad gets turned over, you can see at a glance what color it is! And maybe you will also learn a foreign language while you are placing all the labels on your ink pads!
Here are the features of Stampin’ Up! ink pads!
“Classic Stampin’ Pads come in exclusive Stampin’ Up! colors, grouped in collections to take the guesswork out of product coordination. The innovative ink pad design has a patented flip-top lid and a firm foam pad to give you a superior stamping experience.
* Fast drying, dye-based ink
* Always Artichoke
* Acid free
* Flip top for upside-down storage: pads stay inked during storage
* Firm foam pad lasts longer than felt pads and provides exceptional ink coverage, especially with solid-image stamps
* Can be re-inked with matching Classic Stampin’ Ink Refills
* Coordinates with Stampin’ Up! cardstock, markers, and embellishments
* 3-1/2″ x 4-1/2″
Be sure to order an ink refill when you purchase an ink pad so you have one on hand. You can also use the ink refills for various techniques so they’re not just for reinking!
Now that you know how to label Stampin’ Up! ink pads, I hope you will take the time and put the extra labels to good use!
Shop Stampin’ Up! Online 24/7

