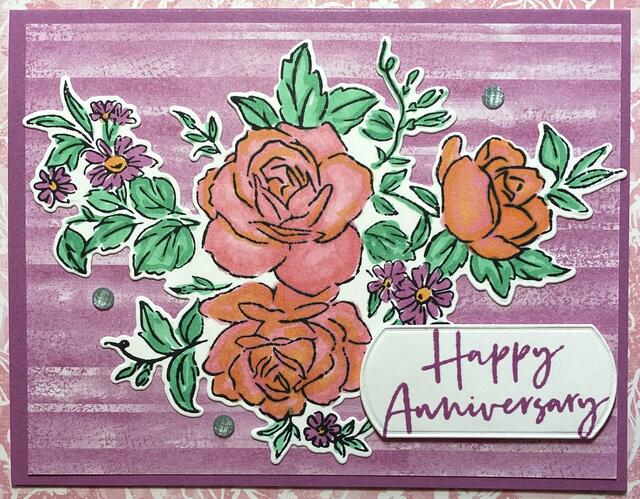
I thought I would try out this lovely new stamp set to make this Layers of Beauty Anniversary Card. We may have lots of floral stamp sets and dies but there’s always a new one that is so pretty we must have that one, too! This Layers of Beauty Stamp Set and Die is something new coming in the Stampin’ Up! Annual Catalog 2024-2025. There are also Layers of Beauty Decorative Masks in this Bundle that can be used to color this large floral piece.
My other goal with this card was to use some of the new In Colors 2024-2026. The card base is Petunia Pop cardstock. The layer of striped paper is in the Unbounded Beauty Designer Series Paper. I thought it looked good as a background to the floral piece without being too distracting.
The large floral piece fits on the largest acrylic block we have! That’s how big it is! It is stamped with Memento Ink on Basic White cardstock. I stamped it on a piece of 4″ x 5 1/4″ Basic White. Be careful how you place it before you put the stamp down on the paper so you get all the areas of the stamp.
To color in the floral piece, I used my brand new Stampin’ Blends Markers of the In Colors 2024-2026. For the roses, I colored in with Pretty in Pink, both Dark and Light. The daisy-like flowers are colored with Petunia Pop with little Peach Pie centers. The leaves are all colored with Light Shy Shamrock and then highlighted a little bit with Dark Shy Shamrock. Then I went back over the roses with a little bit of the Peach Pie Stampin’ Blend Marker just for fun.
After coloring the floral piece, I used the die to cut it out. It’s not too hard to figure out which way it fits on your stamped image, but take some time to make sure all the edges are lined up properly so you get a good diecut. This was glued down flat on the card but I almost popped it up with Stampin’ Dimensionals.
The greeting is stamped from the Layers of Beauty Stamp Set with Petunia Pop ink. I used one of the dies in the Unbounded Love Dies to cut it out. However, that die was a little big to fit on the card without taking up too much space. I took the die cut piece back to my Stampin’ Cut & Emboss Machine to trim off each end of the label by placing the die right on the diecut piece but sliding it down a tiny bit to make it shorter. I did this on the opposite end also. You can feel that the sides are lined up in the lines on the sides of the die. I only ran the die through just over each end, not across the whole piece. I popped up the greeting with Stampin’ Dimensionals.
Lastly, I added three 2024-2026 In Color Shimmer Gems in the Shy Shamrock color. It was hard to stop at three, but I did it!
Right now you can shop the Last Chance Sale at Stampin’ Up! to get select products at a discount or to stock up on your favorite papers, stamps, dies, and embellishments before they retire (or before the prices go up in the new catalog!). This sale lasts until April 30, 2024. And then the new Annual Catalog begins on May 1st!

