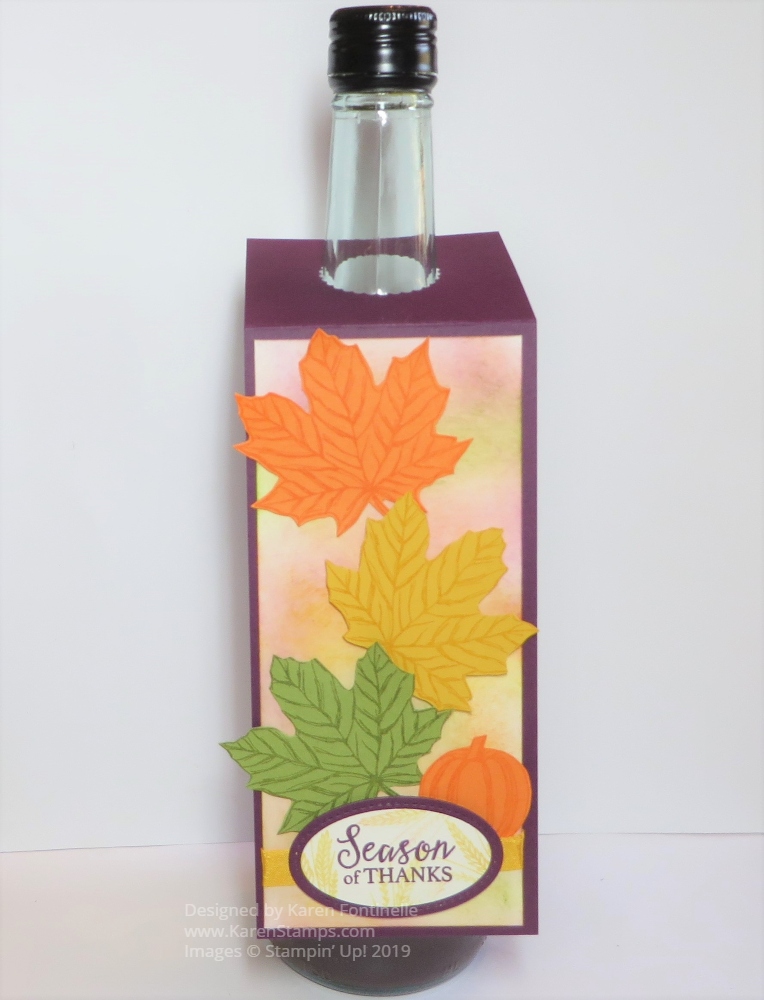
Thanksgiving will be here soon, although this idea can be used at any time of the year, and perhaps if you are going to someone else’s home, you might like to take a hostess gift such as a bottle of wine or other beverage. Rather than just take an ordinary bottle of wine, decorate it with your personal touch by making a Gather Together Fall Wine Bottle Tag such as this one. You can make it as easy and simple or as fancy as you like!
The basic idea is a piece of cardstock to hang down the partial length of the bottle with a score line at the top with a punched hole to make the hanger. Without the score line, the tag would just hang and stick out. You may need to alter these measurements to fit your bottle, but the project is easy enough to understand and you can make adjustments for your individual project.
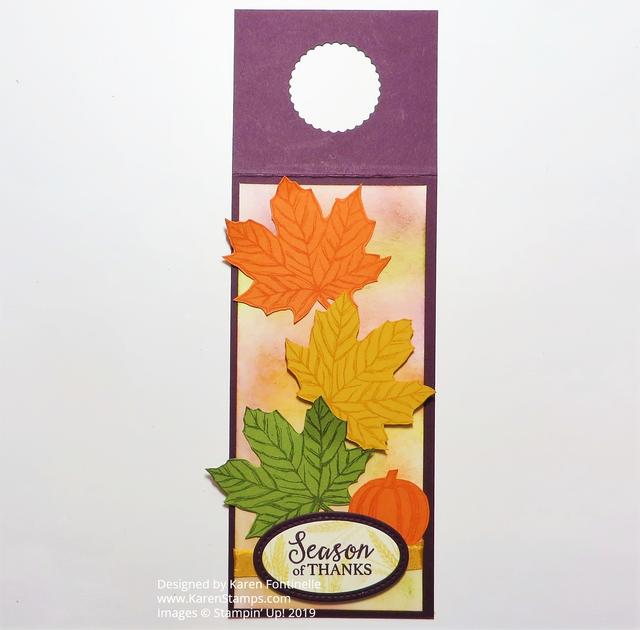
For this exact project, I began with a piece of Blackberry Bliss Cardstock 9″ x 3″. It is scored at 2 1/2″ down from the top. You can either eyeball the center or measure accurately to find the center of this top portion in order to punch a hole to go over the wine bottle. I used a 1 3/8″ Scallop Circle Punch to make the hole. You could also use a circle die.
Next, I cut a piece of Very Vanilla Cardstock to layer on the Blackberry Bliss Cardstock at 6 1/4″ x 2 3/4″. I stamped three leaves with the Gather Together Stamp Set in the same color ink as the cardstock in Pumpkin Pie, Crushed Curry, and Old Olive. If you have the Gathered Leaves Dies, you can die cut the leaves, or if not, just use Paper Snips to cut out by hand (as I did!). The pumpkin is also stamped and cut out.
The greeting is stamped from the Gather Together Stamp Set in Blackberry Bliss Ink and lightly stamped in Crushed Curry with the little wheat stamp for a little interest. It is die-cut with the Layering Ovals Dies and layered on a Stitched Shapes oval die. I put a piece of underneath the popped up greeting.
As I laid out the design of the tag, I decided to add some color to the Very Vanilla layer on the Blackberry Bliss. I simply took a sponge and sponged on some Pumpkin Pie Ink, Crushed Curry Ink, Old Olive Ink, and Blackberry Bliss Ink very lightly. It just adds a little more of a fall look.
I sponged on these colors, then adhered the Crushed Curry 3/8″ Crinkled Seam Binding Ribbon under the popped up greeting at the bottom of the tag. Next, I placed the leaves with the top and bottom leaves being adhered straight on to the tag and the middle one popped up on Stampin’ Dimensionals. I also tucked in the little stamped pumpkin by the greeting and leaf.
Here are another bottle tag I made in the past and another to give you other ideas and see how easy they are to make! And like I said, they could be designed for a birthday celebration or other occasion.
Here is a photo of the entire tag not hanging on the wine bottle to see how the top is made.

If you wanted to take an extra little hostess gift, you could also make an assortment of cards that matched the colored leaves and design on the tag. Give this little project a try and then keep it in mind when you are going somewhere and want to take a gift!
