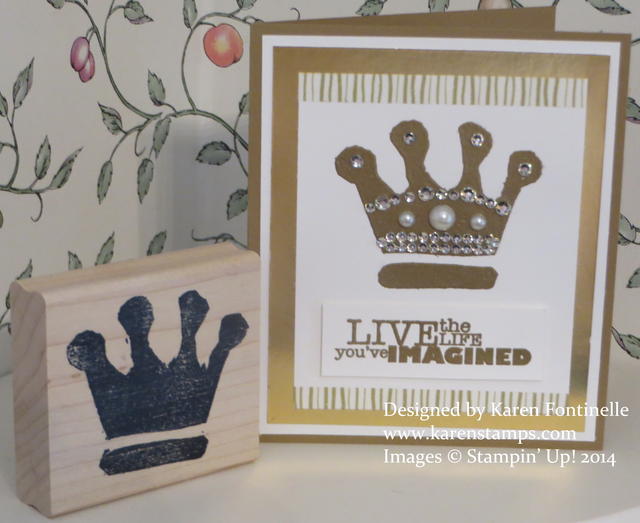
During the Stampin’ Up! Leadership Conference, one of the popular activities we could choose to do was to carve our own stamp using the Undefined Stamp Carving Kit. I waited until the very end and took the easy way of creating, by just tracing the crown emblem on our Leadership program, as a lot of other demonstrators were doing. It was the first time I tried the stamp carving so my skill was not perfect, but it wasn’t too hard for a beginner either! And judging by how many people are coming up with creative ideas for carving their own stamps, it can’t be difficult!
My beloved carved stamp has been sitting on my baker’s rack as a decoration, a home decor item, but today I decided to make a card with it! I stamped the crown with Versamark ink and embossed it with gold embossing powder and the Stampin’ Up! Heat Tool. I was actually able to “clean up” my image a little bit by taking a small paintbrush and smoothing some of the edges of the embossing powder better than I did on the stamp!
After embossing my crown, I had to add some bling! I added lots of different sizes of Basic Rhinestone Jewel Accents and Basic Pearls Jewel Accents. They’re self-adhesive so easy to put on your project. I added a little bit of Watercolor Wonder Designer Washi Tape at the top and bottom of the top card layer. Then this was layered on a piece of the Gold Foil Sheet. The greeting is from the stamp set Really Good Greetings.
I’m not sure carving my own stamps is going to be my “thing”, but it might be for you! Or it might be for just one occasion when Stampin’ Up! doesn’t have the exact right stamp you need for a certain purpose. How handy is it that now you could make up your own stamp without any special ordering? Just get the Undefined Stamp Carving Kit and carve your stamp! You can even get refills! Just go to my Stampin’ Up! Online Store for all your stamping supplies – and don’t forget with a $50 order you can earn a FREE Sale-A-Bration product!

