Are You Ready to Shop the New Stampin’ Up! Spring Mini Catalog?

Spring Mini 2024 Catalog Cover
Click to View the Catalog Online!

Today is the day!!

The January – April 2024 Mini Catalog is LIVE today!

Go for it!

So many new, shiny things! New toys for us stampers to play with! There is so much creativity to be experienced! Lots of fun just waiting inside that cover!

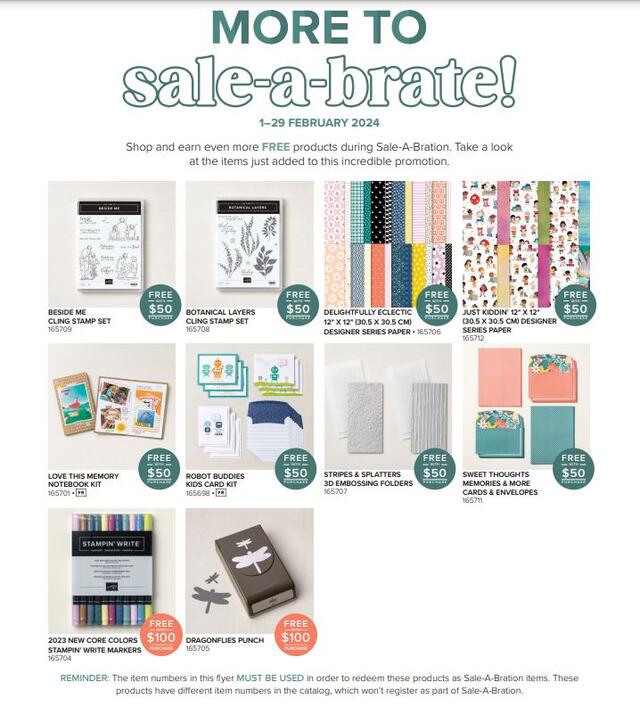
And while you are shopping, think of increments of $50 so you earn FREE products during Sale-A-Bration! It starts today also!

Click to View the Brochure Online!

It’s time for Sale-A-Bration!

With every $50 you spend on Stampin’ Up! products, you earn a FREE Sale-A-Bration product! Spend $100 and choose one special product at the $100 Level or two products at the $50 Level. No limits!

EXTRA BONUS with a $300 order! Make your own big order or go in with friends and earn an extra $30 in products. (See page 18 in Sale-A-Bration Brochure).

JOIN Stampin’ Up! as a Demonstrator and get extra benefits! Build your Starter Kit of products by choosing $125 in products and only pay $99 (including shipping). During Sale-A-Bration, choose one of the two FREE bonus options as shown on page 17.

– Option 1: Stampin’ Glass Mat Studio (a glass crafting mat plus Silicone Mat with 4 palette squares for custom color mixing plus a Cleaning Cloth).

Glass Mat Studio

– Option 2: Choose an additional $30 in FREE products to add to your Starter Kit.

For more information about joining the Stampin’ Up! family, CLICK HERE!

View the Spring Mini Catalog Online HERE!

View the Sale-A-Bration Brochure Online HERE!

SHOP HERE!

Last Day For the Holiday Mini Catalog!

Amazingly, it is time for the September-December 2023 Mini Catalog (otherwise known as the Holiday Mini) to come to an end! Many products are retiring, some are discounted, and many are sold out, but today is the time to take the last stock of this catalog and see what you can’t live without!

Here are some of my favorite cards I made with products from the Holiday Mini! The products may or may not still be available. Click on the card to go to the blog post!

A Walk in the Forest Christmas Card

Beary Christmas Spirit of the Season Card

Layering Leaves October Fall Card

Joy of Christmas Noel Christmas Card

Christmas Ornaments Holiday Card

Merry and Bright Light Bulb Christmas Card

Scrappy Merriest Christmas Tree Card

There are lots more good things in that Holiday Mini so check it out one more time!

SHOP STAMPIN’ UP! ONLINE HERE!
Lighter Than Air Hot Air Balloon Card

Lighter Than Air Hot Air Balloon Card

Happy 2024! After all the holiday excitement, do you feel ready for a hot air balloon ride? Maybe you can’t go on one so easily, but you will be able to make this Lighter Than Air Hot Air Balloon Card very soon!

Today is back to work and back to business, I guess! I hope you had a wonderful holiday and are ready for all the new things coming your way at Stampin’ Up! In just two days we will have a new Spring Mini Catalog and the best promotion of them all, Sale-A-Bration. Then there will be new products popping up in the Online Exclusives and new kits in the Kits Collection! What’s more fun than new Stampin’ Up! products, especially in a new catalog?

Here are the two catalogs my regular customers should have gotten in the mail over the holidays! I hope you found them in all the cards and retail catalogs you probably have been getting!

Spring Mini and SaleABration Catalogs

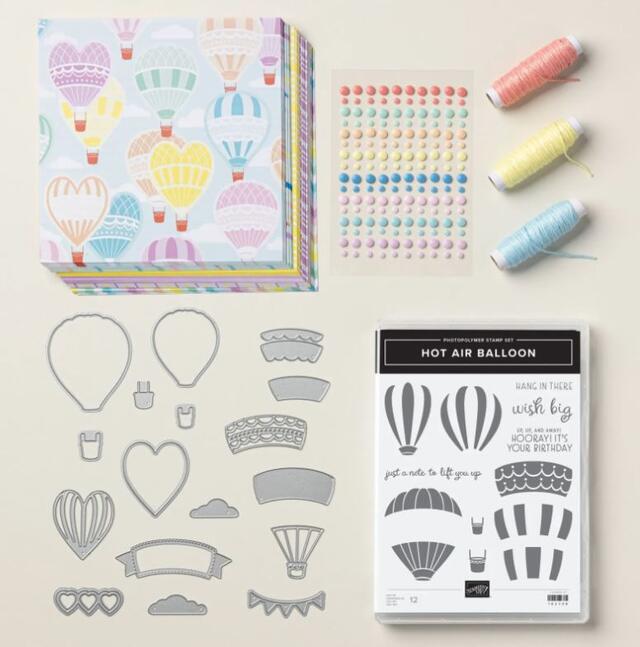
Let’s look at the Lighter Than Air Hot Air Balloon Card! For now, I only have the Lighter Than Air 6″ x 6″ Designer Series Paper (162747) in the Lighter Than Air Suite in the Spring Mini Catalog on pages 32-34, officially known as the January-April 2024 Mini Catalog. I also have the embellishments in the Suite but not the stamp set and dies. You will find some extra dies in the Hot Air Balloon Dies in the Bundle with the stamp set that will be fun to use!

My sample card was inspired by a card in the catalog on page 32. Mine is not exactly the same as I made it only using the designer paper and cardstock for the card base. The card base is Petal Pink with the cloud patterned paper with a Petal Pink background used as a layer. Then I cut out several hot air balloons from the Lighter Than Air Designer Paper using Paper Snips. I don’t mind cutting out images from paper unless they are really detailed, and even then you can usually make it easier on yourself than it looks!

From the paper, I simply chose four hot air balloons I liked and cut them out. I know odd numbers often work best, but I was happy with how four balloons fit on my card. After placing them, I glued two down flat on the card and popped up the other two with Stampin’ Dimensionals.

The greeting is stamped in Petal Pink ink on Basic White with one end flagged and one end straight against the edge of the designer paper layer. The greeting is in the Hills of Tuscany Stamp Set (162682) since it looked like the right size I needed and it was on my table!

I couldn’t resist using the new Rainbow Adhesive-Backed Dots (162758) on page 33. This Lighter Than Air Designer Paper has such pretty colors and there are a lot of them! The Rainbow Dots are equally pretty, 20 each of 8 colors. Be sure you order them because they will be great with spring projects of any kind, even if you don’t order anything in this Suite. The three colors of baker’s twine in the Suite are also very pretty and will be useful for lots of projects, too!

If you love hot air balloons, this Suite is for you for sure! And if you love soft, pretty colors, you will want this Lighter Than Air Designer Series Paper and the embellishments at least!

Remember, during Sale-A-Bration with every $50 you spend, you will earn one free Level 1 product in the Sale-A-Bration Brochure.

All the fun begins Thursday, January 4th!

SHOP STAMPIN’ UP! ONLINE HERE!
Don’t forget the last Holiday Mini products you want! Ends January 3rd!

Didn’t Get the Christmas Gift You Wanted?

Didn’t get the Christmas gift you wanted? The family didn’t appreciate all your hard work to make their holidays perfect? Take matters into your own hands and get something to soothe your soul! Order from Stampin’ Up!!

One option:

Another option:

  • Wait until January 4th when the Spring Mini Catalog (January-April 2024 Mini Catalog) goes LIVE! Get anything you want as long as your order is $50 or more so you can get a FREE Sale-A-Bration item, too! BONUS!

Another option:

  • Order one of the kits in the Kits Collection so you have everything you need and don’t have to hunt for supplies or design a project! Just sit down and make it! Everyone will be back at work and school by the time you receive it. I’d suggest the newest Painted Wishes Kit!

And one more:

Sign up for a Paper Pumpkin subscription to get a papercrafting kit in the mail every month. That should help erase those unappreciated feelings for sure!

Go for it! You deserve it!

Last-Minute Christmas Ideas

Wrapped_Christmas_Candy_Bars

Here are some Christmas ideas from years past in case you need some! Use whatever paper and materials you have!

Wrapped Christmas Candy Bars

Just wrap up some regular-size chocolate bars with cardstock or designer paper and decorate a little! Keep it simple!

Christmas Votive Home Decor

Christmas Votive Home Decor

You most likely have a plain glass votive holder somewhere in your house. Take it out and decorate it for a Christmas home decor item or give it as a gift.

Santa Suit Christmas Gift Bag

Santa Suite Christmas Gift Bag

Need a fun gift bag? Cover a plain gift bag with red cardstock and turn it into a Santa Suit!

Reindeer Candy Cane Treat

Reindeer Candy Cane Treat

You can use the retired Tag Topper Punch if you have it to make the reindeer face, but if you don’t have it, just cut a little chin for the reindeer and it will be fine.

Santa Treats

Santa Treats

Just follow the directions in my blog post to make one of these! They are made much like a 2-4-6-8 box. Then just wrap a belt and buckle around! Fill with candy or a small gift!

Snowman Gift Bag

Snowman Gift Bag

This is such an easy gift bag to make and so much fun! Use what you have to make any kind of snowman you like!

Paper Pumpkin Kit For January: Lovely Lavender

Paper Pumpkin Jan 2024 Kit Lovely Lavender

This is the beautiful new Paper Pumpkin Kit that will be shipped out to Paper Pumpkin subscribers in mid-January 2024! It’s called Lovely Lavender and coordinates with the upcoming Perennial Lavender Suite that will be in the Spring Mini Catalog beginning January 4th!

There is also a little set of dies you can purchase as an Add-on that goes with the Kit. They are called The Love of Spring Dies ((item 164396) – a flower, leaves, a label, the word “love”. You must be a Paper Pumpkin subscriber to order these. But the great new thing about these dies, is that they will coordinate with the first three Paper Pumpkin Kits of the year!

Here is the information about the Lovely Lavender Paper Pumpkin Kit:

Make love-themed cards for special occasions, Valentine’s Day, anniversaries, and more!
• Makes 8 cards: 4 each of 2 designs with 8 coordinating envelopes
• 4 bonus tags that punch out from the card front
• Precut paper pieces and linen thread
• Coordinating colors: Garden Green, Pretty Peacock, Lost Lagoon, Highland Heather,
Gorgeous Grape (Classic Stampin’ Spot), Berry Burst

Giving a gift subscription to someone special for Christmas is a nice idea, also (besides one for yourself!).

To get this January Kit, just subscribe to Paper Pumpkin by January 10th!

JOIN PAPER PUMPKIN TODAY!

Gingerbread Gift Bag

Gingerbread Gift Bag

I’ve been seeing gingerbread designs all over the internet in various forms and I don’t mean cookies! Finally, it dawned on me that I could get a pen and play, too, so here is one of my Gingerbread Gift Bags! It is not stamping but it is papercrafting and something quick and easy you might like to do!

Crafty people have been buying any little 3D house or building they could find anywhere, especially the dollar stores, spray painting them a gingerbread brown color, and then using some white paint pen to add the “gingerbread” design! Maybe Pottery Barn started it with expensive decorations and people came up with their cheap knockoffs as we all like to do!

But then I started seeing this technique used on paper and cards or building their own houses out of cardboard! And when I found a stash of plain kraft gift bags in the closet, the lightbulb went off for what I could make! I ordered a set of 8 paint pens on Amazon! I wasn’t sure exactly what people online were using (and I always want to know ‘exactly’), but I found this package of 8 white acrylic paint pens (White Paint Pen for Art – 8Pack Acrylic White Paint Marker) for a good price, even though I only needed one. And I could get them the next day which was fantastic! You could also use a chalk pen or even real chalk or a white gel pen. I loved watching short videos on Instagram of people drawing designs like this on cards or paper decorations, etc. It was mesmerizing! One person said not to be too exact, she liked the wonky look better!

With that, I got out a kraft bag, primed my paint pen (shake it and press the tip down on a piece of scrap paper to get the ink flowing), and started drawing on the bag! The first one I made I completely copied from someone and it only took a few minutes! Then I got out another two bags for gifts and drew on those! The photo above is one of them. My table was so heaped with craft stuff and wrapping paper that there was no decent place in my dark house to take a good photo….so I just placed it on the carpet which didn’t produce a good background! But you get the idea!

This is like drawing when you were a kid and drawing houses all the time! Remember? You didn’t worry if it was perfect or even or crooked, you just drew the house, the windows, the door, and then maybe spiffed it up a bit with curtains or bricks or shingles or plants. That’s all you have to do here, just add the gingerbread features.

I can’t wait to make more real Christmas gift bags. You could draw a small version on a card or a tag if you need some last-minute things! Have fun making a gingerbread gift bag!

Candy Bar Homemade Christmas Fudge

Candy Bar Homemade Christmas Fudge

I’m bringing back an oldie but goodie! This Candy Bar Homemade Christmas Fudge poem and idea has been around probably as long as I have been a Demonstrator, which is a long time! But no matter how old it is, it will look updated with current designer paper and is always a funny gift to give!

You can modify this idea to whatever size candy bar you have, but my chocolate candy bar is 4.4 ounces and says “XL” on the label. You might even find a gigantic candy bar you could use!

I wrapped a piece of Real Red cardstock around the candy bar, and cut the correct length to cover the candy bar, without scoring. Since the candy bar has some thickness it probably works better to wrap, unless you want to figure out the score lines. The measurements all depend on the size of your candy bar. I think I used a piece about 7″ x 7 1/4″. Then I measured just the top of the bar and cut a piece of designer series paper almost like a card, leaving a slight red margin around the edges. I used the Merry Bold & Bright Designer Series Paper with the cute little light bulbs.

After typing and printing out the poem (you can do it on computer paper or Basic White cardstock if that works in your printer) I cut it down to a narrow size and layered it on a slightly larger piece of Real Red cardstock so it would stand out from the designer paper. I even stamped a few little ornaments in Real Red ink from the Merriest Trees Stamp Set. For the finishing touch, I added a Real Red & Gold Dotted Ribbon bow to the top of the poem.

You will find a few different versions of this poem online, but they are basically the same. Feel free to change it up for your personalization if you are good at poetry!

If I knew how to share a link to the poem I would, but you can type it up and make it whatever size and font you like.

Have fun with this project! I hope you find some giant chocolate bars!

Two Easy Christmas Gift Card Holders

Joy of Christmas Gift Card Holder

We’re getting down to the wire down for Christmas! If some of your gift-giving involves gift cards or even cash, here are Two Easy Christmas Gift Card Holders for you to make.

This first one is decorated with the Joy of Christmas Designer Series Paper. You don’t need very much so it’s a good way to use up scraps! Basically the bottom folds up to make the pocket for the gift card and the top folds down over the pocket. You can vary the measurements.

The Real Red cardstock is cut at 6 1/2″ long and 4 1/4″ wide. Score at 2 1/8″ and 5 1/8″. Fold the bottom portion up and adhere with Tear & Tape on each side to form the pocket. You could add a narrow strip of designer paper on the pocket if you wanted to. I left it plain.

For the cover, I cut a piece of Joy of Christmas Designer Series Paper in the red plaid paper at 2 1/8″ x 4 1/8″. For the inside top flap, I cut the same size piece out of Basic White to write “To: From” or write a personal message and stamped a few little ornaments.

To hold it closed, just wrap around a piece of cardstock or designer paper about 1″ x 6 3/4″ to make a bellyband. Don’t score first, just wrap it around, not too tight. then I stamped a greeting in the Brightest Glow Stamp Set in Real Red ink on Basic White and cut out with one of the small Deckled Circles Dies with a Shaded Spruce layer. Glue this over the seam of the belly band and nothing will show!

Joy of Christmas Gift Card Holder Inside

This second Merry Bold & Bright Christmas Gift Card Holder is also a very easy design. You can make it for any occasion and just decorate how you like.

Merry Bold & Bright Christmas Gift Card Holder

For this gift card holder, start with a 4 1/4″ x 12″ piece of cardstock. You could also use designer paper if you don’t have 12″ x 12″ cardstock.. Score this strip of paper at 4″ and 8″, basically in thirds since the paper is 12″ long. Then on the end section, cut from the score line down to the corner on a diagonal. This can be on either end of the card.

Put a strip of Tear & Tape Adhesive on the bottom of that section with the diagonal cut. Then fold that diagonal piece over to the inside panel next to it.

Merry Bold & Bright Christmas Gift Card Holder Inside

The gift card base is Granny Apple Green. For my sample I decorated the front with a piece of the little trees paper in the Merry Bold & Bright Designer Series Paper. Then I cut out my own little triangle tree out of Shaded Spruce and adhered a greeting across the front of the tree in the Merry & Bright Stamp Set.

For the inside, you can cut another square to layer on that corner but cut it down like a layer, then cut diagonally. That forms the little pocket where you can put a gift card or money.

These gift card holders are easy to make if you’d like to make some personalized ones!

FREE SHIPPING Coming!

Free Shipping Dec 14 Banner Info

YES!!

Stampin’ Up! is offering FREE SHIPPING with any $75 order, ONE DAY ONLY, on Thursday, December 14!

In case you are like me and think December 14 is a couple of weeks away….NO…it is THIS Thursday! Don’t miss it!

Have something on your wish list? Are you thinking about stocking up on crafting essentials? Have you got the urge to splurge? Shop on December 14th and get all the products you love while saving on shipping costs! This incredible deal only lasts for 24 hours, so don’t miss out! Share the good news with any of your crafty friends, too!

PROMOTION DETAILS:

–Free shipping is for 24 hours only. Orders must be opened and closed on December 14, 2023.
–Free shipping automatically applies to your cart after the qualifying amount has been met, which is $75 USD (before tax).
–Coupon codes and product credits are non-commissionable and will lower your order’s retail amount. Orders must meet the qualifying amount to be eligible for free shipping.
–The additional cost for expedited shipping is not covered by this promotion.
–Prepaid 3-, 6-, or 12-month Paper Pumpkin subscriptions can contribute to the qualifying amount for free shipping (Month-to-month subscriptions do not qualify). Subscriptions billed and shipped this month will be charged for the normal amount ($24.50 USD shipping included) + tax.
— Please keep in mind that due to the high volume of orders and the Christmas season, the distribution center may fall behind our typical shipping timeframes. We will do all we can to return to our regular service levels as quickly as possible. Any orders placed during this promotion are not guaranteed to arrive before or by December 25.

HAPPY FREE SHIPPING DAY THURSDAY!

Shining Christmas Merriest Trees Christmas Card

I considered naming this Shining Christmas Merriest Trees Christmas Card a DELUXE card, not because it is too hard to make but because there were a lot of steps. It just came together step by step. Just follow along, you can make this card too!

The card base is Real Red even though Cherry Cobbler is the official coordinating color, but I prefer Real Red! I adhered a layer of the Shining Christmas Designer Paper, an Online Exclusive, but I think it is no longer available. If you don’t already own it, just choose your own holiday designer paper for the background.

My main idea was to make a Christmas tree using the Merriest Trees Dies with all the different sizes that you can either have for separate trees or layer them all together and make it a little like a 3D tree, especially if you kind of curl the bottom edges of the layers. To help it stand out from the background paper of small candy canes on a dark Mossy Meadow green background, I used the Scalloped Contours Dies to make this Real Red background scalloped rectangle behind the tree.

The tree is made from Garden Green cardstock, diecut with the Merriest Trees Dies and sponged on the edges that would show with a little Garden Green ink. It’s barely noticeable but it’s there and I think it adds a little bit of dimension. After I had all the tree sections stacked properly and glued together, I adhered the whole tree to the Real Red rectangle. For some bling, I die cut the little garlands in the Merriest Trees Dies out of the More Dazzle 6″ x 6″ Designer Series Paper (or any gold paper you have or another color) and glued them on with the tiniest drops of glue. If you don’t have a way to add tiny drops of glue try making a little puddle of glue on a scrap and pick it up with a toothpick perhaps and use that. Or think ahead and use the Adhesive Sheets, but these garlands are so tiny and delicate it might be better to just use glue.

I also had the idea to use a white gel pen (but there are other things you could use) along the bottom edges of the tree layers to make it look like snow. The greeting is stamped in Real Red ink on Basic White from the Brightest Glow Stamp Set. Of course, I hated to cover up any part of my beautiful tree, but I think it looks okay. I cut the strip as narrow as I could and then flagged the ends like a banner. At the top of the tree I added a Star Trinket, which are no longer available.

On the inside, I added a layer of Basic White but added a 3/4″ x 4″ strip of the same designer paper at the bottom to decorate the inside. As I added the glue to the backside of the designer paper, I thought THAT side would have looks good inside the card! So before you apply the glue make sure you check both sides of the paper!

SHOP STAMPIN’ UP! ONLINE HERE!