February 2024 Paper Pumpkin Kit

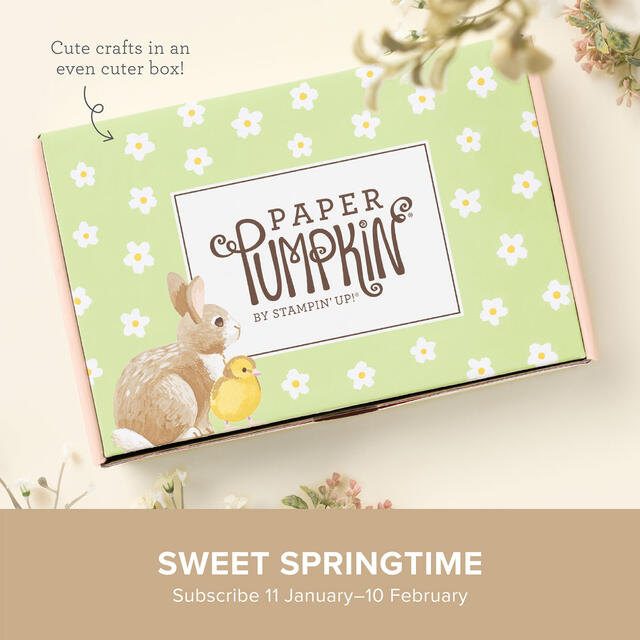
Paper Pumpkin February 2024 Kit Sweet Springtime

The February Paper Pumpkin Kit, Sweet Springtime, is ready for you to subscribe to! I know some(?) of us have just put away our Christmas decorations (okay, me!), but do you realize Easter is March 31? So with springtime and Easter coming up rather soon, it is time for us crafters to begin our springtime cards and projects. And what would be more fun than bunnies, chicks, flowers, and everything spring?!

Get this Sweet Springtime Kit in the mail in mid-February if you join Paper Pumpkin by February 10th. Even if you are not sure about Paper Pumpkin, try this kit, which looks to be very cute and fun, and then you can decide. Each month you can skip a kit if you need to or get the one that is automatically coming with your subscription. Certainly, there is no obligation, and you can cancel at any time. Just make your choice known by the 10th of any month when Stampin’ Up! bills the kit and sends it out. Stampin’ Up! guarantees all Paper Pumpkin kits.

Here is the information about this Kit:

Celebrate Easter and Spring with adorable cards and treat boxes!
• Makes 9 projects: 3 each of 3 designs
• Projects include printed cards, coordinating envelopes, and gift boxes (not food-safe)
• Precut paper pieces, baker’s twine, and embellishments
• Coordinating colors: Petal Pink, Daffodil Delight, Granny Apple Green,
Berry Burst, Early Espresso (Classic Stampin’ Spot), Crumb Cake

PLUS: Stampin’ Up! is doing something different this quarter! The first three months’ kits all coordinate with a set of dies you can purchase separately! They will be in the Stampin’ Up! Online Store while supplies last!

—Add dimension to your crafting projects with The Love of Spring Dies! Choose from a leaf sprig, daffodil, “Love” sentiment, or label to give your cards or tags that extra special touch. The best thing about this add-on is that it coordinates with not just one but three kits (Lovely Lavender, Sweet Springtime, and Memorable Meadows). (Please note that the Stampin’ Cut & Emboss Machine is not included and can be purchased separately.)

The Add-on details:
· Item number: 164396
· Name: The Love of Spring Dies
· Price: $12.00 USD
· Availability: Available in the Online Store while supplies last.
· Includes: 4 dies

I don’t know about you, but I can’t wait to get this kit! The box already sets the tone and it looks like a very cute and useful kit. Even if you don’t celebrate Easter or send out cards, you can use the contents for baby cards, springtime cards, or any-time cards! Plus, you will have variety in the projects with regular size cards, slimline cards, and milk box treat boxes! So fun!

Join Paper Pumpkin TODAY so you won’t forget and miss out!

JOIN PAPER PUMPKIN TODAY!

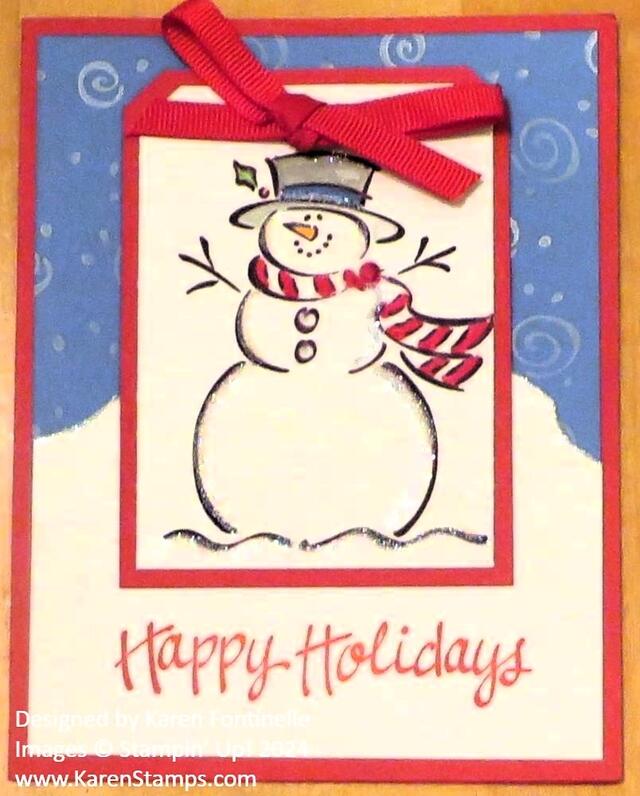
Frosty Happy Holidays Card

Frosty Happy Holidays Card

Who remembers this vintage stamp set from Stampin’ Up!?!! It was a favorite back then and for many years! It’s the Frosty Stamp Set! In reading some old blog posts, I see I wrote it was one of the first stamp sets I bought after becoming a Demonstrator in 2002 so I could use it at my first workshop! It’s one of those stamp sets that we couldn’t believe Stampin’ Up! would retire, but they did in 2007! It came out in 2001 so it had a six-year run, which is pretty long nowadays!

This card has been sitting in a container with some other Christmas cards that I think I made last year or the year before and were extras I didn’t get mailed. I don’t know if I made multiples of this card or just this one. Either way, I think I couldn’t let go of this Frosty card! I had to keep it for the memories!

The reason I am posting it today, besides for a trip down Memory Lane for those of us who have been around Stampin’ Up! for quite a while, is to commemorate all the winter weather all over our country, even all the way down here in Texas! Last winter we didn’t even have a hard freeze here in Houston, they say, but now we are getting real winter weather and extended freezing, maybe even freezing precipitation. I know that is bad if you have to go out and drive, so be careful, but when you can stay inside and off the roads, it’s kind of fun! I’d love to see some snowflakes but it sounds more like icy roads in places later today. I’d say it’s a good day to bake cookies but they have asked us to conserve energy in the morning hours so I’ll wait.

My husband worked hard covering the outside faucets and covering a few plants in the yard, including wheeling the gardening box into the garage as we have lettuce, radishes, and carrots already popping up out of the soil that he planted from seed not long ago. We can get an early start on these things as long as we protect them from a hard freeze. Some neighbors have blankets, tarps and all kinds of covers thrown all over their bushes and every plant in their yard, including some trees! I just hope the freeze kills some bugs that are so prolific here!

Here and here are a couple of very old blog posts of mine about using the Frosty Stamp Set!

I wish I was going to be able to build a snowman like Frosty, but I doubt we are having that kind of weather today and tomorrow! But a girl can hope! Stay warm and safe, Everyone!

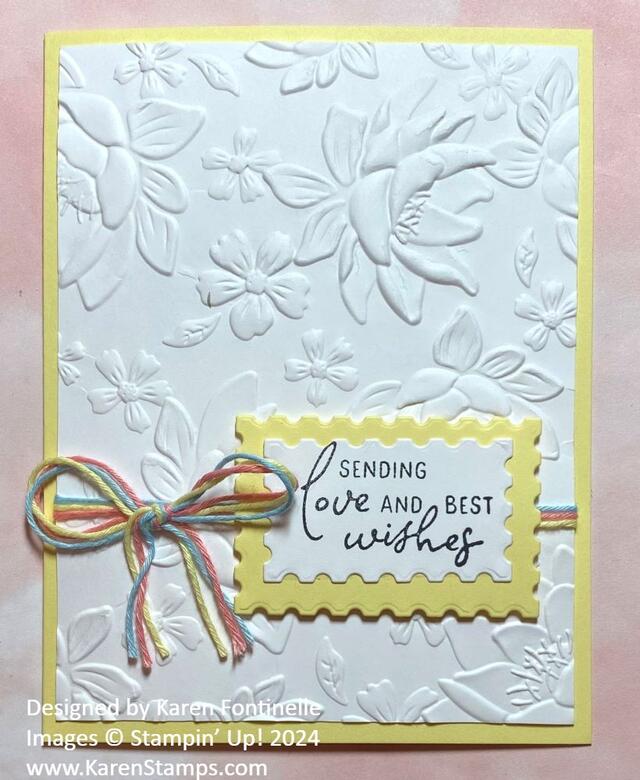
Layered Florals Embossed Best Wishes Card

Layerd Florals Embossed Best Wishes Card

This Layered Florals Embossed Best Wishes Card isn’t at all what I had planned in my mind, but that’s how creativity goes sometimes! Once I embossed the white layer, I couldn’t possibly cover it up as much as I had originally planned! It was very pretty! Then I added a greeting and a little embellishment with some colored twine.

This is one of those basic, easy designs for a card..a layer, a greeting, and some embellishment. Nothing fancy necessarily. When you have pretty designer series paper or as on this card, a very pretty embossing folder, you should show it off with a simple card.

This card starts with a Lemon Lolly card base. I haven’t used this color very much so this was a good opportunity to do so. I embossed the Basic White layer with the Layered Florals 3D Embossing Folder. You will find this embossing folder in the Spring Mini Catalog on page 65. It is kind of hidden in the upper left corner of the page so look hard for it! This embossing folder makes very strong embossed floral images. I had planned to have a center focal image of designer paper and a cardstock layer, but that was going to cover up the pretty embossed flowers!

The greeting is stamped in Memento Black ink on Basic White and then diecut using the Perennial Postage Dies. You could use other dies or punches as well. There are lots of choices. The greeting is in the Perennial Postage Stamp Set. You can purchase the dies and stamp set together in the Perennial Postage Bundle. I used the next larger Perennial Postage Die for a Lemon Lolly layer.

Since the Lemon Lolly, despite being a rather bright color in a way, it’s also a soft color so to jazz up the front of the card a little, besides the pretty embossed layer, I used all three of the colors in the Baker’s Twine Three Color Pack! This Baker’s Twine colors are Balmy Blue, Lemon Lolly, and Flirty Flamingo. First I just wrapped the three strands around the front of the card and adhered the ends on the back of the card front layer. This saves you a couple of inches of twine rather than wrapping all the way around. Then I took another several inches of the three colors of twine and tied a bow, which I then adhered to the card with a couple of Mini Glue Dots. I think these three strands of twine add a little color but doesn’t overwhelm the Lemon Lolly card base.

Don’t forget about making these simpler, more basic cards from time to time! They have their own elegance about them!

SHOP STAMPIN’ UP! ONLINE HERE!

(And don’t forget about Sale-A-Bration! Spend $50 or more and earn a

FREE Sale-A-Bration product!)

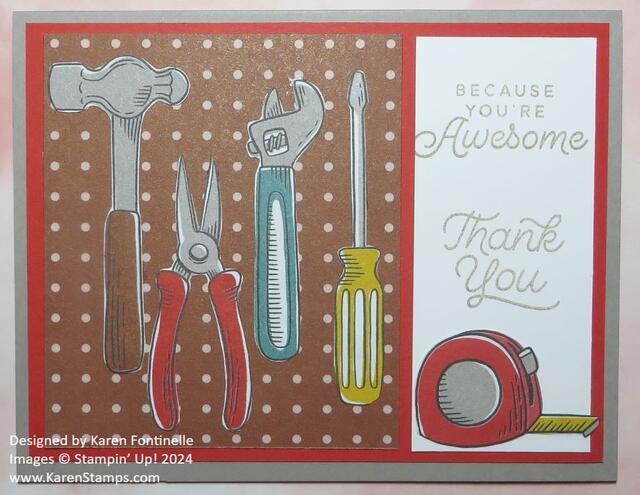
Trusty Toolbox Thank You Card

Trusty Toolbox Thank You Card

This Trusty Toolbox Designer Series Paper is going to be a fun one to use and great for masculine cards, like Father’s Day! This Trusty Toolbox Thank You Card was a good one to make. We all probably have times when we need a handyman, maybe just a friend or relative who can help us out at the last minute, or when we don’t know how to fix something. You can make an easy thank you card to give or send that person for helping you out!

You can earn this Trusty Toolbox Designer Series Paper FREE during Sale-A-Bration with just a $50 purchase! You’ll find it on page 11 of the Sale-A-Bration Brochure. Also, it coordinates with the Trusty Tools Bundle in the Spring Mini Catalog. So there will be lots of things to make with the Bundle and the Designer Paper.

When I see a workbench and tools, even represented on paper and a card, it makes me think about my dad, my grandpa, and my brother. I remember the workbench my grandpa had built for himself in his basement. I loved getting the thing of chalked string and taking it outside on the sidewalk to make a hopscotch. He helped my dad build a workbench in our basement and I remember how the glass jars of screws, bolts, and all the things all hung somehow from the lid. My grandpa also built a small workbench for my brother in our basement, complete with tools of all kinds, maybe some child-size. I liked to play with him at his workbench. Sometimes we would try to make something. I think he had a toy saw that would cut through styrofoam. It was all fun. I can still see that workbench near my dad’s and my brother used it for years. It paid off well because my brother can fix and make anything after learning from our dad.

To make this card, I made a card base of Gray Granite with a layer of Poppy Parade. On the left side of the card, I used the paper that looks like a pegboard and cut it at 3 1/4″ x 3 3/4″. On the right side is a piece of Basic White measuring 1 5/8″ x 3 3/4″. On this paper, I stamped a greeting from the Circle Sayings Stamp Set in Gray Granite ink. I think this would be perfect for someone you wanted to thank who fixed something for you! For the tools hung up on the pegboard, I cut them out by hand from the designer paper with ALL the tools on it! It was fun deciding which tools to use and what would look good on this card.

If you need to make some masculine cards or have a handyman in your life, you might want to choose this Trusty Toolbox Designer Series Paper as your free gift with a $50 purchase. There are lots of great choices and no limit to how many products you can earn with every $50 purchase.

SHOP STAMPIN’ UP! ONLINE HERE!

All About Sale-A-Bration 2024 Free Gifts

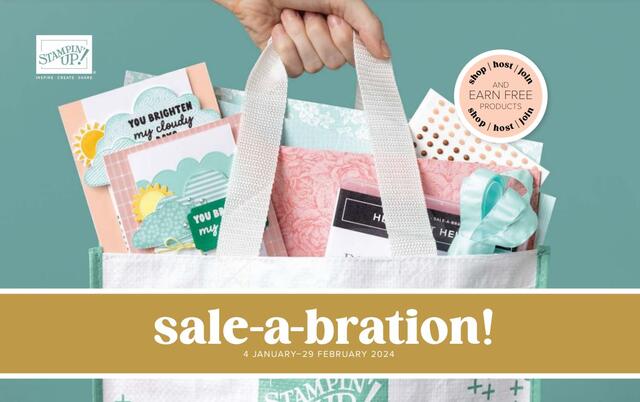
Sale-A-Bration 2024 Banner
Images © Stampin’ Up! 2024

Some of us have been around for a LOT of Stampin’ Up! Sale-A-Brations (Does anyone remember when it was called “Sell-a-Bration”?) but some of you are new and may not be familiar with this favorite promotion of Stampin’ Up! We used to only receive a very small brochure with maybe four to six products to choose from with a $50 purchase. But now, we have quite a few choices for every $50 purchase and even some extra-special choices with a $100 purchase!

Watch this video to see the products and what coordinates with them from the Spring Mini Catalog!

Watch this video and get a good look at all the designer series papers that you can earn FREE during Sale-A-Bration! As good as they may look on video, remember that in person the Stampin’ Up! designer series papers look even more beautiful and fantastic!

Sale-A-Bration 2024 Catalog

Click on the Sale-A-Bration Brochure above to view it online!

Shop from any of the Stampin’ Up! catalogs (Annual & Spring Mini) plus the Online Exclusives, Clearance Rack, Kits, and even Prepaid Paper Pumpkin subscriptions! If you can purchase it at Stampin’ Up! and you spend $50 or more in one order, you may choose a FREE Sale-A-Bration product. Have fun!!

SHOP STAMPIN’ UP! ONLINE HERE!

Bee Mine Sweet As Honey Card

Bee Mine Sweet As Honey Card

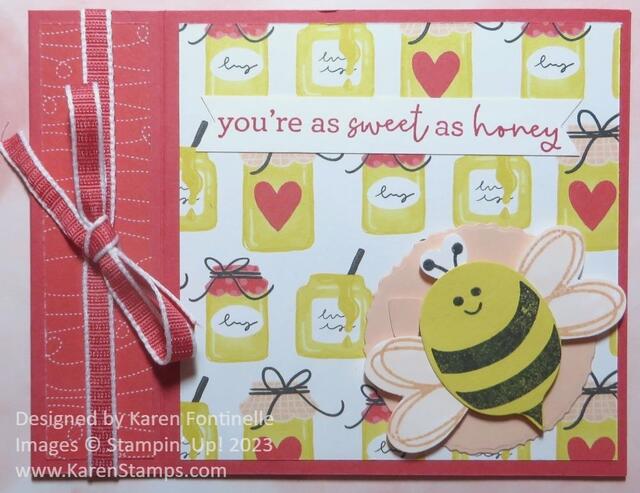
If you stop and think about it, even if some of us still have our Christmas trees up, it is about a month until we probably need to mail out the valentines we make! This Bee Mine Sweet As Honey Card doesn’t have to be a Valentine, but it could be. Or should I say, “It could BEE”?! Yes, the Bee Mine Suite is in the new Spring Mini Catalog on pages 8-10 and will be fun to use for making valentines and any other cards.

This card is called a “Book Fold” card. It is so easy to make. The card base is cut at 11″ x 4 1/4″, then scored at 4 1/4″ and 5 1/2″. The 5 1/2″ score line is actually the center fold of the card. The 4 1/4″ score line makes the “binding” on the side of the card. Glue that area to the card base so that only the 4 1/4″ portion of the card opens. You can put the fold at the top or to the side. Decorate with pieces of designer paper or stamping, whatever you like.

This card has a card base of Sweet Sorbet. I used the Bee Mine Designer Series Paper to decorate the card. I chose the paper with the little jars of honey for the front of the card. This piece is 4″ x 4″. The opposite side of the paper is the Sweet Sorbet pattern with the dotted lines. I used that small piece, 1″ x 4″ on the book fold area. Before adhering that area to the inside of the card, I adhered ends of the Sweet Sorbet 1/4″ Bordered Ribbon to the inside of the card and then adhered that side of the card to itself for the book fold. Then I tied on a separate piece of ribbon to make a bow and adhered with a Mini Glue Dot.

If you like punches, using the Bee Builder Punch will be fun to make a bee. For my bee, I stamped the black stripes on a piece of Daffodil Delight cardstock, the punched it out for the bee body. There are stamps for different bee faces and even the antennae, which can abe stamped on a little heart made with the punch. I thought they were just little hearts until I realized the antennae would fit! The wings are stamped with Petal Pink ink. Actually, I first stamped the wings on a piece of Basic White, but I wanted them to be pink so I colored in with a Petal Pink Stampin’ Blend marker. They are adhered behind the bee body and the antennae on top of his head. You can make your bee “standing up” like this bee or flying from the side. For a little background to help the bee stand out, I diecut a Deckled Circle from Petal Pink cardstock. The whole bee is popped up on Stampin’ Dimensionals.

The greeting is in the Bee My Valentine Stamp Set. I stamped it in Sweet Sorbet ink on a scrap strip of Basic White. I flagged the ends and adhered it to the card. You could add a layer of Sweet Sorbet to make it stand out a little more but I didn’t want to cover up the jars of honey any more than necessary.

For the inside of the card, you can add a layer of Basic White 4″ x 4″ and then stamp a little something or cut out a little bee from the designer paper.

If you would like to see another example of a Book Fold Card, just click HERE.

SHOP STAMPIN’ UP! HERE!

Nature’s Sweetness Flowers and Foliage Card

Nature's Sweetness Flowers and Foliage Card

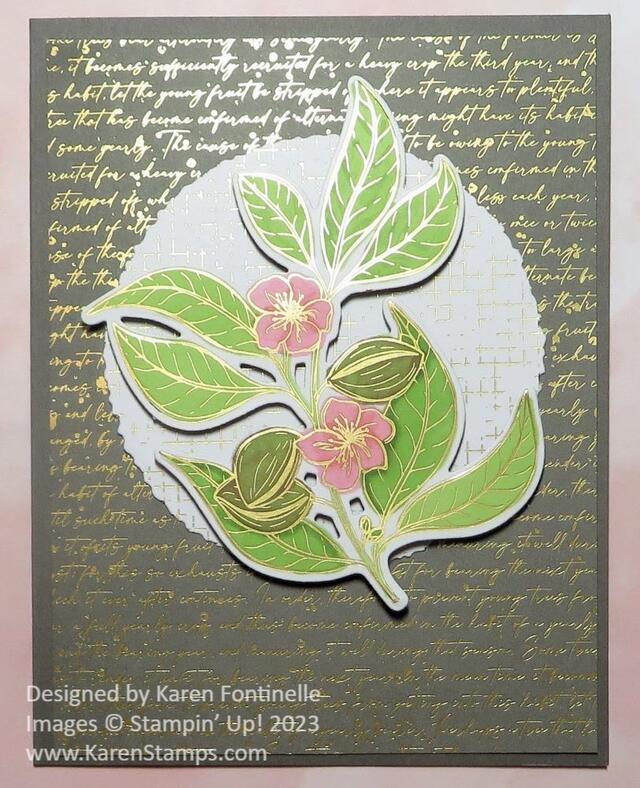
It took me a little while to figure out this card because I just am not very organized yet this New Year with stamping! My supplies are not in the right place after the holidays and I’m not sure which new products I have! But eventually, this Nature’s Sweetness Flowers and Foliage Card came together!

This Nature’s Sweetness Specialty Designer Series Paper is very pretty and very interesting with its gold foil accents on many pages and different designs than we usually have. This paper has images of plants and pages that look like they came from vintage almanacs and field journals. I think this is some paper and a Suite that might be difficult for some of us to know how to use but turns into something we end up loving! The entire Nature’s Sweetness Suite is featured on pages 40-43 in the new Spring Mini Catalog.

To make this card, I started with a card base of Pebbled Path cardstock to match the layer of designer series paper that has a very tiny cursive writing pattern in gold on it. It’s a vibrant design, I think.

On another piece of paper printed with foliage and flowers, I cut out a section that is now the focal point of the card. I colored in the leaves and flowers with Stampin’ Blends, mainly Granny Apple Green and Flirty Flamingo. Then I used the Lovely and Sweet Dies to cut out this foliage piece. I thought it probably needed a little background to help it stand out. I used the Deckled Circles Dies to cut out this piece from another of the Nature’s Sweetness Designer Paper. It’s kind of a grid design on the paper. The foliage piece is popped up on lots of Stampin’ Dimensionals.

Since I couldn’t settle on a sentiment or where to put one on this card, I made the executive decision to not put a sentiment. I can add one later, but really, I like the card as it stands right now. Rather elegant but simple! I can stamp a greeting inside on a Basic White layer I added or write a personal message. I stamped one of the other foliage images in the Lovely & Sweet Stamp Set on the inside layer of the card, down in the corner.

If you decide to try this interesting Suite, just play around with all the elements and you will find lots of opportunities for creativity!

SHOP STAMPIN’ UP! ONLINE HERE!

Flight and Airy You’re Marvelous Card

Flight and Airy You're Marvelous Card

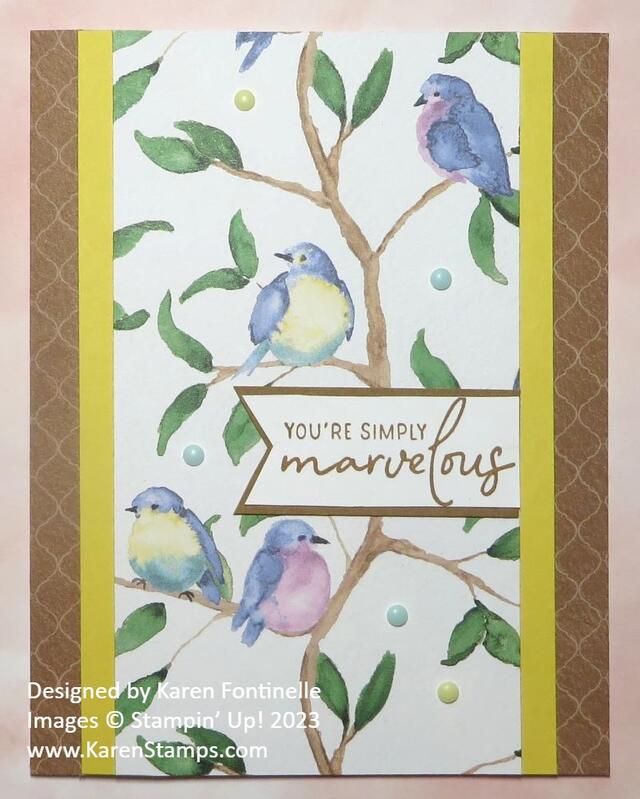
This Flight & Airy You’re Marvelous Card is made with brand new designer paper, and you can earn it for FREE with a $50 purchase during Sale-A-Bration. This Flight & Airy Designer Series Paper is wonderful! It has watercolored birds, foliage, flowers, and washes. These papers will make beautiful cards and projects for spring!

This card has a Basic White card base but instead of leaving a white margin around the layers, I covered the entire card front with designer paper. I started by choosing the sheet of paper with a vertical line of branches and birds. Although you might waste a bit of paper, it was like cutting out the Christmas design with the bears so that you could make a little scene on your card. I chose a section of birds that I liked and cut the strip of paper to include that area. From that full length of paper, I cut the section that I wanted to be on the front of the card. After I worked on the card, I trimmed that piece of designer paper to be just a little bit narrower. It ended up being 3″ x 5 1/2″.

The “other side” of that same paper was a Pecan Pie brown with crisscrossed lines. I liked it and wanted to use it with the birds section. As I played with making the front of the card, I wanted to add another color to brighten up the card a little bit, to bring out the colors of the birds. I chose Daffodil Delight to be just a narrow strip along the side of the designer paper.

I didn’t want to waste a lot of the designer paper, so I cut the brown pattern into two pieces at 3/4″ x 5 1/2″. I adhered those two strips to each side of the card, exactly on the edges, top and bottom. The Daffodil Delight strips, which are 1/2″ x 5 1/2″ were adhered to the sides of the bird paper with just 1/4″ showing. It helps to use Grid Paper to get everything even and straight. Then I adhered that whole section to the front of the card, making sure I had it even top and bottom and with equal amounts of the brown pattern showing on each side.

The greeting is stamped in Pecan Pie ink on Basic White. I diecut it with a Tailor Made Tag Die, but I found it too large for this card. I didn’t want to cover up any of the pretty birds. I ended up trimming that sentiment as narrow as I could, then flagging one end. Then I layered it on a piece of Pecan Pie cardstock and trimmed that as narrow as I could for a layer. Luckily, it fit exactly right on the card without hiding any birds!

You know if I have a new package of embellishments, I must use them! The colors aren’t all perfect matches, but close enough for matching shades of watercolors. I used the Rainbow Adhesive-Backed Dots. These are in the new Spring Mini Catalog on page 33.

Overall this is a pretty basic, easy card for you to make and fantastic when you can get free designer series paper! Plan your orders in January and February in $50 increments so you can take advantage of Sale-A-Bration!

SHOP STAMPIN’ UP! ONLINE HERE!

New Kits in the Stampin’ Up! Kits Collection!

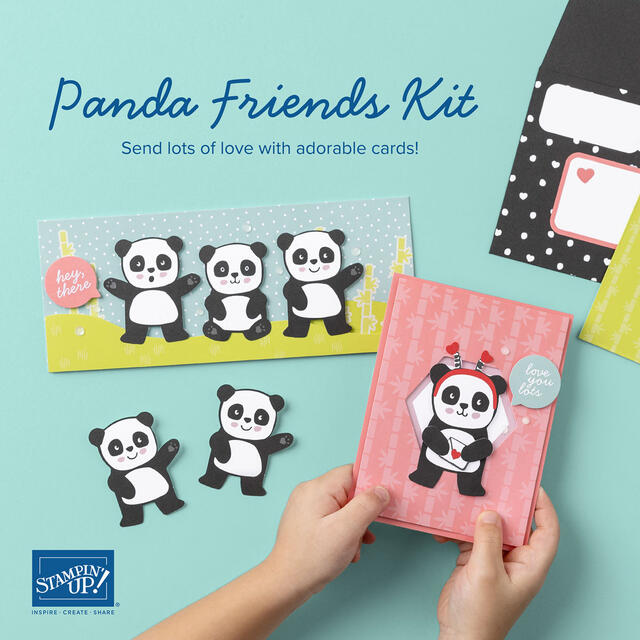
Kits Collection Panda Friends Kit Jan 2024

If you love pandas, here is a kit for YOU! Why are pandas so cute and loveable? Scientists seem to think it’s their big eyes, their snub nose, and big cheeks. Their eyes aren’t so big, they just seem that way because of the black patches around them. There definitely is something about pandas!

This new kit, the Panda Friends Kit, is one of the two newest kits in the Kits Collection. These are kits (cardmaking or craft kits) that you can purchase in the Online Store any time they are available. If they say “Currently Unavailable” it means they will come back in stock. If you search and that kit isn’t in the store, it is sold out and not coming back. The Kits Collection is not the same as the Paper Pumpkin kits which are a recurring monthly subscription. (Another fun papercrafting product, but different!)

This kit includes two different sizes of cards with pre-printed sentiments that will make your cardmaking super easy!

Kit includes:
*Predesigned projects
*Step-by-step instructions
*Precut pieces (No prep work! Get right to crafting)
*Printed sentiment labels in Dutch, English, French, and German
*Makes 8 cards: 4 each of 2 designs
*Folded card size: 4-1/4″ x 5-1/2″ (10.8 cm x 14 cm), 8-1/2″ x 3-1/2″ (21.6 cm x 8.9 cm)
*8 preprinted envelopes
*Enough adhesive to complete all projects
*Iridescent Sequin Embellishments
*A 9-7/8″ x 6-1/2″ x 1-3/4″ (25.1 x 16.5 x 4.4 cm) printed designer box for storage or crafting on the go.

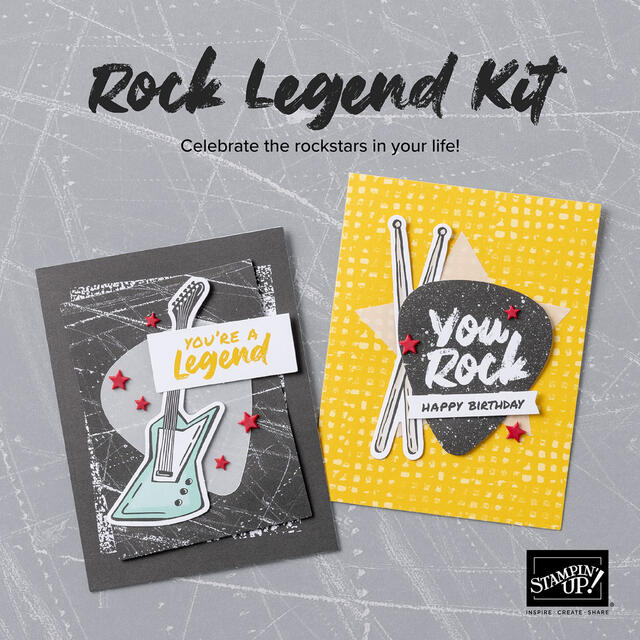
Kits Collection Rock Legend Kit Jan 2024

Stampin’ Up! also has a second new kit in the Kits Collection! It is the Rock Legend Kit in case you have some rockstars in your life! You get paper diecut pieces of electric guitars, lightning bolts, stars and other designs! Sounds so fun! Make 8 cards, four each of two designs with preprinted sentiments!

Kit includes:
*Predesigned projects
*Step-by-step instructions
*Precut pieces (No prep work! Get right to crafting)
*Printed sentiment labels in Dutch, English, French, and German
*Makes 8 cards: 4 each of 2 designs
*Folded card size: 5-1/2″ x 4-1/4″ (14 x 10.8 cm)
*8 preprinted envelopes
*Enough adhesive to complete projects
*Adhesive-Backed Star Embellishments
*A 9-7/8″ x 6-1/2″ x 1-3/4″ (25.1 x 16.5 x 4.4 cm) printed designer box for storage or crafting on the go

Check out ALL the kits in the Kits Collection, especially these two new kits!

Are You Ready to Shop the New Stampin’ Up! Spring Mini Catalog?

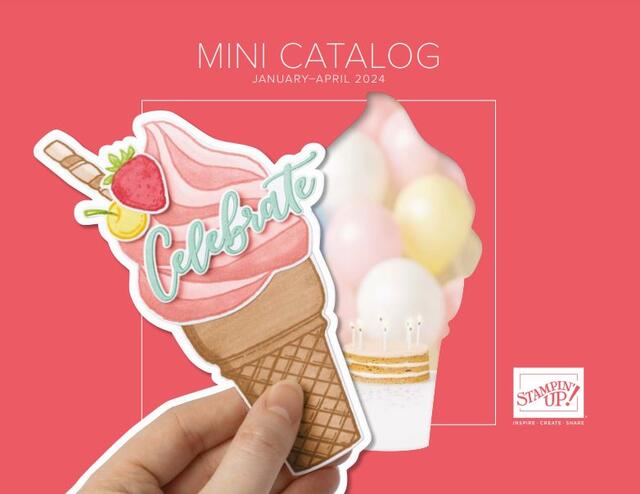
Spring Mini 2024 Catalog Cover
Click to View the Catalog Online!

Today is the day!!

The January – April 2024 Mini Catalog is LIVE today!

Go for it!

So many new, shiny things! New toys for us stampers to play with! There is so much creativity to be experienced! Lots of fun just waiting inside that cover!

And while you are shopping, think of increments of $50 so you earn FREE products during Sale-A-Bration! It starts today also!

Click to View the Brochure Online!

It’s time for Sale-A-Bration!

With every $50 you spend on Stampin’ Up! products, you earn a FREE Sale-A-Bration product! Spend $100 and choose one special product at the $100 Level or two products at the $50 Level. No limits!

EXTRA BONUS with a $300 order! Make your own big order or go in with friends and earn an extra $30 in products. (See page 18 in Sale-A-Bration Brochure).

JOIN Stampin’ Up! as a Demonstrator and get extra benefits! Build your Starter Kit of products by choosing $125 in products and only pay $99 (including shipping). During Sale-A-Bration, choose one of the two FREE bonus options as shown on page 17.

– Option 1: Stampin’ Glass Mat Studio (a glass crafting mat plus Silicone Mat with 4 palette squares for custom color mixing plus a Cleaning Cloth).

Glass Mat Studio

– Option 2: Choose an additional $30 in FREE products to add to your Starter Kit.

For more information about joining the Stampin’ Up! family, CLICK HERE!

View the Spring Mini Catalog Online HERE!

View the Sale-A-Bration Brochure Online HERE!

SHOP HERE!

Last Day For the Holiday Mini Catalog!

Amazingly, it is time for the September-December 2023 Mini Catalog (otherwise known as the Holiday Mini) to come to an end! Many products are retiring, some are discounted, and many are sold out, but today is the time to take the last stock of this catalog and see what you can’t live without!

Here are some of my favorite cards I made with products from the Holiday Mini! The products may or may not still be available. Click on the card to go to the blog post!

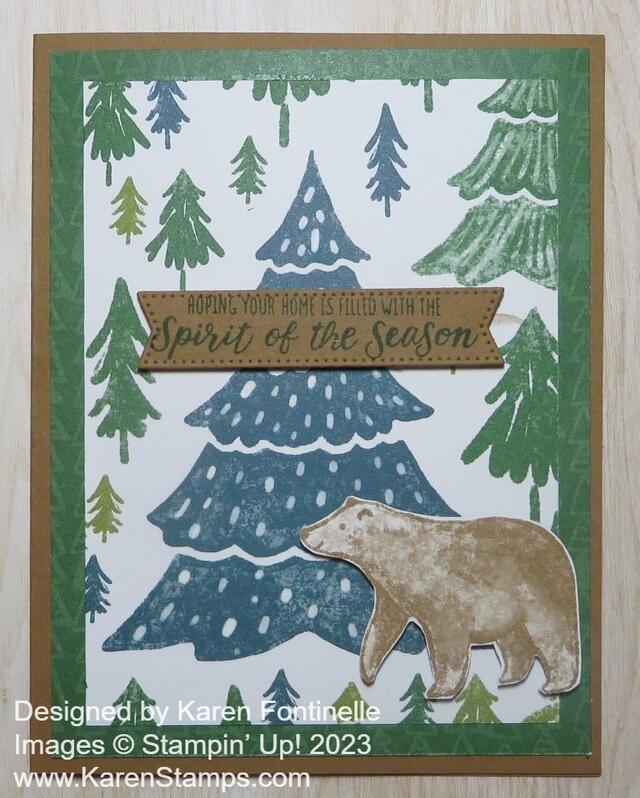
A Walk in the Forest Christmas Card

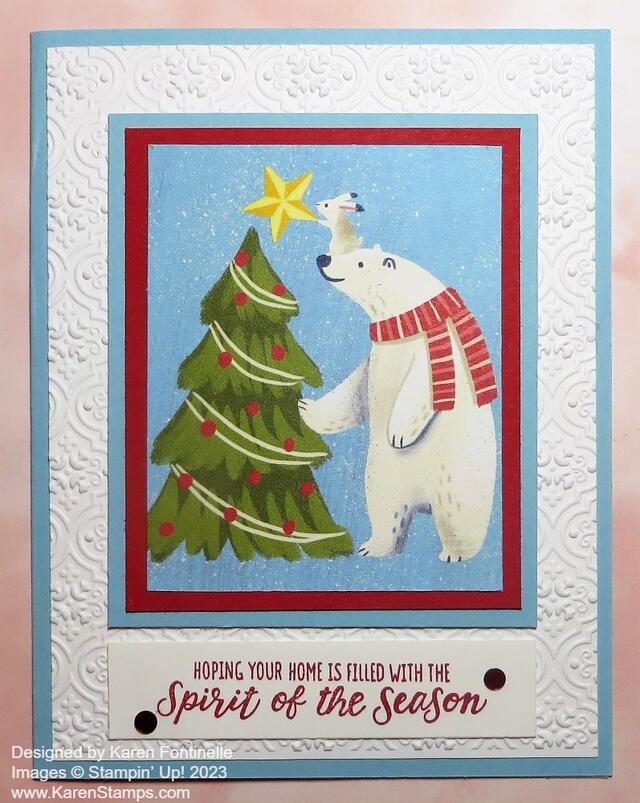
Beary Christmas Spirit of the Season Card

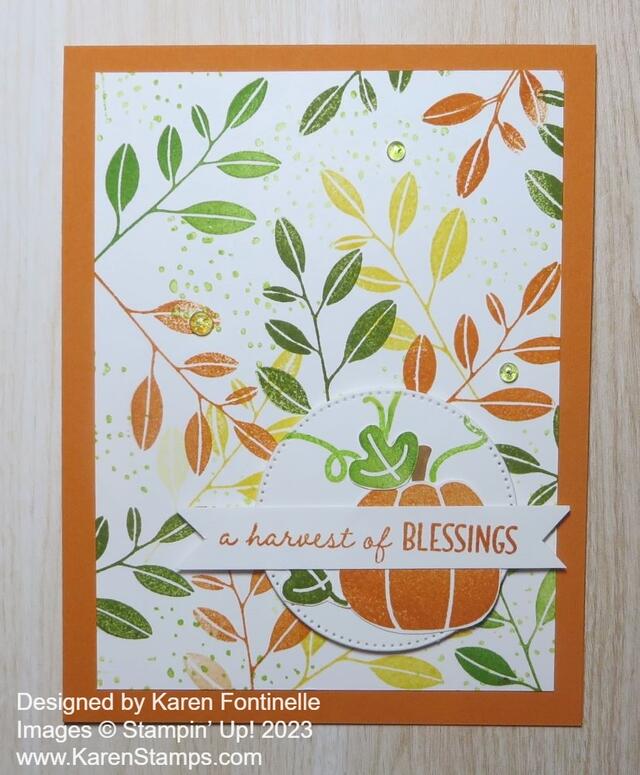
Layering Leaves October Fall Card

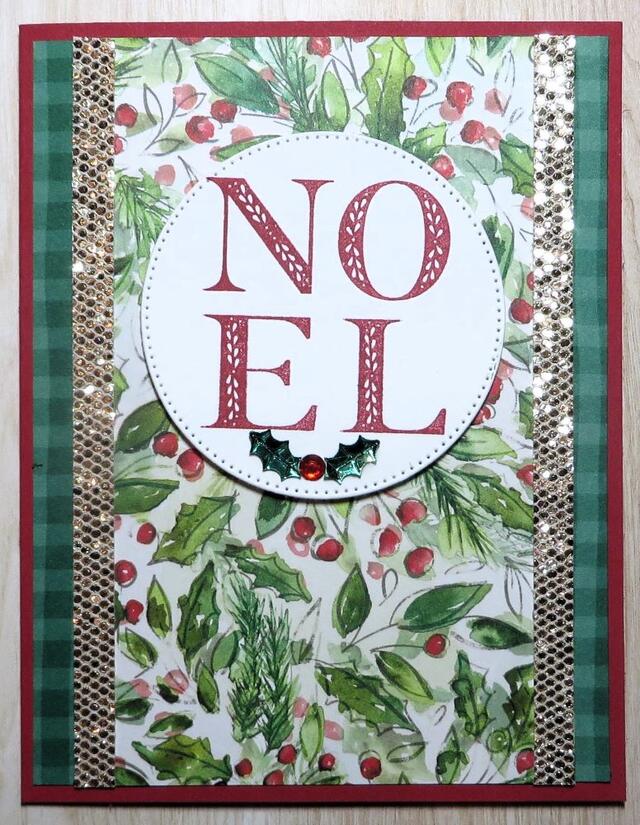
Joy of Christmas Noel Christmas Card

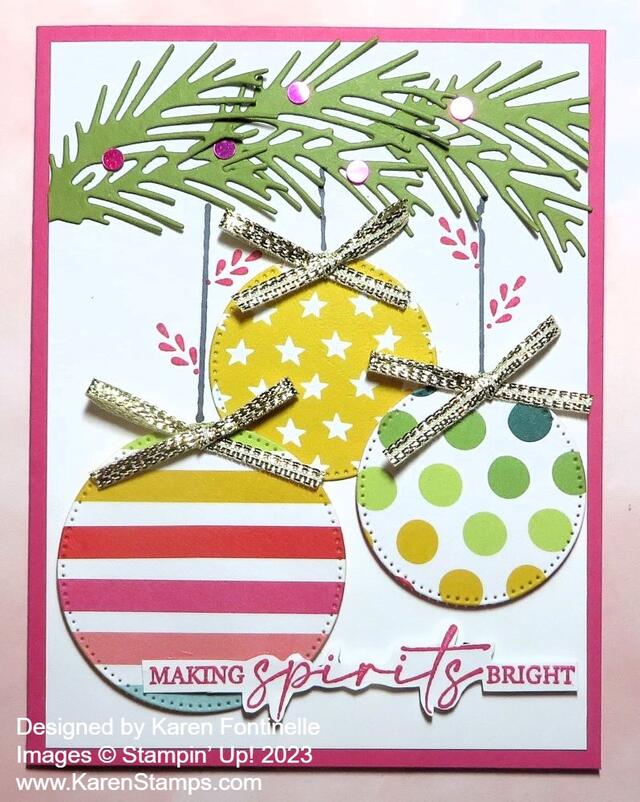
Christmas Ornaments Holiday Card

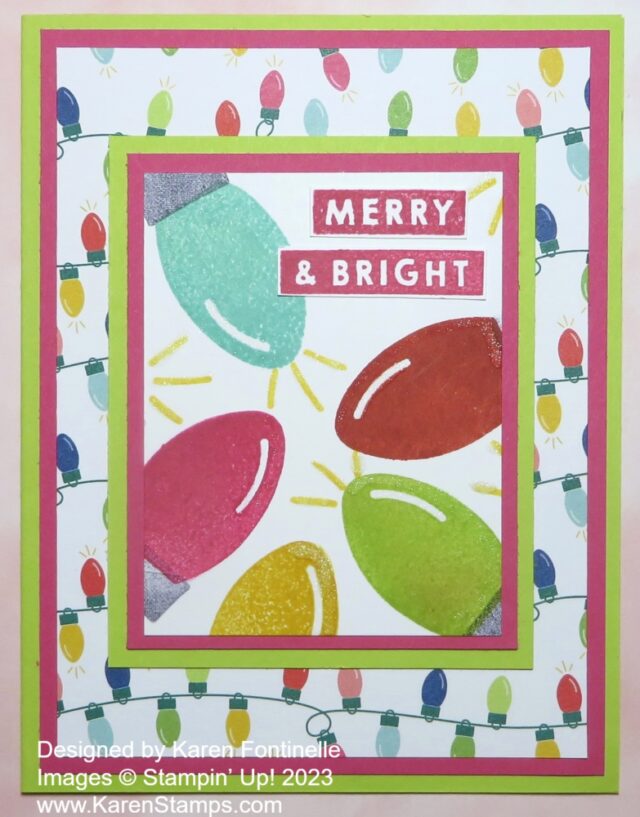
Merry and Bright Light Bulb Christmas Card

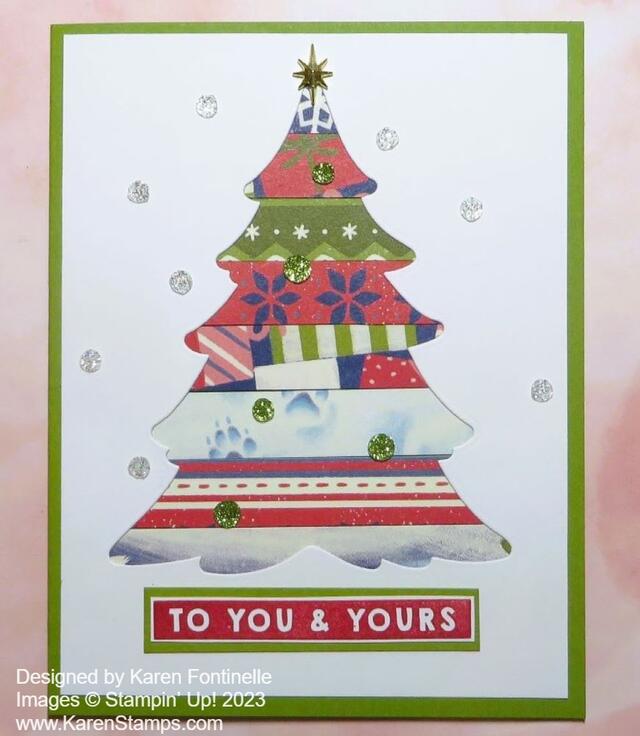
Scrappy Merriest Christmas Tree Card

There are lots more good things in that Holiday Mini so check it out one more time!

SHOP STAMPIN’ UP! ONLINE HERE!

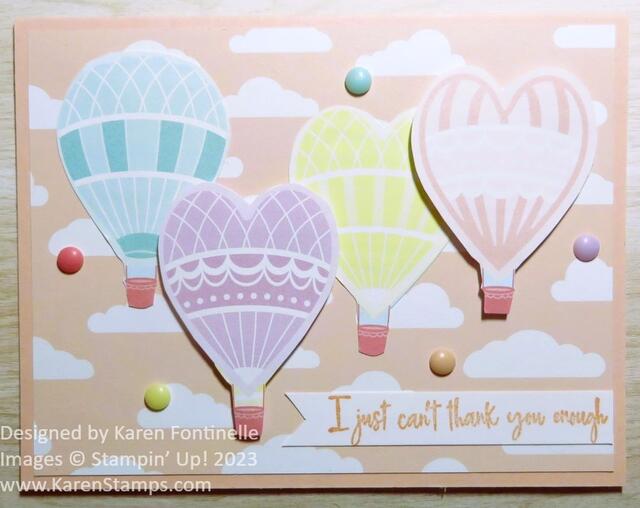
Lighter Than Air Hot Air Balloon Card

Lighter Than Air Hot Air Balloon Card

Happy 2024! After all the holiday excitement, do you feel ready for a hot air balloon ride? Maybe you can’t go on one so easily, but you will be able to make this Lighter Than Air Hot Air Balloon Card very soon!

Today is back to work and back to business, I guess! I hope you had a wonderful holiday and are ready for all the new things coming your way at Stampin’ Up! In just two days we will have a new Spring Mini Catalog and the best promotion of them all, Sale-A-Bration. Then there will be new products popping up in the Online Exclusives and new kits in the Kits Collection! What’s more fun than new Stampin’ Up! products, especially in a new catalog?

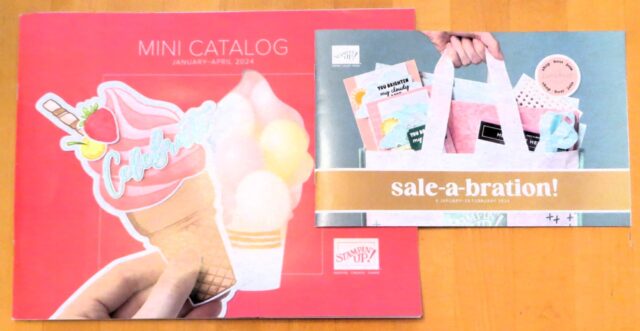
Here are the two catalogs my regular customers should have gotten in the mail over the holidays! I hope you found them in all the cards and retail catalogs you probably have been getting!

Spring Mini and SaleABration Catalogs

Let’s look at the Lighter Than Air Hot Air Balloon Card! For now, I only have the Lighter Than Air 6″ x 6″ Designer Series Paper (162747) in the Lighter Than Air Suite in the Spring Mini Catalog on pages 32-34, officially known as the January-April 2024 Mini Catalog. I also have the embellishments in the Suite but not the stamp set and dies. You will find some extra dies in the Hot Air Balloon Dies in the Bundle with the stamp set that will be fun to use!

My sample card was inspired by a card in the catalog on page 32. Mine is not exactly the same as I made it only using the designer paper and cardstock for the card base. The card base is Petal Pink with the cloud patterned paper with a Petal Pink background used as a layer. Then I cut out several hot air balloons from the Lighter Than Air Designer Paper using Paper Snips. I don’t mind cutting out images from paper unless they are really detailed, and even then you can usually make it easier on yourself than it looks!

From the paper, I simply chose four hot air balloons I liked and cut them out. I know odd numbers often work best, but I was happy with how four balloons fit on my card. After placing them, I glued two down flat on the card and popped up the other two with Stampin’ Dimensionals.

The greeting is stamped in Petal Pink ink on Basic White with one end flagged and one end straight against the edge of the designer paper layer. The greeting is in the Hills of Tuscany Stamp Set (162682) since it looked like the right size I needed and it was on my table!

I couldn’t resist using the new Rainbow Adhesive-Backed Dots (162758) on page 33. This Lighter Than Air Designer Paper has such pretty colors and there are a lot of them! The Rainbow Dots are equally pretty, 20 each of 8 colors. Be sure you order them because they will be great with spring projects of any kind, even if you don’t order anything in this Suite. The three colors of baker’s twine in the Suite are also very pretty and will be useful for lots of projects, too!

If you love hot air balloons, this Suite is for you for sure! And if you love soft, pretty colors, you will want this Lighter Than Air Designer Series Paper and the embellishments at least!

Remember, during Sale-A-Bration with every $50 you spend, you will earn one free Level 1 product in the Sale-A-Bration Brochure.

All the fun begins Thursday, January 4th!

SHOP STAMPIN’ UP! ONLINE HERE!

Don’t forget the last Holiday Mini products you want! Ends January 3rd!

Didn’t Get the Christmas Gift You Wanted?

Didn’t get the Christmas gift you wanted? The family didn’t appreciate all your hard work to make their holidays perfect? Take matters into your own hands and get something to soothe your soul! Order from Stampin’ Up!!

One option:

Another option:

  • Wait until January 4th when the Spring Mini Catalog (January-April 2024 Mini Catalog) goes LIVE! Get anything you want as long as your order is $50 or more so you can get a FREE Sale-A-Bration item, too! BONUS!

Another option:

  • Order one of the kits in the Kits Collection so you have everything you need and don’t have to hunt for supplies or design a project! Just sit down and make it! Everyone will be back at work and school by the time you receive it. I’d suggest the newest Painted Wishes Kit!

And one more:

Sign up for a Paper Pumpkin subscription to get a papercrafting kit in the mail every month. That should help erase those unappreciated feelings for sure!

Go for it! You deserve it!