Beautiful Bokeh Layers of Beauty Card

Beautiful Bokeh Layers of Beauty Card

I was in the mood for flowers when I made this Beautiful Bokeh Layers of Beauty Card, so I pulled out a stamp set and dies I had not used in a long time! I was also in the mood to use the new bokeh paper I just got recently in my order so I used that for the background.

The card base is Daffodil Delight cardstock, which, I do think looks good and at the same time maybe I wish I had used another color! The flowers in the Layers of Beauty Stamp Set were stamped in Memento ink in black and the colored in with Stampin’ Blends. It had been awhile since I had colored with these markers so it was fun to use them again.

I used a variety of Stampin’ Blends markers to color the flowers and leaves on this stamped image. You do need the largest acrylic block to stamp this large flower bouquet! The main flowers are colored with the Calypso Coral combo. I may have even highlighted the petals a little bit with some Light Daffodil Delight. The small daisy-like flowers are colored with the Fresh Freesia Combo. The leaves are various greens. I started with Soft Sea Foam, then kind of highlighted them with some Light Granny Apple Green and maybe a little Lemon Lime Twist. Use whatever colors you like. If you want to test them out, do some scribbling on a piece of Basic White cardstock. I find I don’t get as good a color on my Grid Paper or computer paper.

When the coloring was finished, I used the die in the Layers of Beauty Dies to cut out the bouquet. That was handy! These stamps and dies are found in the Stampin’ Up! Annual Catalog and was a new Bundle when the catalog came out. That seems so long ago now! If you would like to save 10%, you can purchase the stamp set, dies, and decorative masks all together in the Layers of Beauty Bundle. I didn’t use the masks on this card. They are like layers of stencils to color in layers of color. Very pretty.

The background paper on the card is the new Beautiful Bokeh 6″ x 6″ Designer Series Paper in the Spring Mini catalog. I know we all went through a stage of making our own Bokeh paper with a stencil we made ourselves, but just choosing one of these pretty papers is much easier! I chose the Calypso Coral color because you can really see the bokeh design on this paper…light colored circles randomly in the background.

The flowers are glued down flat on the card with Multipurpose Liquid Glue. The greeting is stamped in Calypso Coral ink and is in the Layers of Beauty Stamp Set. It is popped up with an edge of Stampin’ Dimensionals that are remaining on the Dimensionals paper. They worked great for a strip like this! I also added some Shiny Sequins in various colors for a little sparkle on the card. These particular sequins may be retired by now as they came out in the Online Exclusives a year ago, but you can use something similar.

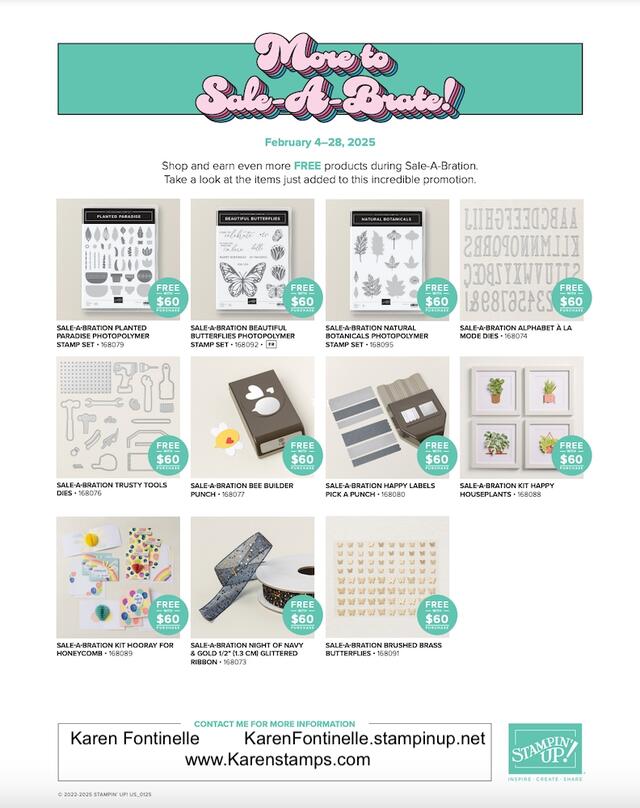
Reminder! Tomorrow is the LAST DAY for Sale-A-Bration! Earn a free product with every $60 purchase on your order! Don’t miss it!

SHOP STAMPIN’ UP! HERE!

With You In Mind Masculine Birthday Card

With You In Mind Masculine Birthday Card

This With You In Mind Masculine Birthday Card uses some rather new products and a soon-to-be-new product! The plaid paper and the colors make it a great masculine card that we often have difficulty coming up with.

I wanted to use the Timeless Plaid 6″ x 6″ Designer Series Paper for a card and this is what I came up with. You’ll find it in the Stampin’ Up! Spring Mini Catalog. This plaid has brown and blues in it. I chose Crumb Cake cardstock for the card base and then the plaid designer paper.

The greeting is stamped in Boho Blue ink on Basic White with the With You In Mind Stamp Set. This stamp set is also in the Spring Mini. I really like this stamp set! It has rather large greetings in a fun font and are ones everyone will use, plus some small images like the stars and cupcake you see on this card. This greeting was then diecut using new dies “coming” on March 4th in the Online Exclusives! Demonstrators were able to preorder. These are the Textured Notes Dies. These are all rectangles with different diecut border designs. They will be very useful dies to use for layering or cutting frames to use. For this card I added an extra plain Boho Blue layer under the Basic White greeting, just cut with the Paper Trimmer, and then the whole greeting piece is layered on top of a Textured Note diecut piece of Crumb Cake. For this card I really liked the extra Boho Blue color layered under the white. I popped up the whole greeting with Stampin’ Dimensionals.

For some embellishments, I stamped two stars, one in Boho Blue ink and one in Crumb Cake ink, plus a cupcake. To stamp the cupcake, I inked up just the cupcake bottom with Crumb Cake ink, stamped that, then inked up just the frosting in Lost Lagoon ink, and stamped that right above the cupcake bottom. It happened to work out perfectly! You could also use Stampin’ Write markers to color both areas, breathe on the stamp, then stamp. It might turn out a little light but it would probably be fine. Then I just cut out the stars and cupcake with my Paper Snips. I felt like the card still needed a little sparkle or something so I added two gold dots in the Low Profile Dots. I really like these dots which are really “low profile” because they don’t add bumpy lumps to the envelope when mailing!

Although I labeled this card as masculine, it could be for anyone as is because the colors are so pretty together in the plaid, but you could change the plaid paper to other colors and brighten up the whole card a little bit. Be sure to check out these Textured Note Dies when they come out next week.

SHOP STAMPIN’ UP! ONLINE HERE!

Wildflower Birthday Slice of Cake Card

Wildflower Birthday Slice of Cake Card

This Wildflower Birthday Slice of Cake Card is the first one I made with this package of paper and a couple other products. My order came the other day and I’ve been trying to organize some of my older (retired?) papers and my new ones. It’s a never-ending battle, right?! I think the products in this Wildflower Birthday Suite will make it real easy for you to make all the birthday cards and others that you can think of! So pretty, festive, and very “useable”.

The card base is Pool Party cardstock, one of the many pretty colors that go with this Suite. I chose one of the papers in the Wildflower Birthday Specialty Designer Series Paper for the background layer of this card. It was a tough choice to start because all the papers are so festive and pretty! I chose the one with lots of pretty small decorated cakes and it also has gold foil accents.

The center focal point of the card started as one of the tags on two of the sheets that can be cut apart. It had an Old Olive top edge on the tag, and although I started to work with that, I finally realized I just didn’t like it on this card but I wanted the cake slice, so I just got off the top Old Olive edge of the tag! Then I even trimmed it to be a little shorter. I layered it on a piece of Pool Party to match the card base and then I was happy. The cake slice piece is 3 1/4″ x 2 3/8″. The Pool Party layer is 3 1/2″ x 2 5/8″. I adhered that flat on the card but I almost popped it up. Instead I popped up the greeting, which I found in the Saying Something Ephemera Pack in the Annual Catalog. The color and size were fine, although I did snip off bits on the ends to make it look like a banner shape.

To embellish the card I added some Party Dots around the cake slice. I used all three colors of dots – Pretty in Pink, Pool Party, and Peach Pie – and they all go together with the cake image. The ribbon is new and coming in the next Online Exclusives in March. It is the White 1/4″ Ribbon.

This is a pretty simple card yet the birthday-themed paper with the pretty cakes and gold foil on each one make it stunning. Also included in the Wildflower Birthday Specialty Designer Paper are two sheets of diecuts which will be fun to use on cards, scrapbook pages, and other projects. You will find this Wildflower Birthday Suite Collection in the Spring Mini Catalog. Get it all or choose which products you want the most!

SHOP STAMPIN’ UP! HERE!

Bloom Impressions Hello Card

Bloom Impressions Hello Card

This Bloom Impressions Hello Card was fun to make with three new things in my Stampin’ Up! order I got last night! No, four new things! It is basically a simple card but the pretty designer paper and the alphabet make it.

We really are running out of time now for Sale-A-Bration! A week from today will be the last day to earn free product with every $60 purchase. If you blink, you might miss it! Stampin’ Up! even added some extra products from the Annual Catalog you can choose from plus the ones in the Sale-A-Bration Brochure.

The card base is Coastal Cabana cardstock and the lovely very floral paper is the Blossom Impressions Designer Series Paper, a freebie in the Sale-A-Bration Brochure on page 11. There are at least 5 more coordinating colors in the paper than are shown in the SAB Brochure. That’s why I picked Coastal Cabana. The designer paper is cut at the usual, 4″ x 5 1/4″.

I wanted to use the Alphabet a la Mode Dies that I just got FREE in my order. Unfortunately, I see right now that they are unavailable so I don’t know if they will get more in to earn them during Sale-A-Bration. But you can use other alphabets or stamps to make a similar card. I cut a piece of Basic White at 1 3/4″ x 3 3/4″. I checked first to make sure my letters to spell out “Hello” would fit on that piece.

Here is the BEST TIP for this or probably any alphabet: Before you diecut, put a piece of Adhesive Sheets on the back of the cardstock so that you turn the letters into stickers. No messy glueing on those narrow pieces. I used Coastal Cabana cardstock for my letters.

Since the white rectangle looked like it needed “something”, I used a Coastal Cabana Stampin’ Write Marker, the tip end, to draw little lines and dots around the edge of the rectangle. You can do it freehand. I used a thin ruler just to make straight lines. But you can make curvy lines so they don’t have to be straight!

For some embellishment on the card, I tied around a piece of my new White 1/4″ Ribbon coming soon in the Online Exclusives and tied a separate bow which is adhered with Mini Glue Dots. I couldn’t resist adding some of the new Purple Adhesive-Backed Sequins, FREE in the Sale-A-Bration Brochure on page 11. Even though the name says purple, you can use them with lots of things because they are actually four different colors – Berry Burst, Bubble Bath, Fresh Freesia and White.

SHOP STAMPIN’ UP! ONLINE HERE!

Storybook Moments Blue Flowers Thinking of You Card

Storybook Moments Blue Flowers Thinking of You Card

This Storybook Moments Blue Flowers Thinking of You Card was an easy card to make with the Storybook Moments Paper again and one of the diecuts in the package. It’s different than what I thought I was going to make, but I’m happy with it!

The card base is made with Boho Blue cardstock, one of the 2023-2025 In Colors. That means this group of In Colors should be going out when the new Stampin’ Up! catalog comes out. Honestly, I won’t be sad to see this group to go. They were just too drab for me, they weren’t my favorites. If you love them and need reinkers or cardstock, you might think ahead and beat the rush when the retirement list comes out.

The blue floral paper on the front is one of the small panels that you cut apart in the Storybook Moments Specialty Designer Series Paper. Such an interesting pack of paper! Two sheets have all these small panels, as I said. Some are florals, some are frames, some are critters like my Easter Duck card HERE from the other day. Another two pages are diecuts of all kinds of things that do with the Storybook Moments Designer Paper. (This paper has sold at as I write this but is due back in stock March 10th. You can check back earlier, sometimes things come in sooner. But still time to get it before Easter!)

This floral piece is 3″ x 4″. I put a layer of Basic Beige 3 1/8″ x 4 1/8″ underneath it and then a layer of Misty Moonlight 3 3/8″ x 4 3/8″. You can vary the widths if you like. The blue flowers, one of the diecuts is centered and popped up on Stampin’ Dimensionals. The greeting is one of the diecuts in the Saying Something Mix & Match Ephemera Pack. It’s so great to find a greeting that works in an ephemera pack! Easy as can be!

For some embellishments on the card I tied a piece of Garden Green thread around the flower stems. It is one of the colors in the Natural Tones Linen Thread. I think it adds just a little bit of interest. And for a little sparkle, I added three Misty Moonlight gems in the Tinsel Gems 3-Pack.

If you already have this paper or Suite, I hope you get some inspiration from this card. If you don’t own the Storybook Moments Specialty Designer Series Paper, you might consider ordering it for spring, Easter, babies, children, and just beautiful cards and scrapbook pages!

Shop Stampin’ Up! Online HERE!

Reminder: Sale-A-Bration Ends Soon!

Sale-A-Bration 2025 Sq Ad Don't Miss Out

Stampin’ Up!’s biggest annual promotion, Sale-A-Bration, has been going on for almost two months and the end is near! I think Stampin’ Up! has had Sale-A-Bration for almost all the years they’ve been in business. When I started as a Demonstrator it was called “Sell-A-Bration” and we had a skinny little brochure with about four stamp sets, maybe six, to choose from. If a customer placed a very large order, they would have to order duplicates of the free products because there weren’t that many to choose from. And now in recent years, we have had many more choices plus usually they add extra products about halfway through. Large orders still get an extra bonus and joining Stampin’ Up! as a Demonstrator always has a special bonus, too!

Click HERE or the image above to page through the Sale-A-Bration 2025 Brochure!

This year the qualifying amount did go up to $60, but as we know, once we start looking through the catalog and online products, it’s not hard to get to $60…or more! We can choose from stamp sets, designer series paper, embellishments, an embossing folder, and even a card kit! If you spend a larger amount, for $120 you can choose from the Heart Shaped Bundle or the intriguing Corner In Bloom Stamp Set. Or instead of one of the $120 level products, you can choose two of the $60 level products. Spend $180 on Stampin’ Up! products and earn three free $60 level products, PLUS Stampin’ Rewards because your order is $150 or over. With an order of $300 (a party order with others or an individual order) you can choose any extra $30 worth of products!

Watch this video below and see what Sale-A-Bration has to offer!

Not long ago, Stampin’ Up! added some Annual Catalog products to the Sale-A-Bration free products offering with some GREAT choices! If you don’t own the Bee Punch you might like that, there are two Kits to choose from, and two expensive die sets to get FREE with just a $60 purchase!

Click on the image below to see the “More to Sale-A-Brate flyer!

SAB 2025 More to Celebrate Flyer Info

This is your reminder that Sale-A-Bration comes to a screeching halt on Friday, February 28, 2025 so don’t delay if you want to order and get some FREE products with every $60 purchase! No limits!

SHOP HERE TODAY!

Storybook Moments Ducks Happy Easter Card

Storybook Moments Ducks Happy Easter Card

Valentine’s Day is over so I guess we are off to Easter…and/or Spring! I didn’t necessarily plan to make an Easter card for today, but this Storybook Moments Ducks Happy Easter Card came about after cutting apart these different little panels on the two sheets of designer paper.

This card features the Storybook Moments Specialty Designer Series Paper. You will find it on page 25 in the Stampin’ Up! Spring Mini Catalog (January-April Mini). It is part of the whole Storybook Moments Suite Collection if you want it ALL! Two stamp sets, two sets of dies, two designer papers, embellishments, and ribbon! It’s an understatement to say it’s an adorable suite! The designer paper has images of cottages, neighborly critters, gardening accessories, and garden grown produce! Don’t think it is only for Easter because it will make darling cards and scrapbook pages for babies, children, springtime, and any time you want to send a special card. The designer paper package also comes with two sheets of diecut images that you can adhere to your projects, cards, and scrapbook pages.

This card starts with a base of Lost Lagoon cardstock. This color is so pretty yet I don’t use this cardstock as much as some others. Besides the diecuts in the Storybook Moments DSP, the other special thing are the two sheets of smaller panels of different images from frames to flowers, to critters and produce. Just cut them apart easily with your Paper Trimmer and then use individually. The one that stood out to me the most was this one with the mother duck and two baby ducks, I assume.

I layered the ducks (panel is 3″ x 4″) on a 3 1/4″ x 4 1/4″ piece of Lemon Lolly Cardstock and another layer of Basic Beige at 3 1/2″ x 4 1/2″. This leaves a nice margin of the Lost Lagoon cardstock to show around the edge of the duck panel picking up the colors of the sky and the duck clothing.

The greeting is in the Greetings For All Mix & Match Ephemera Pack. Just punch out the diecut greeting that you want. This greeting had a white background which I didn’t like because I didn’t have white on the card. So I watercolored the greeting! I thought the Stampin’ Blend marker would be a little too dark so I used a Water Painter and tiny amounts of Lost Lagoon ink. I really mostly picked up the ink off the edges of my ink pad and maybe a bit more by just touching the corner of the actual ink pad. It sort of turned out to be an ombre shading on the greeting! I like the size and shape of the diecut greeting and I like, with my watercoloring, how it blends in a little with the sky in the background. Try it!

That’s how easy this card was, as easy as it looks! I loved it! I thought it was a stunning panel with the ducks, so cute and colorful, yet soft and subtle. I liked how the Lemon Lolly cardstock layer lightened it all up a bit.

As I write this, this paper is “Low Inventory” so if you want it I would order it very soon! Easter, this year, is April 20, 2025 so we have time to make things, but get your supplies while you can!

SHOP STAMPIN’ UP! HERE!

Marbled Elegance Pierced Heart Valentine

Marbled Elegance Pierced Heart Valentine

It’s finally here! Do you have a special Valentine’s Day planned? Does it remind you of when you were in elementary school and had a party at school where everyone exchanged valentines? I think we either made our own valentines with construction paper, paste or Elmer’s glue, and doilies or we bought a box of valentines with envelopes that we would just sign on the back to give out to classmates. Then we also had a decorated shoe bag or lunch sack at our desk and everyone would scurry around delivering valentines! Even when my kids were in school I remember getting to meet other moms in their classes to help with the Valentine party.

I don’t think I posted this card before but I made a lot of them to send. The card base is Melon Mambo cardstock. Then I have a layer of Marbled Elegance Speciality Designer Series Paper layered on a piece of Gold Foil. The pierced heart in the center is diecut with the die in the Hearts of Elegance Dies.

The greeting is stamped with Melon Mambo ink on Basic White cardstock. This is in the Hearts of Elegance Stamp Set. The banner shape was then cut out with one of the Stylish Shapes Dies. To add a little bling, I added some gold gems. You can use whatever you have. Lots of embellishments would look very pretty!

Last Minute Past Valentine Ideas

Easy Valentine Candy Jar

If you are looking for some last minute Valentine ideas, here are some from past years that you can make with stamps and paper in your older “stash” or update them with newer craft supplies.

The first one you see above is super easy if you want to make a treat for someone….or put a candle inside! Just grab a jar, a doily, and a heart! Tie some ribbon or twine around, even add a greeting if you like and you have a very cute holder for some candy, a small gift, cookies, whatever you have that will fit in your jar. You don’t even have to have a lid, but if you do, you can decorate the top of the lid.

Country Floral Lane Valentine Candy Bars

Get a regular-size chocolate candy bar (or even the gigantic ones!) and wrap it with cardstock or designer series paper and decorate. Even if you almost have no supplies, you can cut out or draw hearts for sure! If you want, tie a ribbon around the candy bar lengthwise you they can pull it out of your decorative wrapping without tearing it open!

Country Bouquet For You Card

Make a Heart Flower

Use this card as an idea to make a flower out of a heart, a couple leaves, and a stem! While you’re at it, make two or three heart flowers! You can make a card similar to this one or decorate your Valentine jar with one.

Valentine's Day Chocolate Candy Holders

This idea is an oldie but goodie paper craft….candy holders in a matchbook design! Just fold a strip of cardstock, cut or punch a slit in the bottom section that folds up and slide a chocolate square into it. Decorate the cover and you’ve got it. Click on the title to go to the blog post for all the directions.

Decorated Heart Foil Tins

Maybe you still have a few of these Heart Foil Tins in your stash somewhere, but if not, just decorate a small box or whatever you have. Just use hearts or doilies, stamps, whatever you have to decorate your container.

Bee Mine Book Fold Valentine Card

Whether you have the old Bee Mine Designer Series Paper or the newest Cute As Can Bee Designer Series Paper (which I think is almost the same designs, just different colors) you can make plenty of Valentines with any of the sheets. This card is the fun Book Fold design, with the fold at the top, which is very easy to make. Click on the title under this card for all the directions.

Hopefully these samples give you some ideas if you need to make a Valentine card or treat right away!

Celebrate Love Valentine Card

Celebrate Love Valentine Card

Valentine’s Day is coming up soon and if you have this ephemera pack, you can make this Celebrate Love Valentine Card very easily! And then you can make the same card but change the greeting and have a card for another occasion.

For this card, I used the Celebrate Love Mix & Match Ephemera Pack. These ephemera packs are so handy for just punching out some diecuts and making a card with no stamping. Of course, you can add stamping and anything else you want, but if you are looking for super quick and easy, usually any of the ephemera pack Stampin’ Up! has been offering for awhile really offer the solution. You will find this Celebrate Love Ephemera Pack in the Spring Mini (January-April 2025 Mini).

This card begins with a card base of Soft Sea Foam Cardstock with a layer of Pool Party cardstock cut at 4 1/2″ x 3 1/4″. You could make the layer 5 1/4″ x 4″ as we normally do. To the Pool Party center piece, I simply adhered the ephemera pieces using Multipurpose Liquid Glue.

I began with the white crisscross piece which to me looked like it could be a flower box or a cute little fence. Before glueing it down, I placed the flower diecuts where I wanted them so they “fit” into the flower box and just applied a little bit of glue at the top of those flowers so I could be sure they were where I wanted them to be. Then I went back and added more glue to the base of the flowers on the back to hold them securely. Adding glue to the flower box requires teeny tiny dots of glue in as many places as you can put it with a very light hand.

Above the flowers I added one of the hearts in the ephemera pack. This heart could be popped up with Stampin’ Dimensionals but I adhered it flat. Then I added a “Happy Valentine’s Day” banner in the Celebrate Love Ephemera Pack right across the heart. If you like you can add some gems or jewels for embellishments. I used the Heart Sequins which are unavailable right now but hopefully will be back in stock. You can use hearts any time for embellishments so even though Valentine’s Day will be past when they are available again, you can still order them if you like and use them on lots of kinds of cards and projects.

Now for an alternative card made the same way but with a different greeting. You could use this same card for a birthday, thinking of you, celebrate, congratulations, miss you, and lots more.

Celebrate Love Alternate Valentine Card

You can see this card is the same but I used a different greeting. I could have stamped any kind of greeting but I chose one in the Celebrate Love Ephemera Pack. This greeting is printed on one of the labels in the ephemera pack, but the size was too large for the heart. I simply cut around the words to make it smaller and it fit perfectly on the heart!

Here is another card on which I used pieces from this same ephemera pack.

I’m having fun using these new ephemera packs. The first ones were in the Holiday Mini Catalog and now we have more in the Spring Mini. They make a card easy to design and still pretty! Sometimes simple cards are the best. Check out all the ephemera packs in the Spring Mini on page 13.

SHOP STAMPIN’ UP! ONLINE HERE!

LAST DAY! Join Paper Pumpkin To Get This Kit For Spring!

Paper Pumpkin February 2025 Hello Spring

Get a taste of spring with this “Hello Spring” Paper Pumpkin Kit from Stampin’ Up! If you subscribe to Paper Pumpkin TODAY, February 10th, you will receive this kit in the mail mid-February!

Kit Details:

Plant the seeds of happiness with these lovely garden-inspired cards!

Makes 9 cards: 3 each of 3 designs
• Precut pieces with bronze foil
• Unique spring-themed envelopes
• Coordinating colors: Basic Beige, Bubble Bath, Lemon Lime Twist, Lost Lagoon, Old Olive, Petunia Pop (Classic Stampin’ Spot)

Coordinates with the Grow with Love Bundle (item 164804)! One of the Stampin’ Up! New Arrivals online!

Each kit comes with all the supplies you need to make the project inside, except for scissors! You get an exclusive stamp set, a Stampin’ Spot 1” x 1″ ink pad, embellishments, cards and envelopes. It’s really fun to open the box and see what is inside, even if you have seen pictures online! Seeing it in person is always better.

I like to say Paper Pumpkin is the gift you give yourself each month, a treat you get in the mail, just for you….or maybe you’d like to share the fun with a family member or friend! You can always order more than one kit in your account. And if you have a busy month coming up, you can skip that month and look forward to the next month’s kit! No risk, no obligation. Cancel any time if you don’t feel Paper Pumpkin is for you. You can always come back! Stampin’ Up! guarantees all kits.

These kits are designed for everyone! New crafters, non-crafters, and experienced crafters! Sometimes it is nice to just open the box and there is a project already designed for you and everything at hand that you will need. A video is always available online if you like to watch the assembly (I do!!) and you will find alternate ideas for using the kit various places online if you feel more adventurous.

Don’t wait! Sign up for Paper Pumpkin today and try it out! It’s going to be fun, especially if you like getting something special for yourself! 🙂

JOIN PAPER PUMPKIN TODAY!

Poppy Parade Heart Shaped Valentine

Poppy Parade Heart Shaped Valentine

Are you interested in the Super Bowl today or are you more interested in stamping? Perhaps you will be doing both! Either way, here is another Valentine idea, the Poppy Parade Heart Shaped Valentine, in case you want to make some valentines to send or give. And really, if you changed this greeting on this card, you could make it for any nice occasion.

What I did with this card was choose two complementary colors. Complementary colors are colors opposite each other on the color wheel. If you have the Stampin’ Up! Color Coach, you can do this easily. I started with Poppy Parade since it is a red color but one that I don’t use very often…although when I do, I am really happy with using the color. The color opposite Poppy Parade on the Color Coach is Shaded Spruce. So those are the two colors I used on this card along with Basic White. I think it worked out!

The card base is Poppy Parade with a layer of the Marbled Elegance Designer Series Paper. Obviously the pattern is not one of the marbled designs but “the other side”, the generic side that you can use any time. For the focal point on the card, I stamped the wreath in the Heart Shaped Stamp Set in Shaded Spruce ink on Basic White. The three flowers are stamped with the Heart Shaped Stamp Set also in Poppy Parade ink and diecut with the Heart Shaped Dies. You can get the Heart Shaped Stamp Set and the Heart Shaped Dies in the Heart Shaped Bundle, FREE during Sale-A-Bration this month with a $120 purchase. It is a Level 2 product you can earn.

The Basic White piece is diecut using one of the large circle dies in the Spotlight on Nature Dies. I love how these have a decorative border on them. The diecut circle is adhered flat on the card but you could pop it up with Stampin’ Dimensionals. The three Poppy Parade flowers are also glued on flat on the wreath, but you could pop up these flowers if you wanted to. I also took the tip of a Poppy Parade marker and just dotted the little berries on the wreath right over the Shaded Spruce ink. Just do very tiny dots. You barely see them but I like the look.

I didn’t have Poppy Parade ribbon so I colored my own! I used the white ribbon in the Petal Pink & White 1/4″ Diagonal Trim Combo Ribbon and colored it with the Dark Poppy Parade Stampin’ Blend Marker. I colored on both sides and even touched up the edges a little if some white was still showing. Because they are alcohol markers, the ribbon dries quickly and then you can use it on your card. It’s so great we can make our own custom colored ribbon! I tied the bow and adhered it with a couple of Glue Dots.

The greeting is in the Celebrate Love Mix & Match Ephemera Pack. It had a colored border around it but I wanted it really thin so I trimmed off the border. Then I layered it on a thin strip of Shaded Spruce.

To each side of the greeting I added a little Heart Sequin. These are currently not available, hopefully you have them already, but if not, just use any jewel or gem that you like if you want a little sparkle or bling.

These two complementary colors aren’t too different to use on a valentine or other card, but it was fun to use my Color Coach in choosing the colors.

SHOP STAMPIN’ UP! ONLINE HERE!

Two New Kits in the Kits Collection by Stampin’ Up!

Stampin’ Up! released two new kits in the Kits Collection yesterday! Both of these look very interesting and pretty! I’m sure they will be fun to put together…or do your own thing with the supplies. Get one or both, and of course they count toward your Sale-A-Bration product total! Add a few more products and earn a FREE Sale-A-Bration product.

So Much To Celebrate Kit

SO MUCH TO CELEBRATE KIT

No matter what someone is celebrating, congratulations are in order! A handmade card just makes it extra-special. The So Much To Celebrate Kit makes 9 cards, 3 each of 3 designs. Supplies include gold foil accents, puffy stickers, and diecut flowers.

DETAILS
– Makes 9 cards: 3 each of 3 designs
– 2 folded card sizes
– 4-1/4″ x 5-1/2″: 6 cards
– 6″ x 3″: 3 cards
– Sentiments printed in Dutch, English, French, and German
– Colors: Balmy Blue, Old Olive, Pecan Pie, Petal Pink, Pumpkin Pie

Kit includes one of each item listed below.
– Step-by-step instructions
– 9 printed envelopes
– Puffy stickers
– Gold foil
– Adhesive
– A 9-7/8″ x 6-1/2″ x 2-3/4″ printed box for storage or crafting on the go

So Much To Celebrate Kit Contents

Here are the supplies you will find in the kit in the photo above.

Watch the Kit video below:

Another new kit was also released yesterday in the Stampin’ Up! Kits Collection!

Heirloom Arrangements Kit

Heirloom Arrangements Kit

The Heirloom Arrangements Kit makes 8 cards in detailed vintage designs. It comes with precut images and specialty vellum.

DETAILS
– Makes 8 cards: 1 each of 8 designs
– Folded card size: 4-1/4″ x 5-1/2″
– Colors: Basic Black, Blueberry Bushel, Cajun Craze, Cherry Cobbler, Crumb Cake, Daffodil Delight, Garden Green, Old Olive, Pecan Pie, Pretty in Pink, Pretty Peacock
– Also available in French

Kit includes one of each item listed below.
– Heirloom Arrangements Photopolymer Stamp Set
– Clear stamp block
– Pecan Pie Classic Stampin’ Spot
– Basic instructions
– 8 printed envelopes
– Precut elements
– Specialty vellum
– Adhesive
– A 9-7/8″ x 6-1/2″ x 2-3/4″ printed box for storage or crafting on the go

Heirloom Arrangements Kit Contents

The photo above shows the supplies that are included in your Kit!

Watch the Kit video below:

The Kits in the Kits Collection include predesigned projects that come in a range of project types.
They are perfect for new crafters, busy crafters, or crafters who want quick and easy projects.

Choose a Kit to try on your next order!

Pretty In Pink Sending Lots of Love Card

Pretty In Pink Sending Lots of Love Card

This Pretty in Pink Sending Lots of Love Card uses slightly non-traditional colors, but you can do that! I’d almost forgotten about the In Color 2024-2026 Petunia Pop! I tried to use the Color Coach Wheel to choose two colors for this card, but the In Colors are not on the wheel, but I think these two colors together work just fine.

This card base is Pretty in Pink cardstock. I used Petunia Pop for the center layer. It measures 3 1/2″ x 4 3/4″. Since it looked a little plain as the background, I embossed it with the Forever Plaid 3D Embossing Folder and the Stampin’ Cut & Emboss Machine.

The diecut hearts are Pretty in Pink and Basic White. I used the Hearts of Elegance Dies. These hearts don’t necessarily layer perfectly but they are close enough. Maybe that is the new style anyway! My hearts are adhered flat on the card but of course they could be popped up on Dimensionals.

The greeting is in the Hearts of Elegance Stamp Set. I love the sentiments and especially the fonts used for these! So pretty! I’d like another stamp set of various greetings in this same font. This greeting is stamped in Petunia Pop ink on Basic White. Then it was diecut with a label in the Unbounded Love Dies. You can purchase the Hearts of Elegance Stamp Set and Dies together in a Bundle if you’d like to have both and save 10%.

To embellish this card I added a white bow from the Petal Pink & White 1/4″ Diagonal Trim Combo Pack. I also added three Pretty in Pink gems in the 2024-2026 In Color Shimmer Gems for a little sparkle.

You can call this card a Valentine but as you can see it could be for other occasions because hearts can be for any time!

SHOP STAMPIN’ UP! ONLINE HERE!

More Sale-A-Bration Products to Earn FREE!

SAB 2025 More to Celebrate Flyer Info
Click to view Flyer!

Click the image above to fly the entire flyer.

Stampin’ Up! has added more products that you can earn with every $60 purchase during the remainder of Sale-A-Bration. These are IN ADDITION to the Sale-A-Bration Brochure. Remember, Sale-A-Bration 2025 ENDS on February 28! Time is flying!

IMPORTANT DETAILS:

You must use the item numbers in the flyer in order to redeem these products as Sale-A-Bration items. These products have different item numbers in the catalog, which won’t register as part of Sale-A-Bration.

Two kits are included as part of the Sale-A-Bration newly added products. Once the kits sell out, they will be discontinued. If they do not sell out during Sale-A-Bration, they may be discounted at a later date.

Note: The newly added products that are now redeemable during Sale-A-Bration are part of Stampin’ Up!’s existing product offering.

You can purchase these Sale-A-Bration products at full price using the regular catalog numbers, but if you want to get them FREE as a Sale-A-Bration product, be sure to use the product number on the Flyer.

Sale-A-Bration Products FREE with a $60 purchase!

Last Chance Products Ad1

MORE PRODUCTS ADDED TO THE LAST CHANCE LIST!

Browse our selection of Last Chance paper crafting products. Additional items are added every other month. These products are available only while supplies last so be sure to buy them before they are discontinued! Discounts vary and are subject to change.

SHOP HERE!

SHOP EVERYTHING AT STAMPIN’ UP!