Hello Friend Zoo Crew Card

Hello Friend Zoo Crew Card

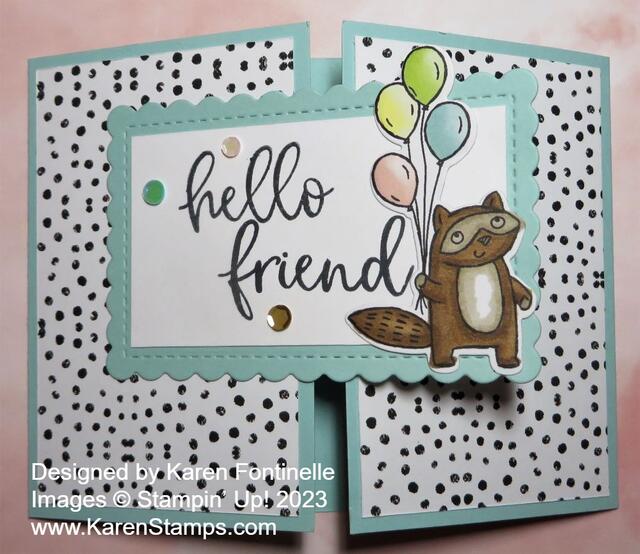
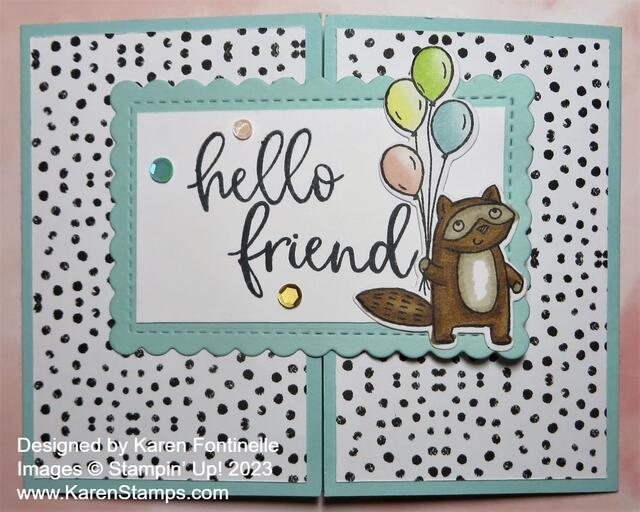
This Hello Friend Zoo Crew Card turned out pretty cute, I think! I just recently saw a card made like this one and I’ve had fun making a couple. It is very easy to make.

The card base of Pool Party cardstock is cut at 4 1/4″ x 11″. Instead of scoring it in the middle, score each end at 2 3/4″. Crease on those score lines being careful that the two ends line up as perfectly as possible in the middle.

I added a piece of the Zoo Crew Designer Series Paper to each flap to decorate the card. Each one measures 4″ x 2 1/2″.

For the focal point of the card, I diecut a scalloped rectangle using the Scalloped Contours Dies. in Pool Party cardstock. Then I added a rectangle of Basic White cut to fit inside the rectangle. On this piece, I stamped the “hello friend” greeting using matching stamps in the Biggest Wish Stamp Set. Usually, I use one word in block letters and one in script letters, but for this card, I just used both cursive words. The words are stamped with Memento Ink.

Next, I diecut this cute beaver holding the balloons using the Zany Zoo Dies. I colored him with Pecan Pie Light and Dark Stampin’ Blends with a little Crumb Cake on his face and belly. I love using the Stampin’ Blends to color. I just glued him to the greeting using Multipurpose Liquid Glue being careful that anything that wouldn’t be on the rectangle wouldn’t have glue on the back of it. Then I glued on the greeting rectangle, making sure the glue was only applied on the side that would be on the left flap of the card.

For a finishing touch, I adhered three Pastel Adhesive-Backed Sequins in each color to the greeting for a little glimmer. I will add a layer of Basic White cardstock inside the card on which to stamp a greeting or write a personal message, although I could just use the Pool Party since it is a light enough color.

This is basically an easy card to make. You could cut a circle or just a rectangle or square of any size for the focal point of the card if you didn’t have dies to use or a punch.

SHOP STAMPIN’ UP! HERE!

Hello Friend Zoo Crew Card Open

TODAY ONLY! Stamp Sale at Stampin’ Up!

Stamp Sale Banner w Info July 2023

Would you like to save money while you buy stamps?!!

Today is the day! Look through the Stampin’ Up! Annual Catalog and see what stamp sets you haven’t bought yet that you like! There are so many to choose from! Every time I look through the catalog I see something new. Maybe you need more sentiments! Some are funny, some are traditional, some have different fonts or sizes, and some are mostly for certain occasions, like a new baby!

Only the individual stamp sets are on sale, not Bundles. Do the math. It is likely that the Bundle is still cheaper than buying the stamp set separately and then the dies. If the dies or punches aren’t available right now, maybe you want to go ahead and get just the stamps on the sale.

I do not believe the Online Exclusives are on the sale, only the stamp sets actually IN the Annual Catalog are on sale (except the Host sets, which are on page 172.)

Remember, the Bonus Coupons are available to be earned during the sale. With every $50 you spend (before tax and shipping), you will earn a $5 coupon to spend in August. Keep in mind, it will be the total of the stamp sale prices, not the regular prices, that need to add up to $50. Of course, you can order anything you want tomorrow, along with any stamp sets. No limit to how many coupons you can earn!

SHOP THE STAMP SALE TODAY ONLY!

The sale ends at 11:59 PM MT.

Tomorrow, July 19! 24-Hour Stamp Sale!

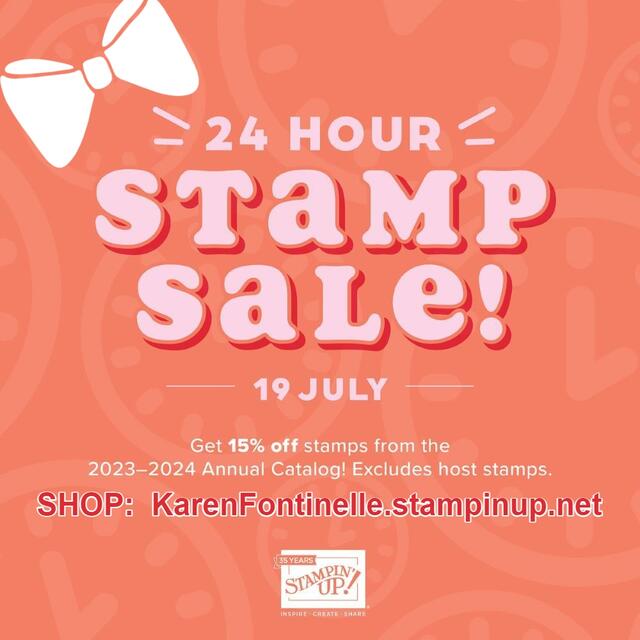
Find yourself staring at multiple stamp sets from the 2023–2024 Annual Catalog and can’t decide which ones to get? You won’t have to stare for much longer because, on Wednesday, July 19, 2023, you can get those stamp sets you’ve been wanting at a 15% discount! But you will have to act fast because this lightning deal will only last for one day, so make sure you are ready to shop ‘til you drop! This is a deal you don’t want to miss out on.

This sale does not include host stamp sets.

You can still earn the Bonus Coupons during the 24-hour sale, just keep in mind you need a $50 purchase AFTER the discount. For each $50 increment you spend, you receive one $5 coupon to spend in August. No limits! Watch for an email with your coupon code(s) right after you order.

SALES PERIOD:  July 19, 2023, from 12:00 a.m. (midnight) (MT) to 11:59 p.m. (MT) 

  • The sale will run for 24 hours.
  • There is no limit to how many stamp sets may be purchased.
  • The 15% discount will apply to all stamp sets from the 2023–2024 Annual Catalog (excluding host stamp sets).
  • No discount code is necessary—the 15% off discount will be applied automatically.

There will be a special section in the Online Store for the stamps that are on sale.

SHOP STAMPIN’ UP! 24-HOUR STAMP SALE!

Countryside Inn Boho Blue Thinking of You Card

Countryside Inn Boho Blue Thinking of You Card

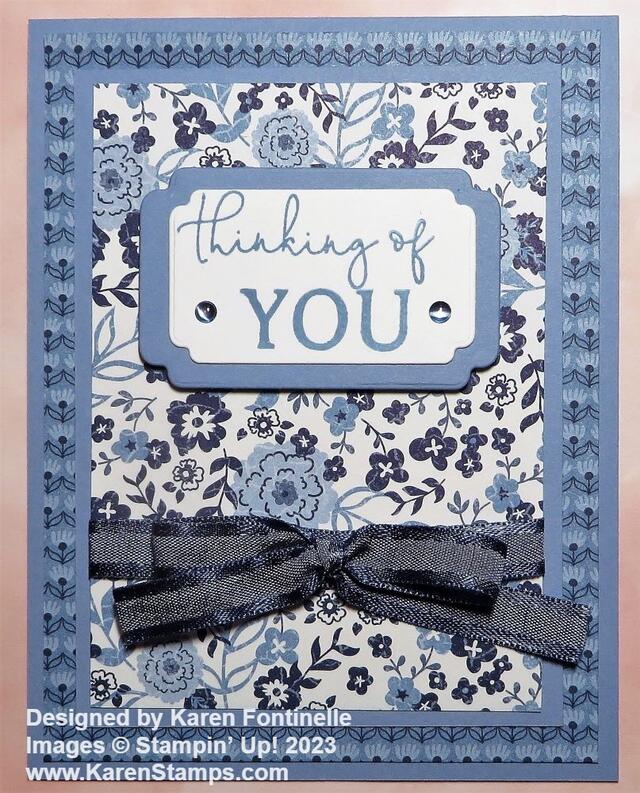
I hadn’t used this beautiful designer series paper in a while, so I looked through the papers, and out came this Countryside Inn Boho Blue Thinking of You Card. You never know what will happen when you go to make a card.

This card uses two different patterns in the Countryside Inn Designer Series Paper. I used one for a background layer and the brighter floral for the front of the card. I used Boho Blue cardstock, one of the newest current In Colors 2023-2025 for the card base and the layer under the floral paper and under the greeting.

This card base is cut at 4 1/4″ x 11″ and scored at 5 1/2″ with a fold at the top instead of the side. You can make it however you like. The designer paper directly on the card base is 5 1/4″ x 4″. The floral paper on the front is cut at 3 1/4″ x 4 1/2″ with the Boho Blue layer underneath cut at 3 1/2″ x 4 3/4″.

Before adhering the floral layer, tie a piece of ribbon around the designer paper and then adhere a separate bow with a Mini Glue Dot. I used the Night of Navy 3/8″ Bordered Ribbon. I could have used my Boho Blue 3/8″ Textured Ribbon to match the other Boho Blue I used on the card, but I thought the Night of Navy ribbon stood out a little better and matched the Night of Navy flowers on the paper. You could pop up this whole layer if you wanted to. I adhered mine flat on the card front but I considered using Stampin’ Dimensionals to pop it up.

The greeting is from the Sentimental Park Stamp Set and stamped in Boho Blue ink. I considered several choices for diecutting the greeting but chose the Something Fancy Dies. I could use one cut out in Boho Blue to layer under the Basic White diecut greeting. We don’t always have something to layer underneath a greeting to help it stand out, but with these dies I did! To finish the card, I added two Boho Blue 2023-2025 In Color Dots to the greeting.

You could make this same card using different designer paper so give this Countryside Inn Boho Blue Thinking of You Card a try!

SHOP STAMPIN’ UP! ONLINE HERE!

Quick and Easy Masterfully Made Cards

Quick and Easy Masterfully Made Cards

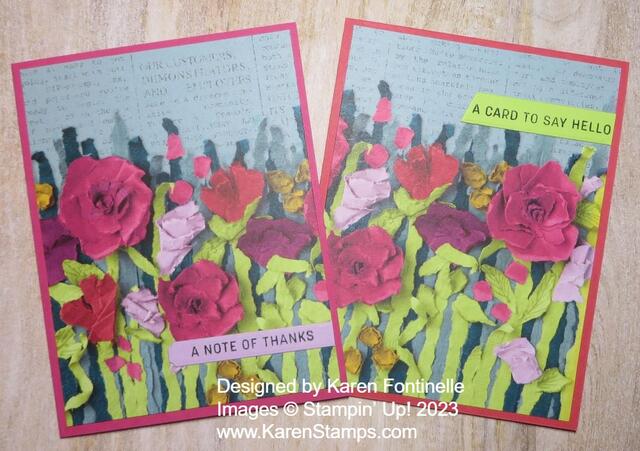
When you are looking for an easy card design, try these Quick and Easy Masterfully Made Cards. All you need is a card base and the beautiful and fun Masterfully Made Designer Series Paper.

This 12″ x 12″ designer series paper gives you the look of texture of torn pieces of paper or handpainted designs without you having to do all the work! Some of the papers are entirely designed with torn pieces of paper of different patterns and you can even add your own real texture by tearing some edges you add to the card as I did on this card.

These two cards are just made by cutting a piece of the designer paper with these flowers and stems and some newsprint in the background. The paper is cut at 4″ x 5 1/4″. The card base is Sweet Sorbet cardstock for the card on the right and the card on the left is Melon Mambo. They practically look the same but I wanted to try both colors.

All you need is a piece of this designer paper and a greeting! Both greetings are in the Sending Smiles Stamp Set. The card on the left with the Fresh Freesia greeting is die cut with the narrow die in the Sending Dies set. The greeting on the right stamped on Lemon Lime Twist cardstock is diecut with the angled banner in the Something Fancy Dies.

If you wanted to, you could add some sparkly embellishments like rhinestones or sequins, but you can also just leave it as is to keep it quick and easy!

Remember, with every $50 you spend at Stampin’ Up! during the month of July, you will receive a $5 coupon to spend on Stampin’ Up! merchandise in August!

SHOP STAMPIN’ UP! ONLINE HERE!

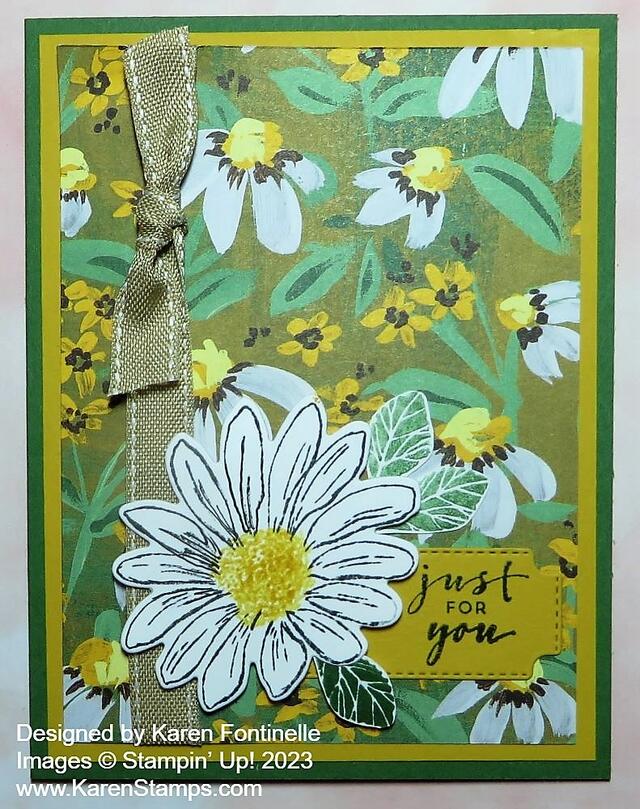
Cheerful Daisies Just For You Card

Cheerful Daisies Just For You Card

My mind ran through several different card ideas before I spied this green daisy paper in the Fresh As a Daisy Designer Series Paper and made this Cheerful Daisies Just For You Card. There was something about the colors on this sheet of paper that really caught my eye. And that’s how coming up with a card goes! You may think you have an idea but it changes, or you don’t have any idea but you do come up with something once you see just the right thing you want to use!

From the designer paper, I chose Garden Green cardstock for the card base and Crushed Curry for a layer because of all the yellows in the daisies.

As luck would have it, I found quite a few die-cut daisies in a little pile of unused die-cut pieces on my table. Some were just die-cuts but there were some stamped and diecut daisies. That’s where I got this daisy which I thought would look good against all the daisies on the designer paper. The daisy is stamped from the Cheerful Daisies Stamp Set and with a Crushed Curry center. To stamp the center of the flower, I stamped it several times with the flower center stamp, but I stamped off each time first on scrap paper before stamping the center of the flower. You can get the stamp set and matching dies in the Cheerful Daisies Bundle and save 10%.

I thought the big diecut daisy needed something to help set it off from the busy background. I used the label die in the Cheerful Daisies Dies in Crushed Curry, then stamped a greeting in the Charming Sentiments Stamp Set off to the side of that label in Memento ink.

Before assembling the card and layers, I wrapped around a piece of the burlap ribbon in the Real Red and Burlap Combo Pack Ribbons. I also tied a knot around the ribbon.

After the ribbon was added around the designer paper layer and all the layers glued together, I adhered the greeting flat on the card and then popped up the daisy with Stampin’ Dimensionals®. I stamped some leaves in Garden Green ink and stamped off the ink on some others. Instead of die-cutting, I simply grabbed my Paper Snips and cut them out by hand, then adhered the leaves either flat or with Dimensionals.

This was an easy card to make and perfect for summertime to send to a friend! On the inside, you can add a layer of Basic White with some stamped daisies or diecuts, or even a strip of designer paper for a decoration.

Here is a very similar card that I had forgotten about, made with a different pattern of designer paper but the same ribbon and a different greeting.

Remember, with each $50 purchase (before shipping and tax) during the month of July, you will earn a $5 coupon to spend on more product in August! It’s called Bonus Days at Stampin’ Up!

SHOP STAMPIN’ UP! ONLINE HERE!

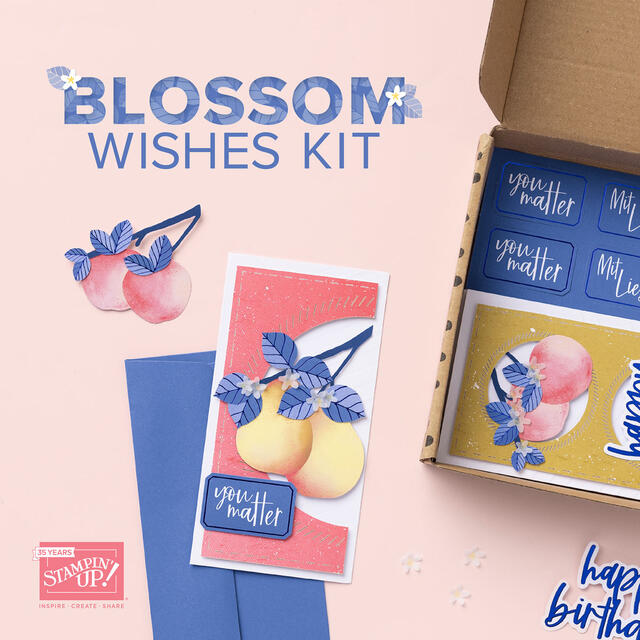
New! Blossom Wishes Kit in the Kits Collection!

Kit Collection Blossom Wishes Kit

Introducing the newest addition to the Stampin’ Up! Kit’s Collection: Blossom Wishes! This kit is special for its trendy, slimline card design, and includes all the precut paper pieces for a fun card for a friend! Order one kit for yourself and an extra for a friend, then get together to stamp!

DETAILS
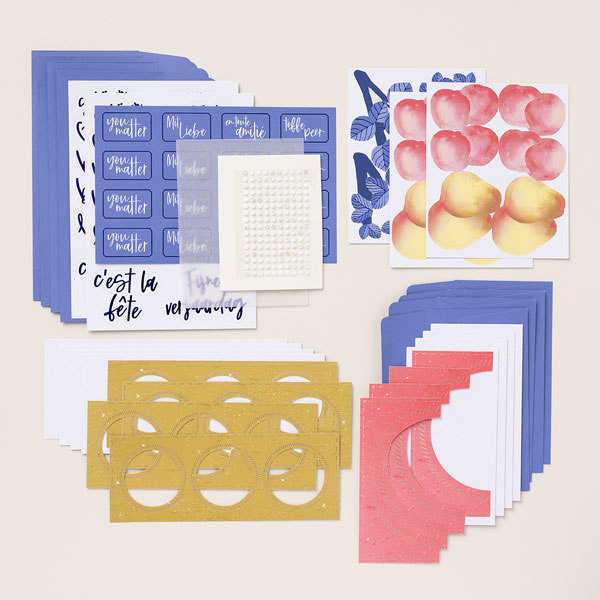
This kit includes:

  • Enough supplies to create 8 cards—4 each of 2 designs
    8 coordinating envelopes.
  • Embossed card bases, printed die cuts, vellum blossoms, adhesive, and embellishments.
  • Precut sentiments in Dutch, English, French, and German.
  • Finished card size: 8-1/2″ x 3-1/2″ (21.6 x 8.9 cm), 6-1/4″ x 3-1/4″ (15.9 x 8.3 cm)
  • Coordinating colors: Lemon Lolly, Orchid Oasis, Petal Pink, Starry Sky, Sweet Sorbet, Wild Wheat
Kit Collection Blossom Wishes Kit Contents

BLOSSOM WISHES KIT 162431

$13.00 USD | $18.00 CAD

SHOP THE KITS COLLECTION

Masterfully Made Slimline Card

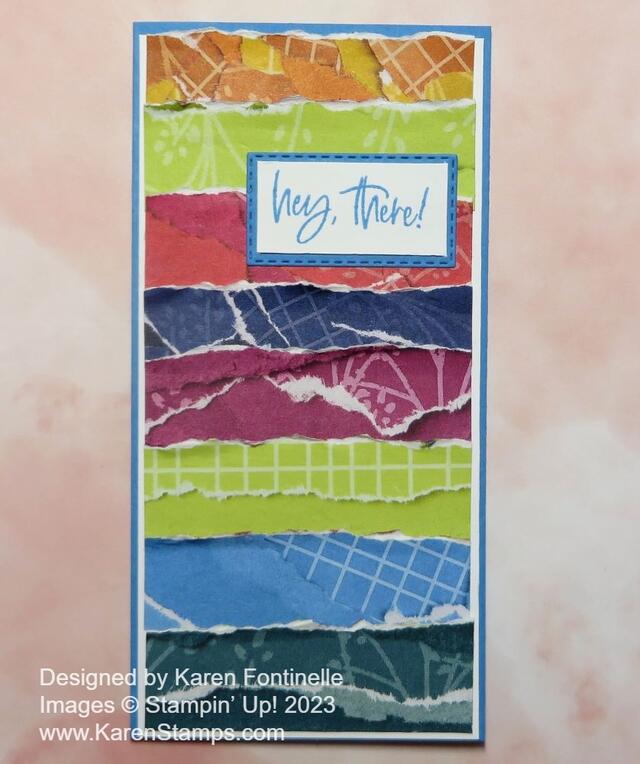
This Masterfully Made Designer Series Paper is so interesting and there are so many ways you can use this paper as you can see with this Masterfully Made Slimline Card. The card turned out differently than I expected, as is often the case, and you can’t tell from the photo, but I will explain!

I just purchased this designer series paper during the Stampin’ Up! designer paper sale in June, but if you missed it, don’t worry because during July 2023 you can earn a $5 coupon for every $50 you spend in July. Then spend that coupon in August! It’s called Bonus Days! Every $5 helps when you want to buy products at Stampin’ Up!

To make this card I started with a card base of Azure Afternoon but in the Slimline design. The cardstock is cut at 6″ x 6″ and then scored at 3″ so the card front is 3″ wide by 6″ high. You can make a slimline card in various sizes but I like this size to go with some standard envelopes I already have.

I thought it would be fun to just cut strips of the Masterfully Made Designer Series Paper to fit across the front of the card. If you had already used a lot of your paper, you might have scraps you could use, but in this case, I had to cut into mostly new sheets of paper just for little strips! A tough thing to do, as you can imagine, with such beautiful paper!

I also added a layer of Basic White over the Azure Afternoon which just brightens up the paper strips a little against the medium blue. I just used very narrow margins, so the Basic White is cut at 2 7/8″ x 5 7/8″ and then the strips are cut at 2 3/4″ x 1″. I wasn’t sure about the width of the strips until I played around with the card a bit. I ended up using eight different strips of paper.

The paper itself already looks like it has torn edges. That is the way it is printed. After I was getting the strips laid out how I liked them, I got the idea to tear the top edge of each strip and even kind of rough it up along the torn edge with my fingernail. I suppose that was an unnecessary step when the paper already looks torn and when it doesn’t really show up in the photograph. Even in person, I barely notice it! But it does add a little texture to the card and surely the recipient will notice it and be impressed!

In looking through greetings to put on the card, it obviously needed something small and I found this one in the Charming Sentiments Stamp Set. “Hey there!” is just cocky enough I think to go with this rather wild designer paper! I stamped it with Azure Afternoon ink on Basic White and diecut it with a rectangular stitched die in the Warm Welcome Dies (which I forgot are retired now but you will find another substitute or just cut a rectangular piece). I also made an Azure Afternoon layer under the greeting.

That’s all there is to this card! You could also make the card horizontal and use longer strips of paper! Just play and see what you come up with! But you will definitely want to experiment with this Masterfully Made Designer Series Paper!

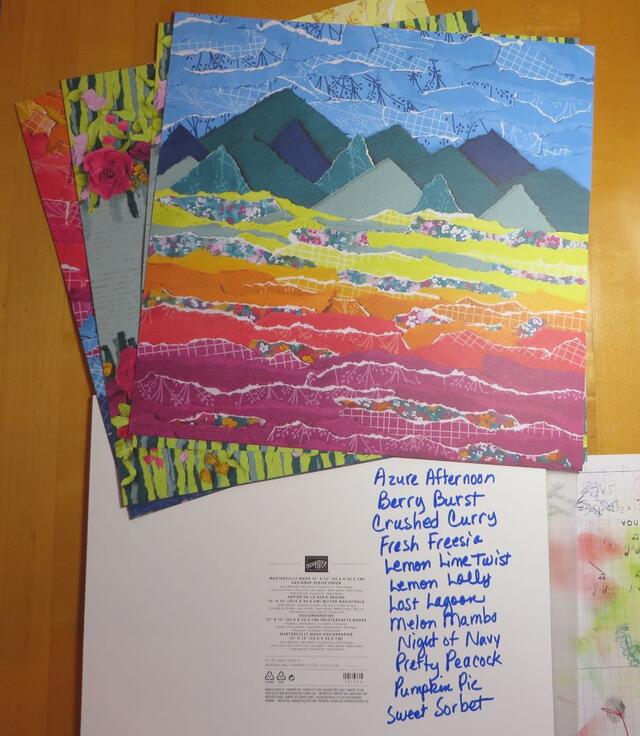
And look at all the colors that these papers coordinate with! I always like to write the color names on the back of the designer paper cardboard so I can READ THEM without getting out my glasses! I wish Stampin’ Up! would print the labels larger!

SHOP STAMPIN’ UP! ONLINE DURING BONUS DAYS! GET YOUR COUPONS!!

Inked Botanicals Thinking of You Card

Inked Botanicals Thinking of You Card

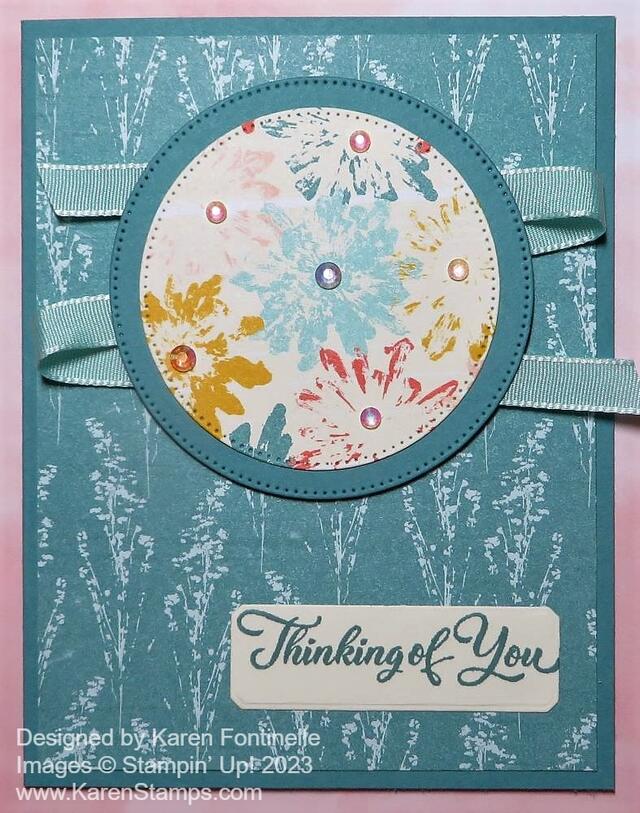
I only recently purchased this designer paper that I used to make this card, but I really like it and it will be easy to work with! I loved making this Inked Botanicals Thinking of You Card with the pretty patterns and colors of this paper. This Inked Botanicals 6″ x 6″ Designer Series Paper was designed by the Stampin’ Up! artists inking up actual flowers and pressing them on paper. Most of us have probably done something like this when we were in elementary school, maybe with colored fall leaves. Clearly, the Stampin’ Up! artists do a much better job with all kinds of flowers and leaves!

This card base is Lost Lagoon, one of the coordinating colors of the paper. I chose a Lost Lagoon patterned paper with whitish flower stems for the layer. It’s pretty and adds texture and interest without being overwhelming.

For the focal point, I just diecut another floral pattern of the paper which had multiple colors of flowers using the Stylish Shapes circle dies plus a larger diecut layer of the Lost Lagoon cardstock. These dies give a nice stitched edge which looks good. On the back, I adhered some Pool Party 3/8″ Grosgrain Ribbon back and forth and then popped up the circles on Stampin’ Dimensionals®.

The greeting is stamped on Very Vanilla cardstock with Lost Lagoon ink. The greeting is in the Go To Greetings Stamp Set. I diecut the greeting using not the tiniest die, but the next one in size in the Countryside Corners Dies. I like the look of that shape on this card.

For a finishing touch, as I often do, I added some Iridescent Rhinestone Basic Jewels on the flowers in the circle for a little sparkle! On the inside, you can add a layer of Very Vanilla maybe with a strip of the floral pattern I used on the circle at the bottom of the inside layer for a little decoration.

Even if you missed the designer paper sale in June, remember that Bonus Days have started at Stampin’ Up! With every $50 purchase, you earn a $5 coupon to use in August on a future article. Go ahead and stock up on designer paper that you don’t have and any other Stampin’ Up! products you would like!

SHOP STAMPIN’ UP! ONLINE HERE!

Four Deals at Stampin’ Up! TODAY!

#1Bonus Days Coupons

Bonus Days Poster

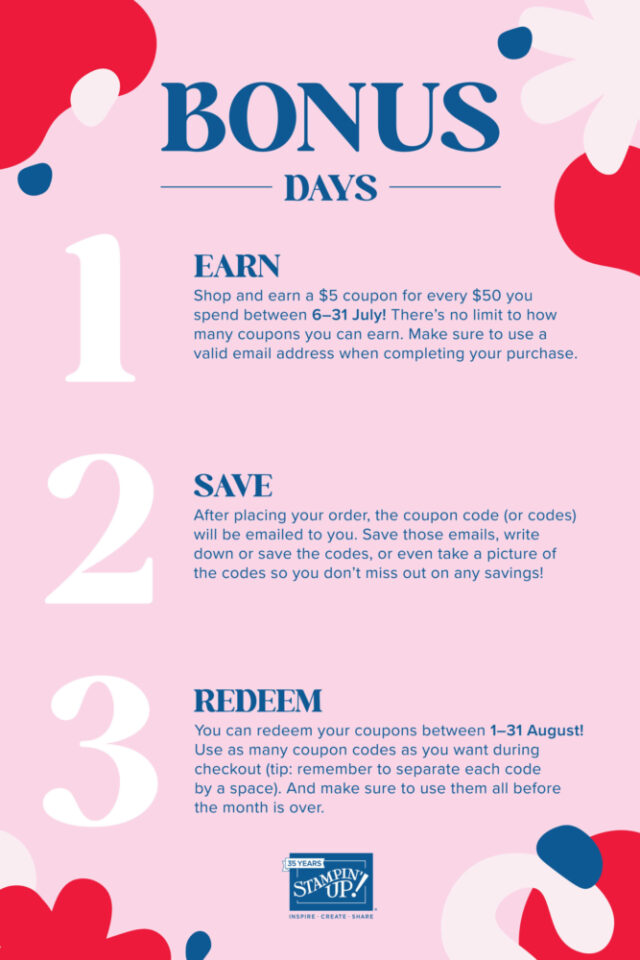
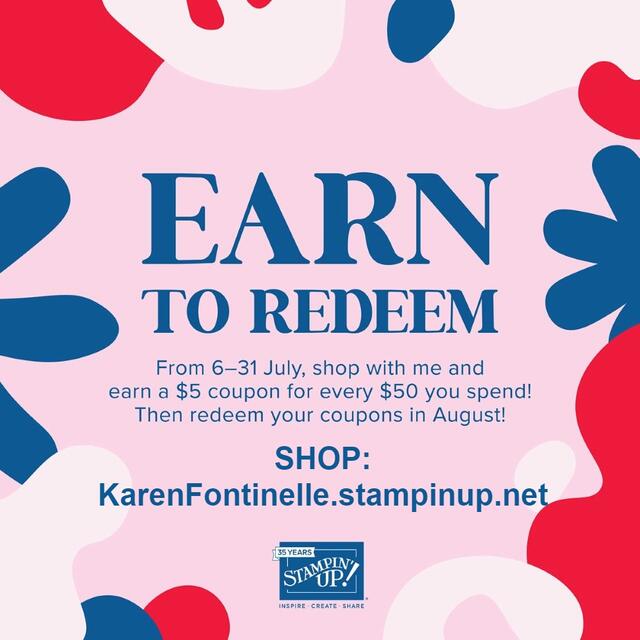
Stampin’ Up! is bringing back one of their favorite promotions—BONUS DAYS! Because do you know what’s a great deal? Getting rewarded for all the crafting supplies you’re already going to buy! When you shop between July 6–31 and spend $50 USD you will earn a $5 USD coupon! Your coupon(s) will be sent to you in an email per each order so make sure you save these emails with the coupon code.

During the whole month of August, you can redeem them between  August 1–31. There’s no limit to how many coupons you can earn!

Here’s a video from George at Stampin’ Up! to explain Bonus Days!

#2 – Clearance Rack Refresh

Clearance Rack Sign

New items added to the Clearance Rack TODAY so see what bargains you can find! While supplies last for sure on the Clearance Rack and the early bird gets the worm! Hurry!

#3 – New Online Exclusives!

Stampin' Up! Online Exclusives July 2023

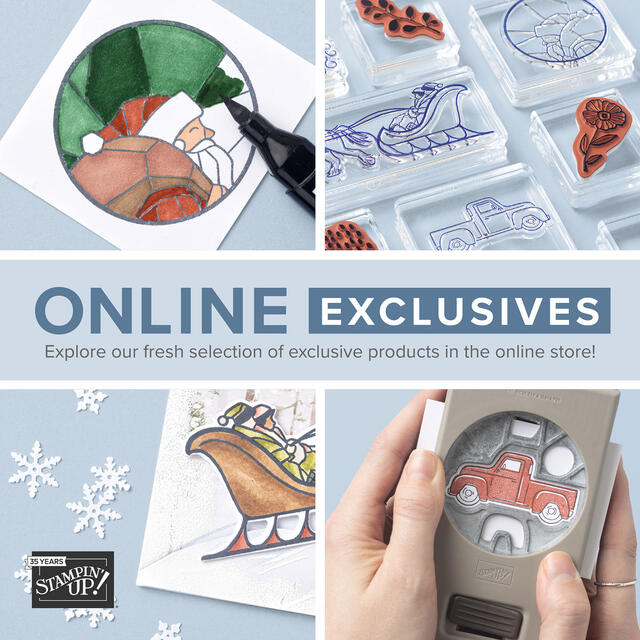
“Online Exclusives” are products that do not appear in a Stampin’ Up! catalog but you can find them in the Stampin’ Up! Online Store! This allows Stampin’ Up! to give us new products in between catalogs so we don’t have to wait! Some will get sold out and be gone for good. Others may sell out but will be restocked. It just depends! So when you see an Online Exclusive that you LOVE, be sure to order it right away so you don’t miss out.

Click HERE for the Online Exclusives Flyer.

#4 – Paper Pumpkin Past Kits, Refills, and Add-Ons Sale

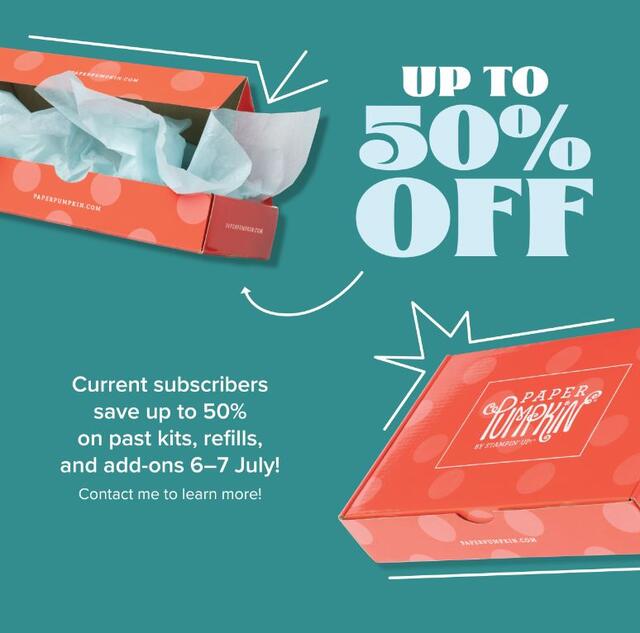
This offer is for Paper Pumpkin subscribers, only today and tomorrow, July 6-7th, but if you are not a subscriber, you can sign up and then take advantage of this sale! If there is a kit you missed or you’d like a “refill” to make more of a kit (stamp set and ink spot not included in Refills), check out which ones are available and which ones are a good deal! There are holiday sets available, like Christmas gift tags and Halloween treat boxes! Take a look!

Shop Paper Pumpkin HERE!

That’s all for today! Stop reading and go shop! Let me know if you have any questions! There may even be things I don’t know about as I write this the night before!

SHOP STAMPIN’ UP! ONLINE HERE!

Stampin’ Up! Bonus Days Are Coming!

Stampin’ Up! Bonus Days are coming in just four days, beginning Thursday, July 6th! Get ready to shop and earn some coupons to use on your order(s) in August!

With every $50 you spend, you will receive a $5 coupon to redeem on a purchase in August! The coupon code will be sent to you in an email after you place your order in July, beginning July 6 and running through July 31. You have ALL month to earn coupons! No limit!

If you spend more than $50 (in increments of $50) on an order, for example, if you spend $100 (before shipping and tax) you will receive one email with two coupon codes in it.

If you place one order of $50 or a little more on July 6th and another order of $50 or more on July 15, you will receive two separate emails with coupon codes.

*** Be sure to SAVE these emails and preferably print them out or write down the codes so that you don’t lose them!

In August, when you order online you will enter the coupon codes you have in the Coupon Code box that you will see under “Checkout”. They just need to be separated by a space or by a comma, and then click “Apply”. If you have any problems, you can contact me or call Stampin’ Up! at 1-800-STAMPUP to have them help you.

But first, you have to earn the Coupons! To help you out there will be new Online Exclusives beginning July 6th! Of course, you can order anything you like or need, but if you want something new then check out the new Online Exclusives on that date!

Stampin' Up! Online Exclusives July 2023

Click the photo above to see the two-page flyer with a list of “some” of the products in this Online Exclusives selection. Or click HERE to see the FLYER. Actually, there will be a larger selection of products available on July 6th that even Demonstrators have not seen yet! So we will all be surprised!

Remember, the Online Exclusives – the One Horse Open Sleigh Suite Collection (or the individual products) and the Timeless Charm Bundle and MORE will be available Thursday, July 6th as well as the Coupons you can earn with every $50 purchase, so I suggest waiting to order until July 6th! May as well maximize your options!

HAPPY SHOPPING ON JULY 6th!

Irresistible Blooms Hello Card in Flirty Flamingo

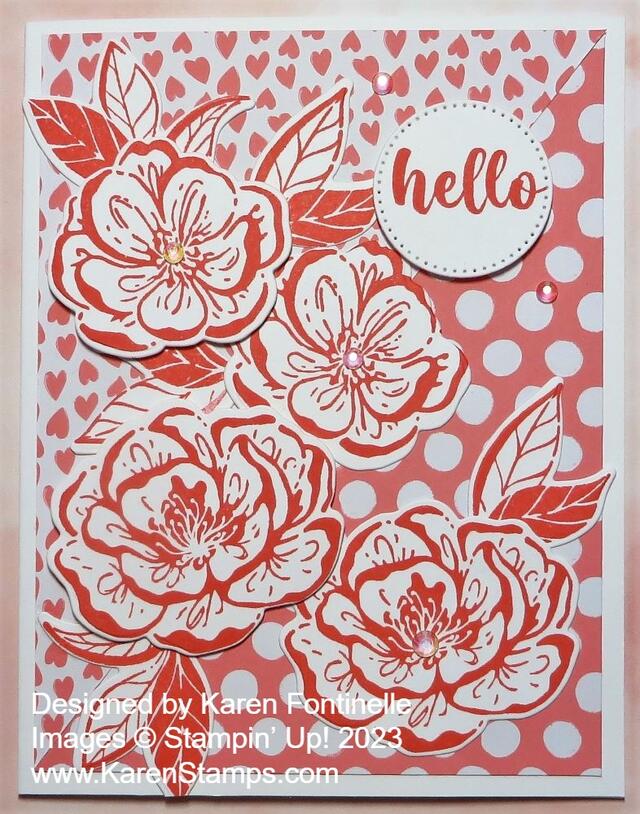
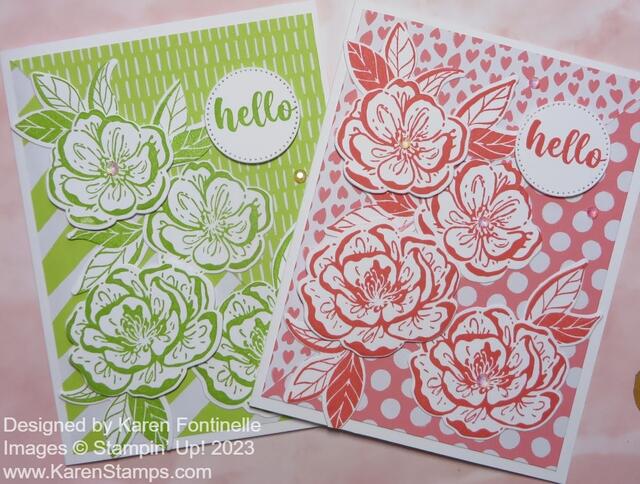
The other day I made a card exactly like this Irresistible Blooms Hello Card in Flirty Flamingo except in Lemon Lime Twist. I was SO happy with it after I made it that I wanted to make another one right away but in another color. I usually like a card after I make it or I wouldn’t even put it on my blog, but for some reason, this card design caught my eye!

The card base is Basic White but you could also use the same cardstock color as whatever designer paper you are using. In this case, I used the Flirty Flamingo patterned paper in the Brights 6″ x 6″ Designer Series Paper. I chose the hearts pattern and the polka dots and cut each sheet at 5 1/4″ x 4″. Then I cut each one in half diagonally. When you do this, be sure to look at the pattern in case it is going in a certain direction.

The flowers and leaves are stamped with Flirty Flamingo ink on Basic White with the Irresistible Blooms Stamp Set. Then those images were diecut with the Irresistible Blooms Dies. Purchase both the stamp set and dies together in the Irresistible Blooms Bundle and save 10%!

Just place the flowers and leaves around and see what arrangement you like best. You can pop up some of the flowers with Stampin’ Dimensionals as I did with one large flower and one small. Plan ahead to see where you are going to slide the leaves underneath the flowers so you don’t glue down the flowers completely to the edge. Or adhere the leaves to the flowers first before adhering to the card.

The “hello” greeting is in the Irresistible Blooms Stamp Set and is diecut with a small circle in the Stylish Shapes Dies.

Here is the original card I made in Lemon Lime Twist.

Also, notice the little sparkle on the card! I just had to use the Iridescent Rhinestone Basic Jewels randomly on the flowers and card.

Which one do you like better? It would be fun to make a card with each color in the Brights DSP!

SHOP STAMPIN’ UP! HERE!

It’s the Last Day For the Stampin’ Up! Designer Series Paper Sale!

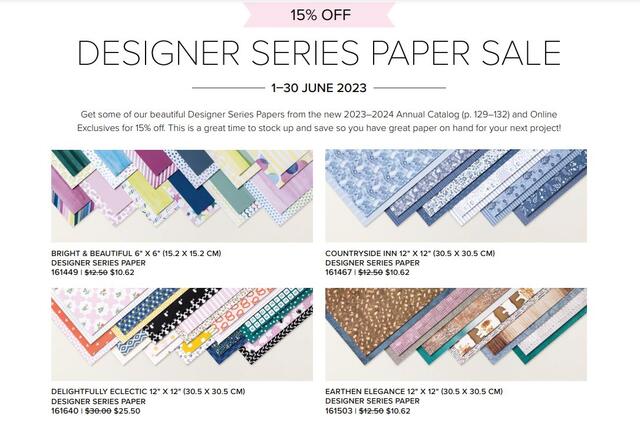
TODAY, June 30th is the last day to get these select designer series papers discounted at 15%! Every little bit helps! Check your inventory and either replace what you have used up so far or get what other papers you want just because!

SHOP THE STAMPIN’ UP! DESIGNER SERIES PAPER SALE!

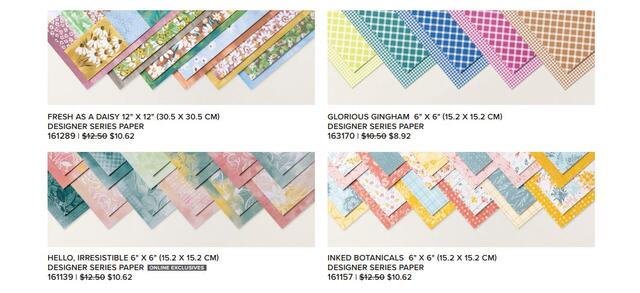
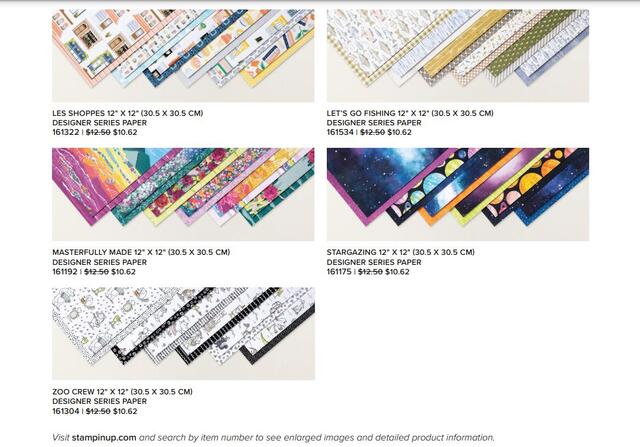
DSP Sale Items1
DSP Sale Items 2
DSP Sale Items4

Those are your choices! Pretty ones! Have fun shopping!

SHOP STAMPIN’ UP! ONLINE HERE!

Check Out the Stampin’ Up! Designer Paper Sale!

Designer Paper Sale Flyer 1
Designer Paper Sale Flyer 2
Designer Paper Sale Flyer 3

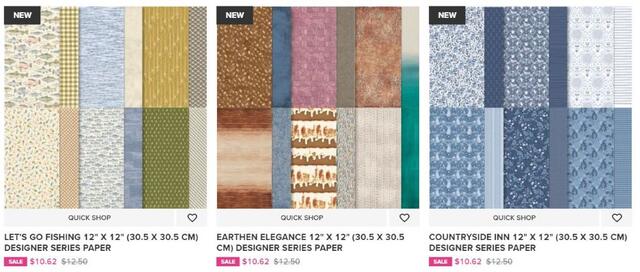
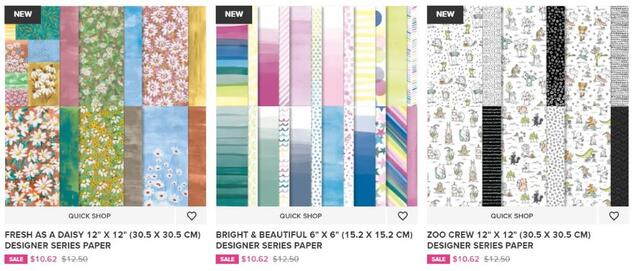
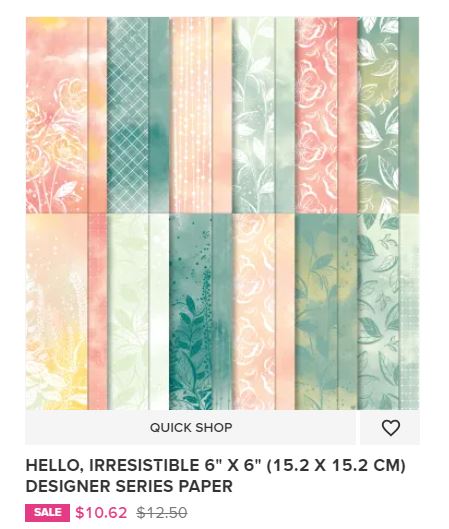
Yes, the month of June has flown by! School is out and vacations are underway! When you have a minute, click on the photos above to see the entire flyer of Designer Series Papers that are discounted by 15%. You’ll find these papers on pages 129 – 132 in the Stampin’ Up! Annual Catalog PLUS the Hello, Irresistible DSP in the Online Exclusives. Thirteen papers in total to choose from!

Here’s my take on these papers!

  • Bright & Beautiful: These are 6″ x 6″ sheets, 4 each of 12 double-sided designs. Very festive, lots of colors, use them for lots of occasions and projects.
  • Countryside Inn: Perfect for “blue” lovers with 4 different colors of blue! Pretty florals and I love the pages with the bunnies, foxes, birds, and trees. Something different!
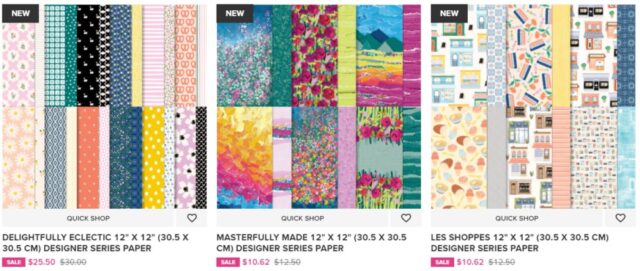
  • Delightfully Eclectic: This is a HUGE pack of 12″ x 12″ paper, 48 sheets! All kinds of pretty and fun designs….like PRETZELS! Also, a little alphabet, swans, geometric designs, florals, and more! Some images coordinate with the Inked & Tiled Punch Pack.
  • Earthen Elegance: Beautiful, rich colors of the earth! Some images are photos of hand-glazed pottery. These new colors and designs evoke feelings and images of nature.
  • Fresh As a Daisy: What is there to say? Everyone likes daisies! Beautiful color combinations! One sheet has multiple individual designs that you can cut apart for multiple card designs out of one sheet!
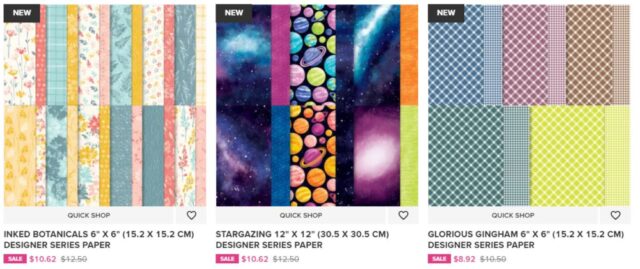
  • Glorious Gingham: These 6″ x 6″ sheets are perfect for multiple projects and come in some of the new colors in the Color Refresh. I think Gingham has a “happy” look to it!
  • Inked Botanicals: This paper was designed by Stampin’ Up! artists by pressing actual inked flowers onto the paper! So many pretty colors, botanicals, and various patterns in this pack of designer paper!
  • Let’s Go Fishing: An obvious choice for the fisherman in your life, a great masculine choice we are always on the lookout for, but not exclusively for men, of course! My girlfriend caught the only fish of the day recently out with her husband with her fishing pole just dangling over the side of the boat!
  • Les Shoppes: Build your little scene or town with these buildings and authentic shops, plus pastries, books, and food! Something different and fun to play with!
  • Masterfully Made: These papers are really different and SO interesting! The torn paper look adds lots of texture and color to your project. Add on a little torn paper of your own and the recipient will wonder which is real and which is printed! Lots of watercolor looks as well.
  • Stargazing: This one is certainly different than we have ever had and quite something! The papers have spectacular designs of the galaxy and cosmos and paired with the rest of the Suite you have so many creative possibilities! I could see this being a theme for a birthday party for kids! And I’ve always been interested in space, growing up during the early days of space exploration.
  • Zoo Crew: Too cute and fun for words! Get it!
  • Hello, Irresistible: Not shown in the catalog but online only, but I fall in love with the paper more and more! So soft and pretty with embossed-look designs! Get it while it lasts.

Tomorrow, Friday, June 30th, is the VERY LAST DAY of this sale! Don’t forget!

SHOP THE STAMPIN’ UP! DESIGNER PAPER SALE!